Rust damage in truck beds poses a serious threat to the integrity and value of commercial vehicles, directly impacting operations for fleet managers and business owners alike. Understanding how to tackle large-scale rust issues is essential for maintaining the safety and functionality of trucks in demanding environments like construction and logistics. The following chapters will guide you through assessing the damage, employing effective rust removal techniques, and applying protective coatings to ensure long-lasting repairs, ultimately empowering your fleet with vehicles that perform at their best.
Diagnosing the Rust Landscape: A Thorough Assessment Before Repairing a Large Truck Bed
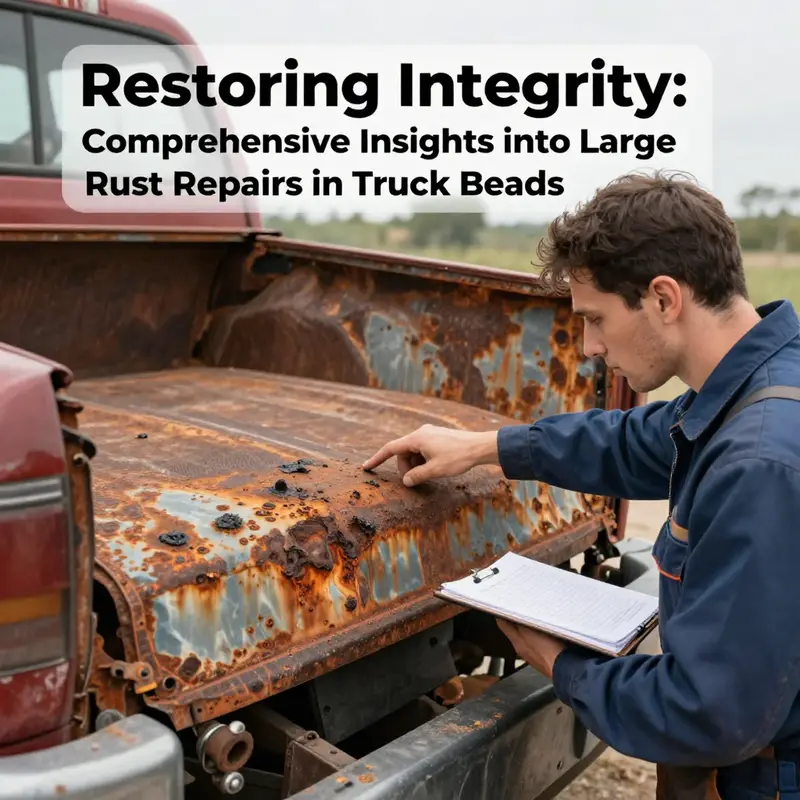
Every repair starts with a careful, honest appraisal of what exists beneath the paint. When the enemy is large-scale rust in a truck bed, the assessment must look beyond surface blemishes and bubbles and probe the metal’s true condition. The goal is to map the rust’s extent, gauge the remaining thickness of the metal, and determine how far the damage has spread into joints, seams, and surrounding structure. This first step is not a mere inspection; it is the foundation of every choice that follows. A precise assessment clarifies whether you are dealing with surface corrosion that can be restrained with coatings and preventive care, or whether you are facing thinning, perforations, and potential loss of structural integrity that demands cutting, patching, or even panel replacement. In other words, the assessment is the moment where plan and reality align, and it sets the tone for how aggressive or conservative the repair must be.
Begin with a visual survey that treats the bed like a map rather than a cosmetic surface. Surface rust will show itself as a rough, orange-brown film or pits under peeling paint, but in large repairs you may find that what looks like a shallow issue is hiding more trouble beneath. Look for bubbling undercoats, flaking metal, and dark stains that suggest moisture has lingered. Pay attention to flow lines along the bed’s channels and along the crossmembers where water can settle and corrosive salts can linger after winter roads. The more you study, the more you’ll notice patterns: rust often concentrates where metal meets mud, where water pools after a wash, or where debris gathers in corners and joints. These patterns aren’t just cosmetic clues; they point to the hidden levers that are driving the corrosion and can indicate whether the bed’s steel remains thick enough to support weight or has been thinned to the point of weakness.
From the surface, you then advance to a more tactile and auditory examination. Run your gloved hand across the metal, feeling for roughness that feels inconsistent with the surrounding panel. Soft spots can reveal material loss beneath the surface, while hard, intact patches may simply be containering a layer of paint or a resin repair. Tap the metal gently with a small hammer or a metal punch and listen carefully. A dull thud tends to signify thinning metal or hollow channels created by corrosion beneath the surface, whereas a sharp, crisp ring usually means the metal remains solid. It’s a simple test, but it can reveal when you are dealing with a localized pocket of rust versus when the damage has compromised a broader swath of the bed. The human ear and sense of touch are surprisingly reliable allies in a field where expensive diagnostic equipment isn’t always available in a home shop.
To quantify and anchor your judgments, you need measurements. Metal thickness gauges, whether a micrometer for spot checks or an ultrasonic thickness gauge for non-contact assessment, provide numbers you can compare to the original specifications. The goal is not to chase precision for its own sake but to establish a threshold: when the metal’s thickness has declined by a significant margin—commonly cited as thirty to fifty percent or more in critical zones—the repair landscape changes. Thinning in areas that bear load, around mounting points, corners, or frame rails, should trigger deeper scrutiny. When you observe gaps or valleys that exceed a few millimeters or when you detect perforations, the case for substantial intervention strengthens. Use multiple readings across defined zones to build a reliable map of the rust’s reach. In a large bed, it is easy to misread one spot as an isolated problem; a grid-like sampling approach helps prevent that misinterpretation and prevents surprises during the actual metalwork. If you discover a zone where the metal is measurably thinner than the surrounding panels, you’ll know to plan for patch work, reinforcement, or even segment replacement rather than a mid-stage surface treatment.
Location matters as much as extent. The bed is not a uniform plate; it hosts seams, corners, mounting points, and connections to frame rails. Rust near the tailgate hinge, the bed corners, or along the bed’s sides where sprays and road spray collect can behave differently from rust found mid-panel. Pay attention to patterns that align with drainage paths and fastener lines. Where rust encroaches toward weld seams or areas that are difficult to access with tools, it becomes a sign that you might need to remove coatings and weld in new metal rather than patching over the problem. In contrast, isolated spots tucked into the inner bed channels near a drain or light aluminum strips can often be treated with careful cleaning and coating without undermining the bed’s structural capabilities. The assessment must note these patterns, tracing not just how much metal remains but where its integrity is most compromised.
A holistic assessment also considers adjacent components. Rust rarely respects an imaginary boundary around the bed. It can spread from the bed into the crossmembers, the frame rails, or even into the cab’s substrate through concealed channels. Visual checks may reveal softened seams or rust halos near the joint of the bed to the frame. If you see that corrosion has extended into mounting brackets, the bed’s capacity to carry loads or to stay fixed securely to the frame becomes a cross-issue. This broader perspective matters because some fixes in the bed alone might not succeed if the underlying frame is compromised. In practice, you often find that a rust-laden bed calls for a broader assessment from a professional who can evaluate the frame, crossmembers, and surrounding structure. A careful note of every affected area helps build a repair plan that stabilizes the truck as a whole rather than merely address the appearance of the bed’s surface.
As you assemble the physical facts, you should also think about the future. The assessment should be forward-looking, not just descriptive. Consider how the bed will be used after repair. Will you continue to haul heavy loads that subject the bed to abrading and moisture? If yes, your plan must emphasize durability and resistance to future corrosion just as much as restoring thickness. This means looking at the quality of the replacement patch or patching material, understanding how it will weld to the existing steel, and planning protective coatings that can cope with repeated exposure to water, salt, and chemical cleaners. A thorough assessment includes a risk calculation: what is the probability of failure if you push a repaired bed into service in wet, salty, or abrasive conditions without a reinforced repair? If that probability begins to edge toward unacceptable risk, you can justify a more robust intervention—perhaps a full panel replacement or the integration of a protective bed liner that guards the newly repaired surface from moisture and abrasion.
Documentation is not an afterthought in this process. You should map the findings into a repair plan that can guide the next steps. A clear diagram or written inventory of zones, thickness measurements, and observed patterns helps you communicate with a shop or with others who may assist with the project. If you intend to execute most of the repair yourself, the documentation becomes your operating manual, keeping your decisions aligned with the data you gathered during the assessment. If you decide to bring in a professional body shop for the heavier work, the documented map saves time and reduces the likelihood of disputes over what was found and what is needed. In either case, your assessment is the truth about the bed’s condition and the contract you are signing with the future repair work.
The interplay between instant judgement and measured data is the heartbeat of a reliable assessment. A good assessor blends careful visual cues, tactile feedback, and objective thickness data into a coherent verdict. You’re not just diagnosing rust; you are diagnosing the metal’s health and the bed’s ability to support work demands. The stakes are practical: a bed that rusts again soon after repair wastes time, money, and trust. The assessment should therefore be honest about what remains viable and what requires more dramatic action. When the conclusion is that a patch will suffice, the plan should specify compatible patch dimensions, welding approaches that preserve strength, and how to blend the repaired area so it looks and behaves like the original bed surface. When the conclusion is that replacement is the prudent route, the plan should spell out the patchwork’s shape, the patch material quality, and the sequence for removing bad sections and welding in new metal with attention to alignment and seal.
In this context, the reader is reminded that significant rust repair—especially when it involves structural elements or extensive metal thinning—often benefits from a second set of eyes. A professional auto body technician can corroborate measurements and assess risks that a home workshop might overlook. A thorough, honest assessment ultimately informs a repair path that balances durability, cost, and time. To keep the dialogue grounded in practical experience, consider the broader perspective offered by trusted sources in the field that discuss practical approaches to truck-bed corrosion. For more background and examples, you can explore a comprehensive resource that outlines what you need to know about truck-bed rust repair. For readers who want a wider view on the topic, the linked resource offers additional context and considerations beyond this chapter.
As you finish the assessment, you’ll have more than a list of damaged spots. You’ll possess a map that highlights both the problem’s scope and the bed’s resilience. You’ll know whether you’re looking at a repair that can be completed with patching and protective coatings or one that demands section replacement and structural reinforcement. You’ll understand which areas require the most careful welding to preserve strength, and you’ll have a sense of how long the repair will take and what it will cost. The assessment, in other words, becomes your plan for success. It makes subsequent decisions about tools, materials, labor, and timelines far less arbitrary and far more anchored in reality. In the chapters that follow, this clarity translates into a coherent repair workflow—from the initial cutouts to the final finish—without ever losing sight of the bed’s long-term performance and its ability to resist the next round of moisture, road spray, and use.
For readers who want to anchor their understanding in further reading, a practical overview of truck-bed rust repair is available in external resources that cover what to expect when you get into deeper corrosion. This external reference complements the specifics discussed here and can help you gauge the level of intervention needed in more complex cases. Additionally, a broader hub of related content in the primary blog space offers guidance on general truck-maintenance strategies, which can be useful as you plan preventative measures after the repair is complete. If you’re surveying the landscape of possible next steps, this dual approach—careful assessment paired with informed planning—will keep your project on track and reduce the likelihood of surprises once you start cutting, welding, and coating. The aim is not to rush into a fix but to proceed with confidence, ensuring that the bed remains a safe, sturdy part of the truck’s overall structure for miles to come.
Internal link note: for a broader background on related topics discussed in this chapter, you can visit the blog hub at mastertruckrepairllc.com/blog/ for more context and practical insights. This internal resource provides a repository of practical guidance, reflections from field experiences, and questions to ask as you navigate repairs of rusted truck beds.
External reference: https://www.autocar.co.uk/repair-and-maintenance/truck-bed-rust-repair-what-you-need-to-know
null
null
Locking in the Repair: Protective Coatings that Shield a Large Rusted Truck Bed
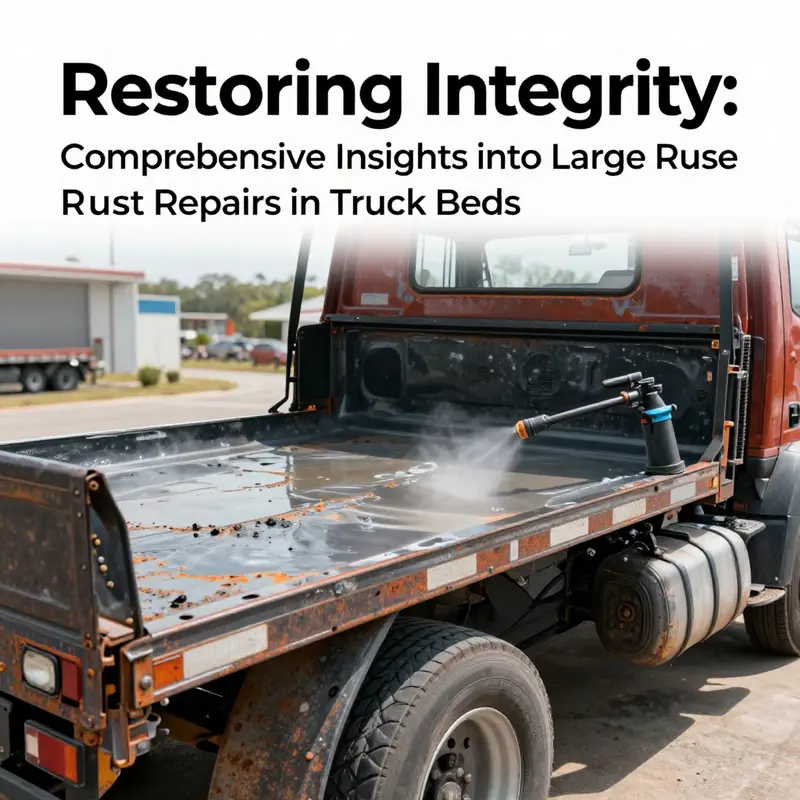
After a major rust repair, the coating is the last line of defense against moisture, salt, and wear. With the metal cleaned, patched, and ground smooth, choose a coating system designed for interior truck bed exposure. A spray applied elastomeric or polyurea based coating can seal contours, cover welds, and resist impact while remaining flexible enough to tolerate movement during loading and unloading. The goal is a seamless interior film that resists water intrusion and chemical attack without cracking or delaminating.
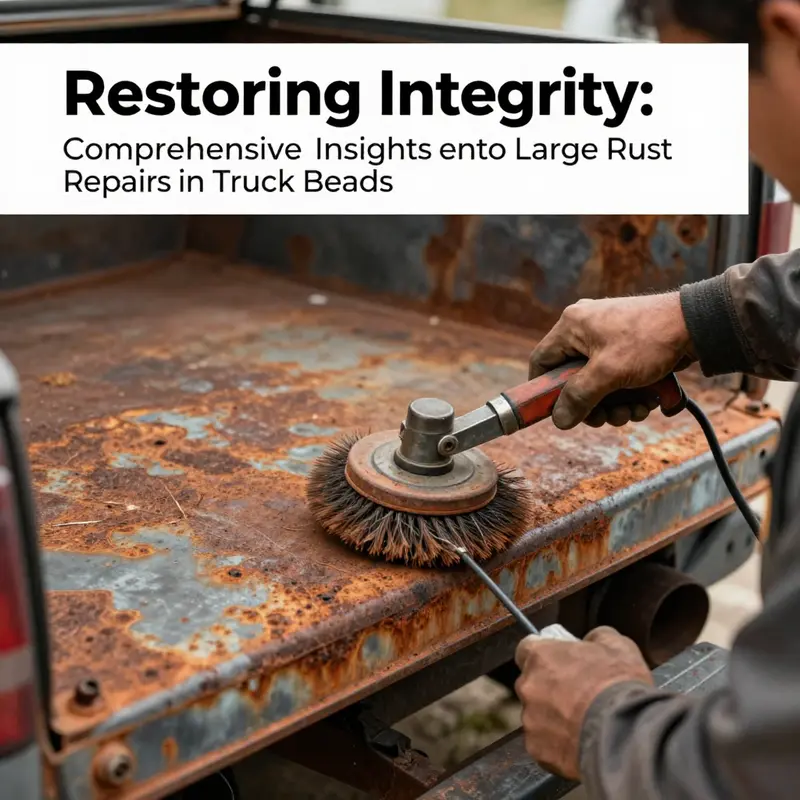
Surface preparation is the first critical step. Remove loose rust and old coatings, then degrease and dry the metal. A roughened surface improves mechanical adhesion, and a clean, dry substrate reduces the risk of solvent entrapment. Wipe with a suitable degreaser, rinse if required, and allow full evaporation before coating.
Application and curing go hand in hand. A spray application yields uniform film thickness and fewer pinholes, but it requires proper equipment, masking, and ventilation. Follow the coating manufacturer guidelines for substrate temperature, ambient conditions, and cure time. Rushed cures can trap solvents and lead to soft coatings that fail early under load. A well cured coating forms a robust barrier and tolerates thermal cycling and the shocks of tools and cargo.
Film thickness should be sufficient to bridge weld seams and irregularities but not so thick that it sags or traps air. Use multiple passes and pay attention to edges, joints, and patches. Inspect the finished surface for pinholes, holidays, or uncoated areas and address any issues before the coating reaches full cure.
Maintenance and inspection complete the lifecycle. Keep the surface clean and dry; mild detergents and water are typically safe, but avoid harsh solvents that can soften the coating. Debris and road salt should be removed promptly. Schedule routine checks every three to six months, or more often after winter driving or heavy use, to catch wear or micro damage early.
Compatibility with liners or bed protectors matters. Some operators run a liner over the coating, while others rely on the coating as the primary defense. Ensure the liner materials are compatible with the coating to avoid trapping moisture or causing delamination.
In practice, plan for a disciplined workflow: after patching and grinding, re-clean, mask, prime if required, then apply the topcoat in thin, even passes. Allow proper drying between coats and protect the surface from dust during cure. A final clear overcoat or UV protection layer may be added if the system calls for it.
The payoff is long lasting interior protection. A properly selected and applied coating reduces new rust formation, supports simple maintenance, and provides a durable surface that withstands moisture, salt, fuels, and heavy loads in real-world conditions.
Final thoughts
Successfully addressing rust damage in truck beds requires a structured approach that encompasses assessment, removal, and protection. By implementing the techniques outlined in this guide, fleet operators can ensure their vehicles remain in optimal condition, contributing to overall efficiency and longevity. Investing in quality repairs not only boosts safety but also minimizes maintenance costs in the long run, allowing for improved service delivery in operations.

