Rust can significantly compromise the integrity of truck fenders, leading to costly repairs and operational disruptions. For fleet managers and logistics operators, timely maintenance is not merely a choice—it’s a necessity. Understanding how to identify and repair rust spots efficiently protects your vehicles, prolongs their lifespan, and enhances your fleet’s reliability. This guide will equip you with the expertise needed to assess rust damage, clean and sand affected areas, effectively apply primer and paint, and recognize when to seek professional assistance.
Assessing Rust, Reclaiming Fender Fortitude: A Thoughtful Pathway to Repairing Truck Rust Spots
Rust on a truck fender often starts as a quiet blemish after a scrape or a stone chip. It can feel like a small problem, but beneath the surface it often tells a larger story about how the vehicle wears and ages in the field, on the highway, and in the elements. The way you read that story—the assessment you make before you pick up tools—sets the stage for a repair that lasts. The goal is not merely to hide a spot of color or to skim over a flaky patch. It is to halt the spread of corrosion, preserve the structural integrity of the panel, and restore a finish that protects and looks right. The process blends careful diagnosis with precise technique, mixing clean preparation with patient layering of primer, paint, and protection. When you approach rust repair as a sequence of decisions rather than a single moment of sanding, you gain control over outcomes and avoid common missteps that invite repaints and repeated fixes.
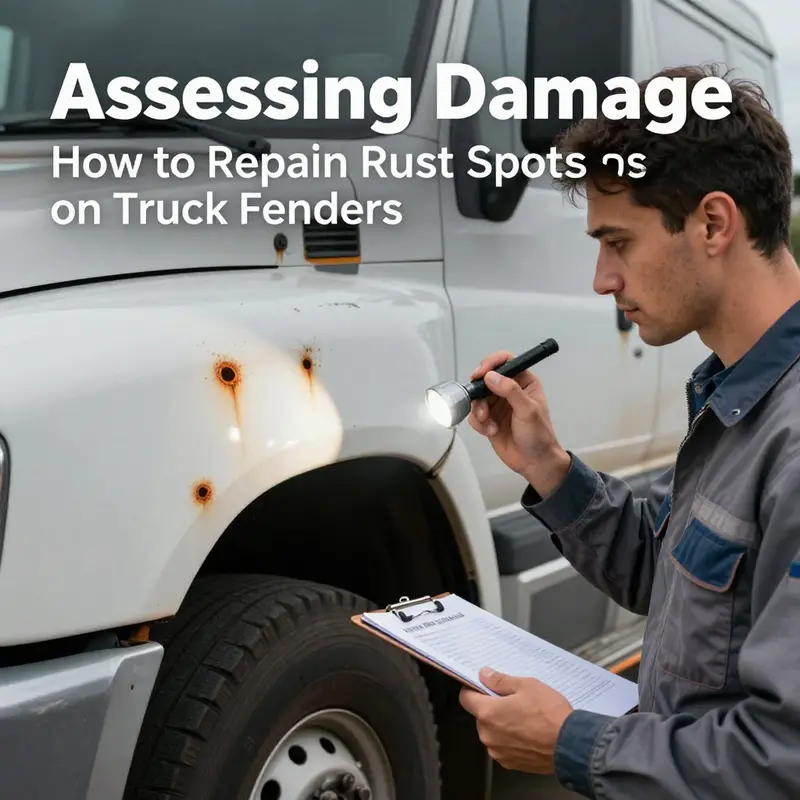
To begin, the first question to answer is how deep the damage goes. Surface rust affects only the topmost layer and often sits on the paint or primer surface. It is a signal that moisture has found its way through to the metal, but that the metal beneath remains intact enough to hold a proper seal once treated. Deeper rust, on the other hand, eats into the metal—creating pits, thinning the fender, or even compromising the panel’s strength. This distinction matters because it guides not just the tools you choose, but your expectations for the repair. Surface rust can frequently be managed with at-home steps that restore the surface and prevent future flaking, while deeper corrosion may require more involved work, up to panel replacement in extreme cases. A clear-eyed assessment helps you decide whether you’re looking at a straightforward fix or a scenario that calls for professional hands.
As you lay out your plan, the surrounding environment becomes part of the diagnosis. Humidity, temperature, and ventilation influence how paints and primers cure and how quickly rust inhibitors set to work. The fender’s edge, where it meets the wheel arch, is a hotspot for moisture retention and salt spray, especially in winter road conditions. It is wise to consider not only the visible rust but also the hidden spots you might expose when you remove paint for repair. A careful inspection under indirect light with a magnifying glass can reveal the extent of pitting and whether any feathered edges of paint have started to lift. If you can hear a faint hollow when you gently tap the spot with a small tool, that sound can hint at metal thinning. If you can see through to primer or underlying bare metal, that is a clear sign you’re in the realm of deeper rust that will demand more attention. The more precise your assessment, the more predictable your repair will be.
Once you have established the severity, you move into the practical steps, guided by the principle that rust must be removed completely before any guard against future corrosion can be laid down. For light surface rust, the removal process begins with thorough cleaning. A degreaser or mild soap and water loosens dirt, oils, and sand, all of which can keep coatings from adhering properly. After cleaning, you must allow the surface to dry completely. Any residual moisture can sabotage adhesion and invite new rust to form underneath a topcoat. The next stage depends on how stubborn the rust is and how delicate the fender’s finish has become. For small spots, you can work with fine-grit sandpaper, typically in the 400 to 600 range, and use a light touch to remove the rust without gouging the metal. Wet sanding is particularly effective for preventing dust and keeping the metal cool, reducing heat that could warp the panel.
If the rust proves more tenacious, you can broaden your toolkit with mechanical aids that help lift the oxide layer without aggressively attacking the metal. A wire brush, a small rotary tool with a sanding drum, or a rust removal attachment can accelerate the process when used carefully. The aim is to expose fresh metal and create a smooth, clean surface for the subsequent layers of protection. After you finish sanding, wipe the area with a damp cloth and allow it to dry, ensuring no debris or moisture remains. It is crucial not to skip this step; any remnant rust acts like a time-release mechanism, continuing to spread under a new coat of paint. The next phase—priming—needs a surface that is rust-free and smooth.
Priming is the essential step that bridges the raw metal and the final color. A rust-inhibiting primer, especially one designed to adhere well to bare metal, forms a protective barrier that resists future corrosion. It also promotes good adhesion for the paint you will apply later. Let the primer dry according to the manufacturer’s instructions, typically a couple of hours, before you proceed. A robust primer helps prevent the pattern of rust from reappearing under the finish. The correct primer is not simply a filler; it is a shield and an anchor—one that will carry the topcoat and any clear sealant you decide to apply. You might decide to use a primer with a built-in corrosion inhibitor, which can add an extra margin of safety in climates with heavy moisture or salt exposure. The choice of primer, while practical, is not about chasing the perfect sheen at this moment. It is about establishing a reliable base that respects both the metal and the paint system you intend to build above it.
With the base prepared, you can consider color restoration. If your goal is to preserve the original appearance and maintain a uniform look across the fender, repainting the repaired area becomes part of the plan. For most DIY repairs, a matching color touch-up in thin coats yields the best results. A spray approach or a paint pen is common, and each coat should be applied in thin layers, allowing the surface to dry thoroughly between passes. Patience here matters, because thick coats can run, create sags, or trap solvent beneath the surface, inviting blistering later on. If you wish, you can finish with a clear coat to restore gloss and provide extra protection. The key is to apply multiple light coats rather than a single heavy one. The color matching is not just about tone; it’s about shade and depth, coverage, and how the repaired area reflects light compared with the surrounding metal. If the rust patch is minor, a careful combination of primer, color, and clear coat can render the repair nearly invisible and provide years of protection. If the patch is larger or if the edges of the repair show irregularities, you may want to consider having a professional blend the color to the adjacent panel for a seamless finish.
Beyond aesthetics, the protective strategy should focus on sealing and shielding the repaired area from moisture. A clear protective layer—often a urethane or clear enamel—helps resist UV rays and moisture, and it can reduce the risk of future micro-scratches that invite moisture penetration. The sealant is the final line of defense in your at-home repair arsenal. Good surface preparation, even after painting, is essential; UV exposure can cause older finishes to chalk or fade, while moisture can creep into tiny imperfections that a sealant might not fully reach if the base layers were compromised. The overall approach is a layered one: clean, remove rust, treat, prime, color, and seal. Each layer relies on the success of the previous and contributes to a finish that stands up to road grime and the pressures of weather and use.
As you evaluate the results, it helps to step back and look at the fender in different lighting conditions. A successful repair will show no visible rust under ordinary daylight and will reflect the surrounding color with a consistent gloss level. If you notice any signs of bubbling, color mismatch, or unglazed patches, you’ll know the job needs revisiting, either by spot refinishing or, in more extensive cases, repeating the primer and paint sequence—with added attention to dust control and curing time. The aim is not to chase perfection but to achieve a practical, durable repair that extends the life of the fender and preserves the rest of the vehicle’s finish.
This approach becomes even more important when you consider the long view. Rust resistance is as much about maintenance as it is about repair. Regular inspection of the fenders after major trips, following road salt exposure or winter weather, can help you catch new spots early. A routine wash and a quick wipe-down after a rainstorm can prevent moisture from lingering in crevices that are hard to access with a rag. If you keep an eye on the repaired area and address early signs of new rust, you reduce the risk of having to redo the job in a few seasons. The process you learned for one patch can become your standard for future repairs, keeping your truck’s fenders in good shape and reducing the likelihood of corrosion creeping across the panel.
In the end, there is wisdom in approaching rust repair as a skillful sequence rather than a one-off fix. The steps are straightforward, yet they require attention to detail and respect for the material you are working with. Cleaning, rust removal, priming, painting, and sealing each play a role in creating a repair that is not only cosmetically acceptable but also durable. If the rust has reached holes or significant pitting, or if the task feels outside your comfort zone for any reason, it is wise to seek a professional assessment. A shop can weigh the structural implications and determine whether replacement of the fender is the more prudent path. On the other hand, when rust is caught early and treated with care, a careful DIY repair can save time and keep your truck looking and performing well for years to come.
For readers seeking broader guidance beyond the technique, there is a wealth of practical, vehicle-specific advice that can deepen understanding of how to manage rust on truck fenders. A helpful path is to explore thorough DIY resources that speak to the recurring issues faced by truck owners in the field. An ongoing conversation about maintenance and repair can illuminate best practices and prevent excuses to delay addressing corrosion. If you want to explore more from an established DIY perspective, you can visit the broader resource space at mastertruckrepairllc.com/blog. It provides a gateway to practical tutorials and ongoing updates that align with the realities of at-home repairs, including tool lists, safety tips, and step-by-step insights that complement the method described here.
As you wrap up a rust repair, take a moment to reflect on the sequence you followed. The repair is not an isolated event but part of a broader approach to maintaining a vehicle that travels through weather and miles. By reading the damage, preparing the surface, removing rust, sealing with primer, carefully applying paint, and finishing with a protective layer, you create a long-term shield against moisture and oxidation. The fender functions as a critical part of the truck’s geometry, ensuring that panels align properly and that aerodynamics and aesthetics remain intact. The careful maintenance of this component is a direct extension of a responsible ownership philosophy—one that respects the vehicle’s past and preserves its capability for the future. A well-executed rust repair does more than restore color; it preserves the fender’s integrity and the truck’s overall resilience in the face of harsh roads, storms, and the inevitable wear of daily use.
External resource: for a broader, authoritative perspective on repairing rust on truck fenders and safeguarding against future corrosion, see the Car Care Council guide. https://www.carcare.org/vehicle-maintenance/repairing-rust-on-your-truck-fender
From Bare Metal to a Lasting Finish: A Safe Guide to Cleaning and Sanding Rust Spots on Truck Fenders
When you spot a rust spot on a truck fender, it can feel like a setback, but rust is a signal, not a verdict. By treating it as a problem to solve, you buy time and improve long term durability. The path to a durable finish is a careful, methodical sequence that starts with cleanliness, proceeds through controlled abrasion, and ends with a protective layer that discourages future corrosion. The fender is more than a simple sheet of metal; it shields the wheel well and carries the vehicle’s visual language, and it endures road grit, moisture, and sun. This guide blends practical technique with a preservation mindset. If you approach the first signs of rust with patience, you can extend the fender life, preserve the vehicle value, and maintain a finish that looks solid up close and respectable from a distance.
Begin with an honest assessment. Surface rust that is light and flaky can usually be repaired at home with the right plan and tools. Deeper rust that has bitten into the metal may require more cautious remediation or even panel work in the future. If you see deep pits or bare metal after sanding, plan for heavier repair or replacement. The first act is honesty about extent. If the damage is shallow and localized, you can preserve most of the fender with minimal downtime. If the metal is compromised more severely, weigh the cost of panel work against the long term benefit of a more complete fix. The aim is a repair that stops rust, creates a smooth surface for paint, and forms a seal against water and salt for the long haul.
Cleaning and prep set the stage. Dirt and grease act like magnifiers for rust in crevices and invite moisture to linger. Use a degreaser or mild soap with a soft cloth to lift the film and improve adhesion for the next steps. Dry the area thoroughly after washing; moisture trapped under new coatings accelerates corrosion. Wipe away residual moisture with a clean lint free cloth and let the area air dry for a few minutes. If you live in a humid climate, spend extra time on drying to pay dividends later.
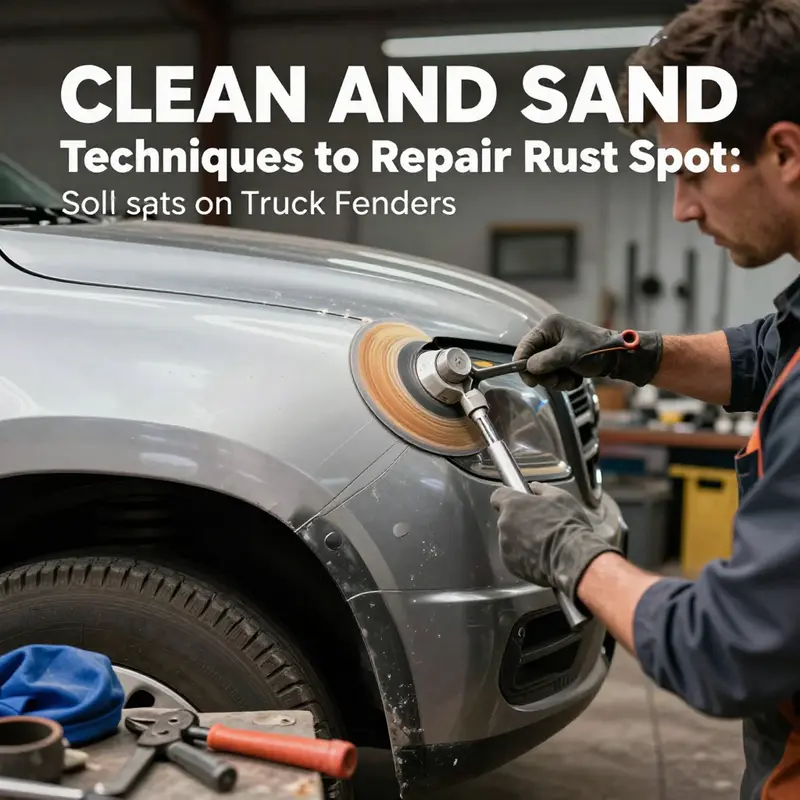
Removing loose rust is a measured, patient process. Loose particles cling and flake if not physically removed. A wire brush or a rotary tool can lift scale and stubborn flakes, but keep the work controlled and remove rust in layers rather than in one aggressive pass. This reduces the risk of warping or deep scratches that complicate the next steps. As you work, keep the area cool and wipe away debris to inspect progress. After you clear loose rust, move to sanding.
Sanding and shaping follow a deliberate grit sequence. Start with a coarse grit to remove remaining rust and roughness, then move to finer grits to create a smooth plane aligned with the surrounding paint. A typical path is 80 to 100 grit first, then 200 to 320 grit for the edge where repair meets original paint, and finally 400+ grit for a uniform blend. Wet sanding helps reduce dust and minimizes micro scratches that could show through primer and paint. Maintain a straight, steady motion to avoid swirl patterns, especially on curves and along the fender contour.
Safety is essential. Work with metal and dust demands eye protection, a mask or respirator in confined spaces, gloves for sharp edges, and hearing protection if you use power tools. The goal is to work longer, more effectively, and with less risk of injury. These protections are a core part of the repair, not optional add ons.
Dusting and inspection before primer. After sanding, wipe the surface with a dry lint free cloth to remove all dust before primer. Inspect for remaining pits or low spots; fill with a light metal compatible filler if needed and re sand. The aim is a uniformly smooth plane that ensures primer bonds evenly and paint lays down evenly. The primer forms a barrier that waits beneath the top coat; a good bond makes the finish durable.
Priming and color work. Apply a rust inhibiting primer; zinc rich primers are often preferred for their sacrificial protection. If pits remain, you can use a light filler or a compatible primer putty to smooth the surface before priming. Follow the manufacturers cure times and handle the area with care until the primer is fully dry. If color matching is important, color match and apply thin coats, allowing proper drying time between layers. Thin coats tend to blend better at edges and curves than a single heavy coat. For longevity and gloss, apply a clear coat after the color coats have cured. The clear adds UV protection, resists moisture, and seals edges of the repair for a durable finish.
Final seal, maintenance, and decision to seek professional help. After curing, consider a urethane sealant or compatible clear barrier as a last line of defense against moisture and sun. A durable finish is not flawless; it is durable and consistent with the rest of the panel. If rust has penetrated the metal deeply or if color matching proves too challenging, consult a body shop. They can provide a consistent top coat, a seamless blend, and warranty backed protection. For small, contained rust spots, a careful home repair is often satisfying and effective.
Further resources. You can find practical guidance, tool lists, and safety tips on the online resources that support this workflow. In practice, the steps cleaning, removing loose rust, sanding, priming, painting, and sealing form a cohesive process. Treat rust as a signal, not a verdict, and work methodically to keep the truck fenders solid and protected for years to come.
Note on standards. For formal standards and more exhaustive procedures, refer to official sources that outline surface preparation and rust repair practices that align with best industry practices. See the relevant maintenance manuals or standards for professional guidance.
Bridging Rust and Road-Ready Finish: A Practical Journey Through Priming, Painting, and Protecting Truck Fender Repairs
Rust has a way of showing up where the metal is closest to the elements and most exposed to road grit. A small chip or scratch on a truck fender may feel inconsequential, yet it opens a gateway for moisture, salt, and airborne contaminants to settle into the base metal. Left unchecked, what begins as surface rust can deepen, spreading under the paint and compromising the fender’s integrity and look. Repairing these spots is less about vanity and more about preserving the chassis’s protective barrier and the vehicle’s resale value. The approach described here treats rust as a signal, not a verdict—a signal that the metal beneath the finish deserves care, and the finish itself deserves a proper foundation. The pathway from bare metal to a durable, road-ready surface hinges on a sequence of deliberate steps that can be mastered with basic tools, a measured hand, and patience. This journey through priming and painting connects the practical with the practicalities of long-term protection, ensuring that the repair does not become a recurring chore but instead a one-and-done improvement that stands up to months of road salt, sun, and spray.
Start with an honest assessment of the damage. Surface rust—light, flaky discoloration that rests on the metal—can usually be managed in a home workshop. Deeper rust, manifested as pitting or corrosion that has breached the metal, may call for more intensive repairs or even panel replacement. The boundary between surface rust and deeper corrosion isn’t always clear, so it pays to be thorough. A careful sweep with a small wire brush or a thin-angle grinder equipped with a wire wheel can reveal how far the decay extends. If the metal beneath the rust shows through, or if you can hear a hollow where the fender should be solid, the project might require professional attention.
Once you’ve gauged the scope, preparation becomes the anchor of success. A clean, dry surface ensures that every subsequent layer—primer, paint, and clear coat—adheres firmly and cures evenly. Dirt, oil, and leftover wax create slip-plains that cause future peeling or fish-eyes in the finish. Begin with a thorough wash using a degreaser or mild soap and water, then rinse and let the area dry completely before you begin sanding. Any moisture trapped under the new layers will ruin adhesion, so take the extra minutes to confirm dryness. The decision to wear gloves and eye protection is a small price for safety and comfort when working with solvents and sharp edges.
With the surface prepared, the rust removal phase begins. Here the goal is to strip away the visible rust and any compromised metal that could act as a reservoir for future decay. For small spots, fine-grade wet/dry sandpaper in the 400–600 grit range works well when it’s soaked in water. Sand in straight, even strokes to minimize circular swirl marks; these marks can show through the final paint layer if not addressed. If the rust is stubborn, a wire brush, a drill with a wire wheel attachment, or a precision rust-removal tool can help lift the oxidized layer without aggressively thinning the surrounding metal. After sanding, wipe the area with a damp cloth to remove dust and residues, then allow it to dry. This moment of re-cleaning ensures nothing lurks beneath the finish that might undermine adhesion.
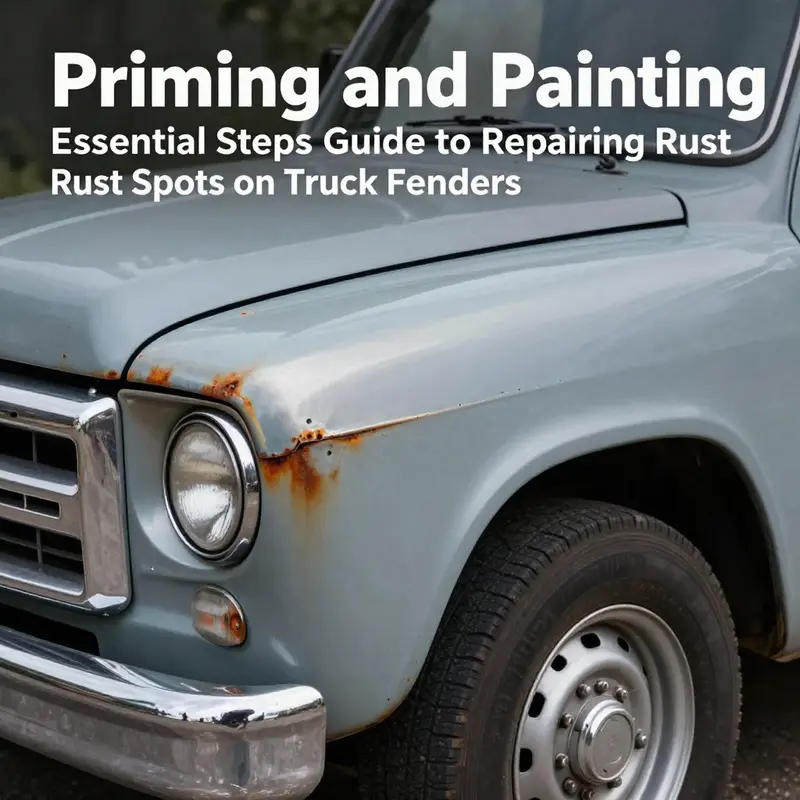
Never skip the rust removal step. Any residual rust can continue to grow under a fresh coat, undermining the entire repair. Once you’re confident you’ve neutralized the corrosion, you’re ready to seal the metal with primer. A rust-inhibiting primer forms a protective barrier that both locks the metal and primes it for paint. Zinc-rich primers and epoxy primers are the go-to options for this purpose because they combine strong adhesion with corrosion resistance. Apply a thin, even coat over the sanded area, making sure the contours of the fender remain visible and free of brush marks. Allow the primer to dry according to the manufacturer’s instructions—usually two to four hours—before deciding whether a second coat is necessary. The principle here is patience; multiple thin coats deliver better barrier strength than a single thick layer.
Primer is more than a colorless coat; it’s a functional shield that anchors the paint and hinders future rust formation. The importance of proper application cannot be overstated: it reduces the risk of solvent bleed, minimizes ridges, and promotes uniform adhesion. After the final primer coat has cured, inspect the surface for micro-misses or pinholes. If you detect any imperfections, a light sanding with very fine 600–800 grit paper can smooth them out, followed by a quick wipe and another primer layer. A well-prepared surface looks dull compared with a finished paint job, but it’s the necessary foundation for long-lasting color and gloss.
Now the color comes into play. Painting is not merely cosmetic; it protects. If you’re aiming to perfectly match the truck’s original color, you’ll want to use a paint system designed for automotive use, typically including a base coat and a clear coat. In a residential setting, spray cans designed for automotive use can yield surprisingly good results when applied with care. The key is to apply multiple very thin coats rather than one or two heavy coats. Thin layers dry faster and reduce runs or sags that can ruin the finish. Between coats, allow a short interval for the solvent to flash off. The 15–20 minute window is a typical guideline, but always rely on the product’s instructions. During spraying, hold the can or spray gun at a consistent distance from the surface and use sweeping, overlapping strokes to avoid buildup along edges or corners.
Patience through the painting phase pays off with a more seamless look and longer-lasting adhesion. If the area is small, a touch-up pen might suffice, but for larger areas, a controlled spray yields a uniform finish that blends with the surrounding paint. If you’re working on a fender that is visibly different in shade or texture from the rest of the body, consider blending the edges slightly to avoid a hard line where the repair ends. After the base coats have dried, a clear coat is commonly applied to seal and protect the color. The clear coat adds depth and gloss while increasing resistance to UV damage and moisture, which are both relentless in outdoor environments. Apply clear in light, even layers, allowing time for each to cure before the next coat. A well-applied clear coat will not only help the color pop but also provide an additional buffer against future weather exposure.
Beyond the look, proper sealing is a crucial step in longevity. The finished surface should feel smooth to the touch and show no obvious texture differences between the repaired area and the surrounding fender. If the finish is rough or uneven, a final light polish after full curing can help. This is not a harsh polish that removes material; rather, it’s a gentle pass to restore the luster without compromising the protective layers beneath. Many technicians incorporate a wax or sealant at this stage as an extra shield against moisture and chemical exposure, especially in regions where road salt is common.
Maintenance matters just as much as the initial repair. Periodic inspections after several seasons of use can catch early signs of corrosion near seams, edges, and fastener lines. Price considerations often pull people toward quick, inexpensive fixes, but the wise approach treats repairs as ongoing maintenance. Regrettably, neglecting to address new scratches promptly can turn a small rust spot into a larger issue more costly to repair. So, after the repair, monitor the area for any signs of lift, blistering, or color mismatch. If you notice any changes, a light touch-up with primer and paint can prevent a more extensive job later on. A simple habit of cleaning and drying after wet weather can extend the life of the finish dramatically.
If you ever encounter a rust spot that seems to resist your best efforts, it’s worth revisiting the decision to pursue professional assistance. When the metal has rusted through, leaving holes, or when pitting is extensive, or if color matching proves problematic, field-grade DIY steps might not be enough. A professional body shop can assess structural concerns, replace damaged panels if necessary, and apply a factory-quality finish that matches the vehicle’s color and texture. Even in such cases, understanding the basic process helps you communicate clearly with the technician and sets realistic expectations about timelines and costs. In the end, a well-informed customer can make smarter decisions about the balance between DIY enthusiasm and professional expertise.
For readers seeking further details with visuals and more nuanced tool lists, there are dedicated resources that lay out the workflow step by step. A practical approach can include reviewing additional guidance from a trusted repair resource, where you’ll find visuals and notes on handling rust removal, priming, and painting with a focus on fender work. If you’d like to dive deeper into the story of rust preparation and priming for protection, the Master Truck Repair LLC blog offers a broad repository of related topics that can support your journey. See the external reference for more on priming strategies and protective coatings: https://www.autorepairadvice.com/vehicle-body-repair/priming-for-rust-protection/
When to Seek a Professional for Rust on Truck Fenders
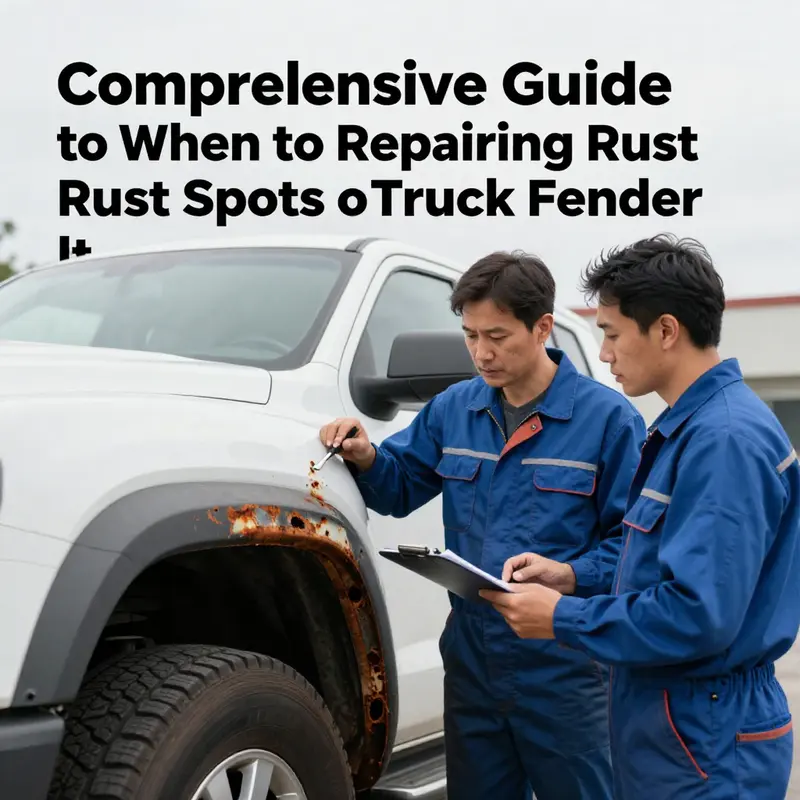
A rust spot on a truck fender is often a signal that moisture, salt, and friction have begun a slow, ongoing process. Small surface rust sits on the top layer of metal and primer and can often be treated at home with patience and proper technique. When rust has advanced to pits or holes, the structural integrity of the fender can be affected and a DIY fix may not be sufficient.
Key checks to decide whether DIY is still reasonable: depth of rust, whether a thin blade can reveal material beneath, and whether the rust has crept behind paint or spread to mounting points. Rust that has reached behind the finish or near fasteners is a warning sign. If the fender attachments to the vehicle are compromised, or if the rust has spread toward the frame, seek professional help. Safety around the wheel arch and alignment with adjacent panels matters as well. If you are unsure about the depth or extent, a quick consult with an auto body professional can save time and money in the long run. For readers who want reliable context, reputable auto repair guides and the NHTSA Vehicle Safety resources provide a framework for decisions about repair versus replacement.
With the damage assessment in mind, the DIY mindset should stay methodical. For minor surface rust, start with cleaning the area thoroughly to remove dirt, oil, and road grime. Use a degreaser or mild soap and water, then dry completely. Remove rust with fine-grade wet/dry sandpaper in the 400–600 grit range, keeping the paper wet to reduce heat. For stubborn spots, a wire brush or a drill with a wire wheel can help lift corrosion without removing too much base metal. After sanding, wipe the area clean and let it dry. Primer is the next barrier: a zinc-rich or epoxy-based rust-inhibiting primer provides adhesion and a moisture barrier. Let the primer cure according to the manufacturer’s instructions before applying paint. When you paint, apply thin, even coats, allow each coat to dry, and consider a clear coat for UV protection. Large rust areas or complex color matching may require a professional finish to ensure durability and uniform appearance.
Ultimately, the boundary is safety and structural integrity. If the rust has created holes, thinning metal, or weakened mounting points, a professional body shop is the prudent choice. Techniques such as patch panels, spot welding, or panel replacement may be needed to restore strength and alignment. A professional assessment can prevent rework and ensure the repair holds up under stress. The broader safety framework from official resources emphasizes keeping body components in good condition to preserve crashworthiness. If you lack the tools or confidence for metal patching or spot welding, seek a qualified auto body shop for evaluation and guidance.
Maintenance after a repair is key. Regular washing to remove salt and debris, light wax or sealant, and periodic inspections help minimize future rust. If new rust spots appear after a repair, reevaluate with the same careful approach and consider professional intervention if necessary. This balanced approach—knowing when DIY is appropriate and when to involve a pro—helps keep a truck fender safe and looking solid for miles to come.
Final thoughts
The integrity of your fleet is paramount, and proactive rust repair is a cornerstone of effective fleet management. By assessing damage accurately, utilizing proper cleaning techniques, applying high-quality primers and paints, and knowing when to call in the professionals, you can significantly extend the life of truck fenders and maintain operational efficiency. Investing time in these repair techniques not only saves costs in the long run but also enhances the performance and reliability of your fleet, ensuring that your operations run smoothly and effectively.

