Maintaining a fleet of trucks often involves dealing with wear and damage, including unsightly dents that can impact the vehicle’s integrity and resale value. For fleet managers, trucking company owners, and operators from the construction and mining sectors, understanding effective dent repair methods is crucial. This article explores reliable strategies for repairing dents, from DIY techniques to recognizing when to seek professional assistance. Each chapter will delve into specific methodologies, ensuring you can tackle any dent scenario efficiently and keep your fleet operating at its best.
Restoring the Line: A Practical, Integrated Approach to DIY Truck Dent Repair

Dents on a truck tell a simple story. They speak of a second or two when a door swung shut with a little misalignment, a hailstorm, or the stubborn impact of road debris kicked up from the highway. The real question is not whether a dent exists, but what it demands to best preserve the vehicle’s integrity and appearance. A truck’s body is more than a shell; it’s a structure that carries loads, endures vibration, and keeps its finish under a harsh cycle of sun, rain, and salt. So when you decide to tackle a dent yourself, you are balancing two goals at once: restore the metal’s shape and protect the paint from additional damage. The path you choose hinges on three practical factors: the dent’s size, depth, and location; whether the paint is compromised; and how confident you are working around the truck’s more critical areas, like the bed rails, door edges, and frame anchors. A careful assessment before you grab tools is the difference between a straightforward fix and a rush job that invites rust or misalignment later on. In the best cases, small and shallow dents on flat panels with intact paint are well suited for DIY restoration. The method you choose should be as conservative as possible, using gentle forces and precise control rather than brute force. It is also wise to treat any DIY approach as a step in a larger process. If a technique fails to produce the desired result after a measured effort, it is time to pivot to a more controlled method or to seek professional help. The science behind these repairs is simple in principle but demands patience, steady hands, and a respect for the material you are working with. Metal expands when heated and contracts when cooled, a physical property that is the cornerstone of several repair tricks. Likewise, creating a seal that transfers force evenly across the dent can coax the metal back toward its original contour. And when the paint layer remains unbroken, the chance of a flawless result improves dramatically. With these guiding ideas, you can navigate a spectrum of techniques—from low-cost, accessible DIY tricks to more involved professional options—without losing sight of safety and the truck’s long-term value. The journey begins with quick, low-risk approaches and steadily progresses to more involved methods only as needed. The important principle is to move deliberately, check progress often, and stop when the risk of further damage outweighs the potential benefits of another attempt. The first decision you’ll make is what kind of dent you’re dealing with. Small, shallow dents on flat panels with no paint damage are the friendliest to tackle and tend to respond quickly to suction-based methods. When the damage is a touch deeper, or if the paint has begun to crack, it is time to temper expectations and consider heat and cold strategies or a more robust push from behind. For larger, deeper, or structurally compromising dents—especially those that affect the bed, rails, or frame—a more controlled approach is required. In the end, the choice is not about chasing perfection in a single try but about encouraging the metal to return toward its original shape while preserving the finish and structural integrity. With that mindset, the repair process becomes less about dramatic fixes and more about careful, incremental improvements that compound over time. Consider this a dialogue with your truck’s body: you listen for subtle resistance as you apply pressure, you observe the smoothness of the surface as you work, and you pause when the metal tells you to stop. The conversation is practical, patient, and, most importantly, safe for you and the vehicle. When you start, you will see that several practical DIY approaches offer meaningful results for different dent profiles. The first and most accessible option is a suction-based method, often recommended for small, shallow dents where the paint remains intact. A dedicated dent puller or a suction cup creates a vacuum seal over the center of the dent. Cleanliness is essential here; dust or moisture can undermine the seal, so wipe the area dry and free of debris. Once the cup is firmly in place, you apply a steady, even pull. The vacuum pressure does the work gradually, coaxing the metal to re-expand toward its original shape. For the DIY enthusiast, this approach is a friendly starting point—simple, inexpensive, and effective for the kind of minor dings that accumulate along fenders and doors after a run through tight spaces or a parking lot incident. It is wise to temper expectations with this method, recognizing that some dents may only be softened rather than fully removed. In those cases, you can blend suction with a heat step to encourage the metal to move more freely. The heat-cold sequence—the thermal shock technique—uses controlled heating to expand the metal slightly, followed by rapid cooling to contract it back. The aim is to create a tiny, controlled rearrangement of the metal’s fibers that helps the dent pop outward. The cautions here are practical and clear: heat should be moderate, and you must avoid overheating the paint or causing blistering. Aluminum panels, in particular, resist this approach, so you should proceed with restraint on those surfaces. If paint damage is present or the dent is deeper, the heat-and-cool method alone is unlikely to suffice. For larger dent situations, a more physical approach from the inside, using a wooden block and a jack, gives you direct control without sacrificing paint. The principle is straightforward. You set a sturdy block against the inside of the panel where the dent sits, align a hydraulic or bottle jack over the block, and carefully apply pressure to push the dent outward. The trick is to move slowly and frequently pause to assess progress. This technique excels in scenarios where the dent is substantial but still well within the panel’s tolerance to pressure, and where the inner side of the panel offers a solid backing. It produces real, tangible improvement without resorting to harsh scraping or aggressive sanding that could mar the finish. The caution here is obvious: never rush the process and never apply force without a solid, safe setup. Support the vehicle securely, use jack stands, and avoid any action that could cause the panel to buckle or misalign. Sometimes, however, the dent’s depth or the paint condition makes the previously mentioned DIY routes insufficient. When the dent has depth, or the paint shows cracks or chips, the only reliable path to restore both form and finish often involves a filler or professional repair. A body filler, such as a two-part epoxy putty, can fill deeper recesses and return the surface to a smooth plane. Preparing the area is critical: you must clean the dent, remove loose paint, and sand the area to create a good bond for the filler. The filler is then applied with a plastic spreader, allowed to cure per the instructions, and sanded to a feathered edge that blends with the surrounding surface. The process does not end with filler alone. After smoothing, you prime and repaint to match the original color and texture. This path can be effective but introduces new steps and materials, and it inevitably changes the painted surface, so color matching and clear-coating become essential. In more complex cases, or when the damage is of uncertain scope, you might turn to professional repair kits that combine specialized tools with guided instructions. These kits provide a structured means to work with panels and aim to deliver consistent results for mid-sized dents. While the DIY route can be economical, it is important to acknowledge when a dent sits in a zone that requires a more specialized touch. This is where professional repair methods come into focus. Paintless dent repair (PDR) is a non-invasive approach used by trained technicians to push the dent from behind the panel using slender rods and strategically placed glue tabs. The strength of PDR lies in its preservation of original paint, which translates to less risk of finish mismatch and rust along the edges. PDR shines on small to medium dents where the metal can be coaxed back without removing panels or applying filler. When paint has been compromised or the dent is severe, traditional bodywork and repainting becomes the reliable route. In such cases, technicians may need to cut, weld, and reform sections of the panel, then prime, sand, and repaint to ensure a uniform surface that stands up to weather and use. The choice between PDR and traditional repair depends on the dent’s nature, the panel involved, and the extent of paint damage. The decision is rarely a single moment but a stepwise evaluation, guided by the panel’s behavior during manipulation and the finish’s response to initial attempts. In all scenarios, there are practical signs to watch for that indicate when DIY efforts should give way to professional hands. If the dent is deep, if the edges show sharp contours, if you notice cracks or chips in the paint radiating from the dent, or if the repair begins to alter surrounding lines and body gaps, it’s time to pause and consult a professional auto body shop. A misjudged move can stretch the metal, create new high spots, or propagate rust—especially in joints, door edges, or near structural anchors. The overarching principle remains simple: safety first, and respect for the vehicle’s structural integrity. While DIY methods can save money on minor dents, the long-term resilience of a truck’s body often justifies professional input when the damage crosses certain thresholds. If you are unsure of your capability or the dent’s impact on safety, a certified auto body shop is the prudent course. For readers seeking practical, step-by-step visuals beyond the narrative, reliable guidance and tutorials can be found at the Master Truck Repair blog, which offers accessible content that aligns with the repair ethos described here: https://mastertruckrepairllc.com/blog/. In the process of learning, it is worth keeping in mind the balance between resourcefulness and accountability. The right approach blends careful problem solving with measured strength, and it treats the truck as a system rather than a cosmetic shell. The material’s memory and the way it interacts with temperature, force, and coating layers all demand a patient, iterative, and disciplined method. When used thoughtfully, DIY techniques can restore a dent to a degree that satisfies the immediate appearance and preserves the vehicle’s value. When the dent is near critical components or involves significant paint damage, professional expertise is the reliable companion to a DIY effort, turning a potential cosmetic issue into a durable repair. To complement the reasoning above, and to encourage continued learning, consider consulting broader guides and visual demonstrations that reinforce the steps described here. For more detailed techniques and visuals, visit the external resource at Motor Trend, which provides practical perspectives on repairing dents at home and safety considerations that echo the cautions outlined in this chapter: https://www.motortrend.com/cars/how-to-fix-a-car-dent-at-home/.
Heat, Cold, and a Gentle Push: Mastering the Thermal Shock Dent Repair for Trucks
Repair work on a truck’s body often begins with a choice between rapid fixes and patient, measured techniques. The thermal shock method sits squarely in the latter camp. It is a controlled approach that leverages how metal behaves when temperature swings occur in quick succession. This technique is especially well suited to small, shallow dents on metal panels where the paint remains intact. It is not a cure-all for every dent, and it carries the caveats that come with DIY repair: the dent must be mild, the paint must be unscathed, and the driver’s patience must be willing to outlast a single attempt. When those conditions are met, the method offers a cost-effective, accessible path to restoring a portion of the truck’s original contour without the need for specialized tools or a full-body shop appointment. As with any repair, the goal is not just to erase a mark but to preserve the vehicle’s structural integrity and its exterior finish for days, months, and miles of service.
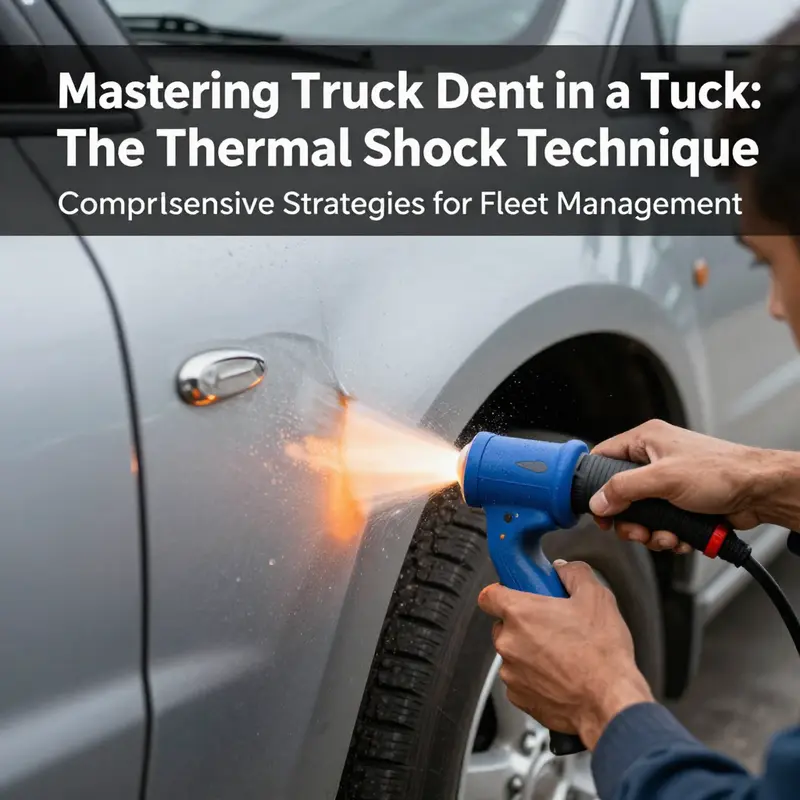
The essence of the thermal shock technique rests on a simple physical principle: metal expands when heated and contracts when cooled. If you heat the dented area evenly, the metal becomes more pliable. When you apply a rapid cold stimulus, the sudden contraction can nudge the panel back toward its intended shape. The trick is balance and control. Too much heat or too abrupt a cold snap can lead to unwanted warping, cracks in the paint, or a misaligned surface that looks worse than the dent itself. The approach works best on steel panels found on doors, fenders, and other flat-to-slightly curved surfaces where the paint layer is intact. Aluminum panels, or areas with cracked or chipped paint, require a different strategy or a professional eye to avoid introducing new problems. The method also presumes there is no underlying structural compromise. If the dent sits near the frame, rail, or a load-bearing member, the calculation changes entirely, and professional assessment becomes prudent.
To begin, take a careful, almost surgical, inventory of the dent. Look for depth, the edges of the impression, and any cooling or heating that might be required to achieve balance. Shallow dents with smooth contours respond best to the standard heat-and-cool sequence. Deep or sharply edged dents tend to resist this approach and can require a different intervention, including professional tools and expertise. The cosmetic surface is one thing; the layer beneath—the metal itself—has a thickness that dictates how much stress it can absorb without deforming further. The environment matters too. A cool, dry space reduces the risk of moisture interfering with the metal’s behavior and helps you avoid condensation that might compromise the finish. Cleanliness cannot be overstated. Dirt or oil on the panel can insulate the heat, create uneven heating, and produce inconsistent results. Wipe the dent area with a clean towel, removing any wax, polish, or road grime. When the surface is dry, you are ready to apply heat with a patient, steady hand.
For the heating phase, a heat gun or a hair dryer on its lowest setting works well, provided you hold it several inches away from the surface and move it in a slow, even arc over the dent. The target is not to blister or scorch the paint but to raise the metal’s temperature enough to increase its malleability. Most practitioners find that 30 to 60 seconds of targeted heating suffices for small areas, though the exact duration depends on ambient temperature, paint thickness, and the metal’s initial condition. The key is to feel for a change in the metal’s response. You should notice a slight softening as the glaze of heat loosens the tightness that confines the ding. If the dent is stubborn, you can extend this phase by short, measured intervals rather than a single long pass. Avoid concentrating heat on the same micro-zone for too long. Uniform heat distribution prevents the creation of new hotspots that could later crack paint or warp the panel.
The cooling step is the dramatic hinge of the technique. Immediately after heating, apply a rapid cooling stimulus to the same area. This is typically achieved with cold water from a spray bottle or a swift pour of cold water, followed by an ice pack wrapped in a clean cloth if more aggressive cooling is required. The goal is not to flood the area but to create a sudden temperature differential across the metal. The contraction induced by cooling helps coax the metal back toward its original geometry. The moment you observe any subtle elevation or reduction in the dent’s depth, you pause and reassess. The process repeats in short cycles: heat briefly, cool immediately, inspect, then reheat as needed. A single dent may respond after one or two cycles; others might require a series of brief cycles. The narrative should be patient, deliberate, and free of haste that risks enjoying a final, imperfect finish.
As the dent yields to the alternating temperature forces, you will notice a few silent cues. The surface may feel marginally smoother, and the edge of the dent might begin to blend more with the surrounding paint while maintaining the same color and gloss as the rest of the panel. Do not chase perfection in one sitting. Small improvements are meaningful and accumulate toward a more even plane. When you sense that the dent has diminished to an acceptable level, pause the cycles. At this juncture, a light inspection with a professional eye can help determine whether you have achieved a satisfying result or if further targeted cycles are needed. It is also wise to check for any micro-scratches or faint marks that the heat and cold might have introduced. If the surface has become slightly rough, a gentle pass with a fine-grit sandpaper or a soft polishing cloth can smooth the texture, but only if you are confident that the paint remains intact. In many cases, a touch-up color match is unnecessary; the objective remains to preserve the paint’s integrity while restoring the panel’s contour as closely as possible.
The method’s practicality becomes clear when you consider the broader repair ecosystem on a truck. For tiny, shallow dents on metal panels, this approach offers a no-frills alternative to more invasive procedures. It avoids the risk of dislodging the paint layer, a common concern with aggressive hammering or puller methods, and it sidesteps the costs and time associated with shop visits. Yet it does require careful execution. The line between a successful outcome and a subtle, unintentional crease in the metal can be thin. That is why the process is often framed as a learning experiment, one that rewards patience and a conservative touch. If you reach a point where the dent remains stubbornly obvious, or where the paint shows signs of stress—cracks, chips, or lifted edges—then it is time to reconsider. The dent may be too deep, or the surface too sensitive for the thermal shock approach. At that juncture, a consult with a professional who specializes in paintless dent repair could prevent further harm and preserve the vehicle’s value.
While reflecting on the method, it is useful to consider how the thermal shock technique sits in relation to other options. A suction cup method, for example, can be effective for very small, flat-panel dents with intact paint. It is inexpensive and easy to perform, though it has a narrower range of applicability than the heat-and-cool cycle. For larger or deeper dents, or when the paint has sustained damage, the scenario changes dramatically. In these cases, professionals may turn to techniques like paintless dent repair from behind the panel, which preserves most of the original finish, or traditional bodywork and repainting for more extensive damage. The contrast between DIY and professional routes highlights a practical truth: the value of a dent repair is not solely measured by cost but by the long-term health of the panel and the vehicle’s resale value. A small dent that has been coaxed back into place with the thermal shock method is preferable to one that is left to corrode or spread due to hidden cracks. The decision to pursue DIY repair should always be grounded in an honest assessment of risk, skill, and the panel’s current condition.
As you gain comfort with the thermal shock technique, you may find that your approach evolves. The discipline builds with experience, and the line between “enough heat” and “too much” begins to blur in a healthy, iterative way. Some drivers report success moving to a second stage of gentle finishing after the dent’s most visible impact has diminished. A final polish can restore uniformity to reflectivity across the panel, helping the repair blend more naturally with adjacent surfaces. If you decide to document the repair, a simple photo log can be a helpful reminder of how the dent responded to heat and cold, and what subsequent adjustments were made. This record can be valuable if you later revisit the same area for a more thorough repair or if a professional assessment is needed. For those who want to deepen their understanding or see demonstrations, a visit to the MasterTruckRepairLLC blog can provide additional context and related repair guidance. The insight from a broader set of DIY discussions often proves supportive when approaching a tricky dent, especially when you are balancing time, budget, and desired outcomes. External resource: https://www.popularmechanics.com/cars/how-to/a38957552/thermal-shock-dent-repair-method/.
Safe Lifts, Solid Surfaces: Repairing a Truck Dent with a Wooden Block and Jack
Before you even think about moving metal, set the stage for safety and accuracy. Park the truck on a flat, solid surface. Engage the parking brake and place wheel chocks behind the tires to prevent any unintended movement. Gather the essentials: a floor jack, a sturdy wooden block or several blocks, and safety stands capable of bearing the vehicle’s weight. A quick visual scan of the dent helps you anticipate the clearance you will need to work and whether the dent is accessible from underneath or from the inside of the panel. Do not underestimate the importance of protective gear. Gloves and eye protection should be worn, and the workspace should be kept clean and free of loose tools that could roll or shift during lifting. The aim is to create a stable and predictable environment, not to rush through the setup. The slower you go at this stage, the safer and more repeatable your results will be.
Dent Decisions on a Heavy-Duty Truck: A Practical Guide to DIY Options and Knowing When to Call in the Pros
A dent in a truck can feel like a small battlefield: a shallow crease on a door, a broader dent across a bed panel, or a sharp impression near a frame rail that makes you wince every time the sun hits the metal. Yet the moment you stop staring and start feeling for options, repair becomes a sequence of measured decisions rather than a single, high-stakes gamble. The core question isn’t only “can I fix it?” but also “should I fix it myself, and if I try, which method keeps the integrity of the truck intact?” Rebuilding a dent is as much about preserving the original paint and the vehicle’s structural readiness as it is about making it look right. The path you choose hinges on several practical factors: the dent’s size and depth, its location on the body, and whether the paint sustained any damage. When those elements align toward a DIY approach, the repair can be cost-effective and surprisingly straightforward. When they tilt away from DIY, the same factors point toward professional service that protects long-term value and safety.
The first step in any repair process is honest assessment. A small, shallow dent with intact paint on a flat panel is a different proposition from a large, deep crease that crosses multiple panels or sits near a hinge or seam. The paint condition is critical: if the coating is cracked, chipped, or peeling, attempting a DIY fix risks trapping moisture or causing further cracking. There’s also a safety and structural lens to consider. A dent near the frame rail or structural members can hide hidden damage. If the dent affects alignment of doors, the bed, or the cab, or if you hear rubbing or binding when the door opens, those are red flags demanding a professional eye. Taking time to photograph the damage from several angles before you touch anything is a wise first step. It creates a record for any later warranty considerations or insurance discussions and helps you compare progress as repairs proceed.
For many truck owners, a small, shallow dent with no paint damage is a good candidate for a do-it-yourself approach. The suction cup method sits at the top of the DIY toolbox because it is simple, affordable, and often effective on flat panels. The technique is straightforward. You start with a clean, dry surface—dust, oil, and moisture hinder suction. Place the suction cup centered over the dent and pull steadily and evenly. The vacuum pressure pulls on the metal, coaxing it back toward its original contour. It’s not a miracle cure for every dent, but on a tidy puddle of steel, it can restore a surprising amount of shape without losing the factory paint finish. A useful companion to suction is the glue-pull system. It’s a little more involved, but it shines on slightly larger or more stubborn dents where suction alone stops short. The idea is simple: a small glue tab adheres to the dent, and a pull tool applies controlled force to lift the metal back toward its original line. The key to glue pulling is patience and clean surfaces. Allow the glue to set fully before pulling, use steady, measured tension, and avoid overpulling. Overpulling risks pulling the dent in the wrong direction or causing additional deformations that require rework.
The heat-and-cold technique, sometimes called a thermal shock method, is another classic DIY approach. The reasoning is physical, not magical: metal expands when heated and contracts when cooled. The process typically involves heating the dented area with hot water or a heat gun set to a low setting, then applying rapid cooling with cold water or a cold compress. The cycle can encourage the metal to spring back toward its original shape. It’s a technique that works best on steel panels and with dents that aren’t severe. Caution is essential here: excessive heat or rapid cooling can damage the paint, leading to cracks or peeling. This method is generally not recommended for aluminum panels, which behave differently under temperature stress. If you decide to attempt heat-and-cool, do so gradually, monitor the paint closely, and stop if you see any signs of damage.
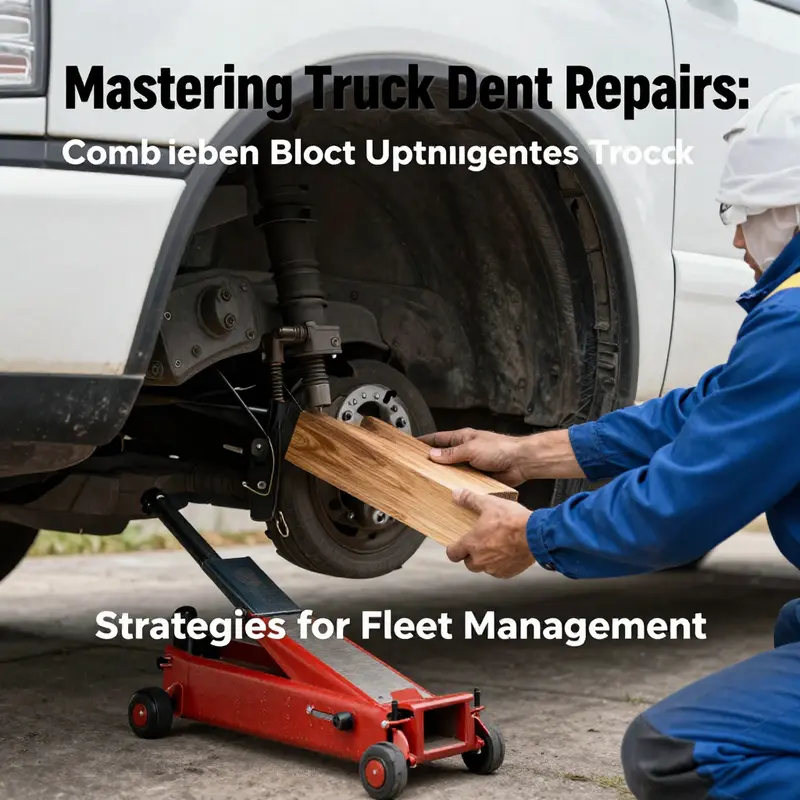
Among DIY strategies, you’ll often encounter the wooden-block-and-jack approach, which is particularly practical for larger or deeper dents where the inside of the panel can be accessed. The concept is to support the interior with a block and apply upward pressure from the inside using a hydraulic jack with care. This approach gives you precise control and can address deeper dents more reliably than suction or thermal cycles, yet it requires a stable setup and steady hands. Safety cannot be overstated here: secure the truck on stands, wear eye protection, and avoid applying force in a rushed, aggressive way. The danger of warping the panel or disturbing adjacent panels is real, so take time, check alignment frequently, and proceed in small increments.
While these DIY options can save money and, in many cases, preserve the original paint, there are clear limits. For dents that are large, complex, or accompanied by paint damage, professional repair is the better path. Paintless dent repair, often described as PDR, uses specialized rods and glue tabs to manipulate the metal from behind the panel while preserving the factory surface. It’s the gold standard for many minor to mid-size dents on steel panels in particular, providing a non-invasive solution that avoids sanding, priming, and repainting. When paint has cracked or peeled or when your dent intersects a structural seam or area requiring interior access, traditional bodywork and painting steps in. That process might involve cutting, welding, reshaping, sanding, priming, and repainting—steps that restore both appearance and protective coatings but at a higher cost and longer downtime.
For complex scenarios, the expertise of a trained technician becomes essential. Aluminum panels, double-layered metal, or dents located in areas that demand total panel integrity demand a professional’s touch. The risks of DIY attempts in these cases aren’t just cosmetic; improper technique can release hidden metal fatigue or create heat-affected zones that rust more quickly. If you suspect any of these conditions, it’s wise to seek a shop with a solid track record in truck body repairs. Documentation remains useful here as well. Photograph the dent, note its position relative to doors, rails, or hinges, and collect any receipts or assessments if you’ve already begun a DIY approach. A professional can then tailor a plan that respects both aesthetics and long-term strength.
In practice, most owners navigate a decision tree that balances cost, time, and risk. If the paint is intact, the dent is small and shallow, and the area is easily accessible, a careful DIY attempt can be sufficient. If the paint shows signs of cracking, if the dent is deep or expansive, if the affected area touches the frame or critical mounting points, or if your experience level with tool-work is limited, lean toward professional help. The safety and future resale value of the vehicle hinge on making the right call, and delaying a necessary professional evaluation can increase the final repair bill if water intrusion or structural concerns emerge later.
A practical, real-world approach to deciding where your repair path begins by documenting the situation. Take clear photos from multiple angles, including the seams and edges. Note the distance from doors, hinges, or frame rails. If you proceed with a DIY method, keep a repair log: what tool you used, the order of steps, the amount of force applied, and any changes you observe in the panel’s alignment or finish. This record-keeping does more than track progress; it helps you evaluate whether the repair improved the situation or merely masked a growing issue.
In the midst of this decision-making, you may face questions about cost and value. It’s wise to consider not just the immediate expense of tools and materials but the potential impact on resale value if the dent is poorly repaired. A scratch in the paint or an uneven panel can become a rust trap in humid climates, especially on exposed edges or tucked-niche spots that are harder to reach later. If you’re unsure about how to balance costs with risk, a practical reference point is to consider budgeting for routine truck maintenance. This mindset helps build a cushion for occasional repairs and unexpected fixes, keeping your vehicle in reliable condition over time. For a straightforward perspective on that budgeting approach, you can explore resources that focus on routine maintenance planning and expenses.
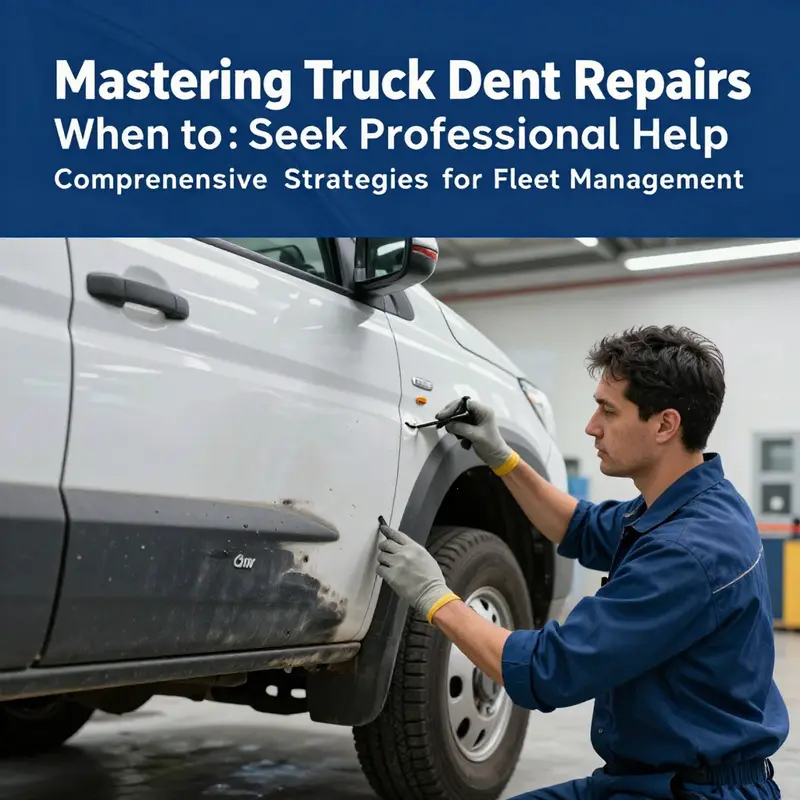
When it becomes clear that DIY is no longer the prudent path, or if you simply want the most durable result, professional options offer the best alignment with long-term reliability. Paintless dent repair technicians bring precision and experience to a process that preserves the original paint while restoring shape. If the dent has compromised the paint or penetrated into the primer, a traditional body shop can re-establish a seamless finish through sanding, priming, and repainting. In either case, a professional will typically begin with a careful assessment, noting the panel’s overall health, the dent’s exact geometry, and the likelihood of successful restoration without repainting. They may use specialized pullers, hydraulic tools, and internal push rods to coax the metal back to its intended contour while maintaining the panel’s integrity. After the bodywork, they’ll scrutinize color match, sealants, and waterproofing to ensure the repair lasts and the exterior retains its factory look. It’s a process that reflects both artistic attention to alignment and rigorous adherence to safety standards.
A broader practical picture emerges when you consider not only the technique but the context of maintenance and ongoing vehicle care. The maintenance mindset helps you anticipate future repairs and avoid escalations. Keeping a dent from becoming a rust pit often hinges on timely intervention and proper sealing after the repair. This is another reason to document the damage early, as that record can become part of a broader maintenance history that protects the vehicle’s value over time. When you choose a professional path, you gain access to experienced technicians who can advise on protective coatings, rust prevention, and the best repaint strategies to achieve a flawless finish that stands up to road grit, salt, and wide-temperature swings typical of truck operation across different regions.
Beyond the choice between DIY and pro, the repair journey should incorporate a mindset of safety and controlled progression. Always ensure the vehicle is securely supported, with stands in place before applying any pressure. Wear eye protection and gloves when handling sharp edges or heavy tools. Work in a well-ventilated area if you are applying glues or paints, and follow the product instructions to the letter to minimize fumes and skin contact. A measured approach helps prevent over-pulling, which could warp the panel or neighboring panels. If at any point you feel uncertain, stepping back to re-evaluate or pausing the job to seek a professional opinion is prudent. The goal is not to achieve a quick fix at any cost but to restore structural integrity and a uniform appearance that will endure the test of time on the road.
Finally, a note on resources and guidance. When you seek information, aim for sources that emphasize safety and best practices. For those who want step-by-step tutorials and visual demonstrations, credible guides and video tutorials can offer tangible cues that align with the techniques described here. If you’re weighing the cost implications and planning ahead, consider budgeting for routine truck maintenance to set aside funds for potential repairs. This practical planning can transform an incidental dent into a manageable, expected maintenance item rather than a surprise hit to your wallet. For readers who want a more formal set of standards and recommendations, reputable professional guidelines can provide a structured baseline for dent repair decisions, including when to call a pro and how to evaluate a shop’s qualifications. The emphasis remains on safety, integrity, and value, ensuring that every dent repair maintains the truck’s readiness for work and the road ahead.
For practical guidance aligned with professional standards, you can consult external resources that detail when a dent crosses into the territory where a pro should take over. These guides emphasize assessment, appropriate technique selection, and the importance of protecting the original paint and structural integrity. In particular, the following resource offers comprehensive recommendations for truck dent repair and when to seek professional help: https://www.ase.com/repair-guides/truck-dent-repair-when-to-call-a-pro. By pairing DIY exploration with professional thresholds, you create a balanced approach that respects your truck, your time, and your investment in a vehicle that remains functional and dependable across miles and seasons.
Final thoughts
Understanding the right methods for truck dent repair is imperative for maintaining a fleet’s appearance and performance. By utilizing DIY techniques for minor dents, applying thermal shock methods for deeper imperfections, and knowing when to consult professionals, fleet managers can save costs and preserve the integrity of their vehicles. Prioritizing timely repairs protects your assets and ensures that your truck operations remain efficient and visually appealing.

