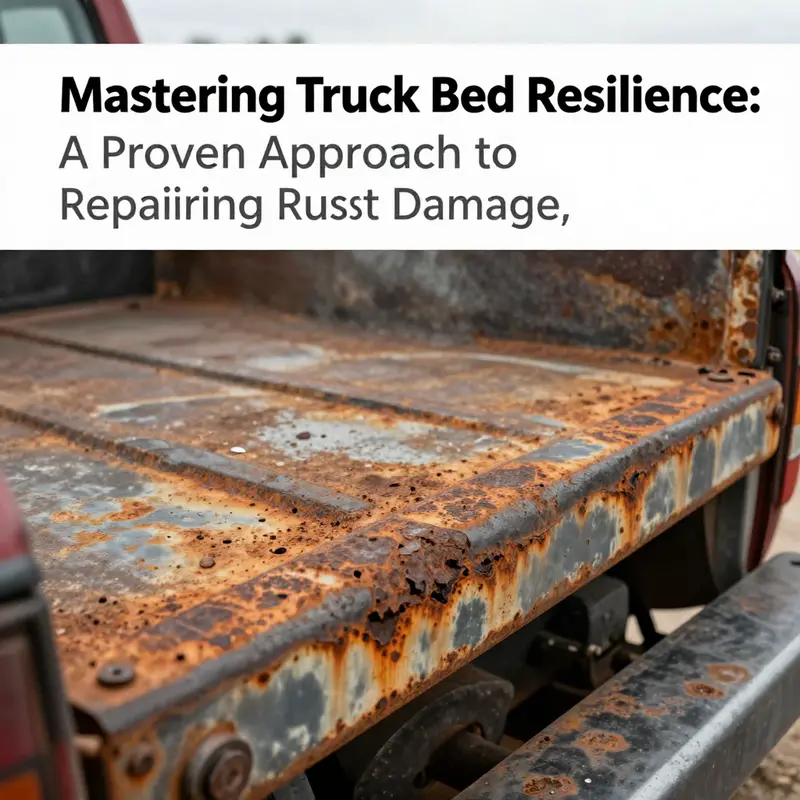
Rust damage in truck beds presents significant challenges for fleet managers and operators. Neglecting rust repair not only compromises the aesthetics but also threatens the structural integrity of the vehicle, leading to higher maintenance costs and potential safety concerns. This guide provides a structured approach to assess, repair, and prevent rust damage in truck beds. The first chapter delves into assessing damage, followed by mechanical rust removal techniques, essential surface preparation, the intricacies of welding new panels, and finally, preventing future rust. By following these comprehensive steps, stakeholders can ensure their trucks remain functional and visually appealing, ultimately enhancing their operational efficiency and longevity.
Reading the Rust: A Thorough, Systematic Assessment to Guide Safe Truck Bed Repair
Assessing damage in a rusted truck bed is not just a first step; it is the master key that unlocks a repair plan that is safe, durable, and economical. A careful assessment does more than catalog surface flaws. It reveals how deep the corrosion runs, where it compromises strength, and which sections can still support the load you expect from a loaded bed. When you approach the bed with a methodical eye, you conserve material and time, avoid wasted effort, and make sure the fix you choose will hold up under everyday use. The process begins with a visual survey that expands beyond the obvious, moving into a tactile and, if needed, instrumental evaluation that anchors every repair decision in measured reality.
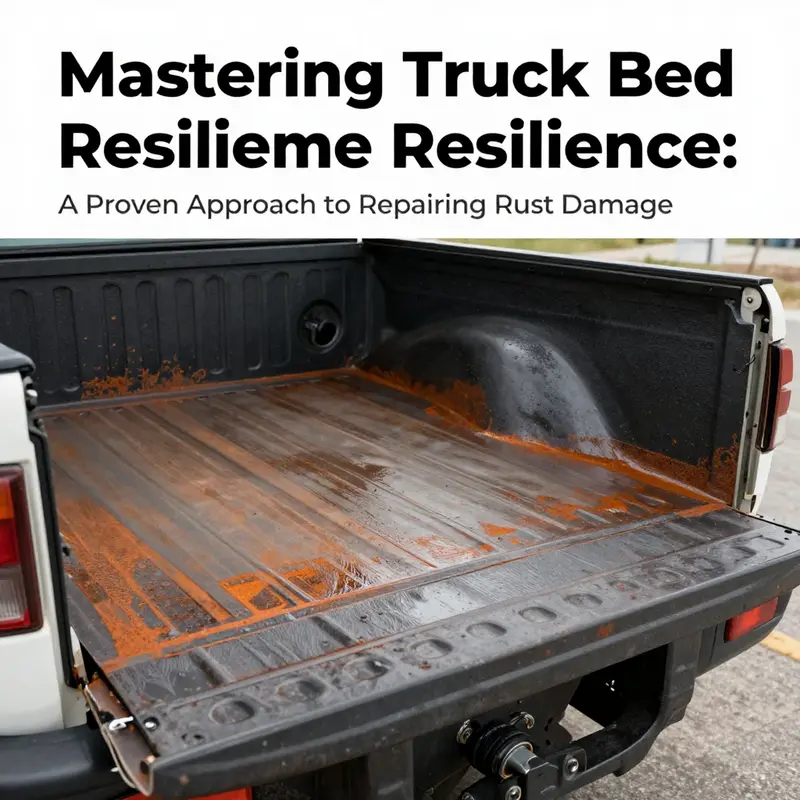
Begin with visual inspection, but train the eye to look beyond color and gloss. The most telling signs appear at high-risk zones: the edges where moisture lingers, the wheel wells that flex with road shocks, the bed floor corners that flex under cargo, and the seams where panels join. Discoloration, whether yellowish or brownish, often marks the start of deeper trouble. Bubbling paint and flaking metal suggest the protective skin is losing its grip against the steel beneath. Pitting, a pockmarked texture on the metal, signals that corrosion has already breached the surface. Yet some trouble hides in plain sight: the inside of bed sides, the underside of the floor, or the seams between panels can trap moisture and rust without immediately obvious color changes. A careful observer notes not only what is seen, but where it is seen, because rust is rarely uniform.
The next layer of assessment is tactile. Run a finger along the surface and over rough patches. If the metal feels grainy, soft, or uneven—especially where paint has failed—you may be detecting early-stage corrosion that has loosened the protective coating but has not yet fully perforated the metal. This touch test is a quick, low-risk way to separate areas that simply need repainting from zones that demand deeper treatment. It also helps track the boundaries of corrosion, which is essential when you plan the extent of any cutting, patching, or replacement work later in the process.
To quantify the problem, you must translate feel and sight into measurable depth. The standard approach relies on thickness measurements. An intact, original truck bed steel might measure around 1.5 millimeters in many common configurations, though thickness varies with design and year. If you find readings dipping toward 1.0 millimeter or less in a critical load-bearing area, that’s a clear warning sign: material loss has progressed enough to affect strength and stiffness. A rule of thumb often used in practice is that regions showing more than 30 percent metal loss deserve special attention and careful decision-making about whether to reinforce or replace. When corrosion has hollowed out substantial tracts or created through-holes, the situation moves from repairable to replaceable. In those cases, the bed’s structural integrity may be compromised to a point where patching would only be a temporary fix.
Beyond surface measurements, assess how rust has affected the bed’s structure. A bed floor that sags or warps under its own weight or under load undermines the geometry that keeps tie-downs and brackets aligned. Bolts and mounting points can become loose because rust expands and locks pieces in place or spreads distortion through the mounting areas. If you notice misfitting components, misaligned seams, or soft spots that suggest the metal loses its capacity to carry stress, the problem is not cosmetic. It is structural, and it demands a repair plan that restores the strength of the entire assembly, not just the surface appearance.
To support a disciplined assessment, some professionals turn to specialized tools that can illuminate hidden rust and thinning metal. A magnetic probe tester, or a magnetometer, can indicate where magnetic properties diminish due to metal loss. While not definitive on its own, a reduced magnetic pull often aligns with regions that require closer inspection or measurement. Borescopes provide a glimpse into cavities and seams that are otherwise inaccessible, helping you confirm whether hidden rust has compromised internal welds, corners, or hidden channels. Together, these instruments complement the tactile and visual checks, giving a fuller picture without destructive probing.
Documentation closes the loop of assessment and fuels a responsible repair plan. Photographs captured from multiple angles—focusing on edges, corners, and mounting points—build a visual map of progressing rust and its impact. Noting the exact locations of high-risk zones, along with depth estimates and material loss percentages, creates a record that can guide decision-making. When you classify rust into simple, practical categories—light, moderate, or severe—you translate that map into concrete repair choices. Light rust, still mostly skin-deep, may respond to surface preparation, rust converter, and repainting. Moderate rust, with material loss up to roughly 30 percent, typically requires grinding away the flakes, treating the exposed metal, welding minor patches, and a protective coating. Severe rust, with significant thinning or visible structural deformation, usually demands more extensive intervention—either large patchwork or replacement of entire panels.
This framework—visual cues, tactile feedback, measured depth, structural assessment, specialized tools, and documented findings—sets the stage for a repair strategy that matches the bed’s true condition. It prevents the common trap of overestimating what a surface-only fix can accomplish and the equally common pitfall of rushing into a high-cost replacement without fully evaluating the potential for salvage. In practice, the decision pathway follows the severity classification. Minor, cosmetic rust may justify a conservative approach: remove corrosion, apply rust-inhibiting primer, and finish with a durable topcoat that seals out moisture. Moderate rust benefits from a more involved sequence: remove loose material, reinforce weak edges with welding where appropriate, and cap the repaired area with a robust liner or coating to extend life. Severe rust is the threshold where the safest option often involves replacing the affected panel or, in some cases, the entire bed segment, especially when the corrosion has compromised essential load-bearing sections or mounting points.
The practical value of a thorough assessment extends beyond immediate repairs. It informs ongoing maintenance and rust prevention that protect the effort you’ve already invested. Regular washing of the bed, especially after exposure to road salt, moisture, or hauling wet cargo, helps slow the progression of corrosion. Drying the bed fully after cleaning minimizes hidden moisture that can creep into seams and edges. Periodic rechecks of the same high-risk zones—edges, wheel wells, seams, and undercarriage protections—catch early signs of relapse before they become costly problems. And while assessment guides the repair, it also shapes the preventive routine that preserves the bed’s service life, reduces downtime, and keeps the truck ready for the next job.
For readers planning the broader lifecycle of maintenance, consider linking this assessment framework to your budgeting and scheduling. Keeping a dedicated fund and a realistic maintenance calendar ensures you have the resources to implement the repair strategy as soon as the inspection warrants it. A practical reference point is Budgeting for Routine Truck Maintenance, which helps translate assessment outcomes into a workable financial plan that supports timely, high-quality repairs. This alignment between evaluation and planning ensures your truck bed stays reliable, safe, and ready for work rather than becoming an unexpected expense at an inconvenient moment.
External reference for further depth on measurement techniques and safety standards can be found at a leading standards organization, which provides industry-accepted methodologies for evaluating metal corrosion and ensuring vehicle safety and durability: https://www.sae.org
From Surface to Strength: Mastering Mechanical Rust Removal for a Durable Truck Bed
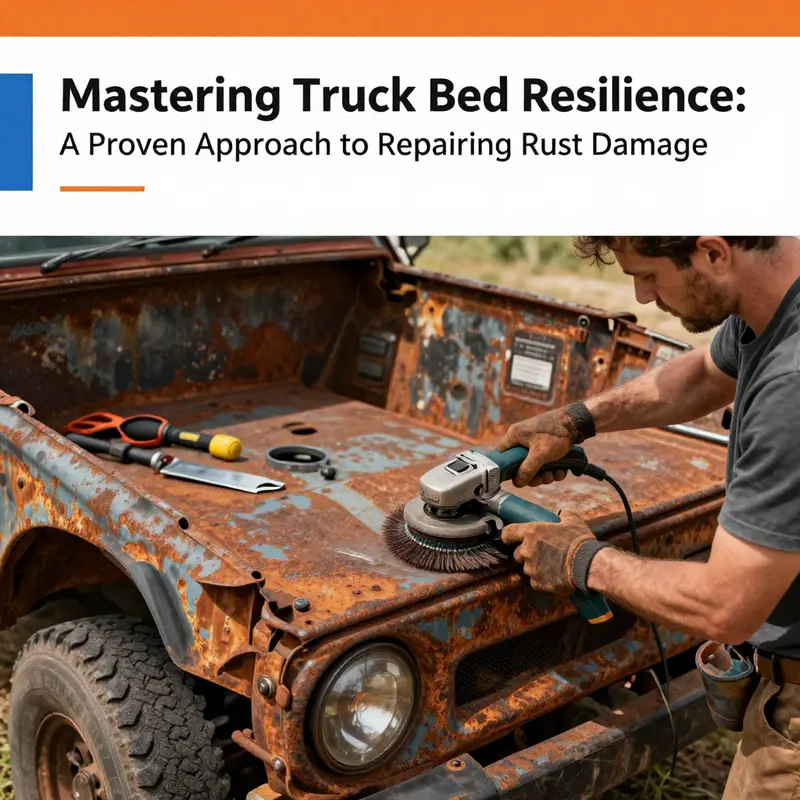
A rusted truck bed tells a story of miles traveled and weather endured, but the chapter isn’t finished until the rust has been properly addressed with mechanical removal. Mechanical techniques form the backbone of a durable repair, because they physically remove the compromised metal and create a clean canvas for protection. Success rests on thoughtful preparation, careful tool choice, and a cadence that respects the metal’s integrity. Before you pick up any tool, equip yourself with safety gear: safety glasses, a respirator or dust mask, and sturdy gloves. The bed is not a delicate surface; it can shed hot sparks, sharp edges, and fine rust dust. Start by wiping the area clean of dirt and debris and then inspect for severity. Surface rust may simply need a thorough cleaning, while deep pits or holes require more aggressive treatment. This initial assessment guides every subsequent choice, from hand tools to blasting, and from patching to priming. The goal is to expose clean metal, not to grind away beyond what’s necessary, because excessive material removal can weaken an already compromised structure. A measured approach also reduces the likelihood of warping the metal or creating new cracks along weld lines. In short, preparation is the foundation of success; it shapes how you select tools, how aggressively you work, and how you plan the next steps toward a lasting result.
Once the rust is assessed, you enter the core of mechanical removal. The methods you choose depend on the rust’s extent and on practical constraints like access to equipment and the bed’s overall condition. For light, flaky rust and small patches, hand tools can often do the job without removing large quantities of metal. Start with coarse materials such as 80 to 120 grit sandpaper or a stiff wire brush to knock down rust flakes and loose paint. Work methodically along seams and around corners, using consistent, overlapping strokes. Gentle pressure matters here; the aim is to expose clean metal rather than gouge a groove into the surface. After the obvious rust is gone, switch to finer grits to blend the surface and to prepare it for subsequent coating. This step also helps reveal any hidden pits that may require attention before moving forward. While hand tools are accessible and inexpensive, they are not ideal for broad rusted expanses. This is where power tools enter the workflow, accelerating progress while maintaining control.
A reliable power tool setup often begins with an angle grinder equipped with a wire wheel or a flap disc. The wire wheel is particularly effective at removing heavy surface rust on flat areas and along riveted joints, where paint and scale cling stubbornly. Move the wheel in steady, overlapping circles, keeping the blade or wheel flat to avoid digging into the metal. It’s essential to maintain control and avoid sustained pressure in one spot, which can generate heat, warp the sheet metal, or nick welds. When you encounter recessed areas or tight corners, a rotary tool such as a Dremel with reinforced reinforced brushing attachments becomes invaluable. The small footprint lets you reach around brackets and into wheelhouses without sacrificing the thoroughness of rust removal. After broad areas are cleared, finish with an orbital sander and use progressively finer sanding pads to achieve a smooth surface free of gritty roughness. This sequence—wire wheel or flap disc for bulk removal, followed by sanding for finish—helps prevent deep pits from remaining hidden beneath a dull film of rust.
For more significant rust, or when the bed shows deep pits and extensive corrosion, blast cleaning enters the process. Shot blasting or sandblasting can strip away rust and old coatings rapidly, yielding a uniform surface profile that is ideal for coatings to adhere to. Dry shot blasting uses abrasive media propelled at high velocity and is well suited for steel surfaces like truck beds. Wet blasting, which uses water and abrasive, helps control dust and often minimizes heat buildup, but it requires more setup and containment. These methods are powerful and efficient but are also the most demanding in terms of safety, space, and equipment. They are often best performed by professionals or in a well-equipped workshop where containment and ventilation can be controlled. The result is a bare metal surface with a predictable texture that ensures coatings bond well and resist future corrosion. It’s important to recognize that blasting generates dust and noise; proper PPE and containment are not optional but essential.
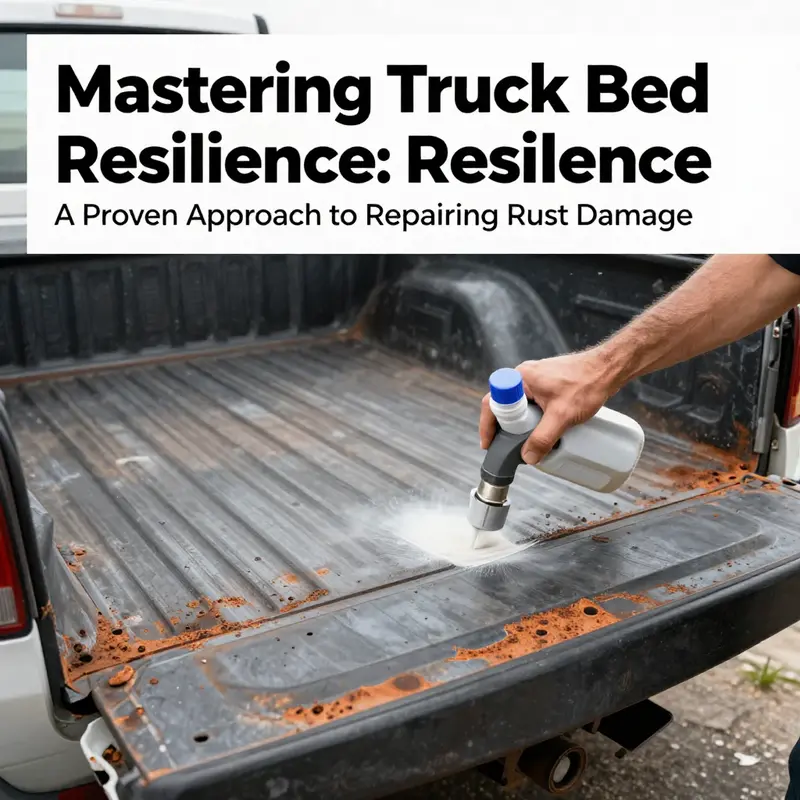
After the bulk rust has been removed, the surface needs a thorough post-removal check. Cleanliness is critical because any remaining dust, oil, or grinding residue can compromise coating adhesion. Use compressed air to blow away dust, followed by a wipe-down with a degreaser to remove any stubborn grease or oil residues. Let the area dry completely before proceeding. This moment is also when you should inspect for hidden corrosion or areas where rust is still active beneath the surface coating. A flashlight and a keen eye help you detect micro-pitting or hairline cracks that could become stepping stones for future rust. If hidden rust is found, address it now rather than letting it fester under a fresh coat. The goal is a surface that is not just clean, but also uniformly prepared for primer and topcoat.
With a clean, bare metal surface, surface preparation takes on new importance. In the preparation window, ideally within two hours of cleaning, apply a rust-inhibiting primer designed for metal substrates. This primer acts as a barrier against moisture and oxygen while filling in minor surface irregularities. The primer should be allowed to cure according to the manufacturer’s guidelines, after which a topcoat can be applied. On a truck bed, the topcoat typically includes a durable bed liner or automotive-grade coating that can resist abrasion, impact, and chemical exposure from salt or road grime. The choice of topcoat matters as much as the rust removal itself; a good bed liner protects the metal and helps maintain a uniform finish that resists chipping and flaking. In many cases, the sequence of primer, followed by a bed liner or equivalent protective coating, is more durable than a paint-only approach. The bed becomes a combination of protective layers that deliver both function and aesthetics, restoring not just appearance but ability to carry cargo with confidence.
As you proceed, bear in mind the role of patching and welding in cases where rust has compromised the bed’s structure. Mechanical removal is the preparatory phase that makes subsequent patching feasible and reliable. If sections have corroded through or created large holes, cutting out the damaged area and replacing it with a matching patch panel becomes the prudent long-term choice. In such cases, welding must be performed by a qualified professional, and the surrounding welds should be ground smooth to avoid creating crevices where moisture can collect. After welding, the repaired seams should be treated with the same meticulous approach as the rest of the surface: clean, prime, and topcoat to ensure a seamless, corrosion-resistant finish. The emphasis on quality—both in technique and materials—protects the bed’s structural integrity and maximizes the repair’s lifespan. This is why mechanical rust removal is best viewed not as a standalone fix but as the foundation of a broader, integrated restoration strategy. It establishes the condition needed for a patch, a weld, and a coating system that work in concert to return the truck bed to service.
Beyond the immediate repair, consider the ongoing maintenance mindset that keeps rust at bay. Regular washing and drying after exposure to salt, snow, or wet cargo remove the moisture that fuels corrosion. Periodic inspections around welds, seams, and scratches catch early signs of rust before they propagate. Small touch-ups on superficial rust, followed by rapid priming and topcoating, can extend the bed’s life dramatically. Keeping the bed clean, dry, and protected also means you won’t be forced to repeat the more invasive removal process as often. When done properly, mechanical rust removal is not just about removing decay; it is about setting the stage for a durable finish that can stand up to daily use and the elements.
For readers seeking a broader perspective on ongoing maintenance practices, you can explore in-house truck maintenance guidance that aligns with these principles at turnage-sons-in-house-truck-maintenance. It offers practical, field-tested approaches to keep a fleet in better shape between major repairs. As you progress, remember that the mechanical removal step is part of a larger cycle: assess, remove, prepare, shield, and preserve. Each phase supports the next, and together they determine how well the repair lasts under demanding conditions. For industry-standard references on surface preparation before coating, see the standards maintained by professional corrosion control organizations, which outline proven methods such as abrasive blasting and tool cleaning. External guidance from credible sources helps ensure your approach remains aligned with best practices and safety. External reference: https://www.nace.org
Laying the Groundwork: Precision Surface Prep as the Bedrock of a Rusted Truck Bed Repair
The moment a trailer or pickup bed shows the first signs of rust, many owners feel the urge to jump straight to welds, patches, or paint. Yet the real durability of a rusted truck bed repair rests on the work done before any metal meets metal: surface preparation. It is the quiet, meticulous stage that determines whether a repair will resist the next winter flood, the next trip through road salt, or the daily wear of hauling heavy loads. When done thoroughly, surface preparation trims away the variable factors that cause coatings to fail. It exposes clean, solid metal, minimizes contamination, and creates a reliable foundation for adhesives, primers, and coatings to bite in and stay put. The process is not glamorous, but it is decisive. It begins with a careful assessment of the damage and progresses through cleaning, roughening, priming, and finishing in a sequence designed to thwart moisture ingress and slow any future corrosion. The aim is not merely to hide rust but to restore a stable, protective platform that can tolerate movement, flex, and the vibrations of everyday use.
A complete and honest assessment sets the stage. Surface rust that flakes and peels is one thing; deep pits, thinning metal, and any deformation threaten the bed’s structural integrity. If the rust has eaten through or created soft spots, the repair strategy shifts from patching a surface to replacing missing material. In such cases, the repair should be planned to restore original thickness and strength, often by cutting away the compromised area and installing a new panel that matches the metal’s gauge. Even when the damage seems localized, a broader inspection is wise. Rust often hides where the eye does not immediately see it: along seams, welds, and the underside where debris accumulates. The more honest the initial pass, the more robust the subsequent steps can be.
Once the scope is defined, the rust must be removed with purpose. Mechanical methods are the most reliable for initiating a clean base. A wire brush or coarse sandpaper can eliminate surface corrosion and loose paint. An angle grinder equipped with a grinding wheel or flap disc accelerates the process of exposing near-clean metal, but care is needed to avoid overheating the steel, which can cause warping. For smaller, stubborn patches, a flap wheel or abrasive disc helps reach into corners and along curves where rust clings. When the rust is more than skin-deep, a common, disciplined approach is to cut away the affected section with a controlled, square edge that allows a patch to sit flush. The goal is not to leave jagged remnants behind; it is to create a solid, straight boundary for the repair panel. In the realm of severe rust, one section may need to be removed entirely and replaced with a new piece of equivalent thickness and alloy. The result is a bed that has a uniform surface ready for the next critical stage.
After the visible corrosion is cleared, attention turns to cleanliness. Any dust, oil, grease, or residue left on the surface can break the bond between metal and primer or topcoat. A degreaser helps lift oils that may have migrated into crevices. For stubborn residues, some practitioners move to a solvent such as acetone to ensure a truly oil-free surface. The area is then rinsed with clean water and allowed to dry completely. Patience here pays off later in the form of better adhesion and a more uniform finish. If the bed has been welded or fabricated in the repair, cooling and residue from the process should be followed by a careful re-cleaning to remove grinding slag and metal dust. The goal is a pristine, oil-free canvas that won’t repel coatings or trap moisture.
A light re-abrasion of the prepared surface follows cleaning. This step, often accomplished with fine-grit sandpaper in the range of 220 to 400 grit or a fine abrasive pad, introduces micro-scratches that create a mechanical key for primer and topcoat to grip. The small scratches act like tiny footholds, providing improved adhesion without roughening the metal to the point of creating stress risers. In areas where metal has thinned or pitted, this micro-scratching is especially important, as it helps ensure a uniform layer thickness and reduces the risk of coating failure right at the site of the most vulnerable metal.
For areas with extreme rust damage or where the metal has substantially degraded, a rust-inhibitive primer can be a prudent intermediate step. This primer forms a barrier against moisture and oxygen, slowing the cycle of renewed corrosion once the surface has been prepped. The primer should be selected for metal compatibility and applied according to its instructions, with attention to drying times and re-coating windows. The decision to apply a rust-inhibitive primer often depends on the extent of the prep and the anticipated exposure of the repaired bed. In more extensive repairs, especially where structural elements were replaced, additional steps may be required: the edges of welded patches must be ground flush, then re-prepared with another round of degreasing and light abrading to ensure the primer adheres evenly across the joint.
The sequencing is deliberate because the surface preparation stage is not isolated. If welding was necessary to repair a damaged section, the next steps are particularly important: grind the welds to smooth them and re-expose clean metal. After grinding, a re-cleaning is essential to remove welding slag and fine metal particles. Only then can you apply primer and topcoat with confidence. This is one of the most common places where repairs falter: the area looks finished, but contaminants embedded in the metal undermine adhesion, cause early peeling, or trap moisture beneath the coating. A meticulous re-check and re-cleaning after welding seals the repair against the elements.
The coating strategy follows a disciplined order. A high-quality rust-inhibiting primer is applied to the prepared surface, sealing the metal and offering a stable base for the final color or texture. The primer’s performance hinges on even, thin coverage rather than thick, rushed coats. Once the primer is dry, a topcoat is applied. The bed can be finished with a durable automotive paint or with a bed liner system designed for impact resistance and spill containment. The best outcomes come from applying several thin coats rather than one or two heavy layers. Each coat should be allowed to cure as specified, with attention to environmental conditions such as temperature and humidity, which can influence cure times and layer adhesion. The finishing coats should blend seamlessly with the surrounding bed to preserve both appearance and protective function.
As important as the coating itself is the ongoing care after repair. The prevention of future rust hinges on keeping the bed clean and dry, minimizing exposure to road salt, moisture, and corrosive cargo. Regular washing, thorough drying, and inspection of seams, welds, and scratches help catch the first signs of trouble before they spread. When signs of rust reappear, the response should be prompt: remove corrosion, re-clean, and re-prime as needed rather than letting it fester. This cycle of maintenance protects the investment and reinforces the long-term durability of the repair.
There is a practical takeaway from the detailed process. For extensive rust, removing and replacing the damaged section with a new panel remains the most effective long-term solution. It provides a clean boundary, preserves structural integrity, and minimizes the likelihood of crevice rust from returning under flaking paint. The emphasis on quality materials and professional workmanship, especially for welding, cannot be overstated. A well-prepared surface favors durability; a poorly prepared one invites costly rework.
For readers seeking additional practical grounding, the broader body of repair guidance available online reinforces these steps and offers perspectives on timing, tools, and technique. A reader can, for instance, explore a broader repository of maintenance insights at the MasterTruckRepair blog, which offers context on DIY tasks and professional considerations. This resource can help align a repair plan with your truck’s specific usage and environment, while reminding you to keep the job within safe, doable bounds.
Ultimately, surface preparation is a discipline of attentiveness. It rewards the patient, methodical craftsman with a finish that resists peeling, cracking, and new rust. By committing to thorough rust removal, careful cleaning, deliberate roughening, and careful priming, the repair moves from a temporary fix toward a durable restoration. The bed becomes not merely rust-free but resilient, ready to carry cargo with the confidence that the protective layer beneath will endure. For authoritative standards that support these practices, consulting official guidelines on vehicle maintenance can be helpful at times, such as the Federal Motor Carrier Safety Administration resources: https://www.fmcsa.dot.gov/
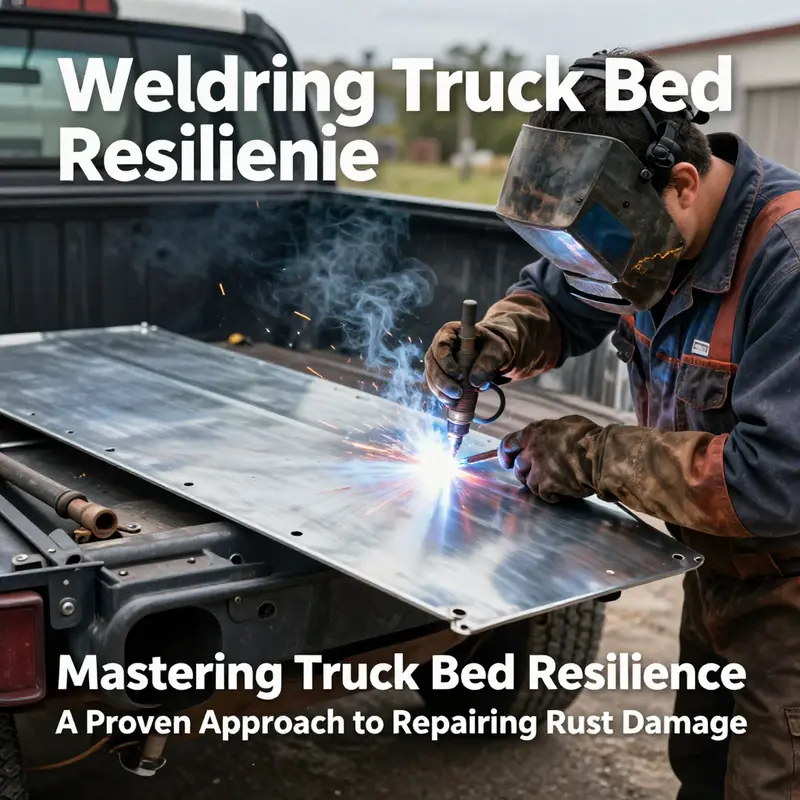
Welding New Panels to Reclaim a Rusted Truck Bed: Precision, Strength, and Lasting Protection
The process starts with an honest appraisal of how far the corrosion has penetrated and whether any surrounding braces or floor contours have buckled under heat or impact. A thorough assessment is essential because it determines not just how large a patch must be, but how the edges will meet the existing metal. If the patch is too small, corrosion may lurk just outside the repair; too large, and you risk distortion of the bed floor. Once the extent is clear, the surface must be prepared with surgical precision. Remove all rust, paint, and loose coatings until you reach clean metal. A grinder, wire brush, and coarse sanding discs work in concert to yield a uniform, bare surface that invites a clean weld. The bare metal is less susceptible to porosity and cracking once heat is applied, and it also makes the subsequent inspection easier. In this phase, it is crucial to consider the panel’s thickness and the steel grade. Matching the original thickness ensures the bed behaves predictably under load and vibration, preserving both ride quality and payload performance. A well-prepared base also reduces the risk of hidden rust under a glossy finish, which is a common sneaky cause of future failure. After the metal is clean, the edges around the intended patch should be bevel-cut or chamfered slightly to encourage a strong, deep seam. This beveling creates a more forgiving joint that can be welded without excessive heat input, helping to minimize warping in the surrounding sheets.
Preparing the replacement panel requires careful planning. Trace the damaged outline onto a fresh sheet of metal, or create a template from the existing bed to ensure fidelity to the bed’s original contours. Cut the replacement panel so that it is slightly larger than the damaged area. The extra margin is deliberate; it ensures an overlap onto undamaged metal, which yields a robust seam and helps guard against future rust at the edge. A clean cut, achieved with a plasma cutter or a precise shear, establishes a square, true edge that is essential for alignment. After cutting, test-fit the patch in place. Look for gaps that could trap moisture or create a weak seam. If the patch does not sit perfectly, trim carefully and recheck until it sits flush and square with the bed floor. A precise fit now saves hours of grinding later and helps ensure the weld will fuse evenly across the entire seam.
With the panel cut and a solid fit established, alignment and securing come next. Properly aligned panels ensure that the repaired section follows the bed’s natural lines, preserving clearance for tailgates, taillights, and any bed covers. Use clamps to hold the patch in position, magnetic fixtures for quick, non-damaging stability, and light tack welds to lock the panel in place without introducing heat distortion. The tack welds should be spaced to maintain even pressure along the seam, giving you a stable, testable fit while you inspect for warping tendencies. It is common to see minor misalignments after the first tack; address these by adjusting clamps and applying additional tacks as needed. When the panel is truly aligned, run a few light, intermittent tacks to keep it from shifting during the main weld. If the bed has curves or braces intersecting the patch, you may need gentle hammering to coax the metal into the correct contour or a few carefully placed relief cuts to relieve internal stress. The objective is a seamless, flush interface where the patch sits in the same plane as the surrounding metal, ready for welding.
Now the welding itself begins, with a focus on control, penetration, and heat management. Most professionals favor a MIG welder for sheet-metal beds because it provides a steady, forgiving arc and clean bead morphology. Set the amperage to match the metal’s thickness; too much heat risks burn-through, while too little can produce a weak joint. The aim is a continuous bead along the seam that achieves full penetration into both panels, creating a fusion that behaves as a single piece of metal. In practice, a stitch-welding approach—short, evenly spaced passes—often helps minimize heat buildup and reduces the risk of warping. If slight distortion occurs, address it promptly with light hammering on a steel block and, when necessary, brief cooling with compressed air to halt the heat spread. Maintain a steady travel speed and a consistent arc length; wandering the arc or pausing mid-bead can create annealed zones or porosity. The final result should be a seam that is strong, crack-free, and flush with the bed’s surface, so moisture cannot accumulate in a rough microfixture that invites rust later.
Finishing the welds is as important as the welds themselves. Grind the seam smooth with an angle grinder, keeping the surface even with the surrounding metal. The objective is a flush seam that looks like a natural extension of the bed rather than a patchwork add-on. While grinding, check for any cracks, porosity, or undercutting along the seam. Porosity can trap moisture and accelerate corrosion, so if detected, address it with a careful re-weld in the affected area. Lightly bevel or feather the edges to blend the patch into the original sheet, then clean once more to remove welding slag and debris. If there are minor irregularities at the edge, you may apply a thin layer of body filler to restore contour before priming, but let the filler cure completely and sand it smooth for a seamless finish. The overarching aim is to arrive at a joint that once painted or coated appears indistinguishable from the rest of the bed. This is not merely cosmetic; it is a foundational step toward long-term protection against moisture intrusion.
With the weld smoothed and the seam refined, cleaning and priming prepare the surface for the final coatings. Reclean the repaired zone to remove any metal dust or debris created by grinding. Apply a self-etching primer designed to bite into bare metal and seal the joint from moisture. The primer serves as a robust foundation for the final color or texture, ensuring that the coating adheres well and resists chipping. If necessary, apply a light layer of filler to restore any remaining contours before a final sanding and a color or texture finish. The finishing coat could be a bed liner or automotive-grade paint, depending on the bed’s use and the owner’s preference. The protection offered by the coating depends on proper surface preparation, a high-quality primer, and an even, durable topcoat. A carefully applied finish protects both the repair and the bed’s surrounding metal, reducing future rust risk by sealing potential entry points and providing a barrier against moisture and salt.
Beyond the technical steps, ongoing maintenance completes the repair’s lifecycle. Rust is a dynamic enemy that thrives where moisture, salts, and dirt accumulate. Regular cleaning—especially after winter road use or exposure to salt and chemicals—helps maintain the repair’s integrity. Thorough drying is essential after washing or exposure to wet cargo. Periodic inspections should focus on welds, seams, and any scratches or chips in the coating where bare metal may have become exposed. Treat new spots promptly to prevent them from spreading and becoming the next repair project. By combining precise cutting, careful alignment, clean welding, and persistent maintenance, the repaired bed becomes a durable part of the truck’s frame rather than a weak link. For readers seeking broader context on repair workflows and related maintenance topics, the Master Truck Repair blog offers additional guidance and perspectives. Master Truck Repair blog. For a detailed external reference with visuals and step-by-step demonstrations, see Popular Mechanics’ guide: https://www.popularmechanics.com/cars/a39276108/how-to-repair-a-rusted-truck-bed/.
Guarding the Fresh Weld: Strategies to Prevent Rust on Your Repaired Truck Bed
When you repair a rusted truck bed, the work is not finished the moment you weld in a new patch or seal a seam. The real test comes after the repair is complete: can the bed resist the reappearance of rust under the pressures of daily use, weather, and road grime? The answer lies in a disciplined prevention plan that starts with meticulous preparation and ends with a durable, maintenance-friendly finish. A repaired bed is at its most vulnerable along edges, welds, and any area where metal was cut away or ground back to clean steel. Those are the spots where moisture can linger, oxygen can reach fresh metal, and tiny chips can form pathways for rust to creep in. A solid prevention strategy treats these zones with extra care, ensuring the repair remains strong and visually consistent for years to come. This is not a cosmetic concern alone; it is about preserving structural integrity and the long-term value of the truck.
Cleanliness is the foundational act of prevention. Begin with a thorough, deliberate cleaning of the repaired area using a neutral cleaner and a microfiber cloth. The aim is to remove grease, oil, dirt, and welding dust that can trap moisture and compromise coatings. Pay particular attention to joints, seams, and hidden crevices where residue can accumulate. Even a small speck of oil can disrupt the bonding of primers and topcoats, creating a silent site for corrosion to begin. After cleaning, make sure every surface is completely dry before moving to the next step. Moisture left behind can undermine adhesion and set the stage for micro-blisters under paint or coating—the kind of defect that invites moisture to accumulate and rust to reassert itself with renewed vigor.
With the surface clean and dry, the next essential move is the application of a rust-inhibiting primer designed for exposed automotive metal. This step is more than a cosmetic layer; it is a barrier that protects bare steel from the first droplet of water, the first trace of salt, and the inevitable wear from loading and unloading cargo. A good primer adheres to clean metal, fills micro-roughness, and provides a uniform base for the subsequent topcoat. It also delivers cathodic protection, offering a sacrificial shield that takes on corrosion before the steel does. Coverage around the edges and weld points must be thorough; neglecting these areas is a small mistake with outsized consequences. Allow the primer to cure fully according to the manufacturer’s guidelines, keeping the surface free from dust and humidity during the cure period. Rushing this stage or skipping it at the edges can create weak points that rust will exploit at the first sign of moisture.
After the primer has cured, apply the topcoat with equal care. The bed is a high-wear environment, exposed to water, road salt, sun, and abrasive loads. A durable topcoat—whether a polyurethane-based coating or a rugged rubberized layer—provides a robust physical barrier while also resisting UV degradation and abrasion that can chip away protective films. The objective is a continuous, defect-free film that lacks pinholes or microcracks. Any tiny defect can become a moisture gateway over time, so apply in thin, even coats and allow adequate cure between passes. A well-executed topcoat forms a seamless shield that deflects moisture, resists micro-cracking, and minimizes the chance of rust returning at a vulnerable seam. In practice, patience here pays dividends; rushing a finish increases the likelihood of flaws that will demand costly repairs later.
The layers of protection do not end with the final coat. Post-application care matters just as much as the initial work. Once the surface has cured, inspect for anomalies—the occasional holiday in the coating, a tiny pinhole, or a scuffed area that could trap moisture. If issues are found, address them promptly with light scuffing, re-priming, and another thin layer of topcoat. A smooth, continuous surface is easier to clean and harder for moisture to cling to. The habit of quick touch-ups prevents a small flaw from growing into a larger problem that could compromise structural integrity. This is where the routine becomes a habit, not a one-off step.
Prevention is most effective when it becomes a living routine rather than a single event. Regular inspection and maintenance are the heartbeat of rust resistance. Establish a cadence that aligns with your driving seasons and local climate, especially if you traverse salt-soaked roads in winter or frequently haul wet cargo. A visual scan after major seasons—spring and fall, for example—helps catch chips, cracks, or wear early. If you notice paint chips or dull spots, treat them immediately: clean, dry, and re-apply primer and topcoat as needed to restore the protective barrier. In practice, these checks can be brief but consistent, turning prevention into a straightforward, repeatable process rather than a dreaded chore.
Beyond the mechanical steps, environmental care plays a decisive role in long-term rust control. The bed should not live in a perpetual damp environment. Minimize exposure to standing moisture, parked under persistent dew, or in humid, poorly ventilated areas for extended periods. After driving through rain or snow, rinse away salt residue and grime, then dry the bed thoroughly. Salt accelerates corrosion, and moisture trapped behind coatings can quietly undermine protection. Consider where you park and how you wash; light, frequent maintenance is more effective than rare, heavy cleaning. The goal is to keep the metal surface dry and free from contaminants that could compromise the coating system. This pragmatic approach makes prevention practical and sustainable for most truck owners, even those with busy schedules or tight budgets.
To help translate this approach into a practical plan, many readers find it useful to anchor ongoing care in a simple framework of cleaning, priming, coating, curing, inspecting, and maintaining. Each link in this sequence reinforces the next, creating a resilient shield around the repaired bed. For readers looking to structure their ongoing care, a practical resource on planning and budgeting for routine truck maintenance can help keep prevention feasible and consistent: Budgeting for Routine Truck Maintenance. This link offers a straightforward way to tailor a plan to your usage, climate, and workload, ensuring you allocate the right mix of time and resources to uphold the bed’s integrity.
External reference for broader context on coatings and rust prevention techniques is also valuable. A trusted, independent source provides foundational guidance on surface preparation, primer selection, and coating compatibility: https://www.ppgautomotive.com
In the end, the repaired bed should feel secure, not fragile. The mark of a successful rust-prevention approach is not just how well the repair looks but how steadily it behaves under the stress of real-world use. Clean, dry surfaces; a robust rust-inhibiting primer; a durable topcoat; and a disciplined maintenance habit form a comprehensive shield. When these elements come together, the bed remains a trusted workhorse rather than a rust-prone liability. The result is a durable, dependable surface that maintains its integrity and appearance through miles of hauling, weather, and everyday wear. The routine you establish today translates into protection for years to come, turning a repaired bed into a lasting testament to careful craftsmanship and proactive care.
Final thoughts
Addressing rust on truck beds is not merely a cosmetic endeavor but a crucial step in maintaining fleet integrity and operational efficiency. By systematically assessing damages, employing appropriate mechanical techniques for rust removal, ensuring thorough surface preparation, executing high-quality welding, and implementing preventive care, fleet managers can safeguard their assets against the relentless assault of rust. Vigilance in maintenance and timely repairs ensures that vehicles remain reliable and serviceable, thereby enhancing the overall productivity of logistics and transportation operations.