The operational efficiency of trucks, particularly those equipped with campers, hinges significantly on the reliability of their jacks. As fleet managers and operators in construction, mining, logistics, and freight services know, ensuring that your equipment functions not only minimizes downtime but also safeguards investments. Understanding the repair processes for various types of jacks—electric, hydraulic, and manual—is imperative. This guide provides a detailed exploration of each jack type’s repair techniques, addressing common issues, challenges, and preventative measures. Each chapter aims to equip readers with the knowledge necessary to make informed decisions, ensuring that truck campers maintain their ideal performance in the field.
When Electric Jacks Fail: A Practical Guide to Troubleshooting and Repair for Truck Campers

Electric jacks are more than a convenience for a truck camper. They are the hinge between a level, stable living space and a load of weather, road vibrations, and uneven ground. When they fail, it isn’t just an inconvenience; it can complicate all plans, from quick campsite setups to long-term storage integrity. Understanding how these jacks work, what typically wears out, and how to approach repair can save time, money, and a lot of frustration. The core of repair work lies in recognizing that an electric jack is a compact system with several moving parts that must work in concert with a reliable electrical supply. The motor provides the turning force, the gear train translates that force into linear motion, the control switch or receiver directs the action, and the wiring harness ties everything together with power and return signals. Any weakness in one of these links can stop the jack from extending or retracting, or cause it to do so inconsistently. A sound approach begins with safety, moves through careful diagnosis, and ends with informed choices about repair versus replacement, all while keeping the camper secured and protected against accidental movement.
To troubleshoot effectively, it helps to picture the jack as a small, power-driven engine surrounded by a few critical supports. The first line of investigation is the electrical system: power source, fuses, wiring integrity, and the control switch. A jack that refuses to move at all is often signaling a simple electrical problem rather than a catastrophic mechanical failure. A jack that hesitates, stalls, or lurches during movement is more likely to reveal internal wear or a mechanical snag within the gear train. The diagnostic mindset is practical, methodical, and focused on isolating symptoms to a specific subsystem—either electrical, mechanical, or a control interface. As you work, always secure the camper first. Chocking wheels, lowering any accessible jacks to a stable, loaded state, and ensuring that there is no possibility of movement are essential steps before you place your hands on the hardware. If you have ever faced a jack that hums or spins without meaningful motion, you understand how a small difference in a current path or a worn tooth can convert a promise of movement into a stubborn standoff. With a calm approach, you can distinguish between a quick fix and a repair that demands more time and care.
The most common issues fall into a few predictable categories. Motor failure is a frequent culprit. A motor can wear out from use, or it can be damaged by heat, moisture, or a short in the power circuit. If the motor spins but the jack does not extend, the problem often lies beyond the motor itself—in the gear train or the mechanical linkage. Electrical connection problems are another frequent source of trouble. Loose, corroded, or damaged wiring can interrupt power delivery, cause intermittent operation, or produce a total failure to extend or retract. Gears wear or become damaged over time, especially if the jack has been forced during a jam or if debris has entered the housing. Finally, switches and control boards—the brains of the system—can fail, creating a mismatch between the operator’s input and the jack’s response. The beauty of modern electric jacks is that most of these issues are identifiable with a careful, stepwise approach and, in many cases, resolvable with parts replacement rather than a complete jack swap. Yet there is always a boundary line: substantial hydraulic or electrical system failures, high-torque gear damage, or control module faults that demand professional attention due to safety and liability concerns.
Begin the diagnostic process with a simple, repeatable sequence. Start by ensuring the camper is on solid ground and all stabilizers are set. Then, check the fuse or breaker dedicated to the jack circuit. A blown fuse is a common and easily remedied cause of total non-operation. If the fuse is intact, move to the battery or power source. A healthy 12-volt system should deliver consistent voltage under load when the switches are engaged. If you have a multimeter, measure the voltage at the jack terminals with the switch in the “extend” position. A voltage drop or a weakened supply under load is a clue that the problem lies upstream in the wiring, fuse, or battery connections. If power arrives consistently but the jack still does nothing, inspect the wiring harness for loose connections, corrosion, or damaged insulation. Even a single corroded pin in a plug can prevent current from reaching the motor. A careful cleanup with contact cleaner and a dab of dielectric grease can restore a reliable path, but only if the wiring conductors themselves are intact and not frayed.
The switch or control interface is another frequent failure point, especially on units that see frequent cycling. A faulty switch can present as a non-responsive jack or as a partial response—one direction works while the other does not. In this scenario, you can test by bypassing the switch: connect the jack directly to a known good power source with the ground return intact to verify whether the motor and gear train respond. If the jack behaves when powered directly, the switch or control circuitry is the likely culprit and should be replaced. If the switch proves to be sound, you must move to the next layer: the motor and the gear train. Sometimes the motor functions, but the internal windings are partially shorted, delivering enough current to run but insufficient torque to move the load. In other cases, the motor may be healthy, yet a binding in the gear set or a seized spindle prevents movement. When a motor and gearbox work in isolation but not when assembled, the problem is often found in misalignment or debris that has lodged in the gearbox. A careful inspection of the gear teeth for chipping or embedded particles can reveal a subtly worn train that compromises the entire system.
It is important to keep your expectations aligned with repair realities. If you can access a belt- or chain-driven assembly from a similarly rated unit, you may be able to bench-test a suspected motor or switch outside the original housing to confirm operation under controlled conditions. This approach reduces the risk of test errors while you confirm a diagnosis. However, bench testing must be done with safety in mind: disconnect power, support the test rig securely, and avoid applying full load to a motor that has been removed from its housing. If the components show wear or no longer produce the needed torque even when powered directly, the practical path is replacement of the failed element—motor, gear set, or control switch. Replacement parts are widely available through manufacturers and reputable aftermarket suppliers, though it is prudent to source parts compatible with your specific jack model and mounting footprint. When you replace a motor or a gear set, ensure correct alignment of the gear train, proper seating of spacers, and proper engagement with any limit switches that stop the jack’s travel at the appropriate points. A misaligned gearbox can create early wear, noisy operation, and eventual failure.
An often overlooked but critical piece of the maintenance puzzle is the environment around the jack. The jack sits in a rugged outdoor environment, exposed to splash, dirt, and road grime. Moisture can corrode electrical connections just as effectively as salt on a winter road. Regular inspection of seals and housings, cleaning of the area around the jack, and keeping moving parts lightly lubricated with products appropriate for your system can extend service life. It is wise to avoid applying excessive lubricant to areas where grit can accumulate; a light film on the pinion, gears, and sliding surfaces is usually sufficient, especially in a dusty or sandy environment. When cleaning, do not spray liquids directly into any seal or joint. Use controlled cleaning to avoid driving contaminants into the housing, where they can abrade gears or clog small passages in the control circuitry. In the longer term, a routine that couples a visual inspection with functional tests on a scheduled basis—from at least twice per year to more frequently in harsh climates—helps catch wear before it becomes a roadside repair.
If, after a disciplined diagnostic sequence, the jack still refuses to perform as required, the repair decision must weigh several factors. For a motor that runs but does not generate adequate lift, the fault lies in the gear train or in the mechanical linkage. If the motor stalls under load or overheats quickly, there is likely a binding or misalignment somewhere in the drive train, a seized bearing, or a pinched shaft. In such cases, you may choose to replace the worn components individually if available, or to replace the entire jack assembly if the footprint and mounting hardware allow. When replacing, one practical consideration is the compatibility of the mounting pattern and the electrical interface to your existing control system. A modern replacement may offer improved reliability and easier installation, but the process still requires attention to mounting, orientation, and the electrical connections that power and control the unit. In all of this, keep clear that complex hydraulic systems and high-pressure components are outside the scope of simple electric jack repairs. Although some vendors of hydraulic jacks offer more straightforward service approaches, high-pressure safety remains a reason to rely on trained technicians for proper repair.
As you confront the reality of repair versus replacement, it is useful to think about sources of information that can guide you without overwhelming you with technical jargon. Manufacturer manuals provide wiring diagrams, torque specifications, and step-by-step procedures tailored to your exact model. Reputable repair tutorials and service guides can help you visualize the sequence of disassembly and reassembly, while keeping safety at the forefront. It is important to remember that while many basic issues can be remedied at home with the right tools and discipline, more complex failures call for professional service. The goal is a dependable, safe, and durable setup that returns your camper to a state where you can use it with confidence. If you want a broader reference on truck maintenance practices and common repair pathways, the MasterTruckRepairLLC blog offers practical insights and guidance that align well with the approach described here. MasterTruckRepairLLC blog
In considering repairs, it is also prudent to reflect on when to upgrade rather than repair. Replacement is not a defeat; it is a strategic decision when the cost of maintenance, the availability of repair parts, or the reliability of the unit fails to meet your expectations. A new jack can bring improved efficiency, faster operation, and better resistance to weather and wear. When evaluating replacement, look for a model that matches your payload support, mounting footprint, and power characteristics. Confirm that the weight rating aligns with your camper’s jacking requirements and that the mounting holes and hardware align with your existing frame. Consider the accessibility of the control wiring and connectors, as an easier installation reduces the risk of future faults. And remember, a higher-quality component is not the same as a flawless one; it still demands careful installation, secure electrical connections, and regular maintenance.
For those seeking additional hands-on guidance, there are reliable, non-brand-specific resources that walk you through the troubleshooting process with diagrams, photos, and clear explanations. The emphasis in these resources is on practical know-how rather than marketing language, and that focus is especially valuable when you are trying to diagnose a stubborn fault at the campsite or in a driveway. The practical takeaway is simple: approach the problem with a plan, verify power and connections first, observe how the system behaves under controlled conditions, and then decide whether a repair is feasible or a replacement makes more sense given your time, tools, and safety considerations. This approach keeps you connected to your camper rather than stranded beside it, and it aligns well with the broader ethos of responsible, informed DIY repair work that respects your vehicle’s electrical system and your safety.
Maintenance remains a cornerstone of reliability. Even when a jack is functioning normally, implementing a lightweight, regular maintenance routine helps prevent the kind of minor wear that escalates into a failure. Wipe away road dust and moisture around the base and housing, inspect for loose fasteners, and ensure the mounting remains sound. Check that all electrical connections are clean, tight, and free of corrosion. If you have any doubt about the integrity of a connector, test it with a multimeter and replace or repair as necessary. Consider keeping spare fuses and switches on hand, particularly if your model uses fuse protection or modular switches that can be swapped with minimal tools. If you ever suspect reliability is slipping, take a moment to perform a deliberate test sequence in a controlled setting to confirm whether you have regained full function before depending on the jack in the field.
In sum, electric jacks for truck campers are robust, but they are not infallible. A clear, patient diagnostic process focused on power, wiring, switching, and the mechanical train often reveals the root cause. When a repair is feasible, it is usually practical and economical to address it with replacement parts from reputable sources. When a fault is beyond straightforward repair, or when the safety margin has eroded due to wear, replacement with a higher-quality unit that matches your mounting footprint is a sensible choice. Either path—with diligence, proper tools, and safety as a constant companion—will restore your ability to level and deploy your camper quickly and reliably. For ongoing learning and practical maintenance ideas, you can explore more from the MasterTruckRepairLLC blog, which offers approachable guidance on truck maintenance and repair topics. MasterTruckRepairLLC blog
External resources can also be valuable when you need a deeper look at parts, schematics, or replacement options. A widely used reference for parts and compatibility guidance is available through a reputable retailer that specializes in RV and trailer accessories. This external resource provides diagrams and compatibility checks to help you select the correct motor, gear set, or control switch for your model and mounting footprint. Visiting that source can help you compare options, confirm fit, and avoid common compatibility pitfalls. External resource: https://www.amazon.com/dp/B0CQJZ6V3D
Steady Ground, Safe Lifts: A Practical Guide to Hydraulic Jack Repairs for Truck Campers
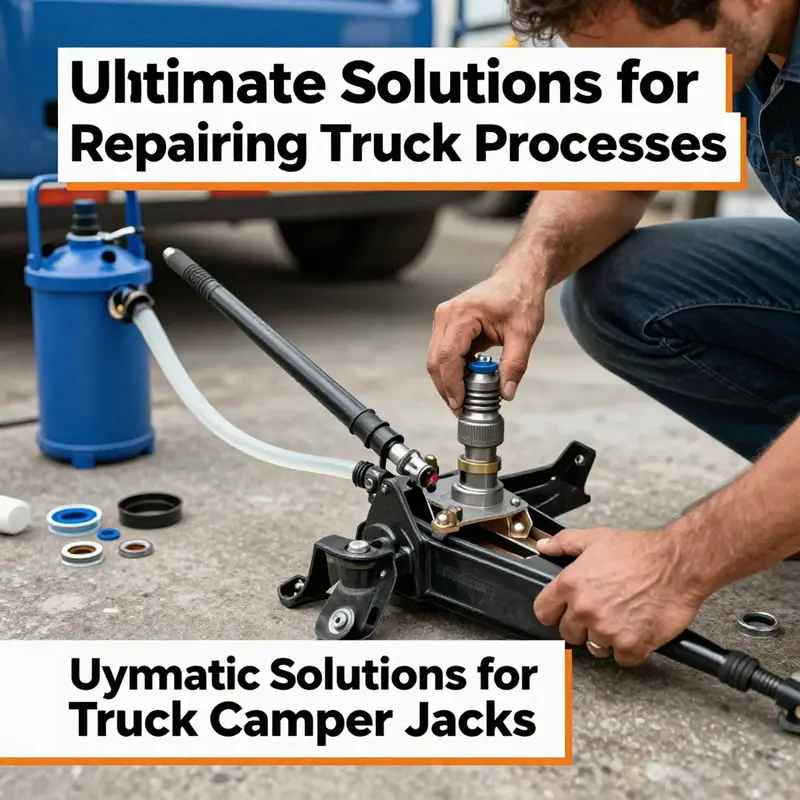
Hydraulic jacks are the quiet backbone of a truck camper’s stability. They lift and level the rig to create a safe workspace on uneven ground and protect interior components from shifting with every breeze or passing vehicle. When these jacks falter, the result is not just an inconvenience but a safety risk: a sagging corner, a misaligned door, or a slide-out that refuses to hold.
The hydraulic system’s power and its danger lie in the same telltale signs—low resistance to lifting, delayed response, creeping descent, or metallic noises—that point to a fault. A repair mindset blends careful diagnosis, respect for high-pressure components, and a commitment to restoring the system to the original performance level. This chapter walks through how such repairs unfold in real life and how owners can navigate the process with confidence while keeping safety front and center.
Diagnosis begins with a careful, non-destructive check: verify lift capacity, observe lever response, and look for leaks or air in the circuit. Pressure gauges, proper seals, and clean hydraulic oil become your toolkit. The goal is to identify the root cause—worn pump, leaky seals, or an air-bound line—before attempting any repair.
Repair steps emphasize safety first: depressurize the system, document component orientation, and replace worn parts with OEM-spec components where possible. Cleaning removes varnish and grit that can abrade seals. After reassembly, the system is bled to purge air, filled to the manufacturer’s specification, and tested first with no load, then with controlled load, and finally for long-term pressure retention and cycling performance.
Professional repair offers advantages beyond safety: predictable results, accurate fault isolation, and detailed service records that aid future maintenance. DIY maintenance such as checking fluid levels and confirming that the pump responds to commands is appropriate, but high-risk repairs should be left to trained technicians or specialized RV shops.
Maintenance best practices include monthly visual checks, quarterly cleaning, and semi-annual oil sampling in harsh environments, as well as lowering the jack to minimum when not in use to relieve stress. A preventive plan reduces downtime and extends the life of mounting hardware and linkages.
In the end, a professional repair path provides confidence that the system will perform reliably when you need it most. It helps protect safety, stability, and sleep on every campsite, in every season.
Hands-On Resilience: Repairing Manual Jacks on Truck Campers for Safer, Steady Setups

Truck campers live and travel on the edge of rugged practicality. When parked, the stability of the unit matters as much as the condition of the engine or the integrity of the living space. Among the most dependable pieces of that stability are the manual jacks—the simple, hand-cranked devices that bite into the ground or a raised pad and hold the camper body steady as the rest of the rig settles around it. Because these jacks are mechanical rather than electronic or hydraulic, a lot of owners assume they are nearly maintenance-free. In reality, their longevity hinges on regular inspection, timely lubrication, and a respectful allowance for the wear that comes with miles and seasons. When a manual jack begins to balk, the problem is rarely dramatic in isolation. It is usually a chorus of signs: stiff cranking, slow movement, a crack in the mounting, or a tilt that hints at misalignment. Read together, these signals map a path from quick fix to careful repair, a path that keeps the camper level, the door from binding, and the living space from becoming an unplanned tilt survey at sunset. The repair approach described here emphasizes practical diagnosis, cautious intervention, and a mindset of safety first—principles that apply whether you are a weekend warrior or a full-time traveler with your home riding on the frame of a truck.
Manual jacks sit at the intersection of simplicity and stress. They are often part of the camper’s traditional, a-frame, or slide-in lift system. The core design is straightforward: a screw mechanism converts the rotational motion of a crank handle into vertical motion of a jack leg. That simplicity is a strength, reducing the number of moving parts that can fail. Yet that same simplicity means every component—threads, gears, bushings, mounting bolts, and the feet that meet the ground—carries the whole load. Wear accumulates, threads get stripped, and corrosion can creep into the threads if the unit is left in damp conditions or not retracted after wet use. The result is a system that may still seem to function but no longer holds as firmly as it should. The fix, more often than not, is not a dramatic rebuild but a careful sequence of inspection, lubrication, tightening, and, when necessary, component replacement.
The first step is to adopt a safety-first frame of mind. Before you touch a jack, secure the camper and stabilize the area around the jacks. Use wheel chocks on the tires to prevent any movement of the vehicle. If weather or ground conditions are uncertain, place wooden pads or thick rubber mats under the jack feet to distribute the load more evenly and minimize sinking. Work with the mindset that you are not just trying to make a single jack operate better, but that you are ensuring the whole camper remains balanced while you perform checks and adjustments. With safety established, you can begin the diagnostic process in a way that minimizes further wear and reduces the chance of surprises when you loosen a fastener.
Inspection is the quiet, decisive act that reveals what is really happening under the crank. Start with the most visible clues: is there any obvious physical damage—cracks in the mounting hardware, bent shafts, or rust forming a halo around the base? If a mounting point looks compromised, stop and reassess. A crack or bend is often a telltale sign of a past impact or chronic overloading that has redistributed stresses through the frame. Good lighting helps. A clean, light work surface makes it easier to detect hairline cracks or wear that would otherwise be overlooked. Then move to the moving parts. Check the screw rod for burrs or nicks that would chew into the nut and cause binding. Feel the crank handle and the pivot points for wobble or play that shouldn’t exist. Worn or galled bearings can produce a rattling sound or a rough feel as you rotate the crank. While the crank is turning, observe the relation between the jack leg and the mounting bracket: do they stay aligned, or does the leg wander or bind as it travels up and down? Alignment matters, because even a small misalignment can introduce torque that compounds wear on the screw threads and bushings.
If the jack feels stiff, the cause is rarely a single bad part. More often, stiffness arises from a combination of dried lubricant, minor corrosion, and tight tolerances that have begun to bind. In this moment, a highly effective but simple remedy is routine maintenance: a thorough lubrication followed by a gentle, controlled exercise of the jack to distribute the lubricant and confirm smooth operation. Lubrication serves dual purposes. It reduces friction between the screw and nut, and it minimizes corrosion at pivot points where metal meets metal. A lithium-based grease is a common, reliable choice because it sticks to metal well and resists washing away in damp conditions. Apply the grease to the screw threads, the pivot joints, and any visible contact surfaces that show signs of wear. After applying lubricant, manually crank the jack through its full travel range a few times. This step helps identify early stiction that may become a full stiffness later if ignored. If, after lubrication, the motion remains resistant or uneven, the problem may lie deeper—in the threads themselves, or in a mounting component that has shifted or worn.
Tightening loose hardware is often the next correct move. Over time, the bolts and nuts that attach the jack to the camper frame can loosen due to vibration, ground impact, or simply the march of time. Check the mounting bolts’ heads and the nuts on the exterior side of the brackets. If any fasteners spin freely when you try to snug them, you have a sign of a potential issue, not just a loose bolt—thread wear or a stripped hole can render a bolt useless. When tightening, do not overdo it. Over-torquing a fastener can crack a mounting bracket or strip a hole, making the problem worse. If a mounting hole has become worn and the bolt no longer bites securely, you may need to repair or replace the mounting plate or use a washer-and-bolt solution that spreads the load more evenly. In some cases, especially with older installations, it can be more prudent to replace the entire jack-mount assembly rather than fight with a worn thread that will re-wear after one season of use.
Alignment, a word that sounds technical but describes a practical truth, matters to both performance and safety. If the camper tends to tilt when raised, or if one jack is higher than the others after leveling, misalignment is likely at fault. Misalignment can arise from a bushing wear, a slight bend in a support arm, or a shift in the frame where the mount sits. Realigning involves adjusting the position of the jack or replacing worn bushings so that the jack’s motion remains vertical and the legs move in sync with one another. In some configurations, you can re-seat the mounting plate or reposition the jack slightly to achieve a more even lift. In others, you may need to replace bushings, which are inexpensive and widely available. The key is to perform a thorough test after any adjustment: crank the jack through its range while the camper sits on a level surface, and verify that all legs extend evenly and meet the ground with uniform contact pressure. A reliable test is to measure from the ground to each mounting point while the jacks are fully extended; uniform readings indicate good alignment, while divergence signals ongoing issues.
When inspection and simple maintenance do not restore the expected performance, the repair path broadens to include component replacement. This is a moment where the pragmatic camper owner accepts that some parts wear out in time. Screws and bolts can be replaced with standard hardware, but the threads in critical mounting holes may require repair. If the screw rod shows significant wear, it can flatten, resulting in back-drama where the jack binds or slips. Replacement of the screw rod is often straightforward, given the standardization of many aftermarket parts that fit a wide range of jacks. Likewise, worn gears within a crank-driven mechanism can be swapped out, but the process may require disassembly and careful reassembly to ensure proper mesh and clearance. When replacing parts, take care to preserve the integrity of the mounting bracket, the alignment shims, and the feet that contact the ground. A misaligned or poorly seated foot can transfer uneven loads to the ground, which undermines the very stability you are seeking to restore.
In some scenarios, the simplest, most durable solution is to replace the entire jack assembly. This option is particularly compelling when multiple issues are present, or when the mounting points show signs of fatigue that could fail catastrophically in a future trip. Replacement kits are widely available and designed to fit many common configurations, but compatibility matters. Measure the overall length of the jack, the threaded rod diameter, and the mounting hole spacing before selecting a replacement. It is not unusual for manufacturers to offer a slightly different bolt pattern or an extended travel range. When in doubt, reset to a configuration that preserves the original alignment, height, and ground clearance, ensuring that the entire leveling system remains consistent with the trailer or truck undercarriage geometry.
Throughout any repair, documentation matters. Note the symptoms you observed, the steps you took, and the parts you replaced. A simple log can become a valuable reference for future maintenance cycles, helping you identify wear patterns and schedule preventive service before a small issue becomes a roadside challenge. If you are a part of a broader maintenance routine, weave this manual jack work into your regular checkups—alongside tire, brake, and electrical system inspections—so that your truck camper retains a predictable, safe footprint wherever you roam. The maintenance mindset here is not about chasing perfection but about cultivating reliability. When the jacks work consistently, they give you confidence to set up camp in diverse environments—from gravel sites to grassy clearings—without the fear of an unseen wobble or a sudden shift when you deploy the stabilizers.
The conversation about repairs also needs to acknowledge the limits of DIY work. Manual jacks, because they are simple by design, lend themselves to do-it-yourself fixes that can be accomplished with a basic toolset. Yet it is equally true that some issues demand professional experience, particularly if the frame or the mounting structure shows signs of fatigue, or if the ground conditions introduce unusual loads or impacts. If the camper has sustained structural damage, or if the jacks fail to engage altogether despite thorough lubrication and tightening, seeking a trained technician or an RV repair shop is a prudent choice. The goal is not to avoid professional help but to leverage it at the right moment—when the risk of bending or cracking a critical component is high or when high-precision alignment is needed for the leveling system to work correctly across different terrains. In that sense, repair is not a binary DIY-or-not decision; it is a judgment call guided by safety, reliability, and the owner’s comfort with mechanical tasks.
A practical, sustainable approach to manual jack care is to implement a routine that blends routine checks with opportunistic maintenance. The cadence could be seasonal, or tied to after each long trip or storage period. A simple ritual might include a quick visual inspection before each trip, a deeper lubrication and loosen-torque test after each month of use, and a more thorough inspection after 2,000 miles or a season’s worth of camping. In this rhythm, lubrication becomes not a chore but a habit that preserves the smooth operation of the system. The quality of the lubricant matters, and the longevity of the threads benefits from a product designed for long-term adhesion to metal surfaces.
For readers looking to extend this discussion into a broader context of truck camper upkeep, consider exploring the in-house maintenance resources that distill practical, hands-on lessons into accessible guidance. The in-house truck maintenance page offers a wealth of tips that reinforce the idea that the camper’s stability depends on a chain of carefully maintained components operating in harmony. Engaging with that resource can provide a broader perspective on how manual jacks fit into the wider system and how to integrate jack care with trailer or cab maintenance in a coherent schedule. You can find a concise, context-rich overview here: in-house truck maintenance.
When you consider the repair of manual jacks as part of a larger, ongoing care plan, you begin to see the value of preventive measures. Keeping the lines clean, protecting metal surfaces from moisture, ensuring the feet are free of debris, and using a light dusting of lubricant on exposed threads—all these small steps accumulate into a reserve of reliability. The goal is not to promise flawless performance in every climate or on every surface but to minimize surprises and maintain the camper’s level, comfortable stance wherever the road takes you. You will notice that the repair process shares a common thread with other mechanical tasks on board: patience, precision, and the willingness to re-check work after a test. A test is a diagnostic instrument as much as a safety measure. It confirms a hypothesis about why a jack was stiff, or whether a misalignment has been corrected. A good test is repeatable and measurable, enabling you to name the exact difference in lift height before and after the service, and to track the durability of the fix over time.
In closing, the practical path to repairing manual jacks on a truck camper is not a dramatic, one-off repair, but a careful sequence of checks, lubrication, tightening, alignment, and, when needed, component replacement. The advantages of manual jacks—their simplicity, reliability, and lower maintenance footprint—are not just theoretical. They become tangible when you move the vehicle into a stable, level campsite and find the door opens smoothly, the fridge stays consistent, and the living space remains comfortable without the tremor of an unsteady stance. The restoration of a jack’s function is not simply about restoring hardware; it is about restoring confidence in your own preparedness and your capacity to manage the physical edges of RV life. The manual jack is a quiet protagonist in that story—unassuming, durable, and ready to perform when you need it most. For those who want a deeper, illustrated guide that complements this discussion, a reliable, detailed resource is available in dedicated online tutorials that walk through the intricacies of the repair sequence and provide clear, step-by-step guidance. Additionally, the broader maintenance ecosystem that supports truck campers offers related advice and checklists that help you build a robust preventive program, integrating the care of jacks with the rest of the camper’s critical systems. If you are seeking more context about how these elements connect to the broader world of truck maintenance and repair, the following resource provides a practical, grounded approach to similar tasks you might face on the road, with emphasis on safety and reliability. External resource: https://www.camperlife.com/truck-camper-manual-jack-repair-guide
Final thoughts
In conclusion, maintaining the jacks on truck campers is essential for operational excellence and longevity. Fleet managers and operators must prioritize understanding the type of jack systems they are utilizing and the common repair techniques associated with each. Electric and hydraulic jacks require specialized knowledge for effective servicing, while manual jacks can often be repaired with straightforward techniques. Prioritizing timely repairs and regular maintenance not only enhances vehicle reliability but also ensures that our investments yield optimal returns. The knowledge gained from this guide equips you with actionable insights to tackle jack repairs proficiently.

