Understanding how to repair semi-truck tires can be a critical asset for fleet managers, trucking company owners, and logistics providers. As tire issues can lead to significant downtime and unplanned expenses, mastering repair techniques presents a viable solution for maintaining operational efficiency. This article will offer you clear guidance through the nuances of semi-truck tire self-repair: identifying when self-repair is appropriate, the tools required, a detailed step-by-step procedure, crucial notes to consider, and scenarios necessitating tire replacement instead of repair. By empowering you with this knowledge, your fleet can achieve greater reliability and efficiency on the road.
Judgment Calls on the Road: When a DIY Semi-Truck Tire Repair Is Safe—and When It Isn’t
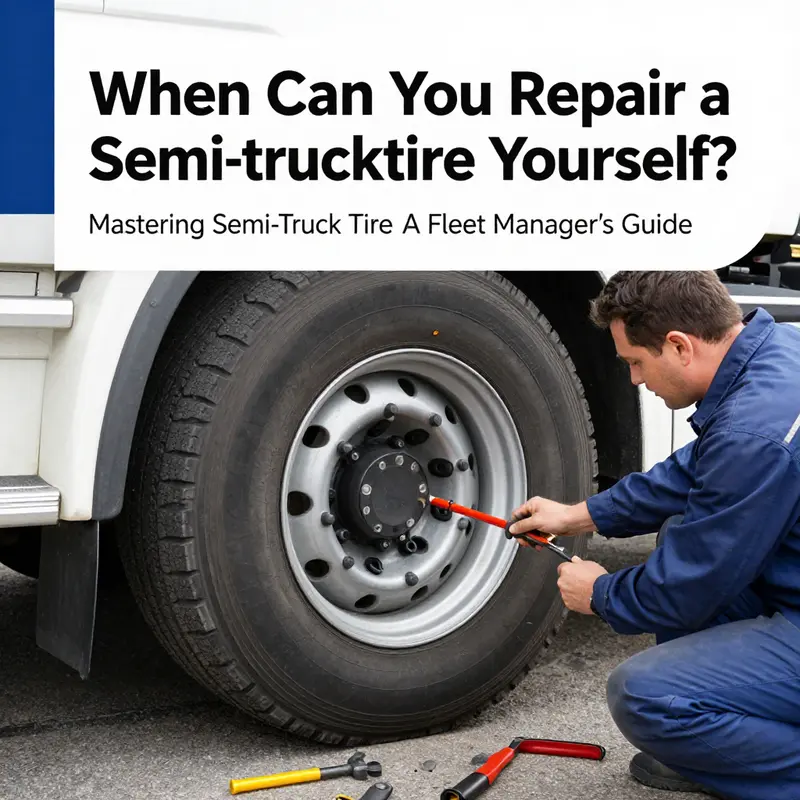
The impulse to fix a tire on the shoulder of a highway is real, especially when miles separate you from a reliable shop and time is money. But self-repair is not a free-for-all. It is a narrow path that opens only when the damage is small, the location is safe, and the repair can be completed with techniques that restore strength without creating a hidden failure down the next mile. For the long-haul operator or the fleet manager watching a clock and a budget, understanding where that line lies can prevent a tragedy and a costly warranty dispute later. In practice, the question is rarely whether you can fix a tire with basic tools, but rather whether you should fix it at all, and under what constraints that fix remains safe over the roadspan ahead.
The boundary between a DIY patch and a professional intervention centers on the integrity of the tire’s structure. Small punctures, cleanly formed by nails or screws, located in the tread, with a diameter under about six millimeters, are the scenarios most people consider for a do-it-yourself repair. Industry guidance consistently points to the tread as the only zone of the tire that can be repaired, because the belt and sidewall carry load and absorb heat in ways the patch cannot reliably compensate for. Any damage that crosses into the sidewall, shoulder, or belt area is a sign to stop and seek a pro repair or replacement. The risk is not just a leak; it is sudden failure under pressure, which can throw the vehicle or injure the operator. In that context, the decision to DIY is a measured, not a reckless, choice.
Even with a small, tread-area puncture, several factors must line up. The tire must not show signs of internal compromise once the object is removed. A visual and a tactile inspection—looking for bulges, cracks, or exposed steel belts from the inside—should accompany any exterior assessment. If the inside shows even mild damage, or if the hole is misshapen or has ragged edges, the tire is no longer a candidate for patching. In these cases, professional repair or replacement is the prudent course. Fleet operators often codify these rules in maintenance manuals because liability and safety are at stake. The decision can affect not only the current trip but the next thousands of miles and the safety of every vehicle that shares the road.
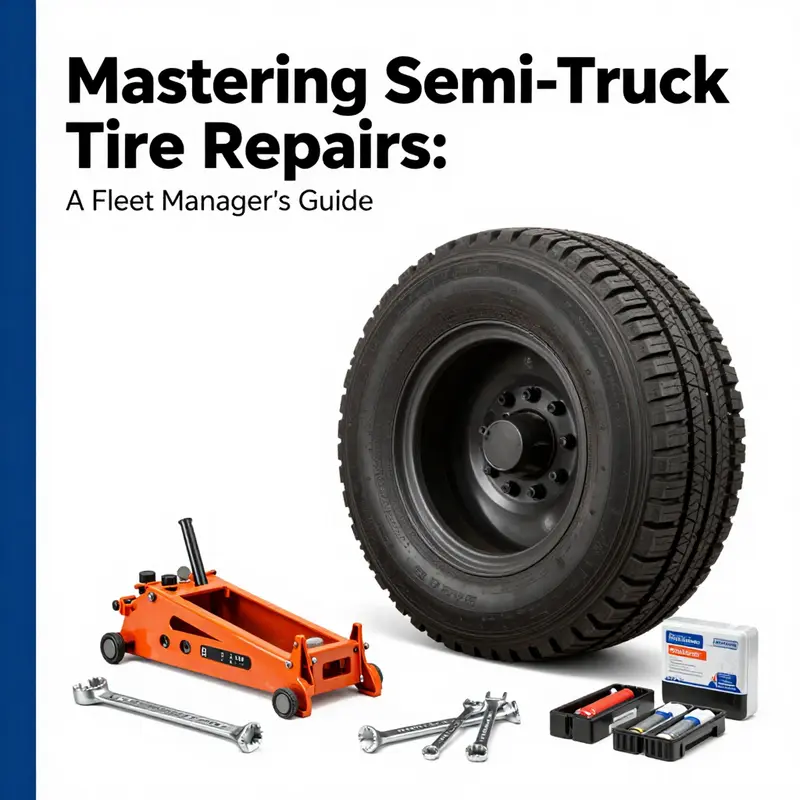
When a repair is deemed safe to attempt, it hinges on the right tools, clean technique, and careful testing. The tools are straightforward: a hydraulic jack or lift to raise the truck safely; a lug wrench or impact gun to remove the wheel; a breaker bar to break loose tight nuts; a rim puller if the wheel becomes stubborn on the bead; sandpaper or a wire brush to roughen the repair area; a patch kit with a patch and adhesive; an air compressor with a pressure gauge; and soap water to detect leaks. It is not a scavenger hunt for parts but a controlled, methodical process that begins with eliminating risk. Safety gear—gloves and goggles—protects hands and eyes from sharp edges and pressurized air as the wheel is reassembled and tested.
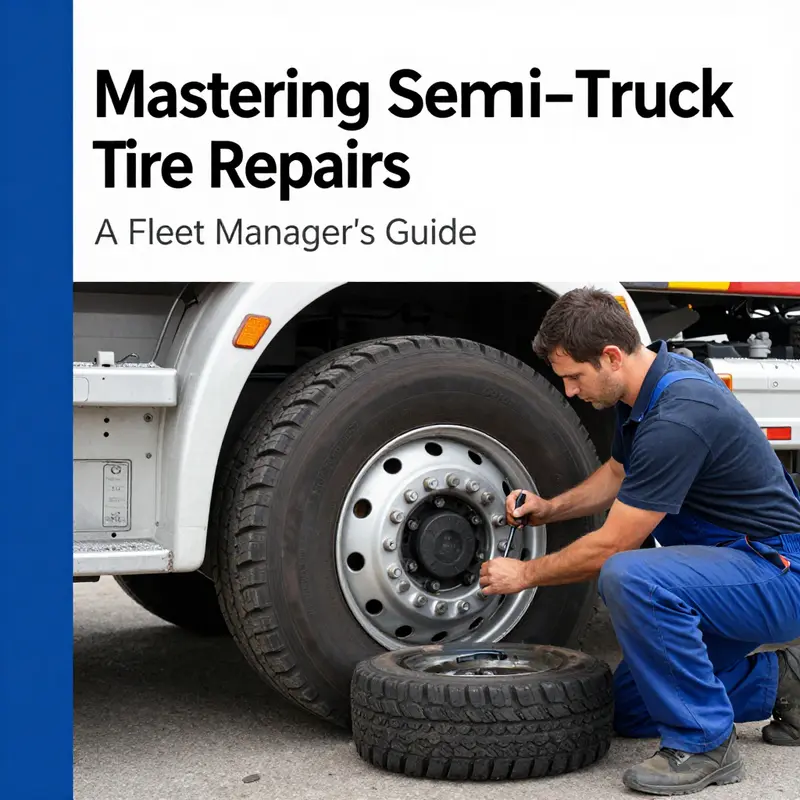
The sequence of repairs is designed not only to seal the hole but to ensure enduring adhesion and structural compatibility. After parking on level ground, applying the parking brake, and placing wheel chocks, the wheel is removed and laid on a stable surface. The area around the puncture is cleaned and dried; foreign debris is cleared. The inside of the tire deserves attention too—an inspection with a flashlight helps determine whether the hole’s size is truly within the repairable limit and whether the patch can bond across a clean, dry surface. If there is any suspicion of inner damage, the repair should be halted. Roughening the patch area with sandpaper or a wire brush creates a micro-grip for the adhesive, and a degreaser or rubbing alcohol removes oils and residues that would otherwise prevent a solid bond.
Applying vulcanizing cement, a thin, even layer, begins the bond. It must dry to a tacky state before the patch is laid over the puncture. The patch, once placed, is pressed with a roller or by hand to ensure complete contact and remove any air pockets. The patch must cure for a period—often 15 to 30 minutes—before the tire is re-inflated. This time window is essential; rushing the cure can leave a weak seal that leaks or peels away under heat and flex. After the patch has cured, the tire can be mounted back onto the rim, and the lug nuts are tightened in a star pattern to the vehicle manufacturer’s specifications. The torque range varies by axle and vehicle model, but the star pattern avoids bias that could distort the wheel or thread engagement.
Inflation is the next critical checkpoint. The tire must reach the recommended pressure, which is listed on the door jamb placard or the tire itself. Then comes the leak check. Soap and water reveal bubbles at the repair site, signaling a continuing leak. If bubbles appear, the repair has failed and must be redone or replaced. A short test drive at a cautious speed follows, watching for unusual vibrations, vibrations, or noises. If anything feels off, the tire should be removed and re-inspected. A properly executed DIY repair should feel indistinguishable from a new patch in how the wheel behaves at low speed—stable, quiet, and predictable.
Even when a repair is technically feasible, there are practical realities that constrain DIY work. A cold patch, as described here, is suitable for minor, tread-area repairs and is commonly used by DIY enthusiasts. A hot patch, applied with specialty equipment in a workshop, provides greater durability for commercial vehicles. The hot-patch method requires more resources and training than most drivers have on the road, and it often makes greater sense within a professional shop where controlled heat and pressure can be applied to a tire in a safe, repeatable way. Automatic sealants and quick-fix solutions are not recommended for semi-trucks. These products can corrode rims, damage sensors, or trap leaks that resurface after a short period, creating a false sense of security and a dangerous situation down the line.
The decision to DIY a tire repair also involves post-repair maintenance. After any patch, tires must be re-balanced and inspected for integrity. Some operators perform a water submersion test or a controlled pressure test to verify the patch’s reliability. Either approach helps confirm there are no hidden leaks, and that the tire can withstand the inflation pressures required for heavy loads. This extra step underscores a broader point: a repair is not a one-and-done moment but part of a broader maintenance cycle that includes periodic checks, regular pressure monitoring, and scheduled inspections. A repaired tire should be checked weekly, especially during the weeks following a repair, because temperature changes, road conditions, and load shifts can influence the patch’s performance.
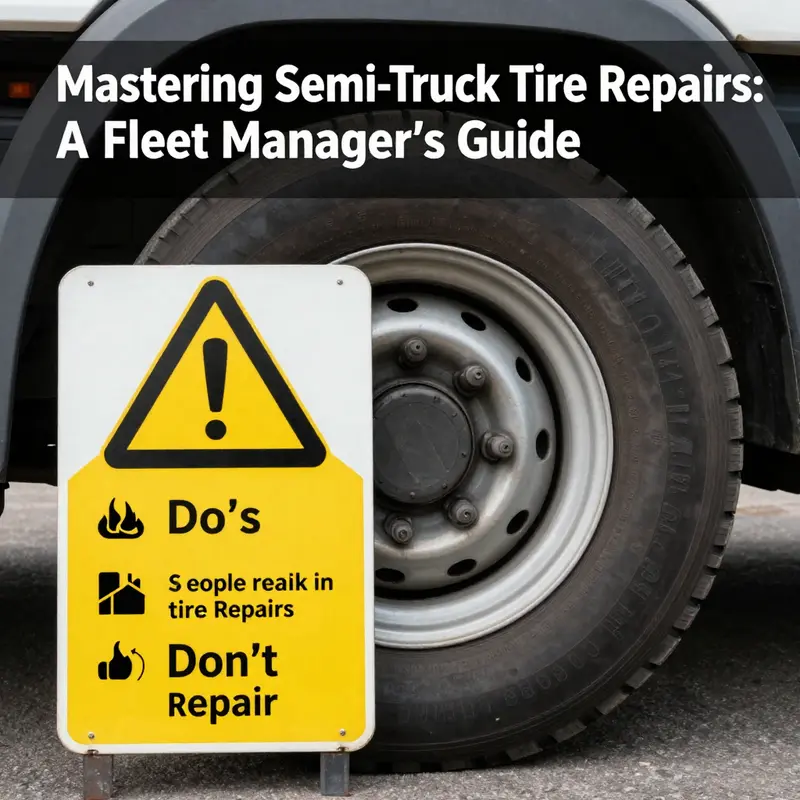
The cautionary side of this topic cannot be overstated. For every rule that makes a DIY repair acceptable, there is a counterpoint grounded in fleet safety and liability. Sidewall or shoulder damage disqualifies any DIY approach; the tire is considered structurally compromised and must be replaced. Larger punctures or deep penetrations that extend through the tread into the belt system demand professional intervention with hot or cold patch techniques and re-balancing by trained technicians. In many fleets, maintenance policies are explicit: only certified personnel or approved facilities perform tire repairs on commercial vehicles. That stance eases liability concerns and ensures consistent adherence to safety standards, which is essential when the vehicle’s duty cycle is critical and lives are at stake.
For readers who want a broader, practical perspective beyond the mechanics, consider how budgeting and planning play into decisions about DIY repairs. A chapter on budgeting for routine truck maintenance offers a wider view on when to allocate funds for on-road repairs, spare tire stock, and the kind of mobile repair kits that enable safer on-site handling. Such planning helps drivers and fleets avoid the pressure-driven impulse to patch everything in the field and instead adopt a disciplined approach that prioritizes safety first and cost management second. You can read more about maintenance budgeting in the dedicated guide on that topic.
Ultimately, the choice to perform a tire repair yourself rests on strict adherence to safety criteria, thorough inspection, and careful testing. If any doubt remains about the tire’s condition, or if you cannot complete the steps with precision, the prudent move is to replace the tire or call in a professional. Safety does not honor a deadline, and on the open road, there is no substitute for certainty when a tire bears the load of a tractor-trailer.
For those seeking authoritative guidance that frames the limits of DIY tire repair within industry standards and safety recommendations, consider reviewing the National Tire Safety Council’s guidance on commercial tire maintenance and repair. This resource reinforces the principle that while DIY can be appropriate for certain minor tread-area issues, the overarching priority is enduring safety and compliance with best practices. It is a reminder that the right choice is the one that keeps the vehicle, its cargo, and the driver secure every mile of the way. To explore more, you can visit their official resource hub here: https://www.tiresafety.org
As a practical takeaway, if you are a fleet operator or a long-haul driver, integrating a simple decision framework into your pre-trip routine can prevent risky repairs. Pre-trip checks should include a quick visual of tire condition, a pressure check, and a mental note about any repairs performed since the last leg. If a tire has any doubt about its post-repair integrity, err on the side of caution and replace it or seek professional assessment. A small investment in proactive maintenance now can prevent a roadside emergency later, a scenario that costs far more than a properly managed repair or replacement.
In tying this discussion back to the broader article, the theme remains clear: self-repair of a semi-truck tire is possible, but it is bounded by strict safety criteria and professional boundaries. The decision must be grounded in a careful evaluation of damage, location, and the tire’s structural condition, followed by disciplined execution and rigorous aftercare. For readers balancing on the edge of DIY possibility and professional service, the guiding principle is simple: safety first, always. And for those who want to explore how maintaining a maintenance budget can support safer road operations, consider the linked resource on routine truck maintenance for practical planning and budgeting guidance.
Tools, Tactics, and a Safe Line: Equipping Yourself to Self-Repair a Semi-Truck Tire
Healing a tire on a heavy tractor-trailer is not a casual roadside fix. It demands a precise blend of the right tools, disciplined technique, and a built-in respect for safety. The aim of this chapter is not to glamorize a DIY shortcut but to illuminate what truly enables a responsible self repair. When a puncture is small, located in the tread, and the tire has not suffered structural deformation, a well-executed repair can extend service life and keep fleets moving. But the moment the damage crosses the line into sidewall injury, excessive tread wear, or signs of internal belt damage, the prudent option is replacement. The scale and rigidity of semi-truck tires demand not only strength but a careful approach, because the stakes involve both highway safety and a driver’s schedule. This discussion threads together the core idea: with the proper tools and a methodical mindset, a trained operator can perform a cold patch repair that adheres to accepted practices, while recognizing the moment when professional intervention is non negotiable.
The backbone of any successful self repair is the toolkit. A heavy-duty hydraulic jack is essential, rated to lift the weight class of the vehicle with a solid, level footing. It must sit on a stable surface and be used in concert with sturdy wheel chocks and the parking brake. The goal is to elevate the wheel enough to remove the tire from the hub without allowing the truck to settle or shift. Lug nuts for commercial wheels are substantial; a large lug wrench or impact gun helps, but a careful hand on the torque sequence is critical. With trucks, many wheels use wide, heavy studs that require a star pattern reassembly to ensure even clamping force. The tools list continues with a tire iron or breaker bar to break the bead and loosen the tire from the rim. In some cases a rim puller or a small air hammer may be needed to free the bead from stubborn rims, especially if the wheel has an aggressive offset or a dual- axle setup where clearance is tight. A tire changer, while a professional-grade option, is the difference between a painstaking manual process and a safe, controlled separation of bead and rim. When the tire changer is unavailable, the process becomes slower and more labor intensive, but the fundamental principle remains the same: avoid pinching or twisting the rubber and keep the bead seating area clean. The air compressor with a high-output hose becomes part of both the inflation phase and the bead breaking phase, since many steps rely on controlled air pressure to seat and re-seat components. A bead breaker helps to seed a clean separation of bead and rim before the tire can be worked on. Scrapers, wire brushes and a grinder or sanding tool are used to remove material around the puncture area and to create a rough, clean surface for bonding. Roughening the area is not cosmetic; it exposes fresh rubber and removes contaminants that would otherwise undermine adhesion. Measuring tools, such as calipers or a simple ruler, ensure you size the patch correctly and verify that the patch area sits within the repair zone limits, typically the tread region, with the hole not exceeding the recommended diameter.
The patch itself is the heart of the repair in most cold patch scenarios. A repair patch, precisely cut to fit the damaged zone, is paired with rubber cement or a similar adhesive designed for vulcanized rubber. The process begins with a thin, even coat of cement applied to both the sanded area and the back of the patch. The goal is a uniform tackiness that prevents voids under pressure. After a suitable cure time, usually a short window of five to ten minutes, the patch is pressed into place with a roller or by hand, ensuring it fully adheres and that there are no air pockets along the edges. The patch must cure for a window that allows sufficient bonding before the tire is inflated again. This patience is not optional; it directly affects the patch’s long-term integrity. If a smoothing roller is available, it helps to contour the patch to the tire surface and maintain uniform contact across the repair zone. Throughout this stage a gentle reminder to keep the surrounding area clean and free of grease is crucial. Any oil or residue can undermine the bond and shorten the repair’s lifespan.
Reassembly is the next phase, and it requires discipline. The wheel must be remounted on the hub with all fasteners accounted for and torqued to the manufacturer specifications. The star pattern remains a standard best practice to balance clamping forces around the rim. After the tire is reinstalled, the truck is lowered carefully and the lug nuts are retorqued to ensure the wheel seats evenly under load. The inflation step follows, using the vehicle’s recommended PSI, verified on the jamb placard or the tire sidewall. A careful, incremental approach to inflation reduces the risk of creating new damage or displacing the patch. At this point the test should begin with a careful visual inspection and a soapy water leak check, looking for any bubbles that would signal a failure in the patch seal or a loose bead. The truck should then be subjected to a controlled test drive—short and slow at first—to observe for vibrations or abnormalities that might suggest an out-of-balance wheel or an underlying defect the patch did not address.
A practical understanding of patch quality distinguishes an endurable repair from a rushed fix. There are two main patch philosophies in tire repair: cold patches and hot patches. The cold patch, as described here, relies on adhesive bonding and patch material designed to cure in place. This method is within the reach of skilled DIY enthusiasts who have the appropriate tools and the space to work. It remains the most common DIY approach for smaller punctures in tread, provided the hole is no larger than the limit and the area shows no signs of internal damage. The hot patch method, which involves vulcanization at elevated temperature and pressure, is more robust and durable. It is typically reserved for professional shops or dedicated facilities with proper equipment and trained personnel. The decision between cold and hot patch hinges on the extent of the damage, the tire’s construction, and the vehicle’s service demands. In any case, the risk of DIY repair should be weighed against the tire’s role in a fleet and the potential consequences of failure on the road. A critical caution is to avoid automatic sealants that are not designed for large commercial tires. These quick fixes can corrode rims or interfere with valves and sensors and are not recommended for most semi-truck applications. Also, remember that sidewall damage and breaches near the shoulder remain conditions that require replacement rather than repair. A patch cannot restore the structural integrity of a compromised sidewall.
Incorporating the broader repair ecosystem into your workflow matters as well. While the core tools and steps form the backbone of a repair, the surrounding practices determine whether a repair lasts. Regular pressure checks, especially after a repair, help detect creeping leaks that static tests might miss. The patch’s long-term performance depends on maintaining a clean surface, using high-quality cement, and allowing sufficient cure time before reintroduction to service. Documentation of the repair, including the patch size and the time to cure, can be invaluable for fleet management and compliance records. For fleet operators, carrying a spare tire and a mobile repair kit can dramatically reduce downtime if a roadside event occurs. Even with the best at-home procedures, there will be occasions when roadside assistance or professional service is the safest choice, particularly for high-mileage operations under extreme conditions or when the tire has sustained concurrent structural damage.
Within this framework, a mindful approach to learning pays off. Before attempting a repair, study the tire’s history, inspect for edge cracks or bulges that could indicate belt damage, and ensure the puncture is truly a candidate for patching. The patching technique itself should be meticulous: roughen the area as described, clean with a degreaser, apply cement evenly, and press the patch into place with sufficient dwell time before reinflating. If a bead seal is not achieved by the first attempt, re-evaluate the condition of the bead and consider more extensive surface preparation or, if necessary, replacement. The goal is to leave a repaired tire that behaves predictably at speed, with minimal risk of a sudden air loss. This is especially important on long-haul routes where tire failure can cascade into delays, safety concerns, and compliance issues. The process, though technically demanding, becomes more manageable with practice and a disciplined workflow. It is the mastery of this workflow that turns a potentially risky DIY repair into a responsible, safety-conscious maintenance activity.
For readers seeking a broader primer on maintenance and repair content that supports this topic, there is value in connecting to a wider resource hub. See mastertruckrepairllc.com/blog/ for additional perspectives on truck maintenance, tire care, and related topics. In addition, the official guidance that governs tire safety and repair standards can be found through external safety authorities. For comprehensive regulatory context and best practices, consult general tire safety guidance and the latest federal safety recommendations at https://www.nhtsa.gov/vehicle-safety/tires-and-wheel-assembly. This external resource provides up-to-date information on tire safety, repair standards, and the legal requirements for commercial vehicles, complementing the practical, hands-on approach outlined here.
In sum, self repairing a semi-truck tire is feasible when the damage is confined to small tread punctures, the area is clean and properly prepared, and the patching process is performed with appropriate materials and dwell time. It is not a universal remedy, and the safety margins shrink rapidly with any indication of sidewall damage, large punctures, or visible internal compromise. The prudent operator knows when to repair, when to seal, and when to replace. The careful orchestration of tools, technique, and time is what makes a tire repair a sustainable, safe option that minimizes downtime and keeps the wheels turning on the open road.
On the Edge of the Road: A Practical, Safety-First Guide to Self-Repairing a Semi-Truck Tire
When a tire loses its bite on the highway, the impulse to fix it and press on can feel urgent. Yet semi-truck tires operate under unique stresses and carry heavy loads, so any DIY repair must be grounded in careful assessment, proper tools, and rigorous safety. The goal of this chapter is not to promote reckless improvisation but to provide a coherent, practical framework for handling small, tread-area punctures with confidence—and to recognize when the safest move is to replace. You don’t need a full shop, but you do need discipline, the right approach, and a clear sense of limits. The decision to repair or replace hinges on the damage’s location, size, and the tire’s condition. A puncture in the tread that is small and well-behaved can often be managed with a patch or sealant, but any puncture in the sidewall, or a hole larger than about 6 millimeters, signifies compromised integrity and a higher risk of sudden failure. When in doubt, replace rather than repair, especially if the tire has signs of aging, heat damage, or prior repairs that might have weakened the structure. Safety begins the moment you pull onto the shoulder and ends only when you are back on a stable, well-maintained road. The first principle is to park the vehicle on level, firm ground and to use wheel chocks and the parking brake. Hazard lights should be on, and, whenever possible, a reflective vest or bright outerwear helps others see you. A truck bay or open space with good footing makes the difference between a routine tire repair and a hazardous crawl under a vehicle that could shift. With the engine off and the axle secured, you can begin the careful, methodical process that protects you, your cargo, and the tire. The work unfolds as a sequence of checks and preparations rather than a single moment of force.
Begin by assessing the damage. Look for the puncture’s origin and size, and determine whether it is in the tread area or the sidewall. Punctures on the tread can sometimes be repaired if they meet the size criteria and there is no tearing or structural compromise. Sidewall damage, on the other hand, is almost always a replacement scenario. If a foreign object—nail, screw, or sharp shard—has penetrated the tire, do not yank it out in a way that could unleash a longer tear. Instead, observe where the object sits and how the puncture presents itself. A small, uncomplicated hole in the tread can be managed, but the inner liner, steel belts, and the tire’s carcass must remain intact for a repair to be viable. A flashlight can help illuminate the interior when you inspect the inside of the tire, where hidden damage can exist and only become evident after the wheel is removed.
Next comes preparation, which centers on creating a clean, stable surface for any patch or sealant to adhere. Roughen the area around the puncture with sandpaper or a wire brush to create a micro-rough surface that improves bonding. Remove oil, dirt, and residue with a degreaser or rubbing alcohol. Adherence is the hinge on which the repair turns; otherwise the patch can peel or the sealant can fail under pressure. In the event you choose a sealant approach for a small puncture, you need a proper toolset: a sealant injector, a high-volume air source, and a way to monitor inflation. In many fleets, a dedicated tire sealant kit designed for heavy-duty tires is kept as part of maintenance gear. When injecting sealant through the valve stem, follow the kit’s instructions closely, and never exceed recommended quantities. After injection, allow circulation by driving the vehicle at a cautious pace. The goal is to flush the sealant around the puncture so it can seal from the inside as it contacts air. If the puncture is truly small and remains stable, you may observe a temporary seal that buys you time to reach a suitable service point.
For a longer-term and more robust repair, many operators rely on a patch system. The process begins after you’ve tested the sealant’s behavior and ensured it has set, then you remove the sealant residue and proceed with a patch. A patch is placed over the cleaned, prepared area and pressed firmly to ensure full contact with the rubber surface. The curing time is essential; the patch should be allowed to cure according to the patch kit’s guidance before the tire is reinflated. It is crucial to note that the integrity of the tire’s inner liner and belts must be preserved. If you discover any bulging, cracking, or exposed steel belts on inspection, this is a clear signal that the tire has failed structurally and must be retired. In that case, the repair is not just unwise; it’s unsafe. The decision to pursue a patch versus a plug can hinge on the specific tire’s design and the patch kit’s effectiveness on heavy-duty tires. The patch should be slightly larger than the puncture to guarantee complete coverage.
If you are repairing a tire with a plug, the approach differs. A plug can seal the outer hole, but many industry professionals still prefer a patch as the definitive fix for commercial vehicles. A plug is a convenient, sometimes quick, remedy that can be used for certain hole shapes and lengths, but it does not restore the tire’s internal structure to the same standard as a patch. In practice, many operators combine a plug for the initial seal with a subsequent patch for long-term reliability, provided the tire’s overall condition remains sound. Either method demands meticulous cleaning and proper curing time before reinflation. After the repair, reinstall the wheel with proper technique. Start all lug nuts by hand to avoid cross-threading, then torque to manufacturer specifications in a star or crisscross pattern. The precise torque value depends on the axle and the wheel design, and it’s essential to consult the truck’s service manual or the tire/wheel manufacturer’s guidelines. Once snug, lower the truck slowly and re-torque after a short run if the manufacturer’s recommendations call for it. It may be tempting to rush calibration, but any undetected lug loosening can threaten steering stability and load distribution.
Inflation is another critical juncture. Inflate the tire to the recommended pressure, which is listed on the door jamb placard or on the tire sidewall. Do not rely on guesses or external pressure readings. A tire’s pressure must be accurate to keep the patch or sealant functioning under load. Before you take the truck back on the road, perform a leak test. A classic method is to apply soapy water around the repaired area and watch for bubbles that indicate escaping air. Even a small, persistent bubble can foretell a failure in the seal. If you detect any leak, you must redo the repair with proper cleaning and reapplication of the patch or sealant. Then perform a controlled road test at a low speed, ensuring there are no vibrations or unusual noises.
Of course, the limits of DIY tire repair must be acknowledged at every step. Cold patches or sealants can be a practical, temporary fix for small tread-area punctures, but hot patches, applied with vulcanization equipment, offer a more durable, fleet-ready solution. The hot-patch method requires professional equipment and training, which is why it generally falls outside DIY practice for semis. Avoid automatic sealants or “easy fix” products that claim to solve everything; many of these substances can corrode rims or affect sensors, and they are not recommended for heavy-duty trucks. And, never attempt a repair if the damage is in the sidewall or shoulder, or if the tire shows signs of aging, dry rot, or abnormal wear. These conditions often point to compromised structural integrity that makes repair unsafe. The overarching rule is simple: safety first. If you cannot confidently repair the tire to the standard needed for highway speeds with a margin of safety, replace it.
The repair mindset should extend beyond the moment of patching. After a repair, monitor tire pressure regularly. The quiet confidence of a well-seated patch becomes a habit only when you stay vigilant. A repaired tire should be checked weekly, and more often if you operate in extreme temperatures or on rough routes. A repaired tire is not a lifetime guarantee; many operators replace it after a defined mileage window or when signs of stress reappear. A practical pro-tip for long-haul drivers is to carry a spare tire and a compact, mobile repair kit that covers both patching and light sealing. In many situations, replacing a damaged tire is a safer and more cost-effective choice than pushing a marginal repair to the limit. The decision is never taken lightly, but it is guided by the tire’s condition, the load, the route, and the reliability required for the fleet.
In the larger framework of tire safety, the standards set by federal transportation authorities remain the compass. The guidelines emphasize that only certain punctures are safe to repair, and repairs must maintain the tire’s structural integrity for service. For a structured review or deeper regulatory context, reference the official safety guidelines on tire and wheel assembly. If you are seeking further reading that feeds into a broader maintenance mindset, you can explore the Master Truck Repair blog for additional context and practical maintenance strategies. For more detailed, industry-standard procedures, see the NHTSA tire safety guidelines: https://www.nhtsa.gov/vehicle-safety/tires-and-wheel-assembly.
As you carry these steps forward, the goal is not just to fix a puncture but to sustain road safety. The decision to repair a semi-truck tire hinges on many factors: the tire’s age, the damage’s location and size, the presence of internal damage, and the loading conditions it bears. If the patch or sealant doesn’t hold under a controlled test, or if the tire reveals any sign of weakness, the prudent course is to retire it from service. The repair is not just a matter of expedience; it is a matter of safety, reliability, and responsible fleet management. In practice, the most disciplined operators keep a clear threshold and a ready plan: a patched tire with a control test, a backup spare, and a decisive replacement strategy when the seal does not inspire complete confidence.
The road demands discipline, and this discipline begins with accurate damage assessment, careful preparation, and a repair method that honors the tire’s design and the demands of heavy loads. The practical takeaway is clear: you can self-repair a semi-truck tire within defined limits, but you must always weigh the tire’s condition, the repair’s robustness, and the potential consequences of failure. If you can confirm the tire’s history, confirm the damage’s boundaries, and complete a careful test that demonstrates reliability, you are on solid ground. If any step feels uncertain, or if the tire shows signs of compromise, the safest route is replacement. The ultimate objective is a road-ready tire that sustains performance, reduces risk, and upholds the standards that keep the fleet moving forward.
null
null
Knowing When to Replace, Not Repair: Essential Rules for Semi-Truck Tire Safety
On the highway and in the yard, the moment you suspect that a tire might fail is the moment you weigh repair limits against replacement options. This decision is not simply about saving a few dollars; it is a safety threshold for the vehicle and its load. While careful patching in the tread can buy miles in some cases, several firm indicators tell you that saving a tire is not worth the risk. In this chapter, we examine those indicators in a practical, situational way. The aim is to give you a clear, rule-based framework you can apply without pausing your daily operations.
Tread depth remains the most widely recognized signal. The legal minimum for heavy-truck tires is commonly set at 2/32 of an inch, roughly 1.6 millimeters. When the tread recedes toward this mark, its ability to evacuate water deteriorates, and hydroplaning becomes more likely at highway speeds. But many operators adopt a stricter threshold to account for variable weather and long downhill pulls. A practical check uses a proper tread-depth gauge placed in the center of the groove, not in a shallow or worn edge that could mislead. If even a single location on a tire is near the minimum, treat it as a retirement candidate, because uneven wear can indicate a loss of structural balance and unpredictable performance across the wheelset.
The sidewall is where the repair conversation should end before it begins. Any cut, crack, bulge, or puncture in the sidewall or at the bead deserves retirement. The sidewall carries the bulk of the tire’s lateral and bending stresses, and its internal cords can fail under load even if the patch in the tread holds air. A patch or plug cannot restore the integrity of damaged cords or a compromised bead, and the consequences of a late failure can be catastrophic for a commercial vehicle carrying heavy loads. If you observe a deformity near the shoulder or a pinprick that travels through the rubber into the belt layer, the tire should be removed from service. It is a hard line, not a negotiable option.
Age is another reality many fleets learn the hard way. Rubber deteriorates with time, irrespective of miles driven. The conventional wisdom in many fleets regards five to six years as a conservative retirement window, even if tread depth remains acceptable. The date code, stamped on the sidewall, tells the tale: a tire older than that window deserves scrutiny, and often replacement, because aging foam, fatigue in the belts, and microcracking erode the margin of safety. Signs of aging aren’t always obvious from the outside: small cracks, chalky residue, or a feels-like-stone stiffness when the tire flexes can precede a failure. In those cases, the cost of an abrupt roadside event dwarfs the price of a planned replacement.
A history of repairs matters deeply. If a tire has been repaired more than once, especially in zones close to the tread seam or near the shoulder, the structural integrity declines with each intervention. The so-called three-repair rule is a widely cited heuristic: three repairs on a single tire generally signal that replacement is the safer course. A tire that has sustained multiple repairs in a short window is effectively a patchwork of compromises; its integrity, after repeated cycles of pressure and flex, is unpredictable. When you encounter a tire with a large or unusual puncture, like an angled hole or a puncture near the belt line, the internal structure may already be compromised in ways that surface sealing cannot address. In those circumstances, retirement rather than another patch is prudent.
Tire performance cues offer a last, practical layer of judgment. Watch for bulges or blistering on the sidewall, tread separation, or irregular wear patterns that you cannot explain by driving conditions alone. A tire can look fine on the outside while harboring an internal belt separation or cord damage. If you notice a hard spot, a loose bead, or a tire that vibrates abnormally at speed, consider replacement rather than repair. The decision becomes even clearer if the vehicle operates under heavy loads in hot climates, where a marginal tire can overheat quickly and fail with little warning. In those cases, the probability of a safe repair drop dramatically, and the risk of a roadside blowout increases.
Some decisions require considering the bigger picture of maintenance planning. Replacement is not a sign of failure but a deliberate, safety-first choice that reduces downtime and avoids the unpredictable consequences of a weak tire. When you frame tire life as a finite resource within your maintenance plan, you can align purchase cycles, inspection routines, and inflation checks with your operation’s uptime goals. It helps to specify a clear retire-at threshold for each tire position, document the rationale for retirements, and keep this data in the maintenance log. This proactive approach minimizes surprises and supports regulatory compliance by showing a consistent, safety-driven policy in action.
From a practical standpoint, you should integrate replacement decisions into a wider preventive-maintenance mindset. Replacement decisions can be cost-effective in the long run because they prevent emergency downtime, urgent depot visits, and the cascading effects of a tire failure on a multi-axle vehicle. For operators aiming for predictable uptime, it helps to budget ahead for tire replacement and to have a policy that clearly states when to retire a tire. This is where planning pays off: you should place replacement decisions within an overall maintenance strategy that includes inspection routines, rotation schedules if applicable, and timely inflation checks. It helps to specify a clear retire-at threshold for each tire position, document the rationale for retirements, and keep this data in the maintenance log. This proactive approach minimizes surprises and supports regulatory compliance by showing a consistent, safety-driven policy in action. For a structured approach to fitting tire lifecycle planning into routine maintenance, see Budgeting for Routine Truck Maintenance.
On the regulatory and safety front, the emphasis is on prevention. The official guidance from the agencies that oversee commercial-vehicle safety reinforces the boundary between repairable and replaceable damage. While minor tread-area punctures can be patched and remain legally compliant under certain conditions, any damage to the sidewall or the bead, any tread loss beyond a certain depth, or evidence of aging demands retirement. The aim is simple: prevent failures that could kill or injure a driver, a fellow road user, or a convoy traveling with you. You should consult the formal guidelines for tire and wheel safety to stay aligned with current industry standards and legal requirements. If you want to explore the most up-to-date rules and recommendations, you can reference the official resource maintained by the DOT and the FMCSA.
When in doubt, replacing a tire may be the most cost-effective option in the long run. The decision is rarely binary, however. You may encounter a mid-life tire that presents a borderline case—tread depth just at the minimum, no visible sidewall damage, recent maintenance history favorable, and a predictable wear pattern under load. In such cases, a risk assessment that weighs the cost of an unexpected failure against the price of replacement, plus the advantages of maintained traction and uptime, can guide you toward the safer choice. Keeping a spare tire and a small mobile repair kit can further reduce downtime if a patch is feasible but not ideal, preserving service until you can perform a full inspection or replacement during your next planned maintenance window.
For readers who want to dig deeper, the FMCSA publishes tire-safety guidelines and performance requirements that help fleets set their own thresholds and procedures. The central aim is to minimize unsafe repairs while maximizing reliability on the road. By building your policy around the indicators described here and consulting authoritative sources, you create a robust framework that supports safe driving, efficient operations, and regulatory compliance.
External resource: https://www.fmcsa.dot.gov
Final thoughts
Successfully self-repairing semi-truck tires requires thorough knowledge, appropriate tools, and adherence to safety standards. Emphasizing proactive maintenance strategies enhances fleet reliability and operational effectiveness. Understanding when to attempt repairs versus opting for replacements can significantly reduce downtime and costs, leading to improved productivity. Continuous education and preparedness for tire issues will prepare fleet managers and operators to navigate on-road challenges expertly, ensuring their vehicles remain on the move without interruptions.