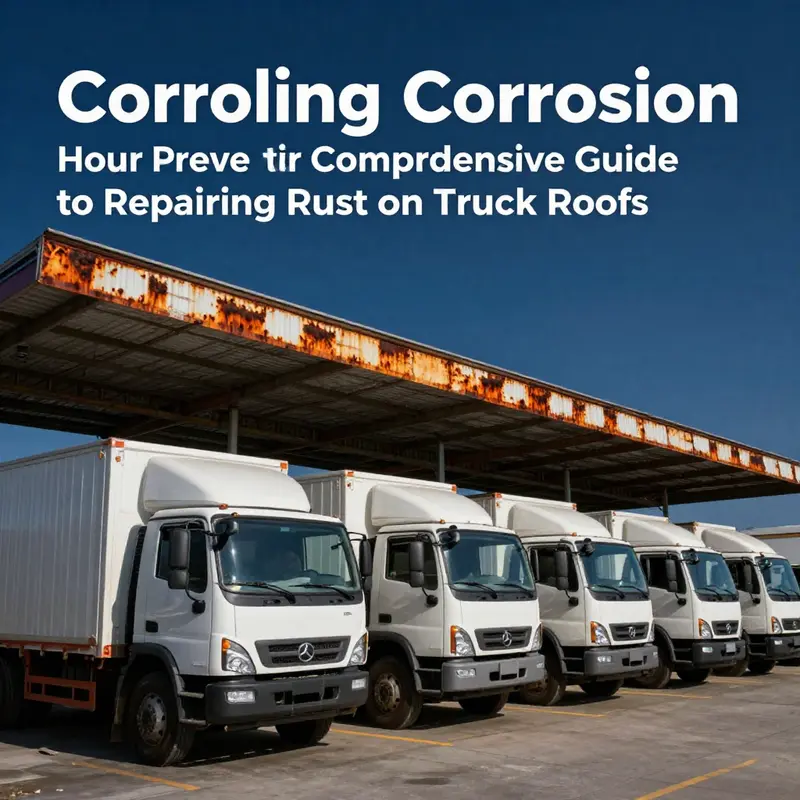
Rust on truck roofs is a pervasive issue that can threaten the lifespan and aesthetic of a fleet. For fleet managers, trucking company owners, and operators in rugged industries such as construction and mining, understanding how to manage rust effectively is not merely a maintenance task; it’s an integral part of operational longevity. This guide delves into assessing minor and severe rust damage, outlining essential tools, techniques, and preventive measures. Each chapter builds upon the last to equip you with the knowledge necessary to maintain the integrity of your vehicles.
From Surface to Sealant: Mastering Minor Rust on a Truck Roof
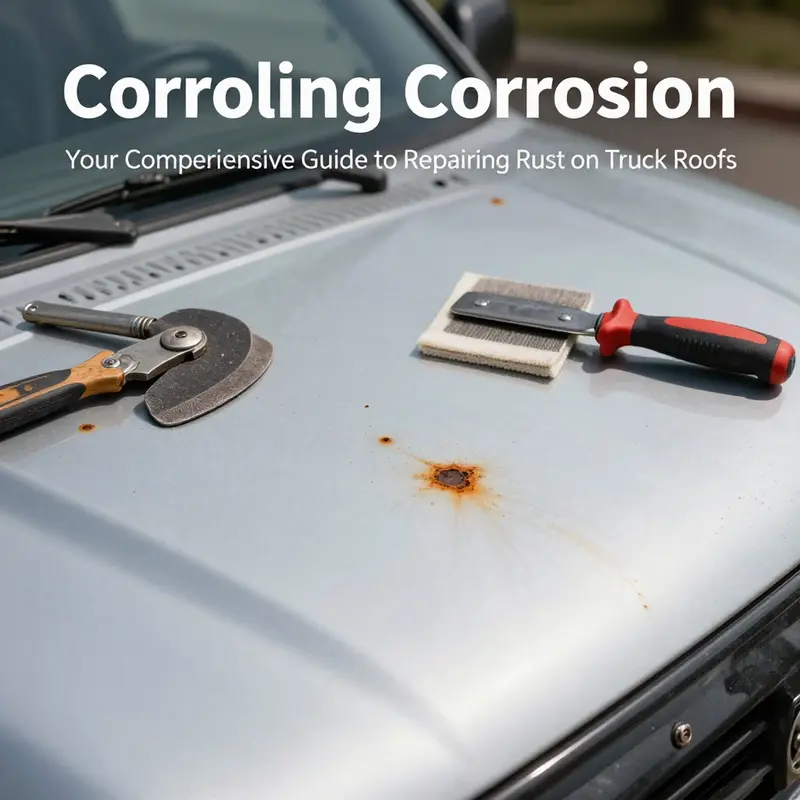
Rust on a truck roof often starts as a quiet discoloration or a tiny sparkle of exposed metal. Left unchecked, that small blemish can creep under paint, widen into pits, and eventually threaten the roof’s integrity. The good news is that most minor rust spots—those that are superficial and do not breach the metal—can be managed at home with careful preparation and methodical steps. The key is early assessment and disciplined execution. When you treat these spots promptly, you not only stop the current corrosion but also lay down a durable barrier against future moisture ingress. This approach keeps the roof looking sharp and, more importantly, prevents small problems from becoming costly repairs later. It is a rhythm you can apply as part of regular maintenance, a practice that pays off in longevity and peace of mind as you put miles on the truck.
Begin by honestly assessing the damage. Look closely at the spot: is it just a surface discoloration or a tiny, shallow pit that measures less than a quarter of an inch in diameter? If the metal beneath is still solid and no hole has formed, the issue qualifies as minor rust. If you do notice a hole, or if the metal feels spongy or unusually thin at the spot, pause and consider a more substantial repair or professional help. The roof’s structural integrity matters, and a persistent hole is a sign the underlying panel has started to fail. With minor rust, the plan unfolds as a controlled sequence designed to halt progression, restore the surface, and seal it from moisture. For context, some DIY resources emphasize similar approaches, and a broader perspective on car surface rust care is available via a well-regarded automotive publication; this can be useful if you’re comparing methods and timelines. If you want a broader take on DIY vehicle maintenance beyond rust, you can also explore the Master Truck Repair Blog for general guidance and tips. Master Truck Repair Blog.
Once you’ve confirmed the spot is minor, start by cleaning the area thoroughly. Rust tends to cling to oil and dirt as much as it does to metal, so a clean surface is essential for an even repair. Use a soft cloth or sponge with mild car wash soap and water to wipe away dirt, grease, and grime from the affected panel and a small margin around it. Rinse well and let the area dry completely. Moisture left behind will undermine primers and paints, so a dry surface is non-negotiable. In this phase, you’re setting the stage for the rust removal that follows. If you prefer a more chemical approach, a specialized rust remover product can be used according to its instructions, but the goal remains the same: expose clean metal, free of rust and residue.
The next step is to remove the visible rust itself. For minor spots, fine-grit sandpaper—typically in the 800 to 1200 grit range—works well, as does a very fine steel wool pad. Work gently in small circular motions, staying within the rusted area and protecting the surrounding paint. The objective isn’t to strip paint but to erase the rust and reveal bright metal beneath. If you opt for a chemical rust remover, apply it as directed and then wipe away any residue with a clean cloth, repeating as needed until you see bare metal where the rust existed. Throughout this process, wear eye protection and gloves, and avoid breathing in particles created by sanding. Use light pressure; aggressive sanding can create little scratches that will need filling later, which complicates the repair. The moment you see clean metal, you’re ready to move on.
With the rust removed and the surface clean, the metal is exposed and vulnerable. The most important step now is priming. Apply a high-quality rust-inhibiting primer to the bare metal as soon as it’s dry to minimize the risk of new rust forming under the paint. This primer acts as a chemical barrier as well as a key bonding layer for subsequent paint. Follow the manufacturer’s drying times closely; rushing this step can trap moisture or solvents beneath the coating, undermining the repair. After the primer has dried, visually confirm that the surface is smooth and uniform. If you notice any tiny imperfections or tiny depressions where the rust Spot was, this is the moment to address them. Small depressions can be filled with a light body filler or putty, then sanded flush with the surrounding panel. Allow the filler to cure thoroughly, then re-sand with progressively finer grits until the area is perfectly level with its surroundings. This extra step helps you avoid a noticeable ridge once paint is applied and ensures the finished surface looks seamless under the sun.
Now the finish layer comes into play. When you’re ready to paint, you’ll want to match the truck’s original color as closely as possible. Use a topcoat that blends with the surrounding roof, applying several thin coats rather than a single thick one. Thin coats help avoid runs and sagging, and they dry more evenly, creating a smoother final appearance. Between coats, observe the drying times recommended on the paint can or by the primer manufacturer. Rushing through coats increases the chance of peeling or flaking later. For a professional touch, you can apply a clear protective topcoat after the final color coat. The clear coat seals in the color and adds an extra layer of moisture resistance against sun, rain, and road grime. The result should be a uniform finish that mirrors the rest of the roof, with the repaired area indistinguishable from its surroundings to the casual observer.
This sequence—clean, remove rust, prime, fill if needed, paint, then seal—relies on patience and precision. The sequence also hinges on a simple philosophy: protect bare metal as soon as it appears. The moment you delay, you give moisture a foothold, and a tiny rust spot can quickly grow. There’s a practical reason for each step. Cleaning removes what can promote corrosion, removing rust exposes clean metal so the primer can bond properly, priming creates a protective shell that discourages new rust from forming, filling tackles any minor inconsistencies that would otherwise telegraph through paint, and painting plus sealing locks in the repair and softens the edge where color meets color. If you’ve never performed a repair like this before, consider practicing on a small inconspicuous area or a test panel first to get a feel for the pressure and motion required for smooth sanding and uniform paint application.
As you complete the repair, don’t forget to recheck the area after a few days of exposure to the weather. Rust can reappear if moisture remains trapped beneath paint or if the seal isn’t complete. Periodic maintenance becomes part of the long game: wash the roof regularly to keep debris from settling in around the seals and drains, and consider a protective coating or wax that adds a sacrificial barrier against moisture and UV exposure. If the rust spot is near a seal, drain, or edge where water tends to pool, keep a closer eye on it. A well-sealed roof resists corrosion longer and keeps this kind of spot from returning.
The overarching message is straightforward: with minor rust on a roof, you can take control of the repair by moving deliberately through assessment, cleaning, rust removal, priming, painting, and sealing. The process is not glamorous, but it is effective, affordable, and repeatable. And while this approach works well for spots that are strictly surface rust, it’s also a reminder that any sign of deeper decay—holes, soft metal, or widespread pitting—signals a different level of repair. In those cases, a professional assessment is prudent, since the structural integrity of the roof matters. If you want additional perspective on DIY maintenance that complements this rust work, the blog mentioned earlier can provide broader guidance and context. Master Truck Repair Blog.
For readers seeking further reading beyond the how-to specific to minor rust, a detailed discussion of rust repair techniques across vehicle surfaces is available in a technical overview from a major automotive publication. It covers various scenarios and emphasizes safety, proper prep, and durable finishes. You can explore this external resource here: https://www.caranddriver.com/features/a57952562/how-to-fix-rust-on-a-car/ .
Rusted Roof, Rebuilt: Mastering Severe Rust and Pitting on a Truck Roof
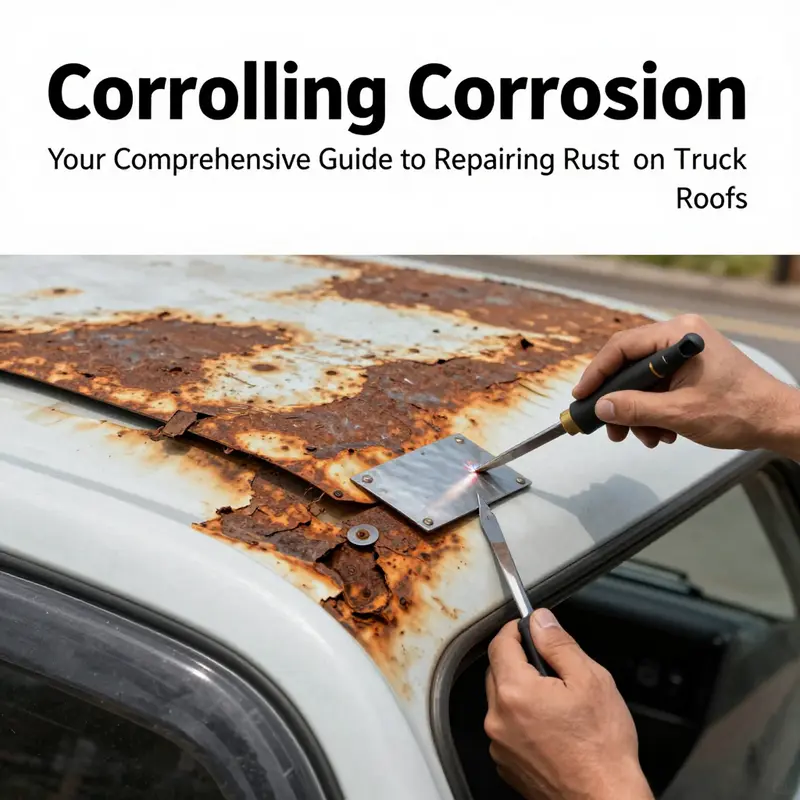
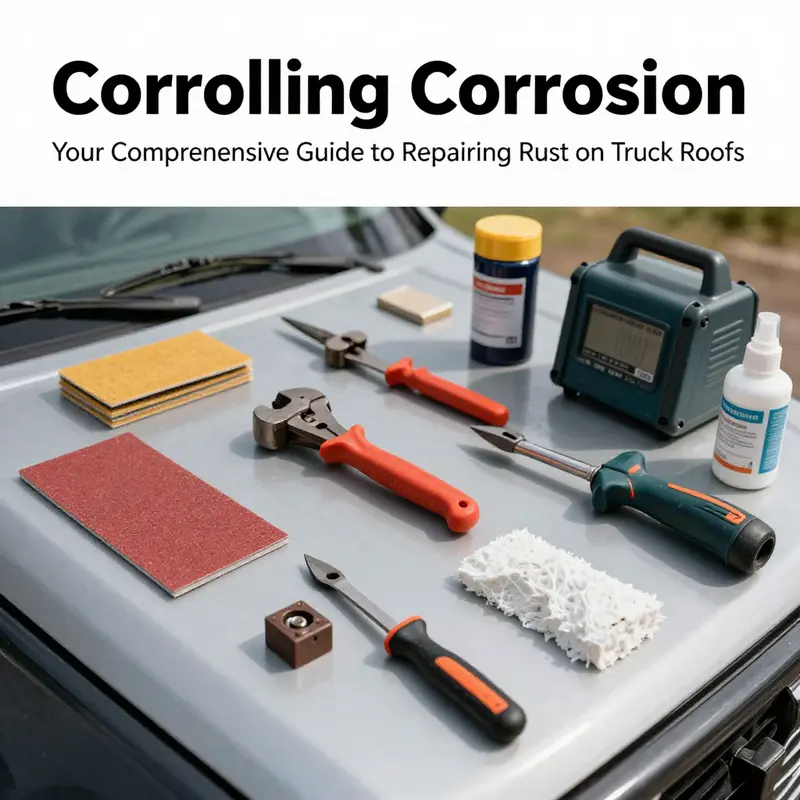
The sight of severe rust and stubborn pitting on a truck roof instantly switches the project from a quick touch-up to a careful restoration job. When metal has corroded deeply, it signals more than cosmetic damage; it signals potential structural weakness that can worsen with time and exposure. Approaching this repair demands a methodical plan, strong safety practices, and a willingness to accept that some sections may require replacement or professional intervention. Before any tool is touched, a thorough assessment sets the rhythm for the work ahead. Look for thin spots, bubbling paint, visible holes, or metallic roughness that betrays hollowed anything beneath the surface. If you can press on a rusty area and hear a faint dull thud or feel the metal give slightly, you’re likely dealing with pits that have compromised the integrity of the panel. In such cases, the repair must prioritize removing compromised material and replacing it with sound metal, while preserving the roof’s overall shape and structure. Safety comes first. Wear goggles to guard your eyes against flying shards, gloves to protect your hands, and a respirator or mask to minimize inhalation of dust and fumes. Park the truck on a flat, stable surface, and consider disconnecting the battery if you’ll be working near any electrical components or vents. A clean, well-lit workspace helps you spot underlying issues that could be missed in dim light. With the safety layer established, the removal phase begins. The goal is to strip away rust and paint from the affected zone until you reach clean, solid metal. Mechanical removal is essential here; you’ll want to aggressively remove all loose rust, flaking paint, and any metal that has become brittle and thin. A die grinder with a wire wheel, or a power tool with a coarse-to-medium abrasive disc, can rapidly expose fresh metal. If you prefer a gentler approach or are working in a tight space, a wire brush attachment can do the job with more control. Sandblasting is another option for larger areas, but it requires proper containment and a steady hand to prevent collateral damage to surrounding paint and panels. Whichever method you choose, the aim remains the same: reveal bare metal that is sound enough to hold a patch and withstand future moisture. After the bulk of the rust is cleared, a thorough cleaning follows. Degrease the area to remove oils, waxes, and residue created by grinding or sanding. A stiff brush helps dislodge stubborn dust, and a final wipe with a clean solvent ensures the surface is dry and ready for treatment. When the surface is pristine, you face the turn from removal to reinforcement. If the pits are shallow and the metal has not thinned significantly, you can patch the area with a compatible filler and then re-seal it with primer and paint. For deeper pits or holes, however, the repair path shifts toward material replacement. This is where the repair must be treated as a structural fix rather than a cosmetic one. The method I’ve seen recommended in professional practice involves a patch approach: you cut out the damaged section, create a replacement panel from sheet metal with the same gauge and thickness, and secure it with welding so the patch is flush with the surrounding surface. The critical point here is to ensure you’ve removed all compromised metal to prevent future corrosion from migrating underneath a patch. If you don’t have welding experience, this step is exactly where a professional body shop can save time and ensure a durable result. Once the patch is in place and the welds are solid, the seams require care. Grinding down welds with precision produces a smooth surface that can be primed and painted. The goal is to have the repaired area blend with the factory contours, without sharp transitions that trap moisture. After smoothing, the same anti-corrosion philosophy applies. A zinc-rich or self-etching primer is applied to the bare metal, designed to bond well to the surface and provide a robust barrier against future moisture ingress. The primer also helps with adhesion for the subsequent paint layers. For patched areas, multiple light coats are more effective than a single heavy application, allowing each coat to cure and contribute to a uniform, integrated look. Following priming, the painting stage proceeds. A color-matched topcoat is applied in thin, progressive layers to build up a durable finish that can withstand weather, UV exposure, and the general wear of highway travel. In many instances, a clear protective layer is added on top of the color coat. This clearcoat seals the color and adds an additional moisture-resistant barrier, reducing the chance of future corrosion from surface moisture and road salts. It is important to allow adequate curing time between coats and after the final coat before subjecting the roof to rain, washing, or other stress. The finishing touches matter as much as the main repair. A light, final sanding with very fine grit between coats helps the patch fade into the surrounding paint and maintain a glossy, uniform appearance. If pitting has been extensive, you may consider a contained re-finishing approach that protects the patch and surrounding metal without compromising the roof’s aerodynamic profile. In scenarios where pits have not penetrated deeply or the structure remains uncompromised, a careful patching and coating strategy can restore the roof to a stable condition with a long forecast for resistance. Yet, there are thresholds beyond which DIY becomes impractical or unsafe. When you encounter multiple holes that threaten water intrusion into the roof ribs or internal structures, or when the metal around the patch has thinned to the point of collapse, the risk of shared structural failure increases dramatically. At that juncture, the prudent course is to consult a professional auto body shop that specializes in metal repair and, if necessary, fiberglass reinforcement for added rigidity. With severe rust, the chronic challenge is moisture management. Rust thrives in damp crevices and joints where water collects, such as around seams and drip channels. A robust repair plan, therefore, includes not only patching and priming but also an emphasis on sealing. After the finish coats cure, re-check the roof’s seams and drainage channels. Clean them well and apply a protective sealant or paint-grade sealant around joints to minimize future water retention. This proactive sealing is a critical, often overlooked, component of a durable fix. It complements the dye of the work you’ve already completed and helps protect the surrounding paint from peeling or chipping that might result from temperature shifts and wind-driven debris. The maintenance mindset that follows a severe rust repair is essential. Regular inspection becomes your best defense. Look for new rust halos around edges, corners, and fastener points where moisture might retreat. Daily or weekly upkeep should include a quick wash of the roof surface to remove contaminants and salt, especially in winter or coastal environments. A protective coating or wax can add one more layer of defense, reducing the likelihood that water and grit find their way into micro-abrasions. In all of this, the decision tree matters. If the corrosion has created holes or if the structural skin of the roof is compromised, it is wise to pause the DIY path and seek professional assistance. While fiberglass patches and resin can reinforce a weakened area and deliver a serviceable repair, they are most effective when used judiciously and in combination with proper substrate preparation and paint finishes. A professional will verify the patch’s long-term stability and can ensure that the repair integrates with the truck’s overall body integrity and safety standards. For those who want a deeper dive into professional benchmarks and standards, peer-reviewed guidelines from recognized automotive authorities can offer authoritative direction. See the external resource for formal recommendations and best practices in rust prevention and repair procedures: https://www.ase.com/. If you seek broader maintenance support or more practical, hands-on ideas, you can also explore related content within our network’s resources, such as Turnage Sons in-house truck maintenance, which offers insights into routine upkeep and long-term care strategies for fleets and individual owners alike. For those who want a concrete path to expanding their DIY toolkit, consider the practical wisdom found in the linked guide to in-house maintenance, which helps you build a durable knowledge base for future repairs and preventive care: Turnage Sons in-house truck maintenance. Although the focus here is on severe rust and pitting, the broader message remains clear: preventive care and timely, well-executed repairs protect your truck’s roof and its value over time. As you plan future projects, keep in mind that rust repair is as much about strategy as it is about tools. A patient, measured approach reduces the risk of under-preparing or rushing through a patch, both of which can lead to recurrence. The roof of a heavy-duty vehicle endures a lot of weather exposure, and a thoughtful repair that emphasizes sound metal, clean seams, and robust coatings will pay dividends in durability and appearance. In practice, the most successful repairs blend a disciplined process with an eye for detail and an understanding of the roof’s role in the truck’s overall performance. The patch may feel like a small repair in the moment, but its quality determines whether you’ll be visiting this chapter again in a few years or enjoying many seasons of trouble-free service. By combining mechanical removal, patching where necessary, thorough sealing, and disciplined finishing, you create a repair that stands up to the test of time rather than a quick fix that fails when moisture returns. If you sense uncertainty about any step, it’s wise to pause, reassess, and consider enlisting professional help. The aim isn’t to win a DIY trophy but to preserve the roof’s integrity and the truck’s value, ensuring you can depend on it for miles to come. External reference: ASE guidelines and resources provide authoritative coverage on rust prevention and repair techniques for vehicle panels. (Source: https://www.ase.com/)
From Surface to Seal: Mastering Durable Rust Repair on a Truck Roof
Rust on a truck roof is not just an eyesore; it’s a signal that moisture has found a way in and may be undermining the metal’s integrity. The roof is constantly faced with weather, road salt in winter, tree debris, and the spray from rain and splashed puddles. A repair plan that respects the roof’s exposure and its role in protecting the interior and the cargo area must blend careful assessment with decisive work. The process begins with a clear-eyed appraisal of how far the corrosion has progressed and what kind of repair will hold up over the long haul. Surface rust that has settled on the top layer of paint is a different challenge from rust that has eaten through the metal or left pits and holes. Yet both demand respect for the metal’s texture, the paint system that protects it, and the seals that keep water from migrating beneath the surface. When you think about repair, you are really thinking about restoring a barrier: a continuous shield of clean metal, primed and painted, that keeps moisture at bay and preserves the roof’s strength under stress from wind, sun, and weathering. The goal is not just to remove rust but to re-create a surface that will resist future rust formation and maintain the roof’s structural role in the vehicle’s safety envelope.
A practical repair starts with preparation and inspection conducted in one sustained, patient session. Before you touch a tool, you assess the area for how deeply rust has penetrated. Surface rust may present as a reddish-orange film or flaky scales that lift away with gentle touch. If you can wipe away the rust with a cloth and the metal underneath shines, you’re likely dealing with surface rust. If you feel a roughness, pinholes, or a noticeable depression after removing the loose material, the problem may be deeper and could require more involved work. In either case, safety remains the compass. You will be working with metal edges and potentially hazardous dust, so gloves, eye protection, and a respirator or dust mask are essential. A ventilated space is best, especially if you are sanding for an extended period. The roof is a large canvas, and you want to keep containment and control over the process so you don’t spread rust particles to adjacent surfaces or the interior that might be near the edge of the roof hatch or roof rack mounts.
If the rust is strictly surface-level, the repair becomes a sequence of careful steps that honor the metal and the paint. Start with thorough cleaning to remove dirt, grease, and any residues that could interfere with adhesion. A degreaser or a simple soap-and-water wash, followed by a thorough rinse and full drying, sets the stage for a pristine repair surface. Once dry, the rusted area is addressed with fine-grit sanding. An 800 to 1200 grit paper is typically sufficient to remove the visible rust without aggressively gouging the surrounding paint. It is important to sand gently and maintain a feathered edge, so the paint’s transition remains seamless when you recoat. This is the moment when you truly gauge how much of the metal is exposed and how much original film remains around the perimeter. If the depression left by rust is minimal, you may be able to fill it with a compatible body filler and then sand it flush with the surrounding surface. This step should be treated as a small rebuild rather than a cosmetic patch; the aim is to reestablish a flat, uniform plane so that primer and paint can bond evenly.
Next comes priming. A rust-inhibiting primer is essential because it creates a barrier that slows any residual moisture from re-entering the metal and gives a solid base for paint adhesion. The primer should be applied as soon as possible after cleaning and sanding to minimize the chance of new oxidation forming on freshly exposed metal. Follow the manufacturer’s drying times; rushing this can trap solvents and create a poor base for color coats. If you have used filler, a light block sanding will be needed after primer dries to ensure the surface is smooth. The goal here is not to chase perfection with filler but to replicate a smooth, even plane that will accept paint uniformly. The next stage—color—must match the truck’s original finish and should be applied in thin, even coats. This part of the process benefits from patience; multiple light coats will outperform a single thick one by reducing runs and sags. A well-chosen clear coat at the end adds another layer of protection and helps resist UV-induced chalking and moisture ingress.
In cases where rust has actually eaten through the metal and created pits or holes, the repair becomes more about restoring structural integrity than merely cosmetic appearance. The approach shifts to removing the damaged section and replacing it with fresh metal. The technique requires careful cutting with a tool that can produce clean, square edges around the hole or corrosion zone, followed by shaping a replacement panel to fit. The patch should be identical in thickness to the original panel to preserve door and roof seam alignment and to avoid issues with paint coverage and panel fit. The new piece is welded in place using appropriate techniques to ensure a strong, continuous seam that won’t reopen when flexed by wind or thermal expansion. After welding, the weld beads are ground smooth so the surface reads as a single plane. This is a moment to check for any warping or heat damage, then to retrace the priming and painting steps. The protective lifecycle continues with a rust-inhibiting primer, a multi-coat paint process, and a clear coat, much as with surface rust repairs. The emphasis in this scenario is on ensuring the patch bonds well to the existing sheet metal, that there is no moisture trap at the seam, and that the finished surface presents the same apparent continuity as the rest of the roof.
Beyond the mechanics of the repair, there are ongoing practices that sustain the roof’s health. The roof’s exposure to the elements means attention to drainage and seals is essential. Areas around sunroofs, panoramic vents, or roof racks can trap moisture or accumulate debris that acts as a moisture reservoir. Periodic washing with attention to the roof’s edges and gutters removes contaminants that could accelerate corrosion. Protective coatings and sealants, when properly applied, form a barrier to water intrusion and help repel road grime. It is equally important to inspect the seals around the edge of the roof, where water can creep in along seams and gather at joints. A small leak here can mimic a larger rust problem over time, because water behind paint layers can corrode metal from the inside out. A habit of regular inspections—looking for bubbling paint, changes in color, or small pits—provides a proactive approach that often prevents rust from taking hold in the first place.
When you approach rust repairs with a consolidated plan, you gain a practical philosophy: treat rust as a process, not a moment. You start with clean, dry metal, progress through careful removal of corrosion, apply protective barriers, and finish with a paint system designed to resist the environment. The sequence respects both the chemistry of corrosion and the physics of weather exposure. As you gain experience, you’ll notice that the quality of prep—cleanliness, edge definition, and dryness—often determines the durability of the finish more than the exact shade of the paint or the particular primer brand. That is not to say materials do not matter. A high-quality rust-inhibiting primer and a robust topcoat are crucial to long-term success, particularly on a surface as exposed as a truck roof. You build a shield with layers that work together to keep moisture out and the metal intact, even when the truck endures winter driving and hot sun.
For readers who want to extend their knowledge beyond the local repair bench, our hub offers practical maintenance tips that complement the repair work. The journey from rust removal to a sealed, glossy finish benefits from context and community insight. You can explore more on our blog, which compiles hands-on guidance and shared experiences from other truck owners facing similar challenges: mastertruckrepairllc.com/blog/.
While the method you choose should be tailored to the specific condition of your roof and the surrounding sheet metal, the essential principles stay the same: remove rust cleanly, protect the exposed metal, and restore a seamless, durable finish. If rust has already compromised structural integrity around critical seams or through the metal, it is prudent to consult a professional auto body shop. They can assess whether a more extensive repair, such as panel replacement and structural reinforcement, is warranted. The roof bears a responsibility far beyond cosmetics; it is a critical component of the vehicle’s integrity and the safety of its occupants. A well-executed repair restores that integrity and preserves the vehicle’s value and usefulness for years to come.
External resource for deeper insights into professional techniques and best practices can be found here: https://www.autocar.co.uk/reviews/repairing-rust-truck-roof-essential-tools-and-materials
Raising the Roof: Repairing Rust on a Truck Roof and Shielding It From Future Rust
Rust on a truck roof is more than a cosmetic blemish. It is a warning that moisture has found its way into the metal and that the protective skin of the vehicle is compromised. The roof bears the brunt of weather, road spray, and seasonal freeze-thaw cycles, so a thoughtful repair paired with a solid prevention plan is essential. A measured approach starts with accurate assessment. If the rust is surface level and has not penetrated, you can regain a smooth, clean finish with careful hand work and appropriate coatings. If the metal shows deep pits or holes, the task becomes more complex and may require panel replacement and controlled welding. Across the board, the goal remains the same: remove the rust, seal the metal from moisture, and build a durable finish that resists future corrosion. The journey from bare metal back to a shielded roof is a blend of technique, patience, and a commitment to long-term protection, rather than a quick fix you might find tempting in a rush to return the truck to service.
Begin with a thorough surface preparation. Cleanliness is the foundation of any durable repair. Start with a dedicated automotive cleaner or a mild detergent solution to strip away dirt, oils, and road grime. A clean surface ensures the rust removal tools can contact the metal without carrying contaminants that could compromise adhesion later. After washing, rinse well and allow the area to dry completely. Moisture left behind is the enemy of primers and sealers, and it can trap moisture beneath layers that should be protecting the metal.
Next comes the removal of rust itself. A wire brush or a set of hand sanding discs works well, but the key is to remove every trace of rust that could continue to spread. Begin with a coarser approach to knock down the loose material, then move to finer grits to reveal a smooth, even surface. A typical progression starts around coarse to mid-grit and finishes with a fine grit that leaves the metal almost glossy. Take care not to gouge or thin surrounding paint too aggressively; the objective is to expose clean metal and preserve as much of the original paint as possible.
With the surface smooth and bare, apply a high-quality anti-rust primer or sealer. The primer acts as a moisture barrier and provides an optimal surface for topcoats to adhere to. It should be applied in thin, even coats and allowed to dry thoroughly according to the manufacturer’s instructions. If the rust has left a slight depression, you can rebuild the area with a body filler designed for automotive use. Epoxy-based fillers offer good adhesion and durability. Once cured, sand the patched area with progressively finer grits until the surface is level with the surrounding metal. The aim is a seamless plane that accepts paint without showing the repair beneath.
Painting follows as the final step in the repair phase. Start with a base color that matches the truck’s original finish if you want an invisible repair, and then seal with a clear coat for extra protection against UV exposure and the elements. Apply several thin coats rather than a single heavy coat, allowing adequate drying time between passes. This layering approach minimizes runs and yields a more even, durable finish. The result is a roof that looks uniform and behaves as a shield against moisture, rather than a raw surface ready to rust anew.
When corrosion has progressed more deeply—when pits are pronounced or holes have formed—the repair method must adapt. The first action is to cut away the damaged section of the roof so you’re working with solid metal on all sides. A careful, straight cut ensures clean edges that will mate properly with replacement metal. Measure and cut a replacement panel that matches the original thickness and contour as closely as possible. The next step is to attach this patch securely, typically through welding. This stage requires appropriate safety gear and welding skills, because you’re joining metal that will be exposed to the same harsh conditions as the rest of the roof. After welding, the seam welds should be ground smooth to minimize any high spots that could trap water. Then follow the same priming and painting sequence as with minor rust: seal, then rebuild with a finish that blends with the existing surface.
Even the best repair deserves ongoing protection. Preventive care hinges on controlling moisture and limiting points where water can hide or pool. Regular inspections should become part of your routine. Look for seals around skylights, sunroofs, or any other penetrations, as well as drains and troughs that can collect debris. A clogged drain invites moisture to linger, which accelerates rust from behind the paint. It helps to keep the roof surface clean and dry, especially after storms or road salt exposure, which can accelerate corrosion if left to sit. A simple routine of washing and drying once a week, or more often in harsh climates, can make a huge difference. When you wash, pay attention to the roof edges, seams, and any pitted areas; these are common starting points for rust to reemerge if left untreated.
Beyond cleaning, consider a protective barrier that stands up to weather and salt. A professional undercoating or chassis protection treatment can form a durable shield that resists moisture ingress. While some products are marketed specifically for the undercarriage, applying a similar, nonabrasive coating to the roof can also help, provided it is compatible with the existing paint and does not trap moisture in crevices. Good drainage remains critical—ensure all roof drains and channels are clear so water can move away freely rather than pooling in hidden pockets where rust can take root.
Preventive maintenance also means addressing minor damage promptly. Small scratches or chips in the paint expose fresh metal to air and moisture. A quick touch-up with matching color and a protective topcoat can stop those chips from becoming rust spots. While a car cover might seem like a convenient shield, it can do more harm than good in windy conditions. Flapping fabric can abrade the finish and harbor sand and grit that sand away at paint. If a cover is part of your storage plan, choose a breathable, well-fitting option and use it in calm conditions or shade rather than in gusty environments.
A thoughtful preventive plan extends to the undercarriage and wheel wells as well. Road salts, mud, and road spray are relentless convectors of corrosion. An application of protective coating on these areas can dramatically slow rust, but the key is to choose materials that won’t crack or peel in the sun and heat cycles. Periodic reapplication keeps the barrier intact and effective. With the roof, the strategy is the same: keep moisture out, keep the surface smooth and intact, and maintain a finish that resists environmental stress.
To weave all these steps into a practical, sustainable routine, many owners find it helpful to frame maintenance as part of a larger plan for the vehicle’s longevity. A maintenance rhythm that includes budgeting for routine truck maintenance supports ongoing care and helps ensure preventive tasks aren’t sidelined by other priorities. For example, a simple reference point can be a plan like budgeting for routine truck maintenance, which guides you to allocate resources for tools, materials, and time for annual or semiannual roof checks. This approach keeps prevention front and center rather than letting rust creep back with the seasons. By tying the repair work to a broader maintenance mindset, you create a cycle of inspection, minor repairs, protective care, and renewed peace of mind.
For readers who want a wider perspective on rust repair and prevention, a comprehensive guide from an external automotive resources site provides additional context and techniques that can complement your hands-on work. External reference: https://www.carbibles.com/how-to-fix-rust-on-your-car
In practice, the steps you take on a single roof section can serve as a blueprint for the whole vehicle. Start with a clean, bare metal surface, proceed through careful rust removal, protect with primer, fill only when necessary, and finish with a controlled paint sequence. Then shift the focus to prevention: frequent cleaning, vigilant inspection for chips and scratches, thoughtful protection against the elements, and deliberate maintenance planning that includes budget considerations. The result isn’t merely a patched roof; it is a lasting shield that minimizes future rust and extends the life of the metal beneath the paint. As you follow this integrated approach, you will find that long-term rust control is less about heroic, one-off fixes and more about steady, informed care that respects the roof as a critical line of defense for the entire truck. And by linking this discipline to your broader maintenance goals, you reinforce a culture of care that protects the asset you rely on every day.
Rust on the Roof: A Pragmatic Guide to DIY Fixes and When to Call in a Pro

Rust on a truck roof is more than a cosmetic nuisance; it signals the body’s armor losing its shield against the elements. The roof endures the most exposure—sun, rain, road spray, and splash from leaks around seals and drains. When rust appears, the first task is to read the damage correctly. Not all rust is created equal. A small, surface blemish that hasn’t pierced the metal is very different from pitting that eats through the panel or a pattern of corrosion that weakens the roof’s integrity. The path you choose should flow from that assessment, so the repair remains durable and the truck’s structure remains sound. This is not merely about appearance; it’s about preventing leaks, preserving value, and avoiding costly rework later on. The long game is simple: stop the spread, restore protective coatings, and prevent water from finding its way under the roof liner or into the cabin. The best way to approach it is to move from careful inspection to deliberate action, and to know when a repair belongs in your own hands and when a pro’s tool set and experience are required.
For pockets of surface rust, the repair can be straightforward and forgiving. Start with a thorough clean that removes dirt, oil, and aging film. A degreaser or a soap-and-water wash followed by a rinse removes the grime that hides the rust and makes the next steps less messy. Drying is essential; moisture left on bare metal invites a fresh round of corrosion. Once the area is dry, the focus shifts to removing the rust itself. Fine-grit sandpaper, roughly in the 800 to 1200 grit range, is ideal for this task. Gently rub the rusted patch until all visible corrosion is gone and the metal shows a clean, smooth surface. The surrounding paint should be protected during this step, so take care not to gouge the nearby finish. For small imperfections that remain, you can use a polishing compound to bring the metal to a uniform sheen, which helps the primer bite evenly in the next stage. If you do discover a shallow depression where rust has eaten a bit deeper, a light application of body filler—a product designed to level small irregularities—can restore a smooth contour. After curing, a follow-up sanding with finer grits (say, 1200 to 1500) makes the surface ready for priming.
The primer is the keystone in stopping rust’s advance. Once the metal is bare, prime promptly with a rust-inhibiting product. The primer seals the metal and creates a surface finish that the paint can bond to effectively. Prompt priming reduces the chance of new oxidization creeping back under the finish and it helps ensure the repair remains weather-tight. After priming, inspect the area. If the surface still shows any unevenness or minor pits, a thin layer of filler and a subsequent gentle block-sand can bring the repaired patch flush with the surrounding roof. The goal is a seamless transition to paint, not a patch that traps water beneath. When the surface is smooth and primed, the color match comes into play. Apply the color in several thin layers, allowing each coat to dry before the next. This approach reduces runs and creates a more durable shield. A final clear coat adds depth and extra protection against UV exposure and moisture, helping the repair last longer against the sun’s bleaching and the elements’ assault.
If the rust has progressed beyond surface level and created true pits or small holes, that is a different scenario and it often requires more than the DIY toolbox can provide. The presence of through-holes means the structural skin of the roof is compromised. In such cases, the repair process typically starts with cutting out the damaged section. A clean, square edge is critical for a solid patch. The replacement panel, usually a sheet of metal of the same thickness as the original, is shaped to fit the cutout precisely. The next step—attaching the new panel—uses welding to fuse the new metal into place. MIG welding is common in auto body work; it requires clean, careful technique to ensure strong seams that won’t trap moisture. This step is where the average DIYer can overstep their expertise, given the heat involved and the need for proper PPE and structural accuracy. After the welds are finished, the seam is ground smooth, and the same cadence of primer, filler (if needed), paint, and clear coat applies. The objective remains the same: a uniform surface that seals out water and preserves the roof’s integrity.
Beyond the mechanics of the repair, there are important considerations that frame the decision to tackle rust DIY or to call in help. Regular inspection is the first line of defense. Rust loves neglected seals, clogged drains, and water pooling near rain gutters, sunroofs, or vents. A simple habit—crawl under the truck or climb to the roof with a soft brush and magnifying glass a couple of times a year—can catch trouble early. During these checks, pay attention to any signs of moisture trapped under the roof liner or damp patches along the headliner. Water infiltration isn’t just a cosmetic problem; it can indicate that a seal has failed or that a drain line is clogged, both of which require prompt attention to prevent mold or structural corrosion from spreading.
Another practical guardrail is coating and sealing. After a repair, whether you DIYed or had it done professionally, applying a protective coating or wax can help repel moisture and slow the onset of new rust. Clean the surface, allow it to dry completely, and apply a sealant designed for automotive exterior use. The coating isn’t a substitute for proper rust repair, but it can reduce the risk of superficial rust forming again near exposed edges, fasteners, or along panel joints. Cleaning remains essential. A clean roof is less likely to trap moisture and more likely to display early signs of trouble before it becomes a bigger issue.
From a decision-making standpoint, understanding when to reach out to a professional is as important as the repair technique itself. Minor surface rust that hasn’t penetrated deep into the metal is a candidate for DIY, provided you have the time, the proper tools, and a steady hand. The moment rust breaches the paint and begins to eat into the substrate, or if you notice pitting that erodes the surface, the line between DIY and professional work becomes clear. Structural weakening is a red flag. A roof panel with compromised integrity can bend, leak, or fail under load, especially if the truck endures vibrations, wind, or heavy rain. In those cases, attempting a makeshift fix risks spreading corrosion or creating new problems in the form of warped panels or misaligned seals. Water infiltration signs—dampness in the cabin, mold growth, or rust spreading under the roof lining—are the loudest call to action. These symptoms suggest broader issues that a professional is best equipped to diagnose and repair. The costs of inaction or delay in these scenarios can compound over time, turning a manageable fix into a more invasive and expensive job.
When a professional is warranted, what should you expect? Shops that specialize in auto body repairs bring together an arsenal of tools and techniques that go beyond a DIY kit. Industrial-grade grinders, sandblasters, rust converters, and panel replacement capabilities allow technicians to strip away corrosion thoroughly and restore a strong, clean base for finishing. The typical professional process begins with removing the rust-affected area or cutting out severely damaged sections. They prepare a replacement panel that matches the original geometry and thickness, then weld it into place with precision. After welding, seams are ground smooth, and the surface is treated with primer and fillers as needed. Finally, a color-matched paint job is applied, followed by a protective clear coat. The aim is not just cosmetic restoration but a durable shield against future moisture intrusion. In cases where the metal has corroded beyond repair, a roof panel or even sections of the roof structure may need to be replaced, a task that requires careful alignment and structural integrity checks that DIY methods cannot reliably achieve. For a recurring issue like water infiltration, a professional diagnosis can reveal root causes beyond the rust itself—such as failed trim, cracked sealant, or clogged drainage pathways—and guide a comprehensive fix.
The decision-making thread also includes considering long-term maintenance and costs. A practical point is to allocate funds for routine maintenance before rust reappears. This is where a proactive budget can prevent repeated, escalating repair cycles. The concept of maintenance budgeting becomes an investment in keeping the roof resilient. For those organizing their approach to maintenance—whether for a single truck or a small fleet—finding a stable routine is key. A useful resource on planning and budgeting for routine truck maintenance can be found at Budgeting for Routine Truck Maintenance, a hub that discusses allocating funds for inspections, protective coatings, and timely repairs. This reference can help you plan ahead so rust repair remains an exception rather than the norm.
In guiding readers through these choices, the overarching message is clear: treat minor rust as a solvable, DIY opportunity when feasible, but never underestimate the risk of allowing corrosion to spread. If you’re unsure of the depth of the damage, or if the repair will involve cutting and welding, err on the side of caution and seek professional assistance. The consequences of a rushed repair can be far more costly than a professional assessment. The road to a durable fix is paved with careful evaluation, proper preparation, and a finish that protects against moisture and UV exposure. Maintaining the roof’s integrity isn’t about chasing a flawless finish alone; it’s about preserving the structural soundness of the vehicle and safeguarding the cabin against leaks, mold, and the wear that comes with exposure to the elements. For readers who want a grounded sense of how maintenance fits into the broader lifecycle of their trucks, the linked resource offers a practical framework for budgeting and planning long-term upkeep. And for those who prefer a broader, safety-oriented perspective on vehicle maintenance, authoritative guidance from national safety resources emphasizes regular inspection and proper repair practices. See the official vehicle maintenance resource for further context and recommendations: https://www.nhtsa.gov/vehicle-maintenance.
Final thoughts
Successful maintenance of rust on truck roofs is crucial for extending the life of your fleet and minimizing operational disruptions. By understanding the signs of rust, employing proper repair techniques, and taking proactive preventive measures, fleet managers and truck owners can safeguard their investments. Whether addressing minor surface rust or conceptualizing strategies for severe pitting, being informed empowers operators to make decisions that benefit their vehicles and bottom line. If situations exceed your capabilities, remember, professional intervention can be a worthwhile investment.

