Truck repairs in DayZ require a systematic approach to ensure vehicle reliability. Understanding the intricacies involved in assessing damage, fixing critical components, and maintaining these vehicles is crucial for fleet managers, construction operators, and logistics providers. Each chapter in this guide will delve into specific facets of truck repair, ranging from effective damage assessment techniques to practical solutions for repairing engines, fuel systems, batteries, and wheels. By integrating these insights, professionals can enhance their operational efficiency and extend their vehicle lifecycles, ensuring that their fleets remain operational in challenging environments.
DayZ Truck Repair: Reading Damage, Rebuilding the Ride
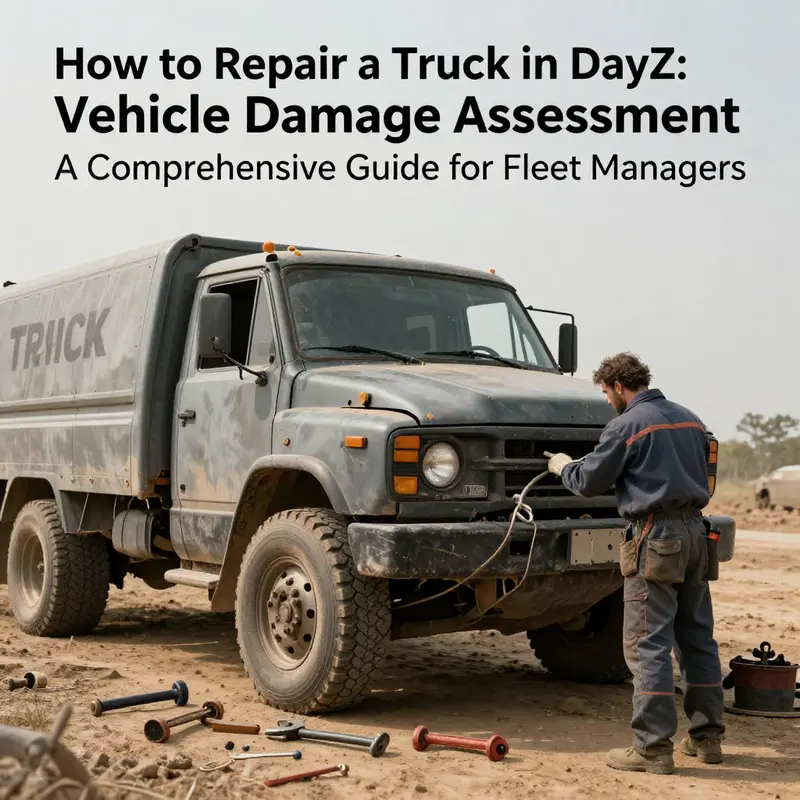
In a world where a ride can mean the difference between life and waiting out the night in a shadowed grove, repairing a truck in DayZ demands more than brute force or a lucky scavenger haul. It requires a calm, methodical mind that treats the act of repair as a sequence of interlocking systems, each with its own failure modes and rewards. A truck is not a single broken part but a network of components whose health depends on how you read the damage, how you prioritize fixes, and how you manage limited resources under pressure. The process begins with a careful damage assessment that blends visual inspection with an understanding of the vehicle’s inner workings. Approach a damaged truck slowly, and you’ll notice tells that aren’t always obvious. A misaligned frame might not move at all, while a wheel with a torn sidewall might still look intact from a distance. The moment you open the vehicle’s inventory, the world narrows to a handful of critical cues: engine health, radiator condition, fuel tank integrity, battery status, and wheel wear. Damaged parts are highlighted by the game’s feedback, which acts as a map for your next steps. This is where practical survival becomes a kind of medical triage for machines. You may see the engine marked as compromised or the radiator flagged for overheating risk. The first rule is to separate symptom from cause. A hot engine isn’t just a single fault; it can be the result of broken cooling, a damaged fuel line, or a compromised hood area that allows heat to build up. The same logic applies to the fuel system. A punctured tank or a damaged cap area will limit fuel supply, and attempting to run the engine without addressing the tank or line could waste time and fuel. The damage assessment is not a one-off check; it’s a diagnostic mindset that you’ll return to at every repair session, especially as you bring more parts back to life. The early hours in DayZ are often spent in a quiet ritual: you move around the truck, examine seams and panels, and listen for the subtle rattle that signals a loose connection. You learn to trust your eyes—the way a bent frame narrows the truck’s stance, or how a detached door panel leaves a gap that you can feel with a gloved hand. The frame is more than a straight line; it is the truck’s backbone. If the frame is bent, the engine may be starved of proper alignment, causing drag on the drivetrain and a cascade of mechanical errors that ripple through the transmission and wheels. The body panels, including the cover, are not cosmetic extras here; they influence aerodynamics, protection, and even heat dissipation. A dented or detached panel can alter airflow and create fresh stress points that aggravate other components. When you identify a detached or damaged truck cover, your mind should shift toward reattachment as a priority. The reattachment process requires attention to secure fasteners and proper alignment. Bolts and screws must find their mating holes, and you must check every attachment point for security. If a panel remains loose, even a short drive can cause vibration that worsens the damage and increases the risk of a catastrophic failure at speed. The assessment thus becomes a practical habit, not a one-time diagnostic. The toolkit you carry becomes an extension of your diagnostic sense. A basic toolkit in DayZ should include a wrench for engine and fittings, a sturdy hammer for panel alignment, a screwdriver for faster detachments or reattachments, and pliers for wire and hose management. You may discover that some repairs require a jack to realign the chassis or to lift a wheel for easier access to the hub or brake system. In some cases, frame straightening might require a second pair of hands to stabilize the vehicle while you apply pressure or torque, especially when dealing with a raised corner or a bent crossmember. This collaborative aspect echoes the reality of field maintenance: large repairs often demand shared effort, careful planning, and coordinated timing. You might be working with teammates to stabilize the truck on a jack while you realign other elements, and you’ll quickly sense how a shared task can turn a fragile repair into a reliable fixture. As you work through the engine and its cooling system, the critical components come into sharper focus. The engine itself is a central node in the repair network; if it fails to start or runs inconsistently, you’ll want to check the core elements again with a methodical eye. The radiator holds a similar imperative. A damaged radiator risks overheating and reduces the engine’s ability to perform under load. The fix here is to apply the proper piece to the correct location, using a wrench to secure it firmly in place. Once you’ve addressed the engine and radiator, you can turn your attention to the fuel system. A damaged fuel tank must be repaired before fuel can be added. A properly repaired tank, once sealed, allows you to refuel using a fuel source such as a can or jerry can, which you will right-click to select the target tank. The sequence matters: without a repaired tank, fuel can leak, and even the best engine can fail if it is starved of fuel. Recharging the battery is another hinge in the repair chain. The battery is the lifeblood that empowers starting the engine and supporting electrical systems. If the battery is dead, you can attempt a recharge with a battery charger or by connecting jump-start cables from another vehicle. A jumper pack from a nearby vehicle can also be a lifesaver in a pinch. In practice, that means you carry not only the tools but also the means to revive life in the vehicle’s electrical frame. This is where knowledge of the vehicle’s wiring and the status of the battery becomes essential. If you cannot start the engine after fixing the major mechanical points, you must re-check every step. It can be surprising how a small misstep—like an incorrectly reattached hose or a loose electrical connector—can stall the restart. The test is not a single moment but a process of verification. A successful start confirms that you’ve achieved more than a momentary fix; you’ve reestablished a reliable baseline for the vehicle’s core systems. The wheels represent the final operational frontier in this cycle. If a tire is flat or the rubber is damaged, you have two clear options: a patch with a tire repair kit or a spare tire. The repair kit, which includes a patch and sealant, is a practical choice for short-term resilience, while a spare wheel offers a robust long-term solution if available. Applying the repair kit to a damaged wheel requires precision and care; you must clean the mounting surface, align the patch correctly, and ensure that the wheel’s communication points with the hub are precise. Replacing a wheel is a straightforward but essential step when damage is beyond repair. The correct wheel, when installed, must be torqued to ensure balance and safe driving dynamics. As you assemble these components—the engine, radiator, fuel system, battery, and wheels—the truck becomes a cohesive machine again, but not one to be tested lightly. A short, careful test drive in a controlled area is the final assurance that you’ve restored not just the appearance but the vehicle’s reliability. If the truck stalls or struggles, you return to the earlier steps with a disciplined approach, re-checking each connection, verifying that all components align, and ensuring the fuel and electrical systems are clean and intact. The sense of accomplishment is proportionate to the complexity you’ve navigated. There is a quiet satisfaction in knowing that a vehicle you’ve repaired can endure the demands of the environment, the chill of night, and the unpredictability of scavenging routes. This satisfaction also comes with practical discipline. Always carry essential repair tools and spare parts; they can be the difference between continuing a mission and being stranded. The steps outlined here echo practical guidance that emphasizes a systematic approach to vehicle repair, a logic that helps you reason through failures rather than guessing your way to a solution. If you want to deepen your understanding and support the decisions you make in the field, you can explore a resource that condenses many of these ideas into a structured approach to maintenance and contingency planning. For a practical framework on budgeting and preparedness, consider a resource focused on building an emergency repair fund for truck owners Building Emergency Repair Fund for Truck Owners. The framework isn’t a substitute for hands-on practice, but it helps you think ahead about parts, tools, and timelines so that you don’t find yourself stranded because you underestimated the cost or the complexity of a repair. As you apply these principles to DayZ’s rugged terrain, you’ll discover that repair is less about magic and more about a disciplined sequence of checks, balances, and careful assembly. The vehicle becomes more than a means to travel; it becomes a platform for resilience, a project you steward rather than a problem you solve in a single moment. In practice, you’ll develop a rhythm: inspect, diagnose, repair, test, and refine. You’ll learn to prioritize engine and cooling first, secure the frame and body panels, ensure fuel flow and electrical power, and finally verify wheel integrity. The rhythm grows into you, and with it, your capacity to survive grows alongside the vehicle you rehabilitate. For those who crave a visual companion to this practice, a practical walkthrough can offer step-by-step demonstrations that mirror the decisions you make in-game. In DayZ, as in any field scenario, the best lessons gain from seeing the real-time consequences of each action—how the sound of a successful engine start confirms a good reconnect, or how a misaligned cover rattles until you fix its mounting. If you want a concrete reference that translates these ideas into a dynamic demonstration, you can check out a detailed day-to-day repair walkthrough video, which provides a time-stamped sequence of tool use and part handling. For a detailed visual walkthrough, consider this DayZ truck repair video: https://www.tiktok.com/@mrnadesgaming/video/1234567890
Reviving the Behemoth: A Measured, Hands-On Guide to Engine and Radiator Repairs in DayZ
The first time a durable, diesel-stained truck shudders to a halt in DayZ, the mind sprints to a single, stubborn question: can I coax it back to life without leaving the field of play or losing the will to survive? The truck is more than a machine here; it is a lifeline, a moving fortress that carries fuel, tools, and momentum through a landscape that rewards patience as surely as it tests it. Repairing a truck becomes a story about restoring systems that keep the engine singing, the radiator cooling, and the tires gripping. It is a choreography of inspection, diagnosis, and careful replacement, where each part you touch has a story behind it, and each decision carries weight in a world where resources are finite and time is scarce. This chapter follows that rhythm, weaving a practical, immersive approach to bringing a stubborn vehicle back from the edge by focusing on two core pillars: the engine and the radiator, while keeping the surrounding systems in mind so the revival does not falter at the first hiccup.
You begin with a patient inventory of the damage. In DayZ, the truck’s health is not a single number but a map of dozens of components. Open the hood, feel the metal under your palms, and scan the engine bay as if you are reading a weather report for a storm. The engine block, the radiator, the fuel tank, the battery, even the wheels—all of these are nodes in a single network, and the health of one can betray the health of another. The game highlights damaged parts, a subtle but crucial cue that helps you avoid chasing problems that do not exist. What you discover guides your choices, and in a world where a misstep can strand you in the middle of nowhere, the discipline of a methodical approach matters as much as the parts themselves.
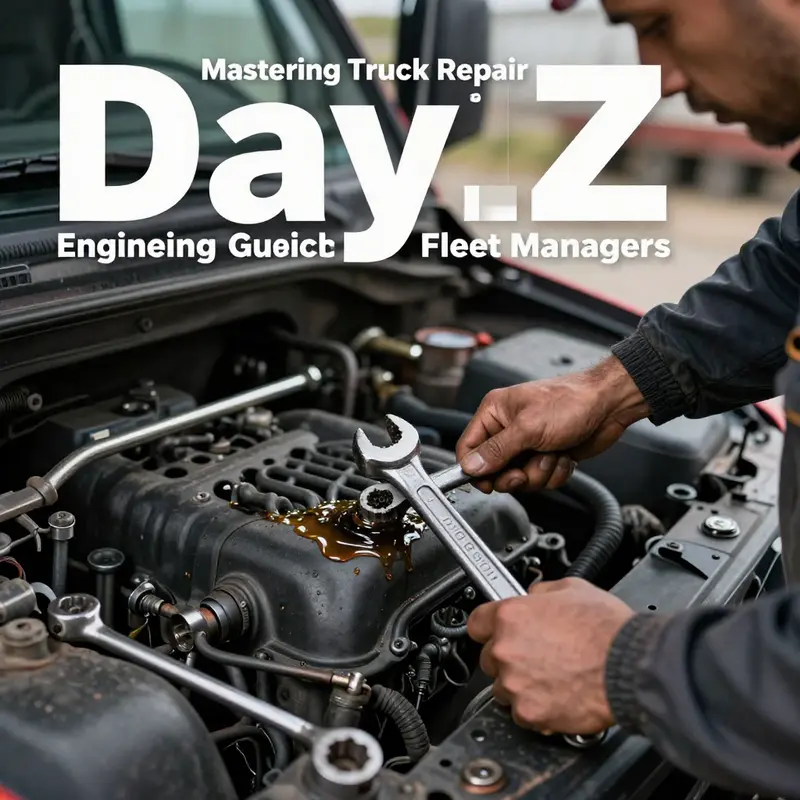
The engine is the heart, and in DayZ it often tells the most persistent stories. You will hear or feel it in different ways: overheating may hiss from the radiator or misfire in a way that shakes the chassis; a sputter may precede a stall, or a no-start condition might leave you cold and calculating at the front bumper. The tools you need for engine work are practical and austere: a repair kit to address internal defects, a socket wrench or similar tool to tighten bolts, spare engine parts for the inevitable leakage or wear, and bolts with sealants that keep the seams snug when the engine revs again. The repair process starts with diagnosis, not bravado. If the engine is overheating, the diagnosis points toward cooling paths and seals failing in places you can reach. If there is sputtering or a stubborn no-start, the diagnosis pushes you toward the fuel and ignition systems, then back to the engine block itself.
In practice, the engine repair unfolds like a careful conversation with the truck. Open the hood and gain access to the block. The repair kit is not a miracle; it is a bundle of parts designed to replace damaged internals, seals, or attachments. You may need to disassemble certain components to reach what is fractured or worn. The narrative here is not about rushing through steps but about following a sequence that preserves alignment and reduces the chances of leaks or loose parts once the engine is brought back together. You replace damaged parts according to the kit’s instructions, tighten every fastener with a socket wrench, and ensure that nothing binds or misaligns. The moment of truth arrives with a test: you crank and listen for a return to a stable idle, and you gauge the engine’s response to throttle input. If the engine coughs, wheezes, or stalls, you pause to retrace your steps: check the fit of hoses, the securement of belts, and the routing of ignition wires. Sometimes the smallest misconnection will cascade into bigger trouble, so the ritual of rechecking becomes as important as the repair itself.
Yet the engine does not live in a vacuum. The radiator is the other half of the cooling conversation, and in DayZ its health can tip the balance between survival and a searing engine failure. Radiator repairs are tricky because the radiator sits at the juncture of heat and coolant flow. In vanilla DayZ, repairing a radiator while it remains installed in the vehicle is not always possible; many players end up replacing the radiator entirely when leaks or corrosion render it ineffective. This constraint shifts your strategy toward prevention, careful handling, and, when possible, patching options offered by mods that expand what you can do with a damaged cooling system. The presence of a radiator in good order is not only about a cool engine; it is about consistent performance under load, about the ability to climb hills without watching the temperature needle spike. If your radiator shows signs of leaks or damage, you face two paths: a replacement that can be a practical fix in the field, or, when you have access to a mod that enables it, the option to patch and repair the radiator on-site. The reality in DayZ is that how you approach the radiator depends on whether you are playing with alterations or in the vanilla experience, and you should be prepared to adapt your plan accordingly.
Pushing beyond the engine and radiator, you also attend to the fuel system and the electrical heart that wakes the machine. A damaged fuel tank must be repaired before you attempt to refill it. Here the wrench reappears as a faithful companion, used to fix the tank’s structural integrity so that fuel does not leak when you pour it in or drain it out. After the tank is sound, you refill with gasoline using a fuel can or jerry can, a simple action with outsized consequences. The battery, too, deserves deliberate care. If the battery is dead, a battery charger helps coax life into its cells, or you can connect a jump starter cable to a nearby vehicle. The world between vehicles becomes a network of lifelines when resources are short, and the jump-start moment is a small ceremony of transfer that can keep your expedition moving rather than forcing you to improvise a new route.
Wheels demand their own brand of respect. A vehicle cannot traverse the map without proper contact with the world, and a wheel that is flat or damaged can undo all your other work in a single mile. A tire repair kit, which includes patches and sealant, can salvage a tire that has lost its air or developed a puncture during a rough ride through debris and wreckage. In the event of severe damage, you will need a spare wheel to replace the compromised one. The careful craftsman knows when to patch and when to replace, preserving momentum and ensuring you do not end up stranded in a hostile environment because a wheel bit the dust at a critical moment.
And so you assemble your toolkit, a compact but capable set designed for a day’s labor in the field. The essentials include a wrench, pliers, screwdrivers, and a hammer. The kit does not guarantee success, but it removes the mystery from the process and keeps your hands steady as you work. Some repairs in DayZ require specific tools found in the world, and the habit of carrying a basic toolbox can save you long treks to distant towns where the right tool resides. The process becomes a conversation with the truck, a careful dialogue about fit and function rather than a brute push to sweep away the problem with force.
After the repairs, the test is the moment of truth. You attempt to start the engine, listening for a reliable cadence rather than a faltering cough. The response of the vehicle to the first turn of the key, the first press of the throttle, paints a final verdict. If the engine purrs and the radiator holds steady temperature under light load, you breathe a little easier. If the engine refuses to start or temperature climbs, you re-enter the loop of diagnosis. The path to success in these moments is humility and patience: you retrace, verify your connections, confirm that the cooling loop is intact, and ensure that the fuel and ignition circuits are delivering power in the correct order. Each pass through the checks is a small victory, a reminder that salvage is not a one-step miracle but a careful recurrence of the same disciplined practice.
This is a chapter about the quiet, stubborn progress of repair, not about dramatic heroics or quick fixes. It is about learning the language of a truck that has weathered more days than you can count and choosing to preserve its usefulness rather than discard it at the first sign of trouble. In that sense, the repair work becomes part of a broader survival philosophy: know the systems, respect the limits of your tools, and understand that the vehicle is a partner as much as a resource. The day you decide to embark on a long journey with a patched radiator and a tuned engine is the day you commit to treating the truck with the care that keeps you moving through the map’s uncertainties.
If this path feels like a careful ritual rather than a rough-and-tumble fix, that is by design. The aim is not to pretend that DayZ’s vehicles cannot fail or to glorify a superficial fix. It is to recognize that a well-maintained truck, even in a harsh world, becomes a reliable ally. The engine and radiator discipline is the backbone of that reliability, with everyone else in the system following its lead. In practice, a steady approach to diagnosis, part replacement, and testing protects you from cascading failures and makes it possible to recover from near-disasters with your dignity intact and your resource pool preserved. The experience rewards those who invest in understanding a vehicle’s inner life rather than those who treat it as a disposable tool that can be swapped at every sign of trouble.
For readers who want to deepen their field knowledge while exploring the broader craft of vehicle care, consider exploring practical maintenance perspectives through a generalist lens. You may find value in reading broader discussions about long-term truck readiness and routine upkeep; such sources can complement the DayZ-specific approach described here and offer transferable techniques for keeping machines reliable under pressure. A practical note on community knowledge: the DayZ community often shares modular expansions that influence how you manage repairs, especially around cooling systems. If you are curious about how mods might change the radiator repair workflow, you can explore dedicated community discussions and resources that illuminate how to patch cooling components when base-game mechanics fall short. As you widen your toolbox of possibilities, you will discover new ways to keep a DayZ truck alive longer and with fewer interruptions to your survival plan.
Internal link for ongoing practical exploration: for a broader perspective on field maintenance strategies that translate well to DayZ, see the Master Truck Repair blog. It offers general guidance on tool selection, routine checks, and the discipline of systematic repair, which can inform your in-game decisions without turning the experience into a real-world maintenance tutorial. Master Truck Repair blog
As you close the hood and listen to the engine settle back into a steady rhythm, you understand why this work matters. The truck, scarred by the map and weathered by time, is still capable of carrying you through a landscape where every mile can matter. Engine and radiator care is not merely about preventing a breakdown; it is about preserving a narrative of resilience, about choosing to repair what you own rather than abandoning it when trouble arrives. The experience teaches patience, precision, and respect for the machine that powers your survival. If you remain curious about how others approach cooling and combustion in similar survival contexts, the community has explored a wide range of methods and experiences that can enrich your own practice, even as you adapt them to DayZ’s particular rules and realities. The dialogue between gameplay mechanics and practical repair wisdom continues to evolve, and that evolution is what keeps the road ahead open and navigable, even when the world around you grows harsher with each passing day.
External resource: for players interested in a more realistic approach to radiator repairs and on-field patching options through mods, see the Radiator Repair mod page. Radiator Repair mod
Fuel Tank Repair in DayZ: Patching the Breach, Sealing the Future, and Getting Your Truck Back on the Road
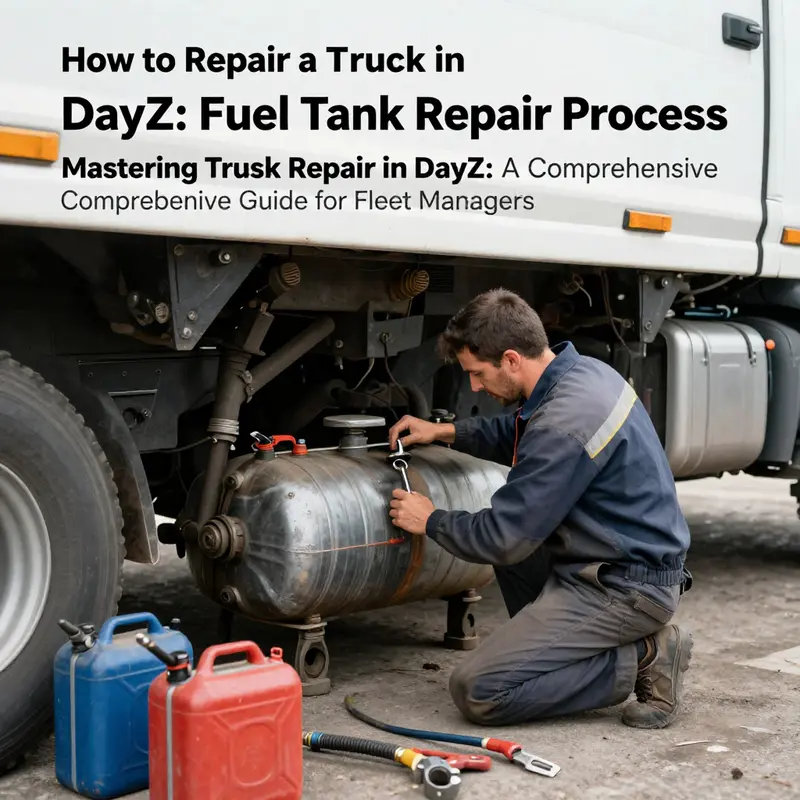
When you roll a truck through the desolate roads of DayZ, every drop of fuel carries weight far beyond its gauge value. Fuel is a lifeline that anchors you to long treks, risky trades, and the stubborn push to survive another day. The fuel tank, though simple in the larger system, sits at the center of a repair effort. If the tank leaks or fuel escapes through a gash, the whole operation can stall before you hear the engine cough. Repair here is not a single task but a sequence that moves through diagnosis, access, patch work, sealing and testing. The fuel tank repair path in DayZ rewards a methodical approach rather than haste.
Diagnosis and access. Start by shutting down the engine and securing the work area. Access to the tank may require removing panels or body parts to reveal the tank proper. This moment is where many repairs fail if you lack context. You cannot simply cover a visible hole; you must address the hole itself. The viable path is to locate the breach, gather the right materials, and apply a patch that seals the hole under fuel pressure and movement.
Materials and patch design. Gather metal sheets and a patch that is larger than the hole, a hammer, and welding tools or equivalents. Epoxy glue may tempt but it is not enough for a real leak. A patch that combines metal with a proper weld is stronger. The patch should conform to the tank curvature and have edges filed smooth to avoid catching on nearby parts.
The welding phase and sealing. Weld a continuous bead around the patch to seal the edges. If welding tools are not available, improvise with your in game crafting options but aim for a tight seal that survives vibration and fuel pressure.
After patch and weld, seal the repair. Check for gaps and micro cracks, apply a sealant appropriate to your tools, and reassemble panels carefully.
Testing and refueling. Perform a cautious test with a small amount of fuel to observe leaks. Watch for a hiss or dampness. If leakage continues, repeat patch and seal steps and test again. Once the patch holds, refuel in a safe space, monitoring gauge and listening for anomalies.
Impact on other systems and best practices. A fuel tank repair can affect engine cooling, fuel lines, and electrical components. After repair, run a brief diagnostic of the engine, listen for misfires, and verify that fuel delivery and gauge response are normal. If other components are damaged, address them in the same patient manner.
Mindset and preparation. Expect that epoxy alone is rarely enough. A well made patch with metal and weld is sturdier. Access with care, test repeatedly, and carry spare fuel and patch materials for contingencies. The world rewards preparation and calm execution.
As a broader context, link to resources. For broader car repair context in DayZ one can consult general guides and community tutorials. See the Master Truck Repair blog and other community guides for additional context and guidance. The linked resources provide broader perspectives for real world and in game repair logic. https://mastertruckrepairllc.com/blog/
Conclusion. In DayZ the fuel tank is stubborn but repairable with patience, precision, and the right tools. The patch, the seal, and the test together restore the lifeline to the truck and keep you moving toward your next horizon. You may also explore external references like the Master Truck Repair blog for deeper context and related topics. https://mastertruckrepairllc.com/blog/
Restoring the Heartbeat: Battery Revival Techniques for DayZ Trucks
When you climb into a DayZ truck and the ignition clicks once, twice, and then sighs back with silence, you feel the stubborn reality of survival in a broken machine. The battery, that quiet powerhouse, has failed you. This chapter isn’t a single trick or a hurried fix; it’s a careful, almost patient restoration of a vehicle’s heartbeat. The repair discipline in DayZ rewards a calm, connected approach where every component exists in a web of cause and effect. A dead battery is not an isolated misfortune but a symptom of how the engine, the alternator, the fuel system, and even the electric circuits interact under stress. And while the idea of reviving a crusted, age-dimmed battery might seem technical, it becomes a fluid, almost ritual process when you understand the sequence and respect the practical limitations of your world. You begin not with a spark, but with a plan, and the plan rests on three steady ideas: verify the battery’s status, provide a clean, reliable charge, and test the result while observing other systems that can betray a tired electrical heart.
First, you verify and observe. In DayZ, the vehicle’s inventory is where the truth sits. Open the truck’s inventory, and you look for battery indicators and terminal conditions. A healthy battery gleams with a steady level of charge; a dead one appears inert, and corrosion along the terminals can glare like a pale, white crust at the ends of metal prongs. You check for loosened connections, grime that interrupts contact, and any sign that the battery has been drained through a parasitic electrical draw. If you find corrosion, you remove the crust with the appropriate tool, wipe away residue, and reattach with snug, clean connections. This is not merely maintenance; it is restoring faith in the machine’s willingness to work with you again. The moment you touch the terminals and feel the resistance drop, you sense the vehicle beginning to trust you again.
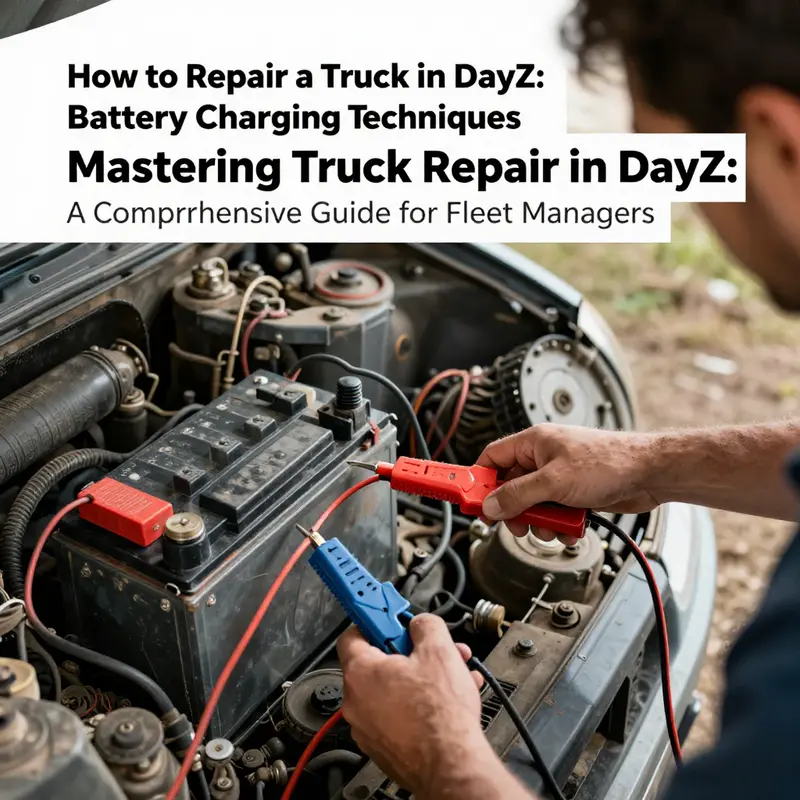
The next phase is the physics of charging. In DayZ, reviving a dead battery typically requires a functional generator, a cable reel to bridge electrical power, and a battery charger—or a direct line from a generator through the cable reel to the battery terminals. The generator needs fuel, which means you carry a supply of gas or diesel and you guard it as carefully as any other precious resource. Place the generator on solid ground away from flammable debris or explosive hazards, just as you would place a camp stove on stable ground before you begin boiling water. Turn the generator on and bring it up to a steady operating rhythm. A generator that stutters or coughs is telling you something about its own state: it wants a fuel top-up, or perhaps it is signaling that it cannot sustain a high output for the duration of a long charge.
The cable reel is the lifeline in this moment. You attach one end to the generator’s outlet, then carefully connect the other end to the truck’s battery terminals. The alignment matters: positive to positive and negative to negative, just as you would with any vehicle’s electrical circuit. A misstep here can cause a momentary misfire or, in a worst case, damage that you’ll pay for later in troubleshooting. Once the connections are secure, you switch the generator to a real, continuous load. The power runs through the cable reel, into the battery, and you begin to watch the process in your mind as well as in the instrument panel of the truck. In DayZ, battery charging is not instantaneous; the time it takes mirrors real-world pacing. The game’s physics reflect that you should expect a window—typically in the ballpark of five to ten minutes of steady charging—to acquire a meaningful increase in voltage sufficient to attempt a start. During this interval, you stay alert for any smells of overheating or any unusual hums from the engine bay. A careful observer of the repair: you listen as much as you watch, because sound can reveal overheating or misfiring left unseen by the eye.
As charging proceeds, you prepare for the moment of ignition with a blend of patience and practical checks. If the battery was truly dead, the moment you turn the key might still require a little coaxing. In many cases, a dead or recently drained battery can benefit from a spark plug check—if the plug has fouled or aged, the engine may not catch even after voltage returns to the battery. You don’t force it; you confirm that the spark plug is in a good condition or, if necessary, replace it with a spare you have stored. A clean plug that sparks well can be the final nudge that makes a stubborn engine come to life. If, after the charge, the truck still refuses to start, you retrace your steps. You revisit the battery terminals for tightness and contact quality, you ensure the cable reel remains fully engaged, and you assess whether the generator maintained a stable output throughout the procedure. The restart procedure is a test of the entire chain: battery, cables, generator, fuel, and engine readiness. This process—methodical, patient, and aware—becomes a ritual of restoring not just one component but the confidence that a vehicle can carry you forward when the world is unforgiving.
A practical note: in DayZ, vehicles often charge their batteries while they are running, a simplification that mimics the way real life works. If your truck is already operational, you may not need to hog power with a separate generator just to keep the battery topped up. Driving the vehicle gently over a stretch can help the alternator recharge the battery as you go, an important detail that encourages you to consider the timing of a fix in the context of your broader journey. Yet there are plenty of situations where you encounter a truly dormant battery, and then the generator-and-cable-reel method becomes your direct and reliable route back to life. In those moments, your sense of the vehicle’s history matters just as much as its current state. A battery that dies under the weight of repeated cold starts often tells a longer story about the wear and tear the truck has borne, the quality of its fuel, and the cleanliness of its electrical contacts. You learn to listen to the machine, and to time your intervention so that you can prevent the cycle of dead batteries from returning.
The moment of ignition, when it finally succeeds after a measured charge, is not the end but a bridge back to a smoother operating life. You do not simply let the engine idle on a fresh charge; you watch the temperature gauge, the lubrication flow, and the radiator’s response. If the radiator shows instability—heat rising beyond a safe threshold—your next steps might involve addressing cooling as part of your overall repair strategy. The engine’s comfort about the world around it depends on the cooling system, the fuel system, and the electrical system all playing their parts in concert. And as you listen to the engine’s cadence finally settling into a steady rhythm, you remind yourself that the battery was the hinge holding the entire repair together. This is why battery revival is a central field in DayZ vehicle care: it is the moment at which a plan, a tool kit, and a field of fragile survival gear converge into a single, practical victory.
To weave the battery revival into a broader, durable practice, consider the long arc of maintenance that keeps these machines dependable. The battery’s health and the engine’s readiness depend on attention to a handful of interconnected systems. When you repair the battery, you are also implicitly inspecting the condition of the engine’s electrical start circuit, the alternator’s charge output, and the integrity of the fuel supply that feeds the engine after a restart. A dead battery can mask more significant issues if you rush to a quick restart; giving the battery time to recover through proper charging provides you with a moment to examine these larger questions without losing the vehicle to fail states that could escalate into a breakdown in the middle of nowhere. The approach matters: slow, deliberate, and tied to a complete picture of vehicle health. In the longer arc, the routine maintenance mindset—carried forward through practice and preparedness—ensures that the truck’s heartbeat remains strong through the more demanding stretches of your DayZ campaign. For those who want to embed this practice into their ongoing routine, a practical touchstone is to plan ahead for fuel, spare parts, and the electrical accessories that keep the battery in good condition, as part of a broader, disciplined maintenance habit. See Budgeting for Routine Truck Maintenance for a strategic perspective on keeping a spare battery or charger in stock and ready for action, so you are never caught in a critical moment without a clear path back to life.
In the end, battery revival in DayZ is not merely a technical feat; it is a measure of your readiness to convert uncertainty into progress. You honor the vehicle’s history by honoring the steps that bring it back to life. You preserve your own safety by avoiding rushed, improvisational fixes that might crumble under pressure. You cultivate patience because the game’s realism forgives neither haste nor guesswork. And you cultivate confidence because the more you practice this sequence, the less the truck becomes a puzzle with a single fatal flaw and more a partner that understands your movements and responds with reliability when given a chance. After a successful restart, you take a moment to test the truck beyond a mere roar of the engine. You listen for the telltale signs of a healthy system: a stable temperature, a steady oil pressure, clean intake air, and consistent voltage across the battery terminals. You watch for any signs of a lingering drain that could herald a future warning. This is how the heart and mind of a survivor work in tandem, turning a moment of electrical trouble into a continued path forward, mile after mile, road after road, in a world that rarely gives you a second chance.
External reference and further context can be found at an external source that offers a concise visual overview of charging a car battery using a generator in DayZ. For visual guidance, you can review this external tutorial: https://www.tiktok.com/@dayz_gaming/video/7234567890123456789
Wheel by Wheel: A Practical, Survival-Ready Guide to DayZ Truck Repair
Wheel by wheel, this chapter lays out a practical, survival-minded approach to tire repair in DayZ. The goal is simple: keep you moving, reduce risk, and extend your journey between safe havens. Start with the Tool Box, your portable workshop. Without it, wheel work becomes guesswork. Tool boxes can be found in industrial zones, abandoned buildings, or inside vehicles. With the toolbox, your kit becomes a compact, ready-to-use repair station.
There are two main repair routes. A quick patch with a Tire Repair Kit can seal small punctures and leaks, followed by inflation to get you back on the road. If you have a spare wheel, a full wheel replacement provides a longer-term fix. Use the Tool Box to remove the damaged wheel, fit the spare, and tighten the lug nuts in a diagonal sequence. Some game versions offer a torque wrench to help reach proper tightness. Remember that wheel repairs sit within a larger system: engine, radiator, fuel tank, and battery all impact your ability to drive safely.
After any wheel work, test the vehicle: start the engine, listen for smooth operation, and recheck seals and connections. Maintain proper tire pressure, avoid long drives on repaired tires, and carry extra patches or spare wheels to stay in motion when terrain and danger demand resilience. Finally, keep in mind that wheel maintenance is a node in a larger survival strategy: it supports propulsion, cargo protection, and your ability to reach the next objective.
Final thoughts
Repairing a truck in DayZ is a multifaceted task that requires careful attention to detail and thoroughness in each repair step. From assessing vehicle damage to ensuring all systems are functional, every aspect plays a crucial role in maintaining fleet performance. By employing these strategies, fleet managers and operators can preserve their vehicles’ longevity and reliability, ultimately enhancing their operational readiness in the game. Continuously honing these skills can provide a competitive advantage in challenging scenarios, ensuring vehicles remain roadworthy and effective.

