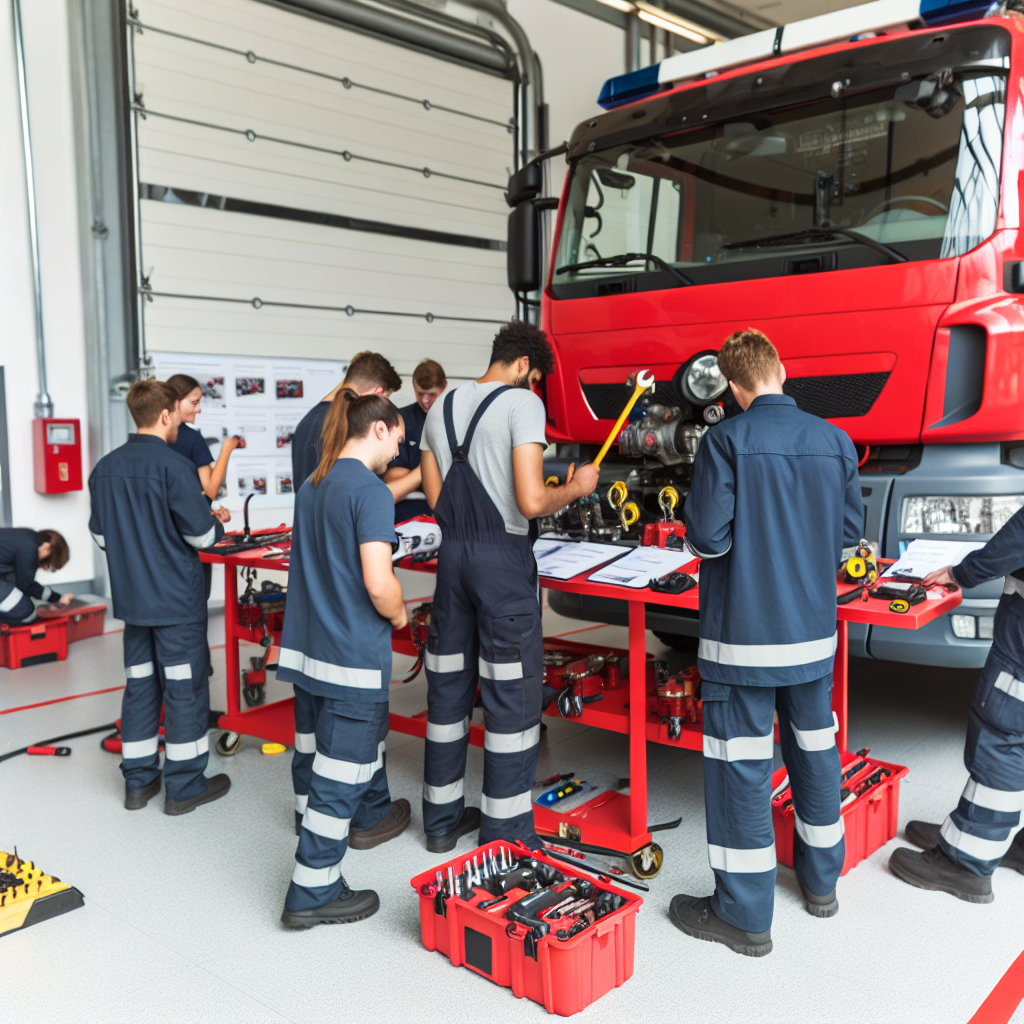
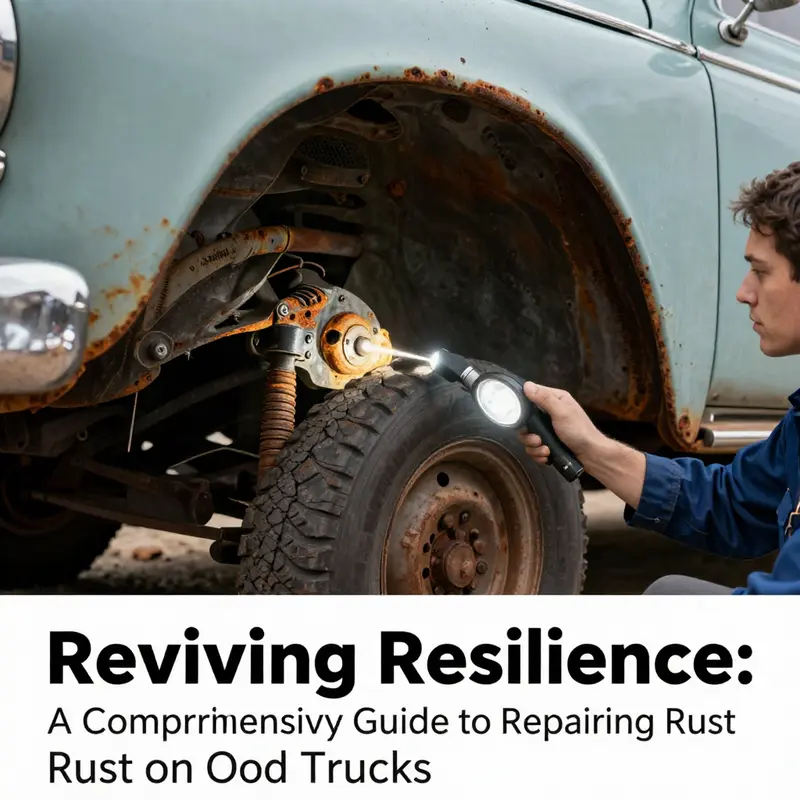
Rust damage on old trucks can severely compromise structural integrity and safety, posing significant challenges for fleet managers and trucking company owners. Understanding how to effectively identify, prepare, and repair rust is crucial for maintaining a reliable fleet. In the following chapters, we will provide a systematic approach that encompasses assessing rust damage, preparing the repair area, treating exposed metal, and the nuances of panel repair or replacement. By following these guidelines, you can ensure your vehicles not only retain their appearance but also their value and safety on the road.
Reading the Rust: A Thorough Assessment Before You Repair an Old Truck
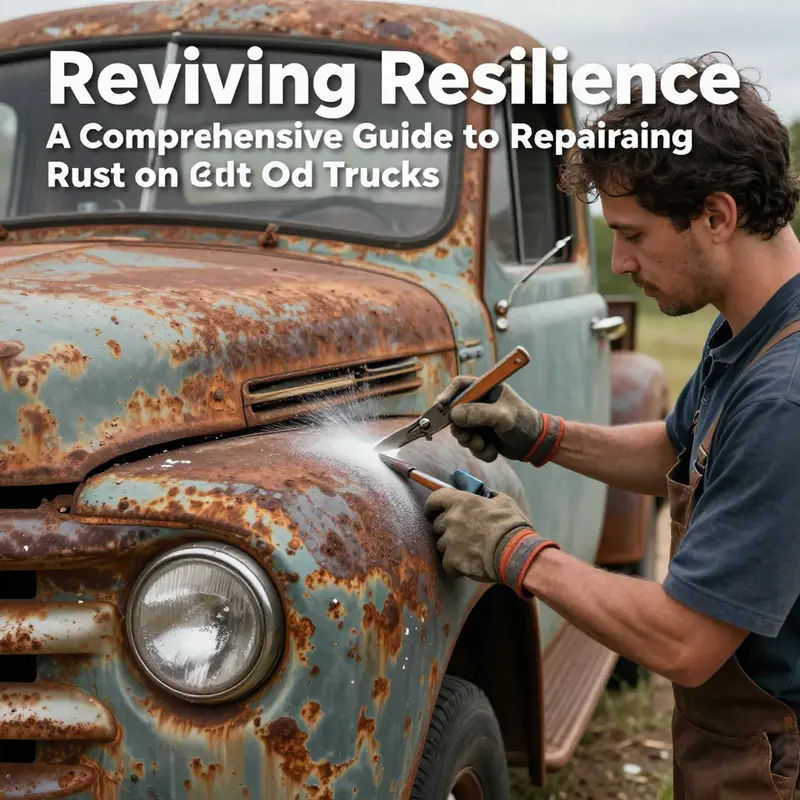
Rust is not just a cosmetic problem; it is a ledger of time, moisture, and stress written into the metal of an old truck. The assessment phase is where you learn the story your particular vehicle tells about its past use and future reliability. A careful, methodical inspection can reveal whether the rust remains a surface nuisance or has already gnawed into frames, floors, and mounting points. The goal is not to panic, but to understand—so you can decide whether a repair is sensible, and how extensive it needs to be to return the truck to safe service.\n\nStart with a broad, calm survey that moves along the predictable highways of corrosion while keeping a keen eye on the hidden corners where rust tends to hide. The frame and undercarriage sit at the top of the risk list. A truck’s frame is its backbone, and iron that has started to pit or flake can silently erode its strength. In many cases, you won’t see the full extent without removing grime or peeking into crevices. A flashlight and a small mirror become your trusted allies, helping you peek behind crossmembers, inside frame rails, and around welds where silt, road grime, and salt tend to accumulate. Where the light fails, the evidence often speaks louder: a dull surface that sounds hollow when tapped, or pits that look like tiny craters in a once-solid highway of steel. This is where patience matters most, because the line between a surface issue and a structural threat is sometimes a thin one.\n\nBeyond the frame, the wheel wells and fenders form a continuous battleground against moisture and debris. These zones collect spray, spray that carries salt in winter and salt air near the coast, and the patchwork of road debris that lodges in seams. The inner fender wells, the edges where the wheel arch meets the cab, and the areas behind the wheels all deserve careful scrutiny. A soft edge here or a rough edge there may indicate past repairs that were never properly protected, inviting future corrosion. The habit of pausing to feel for roughness or to glance for color change can save a lot of trouble later because rust tends to migrate along seams, rather than marching in a straight line across open metal.\n\nInside the cab, the door sills and floorboards carry another narrative, one that often hints at water intrusion and years of dampness. Lift the floor mats and listen for a squeak or feel for a soft spot when you press with your foot. Bubbling paint and discoloration are not merely cosmetic cues; they can signal substructure issues that compromise rigidity and comfort. If you encounter soft patches, trace them to their source—rain channels, drain holes, or compromised undercoating—and map how far the damage has spread. Even if the exterior looks sound, rust sometimes travels from the inside out, driven by leaks that water repeatedly finds and the way moisture sits in corners where air flow is slow. The assessment must extend to areas where you cannot easily see, because the safest repair choices depend on understanding the full extent of penetration.\n\nThe bumpers and their frame mounts deserve equal concern. Corrosion here can be deceptive because the mounting hardware itself may look benign while the structural mounts deteriorate. Examine brackets for cracks, scale, or boggy, softened edges. A mounting point that looks ordinary can be a ticking time bomb if the metal around it has become hollow or pitted. And for trucks with beds that travel over rough roads, the bed rails and the bed itself warrant a careful check. Water and cargo dampness converge along the bed rails—especially at drain holes and joints—so rust here often appears as small rust-throughs concealed beneath the liner or paint where the eye easily glosses over dimples or scrapes.\n\nSuspension components deserve a close look as well. Control arms, brackets, and other suspension hardware can rust from the inside if seals have failed or if exposure has been prolonged. Look for rust on bolts and around welded joints, not just on flat surfaces. Internal rust can compromise the strength of components that bear suspension loads, and the consequences aren’t always visible immediately. A good test is tactile—the feel of a bolt head, the firmness of a joint, the sound as you move parts through their range of travel. If you sense looseness, stiffness, or unusual sounds, document it as part of the rust assessment rather than dismissing it as normal wear.\n\nAs you undertake this survey, a practical toolkit becomes invaluable. A bright flashlight is essential, but so is a small mirror to investigate tight spots. A borescope can reveal the interior of frame rails or behind bulkheads without removing panels, and a simple tapping test helps distinguish solid metal from weakened structures. A magnetic thickness gauge can provide a rough sense of whether metal is thinning under paint, even if you cannot measure exact thickness in every corner. This combination of tools helps you create a mental map of where rust is superficial and where it has already become a hazard requiring remediation or replacement.\n\nDocumentation matters as much as observation. Keep a notebook or a digital record that notes where you found rust, its apparent type (surface, pitting, or structural), and any signs of moisture or prior repairs. Take clear photos from multiple angles, and if possible, capture the progression of rust in a few weeks to gauge whether it is spreading. This isn’t about alarmist labeling; it is about data that informs a repair plan. A careful rust map makes it easier to decide whether repair should be limited to surface treatment, whether patches or reinforcements are enough, or whether the vehicle should be retired from heavy-duty work and treated as a parts donor or a restoration candidate instead.\n\nIn more severe cases, where the frame rails or crossmembers show deep pitting, or where floor panels have developed soft spots that indicate material loss, a professional evaluation becomes prudent. An experienced mechanic or body shop can perform ultrasonic thickness measurements and use avenues such as X-ray or advanced imaging in some shops to quantify metal loss. They can determine whether a hole is a repairable spot or a sign that a larger section must be cut and replaced. The responsible course, especially on a truck that will bear load or carry passengers, is to acknowledge when the rust has crossed a line beyond DIY fixes. Structural repairs require precision welding, appropriate filler, and a thorough post-repair inspection to verify safety, alignment, and load-bearing integrity.\n\nEvery assessment should end with a clear sense of next steps. If the rust is confined to non-structural areas, you may be able to proceed with minimal risk and a straightforward repair plan. If you uncover significant metal loss in critical zones, the repair strategy changes from cosmetic to structural. In such cases, you may choose to replace panels, reinforce with welded plates, or even replace entire sections of the frame. The decision hinges on the severity of the corrosion, the intended use of the truck, and budget realities. The aim is a restoration that returns the vehicle to reliable service while keeping safety at the forefront. Throughout, maintain a bias toward conservative judgment; when in doubt, seek a professional opinion. Safety should never be the area where you cut corners.\n\nAs you wrap the assessment, you’ll likely consolidate a plan that blends immediate repairs with long-term prevention. Even if the rust discovered is modest, outlining a maintenance cadence helps it stay in check. Regular washing after salted roads, periodic inspections of seams and undercarriage, and a proactive undercoating can dramatically extend the life of a truck that has survived more seasons than its owner. The assessment is not a one-off task but the first step in a proactive approach to preserving value and safety. If you want a broader view on what lies beyond the inspection, you can explore the Master Truck Repair blog for related guidance on maintenance planning and how to structure a repair budget that covers both immediate needs and future protections.\n\nIn summary, assessing rust on an old truck is a careful diagnostic process that respects both the history of the vehicle and the physics of metal. It requires patient inspection, a few reliable tools, and a disciplined record of findings. By focusing where rust is most likely to appear and by distinguishing surface threats from structural ones, you set the stage for repairs that are not just cosmetic but genuinely sound. The insights you gain during this phase influence every subsequent choice—from how you patch or replace metal to how you protect it against a repeat performance of the very problem you’ve just diagnosed. An honest, thorough assessment is the bridge between a rusty past and a safer, longer-lived future for your old truck.\n\nExternal resource: For a broader diagnostic guide drawn from practical experience, see the CarCare.org article on assessing rust damage in trucks at https://www.carcare.org/assess-rust-damage-trucks
Laying the Groundwork: Thorough Area Preparation for Rust Repair on an Old Truck
Rust repair on an old truck doesn’t begin with the hammer and welder. It begins with the space you choose, the light you cast on every seam, and a plan that treats rust like the disease it is rather than a cosmetic nuisance. A clean, dry, well-organized workspace acts as the first line of defense against missteps. You need room to move, an elevated stance so you can see the underside, and a containment method for dust and debris. This preparation is not a chore but the foundation of a durable repair that won’t peel or rust through again within a season. The moment you set up a good working area, you are already halfway to a restoration that stands up to grit, salt, and road grime. Take a breath, inventory your rust with patience, and you’ll find the path forward begins here, in the untouched corners where old trucks hide their worst problems.
The first step is a clear, honest assessment of how far the rust has gone. Distinguishing surface rust from deeper trouble is essential because it dictates the whole repair approach. Superficial surface rust only eats away at the paint, leaving the metal beneath largely intact and ready for treatment with a rust inhibitor and refinishing products. Pitting rust, on the other hand, creates small holes or indentations that will require careful filling or patching to restore the metal’s surface. Structural rust is the most serious category, penetrating deeply enough to threaten frame rails, floor pans, or critical support components. When you see thinning metal, flaking areas, or sections soft to the touch, you’re likely dealing with something more than a surface problem. It’s worth taking the time to probe with a flashlight in hard-to-see areas—wheel wells, undercarriage nooks, door sills, and seam joints are common hiding places for corrosion. If the metal has thinned to less than its original thickness, or if you can press through a weak spot with a finger, that’s a red flag indicating a repair that may require cutting out damaged sections and welding in new metal. This stage isn’t about finding excuses to quit; it’s about mapping a realistic plan so the work you do actually lasts. In practice, you’ll often find a mix of rust types across the same panel, which means you may need to treat some areas with inhibitors, while other zones demand patching or replacement. The goal is to end up with a surface that is clean, stable, and ready to accept primer and paint, free from rusty pockets that could undermine adhesion later.
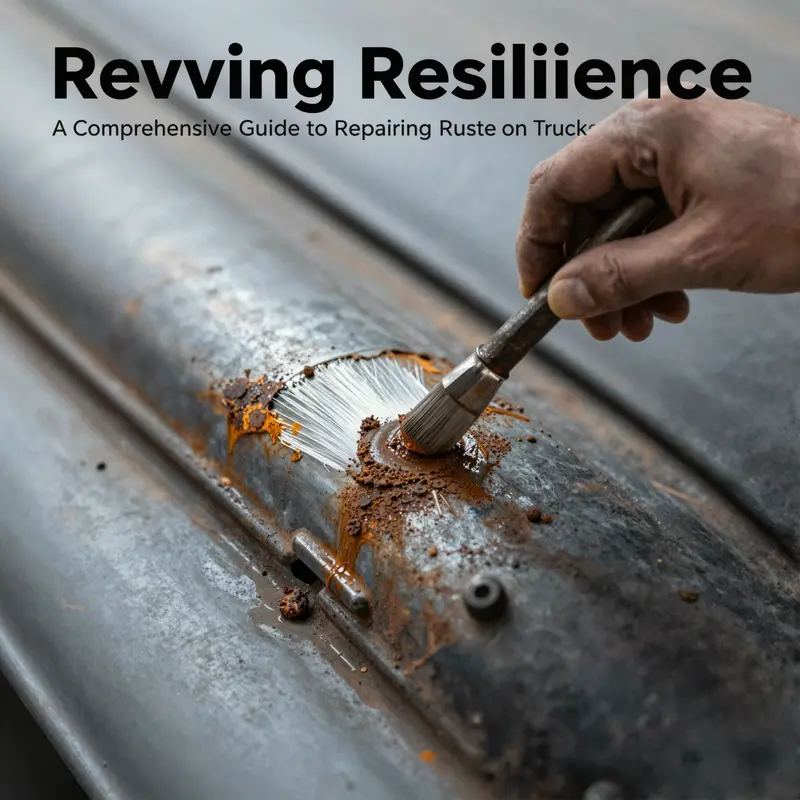
Once you’ve formed a mental map of the rust landscape, you move into the aggressive cleaning phase. The rationale is straightforward: you must remove all loose paint, dirt, and rust flakes to reveal the true condition of the metal beneath. A wire brush or a sturdy set of 80–120 grit sandpaper is your first line of attack, followed by an angle grinder equipped with a wire cup brush for tougher deposits. This combination is designed to strip away the flaky rust and paint so you can clearly see what remains. For stubborn areas, a rotary tool with a sanding attachment can reach into corners and tight seams that a larger grinder misses. The work is deliberate and methodical; you don’t rush because heat buildup or lingering edge roughness can create more harm than good. As you scrape, use compressed air to blow away the dust and debris. The air helps you keep the surface visible and reduces the chance that you’ll miss a thin edge or a hidden pit. A practical tip from seasoned restorers is wet-sanding small patches with 2000-grit paper. This gentle approach reduces micro-scratches and helps you see a smooth, uniform steel surface beneath the last layer of material. It’s not about finishing a cosmetic job yet; it’s about exposing the clean metal that will anchor the next steps.
After you’ve removed the loose material and achieved a bright, clean metallic surface, it’s time for a chemical midwife to rust. A phosphoric acid–based rust converter can be applied to areas where rust has only minimally attacked the surface. These products chemically transform iron oxide into a stable black compound, effectively stopping oxidation and providing a more uniform base for subsequent priming. The converter acts as a primer of sorts, ensuring that the metal won’t immediately start accepting new rust once you seal it with paint. However, this step comes with clear boundaries. If rust has penetrated deeply or created holes, grinding away the damaged metal remains mandatory, since a chemical treatment cannot restore thickness or structural integrity. In practice, you apply the converter sparingly to the clean areas, allow it to cure as directed by the product’s instructions, and then test the surface with a light touch to confirm it has formed a solid film ready for the next phase. It’s tempting to treat everything with chemistry, but a honest appraisal of how the metal has behaved under stress will keep you from overreaching and ending up with a brittle, brittle patchwork instead of a solid repair.
With the chemical stage complete and the surface cured, you return to one last cleansing pass. Clean, dry, bare metal is the common thread that binds all successful rust repairs. Wipe the area with a solvent such as acetone or a dedicated degreaser to remove any residual oils, dust, or converter remnants. Even a thin film of oil or a trace amount of dust can interfere with adhesion of fillers, primers, or paint. A meticulous final wipe ensures that you are not locking in contaminants under your primer or topcoat. Drying is critical; you want the surface to feel cool and dry to the touch before you apply any filler or primer. In addition to the chemical and mechanical steps, this final cleansing session also helps you confirm that the area is comfortable to work in. If you notice chemical fumes or strong solvent odors, you may need better ventilation or a smaller, more controlled space for the next stage.
The preparation work described here may feel lengthy, yet skipping any part of it invites trouble later. A rusted truck can be a money pit if you neglect the groundwork; impartial, thorough prep preserves the integrity of every repair you make and protects the surrounding metal from recontamination. If you’re curating a broader restoration plan, remember that these foundational steps connect directly to what comes after—treating exposed metal, selecting the right filler or patch, and choosing a compatible primer and paint system. For readers looking to see how these foundational steps fit into a wider restoration workflow, the Master Truck Repair Blog offers broader guidance on truck maintenance and repairs that complement rust work. See Master Truck Repair Blog.
As you finish this preparation stage, you should feel a sense of clarity about the next moves. You have identified where the metal is sound, where it has merely surface rust, and where patching or replacement will be necessary. You have removed what could trap rust under new coatings, and you have created a clean, stable canvas for the repairs to come. The next section will build on this foundation, detailing how to repair or replace damaged panels with proper technique and strength. The aim is not just to fill a hole, but to restore structural integrity and safety while maintaining the truck’s original character. For additional, practical context on the broader approach to underbody work and rust mitigation, you can consult external professional resources that walk through real-world scenarios and best practices. See the following external resource for deeper insights into underbody rust repair: https://www.autocar.co.uk/repair-and-maintenance/underbody-rust-repair-what-you-need-know
Guarding the Exposed Metal: A Practical Rust-Prevention Blueprint for Old Trucks
Exposed metal on an aging truck is more than a cosmetic concern. It is a living warning that the structure beneath curious eyes may be quietly weakening. When rust first peeks through paint, it is tempting to chase only the surface and paint over the problem. Yet successful rust prevention on an old workhorse requires more than a quick fix. It demands a deliberate, methodical approach that starts with the metal you can see and extends to the areas you can’t, ensuring the frame, floor pans, and wheel wells remain sturdy enough to carry loads and miles to come.
The journey begins with a careful assessment of what you are really dealing with. Exposed metal can harbor a range of conditions—from light surface oxidation that only dulls the sheen, to heavy pitting where the metal has been eaten away, to structural rust that weakens critical sections. You want clarity before you mix primers and coatings. The first days on the bench should feel like a medical exam for metal: a full scan of vulnerable seams, joints, and cavities where moisture gathers. A flashlight is a small, patient ally here, revealing corners under the rocker panels, inside wheel wells, and along door sills where a soft rust bloom often hides. Once you’ve identified the rust scenario, you can map out the repair and prevention plan with confidence rather than guesswork.
Mechanical surface preparation is the backbone of long-lasting protection. The goal is to remove all loose rust, flaking paint, and scale until you reveal clean, bare metal. This is not the stage to skip. If you leave even a whisper of rust behind, it can propagate under a fresh coating much sooner than you expect. A wire brush and a scraper work well for large patches, but you may need an angle grinder with a wire cup brush for stubborn areas. For factory seams and harder-to-reach spots, a rotary tool with a sanding attachment can deliver a clean edge and a true surface. The moment you see the bright, fresh metal, you know you’re on the right track. After this mechanical assault, it is essential to scrub away dust and residues with a degreaser and a lint-free wipe. Let the area dry completely; moisture is a silent villain, and you want to seal the metal while it is bone dry.
Even after you’ve scrubbed, you should not let the moment pass without chemical backup. A rust-converter or rust-stabilizing solution can transform any residual iron oxide into a stable layer that won’t continue to flake or spread. These products work by converting iron oxide into a black, inert compound that can accept primer and paint. Follow the manufacturer’s instructions for mixing, application thickness, and drying times. This chemical step is not optional when you are dealing with deeper pits or edges where physical removal proved too aggressive or insufficient. The risk of untreated micro-rust creeping back behind a fresh coat is real, so the converter’s stabilizing action can be a quiet insurance policy worth paying.
With the metal stabilized, you move into the protective coatings stage. The primer you choose should be designed for bare metal and for the environment the truck faces. Zinc-rich primers offer cathodic protection, which helps if there are tiny pinholes you could not fully grind away. Epoxy primers provide exceptional adhesion and moisture resistance, forming a solid base for subsequent layers. The right primer is the bridge between bare metal and the topcoat, and it should be allowed to cure thoroughly before any color or clear coats go on. When the primer has cured, you lay down the color and seal with a clear coat for UV protection and gloss. In outdoor or exposed areas, the top layer keeps moisture and road grime from wicking back into the primer and metal. For many owners, a durable automotive enamel or a polyurethane topcoat offers a good balance of hardness, flexibility, and resistance to chemicals, road salt, and weathering. In areas that endure more abuse—undersides, wheel arches, and the undercarriage—it pays to consider an extra protective layer, such as a rubberized undercoating. A flexible barrier can handle road vibration, chipping, and moisture ingress better than a rigid paint film alone.
The prevention plan must reach beyond the finish paint. Environmental control plays a decisive role in the long-term success of any rust-prevention strategy. Moisture is the frequent culprit behind recurring rust. When possible, store the truck in a dry, climate-controlled environment. If outdoor storage is unavoidable, a breathable cover can shield the finish from dew and drizzle while allowing the metal to vent. Humidity, even in a garage, promotes condensation and slowly seeps into seams and crevices. If a garage is damp, a dehumidifier can be a simple but effective tool. Desiccant packs in the cabin also help reduce ambient moisture that can migrate into door seals and floor pans. Salt exposure poses another serious challenge. Coastal spray or winter road salt can attack metal relentlessly. Regular washing becomes part of preventive maintenance in such environments. A wash that includes attention to the undercarriage, wheel wells, and frame rails goes a long way toward removing corrosive residues before they can set up shop.
Maintenance is not a one-and-done ritual. It is a cadence, a rhythm of checks and quick touch-ups that keeps corrosion at bay. Routine inspections should focus on the most vulnerable zones: seams, corners, and joints that trap water and grit. Look for bubbling paint, peeling primer, or any darkened or rough spots where moisture can linger. If you spot a blemish, address it immediately. Lightly roughen the area, reapply primer, and topcoat over the patch to restore the barrier. This proactive stance prevents small rust spots from becoming large, structural problems.
The dialogue between prevention and repair is ongoing. While you protect the exposed metal, you also reinforce it with proper substrate support. For areas with thinning or compromised metal, you may need patching or reinforcement. A shallow patch with epoxy filler can seal minor defects, but larger areas demand careful cutting and welding of compatible steel. When structural members—such as frame rails or floor supports—are compromised, the solution must be robust and precise. In these cases, welding in new metal of the same thickness creates a solid, lasting repair rather than a fragile band-aid. Reinforcement plates welded underneath can distribute loads and reduce the concentration of stress around repair sites. It is crucial to ensure that a repair of this magnitude meets safety standards and local regulations, and when in doubt, seek professional input. The strength of the repair is as important as the cosmetics of the finish, since the truck’s safety and load-bearing capacity hinge on well-executed structural work.
Finally, the philosophy of prevention ties back to the larger maintenance plan for an old truck. Integrate rust-prevention practices with ongoing upkeep. Clean and inspect regularly, touch up coatings as needed, and keep protective barriers intact. A well-maintained truck looks and performs better, but more importantly, it remains safer and more dependable on the road. A practical habit is to couple a seasonal inspection with a cleaning routine, especially before and after winter or long road trips where exposure to salt or moisture is higher. Keeping the environment dry, clean, and buffered against the elements creates a durable shield for the metal you have preserved or restored. In this way, treating exposed metal becomes less of a one-off repair and more of a disciplined approach to vehicle longevity.
As with any mechanical art, experience grows with time and hands-on practice. The more you work with bare metal, primers, and topcoats, the better you understand how products behave with different substrates and how environmental conditions reshape outcomes. For owners who want a concrete example of a practical, real-world approach to maintenance, a trusted resource on long-term truck care can be revealing. See Turnage Sons in-house truck maintenance for a relevant blueprint on how a shop conceptualizes ongoing upkeep while balancing do-it-yourself tasks with professional oversight. Turnage Sons in-house truck maintenance.
Beyond the shop floor, there is a broader map of protection that professionals and enthusiasts alike can consult. For a deeper dive into metal corrosion, protective strategies, and materials science behind modern coatings, the American Iron and Steel Institute offers authoritative guidelines and resources that illuminate why certain approaches work so well in practice. AISI provides perspectives that help frame practical steps within a larger framework of safety and durability. You can explore their materials at the following resource: https://www.aisi.org
In sum, protecting exposed metal on an old truck is not glamorous, but it is essential. The combination of thorough surface preparation, stabilized chemistry, robust priming, and durable topcoats, reinforced by disciplined moisture control and regular checks, creates a lasting barrier against rust. The goal is simple: keep metal clean, dry, and sealed so that the next miles you log remain solid and safe. When you take this approach, you extend both the life of the metal and the value of the truck, preserving a relic that can still earn its keep on the road tomorrow.
When Rust Eats the Panels: Repairing or Replacing Body Panels on Classic Trucks
Rust on an old truck doesn’t just mar the paint. It gnaws at the metal, tightens its grip where you least want it, and can quietly erode the very structure that keeps you safe on the road. The decision to repair or replace damaged panels hinges on a mix of severity, location, and practicality. In many cases, minor surface rust that hasn’t penetrated the metal can be cured with careful cleaning, a rust inhibitor, and a fresh coat of paint. When corrosion has hollowed out or compromised a panel, replacement becomes the wiser long‑term choice, even if it demands more time, tools, and skill. The difference between a short‑term fix and a lasting repair lives in your willingness to measure the damage honestly and to invest in proper procedures that preserve the truck’s integrity as well as its value. This chapter walks through that decision with practical, step‑by‑step guidance that stays grounded in real‑world shop work, not theory alone.
Assessing the rust damage begins with a clear distinction among rust types. Surface rust, the kind that sits on top of the paint, is mostly cosmetic. It can often be removed with a wire brush, sanding, or a light abrasive, followed by protection to keep it from returning. Pitting rust is more troubling: tiny holes or pits in the metal can deepen quickly if left untreated, and even if the surface looks okay, unseen pits can undermine a panel’s strength. Structural rust is the deepest concern: corrosion that has penetrated into frame rails, floor pans, or suspension components. For those areas, the repair approach changes entirely, because you’re not just restoring appearance—you’re restoring safety and rigidity. A flashlight or a portable light is invaluable for peering into wheel wells, undercarriage sections, door sills, and other hidden gaps where rust loves to hide. The thoroughness of your inspection sets the tone for the rest of the job.
In the realm of minor surface rust, the path is straightforward and disciplined. Start by cleaning the area to remove dirt, oils, and loose rust that could sabotage adhesion. A wire brush, a series of coarse to medium sanding steps, or a grinder with a brush attachment can lift flaking material and expose sound metal beneath. Once the surface is clean, administer a rust inhibitor or converter to neutralize any loose rust and form a barrier against future oxidation. Allow the coating to cure according to the product’s instructions, then feather with progressively finer sandpaper to create a smooth, paintable surface. Repaint with a compatible base coat and finish coat to seal the metal. For small patches, final steps can be finished with careful finishing sashes of clear, UV‑protective top coats to preserve coloration and gloss. This approach preserves the panel without unnecessary exposure to heat and metalwork that could distort the sheet metal. It’s worth noting that even seemingly minor rust can creep back if moisture makes its way into seams or joints, so sealing seams and ensuring thorough drying before final paint is essential.
When the corrosion has eaten through the metal or compromised the panel’s structural integrity, repair alone offers only a fragile reprieve. The guide from the field emphasizes a clear line: if the metal has been structurally compromised, replacing the panel is the more durable, safer choice. The process begins with a careful assessment of the damaged section to determine the extent of the cut needed. The goal is to remove only the affected portion while preserving surrounding metal to maintain alignment with adjacent panels and the vehicle’s overall geometry. Cutting out the damaged area must be done with care to avoid warping the surrounding metal. After removing the defective portion, a new panel, fabricated to the same gauge or thickness as the original, is prepared for fitting. Because even small misalignments can ripple through the bodywork, the new panel should be shaped to fit precisely, with attention to edges, bends, and flange lines that will join with the existing metal.
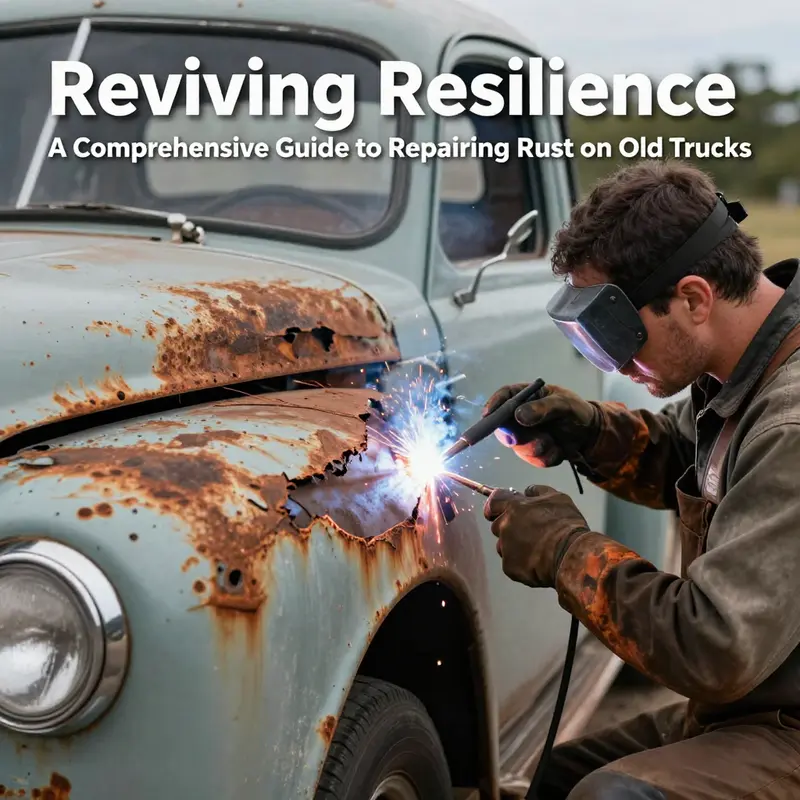
Fitting a replacement panel is where welding becomes the defining skill. The joint must be solid, evenly spaced, and free from gaps that would allow moisture to seep in and resume corrosion. MIG welding is commonly employed for body panel work because it provides strong, clean seams with manageable heat input. TIG welding might be used for more delicate joints or for thinner metals where precision is crucial. Regardless of technique, you must manage heat to avoid distorting adjacent sheets. A series of spot welds with careful stitch patterns can distribute heat and avoid warping, followed by continuous welds where necessary for strength. After welding, the seam needs to be ground smooth and then treated with rust protection to prevent future corrosion along the joint. Some repairs also include reinforcement plates—thin steel patches welded beneath the panel to reinforce areas that have been heavily stressed or that bracket critical structural zones like frame rails. Those plates distribute stress more evenly and help prevent a recurrence of fatigue at a vulnerable seam.
No matter whether you repair or replace, finish and paint remain essential. A solid repair relies on a robust undercoat strategy. After the metalwork, a primer designed to bond to bare metal is applied to seal the surface and improve paint adhesion. This primer should be compatible with the chosen topcoat and capable of providing a durable, corrosion‑resistant base. The topcoat layer can be an acrylic enamel or a polyurethane finish, selected for its durability and color stability. A clear coat at the end adds UV protection and gloss while helping to preserve the finish against the elements. The finish stage should be approached with the same care given to any other high‑stress area of the truck; smooth, even spray or brushed coats, proper curing between layers, and attention to color matching will help the repair blend with the rest of the vehicle. If the truck carries a historic or original appearance, you may want to consult color codes or matching services to ensure the repaired panel integrates aesthetically with the rest of the body.
A key thread running through this work is realistic expectations and a clear assessment of cost versus benefit. Minor rust that is promptly treated and sealed can be a cost‑effective maintenance task that preserves value and safety. However, when corrosion has claimed a crucial panel, replacement becomes a safer and more economical long‑term choice, even if the upfront effort and expense are higher. The choice also hinges on your skill level and access to the right tools. Replacing a panel is a substantial undertaking that benefits from a careful approach, clean workshop conditions, and precise measurement. If you’re unsure about your ability to execute a clean cut, to align the new panel with the surrounding geometry, or to weld without distortion, it’s prudent to consult a professional body shop. The structural role of certain panels means that even small mistakes can lead to misalignment or safety concerns after the vehicle is back in service.
To those who are doing the work themselves, the process can be deeply rewarding when done carefully. Start by ensuring you have a clean, dry workspace and a predictable sequence of steps. Document the process with photos to track how the repair progresses and to serve as a reference for future work. Work methodically, checking alignment frequently as you go. After finishing, step back and inspect the repaired area in daylight, examining seams for uniformity and paint for any signs of uneven coverage or orange peel. Finally, treat the rest of the truck as a living system: rust does not respect door edges, seam lines, or undercarriage nooks. A routine maintenance plan that includes regular washing, prompt attention to any new rust spots, and a light application of protective coatings will extend the life of the panels and the truck as a whole. Regular checks should emphasize vulnerable areas such as wheel arches, door sills, and the underbody where road salts and moisture tend to accumulate. This proactive approach helps ensure that a repair remains durable and that your old truck continues to serve reliably.
As you plan the next steps, integrate your learning into a practical workflow that keeps the work humane and the result durable. For ongoing guidance and more hands‑on tips, you can visit the Master Truck Repair blog, which offers additional discussions of in‑depth maintenance and repair practices. This chapter’s emphasis on evaluating damage, choosing between repair and replacement, and executing sound metalwork aligns with the broader goals of preserving the truck’s safety, performance, and character over time. The path from rust detection to final paint is rarely linear, but with patience, careful measurement, and proper technique, you can restore an old truck’s body panels to a state that honors its history while providing reliable use for years to come.
External resource: For a broader, expert look at rust repair panels and professional considerations, see Popular Mechanics’ guidance on repairing rusted truck panels: https://www.popularmechanics.com/cars/how-to/a28794/repairing-rusted-truck-panels/.
Final thoughts
By systematically addressing rust damage through assessment, preparation, prevention, and repair, fleet managers can save costs in the long run and ensure operational efficiency. Implementing these techniques safeguards your trucks against future deterioration while preserving their structural integrity. Regular maintenance checks and timely interventions are essential strategies for enhancing the lifespan of your fleet. Investing in quality repairs today translates to safety and reliability on the road tomorrow.