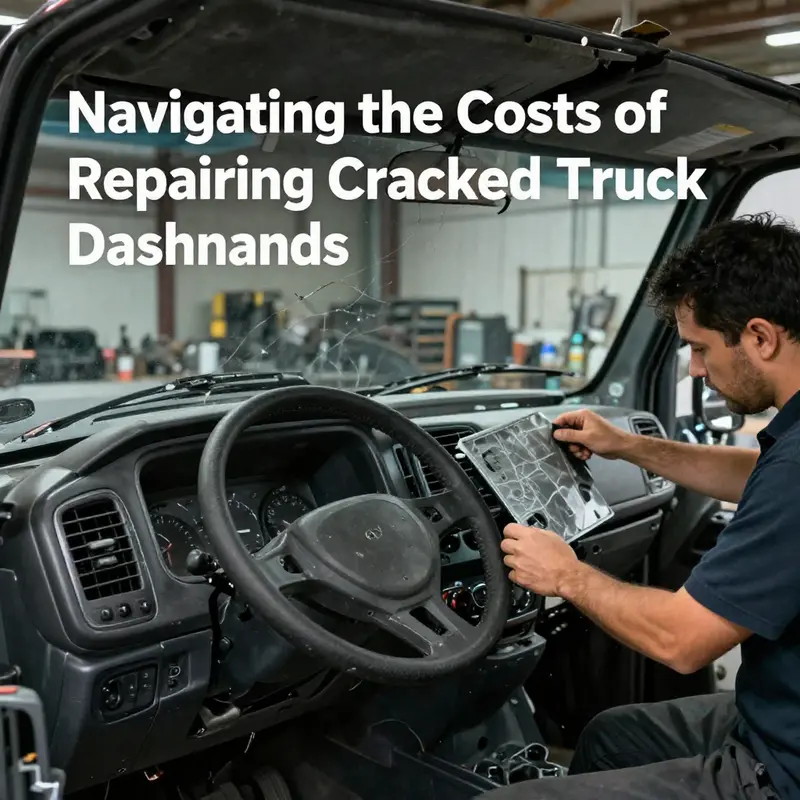
Cracked dashboards in trucks are not only unsightly but can lead to safety concerns and decreased vehicle value, especially for fleet operators. Addressing this issue promptly is crucial for maintaining operational efficiency and ensuring the safety of your drivers. This guide explores three primary options for repairing a cracked dashboard, including do-it-yourself (DIY) repairs, professional services, and complete dashboard replacements. Each solution comes with its own cost implications, advantages, and drawbacks, providing a thorough understanding necessary for informed decision-making. Additionally, we will discuss the long-term impacts that repairing or replacing a cracked dashboard may have on your fleet, helping you weigh immediate costs against future benefits.
Cost-Smart DIY: Restoring a Cracked Truck Dashboard Without Breaking the Bank

A cracked dashboard on a heavy duty truck is more than a cosmetic nuisance. It sits at the heart of the cab experience, and in trucks the dashboard endures extreme temperatures, relentless UV exposure, and the constant vibration of long hauls. The decision to fix it at home or hire a professional depends on how deep the damage goes, the materials used in your dash, and how much you value a seamless finish that lasts. For most drivers facing a crack that does not threaten the structural elements or safety systems, a measured DIY approach can deliver a solid result at a fraction of the cost of replacement, while still preserving the interior’s look and feel. The trick is to move from quick cosmetic remedies to a repair that respects the dash’s original materials and its place in a high vibration, temperature fluctuating environment. With that mindset, you can balance expense, time, and outcome in a way that fits your truck and your budget. The numbers are persuasive: a basic DIY fix can run roughly twenty to sixty dollars, while professional repairs typically fall in the range of one hundred fifty to four hundred dollars. Replacement, when necessary, can climb to another tier entirely, often between one thousand and three thousand dollars or more once parts, labor, and possible OE compatibility considerations are included. These figures aren’t universal, but they sketch a reliable framework for planning. More important than the exact price is understanding what each path delivers in terms of durability, color match, and integration with nearby components like vents, switches, and gauge clusters. If your goal is to extend the life of a dashboard that’s otherwise sound, a well executed DIY repair can be a sound compromise between price and performance. If, on the other hand, the crack is spreading, or it intersects with electronics, a professional assessment will help you avoid a result that looks good at first glance but fails under heat or sun exposure after a few weeks. The best approach is to start with a clear assessment, proceed with careful preparation, and then decide whether your skill set aligns with the repair you’re about to undertake. That orientation is especially valuable because the cost of inaction—allowing a crack to propagate, letting debris accumulate, or letting heat degrade surrounding plastics—can translate into more extensive repairs down the line. In practice, the DIY path works well when you combine a structured plan with patience and the right materials. You should be honest about your own abilities, because a botched fix can end up costing more to repair later. If you opt to tackle the job yourself, you’ll be following a sequence many truck owners have used with success: assess the damage, clean the surface thoroughly, fill the crack with a suitable repair compound, sand the area smoothly, match the color, and finally seal and protect the repaired surface. Each step matters, especially for dashboards that carry texture and a matte or satin finish rather than a glossy look. The goal is not merely to hide the crack but to restore a surface that remains cohesive with the rest of the interior and durable enough to resist the next round of temperature swings. In terms of cost awareness, the DIY route is not automatically the cheapest over the truck’s lifetime if you value near perfect color matching and a flawless finish. But for many owners, it offers a balanced mix of economy and long term value when executed with care. When you compare options over a five year horizon, the DIY approach can be a practical first choice for minor damage, with a plan to transition to professional work or even replacement if the damage advances beyond a simple fix. The key is to stay practical about expectations and to recognize the limits of a home repair. If you find yourself dealing with a crack that extends through multiple layers or sits near critical electrical components, a professional evaluation becomes the prudent next step. If you decide to pursue a DIY repair, you’ll perform a series of steps designed to ensure the repair endures under the same harsh conditions that created the crack in the first place. Start by assessing the damage in detail: is it a hairline fracture or a deep fissure that penetrates the surface and potentially bleeds into the underlying substrate? Is the crack near a vent or instrument cluster where precision matters? A flashlight angled across the surface helps reveal hidden fissures, guiding your approach and preventing surprises once you begin. Next comes a thorough cleaning. A clean surface is essential because dust, oil, and old residues will compromise adhesion. Use a microfiber cloth and a mild soap solution to remove grime, then switch to a swab with isopropyl alcohol to degrease and disinfect the area. Allow the surface to dry completely before you proceed. Any remaining moisture can undermine the bond of the repair material. When the surface is prepped, the filling step becomes the heart of the process. For most truck dashboards, a two part epoxy or a specialized plastic repair kit designed for automotive interiors provides the best balance of strength and flexibility. Select a high strength, flexible plastic repair adhesive and mix it according to the manufacturer’s instructions, usually in equal parts resin and hardener. Use a plastic applicator or a toothpick to press the mixture into the crack, filling it slightly above the surrounding surface to account for shrinkage as it cures. Let the compound cure fully—this typically takes several hours at room temperature. Flexibility is crucial here; dashboards experience a lot of thermal movement, and a rigid fix can crack again as temperatures swing from hot sun to cool air. Once cured, the repair surface needs smoothing. Start with fine grit sandpaper, about 600 to 800 grit, and sand in small circles to level the filled area with the surrounding texture. Wipe away dust as you go. Be careful not to gouge the area or remove adjacent paint or texture. After sanding, color matching becomes the next critical hurdle. Automotive touch up paints are available in a broad array of codes and finishes, but the trick with dashboards is to preserve the textured look and typical matte or satin finish rather than a high gloss. Apply thin coats, letting each coat dry according to the product guidelines. Several light coats usually yield a better blend than a single heavy application. If the repair requires a clear topcoat to protect the paint and add gloss uniformly, apply that as a final layer after the color has cured. The goal is a seamless transition that holds up under UV exposure and heat. Finally, polishing and protection can help restore the dash’s original luster and guard against future cracking. A light buff with a non-abrasive polish and a microfiber cloth can restore some of the original sheen without flattening the texture. If you want to go a step further, consider a UV protective spray designed for dashboards. This extra layer helps reduce sun yellowing and keeps the repaired area from becoming brittle again. As you complete the process, you may find cost awareness becomes a guiding theme in your decision making. The DIY path has a clear upfront cost, often in the range of twenty to sixty dollars for materials, with a potential one time investment in tools if you do not already own them. Professional repair, by contrast, runs around one hundred fifty to four hundred dollars depending on the extent of work, the shop’s location, and your specific dash material. Replacement remains the high end, typically a thousand dollars or more when you factor in parts and labor. Those numbers underscore the value of a careful evaluation before you begin. A good rule of thumb is to start with a DIY assessment for cracks that are minor, carefully located away from critical components, and not spreading rapidly. If you notice the crack widening or crossing into areas that affect venting or display visibility, pause and seek a professional opinion. The professional option may involve more advanced techniques, including vacuum assisted resin injection or precise color matching not feasible in a home environment. If you proceed with a DIY fix, document the process and set realistic expectations. You may find that even a well executed repair looks good at a distance, but a close inspection reveals texture differences or slight color variance. In the long run, the value you get from DIY depends on how much you care about the subtle details. For some drivers, a near perfect repair is sufficient to preserve interior aesthetics and resale value, while others may prioritize a factory like finish that only a pro can guarantee. If you need to budget for the repair in a broader sense, consider integrating the cost into a maintenance plan rather than treating it as a one off. A practical approach is to view the dashboard fix as part of routine interior upkeep, alongside other wear and tear items that accumulate over time. For those who want to plan ahead, a budgeting resource focused on routine truck maintenance can help you map out anticipated expenses across the year. This can make the cost of a DIY dash repair feel more predictable rather than alarming. For more on budgeting, see this resource on budgeting for routine truck maintenance. The decision to DIY or hire a pro is shaped by your tolerance for risk, your finished appearance standards, and the available time you can invest. If you decide to pursue DIY, keep in mind that the most durable outcomes come from patience, careful prep, and attention to the subtle cues of the dash surface. Small, deliberate steps—cleaning, filling, sanding, painting, sealing—apply not just to the dashboard but to the entire interior repair mindset. And finally, remember that you do not have to commit to a single path forever. If after attempting a DIY fix you are unhappy with the result or the crack resumes its spread, you can reassess and move toward professional attention or replacement. If the crack has already compromised safety features or if the texture and color cannot be matched closely enough for your standards, replacement may be the only option that satisfies both aesthetics and function. In the end, cost effectiveness serviceable repairs demand honesty about the crack’s extent, a plan for maintenance, and a clear sense of how you want the interior to feel during long miles on the road. If you approach the repair as a careful balance of material science, interior aesthetics, and real world usage, you will not only save money but also keep your truck cabin functional, comfortable, and visually coherent for miles to come. For more context on managing interior maintenance costs across a fleet or single truck, explore the budgeting resource mentioned earlier. And if you crave deeper guidance on color matching and blending, this external resource offers a detailed look at paint codes and matching strategies that can help refine your approach to the final finish: https://www.cargurus.com/cars/repair/touch-up-paint-guide
Chapter 2: The Professional Dashboard Repair Path for Trucks — Costs, Craft, and What You Get for Your Money

A cracked dashboard in a work truck is more than a cosmetic blemish; it can become a symptom of longer term issues that affect visibility and the interior environment. In professional repair, cost is a function of damage extent, truck model, materials, and shop location. A clear assessment identifies cracks that penetrate beyond the surface, any warping affecting instrument alignment, and whether mounting points or vents are compromised. The typical workflow begins with cleaning, crack mapping, and selecting a repair method. For small surface cracks a high quality filler and sealant may suffice, with color match and UV resistant clear coat. Deeper cracks may require resin injections or heat welding, and in severe cases a panel or module replacement. Materials are heat resistant and UV stable, designed to endure temperature cycles and cabin humidity. Pricing ranges: minor repairs from around 150 to 300 dollars, mid range from 800 to 2000 dollars, and full dash replacements can push toward 3000 dollars or more, especially with OEM parts and complex color matching. Replacement options include OEM and aftermarket dashboards, with OEM parts typically costlier and longer lead times but potentially better fit. Labor is a major component, often more intensive for a full replacement. Reputable shops provide written estimates and warranties and document the repair path and expected lifespan. Transparent pricing helps fleet managers forecast maintenance costs and downtime. The professional route tends to reduce long term downtime and the risk of recurring cracks, preserving access to gauges and climate controls. When planning budget, consider total cost of ownership including surrounding components such as vents and bezels. For readers seeking local pricing guidance, consult trusted shop quotes and maintenance resources in the trucking community. This chapter frames the repair decision as a balance of durability, fit, and business value rather than a cheap patch.
From Cracked to Cost Clarity: Mastering Dashboard Replacement Costs for a Truck
A cracked dashboard on a truck is more than a cosmetic blemish. The surface damage can creep into glare during bright days, obscure instrument readings, and, in ways subtle or obvious, point to the aging of materials that once kept the interior comfortable. Heat from the sun and the steady reach of ultraviolet rays can dry out vinyl or plastic resins, making the dash brittle and prone to fissures. A crack may start as a hairline fracture and progress to a broader break that runs across a critical portion of the panel. In some installations, the dashboard hides wiring, sensors, or displays. When cracks reach those depths, the risk of short circuits or electrical glitches grows. In short, what begins as a cosmetic fault can escalate into a safety concern if not addressed with a durable solution. That is why many drivers facing a cracked dashboard shift from thinking about a quick cosmetic fix to weighing full replacement as a long term, safety oriented investment. Replacing a dashboard is not simply swapping out a broken surface; it is restoring the integrity of the vehicle’s interior geometry, preserving navigation and control interfaces, and ensuring the dashboard that houses the warning lights and vital indicators remains reliable through miles of use and exposure to climate cycles. The decision may hinge on the extent of the crack, the age of the truck, and the importance of the information and controls that sit behind the panel. The cost picture is not a single line but a spectrum shaped by the choice of parts, the complexity of installation, and the level of calibration the vehicle requires after the swap. In this sense, replacement costs must be read as a combination of parts, labor, and the potential downstream needs that come with modern dashboards that integrate screens, sensors, and driver assist features. When someone starts to weigh replacement, they also weigh the value of matching the original feel and fit of the interior against the savings of opting for a broadly compatible aftermarket option. That balance is best understood by looking at the core cost drivers and how they interact with the realities of a given truck’s year, trim, and technology package. It is worth noting that the cost landscape for dashboard replacement is not static; it shifts with market part availability, regional labor rates, and the evolving complexity of dashboards that include climate controls, infotainment systems, and advanced driver assistance components. In practical terms, the decision to replace centers on a calculation that blends safety, reliability, aesthetics, and long term resale value. A repaired surface may be adequate for a time, but deep creases or misalignments can undermine the panel’s integrity or leave openings for moisture and dust to penetrate the core structure. For those who drive a workhorse that endures long hauls and harsh conditions, choosing replacement over short term patchwork can be the more prudent approach. This perspective aligns with broader maintenance wisdom: the cheapest option today is not always the cheapest over the vehicle’s total life cycle. The cost calculus, then, begins with the part itself and the path to getting it installed properly. When the decision turns toward replacement, two broad routes emerge: OEM parts, which promise exact fit and the most consistent durability, and aftermarket dashboards, which offer savings but may vary in fit, finish, and long term behavior. OEM dashboards are typically designed to match the original in texture, color, and mounting points, which helps preserve the interior’s look and feel. Aftermarket units can be surprisingly close in fit and function, but the nuances of color matching for the interior trim, the alignment of instrument apertures, and the compatibility with the vehicle’s electronics can differ from one model year to the next. The precise year and trim level matter because dashboards are not generic modules; they are assemblies that may include climate control interfaces, display screens, embedded modules, and wiring harnesses that must align with the vehicle’s electrical system. A dash that does not perfectly match can cause rattles, improper seating of components, and premature wear in areas that were not designed for stress. In this context, the part price alone tells only part of the story. The labor component often dwarfs the sticker price of the piece itself, because removal and installation involve careful disassembly of components that sit around the steering column, the instrument cluster, and sometimes airbags or other safety devices. The process benefits from technicians who follow manufacturer guidance and who possess the right tools to handle sensitive safety features without compromising their integrity. The labor phase can also include a calibration step, especially if the vehicle carries modern driver assistance features or a touchscreen interface that requires reinitialization or reconfiguration after the dash is swapped. It is here that the cost profile expands beyond the part price and into the realm of procedural compliance and system verification. In practical terms, the cost to replace a cracked dashboard can be framed as a spectrum with three broad bands. The first band centers on a straightforward replacement using aftermarket parts. In this scenario, the dash itself is the primary component, and the rest of the interior retains its factory alignment. The second band encompasses the use of an OEM part, where an exact match in shape, color, texture, and mounting points is prioritized. The third band reflects the most complex installations, where the dashboard integrates advanced electronics, high grade displays, or ADAS interfaces that require diagnostic recalibration and sometimes additional sensor alignment. Within these bands, the numbers shift by year and trim level, but a reasonable expectation for the part alone sits in a general range. A typical aftermarket dash might cost something like a few hundred dollars, whereas an OEM replacement part can run higher, sometimes reaching into the upper end of the range. The labor component follows suit, influenced by the shop’s hourly rate, the amount of interior disassembly required, and the necessity for careful reassembly to prevent rattles or misalignments. The combination of part and labor produces a total that most drivers find reasonable when they consider the long term comfort, safety, and resale potential of the vehicle. The budgeting frame becomes clearer when these numbers are translated into an actionable planning approach. In many cases, drivers will encounter a practical window for the combined parts and labor that captures the typical reality of a replacement project. While regional pricing can push totals higher or lower, a general target for a non specialty vehicle or standard trim is a few hundred dollars for the part plus several hundred dollars for labor. This translates into a total that commonly falls into a broader range that can be expected across many shops and regions. It is important to recognize that any upgrade or replacement is not a one size fits all event. The presence of a large display panel, a climate control module, or a suite of integrated sensors can push costs up, particularly if professional recalibration is required after installation. If the dash includes a proprietary navigation or infotainment system, the technician may need to perform software reconfigurations or system handshakes with the vehicle’s network. These steps, while sometimes subtle in description, can add meaningful time to the labor bill and, consequently, to the overall price. The numbers themselves do not tell the entire story. There is value in approaching replacement with a plan that includes multiple quotes, an understanding of what is driving the variance between bids, and a clear view of the long term benefits of durability and fit. For readers who are budgeting for this expense, consider the benefits described above and evaluate how much you are willing to invest to restore the dash to a condition that feels new. If you want to anchor your planning in a practical framework, you can consult a budgeting guide that addresses routine maintenance and replacement scenarios for trucks. For practical budgeting guidance, see Budgeting for Routine Truck Maintenance. The path to replacing a cracked dashboard also involves considering alternatives to a full swap. In some cases, minor surface repairs or patchwork—such as resin fills followed by color sealing and UV protection—can temporarily mask the damage and slow further deterioration. These approaches are often far less expensive than a full replacement and can serve as a bridge if the truck is near the end of its life or if part availability is constrained. Yet these options do not restore structural integrity and may not resist stress from long hours of sun exposure or the flex of the dash during operation. For many owners, the decision to replace is finally a decision to protect the interior’s integrity and preserve the vehicle’s resale value. When the dash is cracked to the extent that it compromises control readability, concealment of wiring, or the safe placement of airbags, replacement becomes not just a preference but a safety and reliability imperative. The final cost, then, is a synthesis of the part price, the labor charge, and any calibration or reconfiguration that accompanies the swap. If the vehicle carries a higher tier trim with advanced features, the chance of needing recalibration after installation rises, and with it, the overall expense. In this light, the replacement cost can be summarized as a blended figure that reflects both the immediate outlay for the dash and the longer term value of dependable performance, clear displays, and safe operation. The objective of the chapter is not merely to spell out numbers but to help readers translate those numbers into choices. It is a reminder that the right decision balances safety, long term maintenance costs, and the vehicle’s overall value. For those who want a clearer route to budgeting and decision making, a practical reference point is available through the budgeting guide mentioned above. It consolidates selective guidance on when to repair, when to replace, and how to weigh the relative benefits of OEM versus aftermarket options in the context of a workhorse that is used for daily tasks and long trips alike. In the end, replacement costs do not stand alone. They sit at the confluence of engineering, materials science, and the realities of owning a truck in a world of variable labor rates and part availability. The path forward—whether you choose a direct OEM swap, a closely matched aftermarket alternative, or a cautious temporary repair—depends on your priorities: the importance of precise fit, the desire for a seamless interior appearance, the tolerance for potential calibration tasks, and the requirement that the dash stay durable through years of operation. The more information you gather, the more confident you become in making a well informed choice that aligns with safety and value. External references can provide additional context for the specifics of installation and calibration work. For a detailed OEM installation reference, see the official service manual available here: https://www.ford.com/service/manuals/f-150/
Chapter 4: Safeguarding Safety, Value, and Longevity—Long-Term Realities of Fixing a Cracked Truck Dashboard

A cracked dashboard is easy to dismiss as a cosmetic nuisance, but the long arc of a repair stretches far beyond appearances. When a truck’s dash shows scars from heat, sun, and time, the decision you make about fixing it—whether a DIY fill, a professional restoration, or a full replacement—threads through safety, comfort, and resale value for years to come. The long-term picture demands a careful balance between durability, fit, and the future needs of the vehicle. The goal is not merely to seal a crack but to restore a surface that can withstand the daily onslaught of temperature swings, UV radiation, and the mechanical stresses that travel with every mile, every load, and every weather system. This is where the repair choice becomes a sustainability decision rather than a quick cosmetic stopgap. If we trace the consequences of each path—DIY, professional repair, and replacement—we begin to see how the durable repair patient, the one that lasts, is shaped not only by material science but by how well the job is planned and executed over time.
The body of a dashboard is essential to the vehicle’s interior life, and when cracks appear they are a sign of deeper material fatigue. In harsh climates, temperature fluctuations can cause the polymer matrix in the dash to expand and contract, a process that slowly widens fissures and invites more cracking. Heat accelerates this cycle, and sustained sun exposure can break down binding agents in the surface film. A superficial fix may hold for a season, but without addressing the underlying degradation, the crack surfaces can reappear, sometimes with greater spread. A durable repair, therefore, must consider not only the visible crack but the way the repair material will behave under heat, cold, and continuous exposure to UV light. Epoxy-based fillers and compatible topcoats, used correctly, offer a robust path forward. They resist cracking themselves and provide a sealed surface that can be color-matched and protected with a clear sealant. However, the real strength comes from proper preparation: proper sanding to create a mechanical bite, careful priming, and several layers of coating with appropriate cure times. When these steps are followed, the dashboard becomes a more stable platform, reducing the chance that a repaired crack will worsen as seasons pass.
Beyond durability, the repair must safeguard the dash’s relationship with the technical systems embedded within or behind it. Modern dashboards anchor critical components, including instrument clusters, climate controls, and sometimes airbags or warning sensors. A repair that fails to maintain alignment and sealing can indirectly affect these systems. For example, improper sealing can let moisture creep into electronic connections or the housing that holds components in place. Over time, this can lead to erratic gauge readings, errant climate performance, or even a misaligned airbag mount in the event of a crash. In such cases, the repair isn’t merely about looks; it’s about ensuring that safety-critical features retain their intended performance. This reality pushes owners toward repairs that emphasize precision, durability, and adherence to the original geometry of the dash’s mounting points. A careful restoration can restore both function and form, preserving the dash’s ability to support the components that keep the truck safe and usable on the road.
Economic calculus plays a significant role in long-term outcomes. The figures are familiar: a DIY fix may cost as little as a small kit, usually under the range of $60, while a professional repair typically runs from about $150 to $400 depending on the extent of damage and local labor rates. Replacement dashboards, whether OEM or aftermarket, bring a higher upfront price. An OEM dash often lands in the broader range of $800 to $2,500, with installation labor potentially adding several hundred dollars. Aftermarket options are cheaper but can introduce fit or finish variances. These costs are not merely line items; they reflect the longer-term total value of the repair. A well-executed professional repair can extend the dashboard’s life by many years, especially when paired with a protective topcoat and careful maintenance. In contrast, a rushed DIY repair may look good briefly but risk higher long-term expenses if the surface degrades again. When the dash is a shared space with heat, sun, and daily wear, longevity becomes the currency by which the decision earns its keep.
From a resale perspective, the condition of the interior often speaks loudly to buyers. A visible crack erodes perceived quality, suggesting neglect or a lack of care that can ripple into other parts of the vehicle. Even if the mechanical systems are sound, a damaged interior color and texture can create a negative impression during an inspection. This is not just about a buyer’s first impression; it translates into lower offers and longer time on the market. A durable, well-executed repair can mitigate these effects, signaling that the truck has been maintained with attention and that interior components were treated with respect for longevity. The value question is not about chasing perfection but about making a choice that preserves the interior’s integrity and the vehicle’s overall appeal. It’s a subtle equation where the upfront cost of a quality repair or replacement may pay off in a higher resale price and quicker sale when the time comes to move the vehicle on.
The material choice in the repair carries its own long-tail implications. In a typical restoration scenario, the repairer will choose materials designed to resist shrinking, expanding, and color fading. Epoxy-based fillers, respected for their strength, must be paired with compatible primers and topcoats that dry evenly and cure without sinking or cracking. A robust repair plan also includes attention to the repair’s environmental resilience. That means selecting materials that can withstand UV exposure, heat cycles, and humidity without losing adhesion. It also means preparing the surface so that the repair bonds strongly with the underlying dashboard, creating a unified shell that continues to behave like the original surface under stress. The right sequence—clean, sand, prime, fill, prime again, topcoat, seal—provides the backbone for a repair that remains intact through seasons and miles. Skipping steps or choosing incompatible products is a common reason for failures that show up months later as new cracks or a dulled appearance.
Another long-term factor is the decision between restoration and replacement in light of the dashboard’s material quality. Some dashboards are built with polymers that degrade faster than the rest of the interior. This makes a durable repair more challenging, and the argument for replacement stronger. When the core material has become brittle or the cracks have reached a level where structural concerns exist—such as mounting points for gauges or control modules—the risk of a failure that affects functionality or safety grows. In such cases, a replacement may offer a more predictable, longer-lasting outcome. The durability of an aftermarket dash depends on its fit and how well the mounting points align with the truck’s existing architecture. A misalignment can produce odd gaps, rattles, or misdirected climate flow, which, while not dangerous, degrade driving comfort and interior ambiance over time. The wiser approach is to weigh the probability of future problems against the upfront investment in a high-quality replacement that fits correctly and carries a reasonable warranty. This is not a stance against maintenance but a pragmatic view of where the interior will stand after years of use.
The decision framework for long-term outcomes also invites a look at maintenance habits. A repaired or replaced dash benefits from a proactive maintenance plan. Regular protective cleaning, gentle conditioning of the surface, and prompt attention to any new cracks or shifts can extend the life of the dashboard surface. Protecting the dash from direct sunlight with shades or reflective covers can dramatically slow the ageing process. While covers can offer immediate protection against UV damage, they do not repair material fatigue or restore the original surface’s structural strength. They should be viewed as supplementary protection rather than a substitute for a sound repair or replacement. The aim is to keep the repaired area as stable as possible and prevent new cracks from forming. A routine check, perhaps at the same cadence as other interior maintenance tasks, helps ensure early detection of any new issues and avoids cascading problems that could threaten instrument clarity or control layout.
In the landscape of long-term considerations, the type of dash material also matters. If a dash is built from a polymer that tends to become sticky or brittle with heat exposure, the repair must address that vulnerability. Some materials soften under heat while others cold-crack in cold environments. Understanding this helps the repair approach: a stable surface is created only when the filler, primer, and topcoat are compatible with the specific polymer makeup of the dash. A skilled technician evaluates the material’s tendency to warp, shrink, or craze and selects methods that minimize those risks. This is why, in the best repairs, there is a clear alignment between the repair strategy and the vehicle’s operational context—driving routes, climate exposure, and the owner’s maintenance philosophy—rather than a one-size-fits-all solution.
The broader narrative here is not simply about choosing between DIY, professional repair, or replacement. It is about recognizing the dash as a living, functional part of the cabin ecosystem. Its condition mirrors the care given to the vehicle as a whole and foreshadows how well the truck will perform under load and in rugged service. When owners invest in a repair plan that prioritizes durability, alignment, and material compatibility, they are choosing a course that supports safety, comfort, and value preservation. The long-term health of the dashboard is a proxy for the long-term health of the vehicle’s interior and, by extension, its overall reliability.
For those seeking practical guidance that moves beyond the high-level considerations, a structured, step-by-step approach can help. A reliable guide emphasizes surface preparation, material compatibility, and controlled curing. It also reinforces the need for proper matching of color and finish to preserve a cohesive interior aesthetic. A well-executed repair aligns with the truck’s interior’s lines and textures, so that the repaired area reads as a seamless continuation of the original surface rather than a separate patch. The best outcomes happen when the repair is treated as a mechanical and cosmetic restoration, not a quick fix. This mindset keeps the repair resilient under stress and helps ensure that the dash continues to support the necessary components without compromising safety.
The practical takeaway is straightforward. If your goal is to retain safety, comfort, and resale power, plan for a repair that prioritizes durability and precision. When the crack is a sign of material fatigue rather than a simple surface wrinkle, consider replacement as a viable option, especially if the underlying material has degraded to a point where a repair would be unlikely to last. If you opt for a repair, invest in high-quality epoxy-based fillers, the right primers, and a multi-layer finish; avoid quick sealants that don’t withstand heat well. Maintain the dash with protective measures and monitor for new signs of stress. The most durable path is one informed by the truck’s climate, usage, and the dash material’s behavior under thermal cycles. That approach keeps the interior safer, keeps gauges and controls accurate, and preserves the vehicle’s market value over time.
For readers seeking to connect this long-term perspective with practical, precise steps, our archived guidance and extended discussions offer a deeper dive into restoration principles and proven techniques. See the Master Truck Repair Blog for broader context and ongoing maintenance conversations. Master Truck Repair Blog
External resources can complement this chapter by offering detailed procedural insights that align with the durability framework described here. A well-regarded, practical guide on how to approach cracked dashboards provides step-by-step guidance on preparation, filling, priming, and finishing. This external resource distills collective experience into actionable technique, helping truck owners translate long-term goals into a repeatable repair process. For those who want a concrete, verified walkthrough, visit https://www.wikihow.com/Fix-a-Cracked-Dashboard to explore a comprehensive approach to restoring cracked dashboards and preventing recurring damage. The discussion here, anchored by real-world considerations of safety and value, remains grounded in the idea that lasting repairs require careful material science, proper execution, and an eye toward the interior’s long-term performance.
Final thoughts
In conclusion, understanding the costs and options available for repairing a cracked dashboard is essential for fleet managers and operators. Each choice—whether a DIY solution, professional repair, or dashboard replacement—offers different trade-offs in terms of cost, time, and quality. It’s imperative to assess the severity of the damage and consider not only immediate budget constraints but long-term vehicle safety and operational efficiency. By making informed decisions in this area, you can maintain a reliable fleet that supports your business goals.