Rust formation on trucks can threaten the longevity and safety of your vehicles. Understanding how to effectively repair and prevent rust is crucial for fleet managers, trucking company owners, and operators in construction and logistics industries. In this guide, we will dissect the rust repair process into four distinct yet interconnected chapters: first addressing minor rust removal techniques suitable for surface-level corrosion, then focusing on moderate to severe rust cases that may require more intensive repairs. The third chapter will explore preventative maintenance and protection strategies aimed at mitigating future rust formation, and finally, we will outline when it’s essential to seek professional help, ensuring your fleet remains operational and safe on the road.
From Surface Rust to Solid Finish: Mastering Minor Rust Repair on a Truck
From Surface Rust to Solid Finish: Mastering Minor Rust Repair on a Truck
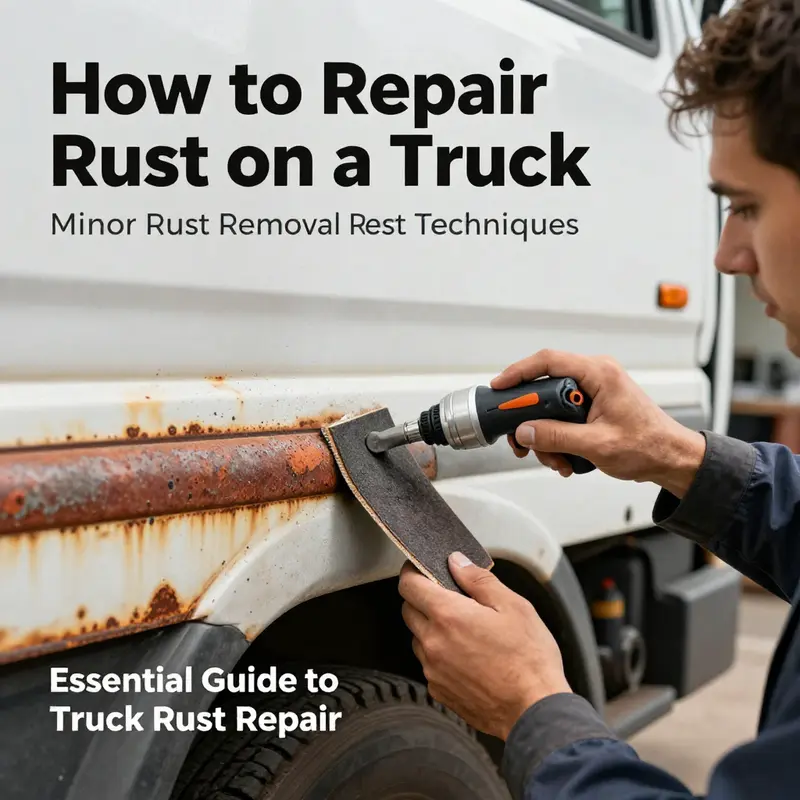
Minor rust on a truck is not a cosmetic nuisance to ignore. It is a signal that moisture, salt, and metal fatigue are at work, and left unchecked it can creep into the panel and undermine structural integrity. When caught early, minor rust can be cleaned away with careful work and a few deliberate steps that restore both look and longevity. The goal is not to erase every speck of oxidation with brute force, but to stop its spread, create a clean base for primer, and seal the metal against future moisture. This chapter walks through the practical, patient process that keeps a truck’s body panels strong and presentable without resorting to heavy welding or panel replacement. The approach is systematic and repeatable, so you can tackle small patches as soon as you notice them, before they become costly repairs or a source of lasting disappointment on the highway or in the lot.
Begin with a clean slate. Dirt, grease, and road grime can hide the true extent of corrosion and complicate every subsequent step. A thorough cleaning with soapy water or a dedicated car wash solution removes oils and grit that would otherwise contaminate the metal surface during sanding and treatment. Rinse well and allow the area to dry completely. A dry surface is essential not only for an accurate assessment of the rust but also for ensuring good adhesion of primers and coatings. If you suspect salt exposure or road spray has penetrated into seams or creases, take a moment to dry those areas carefully and consider a light rewash before you proceed. The cleaner the base, the more predictable the repair will be, and the less risk you face of trapping moisture beneath new coatings.
With the area clean, inspect the corrosion closely. Surface rust appears as a reddish or brownish film that sits on top of the paint. It is typically scoured away with mild mechanical action rather than brute force. Gently rub the rusted spot with fine-grit sandpaper in the 400 to 600 grit range or a fine steel wool pad. The objective is to remove the visible rust and expose bare metal without cutting into the surrounding paint or creating new scratches that will later become moisture traps. A small handheld wire brush can assist stubborn patches, and for tougher spots an electric rotary tool with a fine polishing attachment can be used to refine the surface. The key is to work slowly and evenly, keeping the patterns of micro-scratches consistent so you don’t gouge or overheat the metal. As you work, stay mindful of the edges where the paint meets the bare metal. You want a crisp, clean line where you’ll reattach protective coatings later, not a feathered break that invites moisture back in.
Once you’ve cleared the rust down to solid metal, the next step is to prepare the surface for protective chemistry. Wipe away the dust with a clean, damp cloth, then dry the area thoroughly. It is easy to underestimate the value of this wipe-down, but residual dust can interfere with the adhesion of rust inhibitors and primers. A second quick inspection is worthwhile; if you see any remaining pinpoints of corrosion, you can address them now with a touch more light sanding. The objective is a smooth, dry, dull metal surface that reads as ready for treatment, not a glossy, contaminated finish that might peel later.
The crucial turn in minor rust repair is applying a rust inhibitor or converter. These products chemically treat the iron oxide and bind with the remaining corrosion to form a stable, inert layer that resists further oxidation. Follow the manufacturer’s instructions regarding application and drying times, as formulations vary. In general, you’ll apply the converter to the treated area and allow it to cure—often within minutes to a fraction of an hour—before moving on. The converter creates a protective bridge between the bare metal and the primer, helping to prevent rust from rekindling under paint. It is a step that many DIYers skip, yet it is worth the extra attention because it adds long-term resilience to the repair. During this phase, keep the workspace well-ventilated and wipe away any drips or runs promptly to avoid staining the surrounding paint once you bring the area back to life with primer.
After the converter has set, priming the treated area becomes the next anchor point in the repair. A high-quality automotive primer designed for metal-to-metal bonding provides the necessary adhesion and a protective moisture barrier for the topcoat. Apply the primer in light, even coats, allowing each layer to dry according to the product’s directions. Avoid heavy, run-prone applications; thick layers can trap solvents and impede drying, which would compromise adhesion. A well-sealed primer creates a uniform base that not only gives the paint something to grip onto but also reduces the chance of corrosion finding a new foothold beneath the finish. If the primer has a built-in sealer, you may be able to proceed to paint after the recommended flash-off time, but in the case of uncertain conditions or unusual surface textures, a light block-sand with very fine paper (or a polishing pad) after the primer dries can produce an even, flat surface ready for color.
The painting stage, while seemingly straightforward, rewards careful technique. Color-matching a small repair with the rest of the panel is more feasible when you work with thin, even coats rather than trying to cover with one thick application. If you use a spray can, practice the motion on a scrap surface before you reach the panel. Maintain a consistent distance from the surface and sweep with steady, overlapping passes. Allow each coat to dry thoroughly before applying the next one. When the color looks even and there are no visible imperfections, a clear coat can be added to protect the finish and deepen the gloss. A clear coat also helps to blend the repaired area with the surrounding paint, which can be especially important on flat panels or curved surfaces where reflections reveal subtle discrepancies. For those seeking the most durable result, a professional spray application can sometimes offer a finer, more uniform appearance, but an even hand, patience, and good lighting can yield excellent results in a home shop as well.
Even after color is restored, a protective layer around the entire panel is wise. A well-chosen wax or sealant forms a sacrificial shield against moisture and contaminants, helping to slow future oxidation in the repaired area and nearby spots that may be at risk. Applying protection beyond the immediate repair spot creates a uniform barrier that can extend life across the entire surface. In many cases, re-waxing every few months or after winter driving in salted conditions becomes part of a practical maintenance routine. The aim is not to create a flawless, one-off restoration, but to establish a durable, maintainable finish that looks good and resists the elements over time.
If you live in a region where rust severity is a regular concern, you may develop a feel for when minor rust is still manageable with surface work and when it has progressed to a point where the underlying metal could be compromised. The line is not always crisp, and it requires judgment born of experience. If you encounter spots where rust has penetrated through the metal or has already created holes, or if the panel itself is buckling or deforming, the approach above will not suffice. In those cases, professional welding and panel replacement may be the only durable solution. Recognizing the limits of a DIY approach is part of responsible maintenance, especially on a vehicle that carries people or heavy loads. The same insistence on cleanliness, cautious sanding, and careful priming that governs minor rust repair also guides decisions about whether to pursue alternative repair paths or to seek expert hands.
Beyond the immediate repair, consider the broader discipline of prevention. Minor rust repair gains its value because it is part of an ongoing practice rather than a one-time fix. Regular inspection of the undercarriage, wheel wells, and door frames helps catch trouble early. Cleaning remains a central habit: frequent washes, especially after exposure to road salt or wet road conditions, followed by thorough drying. Protective coatings should be revisited on a routine schedule. A sound maintenance plan includes periodic reapplication of protective sealants and waxes, and where feasible, an undercoating or rustproofing treatment can offer an extra margin of defense for vulnerable zones such as the frame itself and the floor pans.
As you weave minor rust repair into your maintenance routine, you might find resources that broaden your approach and save you time and money in the long run. For broader maintenance planning and budgeting, consider our guidance on budgeting for routine truck maintenance. It helps you align small repairs with larger, ongoing upkeep, so rust treatment becomes part of a predictable workflow rather than a crisis response. budgeting for routine truck maintenance. This framing keeps you focused on longevity rather than chasing quick fixes, and it supports consistency in how you treat rust repair alongside other essential maintenance tasks.
Finally, the practical context of these techniques matters. The minor-rust case you encounter on a truck’s exterior panel has parallels with similar work on frame rails and wheel arches, where careful cleaning, inhibitor treatment, and a disciplined painting sequence can avert progression. The method described here—clean, remove, convert, prime, paint, protect—provides a repeatable blueprint. It respects the realities of an owner-operator economy while delivering a repair that is sturdy, visually acceptable, and durable enough to withstand seasonal pressure and road conditions. If performed with patience and attention to the nuances of metal, primer, and finish, the repair occupies a balanced middle ground between cosmetic restoration and genuine structural protection. And because rust is a recurring challenge in trucking climates, adopting this approach as a standard practice elevates not just the present appearance but the truck’s long-run reliability.
External resources can broaden the practical understanding of rust prevention. For a broader, official perspective on rust prevention and vehicle safety, consult the relevant resources from recognized authorities. NHTSA rust prevention resources.
Rescuing the Big Beam: Repairing Moderate to Severe Rust on a Truck
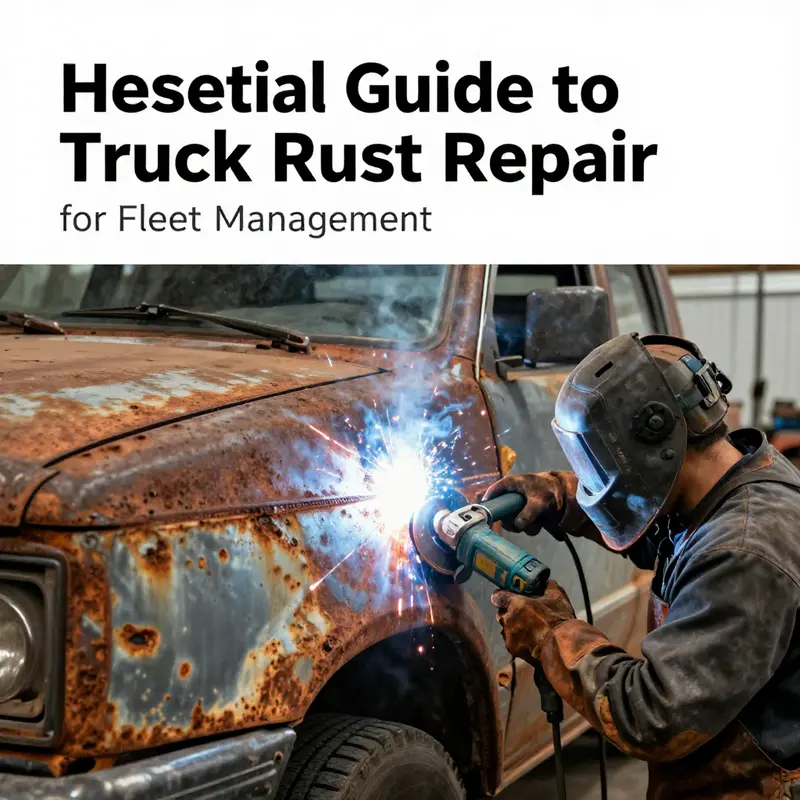
Moderate to severe rust on a truck is more than a cosmetic issue; it is a test of a vehicle’s structural heart. When corrosion has reached the frame, crossmembers, or the cargo box floor, the task shifts from masking blemishes to rebuilding and reinforcing a load-bearing system. This chapter follows a practical, methodical path through the kind of repair that restores safety and longevity, not just appearance. The objective is clear: remove compromised metal, replace what must go, and shield the repaired area from renewed attack by moisture and salt. It is a process that rewards patience, precision, and a respect for the metal’s grain and the vehicle’s geometry. A successful repair blends sound metalwork with thoughtful protection, ensuring the truck can shoulder its duties again, whether it’s hauling fleet loads or serving as a dependable workhorse.
The starting point is an honest assessment. Before you touch a single bolt or grind a single inch of rust, you must identify the extent of the damage and the criticality of the components involved. Frame rails, front and rear crossmembers, floor pans in the cargo area, and any inner webs that anchor suspension or body mounts require careful scrutiny. Look for thinning metal, flaking paint that hides cavities, pinholes that appear when you tap with a hammer, and any movement when you apply a load or flex the panel. If the rust has created soft spots, honeycombing, or holes, you are likely facing metal removal and patch work rather than cosmetic resurfacing. The decision tree is simple but unforgiving: if the structure’s integrity is compromised beyond superficial repair, you must cut away the damaged metal and weld in a properly shaped patch. The goal is not merely to seal the opening but to reestablish the load path and support the stresses the component will bear under normal operation.
Preparation is everything. Once you’ve mapped the damage, the area around it must be clean and dry, free of grease, wax, and old coatings that would trap future moisture. Loose paint and scale should be removed with a grinder or wire wheel, but you must guard adjacent metal and trim the risk of overheating the surrounding metal. Excessive heat can alter the temper of structural steel, cause warping, or create new stresses that weaken the repaired area. As you grind, keep the work area well ventilated and use appropriate eye and skin protection. The burrs of cut metal create sharp edges that, if not feathered and sealed, become starting points for new rust. The next phase—whether you repair in place or remove a panel for welding—depends on the damage’s location and severity. If the damage is contained to a small, localised area, you may fashion a patch from a piece of steel that mirrors the original gauge and shape. For large or irregular openings, the patch may need to be cut as a dove-tail or wedge pattern to provide a robust joint that resists pulling away under stress. The dove-tail concept is simple: the angled sides increase surface area for weld bonding, improving rigidity and reducing the chance of rust creeping behind a flat seam.
With the surface prepped, the repair proceeds to the core task: patching. A patch must fit precisely, sit flush with the surrounding metal, and be welded with full fusion along all edges. You may need to trim the patch, bend it, or add a reinforcing plate behind it to restore stiffness. The welding itself is a blend of technique and restraint. On frames and structural panels, you’d typically choose a process compatible with the metal thickness and your skill set, ensuring penetrative welds without burning through. The patch should be held in place with clamps or tack welds before a continuous weld sequence seals it to the old metal. A well-executed weld forms a single, continuous metal mass across the joint, with depth and width balanced to avoid creating heat-affected zones that could lead to future cracking. After welding, the seam must be ground flush; the edges that meet the original metal should be feathered so there is no sharp transition that could trap moisture or collect grit. This finishing step matters as much as the weld itself because a smooth transition reduces crevices where rust could hide.
In addition to the mechanical repair, a chemistry-driven approach to corrosion control helps ensure longevity. Once the new metal is integrated and the surface is clean, apply a rust converter to the repaired area. This type of product reacts with any remaining rust and converts it to a stable, inert layer that can bond with primer. Although the converter is most effective on surfaces that have been thoroughly cleaned of loose rust, it also serves as a converter in the crevices where metal-to-metal contact has been reestablished. After the converter has cured according to the manufacturer’s directions, prime the metal with a durable automotive primer designed to promote good adhesion of the subsequent topcoat. The primer acts as a shield, but its performance hinges on a clean, dry surface and meticulous surface preparation. The protective sequence continues with a paint layer that matches the truck’s original color and provides a weatherproof seal. For structural repair areas, higher film thickness primers or primers designed for metal-to-metal bonding can help ensure that the final coat adheres evenly and resists moisture intrusion.
A modern approach to rust treatment echoes in the broader discussion of prevention. Some techniques emphasize direct chemical treatment of rusted areas, forming a stable base that accepts paint well. While it is tempting to reach for a quick fix, the reality is that one step does not replace the others. A robust finish relies on multi-layer preparation: clean and dry surface, rust conversion where applicable, primer, topcoat, and a protective finish. The final layers—paint followed by wax or a sealant—augment the surface’s resistance to water, road salts, and contaminants that could start the rust cycle anew. The protective wax or sealant acts as a hydrophobic barrier, helping to shed water and reduce moisture retention in microcrevices where rust tends to take hold.
Prevention and maintenance after a major repair are not afterthoughts; they are essential to the repair’s durability. The best approach blends routine inspection with disciplined care. Regular inspections should be a monthly habit for the first year after a repair, focusing on the frame, crossmembers, and cargo-area floor. Pay attention to any sign of new discoloration, bubbling paint, or flaking in the repaired zone. After each use, especially in or after winter conditions or trips through salted roads, wash and dry the undercarriage and cargo area thoroughly. Salt and moisture are the most insidious combination; they can creep into seams and behind curing finishes if the area is not fully dry. A seasonal wax or protective coating adds a further layer of defense by providing a sacrificial barrier that slows moisture ingress. In vulnerable areas such as the floor pans and the inner surfaces of the cargo box, consider an additional protective coating designed for bare metal and resistant to abrasion from dirt and debris kicked up by trailer tires. A well-maintained truck becomes a more predictable asset, and the investment in time and materials pays off in reduced risk of repeat rust damage.
The path from moderate rust to restored integrity does not exclude professional assistance. There are cases where the extent of corrosion penetrates beyond the capacity of a DIY repair, particularly when rust has undermined critical joints, anchor points, or the structural balance of the chassis. In those scenarios, a professional auto body shop brings precise welding skills, clamps, jigs, and inspection protocols that ensure the repair is not only visually sound but dimensionally true and load-rated to its original specification. If you are working within a fleet, this is where a coordinated plan with in-house and off-site technicians helps keep downtime to a minimum while maintaining safety standards that protect drivers and cargo.
As you integrate the repair into a broader maintenance philosophy, consider the value of a proactive approach. A robust maintenance framework reduces the risk of severe rust progressing to an unmanageable stage. This includes regular undercarriage inspections, timely addressing of paint chips and dents, and a consistent plan for applying protective coatings in vulnerable areas. For readers planning to align their approach with broader fleet practices, a practical reference point is available in a guide on fleet maintenance that emphasizes optimizing routines and resource allocation for small fleets. It offers a strategic lens on maintenance scheduling, budgeting, and preventive measures that complement the technical repair work described here. You can explore that resource here: Optimizing fleet maintenance for small fleets. The aim is not to replace skilled metalwork but to integrate it into a durable, long-term care plan that keeps trucks safe, capable, and ready for the next mile.
One more note on method and mindset. A common misconception is that rust can be banished with a single chemical trick or a single-shot coating. The reality is more disciplined. The repair process is a sequence of tightly controlled actions: remove the corrosion to solid metal, fashion a patch that restores structural continuity, weld and finish with care to avoid heat-affected damage, and seal and protect with primers, paints, and protective films. In some modern demonstrations, practitioners show a rust-conversion step that forms a stable base when applied directly to rusted areas. While such a method can be effective as part of a broader system, it should be used judiciously and within the context of proper surface preparation and subsequent priming and painting. Treat it as a supplementary step rather than a substitute for thorough metal removal and structural restoration.
The final takeaway is pragmatic: when the rust has become a structural concern, you should approach the repair with a blend of metalwork discipline, protective chemistry, and cautious maintenance. The big beam of the truck the frame must be treated with respect, because any compromised strength will echo through handling, suspension, and load-bearing performance. The cargo box, floor pans, and mounting points deserve the same careful treatment, as they contribute to safe loading, securing cargo, and maintaining the vehicle’s geometry. By combining careful removal of compromised metal, precise patching and welding, thoughtful corrosion control, and a steadfast commitment to protection and maintenance, you transform a fragile repair into a durable restoration. And when in doubt about structural repairs or when a patch would require more than a typical home workshop can safely deliver, the best choice remains to bring the vehicle to specialized service. The goal is to preserve the truck’s capacity to perform well, mile after mile, with a repaired structure that resists the very conditions that caused the rust in the first place.
For readers who are building a long-term maintenance mindset, this chapter connects to a broader continuum. The repair work you undertake becomes part of a lifecycle approach where prevention, timely intervention, and periodic reinspection are the norm. In the end, the truck that emerges from this process is more than a patched shell; it is a restored system that balances strength, reliability, and dry, road-ready resilience. To keep this momentum going, remember to integrate your repair plan with a broader fleet-maintenance strategy, and consider how regular servicing, protective coatings, and disciplined inspections can extend the life of steel that has stood up to years of service. External resources and ongoing demonstrations continue to refine these methods, and the evolving craft of rust repair remains a practical, hands-on discipline grounded in sound metalwork and a steady commitment to safety. External reference: https://www.douyin.com/video/74856789123456789.
Repairing Rust on a Truck: A Practical Guide to Prevention, Protection, and Longevity
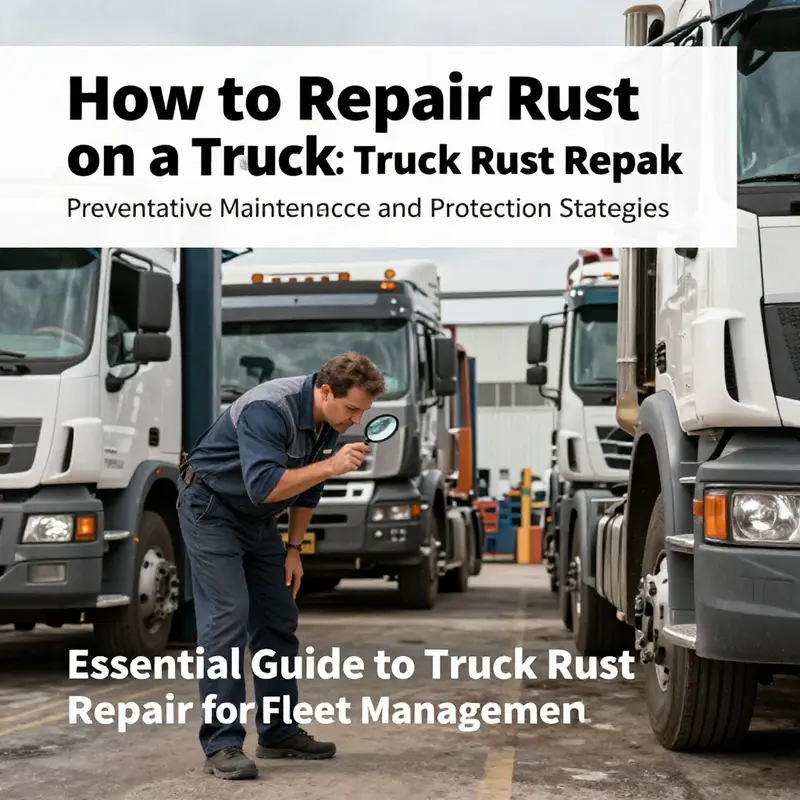
Rust on a truck is more than a cosmetic problem. It is a signal that moisture, road salt, and time have started to compromise metal that bears weight, supports joints, and frames the vehicle’s safety undercarriage. The aim of any repair should be twofold: first, to restore structural integrity where rust has penetrated, and second, to build a durable shield that slows or stalls future corrosion. Achieving that balance requires a sequence that starts with honest assessment, moves through targeted repair, and ends with a long-term protection plan. When you approach rust with that mindset, every phase—repair, prevention, and protection—becomes part of a cohesive system rather than a series of isolated fixes. The path you choose will depend on how deeply the corrosion has taken hold, but the guiding principle remains the same: remove the damage, replace what’s compromised, and then seal and defend the metal surface so that the next wave of weather, road grime, or winter grit does not erase the repair overnight.
The moment rust is spotted, the first priority is to act promptly. Small, surface rust often hides under paint but still severs the protective layer that keeps iron from meeting oxygen and moisture. A careful surface preparation sets the stage for a durable fix. Begin by removing loose rust and flaking paint with a wire brush, a scraper, or a handheld grinder equipped with a flap disc or a coarse wheel. The goal is to expose clean metal while avoiding gouging or warping the surrounding area. The area should be free of grease, oil, and dirt. A degreaser or a simple solution of water and a mild vinegar rinse can help dissolve stubborn residues, followed by a thorough rinse and a complete dry. Moisture left behind invites new rust, so the surface must be completely dry before you proceed.
Once the surface is clean and dry, you face a pivotal choice. For light, surface rust that hasn’t penetrated the metal deeply, a rust converter can be a practical ally. This chemical treatment bonds with iron oxide to form a stable, inert layer that halts further oxidation. It is not a substitute for primer, but when used correctly it offers a robust base that prevents a new, bare layer of metal from rusting under paint. After the converter dries according to the manufacturer’s instructions, apply a rust-inhibiting primer. The primer’s job is to seal the metal and provide a uniform, adhesion-friendly surface for the topcoat. The topcoat itself should be a durable automotive paint matched to your truck’s color. In practice, several light coats tend to yield better results than one heavy application, reducing the risk of runs and ensuring a smooth, even finish that resists chipping and weathering.
For rust that has penetrated beyond the surface and begun to dull or thin the metal, the repair approach must be more invasive. Moderate to severe rust is not something you can simply cover with paint and hope for the best. In these cases you must remove the damaged metal to reach sound, undamaged material. This often means cutting out the affected area and preparing a patch that can be welded in place. The aim is to recreate a seamless panel where the original metal has been compromised. A well-executed patch should mirror the shape and contour of the original panel, and some repair scenarios employ a dove-tail or similar patch geometry to create a stronger bond with the surrounding metal. Once the patch is cut and positioned, welding the replacement metal in place becomes the crucial step. The welds should fuse fully with the surrounding sheet, with no gaps or cracks that could harbor moisture. After welding, grind the seam smooth and feather the edges to blend the patch with the adjacent metal. A careful finishing pass is essential to avoid creating high spots that can trap moisture or cause paint to crack.
But welding is only part of the story. Just as you would with surface rust, treat the repaired area with a rust converter to neutralize any remaining oxide, then apply a primer designed for metal-to-metal bonding. The goal is to ensure that the patch, the surrounding original metal, and the new finish act as a single, cohesive unit. When you apply the final paint, professional spray techniques can deliver a flawless appearance. If you do not have access to a professional spray setup, take care with the environment: work in a well-ventilated space, maintain constant temperature, and apply multiple thin coats with ample drying time between passes. These steps are not mere cosmetics; they establish a protective barrier that resists moisture ingress and resistive wear from road debris.
The restorative steps—whether addressing surface rust or a deeper structural compromise—are only part of the broader program. Without prevention, previous rust issues can reemerge in less than a season. Preventive maintenance is the quiet, ongoing work that keeps a repaired truck from returning to the same trouble spots. It begins with regular, intentional inspection. After every run, particularly when the vehicle has operated in wet or salty environments, walk around the truck with a critical eye. Look for small scratches, chips in the paint, or new signs of rust around vulnerable areas such as wheel wells, door edges, and joints where moisture can settle. Early detection makes quick, straightforward fixes possible. A chipped area is not just a cosmetic blemish but a potential doorway for moisture to creep under the paint and start a new cycle of corrosion.
Another fundamental aspect of prevention is keeping the surfaces clean and dry. Dirt and road grime can trap moisture and accelerate rust, especially in crevices, seams, and drain channels. A routine wash, with extra attention to the undercarriage and wheel wells, helps dislodge salt and corrosive residues that wind up there during winter or off-road adventures. Drying is equally important; make time to dry the truck thoroughly after washing or after exposure to rain or snow. Moisture left in recesses—such as the bed corners, hinge lines, and aftermarket access points—can set the stage for rust to reassert itself beneath coatings that were once protective.
Protective coatings play a central role in long-term durability. A wax or protective sealant applied to the metal surfaces can create a barrier against moisture and oxygen—the twin culprits of rust. For exposed areas where wear and chafing are common, a robust surface coating helps keep the metal isolated from the environment. In areas that are particularly prone to water exposure, such as the undercarriage or the floor pans, an undercoating or rustproofing layer can offer additional protection. While no coating can guarantee perpetual rust-free performance, a disciplined approach—reapplication every few months or as directed by the product—dramatically extends the life of the repaired metal and preserves paint integrity.
Managing moisture and corrosion is also about practical habit. If possible, park in a dry, covered location. When the truck is stored for longer periods, consider a breathable cover that protects against rain and humidity without trapping damp air beneath it. Drainage is another often overlooked detail. Make sure the bed drains and any other drainage holes are clear and unobstructed. Blocked drains allow water to pool and seep into seams, accelerating rust from the inside out. Keeping drainage channels clear is a small maintenance act that yields outsized protection over time.
Of course, rust repair and prevention are tasks that demand respect for safety and skill. Welding, cutting, and metal shaping, especially on structural components, carry inherent risks. If the damage is extensive, or if the repair involves structural members such as the bed supports or frame rails, the expertise of a professional body shop is strongly advised. A professional can ensure that the patch geometry, weld quality, and corrosion protection meet safety and durability standards. In some cases, corrosion can travel beyond what’s visible, weakening critical areas that can impact handling and safety. A cautious approach—acknowledging when to stop and seek expert help—protects both you and the vehicle in the long run.
As you weave together repair, prevention, and protection, you’re building a comprehensive strategy rather than chasing quick fixes. The process aligns practical mechanics with a broader, proactive philosophy: act quickly to arrest rust, repair thoroughly to restore strength, and protect consistently to preserve that strength over years of use. This approach is not about chasing a flawless, showroom finish. It’s about restoring the truck’s reliability, keeping the structure sound, and ensuring that the vehicle continues to serve as a functional workhorse rather than a rust factory. In practice, that means the repair steps—whether surface-focused or patch-based—are repeatedly reinforced by a routine of inspection, cleaning, and protective coatings.
For readers who want to explore further how to translate this approach into hands-on practice, practical guides and real-world repair stories can be a valuable resource. The Master Truck Repair blog hosts a range of articles on maintenance, repair, and the daily realities of keeping heavy-duty vehicles on the road, which can complement this chapter with additional perspectives and techniques. You can visit the blog for more practical tips and examples, and read about how others have tackled rust challenges in their own shops and on their own trucks. Master Truck Repair blog.
If you want to broaden your understanding beyond the practical how-to and into the broader context of rust repair as a discipline, a reputable external source provides a comprehensive overview of strategies for repairing rust on trucks. It discusses the balance between removing damaged material, choosing the right priming and coating sequences, and the importance of protection that endures in demanding conditions. This external resource can offer additional insights into progressions from initial assessment to long-term maintenance. See here: https://www.autotrader.com/truck-repair-and-maintenance/repairing-rust-on-trucks
The overall takeaway is clear: rust is manageable when treated as a continuous process rather than a single event. Repair the damaged metal with precision, restore the protective layers to create a reliable barrier, and maintain the vehicle with regular care that includes inspection, cleaning, drainage maintenance, and protective coatings. With that mindset, your truck can withstand rough environments and frequent use, preserving its structural integrity and its value for years to come.
Rust Demystified: Deciding When DIY Suffices and When to Call in a Pro for Your Truck
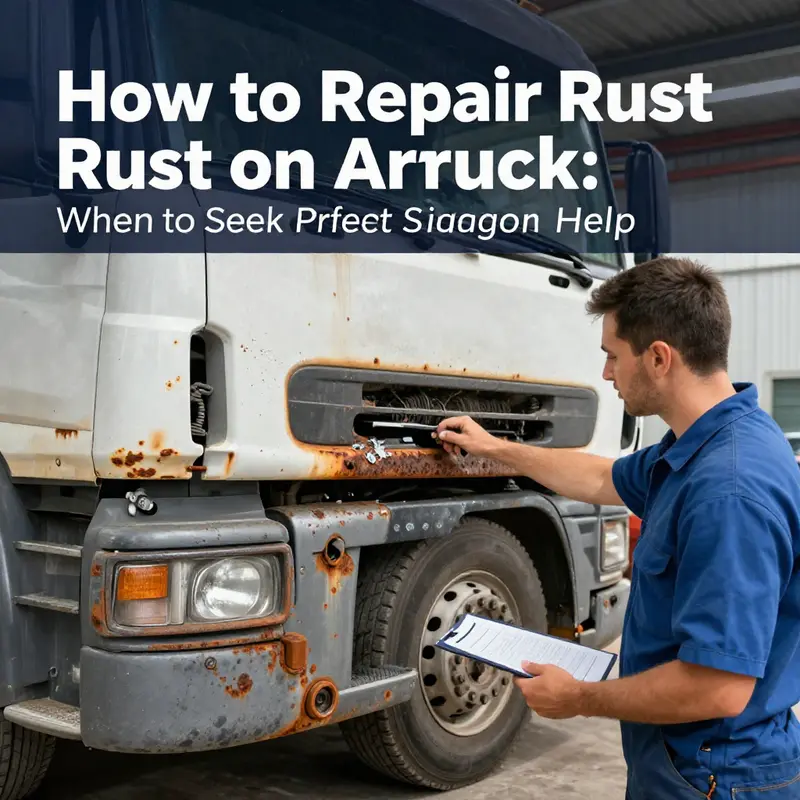
Rust on a truck isn’t just a cosmetic nuisance. Left unchecked, it can creep from a paint speck into the metal itself, undermining the enclosure that keeps a vehicle structurally sound and safe on the road. The way you tackle it should start with a clear assessment of how bad it is and where it sits. A careful eye will separate subtle surface rust from rust that has penetrated deeply enough to threaten frame integrity or safety-critical components. When you know what you’re dealing with, you gain a path that’s efficient, economical, and, most importantly, safe for you and your passengers. This chapter follows that logic in a practical, narrative way, bridging the gap between DIY fixes and the professional repairs that sometimes become unavoidable. The aim is not to glamorize rust work as a purely DIY triumph but to empower you to make the right call for the specific problem in front of you, with a clear sense of the risks and the returns at every step.\n\nIdentifying rust types is the first move. Minor surface rust often appears as flaked spots or thin, powdery remnants on paint or bare metal. It is generally localized, and the metal beneath is still solid. Moderate rust has burrowed deeper, leaving pits and revealing a loss of metal thickness. It may still be contained to a panel, but the integrity of that panel is no longer certain. Severe rust has breached the metal’s strength, creating holes or weakening a structure to the point where it would be unsafe to drive without a proper repair. The location matters as much as the extent. Rust on areas that bear weight or handle loads—such as the frame, suspension mounts, wheel wells, or floor pans—needs heightened scrutiny. Rust near brake lines or steering components is especially critical because corrosion here can translate into a direct safety risk. An honest assessment asks not just how much metal is affected, but how essential the affected component is to the vehicle’s safety and performance.\n\nFor the DIY route, the logic of treatment follows from that assessment. Minor surface rust offers the most forgiving path. You begin with a thorough cleaning to remove dirt, grease, and any road grime that can trap moisture. A clean surface lets you see what you’re dealing with and prevents contaminants from seeping back under fresh coatings. After cleaning, you must remove the rust itself. Sanding with fine-grit paper, typically in the 400–600 grit range, or a wire brush will usually clear the surface rust down to bare metal. If stubborn spots refuse to yield, an electric drill equipped with a wire wheel can be effective, but you should work slowly to avoid gouging the metal. The goal is a smooth, shiny metal surface that’s ready for protection, not a rough, ragged edge that will trap moisture later.\n\nOnce the rust is removed, the next step is a rust converter if you choose to use one. A rust converter chemically bonds with iron oxide and converts it into a stable, inert compound that can act as a primer layer. The chemical change helps prevent any remaining microscopic rust from growing beneath the paint. It’s a prudent step, though optional in many DIY workflows. If you do apply a converter, you’ll want to let it cure according to the manufacturer’s directions before moving on to primer. Primer then seals the metal and provides a robust base for the final color. A high-quality automotive primer creates a barrier that minimizes future moisture intrusion and gives the topcoat something to key into. The painting itself—ideally done with a spray technique in layers—restores the aesthetic and protects the metal from moisture. The curing times, spray technique, and the number of coats depend on the products you choose, but a careful, even application is essential for a durable finish.\n\nThat said, minor rust is the realm where good maintenance pays dividends. The habit of thorough, periodic inspections after winter, during wet seasons, or after road salt exposure minimizes the chance that small rust issues become bigger problems. Regular cleaning, including underbody washouts and attention to wheel wells, helps too. A protective coating every few months—whether wax or a more robust sealant—provides a shield that reduces moisture contact with exposed metal. When you commit to a maintenance mindset, you turn rust from an escalating threat into a manageable, controllable condition.\n\nBut not all rust is so forgiving. Moderate to severe rust presents a different landscape. If you can see holes or the metal has thinned enough to feel soft when you press with a tool, DIY may still be possible in some cases, but it often requires more invasive steps to restore structural integrity. The process typically involves removing the damaged metal completely and replacing it with a patch that’s shaped to match the original panel. This may require cutting out the bad steel with a grinder, shaping a replacement patch, and welding it into place so the new metal fuses with the surrounding structure. A patch doesn’t just fill a hole; it restores stiffness and the ability to handle loads and stresses the panel would experience under normal use. After welding, the seam must be ground smooth and feathered to blend with the original metal. The repaired area should then be treated with a rust-inhibiting approach that covers not just the surface but also the edges and any potential seam lines where moisture could linger. Priming and painting follow, with a careful, professional touch to ensure the finish is even and long-lasting. This is where experience plays a decisive role. The heat and precision required for sound welds demand a level of skill that isn’t universal among DIY enthusiasts. If any attempt risks weakening the structure or introducing new stress points, it may be wiser to call in a professional.\n\nFor moderate to severe rust, the emphasis shifts from appeasing the eye to restoring the metal’s integrity. You may need to create a patch with a dove-tail or similar joint to ensure a strong bond and a seamless integration with the surrounding panel. The patch should extend beyond the damaged area to where sound metal remains. That broader margin helps distribute stresses and prevents a simple patch from becoming a weak point. Welding, then grinding, and feathering edges require not only the right tools but also proper technique to avoid warping, distortion, or heat-affected zones that could compromise fit and seal. After repair, the area should be treated with a rust converter on the entire repaired surface, ensuring that any residual oxidation is chemically stabilized before finishing. A dedicated primer designed for metal-to-metal bonding then provides a stable base for the final paint layer, which must be applied with care and, if possible, in a controlled environment to prevent dust and moisture from blurring the finish. The painting phase remains the last hurdle before the repair becomes invisible to the casual observer, but the functional confidence it provides—knowing the metal panel now behaves as a true part of the structure—is significant.\n\nEven when the repair looks complete, rust prevention must continue. Professional repair often includes long-term anti-corrosion treatments beyond the basic patch, especially for critical areas like the frame and floor pans. In practice, this means more than the surface coating; it can involve specialized undercoatings or coatings that bond to metal for long-term protection. The aim is to prevent moisture intrusion, inhibit future oxidation, and preserve the metal’s durability under harsh conditions. If the rust was extensive, the pro’s approach might include evaluating drainage and moisture pathways, ensuring that washouts or cleaning routines actually remove standing water from vulnerable cavities, and sometimes re-sealing seams that are potential moisture traps.\n\nThe decision to DIY or to bring in a pro involves several practical factors. Safety is paramount. Welding or cutting metal introduces risks: burns, fumes, fire hazards, and the need for proper ventilation and protective equipment. The structural components—especially the frame, suspension mounts, and wheel wells—carry loads and influence crash performance. Any work that could weaken these areas should be approached with caution. Cost is a practical consideration, too. A DIY fix might seem cheaper at the outset, but if you misjudge metal thickness, misalign a patch, or fail to achieve a proper seal, you can end up with recurring rust, poor paint adhesion, or compromised fit. The time investment matters as well. A professional shop can typically deliver a robust repair with the right equipment and environmental controls, cutting down the risk of rework and the need for further attention after the initial fix. On the other hand, for minor rust that is well isolated from structural members, a disciplined DIY approach can yield durable results if you’re patient with preparation, curing times, and protection.\n\nBeyond the immediate repair, prevention remains a throughline that connects the DIY and professional paths. Regular inspection should become a monthly habit, with particular attention paid to the undercarriage, frame rails, wheel wells, door sills, and joints where moisture tends to pool. After driving in snowy or salted conditions, flush and rinse nooks that accumulate salt and moisture. Dry everything thoroughly to prevent any residual dampness that can fuel future corrosion. Protective coatings aren’t a one-and-done solution. They require periodic renewal, especially in vulnerable regions. Consider an undercoating or rust-preventive spray chosen for its compatibility with your vehicle’s metal. The goal is to create a barrier—one that impedes water and air from reaching the metal—without trapping moisture in areas where it can become a problem. Maintaining a clean, dry environment around the truck helps sustain the protective layer and keeps rust at bay for longer.\n\nIf you find rust reappearing after previous repairs or you suspect underlying moisture issues or poor drainage, take the situation seriously. Widespread rust signals a systemic moisture problem rather than a localized failure. In such cases, a professional inspection is not just prudent—it’s essential to diagnose the moisture source, assess the full extent of damage, and propose a comprehensive anti-corrosion strategy that works with the vehicle’s OEM standards. A certified mechanic or auto body specialist can conduct a thorough assessment, recommend the long-term anti-corrosion regimen, and ensure that repairs meet the manufacturer’s expectations for safety and durability. This is especially important for components that must meet strict tolerances and safety requirements.\n\nWhen it comes to making the choice, your approach should balance the specifics of the rust you see with the realities of your tools, space, and skill. If the rust is isolated to a small patch on a non-structural panel and you’re comfortable with metal prep, rust converter, primer, and paint, a careful DIY can deliver a solid result. If the metal has pitted deeply, if holes are present, or if the damage sits in a crucial structural region, it’s sane and prudent to bring in a professional. The wrong patch in the wrong place can go from a quick fix to a dangerous oversight, especially on a vehicle that depends on precise alignment and load-bearing capabilities for safe operation.\n\nFor readers seeking a deeper dive into professional-grade rust repair procedures—particularly frame restoration and panel replacement—there are resources that discuss the methods used by certified shops, the standards they follow, and the long-term strategies they apply to protect metal surfaces after repairs. These resources offer a more technical view of how rust is battled at the structural level and how technicians ensure repairs withstand years of exposure and use. If you want to explore more, you can consult SAE International’s technical papers, which cover advanced topics in corrosion control and repair methodologies. External resource: https://www.sae.org/publications/technical-papers/content/2019-01-0345/.\n\nAs you plan your approach, remember that rust repair isn’t a one-time fix. It’s part of a broader philosophy of vehicle maintenance that pays dividends in safety, reliability, and resale value. The best strategy blends careful inspection, sensible DIY work where appropriate, and professional intervention when necessary. It also includes realistic expectations about time and cost. A well-executed repair, followed by rigorous prevention, can extend the life of a truck’s body and chassis, maintain structural integrity, and keep performance from degrading under corrosion. The decision to DIY or hire a pro should reflect not only the current condition of the metal but also your capacity to manage future rust development with an ongoing maintenance plan. If you treat rust as a signal rather than a crisis, you’ll be better positioned to keep your truck on the road safely and for longer. For readers who want practical budgeting and maintenance planning aligned with this approach, consider integrating a routine into your calendar and financial plan that anticipates rust-related needs, ensuring you’re prepared when the next inspection reveals a new spot to address. Budgeting for routine truck maintenance can be a helpful anchor as you map out prevention milestones, potential DIY investments, and when a professional opinion becomes the smarter path. In the end, rust is manageable with the right mindset, the right techniques, and a decision framework that honors safety above all.
Final thoughts
Effectively addressing rust on trucks is a vital aspect of fleet management that not only extends vehicle life but also ensures safety and efficiency. By mastering minor and major rust repair techniques, implementing preventative strategies, and recognizing when to consult professionals, fleet managers can significantly reduce downtime and repair costs. Regular maintenance and proactive care are key in maintaining the integrity of your vehicles, thereby safeguarding your investment and ensuring your fleet operates at optimal performance. Prioritize rust management for a resilient fleet that withstands the test of time.

