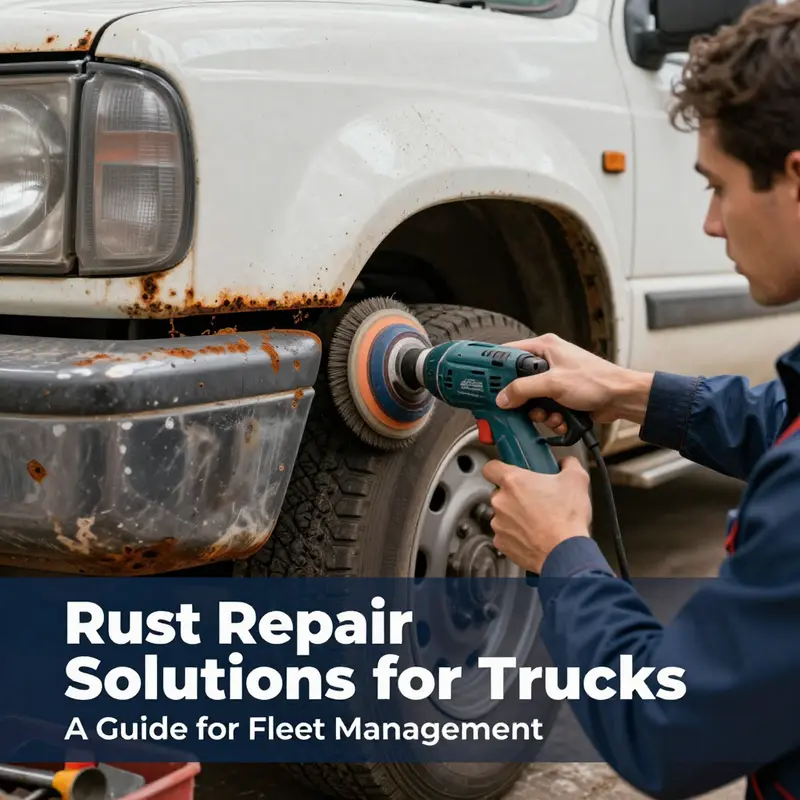
Rust is a common but serious issue for trucks, especially those involved in industries like construction and logistics where they face harsh conditions. Choosing the right strategies to assess, remove, and prevent rust is crucial not just for maintaining aesthetics but also for ensuring safety and longevity of your fleet. This comprehensive guide is tailored for fleet managers, trucking company owners, construction and mining operators, and logistics service providers. You’ll discover systematic methods to evaluate rust damage, practical techniques for effective rust removal, essential protective treatments for long-term durability, and guidance on when to seek professional help, ensuring your investments remain in peak condition.
Reading the Metal: A Practical Guide to Assessing Rust Damage on Your Truck

A Practical Roadmap for Inspection and Decision Making
Assessing rust on a truck is as much about careful observation as it is about simple tests. A correct first appraisal sets the tone for the repair strategy. Start with a slow, systematic walk-around. Look for paint bubbles, flaking, discoloration, and telltale orange staining. These signs often mark where moisture has reached metal and begun the oxidation process. Use natural daylight when possible. Shadows hide corrosion, and bright sun reveals texture changes and surface irregularities. Take photos from multiple angles. Photographs create a record you can compare after cleaning and during repairs. They also help you explain the problem if you consult a pro.
Work from visible panels inward. Check door sills, rocker panels, wheel arches, bed edges, and fender wells. Pay special attention to seams, joints, and factory creases. Rust attacks where water and salt collect, and seams trap debris. Open doors, hood, and tailgate to inspect mating edges. Look inside wheel wells and lift the wheel liners where possible. Remove loose trim pieces gently to expose hidden metal. On many trucks, inner panels hide early corrosion, so a little disassembly up front avoids surprises later.
A tactile test provides more information than sight alone. Wearing gloves, press the suspected area with a fingertip or the blunt end of a screwdriver. Solid metal flexes slightly and resists pressure. Corroded metal often feels soft or gives way. Tap the panel lightly with a small hammer. A healthy panel produces a clear, sharp sound. A dull, hollow thud suggests lost material or weakened metal beneath the surface. For patched areas, probe gently along seams to check for hidden gaps or trapped moisture. These manual checks are simple, reliable, and fast.
Once you identify suspicious spots, clean them to reveal the true extent of corrosion. Dirt, road grime, and undercoatings can mask rust depth. Use soap and water to remove mud and salt deposits. A degreaser helps where oils have accumulated. Dry the area completely. For a deeper look, use a wire brush or coarse sandpaper to remove flaking paint and loose rust. Remove only enough material to expose solid metal. Overly aggressive removal can enlarge holes and complicate repair decisions.
While you clean, follow basic safety. Wear eye protection and gloves. Work in a ventilated area when using chemical cleaners or rust treatments. When grinding or sanding, wear a dust mask rated for metal dust. Secure the truck on level ground before crawling underneath. Use wheel chocks and quality jack stands. Never rely on a hydraulic jack alone when working under the vehicle.
Some forms of corrosion are deceptive. Surface rust looks bad but often affects only the paint and thin top layer. Pitting and perforation are more serious. Pitting appears as tiny indentations. It indicates metal loss beneath the surface. Perforation produces holes that let light or water pass through. When you can push a tool through the panel, the part has lost structural integrity and needs replacement or professional welding.
Structural rust demands a different mindset. Frame rails, crossmembers, suspension mounts, cab mounts, and steering components are critical. Corrosion here reduces load capacity and compromises safety. Inspect frame rails by examining both the exterior and interior of boxed sections. Drain holes and seams in these members can collect moisture. If you see scale, bubbling, or flaking around mounting points, take the truck to a specialist. For components like brake lines and fuel tanks, any rust that compromises wall thickness or creates leaks must be addressed immediately.
Hidden pockets are common trouble spots. Check under the bed and behind bed rails where water pools. Inspect inside the tailgate and inner bed panels. Bed tie-down points and stake pockets corrode from moisture exposure. Remove rubber plugs and inspect drain holes in the frame and bed. Clogged holes trap water and accelerate corrosion. Regularly clear these passages during routine maintenance.
Inside the cab and cabin floor, check beneath carpets and mats. Moisture from leaks or wet boots promotes rust on floor pans and around seat mounts. Lift carpets where feasible. Smell for musty odors that indicate trapped moisture. Use a flashlight to inspect seams and the underside of the floor. Small holes in the floor may be patched temporarily, but widespread weakening requires panel replacement.
Rocker panels and pinch welds hide problems that often start as small bubbles in the paint. Push along the edge of a rocker panel with a flat-blade screwdriver. If the metal crumbles, the panel is compromised. Remember that replacing rocker panels often requires cutting and welding. If you are not prepared for that level of repair, plan for professional help.
Assessing the suspension and brake areas is vital. Springs, shackles, and mounting brackets corrode from road salt exposure. Corrosion on brake hardware and lines is particularly hazardous. Surface rust on brake rotors is usually harmless. Corrosion that reduces line diameter or weakens fittings is not. If you find rust flakes around brake fittings, have the system evaluated immediately.
A simple decision framework helps determine whether a DIY repair is feasible. If corrosion is limited to surface rust, confined to repaintable panels, and the metal remains solid, you can likely perform the repair yourself. If rust has caused pitting, perforation, or affects load-bearing components, plan on replacement or professional welding. When in doubt, document the damage and consult a qualified technician. A second opinion is inexpensive compared to a safety issue.
Documenting the extent of rust supports good decisions and future maintenance. Mark affected areas with painter’s tape and label them with notes. Photograph progress as you clean and test. Keep dates and short descriptions. This log helps you budget repairs, discuss work with a professional, and track the effectiveness of preventive measures over time.
Plan your repair strategy based on the inspection. Superficial rust responds to sanding, priming, and repainting. Pitted areas may require filler or patch panels after removing compromised metal. Perforations and structural damage require new panels or welded repairs. For assemblies like frames and large components, replacement often provides the safest outcome. Prioritize repairs that affect safety first, then address cosmetic or minor structural issues.
Consider environmental factors in your assessment. Trucks in coastal or winter climates face higher corrosion risk. Deicing chemicals penetrate seams and accelerate rust. If your truck operates in these conditions, expand inspections to include undercarriage, bed underside, and suspension. Annual rustproofing or undercoating can reduce future damage but requires pre-inspection to ensure no active corrosion remains trapped under protective coatings.
Finally, integrate these inspection habits into routine maintenance. Quick visual checks at oil changes or tire rotations catch problems early. Practice clearing drain holes, cleaning wheel wells, and checking seams. If you maintain a fleet or use the truck for work, formalize inspections and train operators to report early signs of corrosion. For guidance on maintenance programs designed for service trucks and fleets, see this resource on in-house truck maintenance.
For deeper reading on severe corrosion and a phenomenon known as rust jacking, review the industry analysis linked here for additional context and preventive strategies: https://www.fleetmaintenancetoday.com/fleet-factors-rust-jacking
Rust Repair Mastery: From Assessing Damage to Restoring a Rust-Free Truck
Rust is not a single event but a process that begins at the surface and can creep deeper into metalwork, especially on a heavy-use vehicle like a truck. The repair journey, however, can be mastered with a calm, methodical approach that treats rust as a solvable problem rather than a terminal flaw. The chapter that follows weaves together assessment, removal, treatment, repairing any loss of metal, priming, painting, and the long-term guard rails against recurrence. It is a narrative of progression rather than a grab-bag of quick fixes. When done with care, rust repair doesn’t just restore appearance; it restores structural confidence and the peace of mind that your truck will carry on through seasons of work and weather alike. A well-executed repair starts with honest assessment, then proceeds through steps that emphasize clean metal, proper protection, and durable finishes that resist moisture and road salts over time. As you read, you’ll sense the rhythm of a repair that respects the steel while acknowledging the realities of a life spent on the road and under damp skies.
The first move is to assess the rust with a clinical eye. Surface rust, which is flaky or dull in appearance, is the least daunting kind. It clings to outer layers and rarely reaches beyond the paint into the base metal. But if the rust has carved holes, or if the metal feels soft or crumbles under touch, you are dealing with pitting or deeper corrosion that risks structural integrity. This distinction matters: surface rust responds to straightforward cleaning and coating, while deep rust may have undermined frame rails, bed supports, or wheel wells. In those cases, the repair must be treated as more than a DIY cosmetic task, because the safety and longevity of the truck depend on preserving or restoring structural strength. A careful inventory of the affected zones—under the doors, the fenders, the frame rails, and the cross members—helps you prioritize what can be saved and what might require professional reinforcement or replacement.
With the extent understood, the removal phase begins. The approach to rust removal is not one-size-fits-all; it should be tailored to the rust’s depth and location. For light surface rust, a diligent scrubbing with a wire brush, steel wool, or an 80–120 grit sanding disk can strip away loose flakes and expose solid metal beneath. The goal is to eliminate flaky surface and then progressively refine the surface with finer grits, moving toward a smooth, paint-ready plane. In crevices where rust stubbornly hides, you can use a penetrating rust remover or a rust converter—chemicals that stabilize active rust and create a stable layer that can be painted over. These products are not a permanent shield on their own, but they can dramatically improve the durability of subsequent coatings when used correctly and allowed to cure according to the instructions.
For larger areas, including sizable panels or sections of the undercarriage, you may need to physically remove the rust down to clean, solid metal. This often means grinding with an angle grinder and a flap disc until you reach bare metal. Grinding exposes fresh steel that can be treated to prevent future corrosion. In such cases, you must stay mindful of heat buildup, which can warp thin panels or fuse paint near the edges. If the rust has penetrated deeply and left behind pits or holes, you might choose to retreat with a body filler designed for automotive use. This filler is typically a two-part compound that you apply to rebuild the surface, then sand to a seamless finish that matches the surrounding panel. The critical rule is never to mask deeper corrosion with filler alone; iron out the corrosion first, then build only the missing material to restore the correct contour.
Once you have achieved clean metal, the preparation continues with a meticulous cleansing. Oils, grease, and residues can sabotage adhesion, so wipe the area with a degreaser or rubbing alcohol to remove any film. It’s not enough to remove rust; you must prepare the metal for bonding. A good three-pronged prep—clean metal, a dry surface, and a sound anchor for the primer—creates the conditions for durable adhesion that will hold through heat cycles, humidity, and road salt.
If holes or dented areas persist after rust removal, an automotive patch repair or a patch kit may be required. You apply the patch, blend the edges with careful sanding, and then re-check the area for any gaps before priming. The intent is to restore a smooth, continuous surface that can be sealed against moisture. After the repair, a light guiding coat of primer helps you see any remaining imperfections as you sand. You want a level surface that, when painted, will not show dips or ridges through the color coat.
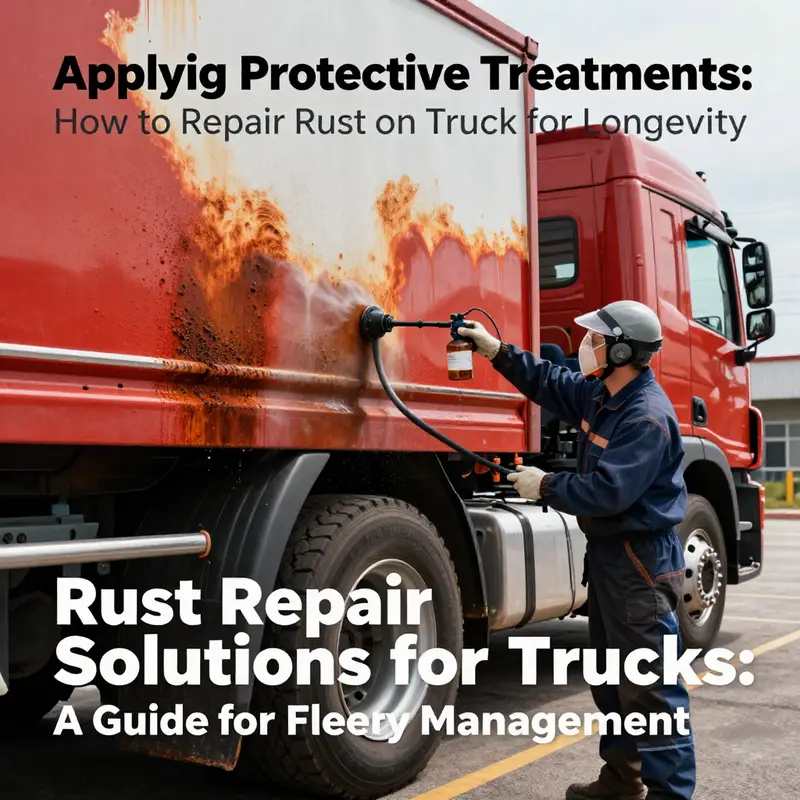
Prime and paint form the next major act in rust repair. You should start with a rust-inhibiting or zinc-rich primer, which serves as a barrier to moisture and a foundation for the subsequent coats. The primer needs to dry fully before sanding—this often means waiting through a recommended cure time and then lightly scuffing with a fine grit to promote adhesion for the base color. The base coat should be color-matched to the truck using the vehicle’s VIN color code, which minimizes the risk of noticeable color differences after the repair. A controlled environment—a spray booth or a clean room with good ventilation—yields far better results than a casual spray in a driveway. A consistent, even spray technique avoids runs and sags and helps you achieve a uniform color that blends with the surrounding panels.
After the base color, a clear coat provides UV protection and depth to the finish. This layer adds resilience against weathering, reduces the risk of chipping, and helps the repaired area maintain its gloss over time. Correct application of the clear coat requires even coverage and an appropriate curing environment. The final look should be seamless with the adjacent paint, so the repaired area holds up with long-term durability while maintaining the aesthetic of the truck.
Even the finest repair can fail if you don’t address long-term corrosion prevention. The most reliable strategy is a combination of moisture control, protective coatings, and mindful maintenance. Regular washing of the truck, with extra attention to the undercarriage, wheel wells, and door sills, helps remove salts, mud, and grime that trap moisture and accelerate corrosion. Drainage holes that collect water in frame rails and floor pans must be inspected and cleared. Clogged holes turn the frame into a reservoir, accelerating rust in places you may not immediately inspect. If you live in regions with harsh winters or high humidity, consider annual rustproofing treatments or wax-based sealants that form a barrier against water and salts. These protective measures are not about vanity; they are about extending the life of the metal you rely on every day for work and travel.
As you move through this process, stay mindful of the line between repair and replacement. If the rust has compromised critical structural components such as the frame rails, chassis, or load-bearing sections, even painstaking DIY repair can fall short of safety standards. In these cases, the most responsible choice is to consult a certified auto body shop or truck repair specialist who can assess whether welding, reinforcement, or replacement is required. A professional can determine if certain sections must be removed and replaced, or if specialized techniques are needed to preserve the vehicle’s integrity. The goal is not to win an ornament competition but to ensure your truck remains sound for its tasks and safe for its crew.
For readers seeking continued practical guidance that builds on this approach, a broad automotive repair blog offers a catalog of related topics and real-world tips. This resource provides a convenient hub for ongoing maintenance and repair wisdom: Master Truck Repair Blog.
To broaden your understanding beyond practical steps, consider an external reference that presents a detailed, step-by-step method for rust removal on trucks. This external guide complements the described workflow by reinforcing best practices for preparing, priming, and finishing a repaired surface. For a detailed external resource, see this guide: https://www.popularmechanics.com/cars/how-to/a39456879/how-to-remove-rust-on-a-truck/
null
null
Rust Runs Deep: Knowing When to Call a Pro for Your Truck Repair

Rust is not just a cosmetic nuisance on a truck; it is a chemical signal of something deeper. When metal has been eroded to the point where structural strength is in question, the decision between DIY fixes and professional intervention stops being about appearance and starts being about safety, reliability, and long-term value. This chapter looks beyond the surface and into the threshold where rust becomes a matter for specialists. It is a narrative about judgment, not bravado. It asks the reader to read the signs carefully, to respect the limits of do-it-yourself work, and to understand what pro repair can restore that a cautious hand, no matter how diligent, cannot. As the road and the seasons keep testing a truck’s body and frame, knowing when to seek help becomes a practical skill as important as the wrench in your hand. The goal is not merely to stop rust but to preserve the vehicle’s integrity for miles to come, and to avoid a promise broken by a failure you could have prevented with timely expertise.
There are clear signals that rust has crossed from a maintenance concern into a structural one. Surface rust, even when it looks stubborn, is often fixable with patient care and the right sequence: remove the flaky paint and loose corrosion, treat the exposed metal, and protect it with primer and paint. But when rust has penetrated deeply—eaten through the metal, created holes, or hollowed out critical sections—the problem is not just aesthetic. The frame rails, the subframes that bear load, and other load-bearing components can weaken enough to compromise steering, braking, and overall vehicle performance. The first instinct should be caution: a vehicle that shows extensive pitting, visible thinning at joints, or soft spots that yield to pressure requires professional assessment. Not every rust spot means replacement, but more spots or larger areas almost always do. When corrosion reaches the structure, even a skilled DIYer risks pushing a repair into a scenario where hidden damage becomes catastrophic during operation. The line is not a single visible hole; it is the cumulative loss of metal thickness and rigidity that gradually erodes the truck’s safety margin.
A practical way to frame the decision is to imagine the truck’s most demanding use. If the vehicle carries heavy loads, traverses rough terrain, or operates in challenging climates—where road salt, humidity, or coastal air accelerate corrosion—the margin for error narrows. In such cases, a professional assessment becomes a prudent investment rather than an optional service. The professional shop brings more than just a welding torch; it brings a methodical approach to evaluate the extent of rust, quantify structural compromise, and determine whether the repair will restore not only the look of the body but the strength and stiffness of the frame. They also bring specialized tools and processes that go beyond home workshop capability. Spot welders, metal-cutting equipment, controlled heat input to avoid warping, and validated primers and sealants that withstand temperature cycles are part of a shop’s repertoire. This is not about skepticism toward DIY because DIY can be rewarding; it is about acknowledging when the job robs the metal of its life and a patch no matter how neat will not restore the original geometry of the frame.
A critical early signal that it’s time to seek a pro is when rust breaches multiple layers of protection. If rust has spread beneath factory paint into the metal or traveled along seams and joints where moisture can gather, the structural picture changes. In the frame, where the metal carries the load of the engine, drivetrain, and passenger compartment, thinning can alter tolerances and misalign components. In body panels, rust that has compromised the integrity of the flange or weld line may have already compromised the attachment method. In these scenarios, the risk of a failure during operation increases. For a modern truck, this risk is not theoretical. It translates into potential steering play, uneven tire wear, compromised cornering, or even a sudden loss of panel integrity under stress. A professional inspection can reveal hidden corrosion that lies under paint and undercoating, something that is often invisible to the naked eye or easy to miss with a casual look in a driveway. That is why the decision to call in an auto body specialist should be guided by a structured assessment, not by a hopeful DIY attitude alone.
When a shop becomes the right choice, the conversation that follows is as important as the work itself. A technician will typically begin with a thorough inspection that confirms the visible rust and then uses non-destructive testing and careful probing to determine the metal’s remaining thickness. They will examine frame rails, crossmembers, floor pans, wheel wells, and rocker panels, testing for pinholes, deep pitting, and sagging. They will assess whether the rust is localized or has spread along hidden channels that channel water and salt toward critical areas. The outcome may be as simple as repairing a patch in a body panel, or as involved as replacing entire sections of the frame. In some cases, the safest, most durable fix may involve reinforcing the damaged area with new metal and, where safety is non-negotiable, replacing the affected parts rather than attempting a patch. A professional will also consider the vehicle’s loaded weight and intended use after repair, ensuring the reinforcement is compatible with the vehicle’s original design and safety standards. It is not unusual for a pro to propose a combination of repair methods: cut out the compromised metal, weld in new material, apply a rust converter where appropriate to stabilize edges, seal with anti-corrosion primers, and topcoat with paint and clear coat for UV protection. The sequence matters because every step influences how long the repair will endure in the field.
Choosing the right shop demands a practical framework. Price is a factor, of course, but it should not be the sole driver. A high price does not guarantee quality, just as a low price does not guarantee poor results. What matters more is the shop’s approach to rust, their experience with load-bearing components, and their transparency about the extent of the repair. A solid estimate should include the scope of disassembly, surface preparation, replacement material, welding method, corrosion protection strategy, and a detailed plan for aligning the finished work with the vehicle’s original specifications. It should also outline a warranty or guarantee for the repair, because rust repair is not a one-off event; it is a treatment that needs to last through future road cycles and seasonal changes. If a shop is reluctant to discuss the hidden parts of the repair or cannot explain how they will protect against future corrosion, that hesitation is a red flag. The best teams will talk through the reasoning behind each step: why they choose a patch, where they add reinforcement, what primers and sealants will be used, how they will manage heat input to avoid warping, and how they will test post-repair function under real-world loads.
For readers who are considering restoration or preservation of older or classic trucks, the calculus grows more nuanced. A vintage vehicle, especially one with historical or collectible value, may require techniques that maintain authenticity while still meeting safety standards. In these cases, the decision to involve professionals is often influenced by the vehicle’s value and the desire to preserve period-correct materials and finish. A 1931 model illustrated in a widely viewed video serves as a reminder that restoration in such contexts is as much about craft as it is about corrosion control. Replacing panels with generic modern equivalents can detract from the vehicle’s integrity and value, so many restorers look for period-correct patches and historically appropriate finishes. In this setting, a shop’s experience with vintage vehicles becomes not a luxury but a necessity, ensuring that repairs respect the car’s genealogy and structural philosophy while still delivering safe, roadworthy performance. This is the kind of decision that often benefits from a second opinion when there is any doubt about how best to preserve historical character without compromising today’s safety requirements.
The practical takeaway is straightforward: not every rust spot deserves or requires a pro, but rust that threatens structure, safety, or the vehicle’s future usefulness deserves a professional’s input. The line is not fixed; it is situational. A capable technician will help you weigh the risk and the reward, balancing the cost of repair against the liability of failure and the vehicle’s value. They will consider how long the repair will last under your typical usage. Maintenance realities—like how you drive, where you park, and how you store the vehicle during off-seasons—will influence the prognosis. A repair that makes financial sense on a short timeline may not hold up when you add more miles, grimmer winters, or harsher climates. Conversely, a professional fix can sometimes save money in the long run by preventing cascading damage that would require multiple patches, more invasive work, or complete replacement of components.
The decision to seek professional help is not a surrender to difficulty; it is a strategic choice that prioritizes safety, durability, and the vehicle’s value. It acknowledges that some rust damage is so extensive or so interconnected with critical systems that the risk of DIY improvisation is simply too great. The right pro will not only repair the damaged area but also fortify surrounding metal to slow future corrosion and ensure consistent performance. They will apply coatings and treatments appropriate to the climate and the vehicle’s life ahead, not just what looks good in the moment. If you are in doubt after an initial assessment, a prudent step is to obtain a second opinion. A second set of eyes can clarify whether the rust is contained or whether a more comprehensive approach is necessary. In the end, the goal is to depart the conversation with a clear understanding of the repair’s scope, a realistic timeline, and confidence that the vehicle will remain safe and dependable on the road.
When you do decide to involve a pro, preparation helps the process go smoothly. Gather documentation about the vehicle’s history, any prior rust repairs, and notes about areas where rust has been persistent. Take a handful of well-lit photos showing the affected zones from multiple angles, including close-ups of seams and weld lines. If you know where the rust began or if you’ve noticed moisture accumulation in a particular corner, share that detail with the shop. Bring the VIN and, if possible, the paint code. While the latter is not essential for a repair, it helps ensure that any new paint integrates closely with the original finish. Communicating clearly about your goals for the repair is also important: are you prioritizing maximum structural strength, preserving originality, or achieving a specific cosmetic look? Professional technicians respond well to owners who participate thoughtfully in the planning process, and they value questions about timelines, warranties, and the long-term maintenance plan. A good shop will also discuss prevention strategies beyond the patch: drainage checks, undercoating considerations, and seasonal maintenance routines that reduce the risk of future rust in vulnerable corners. For anyone who wants to keep a robust, road-ready truck, this proactive collaboration with a trusted professional can be the difference between a repair that merely hides the problem and one that truly restores safety and value.
The balance between DIY and pro work is not a binary choice but a spectrum. Minor surface rust that can be controlled with careful sanding, rust converter applications in tight crevices, and proper sealing may be well within a determined owner’s reach. But once the rust crosses into structural territory—thinning metal in the frame, holes in load-bearing sections, or damage that compromises alignment or rigidity—the safest and most reliable path often lies with trained technicians who can execute precise cuts, align new panels, and verify the repair with professional standards. The real beauty of a pro approach is not just the repair itself but the assurance that the repair will hold up under vibration, heat cycling, moisture, and road salt. It is the difference between a quick patch and a lasting resumption of reliability. Readers who are navigating this decision should treat it as a critical step in safeguarding themselves, their passengers, and their investment.
For those who want a straightforward, down-to-earth summary of when to seek professional help, a practical rule of thumb is simple: if you can poke a hole with a common tool, or if the metal feels soft and spongy around a rusted area, call in a pro. If rust has already moved into the structural backbone of the vehicle, there is little chance a DIY patch will restore the original strength. And if the rust appears in areas that affect steering, braking, suspension mounting, or any load-bearing component, the only safe outcome is a professional assessment and repair. The emphasis is on safety first, followed by durability and value preservation. It is a mindset that recognizes the limits of DIY repair when the stakes are high and the vehicle’s primary function is to transport people and cargo with dependable safety margins. In the end, the best result is achieved when you combine your practical, hands-on knowledge with a professional’s expertise, aligning both to the truck’s intended life on the road.
For ongoing maintenance strategies that support these decisions, see the in-house truck maintenance guide. It provides practical steps to keep rust from taking root after a repair and outlines routine checks you can perform without specialized tools. This chapter is not a dismissal of DIY passion; it is an invitation to bring the same careful methodology you apply to painting or sealing to the question of when it is wise to call in a pro. By approaching rust as a problem with a safe, engineered solution rather than a battle to win with grit, you protect your truck, your passengers, and the time, effort, and money you have already invested in keeping the vehicle on the road. As you consider next steps, remember that authoritative guidance on when to seek professional help is available from industry organizations that set repair standards and certify technicians. Their perspective reinforces the idea that safety and long-term reliability should always guide your decisions when rust threatens the structural essence of a truck.
To explore broader standards and professional certifications that support these decisions, you may consult recognized authorities in automotive service. Their guidance helps ensure that whether you choose to tackle the rust yourself or work with a shop, you stay aligned with best practices, keeping your truck safe and roadworthy for the miles ahead.
External resource: For authoritative repair standards and professional certification, see ASE: https://www.ase.com
Final thoughts
Addressing rust on trucks is not merely a cosmetic concern; it impacts the vehicle’s safety, performance, and value. By systematically assessing rust damage, employing effective techniques for removal, and applying robust protective treatments, fleet managers and truck operators can significantly extend the lifespan of their vehicles. Moreover, recognizing when to seek professional assistance ensures that critical structural integrity is maintained, safeguarding both drivers and cargo. Commit to regular inspections and preventive maintenance to keep your fleet in optimal condition.

