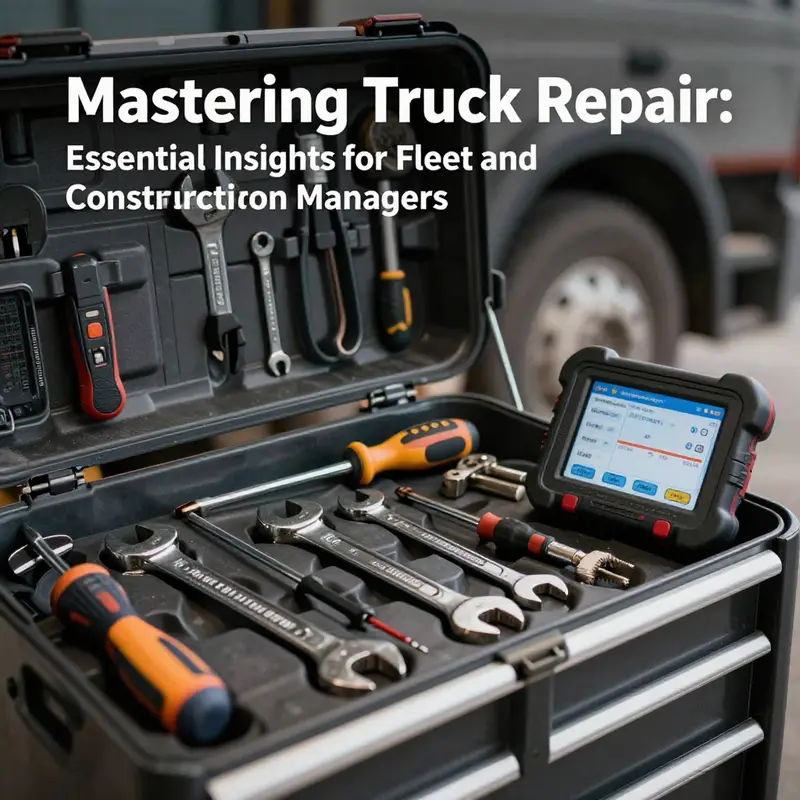
Truck repair encompasses a wide range of techniques and practices crucial for maintaining the safety and performance of commercial vehicles. For fleet managers, trucking company owners, and operators in sectors like construction and logistics, understanding these principles is vital to mitigate risks associated with mechanical failures, optimize vehicle utility, and enhance overall operational efficiency. This article will delve into crucial aspects of truck repair, beginning with safety protocols that protect both technicians and vehicles, before exploring maintenance best practices that extend vehicle lifespans. Furthermore, we will examine the tools and techniques essential for effective repairs, methods for diagnosing common issues, and beneficial resources for professionals seeking to enhance their DIY repair skills. Together, these insights will empower industry professionals to elevate their approach to truck maintenance and repair.
Safety Protocols in Auto and Truck Repair: Building a Safer Workshop from Ground Up

Safety is not a backdrop in auto and truck repair; it is the operating system that governs every action within the shop. Every lift that rises, every high-pressure hose that is disconnected, and every bolt that is tightened depends on a framework of protocols designed to protect technicians, customers, and the broader workforce around them. The research on safety in this field underscores a simple truth: strong safety protocols do not slow work down; they enable consistent, reliable work by reducing avoidable injuries and unplanned downtime. When a shop treats safety as a living part of its culture rather than a box to check, the repairs that follow are more precise, the equipment lasts longer, and the overall service life of a fleet improves.
This is especially true in heavy-vehicle repair, where the stakes for high-energy systems and large mechanical assemblies are continually high. The core of this approach rests on three interlocking pillars: personal protective equipment (PPE), robust operational procedures, and an embedded safety management system that guides training, auditing, and continuous improvement.
PPE is the first line of defense. It is not enough to own safety gear; it must be worn in the right context and maintained in good condition. Safety glasses or splash goggles protect the eyes from fluid splashes, flying debris, and the unpredictable spray from a misfired tool. Non-slip, steel-toed footwear reduces the risk of crushed toes if a heavy part shifts or a jack slips. Gloves play a central role when handling chemical fluids, hot components, or sharp edges. The materials and fit of gloves matter because poor protection offers a false sense of security and can hinder dexterity when handling delicate parts. Protective clothing, including flame-resistant garments for hot-work scenarios, supports containment of sparks or splashes. In the field, even something as simple as a reflective vest becomes vital when work spills onto the roadside or when technicians operate near moving traffic. PPE is most effective when it is part of a pre-job ritual—checking gear at the start of each shift, inspecting for tears or wear, and replacing items before they become liabilities.
Operational procedures form the second layer of safety. The discipline here is clear and practical: every repair action should begin with a hazard assessment and a plan that directly addresses those hazards. Vehicles should be stabilized and positioned in a safe work zone, away from ramps and unstable surfaces. When jacks, stands, or lifts are used, technicians must verify weight ratings, inspect for wear, and ensure that mechanical locks are engaged before any leverage is applied. The moment a system is being serviced—whether it is the engine, the fuel system, or the braking assembly—energy isolation is non-negotiable. High-pressure fuel lines, hydraulic circuits, and electrical systems demand proper de-energization procedures to prevent sudden releases or electric shock. The practice of tagging out energy sources, using lockout devices, and verifying zero-energy states is not merely a regulatory checkbox; it is how a shop prevents catastrophic injuries.
A tightly woven approach to safety also hinges on the correct use of tools and the orderly layout of workspaces. The right tool for the job minimizes the risk of slipping or slipping into a risky workaround. Likewise, correctly labeled parts and components with installation directions reduce the chance of incorrect reassembly. The research emphasizes that part orientation matters in complex assemblies and that misalignment can propagate into future failures. Cleanliness in the work area, organized tool rails, and clear pathways are not cosmetic details; they prevent trips, misplacements, and the cascading chain of errors that can follow. Even the sequence of disassembly and reassembly in a repair matters: when parts are removed, they must be staged in the exact order of removal and marked to avoid mismatches during reinstallation. In practice, a well-run shop will have a simple, visual system for this process, reducing cognitive load and allowing technicians to focus on the task at hand rather than hunting for the correct component or direction.
Beyond PPE and procedures, formal safety training anchors the behavior that keeps a shop resilient. Regular, structured training on hazard recognition, emergency response, chemical management, and proper tool usage creates a shared mental model among all staff. Training should go beyond basic compliance; it should cultivate a proactive habit of hazard identification and near-miss reporting. When workers feel empowered to raise concerns without fear of retribution, the organization learns faster and adapts more quickly to emerging risks. The best programs blend classroom instruction with hands-on drills that simulate real scenarios—a fluid mix of theory and applied practice that reduces the gap between knowing safety concepts and applying them on the floor. Importantly, ongoing education signals to staff that safety is an evolving practice, not a static rulebook.
A comprehensive safety management system translates individual protections into organizational durability. This system begins with clear safety policies that set expectations for behavior and accountability. It extends to regular safety audits that verify compliance with equipment maintenance, PPE availability, and the adequacy of emergency equipment like fire extinguishers and eyewash stations. Incident investigations play a crucial role, not to assign blame but to uncover root causes and to adjust processes accordingly. This approach creates a feedback loop in which near misses and minor injuries become catalysts for process improvements rather than footnotes in a safety manual. The guidance offered by authoritative bodies in the field provides a framework for these efforts, with emergency planning, hazard analysis, and incident management forming the backbone of a robust program. The pursuit of safety, in this sense, is an ongoing project that never ends at the close of a shift.
The integration of safety into daily practice also has important implications for how repairs are planned and executed. High-stakes tasks, such as servicing high-energy fuel systems or brake assemblies, benefit from a culture where meticulous planning and pause-for-check moments are normalized. Even tasks that might be perceived as routine—like oil changes or tire maintenance—carry hazards that can accumulate if attention lapses. In those moments, the safety framework serves as a reminder to pause, verify, and proceed with deliberate care. A shop that treats safety as integral to quality sees fewer defects, fewer equipment failures, and, ultimately, a more predictable schedule for fleet maintenance. The practical upshot is a workflow where technicians can deliver reliable service with confidence, reducing the likelihood of injuries and the downtime that follows them.
Putting these concepts into practice requires not only internal discipline but also access to external knowledge and community support. For technicians seeking to extend their skills or to navigate more complex repairs safely, practical, step-by-step guidance and a supportive community are invaluable. The MasterTruckRepair blog offers a centralized hub of insights, case studies, and troubleshooting experiences that can complement formal training and in-house safety programs. By engaging with a broader professional community, technicians can compare notes on hazard controls, learn from near-miss analyses, and discover innovative approaches to common dangers. This kind of resource supports a culture where safety is reinforced by shared learning, clear communication, and a willingness to adopt remembered lessons from peers who have faced similar challenges. MasterTruckRepair blog
No chapter on safety in auto and truck repair would be complete without acknowledging the strategic role of leadership in sustaining protective practices. Leaders set the tone, allocate resources for PPE and training, and authorize time for safety drills. They champion transparency in reporting hazards and ensure that corrective actions follow promptly after incidents. A strong safety culture is visible in near miss reporting rates, maintenance of equipment in top condition, and a workforce that takes ownership of the risk controls that keep them safe. When management shows its commitment through consistent audits, clear performance metrics, and timely responses to safety concerns, workers respond with discipline and care. The result is not only compliance but a genuine sense of shared responsibility that permeates every repair task—from the simplest tire rotation to the most intricate engine overhaul. Safety, in this sense, is not a constraint on speed; it is a guarantee that speed and quality can be sustained over the long run.
To further explore the structural aspects of these protocols and to see how they align with industry standards, practitioners can consult comprehensive industry resources that codify best practices for auto and truck repair safety. The integration of policies, audits, and training into daily operations reinforces the idea that safety is a continuous journey rather than a one-off set of instructions. For readers interested in broader guidance, the NATSO resource offers a detailed examination of safety protocols across repair environments, including emergency planning, hazard management, and operational controls that can inform both small shops and larger facilities. External resource: https://www.natso.org/resources/industry-resources/safety-protocols-in-auto-and-truck-repair
Building Reliability on the Road: Integrated Maintenance and Repair Best Practices for A and Truck Repair

A truck is more than a machine; it is a moving workplace and a lifeline for communities. The path to reliability runs through organized maintenance and disciplined repair. In A and Truck Repair, safety first shapes every step from daily checks to major overhauls. The foundational principle is simple: prevent problems before they stop work. This chapter weaves together preventive maintenance, the art of using the right tools, and the discipline of thorough testing after repair. It draws on scenarios from asphalt maintenance on roadways to undercarriage work performed under the sun and rain, where condition and timing dictate success.
On municipal and construction sites the asphalt maintenance truck is not just a vehicle; it is a mobile patching unit. Its heated storage hoppers keep material at the right temperature, the conveyor feeds the mix to the screed, and the screed lays down the finish with a level surface. The effectiveness of on site repairs depends on routine checks of these subsystems. Regular inspection and cleaning of hoppers, conveyors, and nozzles prevent material buildup that slows work and raises wear. Worn belts or clogged nozzles are common culprits that reduce heating efficiency and patch quality. The best practice is simple discipline: schedule a quick on site walk around at the end of each shift, note any signs of wear, and replace components before they fail. The goal is consistent heat, steady flow, and a uniform finish that protects the road and reduces future maintenance costs. This approach keeps projects on schedule and reduces costly delays when cold weather or traffic restrictions tighten the window for repairs.
Truck repair often begins with access to the undercarriage, where car body repair jacks provide a stable lift. These jacks rely on hydraulic pressure generated by hand pumps, but the real safety comes from the system design. Swivel wheels enable maneuvering in cramped bays, adjustable saddles support diverse frame shapes, and safety overload valves prevent overextension. Best practice is to check the jack s load capacity before every lift, place the jack on a solid base, and never exceed the rated weight. Regular hydraulic maintenance is essential; inspect fluid levels, watch for air in the lines, and test seals for leaks. When racks and stands exceed their service life, replace them to avoid compression failures that can lead to severe injuries. The right jacks, correctly used, give technicians the leverage needed to reach stubborn fasteners, loosen components without bending metal, and perform accurate alignment work when reassembling after repairs.
Preventive maintenance is the backbone of long term reliability. The routine calendar of checks becomes a shared language across drivers, shop technicians, and fleet managers. Tire pressure might seem trivial, but under inflated or over inflated tires change handling and fuel economy and increase the risk of blowouts. Modern fleets rely on tire pressure monitoring systems that provide real time data, and operators should not ignore alerts. Brakes require regular inspection of linings, rotors, and hydraulic circuits; any sign of reduced pedal feel or vibration demands immediate attention. Oil and coolant levels should be checked at every shift and at the start of long trips, with scheduled replacement in accordance with manufacturer recommendations. Suspension wear, universal joints, and driveshaft wear often reveal themselves as noise or vibration, yet early signs can be missed by focus on the engine alone. A proactive schedule that includes lubrication, filter changes, and belt or chain inspections helps maintain smooth operation and reduces the chance of unexpected breakdowns in isolated rural areas or during winter runs. In harsh winter climates and rural missions, the choice of components matters. Designs built for tougher environments withstand salt and road grit better and help the fleet stay productive longer. The emphasis is not merely on replacement but on selecting recoverable wear items that can be renewed in place, keeping downtime lower and return-to-service faster.
Cargo securing remains a critical duty that influences both vehicle safety and structural longevity. Tie down winches and lashings must be checked and lubricated regularly, and operators should test them under load before heading out. The routine is simple but essential: verify that the cargo is evenly distributed, complete with edge protectors and anti slip mats when needed, and ensure that all straps are free of frays. Regular testing of the locking mechanisms and ratchets helps prevent unexpected loosening that can lead to shifted loads, damaged goods, or worse. The acting principle here is discipline: a secure load reduces mechanical stress on the chassis, prevents lost cargo, and protects nearby workers in busy yards and along congested routes. Beyond compliance, cargo securing safeguards the people responsible for moving freight and the vehicles that carry it, a reminder that maintenance and safety are inseparable allies in day to day operations.
Repair workflows must reflect a culture of clear communication and meticulous documentation. After a repair is completed the work does not end with the last bolt turned. A comprehensive post repair test covers exterior and interior systems, braking, steering, lighting and electronics. A careful inspection of fasteners and mounting points ensures that nothing has loosened during the procedure. A clean, labeled teardown sheet helps every future technician understand what was replaced and in what orientation parts must be reassembled. Even small parts and seals should be organized to prevent mis seating. In some repairs, coatings and surface restorations such as weld overlays or protective platings can extend service life; these methods should be chosen with attention to part geometry, expected wear, and service temperature. Through such attention, worn parts can be restored to serviceable dimensions and performance without replacing them outright, a philosophy often summarized as fixing what is viable and conserving resources where feasible. The approach emphasizes not only restoring function but also documenting the repair so future diagnosis becomes easier and faster. The momentum behind this practice is a trained workforce that values repeatable results and a clear trail for audits and future repairs.
Training and self study play a sustaining role in the maintenance ecosystem. For operators who want to learn independently, there is value in high quality DIY resources that provide step by step explanations, diagrams and community support. A structured learning path builds confidence and reduces the risk of mistakes when tackling unfamiliar tasks. A practical starting point for new learners is Budgeting for Routine Truck Maintenance. It presents a disciplined framework for allocating time and money to essential activities, helping teams avoid the last minute scramble that leads to risky improvisation. Readers can follow a logical progression from basic checks to more advanced interventions, while preserving the professional standards expected in a commercial fleet. The emphasis on disciplined learning dovetails with the need for consistent practice across teams and shifts, ensuring that every repair carries forward the standard of reliability the fleet relies on.
The broader picture emerges when maintenance best practices are embedded into daily routines and earned through experience. The asphalt patching crew, the undercarriage specialist, and the tire and brake technician all contribute to a shared objective: uptime with minimal risk. The internal discipline of labeling parts, maintaining clean work benches, and verifying torque values with appropriate tools reduces the likelihood of rework and costly downtime. It is not enough to fix a problem; the aim is to understand how the fix fits into the larger system, how long it will last, and what early indicators warn of creeping wear. The integration of specialized equipment with rigorous inspection regimes creates a resilient operation that can adapt to different demands, from routine highway patches to challenging winter routes. When teams align on expectations, the fleet becomes not just a collection of vehicles but a cohesive repair and maintenance system that sustains performance across seasons and miles.
For readers seeking a broader frame of reference, external guidance continues to reinforce these ideas. A resource grounded in industry practice offers perspectives on maintaining trucks and vehicle systems with an emphasis on safety and efficiency. External reference: British Trucking Maintenance Best Practices. https://www.britishtrucking.com/maintenance-best-practices-for-trucks-and-vehicle-repair/
null
null
Diagnosing Complex Faults in A and Truck Repair: A Systematic Path from Symptom to Safe, Sustainable Fix
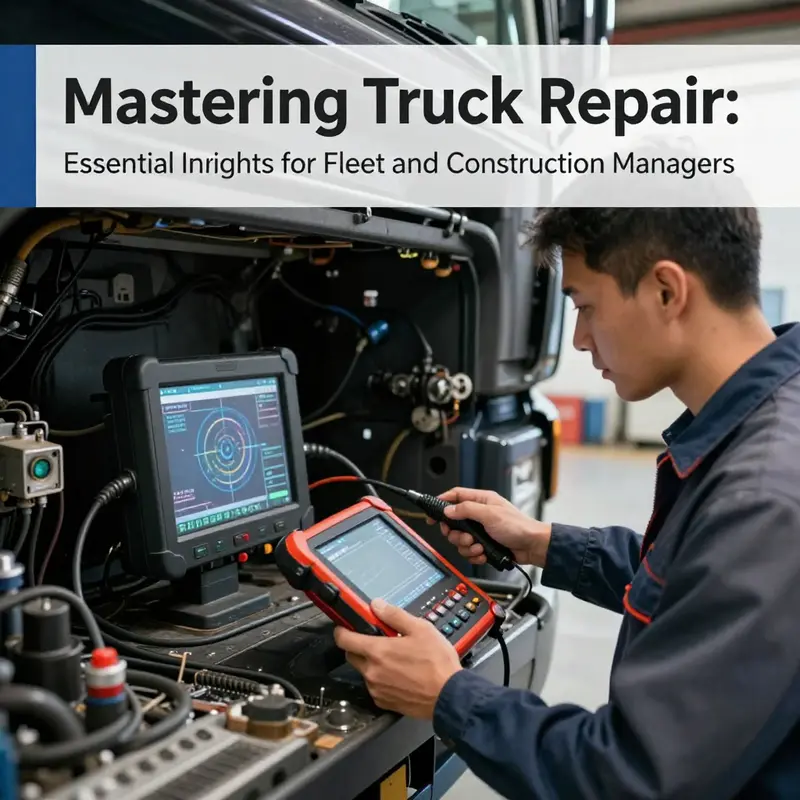
Diagnosing complex faults in heavy trucks demands a patient, methodical mindset. Unlike simpler machines, modern commercial vehicles weave together high horsepower engines, multi‑link chassis systems, and extensive electronic networks. A single fault can disguise itself across several subsystems, so the diagnostician must move beyond quick fixes and toward a disciplined process. The challenge is not just identifying the problem but validating it through data, tests, and careful observation. In this environment, a clear safety framework is the first line of defense. The moment a technician approaches an engine bay or a high pressure fuel line, the principle of safety governs every action. Engine work requires ensuring the machine is fully shut down, its reservoirs depressurized, and all personnel aware of the risks. These habits stem from long practice and reinforced guidelines, because even a moment of carelessness can lead to serious injury. Once safety is established, the diagnostic journey begins with listening to symptoms, reviewing history, and planning a measured sequence of checks that respect the complexity of the systems involved.
Engine diagnostics sit at the heart of most truck repair challenges. When a truck loses power, reduces fuel efficiency, or exhibits rough running, the root cause can spring from any of a number of sub‑systems. Air intake restrictions can choke performance; clogged filters, collapsed ducts, or leaks in the intake path alter mass air flow and fuel metering. The fuel injection system itself is a frequent source of trouble. Injectors can seat unevenly, leaks can develop in high pressure lines, and fuel pressure can drift if the pump or rail components age. In premium engine architectures, the interplay between oil quality, air cleanliness, and electrical circuits becomes especially intricate. A 2025 study notes that the complexity of these engines means faults can cascade across subsystems, demanding technicians to follow precise diagnostic protocols and use specialized tools for accurate troubleshooting. The takeaway is not to assume a single failure mode but to trace symptoms through a disciplined checklist that considers how each subsystem interacts with the others. A careful scan of the engine control unit ECUs can reveal fault codes that point toward sensors, actuators, or communication faults within the engine network. Interpreting those codes requires experience, data from live measurements, and an awareness of how the software and hardware components influence each other in real time.
A structured diagnostic workflow begins with baseline observations. Technicians log operating conditions, such as engine load, ambient temperature, and highway vs city driving stories that often shape fault manifestation. From there, a staged approach emerges: verify mechanical integrity first, confirm fuel and air pathways, and then interrogate the electronic control network. In practice, the engineer checks for air leaks around turbochargers and intercoolers, inspects the intake manifold for cracks, and tests(MAF) sensors as well as manifold absolute pressure readings. If the mass air flow reading is suspect, fuel trims may be thrown off, leading to misfiring or uneven idle. The next step is to confirm fuel delivery and quality. A miscalibrated fuel pressure regulator, worn injectors, or a failing pump can create lean or rich conditions that worsen combustion efficiency. It is crucial to compare current readings with manufacturer specifications and to consider service bulletins that address known pattern failures in certain engine families. In this phase the diagnostic process benefits from a blend of traditional techniques and modern data collection. A handheld scanner can pull trouble codes while live data streams reveal transient conditions that are not apparent during static tests. The combination of codes and live data helps separate correlation from causation, guiding the technician toward the precise subsystem responsible for the symptoms.
The electronic dimension of diagnosis cannot be overstated. Modern trucks rely on a network that links ECUs, sensors, actuators, and comfort and safety systems through data buses. Faults may originate in wiring harnesses, ground connections, or even software glitches that alter how the engine and transmission coordinate with throttle control and shift strategies. In such contexts, a systematic approach to electrical diagnostics is essential. The technician reviews wiring diagrams, checks for corrosion or loose connectors, and uses a scan tool to monitor CAN bus activity. Because software can influence sensor interpretation, tuning, and timing, a software fault can masquerade as a hardware problem. In some cases, the fault may not show until specific operating conditions arise, such as a particular engine temperature window or a given load profile. Technicians must be prepared to simulate those conditions on a test bench or during a controlled road test to observe the fault in action. The overarching principle is to validate each potential fault with independent evidence—codes, sensor readings, physical tests, and the absence/presence of fault symptoms under controlled scenarios.
Beyond the engine, chassis diagnostics present their own set of complexities. A truck’s suspension, steering, and braking systems influence handling, tire wear, and overall ride quality, and misalignment or worn components can mimic engine problems by producing performance deficits under load. For example, a misaligned suspension or degraded dampers can alter vehicle dynamics enough that the operator perceives a loss of power or a change in throttle response in specific driving conditions. Because trucks vary across models and manufacturers, technicians must be familiar with the distinctive chassis architectures of the vehicles they service. Accurate diagnosis requires not only a mechanical inspection but also motion testing to observe how the suspension behaves under acceleration, braking, and cornering. Wheel misalignment, worn springs, or damaged knuckles can be subtle, yet their effects can accumulate over thousands of miles, accelerating tire wear and compromising stability. The diagnostic narrative therefore moves from a static inspection to a dynamic assessment, where measurement tools help quantify camber, toe, and ride height and compare them to design specifications. In this light, the technician returns repeatedly to the premise that the path to repair is not a single cut-and-replace moment but a sequence of refined checks that closes the loop between symptom and solution.
Electrical systems squarely demand a similar degree of rigor. The battery, starter, and alternator form the core of the vehicle’s energy supply, but a modern truck adds layers of sensors, ECUs, and climate and lighting controls that also draw power and change behavior during operation. When a fault arises, it may be rooted in a battery with insufficient cranking power, a failing alternator that cannot sustain electrical demand, or a sensor that feeds the wrong signal to the ECU and disrupts the entire control loop. Wiring defects and connector corrosion are common culprits that can create intermittent faults, especially in harsh environments where vibration, moisture, and temperature fluctuations take their toll. Software glitches add another dimension. A fault code may be generated by an electronic control unit, but the root cause could be a sensor that has drifted out of tolerance, a broken wire, or a poor ground connection. The diagnostician therefore must approach electrical faults with a mindset that values cross‑verification: hardware measurements, live data trends, and software behavior must be reconciled to paint a faithful picture of the underlying issue.
In practice, the diagnostic journey is not a solitary endeavor. It thrives on a disciplined plan, careful documentation, and a willingness to test hypotheses. Clear labeling of parts during disassembly, particularly for assemblies with orientation requirements, helps prevent misassembly later. The use of torque torque wrenches when reassembling critical fasteners protects against both under and over tightening, preserving component integrity and safety margins. Documentation builds a knowledge base that benefits not only the current repair but future work on similar vehicles. A centralized repair log that records fault codes, test results, parts replaced, and calibration updates becomes a living artifact of experience, guiding technicians through increasingly complex maintenance tasks and enabling faster, more accurate diagnoses over time. For readers who want to deepen their hands‑on skills, the Master Truck Repair Blog offers practical guides and community discussions that connect theory to field practice. It is a resource that complements formal training by providing real‑world insights, troubleshooting tips, and step‑by‑step cues that help technicians refine their diagnostic instincts. See the Master Truck Repair Blog for more on practical repair skills and community learning.
As diagnosis matures from symptom observation to evidence‑based conclusion, the repair strategy emerges not as a single act but as a sequence of well‑orchestrated steps. A successful fix rests on three foundations: precise identification of the root cause, careful restoration of required specifications, and thorough validation after repair. The first pillar, root‑cause analysis, relies on the technician’s ability to synthesize data across mechanical, electrical, and software domains. The second pillar, restoring specifications, requires attention to the correct torque values, seal integrity, and alignment tolerances that keep performance and safety margins intact. The third pillar, validation, is perhaps the most important yet often overlooked. It involves road testing under representative conditions, monitoring post‑repair data to confirm that symptoms have vanished, and ensuring that ancillary systems respond as expected. The cumulative effect of this approach is not merely to fix the current fault but to strengthen the vehicle’s reliability and fleet availability over time. For practitioners and operators alike, embracing a systematic diagnosis mindset translates into safer operation, longer service life for components, and lower lifecycle costs—a result that aligns with the broader goals of effective truck maintenance and sustainable fleet management.
External resources can broaden a technician’s perspective. For those seeking deeper theoretical grounding or peer‑reviewed findings that illuminate diagnostic patterns in heavy trucks, an external study on heavy truck maintenance issues provides valuable context and data patterns that complement hands‑on work. See the external study for additional insights into maintenance challenges faced by modern commercial vehicles.
External reference for further reading: https://www.researchgate.net/publication/398765434AnalysisofHeavyTruckMaintenanceIssues
Mastering Self-Rix: Navigating DIY Learning Resources for Auto and Truck Repair
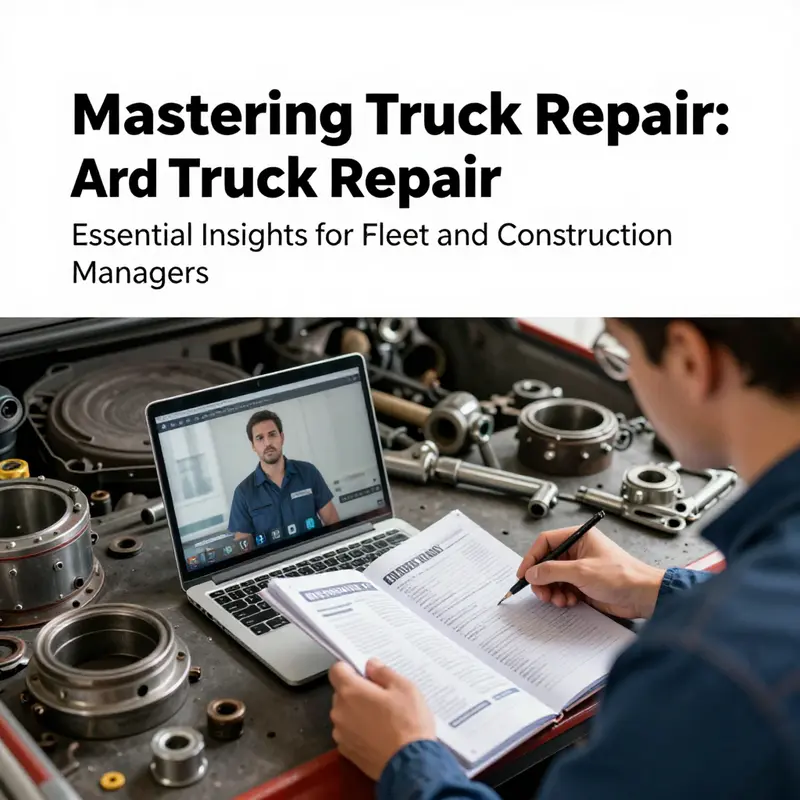
Repair work on a truck, or any commercial vehicle, begins long before the first wrench turns. It starts with a mindset that blends curiosity with caution and a clear plan for learning. The core of any successful DIY repair program is access to reliable, up-to-date learning resources that map onto the actual repair lifecycle. When operators and technicians treat information as a tool as carefully as a torque wrench, they transform knowledge into safer work and longer vehicle life. In practice, this means assembling and continuously updating a personal library of manuals, diagnostic databases, community guidance, and practical how-to content. It also means integrating those resources into a learning path that respects safety, anticipates common failure modes, and aligns with the realities of fleet operations. The lessons from comprehensive repair data—ranging from basic maintenance to complex overhauls—resonate across the spectrum of trucks and commercial vans, where a single forgotten bolt or a missed step can ripple into costly downtime and safety risks.
At the heart of DIY learning is access to free and comprehensive repair manuals and technical data that are current enough to reflect modern engines, fuels, and control systems. A well-curated collection of maintenance manuals, circuit diagrams, and step-by-step repair guides becomes the practitioner’s first line of defense against guesswork. Unlike rigid, dealership-only offerings, these resources provide a breadth of guidance that covers routine service intervals as well as more involved tasks such as engine overhauls, cylinder head work, or transmission servicing. What makes such manuals powerful is not just the checklists, but the way they structure the repair process: precise disassembly sequences, safety precautions, torque specs, lubrication points, and reassembly cues that minimize risk and error. For a person managing a fleet or learning on a personal project, this kind of information acts as a map, helping to prioritize tasks, allocate time, and document steps for future reference. When combined with service bulletins and updates, it becomes a living repository rather than a static binder on a shelf.
Beyond manuals, a robust knowledge base with real-time diagnostics broadens the DIY toolkit dramatically. These online libraries gather data on new vehicle models, catalog fault codes, and present targeted repair strategies. The ability to search by code, symptom, or component allows a learner to quickly connect a specific problem to a sequence of diagnostic steps. The real value here lies in how the information is organized: searchable fault code libraries paired with flowcharts that lead you from symptom to cause to repair. This dynamic access mirrors the way professionals approach troubleshooting on the shop floor, where time is money and misdiagnosis can compound the problem. For the self-learner, such resources shorten the path from uncertainty to action, enabling more efficient practice and safer testing of repairs in controlled cycles.
Community forums and video tutorials extend the DIY learning ecosystem in deeply practical ways. When a learner encounters a stubborn issue—perhaps a stubborn fuel line quick-connect, a stubborn sensor reading, or a difficult-to-seat gasket—peer experience often offers a fast bridge to a solution. Forums provide a archive of troubleshooting narratives, rework examples, and regional considerations that aren’t always captured in official manuals. Video tutorials, in turn, can supplement textual instructions with real-time demonstrations of tool handling, clamps, alignment marks, or lighting and masking during inspection. The strength of these resources lies not in a single perfect method but in exposure to a spectrum of approaches, enabling the learner to assess what is most appropriate for their equipment, budget, and safety standards. The learner’s job is to sift credible contributions from noise, cross-check technique against the official data, and maintain a bias toward conservative, testable methods.
To bring the full range of DIY resources into a coherent practice, it helps to treat the learning journey as a project with milestones rather than a pile of scattered tips. A mindful approach begins with a small, concrete objective—such as mastering proper electrical system scanning on a given model, or learning the correct sequence for removing a valve cover—then expanding into more complex tasks. The learner should cultivate a habit of documenting each repair with notes and photographs, labeling components that require orientation, and preserving service tags or sheet metal marks that indicate assembly direction. This habit reduces the risk of reassembly errors and speeds future maintenance. A practical strategy is to assemble a personal learning folder that collects relevant manuals, diagnostic guides, and vetted forum threads for each category of work. That folder becomes a living playbook, which can be revisited when planning a repair, used to train other team members, or shared as a reference during a long-term project.
A healthy DIY program also builds a bridge between learning and hands-on practice. Theoretical knowledge without practice can become brittle, while hands-on work without proper guidance can create dangerous missteps. A balanced approach blends guided, progressive tasks with independent exploration. Begin with controlled exercises that emphasize safety and measurement discipline: calibrating a torque wrench to a known standard, verifying tire pressures with a TPMS readout, or diagnosing a harmless electrical fault with a multimeter under supervision. As confidence grows, slowly introduce more demanding tasks that require precise marking, component orientation, and careful handling of pressurized systems. In each case, the learner should map the task to the corresponding section of the repair manuals and diagnostic guides, then test outcomes against the documented expectations. This method reinforces a discipline of verification—never assuming success until the guidance checks out against data and field-tested results.
An essential ingredient in any DIY learning plan is the social and community scaffolding that supports independent problem solving. Engaging with peers provides more than reassurance; it delivers access to practical perspectives on tool ergonomics, component compatibility, and fleet-specific constraints. When a learner becomes part of a broader learning loop—posting a problem, sharing photos of a stubborn assembly, or requesting step-by-step feedback—the process acquires a communal accountability. The result is not only faster resolution of individual issues but also a richer understanding of why certain procedures are specified the way they are. In this way, the act of learning becomes an ongoing conversation, a shared repository of tacit wisdom that complements formal manuals and diagnostic databases.
For readers who want a gateway to credible, organized DIY knowledge, consider starting with a centralized blog hub that curates lessons, troubleshooting anecdotes, and practical how-tos. Such a hub can act as a roadmap through the vast universe of repair information, helping a learner connect the dots between theory, tool use, and field performance. See how the roadmap is structured and how it scales across different vehicle types by visiting the Master Truck Repair blog, which collects case studies, step-by-step guides, and fleet-oriented insights. mastertruckrepairllc.com/blog/. This resource is not a product catalog; it’s a living log of practical repair experience designed to accelerate hands-on competence while reinforcing the safety-first mindset essential to any repair operation.
As practical as these resources are, a learner must continuously cross-check information against both OEM procedures and the realities of the working environment. The best DIY practitioners view learning as a disciplined practice rather than a one-off solution. They couple manuals with real-world testing, measure outcomes, and adapt procedures to the specific vehicle and task at hand. They keep safety top of mind, especially when dealing with high-pressure systems, rotating machinery, or components with critical alignment requirements. They also cultivate a habit of rechecking fittings, seals, and fasteners after the initial test run. A final test that includes exterior and interior checks, short road tests, and functional validation ensures that no hidden condition becomes a safety hazard.
In addition to internal study and experiential practice, external resources can broaden the diagnostic lens and provide a curated perspective on what works well in real fleets. A broad external reference may offer a curriculum-like progression—from basic maintenance through more advanced diagnostics and repair strategies—on a platform designed for ongoing learning. For readers seeking practical, up-to-date repair information, a widely recognized external resource is available at https://www.autoservice.com/. This site complements the DIY journey by offering broad coverage of common problems, maintenance planning, and safety considerations that align with the fundamentals described here.
The landscape of DIY learning resources is dynamic, and it rewards ongoing refinement. The most successful DIY practitioners treat knowledge as a tool that must be kept sharp, clean, and organized. They prepare learning plans that reflect the realities of truck repair: the need to work around tight schedules, to manage risk in high-stakes environments, and to keep the fleet on the road with minimal downtime. They build personal libraries that combine authoritative manuals, diagnostic references, and community wisdom with hands-on practice sessions. They document, annotate, and store every repair decision so that the next issue can be approached with confidence rather than hypothesis. In this way, DIY learning becomes not just a way to fix things but a disciplined pathway to safer, more reliable fleet operation, where technicians and operators grow together as capable, informed stewards of the equipment.
The journey from curiosity to competence is continuous. Each repair, each diagnostic test, and each discussion in a forum adds a layer of understanding that can prevent defects and shorten downtime. The resources described here are not a substitute for professional training or on-the-job mentoring; they are a bridge that equips individuals to engage more effectively with higher-level expertise and to take ownership of routine maintenance and more complex tasks in a controlled, safe manner. By embracing these resources, readers can cultivate a learning culture that respects the craft of truck repair, extends the life of components, and upholds the highest standards of safety and reliability as a routine practice rather than a rare achievement. The next chapter will explore how to design an efficient maintenance plan for a mixed fleet, weaving together these learning resources with practical scheduling and budgeting considerations to maintain uptime without compromising safety or quality.
Final thoughts
Understanding the expansive field of truck repair is crucial for ensuring operational safety and efficiency within commercial vehicles. By implementing robust safety protocols, embracing maintenance best practices, utilizing appropriate tools and techniques, and developing the ability to diagnose issues effectively, fleet managers and operators can significantly reduce downtime and repair costs. Furthermore, leveraging DIY learning resources empowers professionals to enhance their skills and tackle repairs confidently, ensuring that their fleet remains reliable and productive on the road. Prioritizing these elements will not only safeguard investments but also elevate service quality across the board.

