Repairing a damaged cut area on a 1965 Chevrolet truck is essential for maintaining its structural integrity and aesthetic appeal. For fleet managers and trucking company owners, understanding this process can significantly minimize downtime and extend the life of these classic vehicles. This guide will walk you through the critical steps of assessment and preparation, cutting out the damaged section, fabricating or sourcing replacement panels, employing proper welding techniques, and implementing effective rust prevention and finishing techniques. Each chapter delves into every crucial aspect of the repair, ensuring that your restoration efforts yield reliable and high-quality results while preserving the truck’s iconic design.
From Assessment to Alignment: Preparing to Repair a Damaged Cut Area on a 1965 Chevy Truck
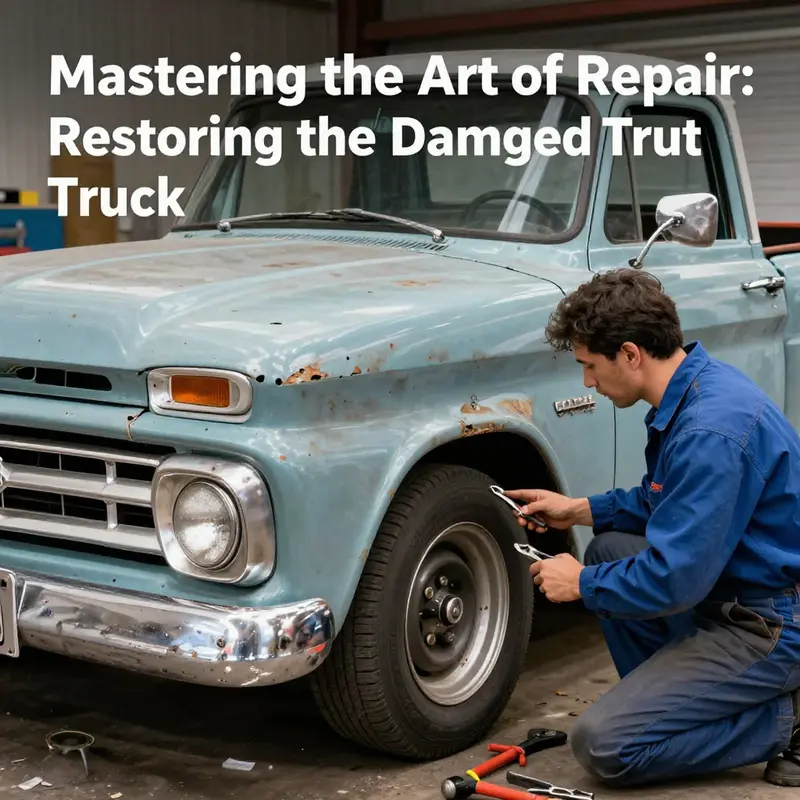
When a 1965 Chevy truck has a damaged cut area, the repair begins long before the first weld is touched. It starts with a deliberate, almost surgical assessment that respects the vehicle’s history as well as its future role on the road. The objective is not merely to close a gap or replace a panel, but to restore structural integrity, preserve the original lines, and ensure that repairs endure through seasons of use and time. The process unfolds in a sequence that blends old-school hands-on feel with modern precision, so the truck’s character remains intact while its strength is renewed.
The first step is a thorough inspection that earns its keep long before any metal moves. A careful eye surveys the extent of corrosion, misalignment, and any damage that has compromised rigidity. Loose rust, flaking paint, and debris must be removed so underlying metal can be examined free of distraction. This isn’t surface patina being hoisted away; it’s an assessment of what remains solid and what has faded too far to support a straightforward patch. The line between salvageable metal and a compromised structural member is the line that determines the path forward. If a small patch in the rocker or floor pan exists, a patched panel can be fabricated and welded in with solid fit and minimal distortion. If the damage stretches to a frame rail, cab corner, or another critical member, the repair becomes more complex and may require reinforcement or replacement of that segment.
To map out the work, many seasoned builders create precise templates. These can be cut from original panels, traced from existing geometry, or captured with digital scanning tools that translate contours into accurate patterns. Templates guide every cut and every tack weld, reducing the guesswork that leads to gaps, misalignment, or warped edges. In a classic truck, where the contours echo decades of design intent, getting the shape right matters as much as the weld itself. A clean, square cut edge is a signal that the new metal will seat properly and that the panel fit will be faithful to factory lines. The cutting itself should be performed with a tool capable of delivering a clean, controlled edge, whether it’s a plasma cutter for quick, precise removals or a reciprocating saw when access is tight. The goal is to remove only the damaged portion while preserving as much sound metal as possible so that the replacement panel can merge with confidence.
Material choice follows from the original construction and the anticipated load path. In many 1965 Chevy pickups, the replacement metal is high-grade steel designed to mimic the strength and form of the factory piece. Aluminum is an option in some modern restorations, but it requires different techniques and a different approach to heat management and joint behavior. Whatever the material, the mating surfaces must be prepared meticulously. The surfaces should be cleaned of rust, paint, and oil, and they must fit together with minimal gaps. A dry, precise fit-up under clamps confirms that the halves align along the same planes and curves as the surrounding bodywork. The moment of truth comes with tack welds that hold the patch in place while you verify alignment in three dimensions. If anything shifts at this stage, it’s easier to correct now than after a full-weld sequence.
Heat management is the quiet subject of many successful repairs. Metal moves when exposed to heat, and that movement can spoil a careful alignment. The welder must monitor heat input, spacing tacks to distribute heat evenly, and avoid prolonged welds that could warp the skin or push the substructure out of true. The choice between MIG and TIG welding matters here. MIG can be forgiving for field repairs and helps fill gaps while maintaining strength. TIG offers finesse for thinner sections or for seams that demand a nearly invisible finish. In either case, the operator aims for clean, continuous fusion without porosity or undercut. After welding, the seam is ground smooth, and the surrounding texture is preserved so the repaired area remains visually continuous with the rest of the panel.
But strength isn’t the only requirement. A damaged cut area creates spaces that invite moisture and rust to reclaim the metal if left untreated. Preparation thus includes a robust rust-control plan. The repaired zone should be treated with a rust-inhibiting coating that seals both the interior and exterior surfaces. A thorough application of barrier coatings and underbody sealants helps prevent future corrosion, especially in vulnerable seams and pinch points. The aim is a durable shield that performs year after year, not a temporary fix that wears thin after the first winter rain. Once the coating has cured, the surface is prepared for finishing. This is where the aesthetic return of the patch becomes visible. If the patch requires filler, it should be used sparingly and only after the metal seams are fully sealed and backed by solid welds. The filler is then sanded to an ultra-smooth finish, responding to the surrounding panels with a feathered transition that avoids hard lines. The color-matching phase follows, either through a professional spray booth or a skilled body shop that can recreate the factory tone with precision. The goal is a seamless appearance that makes the patch indistinguishable from the original sheet metal when viewed from typical angles.
A repair of this kind isn’t completed by the patch alone. Reinstallation of hardware, brackets, and fasteners that were removed to access the damaged area is essential for restoring the truck’s structure to its pre-damage condition. The alignment of bed supports, cab corners, and related mounting points has to be checked in the context of the entire truck. A test fit of the bed, fenders, or adjacent panels ensures that the repaired portion doesn’t pull or push against neighboring structures. Any misalignment at this stage can be corrected with small adjustments to clamp positions and minor rework before the finish coat goes on.
Guidance on how to approach this repair can be found in the broader restoration guidance offered by trusted sources that document similar journeys through the same era craftsmanship. For readers seeking a broader mindset on restoration strategy and budgeting, the Master Truck Repair blog provides context and practical considerations that complement the hands-on work described here. This broader perspective encourages builders to plan for contingencies, allocate time for the inevitable refinements, and approach the task with patience rather than rushing toward a visible finish.
As the work progresses, a well-documented approach helps preserve the truck’s historical value. The process should be recorded with photographs, measurements, and notes at each stage. Such documentation not only assists the current repair but also informs future maintenance and any potential future patchwork. The goal is to leave the truck closer to factory intent than to a purely functional repair. A successful patch becomes a quiet guardian of the vehicle’s legacy, carrying forward the lines and proportions that defined the model when it first rolled off the line.
In this light, preparation becomes a form of respect. It respects the original engineering, the way the metal moved as the vehicle aged, and the now-faded lines that gave the 1965 Chevy its distinctive silhouette. The method of assessment—accurate measurement, honest appraisal of damage, precise template creation, and careful fit-up—shapes not only the immediate repair but the long-term behavior of the vehicle. When the patch is welded, ground, sealed, and finished, you aren’t just closing a hole; you’re reinstating a solid, continuous skin that carries the car’s history forward with renewed integrity.
For those who want deeper practical guidance, consult the broader restoration resources that discuss body and rust repair parts tailored to classic pickups. The emphasis remains on authentic fit and durable performance rather than on quick fixes. A well-executed assessment and preparation phase reduces surprises during the welding and finishing stages. It also minimizes the likelihood of misalignment that can surface after paint or in the years ahead. The result is a 1965 Chevy truck that not only looks right but behaves as a sound, safe vehicle with a structure that endures.
If you’re pursuing this thoughtfully and methodically, you’ll discover that the preparation phase is the most powerful predictor of success. It is where the truck’s future is decided. The more precisely you map the damage, the more accurately you can shape the replacement portion, and the more stable the welds will be when heat is applied. In this way, preparation is not merely a precursor to welding; it is the backbone of a repair that honors the vehicle’s past and its ongoing life as a reliable, classic truck on the road.
For ongoing insight and practical restoration perspectives, you can explore additional resources on the Master Truck Repair blog. The intent is to blend hands-on technique with measured planning, so that every cut, every weld, and every coat of protection becomes part of a coherent restoration narrative rather than a string of isolated tasks. Finally, when you reach the finishing stage, remember that a patch completed with discipline—clean cuts, careful fit, controlled heat, and thoughtful rust protection—will always feel more faithful to the car’s original character than a hurried fix ever could.
External reference for deeper technical detail on body repair panels and alignment can be consulted here: https://www.classictruckparts.com/1965-chevrolet-c10-pickup-body-rust-repair-parts.html
Cutting Out the Damaged Section: Laying the Foundation for a Solid 1965 Chevy Truck Restoration
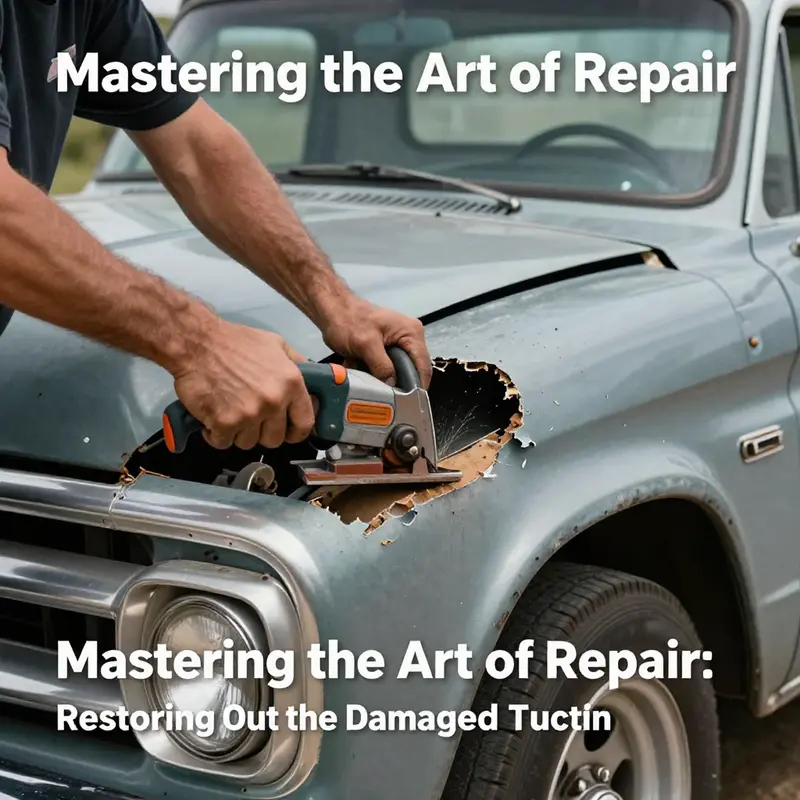
The act of cutting away a damaged section on a classic 1965 Chevy truck is more than a simple demolition. It is the pivotal moment when a restoration begins to take a true shape, where structure and aesthetics start from a clean slate rather than a flawed base. The precision and care exercised here determine how the rest of the repair will behave under stress, how the new metal will weld in, and how smoothly the final finish will sit on classic lines that still carry the truck’s original character. The goal is not to remove as much as possible but to remove exactly what is compromised and to preserve the surrounding metal’s integrity, grain direction, and factory geometry. A thoughtful approach to this step keeps the doorways aligned, the rocker panels square, and the floor pan true to factory contours, all of which matter when the bed, cab, and panels finally come back together.
Assessment is the quiet, steady heartbeat of the process. Before any cutting blade touches metal, take a long, careful look at the damage. Localized rust can mask deeper problems; rust can creep into seams, weld lines, or under tin where it’s easy to miss. The most crucial questions revolve around whether the damage stays within a single panel or if it invades something more structural, such as a rocker, floor pan, cross sill, or a frame member. If the damage lies near a structural component, it is essential to establish a replacement boundary that preserves the original geometry. A misplaced cut can distort the body line or warp the panel gaps, which will be exposed later when the primer and paint go on. Once the scope is clear, you can begin to prepare in earnest.
Preparation is both physical and mental. Clear the area of trim pieces and anything that could trap heat or sparks. The surface around the damaged zone should be cleaned so you can see the cut lines crisply. Sharp cleanliness helps the eye follow a straight path, and that straight path is non-negotiable for a clean seam and a predictable replacement panel. Marking the lines is itself an act of restraint. You want to mark with a steady hand and a straightedge, allowing for a small margin around the compromised area so you can anchor the replacement panel to sound metal. The use of templates or even liberal chalk lines can help, but the mark should be permanent enough to guide the cut even if you have to pause for different tools or a change of blade.
When it comes to tools, the repertoire should be deliberate rather than expansive. A reciprocating saw with a high-quality metal blade is the workhorse for rougher cuts, but for cleaner edges, a plasma cutter can lay down smooth outlines that reduce the need for heavy grinding. An angle grinder fitted with a metal cutting wheel is a dependable backup, especially when you need to finesse a corner or couple of inches that are hard to reach with a larger tool. Measuring tapes and markers stay in constant use, but the straight edge or template remains the most faithful guide. The caveat with any cutting tool is heat. Excessive heat from prolonged cuts can induce warping or micro-cracking near the seam, so make shallow passes, let the tool do the work, and move with a calm, steady rhythm.
Cutting is a dance of precision and restraint. Begin by lifting away trim and any components that might obstruct visibility of your cut lines. Then, with a steady hand, follow the marked boundaries. If you are using a reciprocating saw, allow the blade to bite gradually, keeping the blade perpendicular to the surface to avoid a stepped edge that will complicate fitting. For a plasma cutter, a smooth glide along the lines yields edges that are easier to weld and align. It’s natural to pause and check alignment frequently during the cut. Each small check is a shield against a larger misfit later in the project. After the damaged section is removed, the real work begins in earnest: smoothing and preparing the edges for the new panel.
Post-cutting care is not a cosmetic afterthought. The freshly exposed edges may look clean, but their true readiness depends on how well you manage the metal around them. Grind the edges until they are smooth, eliminating any burrs that could impede a clean weld or trap moisture. A careful eye will note any waviness or distortion that hints at heat exposure during cutting. If distortion is present, a light back-bevel or gentle clamp-and-tettle technique can coax the metal back toward flatness before the new panel is offered up. This is also the moment to examine the adjacent metal for any hidden rust or weakened spots. The goal is a continuous, rust-free border that provides a solid foundation for welding. Any compromised metal near the seam can create a weak line that will show up as the finish. Address those areas now rather than letting the problem surface once you have a new panel in place.
With the cut complete and the edges prepared, you can approach the fitting of the replacement panel. The replacement is not a miracle cure; it is a carefully shaped piece that must respect factory geometry. You should have a panel that mirrors the original contours closely, allowing for a snug, gap-free joint. Temporarily clamp the panel in place and test-fit from every angle—along the rocker, across the floor pan, and at any adjoining seam. The fit should feel almost seamless before you begin welding. Tack welds are the quiet, invisible anchors that hold the plan in place while you verify alignment. If any gaps appear during the test fit, you can adjust by gently bending the edges or trimming small amounts of material until the panel seats with uniform contact along the entire seam. This is not the place for forceful persuasion; it is the place for measured, patient refinement. A poor fit here will ripple through the entire restoration, making door gaps out of alignment and inviting paint runs or filler creep later on.
The structural context of a 1965 Chevy truck adds gravity to the task. If the cut is near a frame rail or a cross sill, maintaining the orientation and offset of the new panel becomes a safety matter as well as an aesthetic one. The original design relies on these joints to distribute loads and keep the cab square with the bed. When you are dealing with the floor pan or rocker panels, the emphasis is on preserving a flat plane that the bed and cab can align to. The replacement panel should be trimmed to fit within the surrounding metal, leaving just enough material to weld without creating a thick seam that would require excessive filler or disguising work. The clamp marks, tack welds, and eventual full welds should all flow in a manner that minimizes heat input while delivering a strong, continuous bond. Welding technique matters just as much as the cut itself. A slow, deliberate weld sequence reduces heat buildup, minimizes warping, and creates a seam that will hold its shape as the panel cools. Grinding the welds smooth afterward should be performed with care to preserve the original contour and avoid creating a noticeable ridge that would later telegraph through primer and paint.
Once the panel is welded and ground flat, the door of rust prevention opens wider. The repair area has to be treated from inside and out. A rust inhibitor or protective coating applied to the bare metal inside the seam, followed by an appropriate undercoating on the exterior, helps prevent moisture from seeping back into the joint. This is the moment where the cycle of restoration moves from structural repair toward longevity. It’s not enough for the seam to be airtight; it has to be durable under road vibrations, temperature swings, and road salt. The aim is to seal the metal so that moisture cannot find its way into hidden crevices where corrosion can start anew. If body filler is required to achieve a smooth transition, use it sparingly and sand it to a feathered edge. The finished surface should read as a single plane when viewed from a distance and should not exhibit depressions or high spots that would catch the eye once the paint goes on.
The narrative of cutting and replacing a damaged section on a 1965 Chevy truck is not complete without a path toward eventual reassembly. After the welded seam has cooled and been ground, the surrounding parts—fender, bed brackets, and cab hardware—should be reintroduced with the same care you applied to the metal itself. The objective is alignment that feels right to the touch and looks correct in the mirror. It’s a quiet discipline: check gaps, check fit, check straight lines, and check that the bed sits square on the frame. If everything is aligned, the work transitions to finishing and painting. If not, a backtrack is necessary, repeating the fit and weld steps with renewed attention to the boundaries that were marked at the outset. This is the essence of restoration—building from sound foundations and maintaining, wherever possible, the lines, textures, and proportions that make the truck recognizable and beloved.
For readers seeking a broader perspective on body repair techniques and to see how this fundamental cut fits into a larger restoration strategy, our blog offers practical guidance that echoes the approach described here blog. In addition to step-by-step techniques, consider consulting an external resource that delves into cabin and body repair specifics for classic trucks of this era. A comprehensive external guide provides deeper insights into areas frequently affected by rust, such as cab corners, rocker panels, and floor pans, and can be a valuable reference as you plan and execute the next stages of the repair.
External reference for deeper reading: https:// Holley.com/1965-chevrolet-c10-pickup-body-rust-repair
Breathing New Metal: Authentic Panels, Precision Sourcing, and the Art of Repairing a Damaged Cut Area on a 1965 Chevy Truck
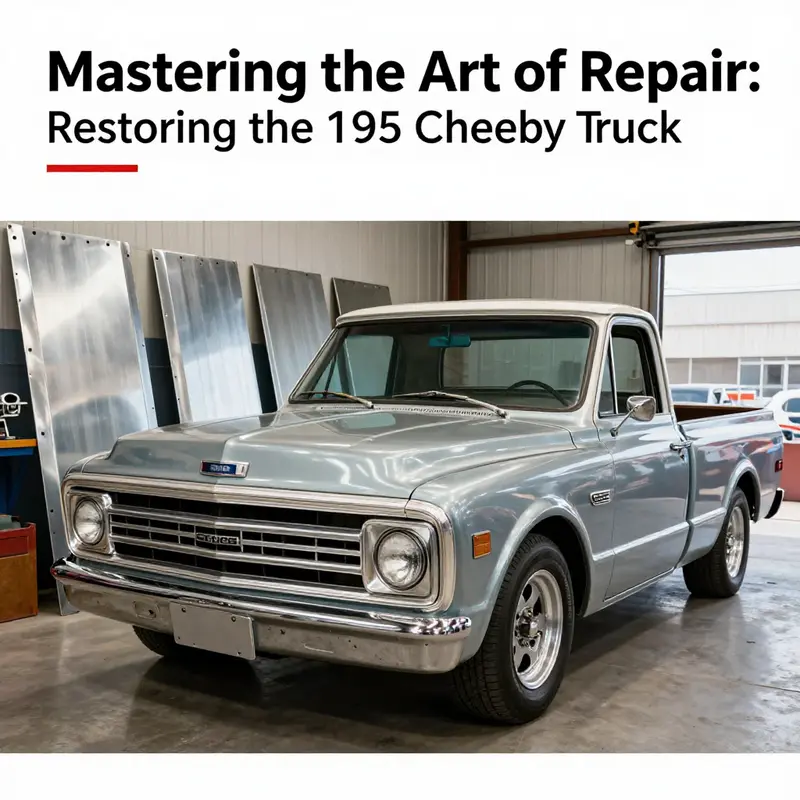
A 1965 Chevy truck carries a lineage of steel, design, and road-worn stories. When a cut area in the body or near a structural member compromises the frame or bed, the repair goes beyond water-tight seams and cosmetic patching. It becomes a test of authenticity, safety, and long-term durability. The goal, then, is to restore the metal to factory dimensions without weakening the structure or altering the lines that give the truck its character. This is not merely patchwork. It is a careful reconciliation of old craftsmanship with modern repair techniques, anchored in a respect for OEM specifications and a disciplined approach to corrosion control. The process begins with a clear view of what is damaged, what must be preserved, and which path—fabrication or sourcing—will honor the original architecture while delivering a solid, rot-resistant repair.
In the assessment phase, the emphasis is on truth-telling. A thorough inspection reveals more than visible rust or bent edges. It shows how the surrounding metal carries the load, how moisture infiltrated the area, and whether the compromise extends into supports that affect door alignment, bed mounting, or cab-to-firewall integrity. The goal is to map every metric: the height and width of the cut, the thickness of the surrounding panels, and the continuity of joints that anchor the patch to the body. Once this map exists, fabrication and sourcing options become clear. You can transform a damaged cut into a clean, deliberate interface that mirrors the original contour rather than a hurried, makeshift fix.
The decision between fabricating a patch panel in-house or sourcing a ready-made replacement hinges on several factors. For some locations, especially those near critical structural members or where the roof windshield channel intersects, a precisely shaped repair panel is worth the extra time. Sourcing panels that match OEM dimensions reduces guesswork, ensures fit, and preserves the line of the truck. That fidelity matters not only for aesthetics but for how the panel behaves under load and how it responds to future rust protection. In practice, this means looking for panels engineered to align with vintage chassis geometry and body contours. The available repair panels are typically designed to fit the intended year range, with margins for trimming and seam allowances. They arrive as flat sheets or slightly pre-formed sections, ready to be trimmed, welded, and finished. The closer the panel is to factory spec, the more forgiving the welding, grinding, and finishing steps will be.
If you choose to fabricate, the patch must be shaped to mirror the original geometry. Metal beyond the patch should remain untouched, preserving the truck’s character and weight distribution. The fabrication process begins with careful cutouts: always cut with clean, straight edges so the patch can butt into place rather than rely on filler to cover gaps. A well-fit patch is anchored with tack welds before full welding. When forming the patch, you’ll want to incorporate the same corner radii, flange thickness, and edge detail that the factory employed. A well-made patch with a tight fit will reduce heat distortion during welding. It also minimizes grinding work and the amount of body filler required later. The final goal is a seamless seam line that, once ground flush and painted, is indistinguishable from the surrounding factory metal. As you work, you should manage heat by moving along the seam and pausing to cool occasionally. Warping is the enemy in a repair like this; a steady hand and a patient approach pay dividends down the line.
Whether you fabricate or source, corrosion prevention is not an afterthought. After the metal is joined, the seam area must be treated from inside and outside. The inside of a cab or bed area is often shielded from view but is exposed to moisture and salt during driving and storage. The first protection is a robust rust inhibitor that can penetrate microscopic pores in the new metal. This is followed by a dedicated undercoating designed for longevity and resistance to salt spray. The aim is to create a barrier that stops moisture from wicking into sills, flanges, and weld lines. Then comes seam sealing to stop air and water from seeping into the joint while allowing the area to breathe enough to prevent pressure buildup behind the patch. After the initial protection, a light primer seals the surface. This sequence keeps the repair resilient over many driving seasons and reduces the risk of later peeling or rust-through.
If you opt for replacement panels, the process remains rigorous but gains predictability. OEM-spec panels are built to the original dimensions, so the patch edges align with existing contours with minimal guesswork. The cut area will still need precise trimming, grinding, and weld preparation, and the surrounding metal must be sound to accept the new panel. Good practice includes cleaning the mating surfaces, checking fit with clamps and temporary fasteners, and confirming the alignment of any related components—bed cross sills, floor pans, or cab mounts. Afterward, tack-welding in strategic points, ensuring that the panel remains square and level, is essential before completing the welds. Heat control continues to be a priority. A steady rhythm of welding, pausing to cool, and then finishing welds reduces the risk of warp. The seam is then ground smooth, and a test-fit is done with the bed, fenders, or other nearby parts to confirm consistent gaps and line-of-sight with the rest of the body.
In the realm of authenticity, the choice of replacement panels can become a study in material and geometry. These panels are typically offered in standard steel grade used during the 1960s, crafted to fit alongside the factory frame and body lines. The advantage of this approach is the mileage you gain when the patch integrates with the rest of the sheet metal and with the frame rails. The patch becomes a living part of the truck’s history rather than a late repair just carried out to pass a visual check. The alignment of features like the bed floor or the roof windshield channel matters as much as the patch’s own edge. The windshield channel, in particular, has subtle radii and a channel depth that, if mismatched, can throw off seal lines and wind noise. For those who value authenticity, labor invested in careful fitment pays a double dividend in terms of long-term performance and the satisfaction of restoring a piece of automotive history.
A practical thread runs through all these choices: the importance of a structured supplier evaluation framework. The path to reliable panels is not simply about price. It is about supplier maturity, technical responsiveness, and long-term viability. The supplier selection becomes a risk management practice as much as a sourcing decision. When evaluating potential partners, buyers should consider the supplier’s ability to provide panels that meet factory tolerances and the documentation that accompanies the parts. Lead times, MOQs, return policies, and the clarity of technical support all weigh into the decision. The aim is to avoid a brittle repair that looks right but fails under stress or moisture. A thoughtful approach to sourcing ensures you are building from parts that maintain structural integrity while honoring the original design language.
In the larger workflow, the repair is not finished with the last bead of weld or the final coat of paint. It concludes with careful inspection and reassembly. Fasteners, brackets, and hardware must be reinstalled with proper torque and alignment. The bed must sit squarely on its mounts, doors should close with even gaps, and the overall silhouette should align with the factory lines that define this model. A comprehensive test fit confirms that the repair has not altered the geometry of the surrounding panels. And as a final guard against future corrosion, a disciplined sealing and undercoating routine should be applied around the repaired area. If you follow these steps with patience and attention to detail, the repaired cut area not only looks original but behaves as if it were part of the truck from day one.
For those who want to deepen their understanding of practical workflows and ongoing project guidance, the Master Truck Repair blog offers a centralized resource hub that covers related topics and nuanced techniques. It serves as a companion to the hands-on work described here, providing insights drawn from real-world repairs and restoration projects. Master Truck Repair blog
Finally, the pursuit of authentic panels and enduring repairs sits within a broader landscape of sourcing and quality control. A supplier guide focused on OEM-spec panels and restoration components highlights the complexities involved in matching vintage design with modern manufacturing realities. It emphasizes the importance of evaluating suppliers not just by price, but by how they manage material quality, dimensional accuracy, and historical fidelity. This broader perspective helps restoration teams and hobbyists alike navigate choices that affect both the immediate repair and the truck’s long-term survivability on the road. An external resource provides further depth on supplier evaluation and OEM-spec panels, offering practical frameworks for making informed procurement decisions. For those seeking this broader view, see the external reference: https://www.supplychaininsights.com/1965-chevy-truck-ac-components-supplier-guide/
Restoring the Cut: Precision Welding Techniques for a 1965 Chevy Truck
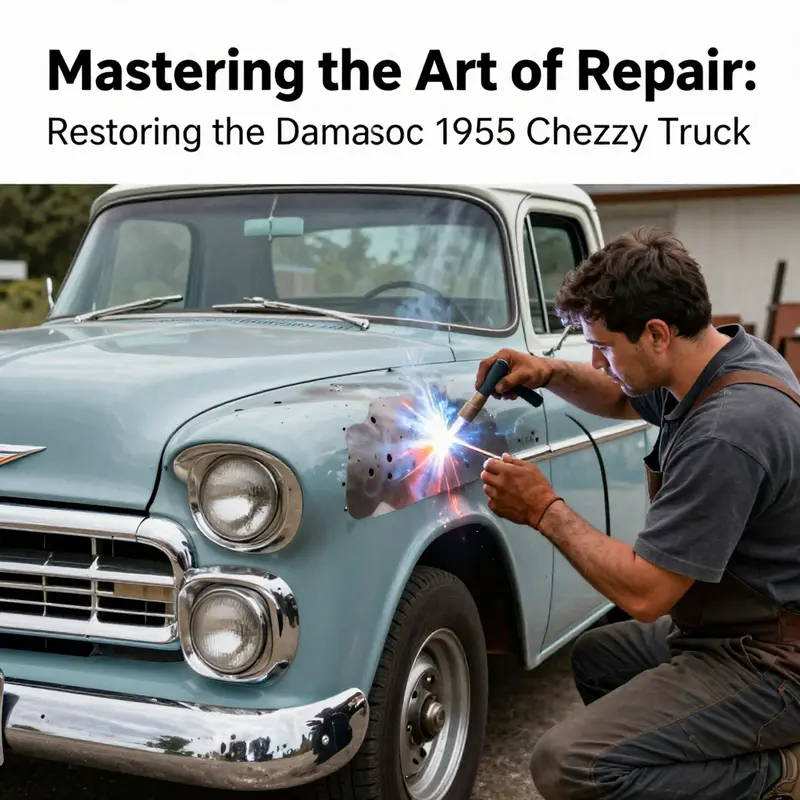
When a 1965 Chevy truck has a damaged cut area in the body or frame, the repair becomes more than a patch job. It is a test of restraint, preparation, and the ability to balance restoration aesthetics with structural integrity. This chapter follows a path that respects the vehicle as a piece of history while recognizing the realities of metal fatigue, rust, and the realities of vintage sheet metal. The core idea is simple but demanding: replace the compromised metal with a panel that fits the original contours, weld in a manner that minimizes heat distortion, and seal the area so that years of exposure do not return in the form of rust. The approach centers on using compatible materials, careful fitment, and welds that blend into the underlying structure rather than fight against it. In practice this means embracing mild steel as the baseline for repair and adopting welding techniques that keep heat input controlled, allowing the surrounding metal to remain stable and true to its factory geometry.
The first step is assessment and preparation. A thorough visual inspection goes beyond the obvious rust holes. It involves checking the surrounding seams, the integrity of the frame rail or bed cross member, and the likelihood that any adjacent metal is compromised from years of stress and moisture. Once the damaged section is isolated, the area must be stripped of rust and paint so the metal surface is clean for a solid bond. Use a wire brush, a grinder with a suitable disc, or a controlled sandblasting approach to remove the buildup without digging into good metal. The goal is to reveal clean metal that will accept welding through the entire thickness needed for a sturdy repair. The surrounding metal should feel sound to the touch and show no signs of softening that would indicate the need for further structural assessment before proceeding. This stage is not optional; a poor initial assessment leads to a weak repair that will fail under load or vibration.
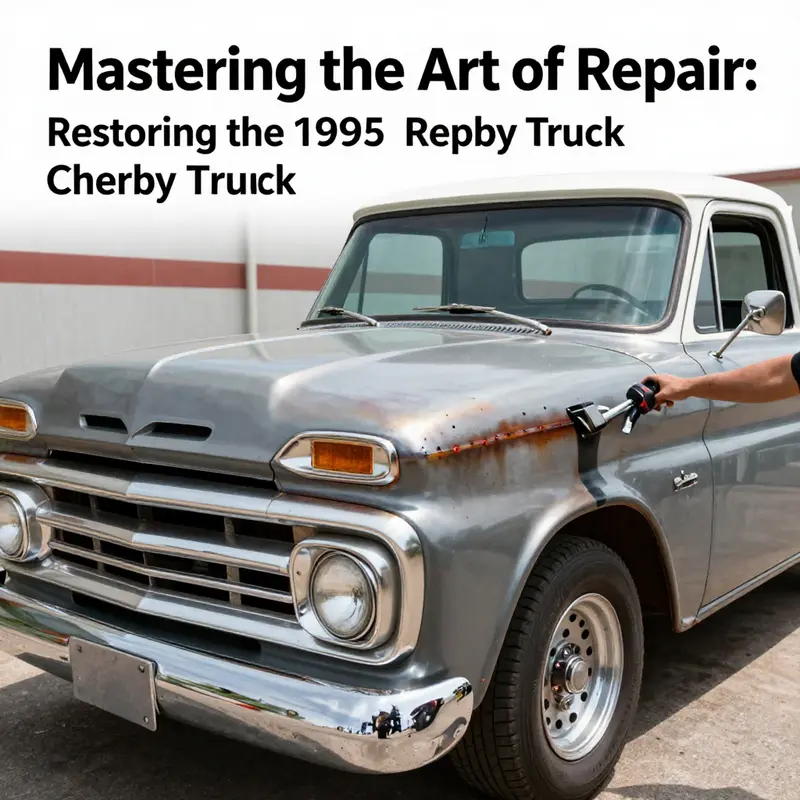
Cutting out the damaged section is where precision matters most. A clean, square cut makes the subsequent fitment of a replacement panel much more straightforward. A reciprocating saw or a plasma cutter can perform this task, but the key is to cut with a steady hand and maintain straight edges that align with existing body lines and frame references. If you discover that a larger portion of the surrounding metal is compromised, it is wiser to remove additional material in controlled steps rather than attempt to salvage an area that will warp or crack under heat. The cut should reveal solid, flat edges ready to accept a panel that mirrors the original factory profile. In vintage trucks the metal is thin, so it is essential to avoid overcutting or bending while removing the damaged segment. The aim is to achieve a plug that fits the opening as if it was manufactured for it, not a makeshift patch that looks out of place and risks future failure.
Replacement panels for a 65 Chevy can come in two routes. They can be sourced as prefab panels that match factory dimensions or they can be fabricated from sheet metal to mirror the contours. The choice depends on the extent of damage and the availability of panels that align with the exact year and model. Regardless of the path chosen, the method of fitting remains the same. The replacement piece should sit flush with the surrounding metal, with gaps minimized in every direction. Use clamps or fixtures to hold the replacement panel in place while you check alignment along the joint lines and any contours that must align with the bed or cab line. A tight fit prevents distortion during welds and reduces the need for excessive grinding to hide gaps later. It also reduces the likelihood of warping caused by heat if you maintain consistent fit and spacing during tack welding.
Welding the replacement piece into place is where the debate between MIG and TIG often surfaces. For most repairs on a vintage truck with thin gauge metal, MIG welding offers precision and a clean finish. MIG is generous with practice tolerance and commonly produces strong, repeatable beads that resist crack propagation when finished properly. It allows you to work at a pace that keeps heat input under control, which is critical when welding near structural elements. TIG welding, while offering superior control over heat input and the potential for a near flawless bead, demands a level of precision and hardware that may exceed the needs of a typical cut area repair. TIG shines in areas where high strength and distortion control are paramount, but for the majority of cut area repairs on a 65 Chevy, a well executed MIG bead with careful technique often provides a durable and visually acceptable result. The best practice is to plan the weld sequence before striking the first arc. Start with tack welds around the perimeter to hold the patch in exactly the right place, then complete fusion along the seam with a series of short, controlled passes. Avoid long continuous welds that push heat deep into surrounding metal. Instead, adopt a stitch or intermittent seam approach that allows the metal to cool between passes. This approach minimizes warping and keeps the face of the repair smooth and uniform.
Heat management is the invisible craft within welding. The old metal in a 1965 Chevy is susceptible to distortion if heat soak is excessive or uneven. To prevent this, plan your welds in a sequence that allows even heat distribution along the seam. Work in short segments and cool the area with occasional pauses or by using a damp cloth between passes, if the process and safety guidelines allow. The goal is to avoid heat buildup near the joint that would sag the metal inward or outward, altering the contours the restoration must preserve. This is particularly true when working near structural members or where the floor pan meets the rocker panel. The advice here is practical: move steadily, test the fit after each stage, and never let a single long weld linger in one spot. If you notice minor warping, address it with gentle hammer and dolly work on the backside or with a small amount of shrinking technique along the seam. The final goal is a seam that feels strong, yet remains visually seamless after finishing.
After the welds are complete, the next step centers on finishing and protection. Grinding the welds smooth is essential, but it must be done with care. Overgrinding can thin the metal and weaken the joint, while under grinding leaves a rough surface that traps moisture. The sweet spot is a flush seam that blends with the surrounding metal, followed by careful feathering into the adjacent panels so that no high spots disrupt the surface. Once the surface is smooth, check the joint for gaps or unevenness. A light tactile pass with your finger can reveal inconsistencies that a visual check might miss. If any seam is not fully fused, perform a small additional weld with the same stitch technique and blend it into the existing welds. Immediately after final grinding, the repair should be prepared for rust prevention. This is not a cosmetic step alone but a shield against future corrosion. Apply a rust-inhibiting coating to the bare metal on both sides of the repair if possible. Since this area may be exposed to moisture from road spray and condensation, a robust sealant is essential to prolong the life of the repair. The rust preventative layer should cover the seam and extend slightly onto the adjacent metal to create a continuous barrier.
Filling and finishing follow the rust seal. Use body filler sparingly, only where necessary to correct minor imperfections and to restore the factory curvature. Excess filler can trap moisture and create hidden pockets of corrosion. After filler sets, sand evenly to a smooth, uniform finish that matches the surrounding panels. Priming is the next step, and the primer should be suitable for metal and compatible with the paint system you intend to use. The aim is a uniform base that accepts the topcoat evenly, without showing the seam through the paint. At this stage a test fit for larger components such as the bed or fenders is prudent to ensure that the repaired area aligns with the other structural interfaces. If misalignment is detected, it may indicate the need for gentle adjustments to the mounting points or a re-check of fit before final assembly.
The final phase is restoration that respects the vehicle while ensuring longevity. A complete restoration plan embraces not only aesthetics but also durability. The repaired cut area should feel solid under gentle tapping and reflect no noticeable flex or movement when pressure is applied. The surrounding paint should appear uniform, with no signs of cracking along the repaired seam. When the final coats of paint are laid down, the color should blend with the heritage of the truck, echoing the original factory finish while providing protection against the elements. It is crucial to verify that the bed, cab, and surrounding panels align not just visually but functionally. The bed mounting points and brackets should be examined to ensure fasteners engage cleanly and that no additional stress is being transferred to the repaired area. In a vintage truck, even a small misalignment can create rattles or stress that accelerates wear. The overall repair should feel integrated into the chassis and body rather than a separate add-on.
In practice, the repair of a damaged cut area on a 1965 Chevy truck is as much about disciplined technique as it is about material compatibility. Matching the original metal properties in a repair is essential to preserve the vehicle’s structural behavior across years of use. This approach reduces the risk of future fatigue and corrosion and keeps the vehicle safe and roadworthy. For those who wish to deepen their understanding of material choices and welding procedures specific to classic trucks, it helps to consult broader resources that address vintage metal characteristics and restoration methods. A comprehensive reference on techniques for restoring 1965 Chevy truck body panels offers context for the decisions you make during a weld, including the importance of heat control, fitment, and proper surface preparation. For more detailed guidance, see the external resource linked at the end of this chapter. In addition, if you are looking for ongoing practical guidance and community wisdom related to truck repair, you can explore the Master Truck Repair blog, which hosts a range of articles that address related topics and practical troubleshooting. This internal resource can be a useful companion as you plan and execute your repair steps.
With the right approach, the repaired cut area on a 1965 Chevy truck can emerge as a durable, nearly invisible seam that honors the vehicle’s heritage while delivering modern reliability. The blend of careful assessment, precise cutting, carefully chosen welding techniques, and disciplined finishing creates a repair that stands up to years of use and weather exposure. The path from damaged metal to restored strength is a sequence of deliberate decisions that respect the original design while embracing the practical realities of restoration work. As you complete the project, remember that each weld is not just a bond between two sheets of metal but a commitment to the vehicle’s future performance and its place in the story of classic Chevrolet trucks. For more context on practical tips and ongoing restoration topics, refer to the internal link to the repair blog. mastertruckrepairllc.com/blog.
External resource for deeper techniques and historical context: https://www.classictrucksupply.com/blog/welding-techniques-for-restoring-1965-chevy-truck-body-panels
Guarding the Cut: Rust-Proof Finishing Techniques for a 1965 Chevy Truck
When you cut into a 1965 Chevy truck to repair a damaged area, you create two realities: the visible repair and the ongoing fight against rust. The goal is not just to close the gap but to reestablish a continuous, corrosion-resistant metal envelope. Start with clean edges: remove loose rust, paint, and debris from the cut, then bevel or feather the edge to help the new panel meet the old skin. Next, treat the metal with a rust-inhibiting primer; zinc-rich primers provide sacrificial protection, while epoxy primers deliver strong adhesion. Apply in thin coats and allow proper cure time. If surrounding members needed reinforcement, weld them with careful heat control and tack welds to maintain alignment. Grind seams smooth but seal them to prevent moisture entry. If filler is used, seal and cure before final sanding, then feather to a seamless transition. Paint with multiple thin coats and finish with a clear sealant for UV and moisture resistance. Seal seams with a dedicated seam sealer to stop water intrusion. Finally, inspect the repaired area in bright light, touch up any imperfections, and reassemble surrounding panels with alignment checks. Maintenance matters: wash, wax, and inspect after winter and highway use to catch early signs of corrosion. For further reading, consult reputable restoration guides and the Master Truck Repair blog for practical, field-tested tips.
Final thoughts
Successfully repairing a damaged cut area on a 1965 Chevy truck requires a systematic approach and expertise in various techniques, from assessment to rust prevention. By prioritizing meticulous preparation and using high-quality replacement parts, fleet managers and trucking company owners can ensure their classic vehicles remain operational and visually appealing for years to come. Investing time and resources in proper repairs translates to enhanced vehicle reliability and longevity, ultimately benefiting your operations. Careful attention to these repairs not only preserves the vehicle’s classic heritage but also maintains its value in the market.