For fleet managers, trucking company owners, and operators in the construction and mining sectors, maintaining the structural integrity of trucks is paramount. Rusted rocker panels can compromise safety and increase long-term operational costs. This guide provides an in-depth exploration of repairing rusted rocker panels on trucks, ensuring you understand the steps necessary for effective restoration. In the following chapters, we will cover the assessment of rust damage, preparation for repairs, cutting out damaged metal, installing replacement panels, and finishing and protecting repairs. Each chapter aims to equip you with actionable insights for maintaining your fleet’s performance and longevity.
Seeing Through the Rust: A Thorough Assessment Before Replacing Rocker Panels on a Truck
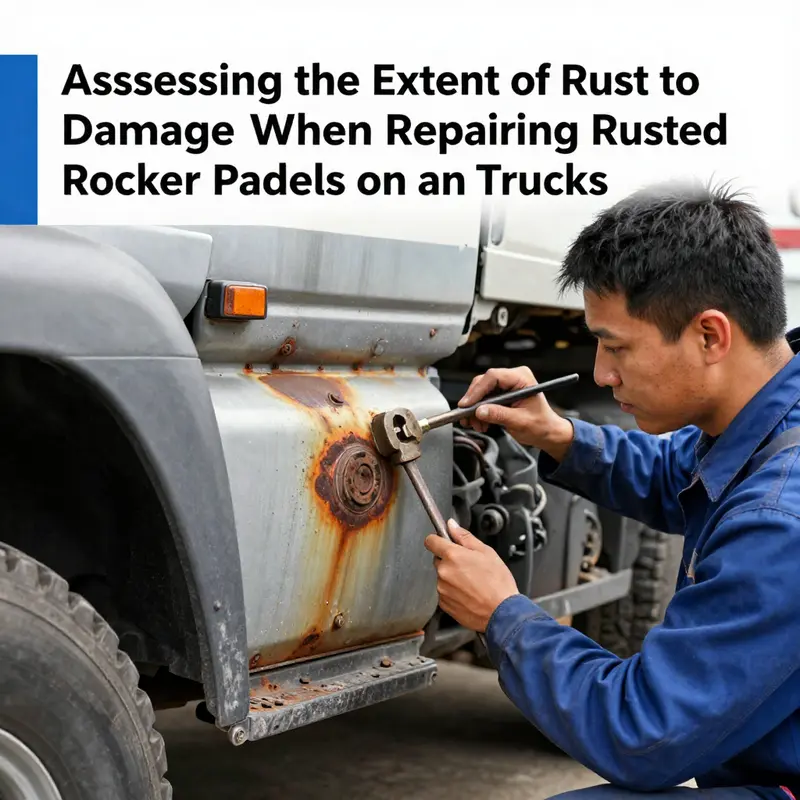
Assessing the extent of rust damage when repairing rusted rocker panels on a truck is more than a visual check. It is a disciplined evaluation that blends careful observation with tactile feedback and precise measurement. This approach sets the course for the entire repair, because the decisions you make in this moment determine whether a patch will suffice or a full panel replacement is required for safety and longevity. The rocker panel plays a critical role not only in the truck’s aesthetic integrity but in its structural balance and resistance to road salt and moisture. If rust has remained superficial, you can usually stop short of invasive work; if corrosion has penetrated, the repair must move toward replacing metal with sound structural strength. The rule of thumb that guides most professionals is straightforward: identify the rust’s reach, quantify what exists, and then decide whether the damage can be contained with surface treatment or warrants a cut-out and new material. In practice, this means a methodical inspection that starts with the light and ends with measurements and documentation, all while keeping the end goal—safety and durability—clear in the mind.
A well-lit, clean panel is the first clue to the truth beneath the paint. Clean the rocker thoroughly so you aren’t guessing what lies under dirt, salt, and old finishes. Lighting should mimic daylight or be standardized to an appropriate level so you can reliably gauge color changes, flaking, and texture. Surface rust can mask deeper issues, especially along the edges and near the front and rear joints where road spray pools and moisture tends to accumulate. In this context, the visual portion of the assessment becomes a dialogue between what you see and what the metal is trying to tell you about its health. You’ll learn to read the telltale signs: paint that bubbles or peels, a tendency for rust to creep into corners, and dark discoloration that suggests ongoing chemical activity. In automotive repair practice, standards exist to help quantify what you see. For example, standardized references like ISO 4628-3:2024 provide a visual comparison method (Ri) and an area percentage method (R%) to quantify rust severity. This isn’t merely academic; it gives a language to describe severity and to justify the repair plan to customers and regulatory bodies alike. When you commit to a repair, you’re committing to a standard of care, and those standards help ensure your judgment isn’t swayed by surface appearances alone.
Beyond sight, touch adds a critical layer to the assessment. Run a gloved finger along the panel and listen for inconsistencies in the texture. A steady, resonant tap with a rubber mallet can reveal a lot about the panel’s interior condition. A solid ring when you strike an area suggests the metal underneath is still sufficiently thick and intact. A dull thud or a hollow crackling sensation indicates deeper material loss, possibly from rust that has progressed inward. The tester’s ear becomes as important as the eye here, because metal that has thinned can fail under stress, even if the surface seems only minorly compromised. The thickness itself is your next measure. A small screwdriver or a probe can help test by feel; if the metal yields easily or if the tool penetrates with little effort, you’re likely looking at advanced corrosion with significant cross-section loss. Remember that corrosion rarely advances in a straight line. It often starts on the inside and eats toward the surface, which means a seemingly modest exterior bite can hide a much deeper weakness. This is why thickness assessment is not a one-off step but a core part of the diagnostic process.
To move from impression to data, many shops bring in precision tools. Calipers or a digital micrometer provide the exact remaining thickness in a few key spots. Non-destructive testing (NDT) methods, such as ultrasonic thickness measurement, offer a way to map the condition without further harming the panel. The goal is a clear, data-driven picture of whether a patch will do or if a replacement panel is the only option that preserves structural integrity. The more you know about remaining thickness, the more confident you can be in your repair plan. In a practical sense, this means you’re deciding between a patch that covers surface rust and a panel that replaces a compromised structure. The diagnostic work is what helps you avoid a fixer-upper mentality—where you mask symptoms with filler or paint and leave a panel that may fail under load or impact.
Another important dimension of assessment is a comparison with established safety thresholds. In many repair guidelines, a rocker panel with substantial material loss—often described in terms of cross-sectional area—should be treated as a candidate for replacement rather than repair. In the best practice framework, when more than about half of the cross-sectional area has deteriorated, the repair loses reliability, and safety becomes the guiding criterion for material replacement. This rule isn’t rigid because every chassis and load path is different, but it provides a sturdy benchmark that keeps the focus where it belongs: on structural integrity and long-term durability.
Documentation is the quiet backbone of a sound assessment. Take photographs from multiple angles after you’ve cleaned the area and note the rust patterns as they appear. Photograph the edges and the joints specifically, since those are the most common spots for hidden deterioration. A detailed record ensures you and the customer agree on the damage and the proposed remedy, and it helps when you reference the plan during the subsequent repair steps. The documentation is also a memory guide for future inspections. A well-kept record makes it easier to monitor rust progression in the months and years that follow, which is essential given how winter road salt and moisture continue to threaten rocker panels.
As you finalize the assessment, you may feel the tension between doing a precise, measured evaluation and moving toward an efficient repair. That tension is healthy, because it reflects the two core obligations of the repair process: first, protect the vehicle and its occupants, and second, deliver a repair that looks right and lasts. If the rust-through threshold has not been crossed, you may proceed with surface rust treatment and protective coating while preserving the original panel. If the rust has eaten through and left holes or weakened the cross-section, the path toward replacement becomes the responsible course. In either case, the path should be transparent, data-driven, and aligned with the service standards that you’ve documented. For readers seeking a concise, practical overview of the shop approach to rocker-panel replacement and repair, a useful companion resource can be found in the Master Truck Repair blog. This external hub presents layperson-friendly guidance alongside professional insight, helping owners understand what a careful assessment looks like in real-world terms. See MasterTruckRepairLLC blog.
Once the assessment is complete, the repair strategy takes shape. The decision to repair the surface rust with cleaning and anti-corrosion treatment versus cutting out damaged metal and welding in a new panel hinges on what the data reveal about thickness, integrity, and safety. If you’ve found it’s mostly surface rust confined to paint and oxide layers, the restoration focuses on thorough cleaning, conversion where appropriate, rust inhibitor use, and topcoat protection to slow future corrosion. If, however, the measurement tools show thinning beyond acceptable limits or NDT confirms areas of weakness that threaten load paths, the restoration must begin with a cut and weld of a replacement rocker panel. The next steps require careful preparation, precise cutting along clean lines, and a controlled welding environment to ensure a seamless seam, proper penetration, and no heat distortion that could compromise door alignment or body lines. These are the decisions that connect the eyes of the inspection with the hands of the welder and the patience of the painter, thus completing a repair that holds up to year after year of use.
For readers who want to explore the concept further and see how a professional shop translates this assessment into a concrete plan, the linked resources provide a broader context. In particular, the blog referenced above offers practical examples and further discussion of rocker-panel replacement procedures that complement the assessment framework outlined here. Keeping your narrative consistent with the article’s broader topic—how to repair rusted rocker panels on a truck—means anchoring your approach in the facts of rust progression, measurement, and safety thresholds while leveraging reputable, accessible reference points. The goal is a repair that begins with a clear diagnosis and ends with a durable, well-finished panel that resists the next season’s salt and moisture. If you are a DIY enthusiast, this approach helps you separate what you can confidently handle from what benefits from professional welding and structural expertise. In any case, the assessment remains the compass that guides your repair journey.
External reference for deeper technical steps and professional guidance: https://www.autobodyrepair.com/repair-guides/replacing-rocker-panel/
To cross-check practical context and to see how a shop may present the process to customers, consider exploring the Master Truck Repair blog for articles that address the broader maintenance and repair decisions a truck owner faces during rocker-panel work. The blog provides a bridge between the diagnostic phase described here and the hands-on, step-by-step replacement and protection steps that follow in subsequent chapters.
Preparing the Rocker Panel: Cleaning, Cutting, and Setting Up a Durable Truck Repair
Preparing the Rocker Panel: a Clear Plan Before You Cut
Preparing the area properly is the difference between a repair that lasts a season and one that endures for years. Before any cutting or welding begins, take time to inspect, clean, and stabilize the rocker panel and the surrounding structure. A deliberate, methodical approach protects the truck’s structural integrity, reduces rework, and makes finishing work far easier.
Start with a close inspection. Walk the length of the rocker panel with good light. Look for bubbling paint, soft spots, flaking metal, and cracks in seams. Use a screwdriver or probing tool to test suspect areas; firm metal resists pressure, while corroded metal gives or crumbles. Remove trim pieces, splash shields, and any weather stripping that might hide rust. Open doors and check the inner pinch welds and floor edges. Rust often spreads inward where moisture collects, so the visible area can understate the damage. Mark all affected sections with a grease pencil or marker so you won’t overlook marginal areas when you begin cutting.
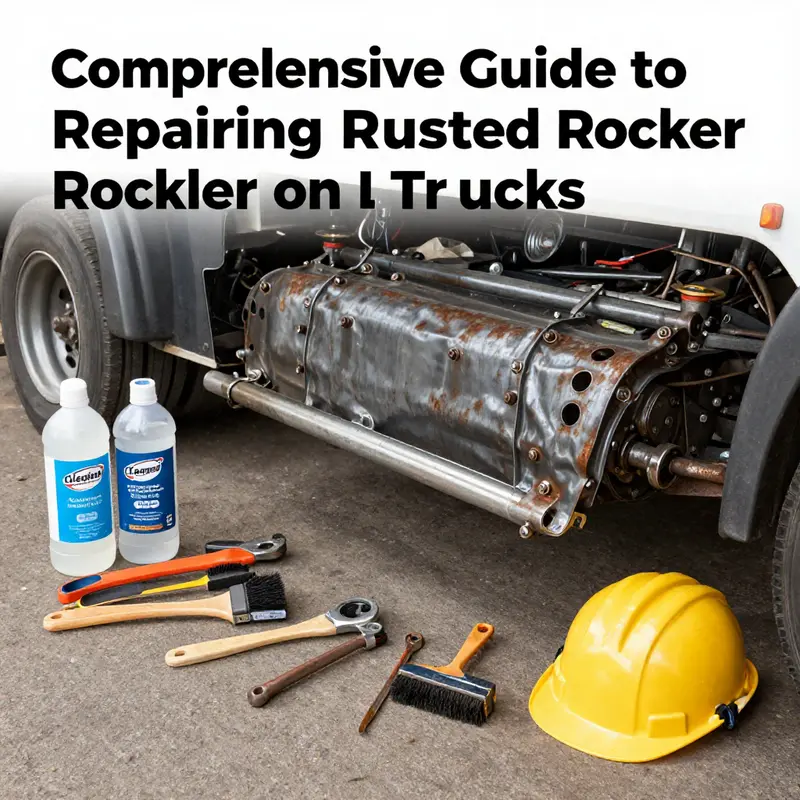
Cleaning is next, and it must be thorough. Wash the truck to remove road grime, oil, and salt. Allow the metal to dry fully. Use a wire brush or a die grinder with a wire wheel to clear loose paint and flaky rust. For smaller jobs a sanding block with 80–120 grit paper works well. The aim is to expose solid, bright metal across the repair boundary. Any remaining scale or powder will undermine welds, adhesion of sealers, and paint. If you have access to a sandblaster, this can speed removal and reach hidden areas, but control the media and pressure so you don’t thin the remaining metal. Keep the workspace clean and vacuum dust frequently to avoid contamination.
When surface cleaning reveals thin or perforated metal, cut out the damaged sections so only healthy metal remains. Accurate, conservative cutting ensures the replacement patch has secure backing to weld to. Mark cut lines beyond any visibly compromised area. Use a cutting wheel, plasma cutter, or reciprocating saw depending on the thickness and accessibility of the rocker panel. Cut with steady motion and keep the tool perpendicular to the metal to produce straight, predictable edges. If the rocker panel overlaps the floor or inner sill, cut in stages and support the surrounding metal so you do not bend or warp components unintentionally.
Precision is vital when you prepare a replacement. Measure twice and cut once. Transfer dimensions to the new panel or patch piece and shape the replacement so it fits flush across the seam. Test-fit often; a close, continuous joint reduces the amount of welding and finishing required. If the panel meets other structural parts, such as the floor pan or inner rocker, ensure the mating surfaces align and hold their original position. Use clamps or temporary cleco-type fasteners to keep pieces tight during fitting. If you plan to use spot welds, mark the original factory spot-weld locations and mimic them where possible to preserve load paths.
After cutting, deburr and smooth the edges. Use a grinder with a flap disc to remove sharp burrs and to establish a slight bevel that will make welding easier. Clean edges promote full penetration welds and reduce the chance of trapped moisture at the seam. Remove paint back to bare metal for several inches around the repair so primer and seam sealer can bond properly. Wipe the area with a solvent-dampened rag to remove oil and dust before you apply any treatments.
Treat the cleaned metal with an anti-corrosion product. Apply a rust inhibitor designed to passivate exposed steel. These products convert surface rust into a stable coating or chemically protect the metal from further oxidation. Apply to both the exterior and the interior surfaces you can reach. For complicated cavities, use a rust-inhibiting cavity wax or spray that leaves a protective film. Allow any treatment to cure according to instructions before moving to fit the new panel. This extra step substantially reduces the odds of rust reappearing where it matters most.
If the repair includes inner sections or floor pan edges, install any required reinforcements before final panel placement. Some rocker panel kits include inner braces or floor extensions that must be tacked into position first. These structural components restore stiffness to the sill area and distribute loads properly. Ensure all mating surfaces are clean and free of coating. Test the fit with the outer panel in place so you can access interior welds and clamps. Tack welds at intervals will hold pieces while you check alignment.
When the replacement sits correctly, prepare the area for welding. Mask off surrounding paint to protect it from heat and sparks. Use welding backing strips where gaps exist to prevent burn-through and to make it easier to weld full, continuous seams. If you are joining to original factory seams, try to replicate the original weld pattern to maintain strength. Keep welds short and alternate spots along the seam to avoid warping from heat concentration. Grind between passes, and maintain a clean, contaminant-free surface for each tack or seam weld.
Once welding is complete, grind the seams smooth but avoid excessive removal that could weaken the joint. Feather the edges of the weld so filler and primer transition smoothly. After grinding, blow out the area with compressed air and wipe it with solvent to remove dust and residue. Apply seam sealer to all joints, both externally and in any accessible internal cavities. Seam sealer prevents moisture intrusion and provides an additional barrier against corrosion. Make sure sealer fills any gaps and is feathered to the surrounding metal.
Prime and protect the repair thoroughly before paint. Use a weld-through primer where appropriate for the immediate weld area, then follow with a dedicated rust-inhibiting primer for exposed surfaces. For underbody or inner cavities, apply an undercoating or corrosion-resistant coating that resists road debris and moisture. Paint only after primers and coatings have cured. Proper priming and sealing are as important as the metal work; they lock out water and salt and keep the new metal healthy.
Throughout the process, maintain safety and organization. Wear gloves, eye protection, and a respirator when cutting, grinding, or welding. Keep a fire extinguisher nearby and remove flammable materials from the work area. Organize tools and fasteners so you can move efficiently from one task to the next. Label and store removed trim and hardware carefully; reusing original pieces ensures a consistent finish.
Small details make the repair last. Clean hidden seams before sealing. Replace any corroded fasteners. Reinstall splash shields so water is directed away from the rocker areas. Schedule a final inspection after a week on the road to catch any missed spots. If you maintain the truck regularly, check this repair area more often during the first winter to confirm the coatings hold up.
For a deeper visual walkthrough and techniques that complement this preparation work, see the detailed guides at Autogeek: https://www.autogeek.net/repairing-rusted-rockers-on-trucks/. For broader maintenance practices that support long-term rust prevention, refer to guidance from Turnage Sons in-house truck maintenance for ideas on inspection routines and preventative care: https://mastertruckrepairllc.com/turnage-sons-in-house-truck-maintenance/.
With careful inspection, meticulous cleaning, precise cutting, and thorough corrosion protection, the area you prepare will give the new panel a strong foundation. Proper prep reduces surprises, improves weld quality, and ensures the final finish both looks professional and defends against future rust.
Precision Cutting for Rusted Rocker Panels: Safely Removing Damaged Metal to Rebuild a Truck’s Side Rocker
Removing damaged metal from a rocker panel is a turning point in any rust repair. It is the moment when you stop hoping the rust will fade and start restoring the panel’s strength and shape. The goal is not to hack out as much as possible, but to remove every trace of compromised metal while leaving the healthy structure intact. In practice, this demands a calm, steady approach and a clear eye for where the original geometry continues to carry load and protect the cab floor and undercarriage. When done correctly, the cut line becomes a solid foundation for a replacement patch, and the patch itself must mirror the contour of the original panel so that the seam vanishes beneath paint and undercoating rather than becoming a rear-view blemish or a place where moisture can linger. The process is as much about precision as it is about courage, because the rocker is where the road and the body meet, and compromise there is not forgiving.
Every repair begins with a deliberate assessment. If the rust has not penetrated deeply, you may be able to remove surface oxidation with careful grinding and then seal the area to slow further intrusion. But when rust has eaten through, leaving holes or spongy pockets, the only durable fix is to remove the compromised metal. The cutting must be long enough to capture all the affected area, yet conservative enough to preserve the adjacent panels and reinforcements. The line you choose will determine how well the patch seat later. A jagged, uncertain edge invites misfit and additional grinding, while a clean line offers a straightforward weld. In the tight confines of a rocker, the line often follows the natural seam of the panel or a marked boundary where sound metal remains crisp to the touch. It is tempting to rush, but patience here pays dividends in weld integrity and in the long-term quiet of the ride.
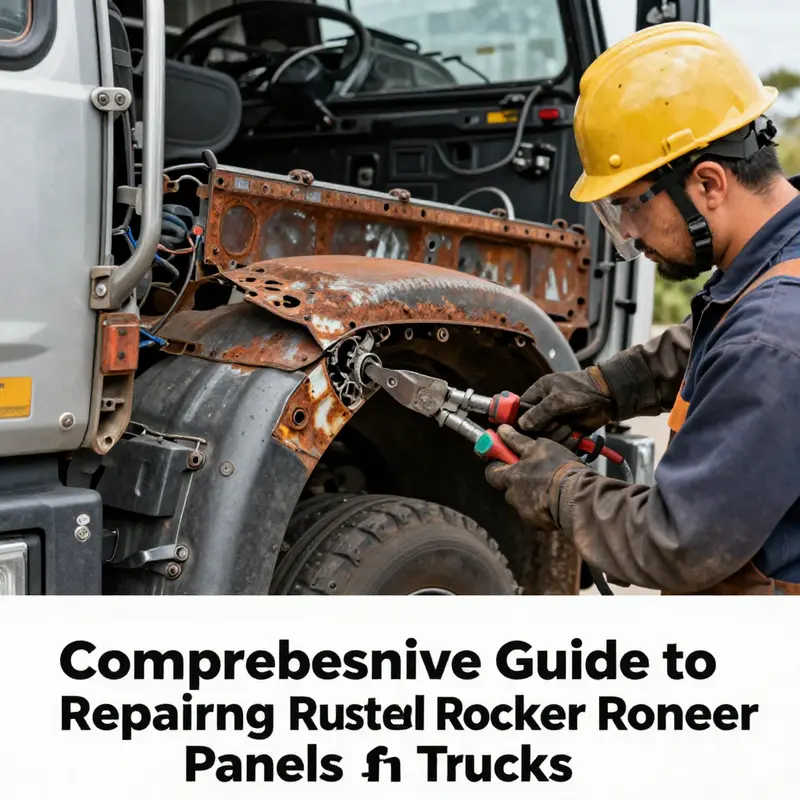
The tools you select reflect both the geometry of the damage and the surrounding metal. Panel cutters, with their narrow blades and controlled feed, are tailor-made for this job. They excel at straight cuts that can ride a marked line without wandering into undamaged areas. When the cut must arc around a reinforced rib or curved contour, a die grinder fitted with a thin cutoff wheel becomes indispensable. It can reach into tight corners, follow gentle curves, and respect the subtle changes in metal thickness that often occur where a rocker bends against the door sill or floor pan. For significantly corroded sections where the metal has become brittle or paper-thin, a reciprocating saw provides the aggressive action needed to remove large chunks quickly. But the operator must temper that speed with care, because a saw’s momentum can easily chew into sound metal if it is not guided precisely.
No matter which tool you use, safety is nonnegotiable. The metal in a rocker panel is often near electrical grounds, fuel lines, and protective coatings; bright sparks can ignite dirt or warm nearby components. Wear eye protection, gloves, a snug long-sleeve shirt, and a respirator when necessary. Secure the vehicle so it cannot shift while you are cutting. If the rocker is still attached to the chassis with spot welds or braces, consider removing the panel’s mount points as a precaution, then place clamps to hold the panel steady. You want the work to be clean and controlled, not a test of reflexes.
Marking the boundary of the damaged area is a deceptively simple step that pays back in spades later. Use a marker to trace around the corrosion, extending the line slightly beyond any soft edges. You want a clear surface to guide the blade, but you also want the patch to align perfectly with the original shape. In a practical sense, you often mark just inside the edge where the sound metal begins. This helps ensure the patch sits flush and reduces the risk of creating a high spot that would show through paint. When marking on the vehicle, it helps to have the surface clean and dry so the line remains visible after the best light is applied. A bright work light can reveal subtle distortions that would otherwise escape notice.
As you begin cutting, a technique emerges: make a series of controlled passes rather than one deep plunge. With a panel cutter, the blade should sip through the metal, cutting cleanly along the drawn line without forcing. If you encounter resistance, slow down and re-check the boundary. With a die grinder, you often work with a shallow bevel and progress inward, gradually widening the cut while keeping heat input low. This reduction of heat is crucial because excessive welding and grinding heat can warp the surrounding metal and compromise the alignment of the patch. In some cases, you may need to back off, reposition, and re-aim your cut a fraction to avoid a high or low seam that could telegraph through the paint later.
The moment the damaged metal comes free, the area under the rocker reveals its true condition. It is common to discover small holes at the bottom of larger corrosion pockets, or to see jagged remnants of rust that remain attached to the hidden skin underneath. A rotary tool with a small burr can help you shear away loose threads of rust present near the opening, but you should avoid over-smoothing at this stage. The goal is to remove all compromised material while exposing clean, solid edges that will weld together with the patch. After removal, it is essential to clean the edge faces for a full two inches around the cut. This means wiping away dust, rust dust, and oxidation so that the weld can penetrate cleanly and form a true metallurgical bond.
With the damaged section excised, the next phase is to verify that the space will accept a replacement patch with proper fitment. A good practice is to bring the patch into position and clamp it along the original seam. You should see a consistent gap along the joint line and confirm that the patch contours mirror the surrounding geometry. If the patch is slightly oversized in one area, you can trim it to fit. If the patch sits high in a corner or dips near a brace, adjustments must be made before any welding begins. This stage—often overlooked—prevents a patch that sits erratically and requires excessive grinding to correct after the weld is applied. In short, you want the patch to look right in the raw stage, because a poor fit becomes a stubborn problem after welding.
Beyond fit, you must consider the metallurgy of the patch and the surrounding sheet metal. Use a panel that matches the gauge of the original rocker as closely as possible. A mismatch in thickness can produce a visible seam if you are not careful with your finish, and it can alter how the panel responds to flex and vibration as the truck is driven. If you are working with aftermarket patch panels, test-fit them in multiple positions, double-checking their alignment before you clamp and weld. Remember that a good patch must not only fill the hole but restore the stiffness of the rocker along the length of the door opening and into the sill. The cleaner the fit and the more precise the cut, the easier the subsequent welding steps will be.
Once the patch is properly seated, you move into the welding phase. MIG welding is the typical choice for thin-gauge rocker metal because it offers good control and rapid fusion. The focus during welding is continuous, small, overlapping beads that penetrate the joint without dumping heat into the surrounding metal. Avoid long, uninterrupted beads that can cause warp. Instead, weld with a stringer technique, moving methodically along the seam and allowing cooling intervals to prevent distortion. When possible, stitch-weld across the seam at evenly spaced intervals rather than attempting one long continuous weld. After the patch is welded in, the welds should be checked for solid penetration with a quick gap test and then ground flush with a grinder or flap disc until the seam sits even with the surrounding metal.
Finishing the repair is both a cosmetic and a protective step. You want a smooth transition from patch to original metal, with no high spots that will trap moisture or create paint cracking later. A skim coat of body filler on the patched area can help achieve a seamless surface, followed by a light sanding to bring the line flush. Then comes priming and paint. The final coating should be rust-inhibiting and compatible with the factory color. Don’t skip the interior coating on both sides of the panel; moisture from inside the rocker can migrate across the seam if the interior surface remains bare. A robust anti-corrosion layer is the best insurance against future rust and helps ensure the repair holds up through a few winter seasons.
The experience of cutting out damaged metal teaches a broader lesson about rust repair. It is not enough to fix the hole; you must re-create the panel’s geometry and fortify it against moisture and road salt. This is where the long view matters. After you complete the patch, inspect the area regularly. Clean the underside when you wash the truck, paying attention to the rocker cavity and any drainage channels. Small chips in the paint can quickly become rust nests if they are not addressed promptly. The combination of precise cutting, careful fitment, controlled welding, and thorough coating creates a repair that remains durable across years of use. To keep the discussion grounded in practical practice, you can explore further reading in our broader maintenance resources, where similar techniques are explained in the context of other structural panels. Master Truck Repair blog.
For those seeking formal guidance on structural patch replacement and best practices, the ASE Official Guide provides a comprehensive framework that validates the methods described here and offers additional specifics for more complex vehicles. External reference: https://www.ase.com/
Rigorous Renewal: Replacing Rusted Rocker Panels on a Truck for Strength, Sealing, and Safety
Rusted rocker panels can seem like a minor cosmetic issue, but they often mask deeper corrosion that compromises frame integrity and water intrusion. When the rust has eaten through, simply applying filler and paint hides danger rather than fixes it. The most durable repair is to remove the compromised metal and replace it with a new panel that fits the truck’s contour precisely. This chapter guides you through that process as a cohesive, practical sequence. You’ll see how removal, precise fitting, careful welding, and thorough sealing work together to restore stiffness, stop further rust, and preserve the truck’s value.
The first step is the assessment: you look beyond the surface. Surface rust erodes only the paint and a thin skin of metal, but rust-through can perforate the panel and weaken the rocker’s ability to shield the body from road debris and moisture. If you discover holes or thinning that ends up around the seam, plan for a full replacement panel rather than patching with filler. The goal is to re-create a continuous metal surface that breathes with the rest of the body and carries load as designed. With a clear assessment in hand, you can map out the cut lines with precision and avoid over-cutting into adjacent panels or pinch welds that anchor structure.
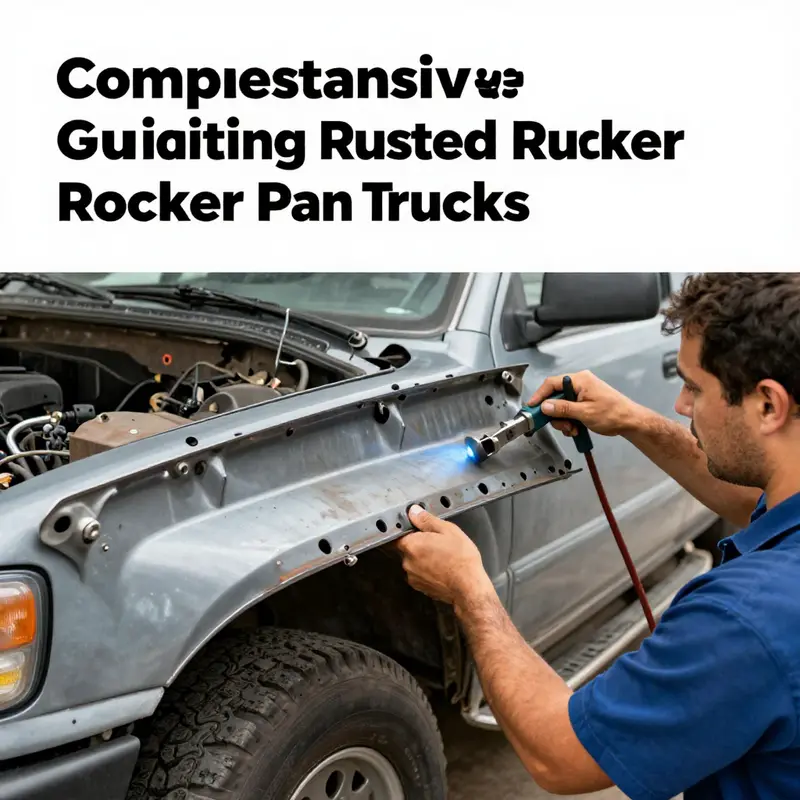
Once you have defined the area to remove, the actual task of extraction begins. A cut-off tool or plasma cutter makes quick work of rusted material, but the emphasis must be on clean, straight edges. You want a border that mates perfectly with a new panel, and that means not rushing the cut or leaving jagged remnants that can snag during installation. Someone performing this repair should wear eye protection, gloves, and a respirator; cutting metal can release fine dust and hot shavings. As you work, keep the vehicle stable with a jack stand and block the wheels. The goal is to expose fresh, sound metal that you can clean and prepare for bonding with the replacement piece. After the damaged section is removed, test-fit the replacement panel to verify alignment with the body line, rocker profile, and door gaps. Any mismatch becomes a sign that trimming or bending is required before welding.
The replacement panel itself is the heart of the repair. Panels are typically made from the same gauge steel as the original or from a compatible aluminum alloy if you’re working on a lighter-weight build. The critical part is that the new panel matches the truck’s make, model, and year well enough to seal against water intrusion and maintain proper gaps around the doors and fenders. When you place the new panel in place, use clamps or temporary spot welds to hold it while you check fitment from every angle. Verify that the top edge mirrors the surrounding metal contour and that the seam lines follow the factory line without pulling the door or rocker out of alignment. The panel should sit flush with adjacent panels along the rocker line and beneath the sill where water tends to travel. Minor adjustments may involve carefully bending the panel at the edges with body hammers or a stretcher, but you should avoid over-stressing metal, which can lead to warping or cracks in the future.
Securing the replacement panel is where the repair becomes truly permanent. MIG welding is the common choice for structural sheet metal because it provides controlled heat and penetrates cleanly through the panel’s thickness when done with proper technique. You’ll want to run continuous, steady welds along the seam to ensure full penetration, while keeping heat input in check to prevent warp. Small, evenly spaced stitching along the seam is preferable to long, heavy beads that can cause distortion. If you’re new to welding, practice on a scrap piece of similar thickness to understand how heat moves through the metal and how that heat affects the adjacent panels. When the panel is fully welded, inspect the seam for gaps or pinholes and re-weld as necessary. After welding, a light deburr or grind helps remove the excess metal and brings the seam flush with the surrounding surface. Always stop to check the edge gaps around the door, the wheel opening, and the lower sill, because any misalignment that isn’t corrected now can become conspicuous after paint.
The post-weld phase is about restoring a clean, corrosion-free cavity that can resist moisture and road salt. Begin by cleaning the area around the welds to remove metal shavings, galvanic debris, and any oils that could hinder primer adhesion. A wipe with a degreaser followed by a clean solvent helps you inspect the seam more clearly. Then apply a primer that is designed for welded metal and will inhibit rust at the seam. For a rocker repair, it’s wise to treat both sides of the panel where practical; this dual-side approach reduces moisture entrapment and protects the inner rocker structure. A seam sealer adds an additional layer of protection between the joints, sealing the tiny gaps that could trap water or salt spray. The sealer should be compatible with the primer and topcoat and remains flexible enough to accommodate normal body movement without cracking.
With the metal stabilized and sealed, finishing becomes a matter of aesthetics and long-term defense. A body filler may be used sparingly to smooth any minor irregularities along the seam, but you should avoid relying on filler to cover structural compromises. Once the filler cures, sand it smooth and apply a rust-inhibiting primer. The paint system should begin with a base coat that matches the vehicle’s color, followed by a clear coat for gloss and UV protection. If the repair falls in a high-traffic area or under the belt line where stone chips are common, consider adding a dedicated undercoating or protective layer that guards against moisture and salt spray. The final look should be indistinguishable to the casual observer from the rest of the body, yet it should carry the integrity of a factory seam and the resilience of a well-sealed joint.
Beyond the mechanics of the work, the chapter’s call is preventive. After you’ve completed the replacement, your ongoing attention will decide how long the repair lasts. Regular inspections are essential, especially after winter or in regions where roads are salted. Wash the underbody and the rocker area frequently to remove salt and debris that trap moisture next to the metal. If you notice any tiny chips or scratches in the paint, address them promptly to prevent initial rust from seeping back into the seam. Keeping the area dry during storage, avoiding prolonged exposure to damp environments, and maintaining a fresh protective film over the rocker line all contribute to a longer life for the repair. Remember, rust is a process, not a single event; by interrupting it at the entry points and building a robust barrier at the seam, you reduce the risk of future corrosion spreading into adjacent panels.
For readers seeking deeper context on the techniques described here, a broad resource is a must. If you want a concise, professional treatment of the welding precision and alignment concerns, consider exploring more guides on our site at mastertruckrepairllc.com/blog/. That hub collects practical approaches to common bodywork challenges without venturing into speculative or flashy products. It’s a useful companion when you’re planning similar panel work on other trucks and you want to gauge fit, weld quality, and finishing strategies against real-world examples.
Finally, as you evaluate long-term strategies, consider how the rocker repair integrates with the rest of the truck’s corrosion defenses. Nothing short of thorough sealing and robust primer will keep moisture from creeping into the seam where the old metal met the new. The alignment must respect existing drain paths and the car’s drainage channels so that water never pools along the seam after a wash. In practice, this means double-checking the line where the rocker meets the door sill, ensuring that the edge follows the factory contour rather than creating a shadow line that traps dirt. A careful water spray test, aimed at the joint, can reveal whether any gaps allow moisture to seep behind the panel before you apply the final paint layers. The meticulousness of this phase often determines if the repair holds for years or becomes a recurring maintenance challenge in salty climates.
External resource to broaden your perspective: a respected automotive publication offers a detailed walkthrough of repairing rusted rocker panels, including diagrams of cut lines and welding sequences that align with the approach described here. See the MotorTrend guide at https://www.motortrend.com/cars/trucks/repairing-rusted-rocker-panels for a professional, step-by-step perspective that complements this discussion.
Seal, Shield, and Sustain: Finishing and Protecting Rocker Panel Repairs for Lasting Truck Fortitude
When the last weld cools and the repaired rocker panel has reclaimed its shape, the work is far from done. Finishing and protecting a repaired rocker panel is the essential bridge between a solid patch and years of reliable service. It is the quiet phase of repair that determines whether a truck will resist future moisture, salt, and debris, or whether the work will corrode again from the inside out. The path from bare metal to a durable, color-matched surface is not a single step but a carefully sequenced process that guards structural integrity, preserves appearance, and reduces long-term repair costs. The aim is not merely cosmetic restoration but a protective shell that stands up to the abuse the road hands out every winter and every mile.
Begin with a fearless return to metal, not just the patch. The rust removal stage isn’t finished simply because you have welded a new panel in place. Any remaining rust must be banished from every corner of the repaired area, and the adjacent edges where the patch meets the original metal deserve the same care. Manual methods like wire brushing and sanding are often sufficient for surface residues, but stubborn oxidation can cling to seams and inside corners. Mechanical methods such as grinders, sanding discs, and media blasting can help reach those tight spaces, while chemical treatments can halt oxidation on the surface that can still be vulnerable. The goal is to leave a clean, stable metal surface that will accept sealants and primers with full adhesion. This stage is not about speed but about ensuring there is no hidden corrosion that will surface later and undermine the patch’s life.
Once the metal is clean, the next act is to apply a rust-inhibiting barrier. A robust rust inhibitor or anti-corrosion primer forms a protective shield that blocks moisture and oxygen from reaching fresh metal. This layer acts like a quiet guardian, working behind the scenes to slow the clock on rust. It also creates a uniform surface that helps subsequent coats blend and adhere more reliably. It is important to note that inhibitors are most effective when applied to bare metal and allowed to cure fully before any filler, primer, or paint is applied. Skipping this step or applying it over uneven or oily surfaces can trap contaminants and create roughness or delamination down the line. The rust inhibitor sets the tone for the entire finish, ensuring that the underlying metal remains stable through the heat of welding, the cool of night, and the experiments of road spray and road salt.
Repairing the structure remains a critical part of the finishing sequence, even after you have sealed the metal. If you used patch panels or body filler to rebuild the contour, the filler must be sanded smooth to match the surrounding surface. The principle here is to create a seamless transition where the patch is invisible to the eye and feels uniform to the touch. A well-executed fill job not only restores the panel’s original shape but also supports the even distribution of loads and stresses across the seam. Sanding should be meticulous but not aggressive to the point of uncovering bare metal again. You want the area to look and feel like a continuous sheet of metal, without ridges or warps that would telegraph under paint or underbody coating. After the filler has been shaped, a light skim coat of primer helps to lock in the finish and creates a consistent base for the next coat.
With the structural work settled, the process calls for a second primer coat. This second primer is a bridge between the repaired surface and the final paint. It fills fine imperfections left by sanding and filler, improves adhesion, and provides an even, durable surface that the color coats can bite into cleanly. The application should be even and thorough, making sure there are no pinholes or thin spots where corrosion could begin again. Allow sufficient drying time according to the primer’s instructions, and inspect under good lighting to catch any irregularities before moving on. Rushing past this step can undermine the entire finish; a primer that cures unevenly will complicate color matching and could compromise long-term protection.
Painting is where the repaired rocker panel truly comes back to life. A color-matched base coat lays the foundation of the repair, followed by a clear coat that seals in color and adds UV resistance. The base coat should be applied in light, even layers to avoid runs or sags, with careful attention paid to the edges where the patch meets the original panel. Color matching is not mere aesthetics; it ensures a uniform appearance that maintains resale value and reduces the likelihood of attention drawn to the repair during inspections. After the base has cured to the appropriate stage, apply a clear coat to protect the paint from the sun’s ultraviolet rays, minor abrasions, and chemical exposure from road grime and washings. The clear coat also adds depth and gloss, helping the repaired area blend with the rest of the bodywork rather than standing out as a repair seam. Curing times, recoat windows, and proper ventilation during painting are not trivial details; they determine the durability and finish quality of the entire repair.
Beyond color and gloss, the finishing phase requires some additional protections that extend the life of the rocker panel. Sealing seams and joints with an anti-corrosion sealant helps prevent moisture from seeping into gaps that may have been created during cutting, patch placement, and welding. Seam sealing is particularly important along the bottom edge of the rocker, where road spray and splash carry moisture toward the internal surfaces of the panel. A well-sealed seam reduces capillary action that pulls water into the joint, thereby slowing the onset of rust at the most vulnerable locations. After sealing, a thorough undercoating or anti-corrosion coating on both sides of the panel adds another layer of defense. Although some owners fear a bulky coating, modern formulations offer thin, durable films that withstand flex and impact while continuing to protect against salt, moisture, and ice melt. This protective layer should be uniform and overlap onto adjacent panels to prevent any edge exposure where moisture could creep in.
For long-term success, the finishing process should include a second phase of protective inspection and minor maintenance. Rechecking the repaired area after a few weeks of driving helps verify that there are no new signs of movement, cracks, or moisture intrusion. If you notice tiny pinholes or creeping rust at the seam, address them promptly before they become larger issues. Regular maintenance becomes part of the repair’s warranty, so to speak, and it is a practical habit that pays dividends in durability and peace of mind. As part of this routine, consider integrating a dedicated maintenance mindset into your overall plan for the vehicle. A practical approach to ongoing protection can be found in broader maintenance discussions, such as budgeting for routine truck maintenance, which helps you prepare for upcoming service cycles and potential fixes before rust becomes a recurring problem. For more on routine maintenance planning, you can explore resources like budgeting for routine truck maintenance.
As you reflect on the finished surface, you should also consider alignment with the rest of the truck’s exterior. A repaired rocker panel, if done cleanly, aligns visually and structurally with the surrounding panels, reinforcing both curb appeal and aerodynamic efficiency. The transition line at the door seam should be precise, and the paint edge should fade naturally into the factory finish. A high-quality finish does more than look good; it resists chipping, stands up to road salt, and remains easier to touch up should minor abrasions occur in the future. The careful sequence—from rust removal through inhibitor, filler, primer, paint, and protective coatings—creates a durable shield that stands as a testament to sound repair practice rather than a quick patch job.
Finally, maintain a disciplined approach to prevention. The most telling measure of a successful rocker panel repair is not the absence of rust today but the absence of rust tomorrow. Schedule regular inspections, particularly after winter driving and in climates where salting is common. Wash the underside periodically to remove salt buildup and debris that can trap moisture along the rocker edge. Promptly repair any paint chips to remove initiation sites for rust and to keep the protective barrier intact. The goal is to keep the repair from becoming a maintenance problem and to preserve the truck’s structural integrity and appearance across many miles of service.
External resource: for deeper guidance on coatings and finishing, refer to official guidelines from PPG Industries at https://www.ppg.com/automotive. This external reference complements the practical steps outlined here, offering a broader, industry-standard perspective on coatings, primers, and protective finishes that contribute to durable, long-lasting rocker-panel repairs.
Final thoughts
The integrity of a truck’s rocker panels is crucial for safety and performance, especially within fleet operations. This guide has outlined the step-by-step process for effectively assessing rust damage, preparing for repairs, cutting out damaged metal, installing replacement panels, and finishing with protective measures. By implementing these practices, fleet managers can enhance the longevity of their vehicles, minimize operational downtime, and ensure safer driving conditions. Prioritizing these repairs can lead to significant long-term savings and improved fleet reliability.

