Rusted truck frames pose significant safety and operational challenges for fleet managers, trucking company owners, and operators across various industries such as construction and logistics. Addressing rust damage is not merely about aesthetics; it fundamentally impacts the structural integrity and operational reliability of vehicles. This article serves as a definitive guide on repairing rusted truck frames, emphasizing the importance of proper assessment, preparation, repair techniques, and post-repair protection strategies. Fleet managers and logistics operators will gain insights into determining the severity of rust damage, preparing surfaces for effective repairs, employing suitable repair methods, and ensuring long-term maintenance practices to safeguard against future corrosion.
Rust on the Frame: Reading Severity, Making the Call Between Repair and Replacement
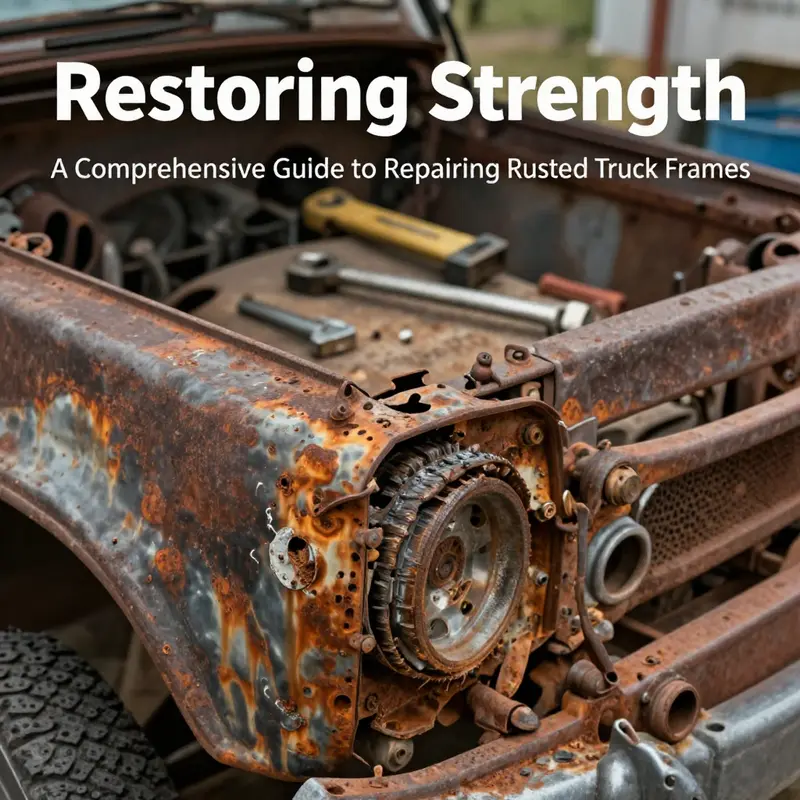
The frame of a truck is more than a skeleton; it is the structural heartbeat that keeps every other component in alignment under stress, vibration, and the weight of payloads. When rust moves beyond the surface, it isn’t just a cosmetic issue—it is a citation from the vehicle to the driver that something deeper is failing. The decision to repair a rusted frame hinges on a careful reading of how extensive the corrosion is, where it sits in the frame, and how much metal has actually been consumed by the rust. A well-balanced assessment can prevent a dangerous situation on the road and save money in the long run, but it can also reveal that what looks fixable at first glance is not safe to operate. The truth is that minor surface rust and severe structural rust sit on opposite ends of a very real spectrum, and the verdict rests on two questions: how much material remains and whether the damaged area can still carry the loads and stresses the vehicle will face in service.
To understand what can be repaired, it helps to distinguish rust by its form and its location. Minor surface rust is typically contained to the outer layer, with little to no material loss. It may show up as rough patches or pitting on flat surfaces where moisture has lingered or where road spray has splashed. In such cases, the frame is usually sound enough to tolerate cleaning and coating processes. The path forward is practical and mechanical: remove the loose rust, treat the metal to inhibit further oxidation, and seal it with durable primers and protective coatings. The goal is not just cosmetic rejuvenation but restoring a protective barrier that can outlast another season of exposure to salt, mud, and rain. The steps here are straightforward, if patient: you will need to scrub away the corrosion, perhaps with a wire brush or abrasive disk, then prime and paint, and finally apply a protective layer that resists chipping and moisture intrusion. In many cases, this approach suffices to keep a vehicle on the road for several more years, provided maintenance remains consistent and drainage paths stay clear of water pooling.
But rust rarely travels alone. When corrosion eats deeper, when pits widen into holes or the metal thins to a dangerous degree, the frame begins to lose its confidence under load. Structural rust—sometimes called pitting when the cross-sectional thickness diminishes—erodes the frame’s ability to withstand bending, torsion, and the impact forces generated by hard braking or uneven terrain. In these scenarios, the repair decision becomes more complex. The core question is whether the remaining metal can still meet safety standards after repair. Safety and reliability are non-negotiable, and here the lines between patching and replacement become clear. If the damage has advanced to the point where the metal is less than a threshold thickness, or if there are visible holes that have weakened critical load-bearing sections, a patch is not enough. The integrity of the structure must be restored to a predictable level, not merely to look better. In such cases, replacing the damaged section or, in some circumstances, the entire frame, may be the only responsible choice.
A practical framework for this decision exists in standards and professional practice. The American Society for Testing and Materials, along with engineering guidance used in the vehicle industry, provides criteria for evaluating metal degradation. These guidelines help determine whether a frame still meets safety standards after any repair work. One crucial rule of thumb is the remaining thickness of the frame wall. If the metal thickness has fallen to a point where it compromises the frame’s ability to carry loads during maneuvers or when carrying a full payload, repair is unlikely to be safe. In many commercial and municipal fleets, a formal evaluation by a certified structural engineer or a qualified technician is standard when rust appears in or near critical load paths like rails, cross members, or joints. Non-destructive testing, such as ultrasonic thickness measurement, can quantify remaining wall thickness and reveal whether any hidden corrosion has undermined structural soundness. The verdict often hinges on a clear, quantified threshold value. If the remaining metal is below the recommended safety threshold—commonly expressed as a percentage of the original thickness—the frame is deemed unsafe and should be replaced rather than repaired.
The calculus of repair also depends on the vehicle’s role and the operating environment. Heavy-duty and municipal vehicles, which routinely bear heavy or dynamic loads, cannot afford even small uncertainties about frame strength. The consequences of a frame failure in service can be catastrophic, affecting not only the vehicle and its crew but also nearby workers and bystanders. In such contexts, replacing a severely rusted frame becomes not just a safety choice but a compliance necessity. It is easy to underestimate the importance of a robust frame when the rust seems isolated to a corner or two, but the stresses placed on a frame during dumping, routing, or highway speeds will quickly expose any lingering weakness. For these reasons, the evaluation process does not end with a single inspection. It expands to include the vehicle’s history of exposure to moisture, road salt, or corrosive chemicals, the frequency of use, and the likelihood that hidden pockets of rust exist in hard-to-reach areas such as inside rails, within channel frames, or around weld seams.
When it comes to repairing a rusted frame, the options vary with the severity of damage. For minor rust, the repair language is protective: remove what is loose, treat the surface, and seal the metal. In practical terms, this means blasting or sanding away the rust, applying an anti-rust primer, and layering multiple coats of topcoat or a protective undercoating. The aim is not only to restore appearance but to prevent future corrosion from creeping back through micro-porosity in the coating. Given the harsh environment a truck faces—road spray, winter salting, and the heat of prolonged operation—this protective approach must be durable and well maintained. It is a straightforward, repeatable process that can extend the life of a frame that is otherwise structurally sound.
Moderate rust presents a different challenge. When corrosion has started to pit the metal or form small holes, simple coating alone is unlikely to be sufficient. In such cases, structural repair techniques may involve filling pitted areas with metal body fillers or epoxy-based putties designed for structural repairs. The idea is to restore a uniform cross-section and to bridge the weakened areas with materials that bond strongly to steel and resist the same environmental threats as standard bodywork. This is not a run-of-the-mill cosmetic patch. It requires careful surface preparation, proper adhesion, and an understanding of how these fillers will respond to load cycles and temperature changes. A professional should verify that the repaired sections can withstand the expected stresses and that the fill materials chosen will not become the next site of failure.
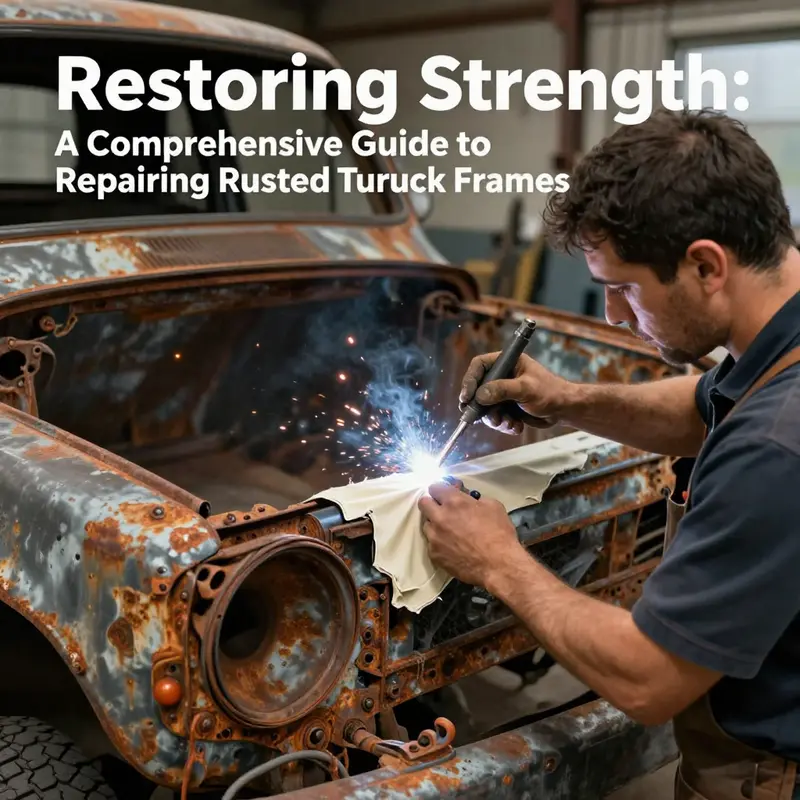
Severe rust, however, demands the most serious consideration. When rust has eaten through the metal to create holes, or when pitting has reduced the cross-sectional thickness to a level where the frame’s structural capacity is compromised, the only safe option is to cut out the damaged sections and weld in new, matching steel. This is a job for skilled welders with the right equipment. The repair must restore the exact geometry of the frame and ensure proper alignment to prevent handling issues or undue stress on joints. Welding introduces its own set of challenges, including hot spots, warping, and the need for precise heat control to avoid weakening surrounding material. The process requires post-weld heat treatment and thorough inspection to confirm that the seams maintain integrity under load. In many jurisdictions, the cost of this level of repair can be substantial, and the safety benefits of replacing the damaged segment—rather than patching and re-welding—are often clearer to managers and regulatory auditors alike.
The discussion of welding and replacement would be incomplete without a clear emphasis on the aftercare that preserves what remains of a repaired frame. Whatever repair path is chosen, the machine deserves a comprehensive protection strategy. Undercoating, chassis armor, and even electrostatic coating systems offer robust, long-term resistance to moisture and salt exposure. Regular maintenance remains essential: keep the frame clean and dry, inspect drain holes and gaps where water can accumulate, and schedule periodic checks for new signs of rust or fatigue around welds and joints. Prevention becomes part of the repair strategy itself, ensuring that the investment in repair does not erode as the vehicle continues to see use on rough roads or in harsh climates.
To help readers translate these considerations into a practical plan, a proactive approach can include financial preparation. A practical step is to set aside funds for maintenance and unexpected repairs, using a strategy like Budgeting for Routine Truck Maintenance. This intention supports timely inspections and professional evaluations when rust first appears, potentially preventing more extensive damage later. The goal is not to overreact to every rust spot but to respond with a structured process that balances safety, cost, and the vehicle’s intended service life. A well-documented maintenance habit also aids communication with fleet managers, insurers, and regulatory bodies, ensuring everyone understands when a frame repair is feasible and when replacement becomes a safer, more economical option in the long run. For those who want to explore more about maintenance planning and financial preparedness, see the deeper guidance available at Budgeting for Routine Truck Maintenance.
In all cases, the decision to repair or replace should be grounded in professional evaluation. When rust is confined to non-load-bearing areas and the structural elements show no significant thinning, a repair strategy with robust inspection and protective coating can keep the vehicle reliable for a meaningful period. In contrast, when rust compromises critical members of the frame or reduces material thickness below safety thresholds, replacement—not patchwork—becomes the prudent choice. The emphasis remains constant: safety first, followed by compliance with applicable standards and best engineering practices. This mindset serves not only individual operators but also fleets that must maintain reliable service while meeting legal and industry safety requirements.
For readers seeking authoritative guidance beyond the repair shop floor, standards and safety organizations offer resources that refine the assessment process and reinforce best practices. An exhaustive review of vehicle structural integrity and safety standards provided by official agencies can help fleet managers and technicians align their inspections with established benchmarks. It is important to consult these resources as part of the decision-making workflow, ensuring that any repair or replacement respects recognized performance criteria and contributes to a safer operating environment for all road users. External resources from established safety authorities provide a reliable reference that complements the hands-on evaluation performed by qualified technicians. As you consider the future of a rusted frame, remember that thorough assessment, precise repair when feasible, and a strong commitment to ongoing protection and maintenance together define a responsible path forward. For more formal safety guidance, consult the official vehicle safety resources available from recognized authorities.
External resource: https://www.nhtsa.gov/vehicle-safety
From Rust to Resilience: The Essential Surface Preparation That Powers a Safe Truck-Frame Repair
When a rusted truck frame first appears with its mosaic of pits and flaky coatings, the impulse to patch and press on can be strong. Yet rust is not only a surface blemish; it is a process that eats at the metal’s core. What you see on the outside often masks deeper corrosion that can compromise strength and load paths. The truth is stark: the longevity of any repair hinges on what happens before the first weld or filler is touched. Surface preparation is not a cosmetic ritual; it is the foundation upon which all subsequent repair work stands or falls. Treat it with care, and the repair that follows can become more than a temporary fix—it can become a durable restoration that keeps the frame trustworthy through thousands of miles of demanding service. Treat it carelessly, and the next winter, the next salt-soaked road, and the next vibration will reveal the flaw again. The chapter that follows outlines a cohesive, safety-minded approach to surface preparation that aligns with the best practice guidelines and the realities of field work, without losing sight of the goal: a frame that remains strong, safe, and capable of carrying its load for years to come.
Assessment is the opening act and perhaps the most decisive one. It is not a pass/fail exam but a practical appraisal of whether the metal core can be repaired or must be replaced. In many fleets and individual trucks, seasoned technicians look for signs of deep corrosion, pitting that penetrates beyond the surface, or thinning metal that reduces cross-sectional area. If the metal has dropped to less than about half its original thickness, or if holes are visible, there’s a real risk that any patch or weld will not bear the stresses of real-world duty. In such cases, repair might be unsafe or legally restricted, and replacement becomes the prudent option. If the damage is mostly surface-level and the structural geometry remains sound, however, there is a pathway to salvage. The key is a precise, informed decision-making process that respects both engineering realities and safety requirements. The decision-making is not an arbitrary judgment; it rests on measurements, experience, and adherence to manufacturer guidelines and applicable safety standards.
With the decision to proceed established, surface preparation begins as a deliberate, multi-layered process. It starts with thorough cleaning to remove dirt, grease, and loose rust—the substances that can undermine adhesion and trap moisture. A robust degreaser helps dissolve oils and films that have accumulated over months or years of operation. After chemical cleaning, the surface is flushed with water under appropriate pressure. In workshop settings, a high-pressure washer is common, but a careful rinse with a strong spray from a garden hose can suffice when professional equipment isn’t available. The objective is to leave a clean canvas free of contaminants that would interfere with priming or welding. Drying the frame completely is essential; any retained moisture can become a new source of rust, undermining the integrity of the repair and the long-term performance of protective coatings.
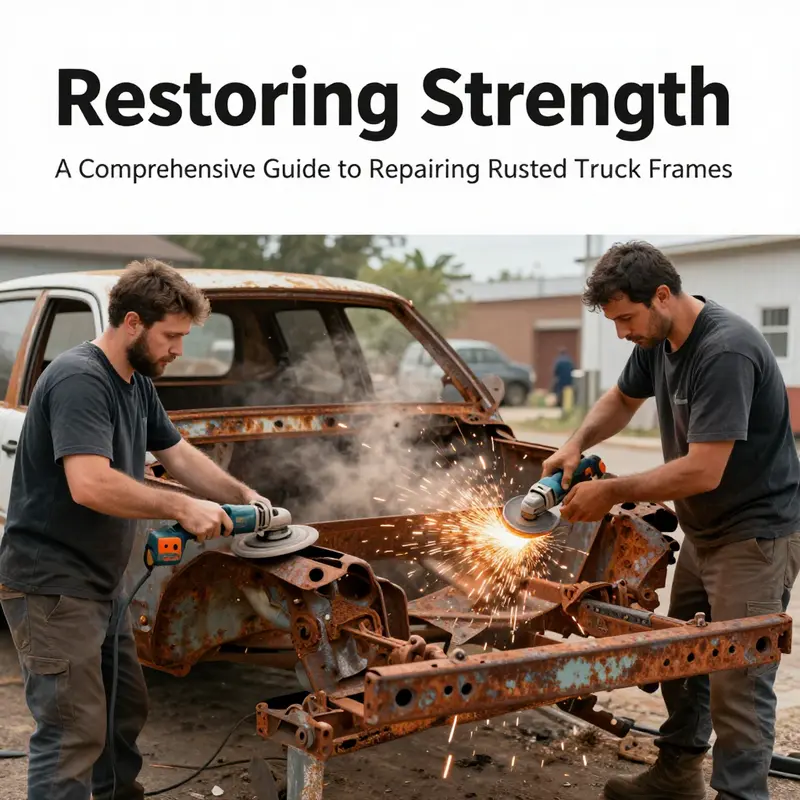
The next stage—rust removal—transforms the surface from a corrosion-weakened base into a solid platform ready to accept treatments. Here you choose tools and methods to match the severity. For light surface rust, a combination of wire brushing, sanding with coarse to medium-grit discs, and careful grinding can peel away the oxidized layer and expose fresh metal. For deeper corrosion, more aggressive approaches may be necessary, such as sandblasting or media blasting, which can reliably strip to bare metal in a controlled manner. This step is labor-intensive and messy, but its importance cannot be overstated: any residual rust—even a few specks—can propagate under coatings or around welds, undermining the repair’s longevity. The guiding principle is simple: continue the rust removal until the surface feels solid and uniform to the touch, and until no loose flakes remain.
Once the stubborn rust has been cleared, smoothing the surface becomes critical. Edges should be deburred, corners rounded where practical, and pits filled to a level that yields a uniform plane for primer and repair materials. Fine-grit sanding or a power sander is employed to achieve a uniform texture that helps coatings adhere evenly. After sanding, a tack cloth is used to wipe away the fine dust. This wipe may seem minor, but it removes dust that can become a pocket for moisture or a site for micro-cracking later on. The smoother the surface, the better the adhesion will be for primers, sealants, fillers, and welds. The careful attention paid in this stage reduces the probability of moisture becoming trapped beneath a coating and starting the corrosion cycle again from within the skin of the metal.
Priming marks the transition from preparation to protection. A rust-inhibiting primer is applied once the surface is clean, dry, and suitably smooth. The purpose of the primer is twofold: it provides a uniform, adhesive base for subsequent repair materials, and it forms a barrier that slows and, ideally, stops the reinitiation of corrosion. In contexts where areas have been ground back to bare metal or where new patches have been introduced, primer ensures that the protective performance of the subsequent layers is consistent across the repaired region. The primer should be selected to be compatible with the materials that will follow, especially any epoxy-based fillers or welds. The goal is a stable base that curtails oxygen and moisture contact with the metal, particularly in drainage-prone zones and joints where water tends to collect.
Assessing structural integrity takes center stage again after priming. This stage is not a static checkpoint but an ongoing evaluation as the surface is stabilized and the repair begins to take shape. If the analysis reveals substantial weakening, the repair strategy may shift toward reinforcement, patching, or even replacing full sections of the frame. Patching involves fabricating reinforcing pieces that fit precisely over the damaged region and weld into place to restore the frame’s cross-section and stiffness. In more severe cases, a new section of steel may be cut and welded in with careful attention to alignment, gauge, and weld quality. These decisions are grounded in engineering principles: the repaired geometry must preserve the original load paths, avoid introducing new stress concentrations, and maintain fatigue resistance. The process respects the vehicle’s design specifications and safety standards, even when those standards demand more than a cosmetic fix. The goal remains safe operation under real-world conditions, including heavy loads, rough roads, and variable temperatures.
When the repair advances to removing damaged material and adding new metal, the methods must be precise. For minor rust, operators might rely on a robust set of coatings and a well-applied sealant to lock in the repairs. The emphasis remains on dependable adhesion and avoiding any weak interfaces where moisture can reside. For more severe corrosion, structural welding is not a casual exercise. It requires meticulous fit-up, proper joint design, and careful control of heat input to minimize warping. The instructions emphasize that the welds need to penetrate, fuse with the base metal, and maintain the structural continuity of the frame. After welding, the area is typically ground smooth, and the surfaces are re-primed to reestablish corrosion protection. This is not cosmetic finishing; it is a critical step in reinstating a frame that can endure the rigors of duty while resisting new cycles of oxidation.
Protection after repair completes the cycle. A robust undercoating or chassis armor is commonly applied to shield the metal from moisture, road salt, and the abrasive particles kicked up by tires and wheels. In harsher climates, this protective layer can be decisive for the frame’s longevity, acting as a sacrificial barrier that maintains the structural environment by keeping moisture away from vulnerable joints and welds. Some shops may also use an electrostatic paint system or an electrocoat process to deliver a uniform, comprehensive barrier against corrosion. These protective systems are not mere touches of finish; they are functional strategies designed to extend the life of a repaired frame in environments that challenge metal integrity. The protective layer helps ensure that the repair remains intact through seasonal cycles of moisture, salt, and temperature changes.
Maintenance is the ongoing stewardship that ultimately determines how long a repaired frame will last. A frame that looks clean but is not monitored will soon reveal its vulnerabilities. Regular maintenance includes keeping the frame clean and dry, ensuring drainage holes remain unobstructed, and inspecting joints, welds, and coatings for early signs of wear. Debris such as dirt and leaves can collect in crevices and trap moisture, accelerating corrosion. Periodic reapplication of protective coatings to susceptible areas—especially around welds, brackets, and hinge points—can dramatically extend service life. In fleets and heavy-use vehicles, scheduled inspections by a professional become especially valuable; such checks can detect evolving issues long before they manifest as critical failures on the road. The discipline of maintenance reflects a simple truth: repair is not a one-time act; it is a commitment to ongoing protection and vigilance.
Ethics and safety underpin every practical choice in frame restoration. A severely rusted frame is not a candidate for a cosmetic fix; the risk of fatigue cracks, misalignment, and catastrophic failure remains real. The responsibility lies with the technician and owner to assess whether a repair can meet safety standards and legal requirements. When the damage exceeds the capabilities of a repair to restore safe performance, replacement of the affected section—or the entire frame—may be necessary. This is not a defeat but a prudent decision that prioritizes occupant safety and regulatory compliance. The conversations between maintenance staff, engineers, and regulatory guidelines should reinforce a shared understanding: safety governs every repair plan, and every choice should be traceable to measurable criteria and transparent evaluation.
For readers who want to translate these principles into hands-on practice, the value lies in treating surface preparation as the cornerstone of any repair project. The clean slate you create on the metal—the product of deliberate cleaning, thorough rust removal, careful smoothing, and a disciplined priming process—sets the stage for successful welding, patching, or replacement. When the base is solid, subsequent layers of repair materials perform better, last longer, and resist corrosion more effectively. The discipline of starting with a pristine surface becomes the most practical gift you can give to a repaired frame, one that pays dividends in reliability and safety over time. If you’re seeking further context from a community that blends practical know-how with professional standards, the Master Truck Repair Blog offers a complementary perspective that echoes the principles described here. Master Truck Repair Blog provides discussions on frame restoration, corrosion control, and maintenance routines that complement this approach.
Alongside practical steps, it is wise to anchor your plan in trusted external guidance. Official safety standards and vehicle integrity guidelines from national safety authorities provide framing for what is possible and responsible when dealing with frame corrosion. These resources help ensure that repairs comply with safety expectations and legal constraints, reducing the risk of unsafe operation and potential liability. For deeper reading on safety standards and vehicle integrity, consult the National Highway Traffic Safety Administration’s vehicle safety information: https://www.nhtsa.gov/vehicle-safety
null
null
Guarding the Frame: Post-Repair Protection for Long-Lasting Strength After Fixing a Rusted Truck Frame
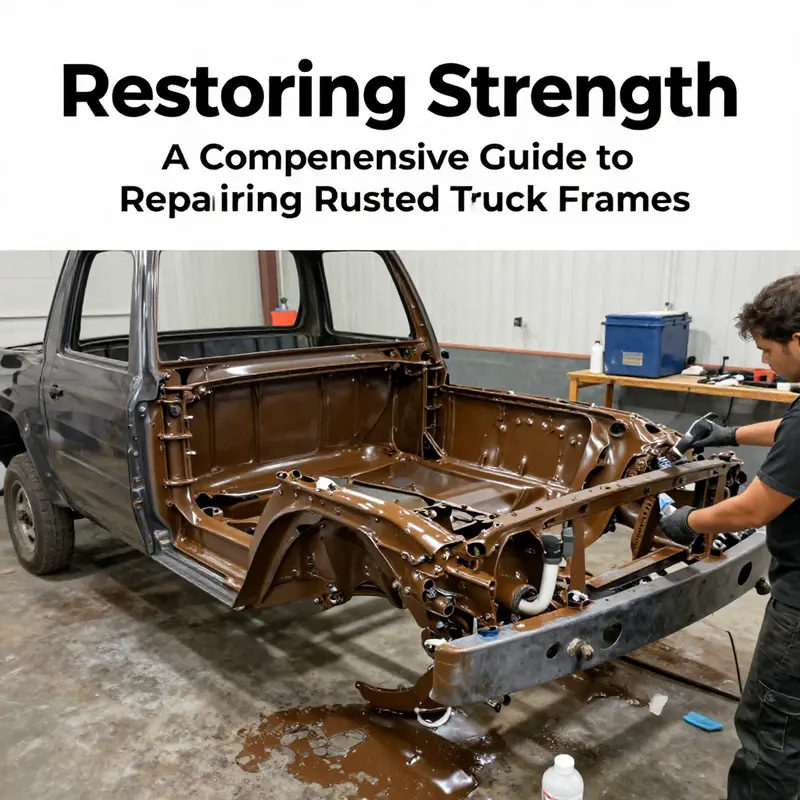
When a rusted truck frame has been repaired, the work is not truly finished. The repair restores metal and structural integrity, but the real test begins with protection. The frame is the vehicle’s backbone, bearing load, guiding wheels, and enduring the daily grind of road salt, moisture, and temperature swings. Without a deliberate plan to keep that backbone shielded, the risk of future corrosion rises again, potentially undoing the repair and shortening the truck’s life. A thoughtful, multi-layered protection strategy is not a luxury; it is a practical necessity that translates into safer operation, lower long-term maintenance costs, and greater peace of mind for anyone who relies on a truck for work, family, or adventure. The aim is to create a durable barrier that blocks moisture and oxygen, seals vulnerable joints, and remains robust under the harsh conditions trucks face year after year. The process that follows the repair should be approached as a cohesive system rather than a series of isolated steps. It begins with a high-quality coating plan, proceeds through careful application and curing, and continues with regular maintenance that catches and corrects wear before corrosion gains a foothold. In this light, post-repair protection becomes part of the ongoing stewardship of the vehicle, a shared responsibility between owner, shop, and the environment in which the truck operates. Implementing this plan requires choosing coatings designed for structural metal, applying them in clean, controlled conditions, and committing to a routine that respects the frame’s geometry and how water travels along seams and members. The choice of coatings is not about cosmetic finish alone; it is about creating a durable, moisture-resistant shield that adheres to the metal, resists heat and chemical exposure, and lasts through countless drives and loads. A rust-inhibiting primer forms the first line of defense, specifically formulated to bond with metal and to prime rough or porous surfaces left after repair. This primer acts as a skeletal layer, filling micro-porosities and providing a solid surface for subsequent coats. The next layer, typically an epoxy or polyurethane topcoat, adds hardness, impact resistance, and a barrier against water ingress. Epoxy-based topcoats are prized for their strong adhesion to metal and their resilience to abrasion, while polyurethane finishes contribute flexibility and UV resistance, which helps keep paint from chalking or cracking under sun exposure. The ideal system is multi-layered: a primer that grips the metal, followed by one or more protective coats that build a robust, uniform surface, and finally a sealant or topcoat that provides a weatherproof finish. In practical terms, this means selecting automotive-grade products designed for structural surfaces rather than generic touch-up paints. The application sequence matters as much as the materials. The surface must be clean, dry, and free of contaminants that can undermine adhesion. Degreasing agents and proper rust removal—removing loose scales and reconditioning the metal surface—prepare the stage for primer to bite into the metal. For the most reliable bond, a light, even profile is key. If the repair included cut and welded sections, the newly joined areas should be thoroughly cleaned and, if needed, treated with a rust-inhibiting converter to neutralize any residual corrosion before priming. After the primer, the epoxy or polyurethane topcoat should be applied in the recommended thickness and allowed to cure according to the manufacturer’s guidance. Curing times vary with temperature and humidity, so a dry, moderate environment often produces the best results. Multiple coats are beneficial, particularly in areas that experience high moisture or splash, such as around the front sill, underbody rails, and cross members. The goal is not a single glossy finish but a resilient, continuous shield that resists moisture, road chemicals, and the physical wear that comes with loading, unloading, and vibration. Beyond coatings, attention to joints, seams, and crevices is essential. Water can collect in these hidden pockets, initiating corrosion long after the visible surface looks protected. Sealing joints with rubberized undercoatings or spray-on sealants designed for chassis protection helps fill gaps and keep moisture out. The sealant also acts as a cushion against vibration and impact, reducing micro-cracks that can become entry points for rust. In complex shapes or tight areas where sealant cannot reach evenly, careful application with appropriate tooling ensures a continuous envelope around welds, brackets, and frame penetrations. The protective strategy extends to the undercarriage as a whole. An automotive-grade undercoating applied to the underside can mitigate spray and splash from the road, particularly during winter months when salt uses dramatically increases corrosion risk. For long-term corrosion resistance, some owners consider electrostatic or e-coat style approaches as part of factory-level or professional refinishing processes. While these methods offer excellent barrier properties, they also require specialized equipment and expertise, and they are typically pursued in a shop setting rather than as a DIY project. Regardless of the specific coating family chosen, the application environment matters. Temperature, humidity, and surface cleanliness directly influence adhesion and cure. A cool, dry day with moderate humidity is often ideal for outdoor finishing; if weather is unfavorable, delaying application until conditions improve can prevent micro-pores or fisheyes that compromise longevity. The beauty of a well-executed post-repair protection plan is that it creates a track record of care. Annual or semi-annual visual inspections should become routine, not a rare event. During these checks, look for coating wear, chips, or dull spots, especially along weld seams and around any previously repaired areas. Small chips or scratches can be touched up before moisture penetrates the metal. If a crack or bubble appears, it is a signal to address it promptly before corrosion widens. Cleanliness remains a cornerstone of protection. Regular washing, particularly after exposure to winter road salt or wet conditions, removes salts and minerals that would otherwise sit on the metal and participate in electrochemical reactions. While washing is important, it should be done with care. High-pressure water and abrasive brushes can wear coatings if used aggressively on freshly coated surfaces. A soft brush with a gentle rinse is often sufficient to remove grime without compromising the protective layers. In addition to coatings and washes, attention to drainage and ventilation around the frame contributes to long-term durability. The frame collects water not only from direct exposure but from condensation, leaks, and pooling in basins formed by bent rails. Ensuring that drainage holes remain unobstructed and that seals around the cab-to-frame junction are intact helps prevent water from stagnating in places where rust can flourish. The post-repair journey is not a one-time event but a continuous routine. A disciplined approach to protection—careful coating, thorough sealing, and regular inspections—translates into a frame that resists corrosion better, lasts longer, and remains safer for the road. This is especially important for owners who operate in harsh climates or who regularly encounter salted roads, where the margin between a durable repair and repeated frame deterioration can be measured in months rather than years. The practical value of post-repair protection also extends to maintenance budgeting and overall fleet reliability. When a frame is well protected, it reduces the likelihood of rework, keeps alignment and structural integrity stable, and preserves the performance of suspension, steering, and braking systems that rely on a solid frame as their foundation. This interconnectedness underlines a central principle: restoration of structural integrity must be paired with robust preventive care to yield a vehicle that is safe, dependable, and capable of lasting through the demands of daily use. For readers seeking a broader perspective on ongoing care, the mention of a reliable industry resource and community blog can be a helpful companion. A practical step is to engage with a trusted maintenance resource, whether that is a hands-on blog from a repair professional or a dedicated maintenance guide, to keep the plan current with evolving best practices. See the Master Truck Repair blog for ongoing maintenance insights that complement this chapter’s focus on protection after repair. Master Truck Repair blog. In addition, a wealth of professional guidance exists from established automotive safety authorities, which emphasize that structural integrity is not just about the metal itself but about the entire system built around it. The National Highway Traffic Safety Administration and related DOT materials stress the importance of maintaining vehicle frames to meet safety standards and to prevent unsafe driving situations. For a deeper dive into vehicle structural integrity and safety standards, consult the official guidance available from these authorities. External resource: https://www.autocar.co.uk/vehicle-repairs/maintenance/repairing-rusted-truck-frame-what-you-need-know
Final thoughts
Understanding how to assess, repair, and protect rusted truck frames is crucial for ensuring the safety, reliability, and longevity of your fleet. By following the structured approach outlined in this guide, fleet managers and operators can effectively tackle rust issues, leverage proper repair techniques, and implement protective measures that enhance operational efficiency. Regular assessments and maintenance not only enhance vehicle performance but also safeguard against the costly implications of frame damage. A proactive strategy fosters an advantageous balance between safety and operational effectiveness.

