Rusted truck roofs pose significant maintenance challenges for fleet managers and trucking operators. Preserving the structural integrity and appearance of commercial vehicles is essential for safety, reliability, and brand image. This guide covers the essential steps for repairing rusted truck roofs, from assessing damage to treating the metal and achieving a durable finish. Each chapter provides actionable insights to help restore roof integrity, extend fleet life, and minimize downtime.
Rust on a Truck Roof: Assessing Damage and Choosing a Repair Path
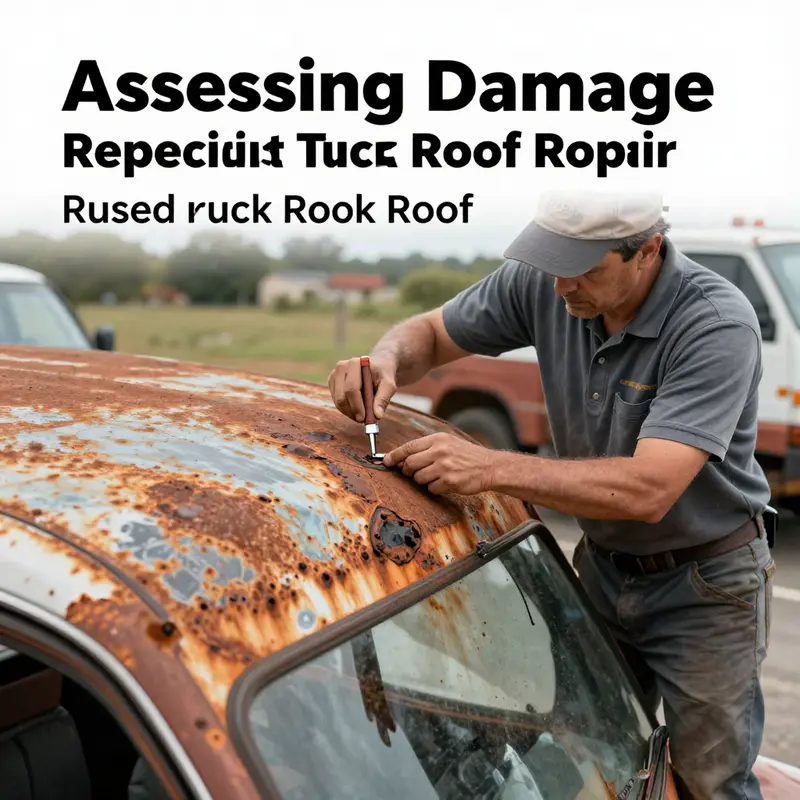
A concise, practical guide to inspecting roof rust and deciding between DIY repair and professional work. Begin with a visual inspection under good light, looking for rust staining, pits, bubbles, and paint delamination. Use a tactile check by gently feeling for roughness, blistering, or soft spots. If a magnet tester is available, note areas where magnetic attraction weakens, which can indicate thinning metal. Consider the vehicle’s age, climate exposure, and the roof’s structural role when evaluating risk. For superficial rust, cleaning, priming, and repainting can restore appearance and protection. For deeper corrosion, holes, or structural concerns near seams, patching, panel replacement, or professional restoration may be required. Document findings with photos and keep notes to compare estimates and inform any repair plan.
From Surface to Seal: Cleaning and Preparing a Rusted Truck Roof for a Lasting Repair
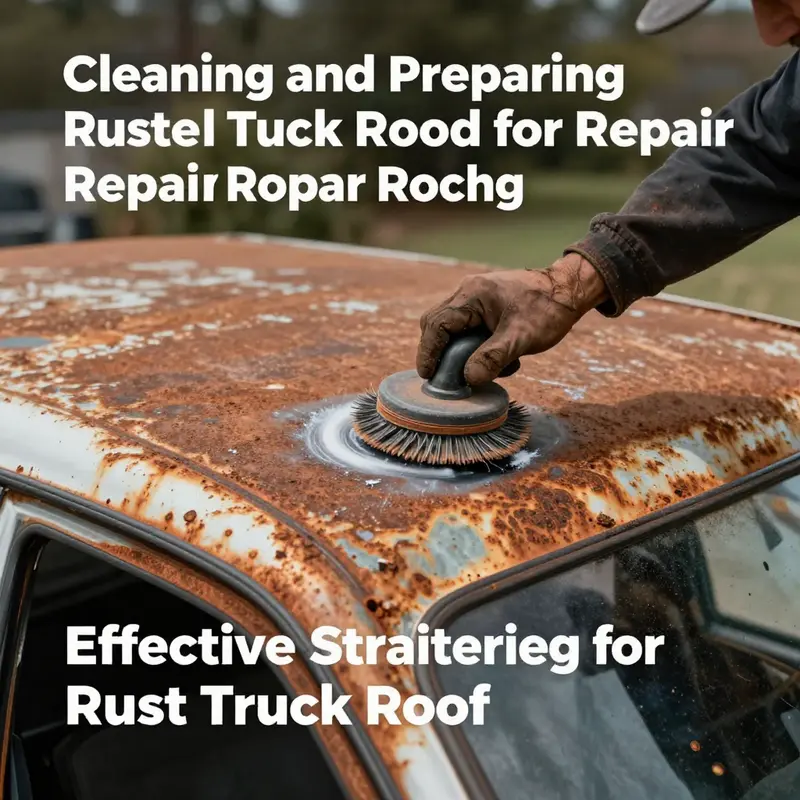
Rusted truck roofs tell a story of exposure, time, and the relentless pull of the elements. Before any patch, filler, or color can fix what the eyes see, the roof must be prepared as a clean, stable canvas. The work described here sits between assessment and the actual repair work, acting as the bridge that determines whether a DIY fix will hold long enough to be worth the effort. When done properly, cleaning and preparation do more than remove brownish pitting or flaky paint; they arrest the progression of corrosion and create a base that grips protection products, filler, and paint alike. The process is methodical but not complicated, and it rewards patience with a repair that lasts longer than a season of highway weather and sun. Begin with a calm mindset: you aren’t just scrubbing rust away; you’re restoring the roof’s ability to resist moisture and support the repair that follows, whether that repair is minor or requires panel work down the line. This approach aligns with the broader maintenance discipline that keeps a truck reliable, safe, and road-ready, and it fits neatly into the continuum of care that every owner owes to a chassis that carries lifetimes of work and miles. \n\nFirst, assess what you’re really dealing with. Surface rust that has not penetrated into the metal is manageable with careful cleaning and a good primer. If the corrosion has created holes or softened the metal, you’ll need to scale back to a structural solution—either patching with a metal repair kit or bringing in a professional for panel replacement. The prep stage, while it cannot reverse severe damage, still sets the tone for outcomes later in the process. Think of it as laying the groundwork for a durable finish. If you identify holes during the cleaning phase, plan to address them after you’ve removed the loose rust and before you apply a protective coating or primer. A roof that’s truly sound underneath will respond more predictably to the steps that follow.\n\nWith the diagnosis in mind, move to the mechanical part of the prep: removing loose rust and flaking paint. This step isn’t about removing every pockmark on the metal; it’s about exposing a solid, uniform substrate. Start with a fine-grade steel wool or a small wire brush to tackle the outer ring of corrosion and lift away what’s ready to come off. The goal is to strip the surface enough to reveal clean metal underneath while avoiding gouges or deep scratches that will show up under paint later. This action also reduces the amount of work later on by minimizing how deep the rust has to be removed when you eventually grind or sand. You’ll discover that the most stubborn rust often clings to edges and seams, corners where water tends to pool, or along the drip rails. Tackle those zones with steady, deliberate strokes, and don’t rush. The patience you invest here pays off later in tighter seams and a more uniform finish. \n\nNext comes the chemical nudge—the gentle attack that helps loosen iron oxide without harsh mechanical scrubbing. A simple application of white vinegar or a solution of lemon juice and water acts as a mild rust converter. The acids in these liquids attack oxide layers, loosening adherence and softening the corrosion so that the next pass with steel wool or sandpaper is far more effective. Apply the solution directly to the rusted areas and let it sit for 15 to 30 minutes. The dwell time is deliberate; it gives the acid a chance to penetrate the nano-scale pores in the oxide, breaking bonds and making the surface more receptive to abrasion. After the dwell period, wipe the area clean with a cloth. If stubborn spots remain, repeat the process. Always wear gloves and eye protection during this step. Food-safe or automotive baking soda helps afterward to neutralize any remaining acid if you want to wipe quickly and avoid resinous residue. \n\nFollowing the acid treatment, move to sanding with a medium-grit abrasive. The 120 to 180 grit range is a sweet spot for automotive metal prep because it removes oxidized material without creating deep scratches that will show through primer and paint. Use smooth, even strokes, and vary your approach between circular and linear motions to avoid creating a flat, glossy patch that betrays the repair plan underneath. The goal is a surface that feels smooth to the touch and looks even when you glance at it from a few feet away. If you notice any small pits or raised areas after sanding, address them now with a light touch of filler, but keep that step for after you’ve ensured the metal is dry and stable. This is a preparation phase, not a final finishing phase, so avoid overworking any one spot. A gentle hand goes farther here than brute force. \n\nDrying is the quiet, often overlooked ritual that makes or breaks the fidelity of the entire repair. Wipe the area with a damp cloth to remove loose dust and residue, then dry thoroughly with a clean towel. If you have access to a ventilated space, allow the roof to air-dry. Moisture trapped under primer is a primary cause of lift and blistering later, so a long, complete dry is worth more than a rushed pass with a hair dryer. The more meticulous you are about dryness, the more confidence you can place in the adhesion of the next layer—whether that’s a rust-inhibiting primer or a filler that may be needed for hole repair. \n\nOnce the surface is clean, dry, and free of loose material, the critical step of protecting the substrate begins: applying a rust-inhibiting primer. This primer is the second set of armor for the metal, designed not only to seal but to lay down an adhesive foundation that promotes paint and topcoat adhesion. Choose a high-quality automotive primer that is compatible with metal and the finish you intend to apply. A self-etching primer, in particular, can offer extra bite to the surface, improving the bond between the bare metal and the coat that follows. Apply the primer in thin, even coats, allowing each layer to dry per the manufacturer’s instructions before applying the next. The aim is to achieve a uniform, matte finish that looks and feels like a fresh, clean canvas rather than a patchwork repair. \n\nAt this point, the discussion naturally moves toward the long view of the repair: if there are holes or significant gaps, they should be filled with a metal-repair patch or body filler designed for metal surfaces. The preparation you have done—removing rust, neutralizing acids, and priming—paves the way for filler to adhere properly and to cure without trapping moisture underneath. If you do use filler, follow the product directions meticulously, allow full cure, and then re-sand with the same fine-to-medium grit progression to ensure the patched area sits flush with the surrounding metal. Sanding should leave the surface uniformly smooth, free from high spots or visible edge lines. A well-prepped zone under the primer not only looks better but holds paint longer and resists moisture infiltration far more effectively. \n\nAfter the filler and primer have cured, you’ll proceed to final topcoat decisions, which hinge on your goals and the vehicle’s exposure. A topcoat that matches the truck’s color will blend the repair with the rest of the roof and help deter UV degradation. For maximum durability, consider a clear protective layer or a flexible sealant over the topcoat to enhance moisture resistance and expand/contract with temperature changes without cracking. The prep work you completed—thorough cleaning, careful acid treatment, measured sanding, and clean, dry conditions—will pay off here, delivering a result that looks purposeful rather than temporary. The emphasis on proper prep is not merely cosmetic; it is the practical difference between a repair that looks good for a season and one that holds up through rain, sun, and road salt. \n\nA note on scope and propriety helps keep expectations honest. If your rust is extensive or if you are dealing with structural members, the best outcome may come from a professional assessment. DIY steps work best for minor rust issues and small-scale damage; when metal has been compromised to the point of weakness, the safest route involves professional repair. The guiding principle remains the same throughout: thorough removal of corrosion, meticulous surface preparation, and the right protective layers under controlled conditions. For those who want a broader frame of reference while they work, a visit to the DIY windshield repair guide for truck owners can offer a complementary perspective on the mindset of patient, careful repair, even when the tasks diverge in technique. \n\nAs you move through this chapter’s process, remember that your goal is not a hurried fix but a durable, well-bonded foundation for the next steps. The integrity of the roof hinges on your ability to remove the rust without replacing metal unnecessarily, to neutralize residues that could undermine adhesion, and to provide a clean, dry surface that primer and paint can bite into. The sequence—remove loose rust, apply acid treatment, scrub and sand to smoothness, dry completely, and prime with a rust-inhibiting product—establishes a reliable path from damaged metal to a finish that both protects and looks intentional. If any holes or deep corrosion are discovered, plan to address them with appropriate patching methods, acknowledging that some repairs may require more than DIY methods can safely provide. The fundamental discipline remains: surface preparation is where a repair earns its staying power. \n\nFor readers seeking a broader toolbox of maintenance strategies, the Master Truck Repair resource hub can be a valuable companion as you continue with the roof repair and other projects on your list. And, if you want a practical takeaway from this prep phase, consider revisiting the idea that good repairs begin with good prep. A small, focused effort on the surface—the type that yields a smooth, dry, primed plane—will make the final finish look better and last longer. \n\nExternal resource for further reading: How to Remove Rust from a Truck Roof – CarGurus. https://www.cargurus.com/cars/advice/how-to-remove-rust-from-a-truck-roof-29181\n\nInternal reading for broader repair psychology and mindset: DIY windshield repair guide for truck owners, a practical companion to the repair mindset described here. https://mastertruckrepairllc.com/diy-windshield-repair-guide-for-truck-owners/
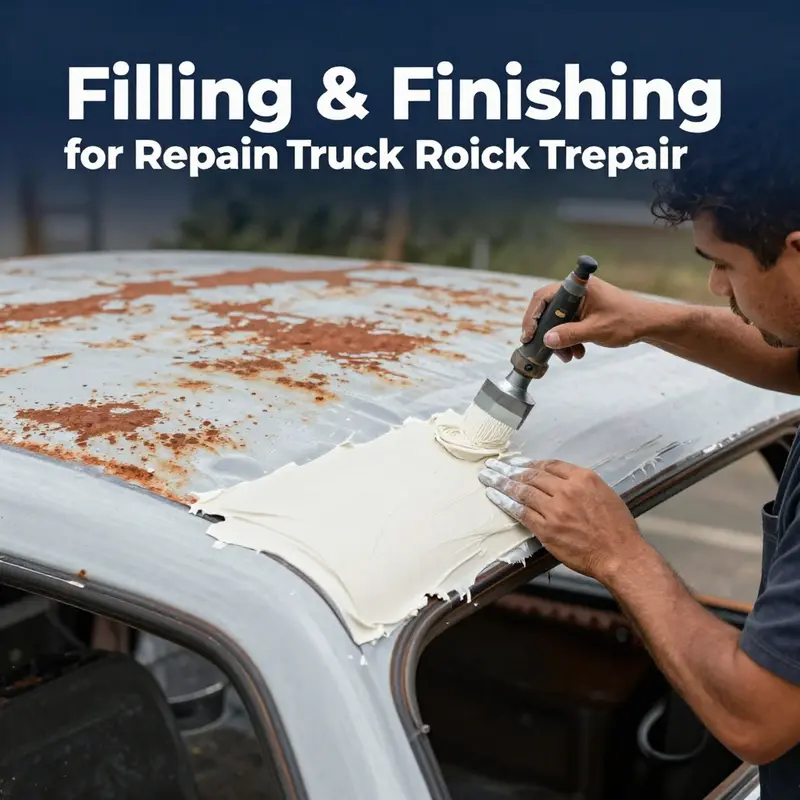
Guarding the Roof: How Rust Inhibitors Shape a Long-Lasting Repair on a Truck Roof

Rusted truck roofs are more than a cosmetic nuisance. They can quietly compromise the metal’s strength and invite moisture deeper into the structure, especially where wind-driven rain and road salt steadily attack exposed surfaces. A repair that addresses both the visible pitting and the hidden corrosion beneath the painted finish can restore not only the look of the roof but, more importantly, its integrity over time. The core idea is simple: remove what rust you can, seal what remains, and then defend the metal from future moisture and oxygen exposure. When done with care, the roof becomes a durable surface again rather than a ticking clock of further decay. The path to that outcome begins with a clear assessment of how far the rust has progressed and what that progression means for safety and function. If the rust has merely begun to surface, you can treat it in a way that stops its advance and preserves most of the original sheet metal. If, however, the corrosion has eaten through to holes or has weakened support structures, the repair may demand more substantial work, or even replacement of panels, and professional input becomes advisable. This broad distinction helps set expectations and frames the subsequent steps in a practical sequence rather than an idealistic, cosmetic fix. Once you’ve judged the severity, you can move forward with a focused, methodical approach that marries careful preparation with durable protection. The step that follows assessment is surface preparation, which is not glamorous but is essential. Begin by clearing the area around the rusted patch. Use a sturdy wire brush to knock away loose flakes and scale, then switch to fine-grit sandpaper to blend the edge of the healthy metal with the worn area. If the corrosion is stubborn or deeply seated, a grinder may be needed to scrub away rust until you reach solid metal. The goal here is to reach bare, clean metal before any inhibitor is applied. After you’ve stripped away the rust, wash the area thoroughly with a degreaser or soapy water and let it dry completely. Any residual oil or moisture can undermine adhesion and negate the protective layer you’re about to apply. With the surface clean, you can introduce a rust-inhibiting product that serves as the second line of defense. A high-quality rust inhibitor or anti-corrosion primer plays a pivotal role. It creates a barrier that discourages moisture from accessing the iron in the metal and slows the kinetics of ongoing corrosion. In a truck roof that endures constant exposure to sun, rain, and road salt, this barrier has to be robust enough to withstand long-term moisture cycles. The emphasis here is not on dramatic chemical miracles but on practical, well-founded chemistry: a coating that adheres well to metal, cures to a stable film, and remains resistant to peeling under typical weather conditions. After you apply the rust inhibitor, give it the recommended cure time. This period allows the film to bond to the metal and bond to itself so that subsequent coats don’t lift or bubble. Patience here pays dividends over the life of the repaired area. If the roof has fully developed holes or if the metal has thinned to the point of weakness, you’ll need to fill or patch. For small holes, a metal patch secured with epoxy or a patch kit designed for automotive metal can be used. The patch should be cut to fit the hole with a slight overlap over the surrounding metal, and the epoxy should be mixed and applied according to the manufacturer’s instructions. Once the patch is set, you can feather the edges with lightweight filler or body filler, ensuring a smooth transition from patch to original skin. This step is a careful blend of repair and disguise: you want a surface that looks uniform and behaves like solid metal again. After any filler has cured, sand it smooth with fine-grit paper. The aim is a flush, even plane that will accept primer uniformly. The next stage is priming and color. A self-etching primer is particularly helpful because it improves adhesion where old paint may have failed and where a bare metal patch has been revealed. Apply the primer in thin, even coats, allowing each layer to dry before applying the next. Once the primer has cured, you can move to the paint. Matching the truck’s original color is important not just for aesthetics but for preventing further moisture exposure through seams and edges. Apply the topcoat in multiple thin layers rather than a single thick coat. Thin layers dry more evenly and are less prone to runs, drips, or visible differences in texture. The spray technique matters: keep the nozzle moving in a steady, overlapping pattern, maintain a consistent distance from the surface, and allow adequate flash time between passes. The goal is a uniform, glass-smooth finish that looks continuous with the rest of the roof. After the color has dried, consider applying a clear coat or protective sealant over the painted area. A clear layer can improve moisture resistance, protect the paint from UV damage, and extend the life of the repair. It also helps to seal minor micro-scratches that can occur from road debris and seasonal shifts in temperature. The intention with this final shield is not just to restore appearance but to stabilize the repaired surface against the elements. If you encounter larger rust damage or if the repair involves more structural components, the best course may be to consult a professional auto body shop. A shop can assess whether a panel replacement is warranted or if a more substantial treatment, such as panel repair or reinforcement, is required. DIY fixes work well for minor issues, but safety and longevity hinge on choosing the right approach for the severity you’ve found. Beyond the technical steps, you should consider maintenance planning as a core part of the repair mindset. The bridge between a one-off fix and a durable, long-lasting result is ongoing prevention. In practical terms, that means budgeting for routine maintenance, monitoring problem spots, and acting quickly at the first sign of renewed rust. This approach is not just about spending more money; it’s about investing in a proactive program that reduces the risk of expensive, recurrent repairs and preserves the roof’s protective role for years to come. For ongoing protection and predictable costs, budgeting for routine truck maintenance can help you allocate funds for rust prevention as well as repair work. The notion of a maintenance budget isn’t only about the financial side; it also clarifies your plan for time, materials, and the sequence of tasks you’re willing to perform or outsource. When you approach the roof with this mindset, you’re less likely to postpone a needed grinder pass, inhibitor reapplication, or a repaint that shields the metal beneath. The practical rhythm of maintenance—inspection intervals, seasonal checks, and a clear work plan—transforms a potentially recurring rust problem into a manageable, predictable cycle. And, because a roof is a relatively large and exposed surface, it benefits from a regular check that looks for new splotches or peeling paint that could herald new corrosion. A few minutes of vigilance after each season can prevent small issues from becoming costly repairs years down the road. When performing work on the roof, prioritize safety. Use a stable ladder, have a helper nearby, and wear appropriate non-slip footwear and eye protection. Work in a well-ventilated area if you’re using solvent-based primers or sealants, and follow all product instructions for ventilation, curing times, and disposal. The simplicity of the method described—clean, protect, fill, seal, and defend—still relies on discipline: if you skip the cleaning, you undermine adhesion; if you rush the cure, you invite failures later on. The roof may be an open, exposed surface, but with careful technique and a steady, deliberate pace, you can achieve results that look right and endure. As with any repair that touches a vehicle’s structure, there is a balance between doing enough and avoiding overreach. The goal is not to chase perfection in a single weekend but to rebuild a reliable, enduring surface that stands up to weather and the road. A well-executed rust-inhibitor strategy is central to that aim, acting as a shield against oxygen and moisture while the paint and sealant work to keep the surface intact. In that sense, the chapter on rust inhibitors within the broader guide to repairing a rusted truck roof becomes less about a standalone trick and more about a foundational practice. It’s the difference between a repair that looks okay and a repair that lasts through seasons of sun and snow. For readers who want a deeper, step-by-step walkthrough that aligns with tested field methods, a comprehensive reference provides a wealth of practical detail, including successful sequences for rust removal, surface prep, and inhibitor use. See the linked external resource for a detailed, field-tested walkthrough of repairing a rusty truck roof. And for ongoing resources and community-focused advice on routine maintenance, consider exploring supporting sections that discuss budgeting and maintenance planning as a practical complement to the technical work described here.
null
null
Final thoughts
Repairing a rusted truck roof is a critical maintenance task for any fleet. By accurately assessing damage, preparing the surface, applying appropriate rust inhibitors, and performing a quality fill and finish, you restore structural integrity and improve the vehicle’s appearance. Following these steps helps minimize downtime, extend roof life, and protect your fleet’s overall value.

