The reliability of a truck’s transmission is crucial for efficient operations, especially for fleet managers, trucking company owners, and logistics providers. A sloppy shifter in a 1976 Chevy truck can hinder not only functionality but also safety on the road. This comprehensive guide provides a structured approach to diagnosing the issue, replacing worn components, adjusting mechanisms, and sourcing quality parts. Through the chapters, we will explore each step necessary to restore that essential precision in shifting, empowering fleet operators to maintain optimal performance and safety in their vehicles.
Restoring a Precise Grip: Diagnosing and Repairing a Sloppy Column Shifter in a 76 Chevy Truck Automatic
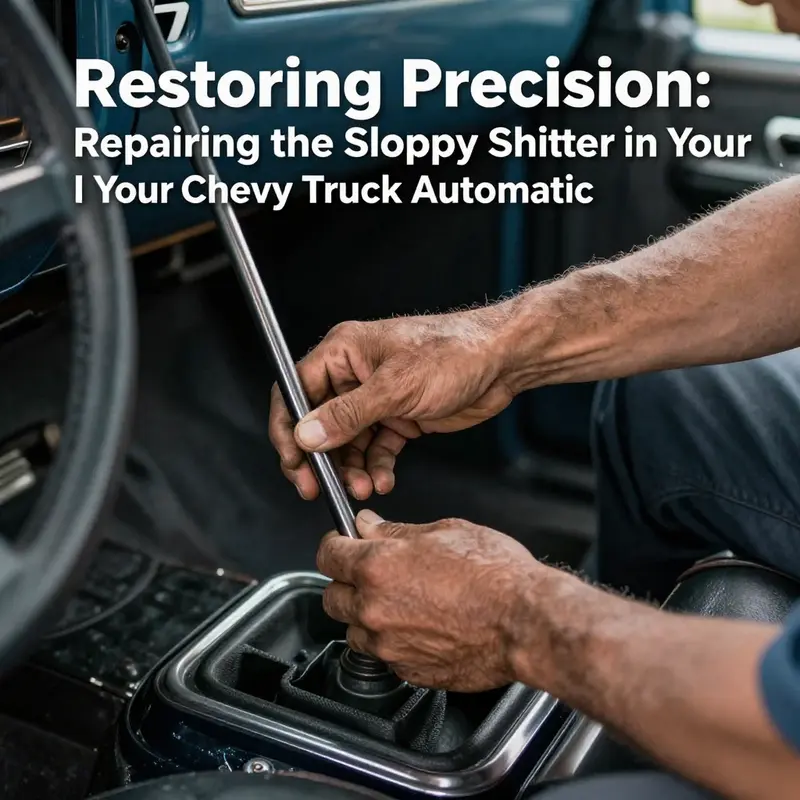
A sloppy column shifter on a 1976 Chevy truck with an automatic transmission is more than a nuisance; it’s a signal that the linkage, pivot points, or the shift mechanism itself are worn to a point where the shifter no longer communicates reliably with the transmission. The symptoms are familiar to anyone who has wrestled with a loose feel at the column: gear selections don’t align cleanly with the indicator, the shifter wobbles or feels “soft” in movement, and, in some cases, you may find it hard to coax the selector into Park or hard to remove the key once you’ve made a shift. The practical approach to fixing this is methodical but doable in a driveway setting with basic hand tools and a little patience. The goal is not only to eliminate the play but to restore confidence that each gear you select actually corresponds to the gear the transmission is in. The journey from diagnosis to a solid, repeatable shift is anchored in understanding where play comes from and how to replace or adjust the worn components that drive the linkage and the column shifter mechanism itself. Along the way, it helps to keep a clear sequence in mind: confirm the source of slop, replace worn parts, realign the linkage, and verify the Park interlock functions so you can reliably remove the key in Park again. The source of sloppiness in a classic Chevrolet column shifter rarely hides deep in the transmission itself. In most cases, the wear is external—on the linkage or at the pivot points of the column shifter—and the quick wins involve bushings, a worn shift rod, or a bracket that has developed a groove or slop over decades of use. Still, a complete or near-complete rebuild of the internal shift mechanism is not out of the question if external play has been absent of repair for a long time. This chapter walks through a practical diagnostic path and a repair sequence that respects the truck’s vintage design while keeping the process accessible for a DIY enthusiast who enjoys turning wrenches rather than staring at a repair bill. The logic begins with the simplest checks and advances to parts replacement and alignment, with careful attention paid to the Park position and the interlock that ties the ignition key to the transmission’s Park state. The Park interlock is a small but crucial part of the system; misalignment here can mirror the symptoms of a loose linkage and make the key hard to remove even when the shifter looks to be in Park. As you proceed, take nothing for granted. A little play in the shifter can be deceptive—what feels like a small wiggle in the column could translate to a substantial misalignment at the transmission selector, which then produces the wrong gear engagement. The diagnostic process described here is designed to reveal those subtle discrepancies and to guide you toward a repair path that restores not only the feel but the accuracy of each gear indication. The first clue is the tactile feedback: does the lever return to a consistent feel as you move it through the range, or does it settle into a soft, almost lazy motion that makes it difficult to discern whether you are truly in Park, Reverse, Neutral, Drive, or Low? A loose column shifter can degrade shifting accuracy quickly, so the aim is to quantify the play and locate its origin with a calm, logical approach. Begin by inspecting the shift linkage—the rod that connects the steering column shifter to the transmission. Look for visible wear at the joints or where the rod attaches to brackets on the column and to the transmission. A bent or kinked rod can introduce a stubborn slack that nothing else will fix until the rod itself is replaced with the correct length and fit. Pivot bushings at the base of the column and along the mechanism are another common source of slop. In a truck of this era, rubber or plastic bushings dry out, crack, or shed material over time, losing their ability to constrain movement precisely where the shifter pivots. A quick wiggle of the column while watching the linkage and listening for rattle or clunk can reveal where the play originates. If the Park position refuses to line up with the actual Park gear at the transmission, that is a strong sign of either a misadjusted shift cable or a worn Park interlock. The interlock ensures you cannot remove the key unless the transmission is physically in Park. When this mechanism becomes misaligned or worn, it creates an uncomfortable disconnect between the key and the Park indicator and can be mistaken for an issue with the shifter itself. The diagnostic steps that follow are designed to isolate these possibilities without tearing into the most sensitive parts first. The shift linkage should be accessible with the column trim removed, but the goal is to minimize disassembly while preserving the original alignment. Start by removing a little trim to visually inspect the linkage joints and the rod’s attachment points. If you see any looseness at the rod’s joints, that is your first target. If the rod moves freely at a joint or the end fittings show elongation or wear grooves, replacement is warranted. When you attempt to shift through the gears, there should be a distinct, repeatable sense of position at each gear. If the lever seems to land in a position that does not translate to the correct transmission state, there is a misalignment that needs correcting. The next common culprit is the shift cable. This cable translates the column shifter’s actions into a rod movement at the transmission selector. Over time, the cable can stretch or detach from mounting points. If the cable is loose or visibly frayed, or if it does not pull with a crisp travel, you have found a major source of the problem. A stretched cable will produce imprecise shifts and can prevent the transmission from fully engaging in Park. If you determine the cable is the problem, the replacement is straightforward in most cases and involves disconnecting the old cable from the lever and reattaching the new one at both ends. When you replace a shift cable, it is critical to ensure the length is correct for your truck’s model year and transmission type. A too-short or too-long cable will defeat even a perfectly adjusted linkage, so confirm fitment before finalizing the install. In many 1970s Chevys, the base of the steering column is a common location for bushings that support the shifter’s pivot points. If you notice play that originates near the base of the column, the bushings in that area are the likely culprits. Pivot bushings wear with age and become cracked, squeezed, or loose. Replacing them can restore a firm, precise feel to the shifter. The replacement bushings are often brass or nylon and are pressed into their seats in the column housing or the shifter bracket. For a proper job, you must remove the column trim and access the bushings, then press the new parts in, ensuring correct seating. When performing these replacements, it’s essential to confirm the shift lever’s angle aligns with the transmission’s selector. A misalignment here can result in the shifter landing in one gear while the transmission sits in another, or in an errant Park position that won’t line up with the indicator. After replacing worn bushings and the shift rod or cable as needed, reassemble and recheck the alignment. The shift mechanism must be reindexed so that each gear position on the indicator aligns with the actual transmission state. The simplest way to achieve this is to stage the shifter in Park, confirm the transmission is in Park, and then adjust the linkage to ensure the Park position on the column corresponds to Park on the transmission. This calibration step is sometimes overlooked but is critical for reliable operation and for ensuring the key can be removed only in Park. Once you have completed these replacements and adjustments, re-check the Park interlock to be sure the key will release only when Park is truly engaged. If your shifter still feels sloppy after replacing bushings and cables and after re-aligning the linkage, there is a possibility that an internal wear issue exists within the transmission’s selector mechanism. This isn’t the usual culprit in older trucks, but it is within the realm of possibility if the external components have received little of the attention they deserve for a long period. In such cases, a professional evaluation may be prudent because the internal shift mechanism—though more delicate to service—can produce similar symptoms if it has worn gears, selectors, or detents that have lost their snap and alignment. As you move through the repair, keep the work orderly and document the process. The pro tip about taking photos before disassembly is worth repeating: images of the original arrangement help you recreate the correct orientation later. Photograph the positions of brackets, the cable clamps, the lever bracket, and the way the linkage attaches to the transmission. This visual checklist makes reassembly less error-prone and reduces the time spent trying to recall how things looked when you started. If you opt to replace parts, ensure that you use high-quality parts that match the original design. Authentic or OEM-style replacements will help maintain the truck’s original feel and reliability. In a 76 Chevy with an automatic, the goal is a crisp, positive shift that you can trust—you should feel the lever connect to the selected gear rather than guessing whether you are really in Drive or Neutral. Realignment after part replacement requires a careful, incremental approach. After installing the new bushings or the shift rod, test the shifter’s travel with the transmission in Park, then in Drive, and so on through all gears. Check that the indicator on the dash aligns with the actual gear, and verify that you can move into Park and remove the key only when the transmission is firmly in Park. A final check should be a short, cautious road test in a safe area. The car should shift cleanly, without hesitation or unintended slippage, and the Park function should engage consistently. If you encounter any hesitation or misalignment during the test, revisit the linkage or the Park interlock; sometimes a small adjustment at the bracket or at the point where the ladder-like linkage attaches to the transmission will bring everything into alignment. Throughout this process, remember that quality parts and careful alignment together create a lasting repair. The value of replacing worn bushings and resetting the linkage is that you will often restore a level of precision that makes the vehicle feel much newer in daily use. The satisfaction of a job well done is amplified when the shifter moves with a decisive, predictable action and the Park position truly locks in place, enabling you to remove the key without a second thought. For readers seeking further guidance on general shifter repair philosophy, our broader blog library offers practical notes and step-by-step illustrations that complement the hands-on work described here. See the Master Truck Repair blog for more discussions on classic Chevy internals and column shifter maintenance. Master Truck Repair blog The approach outlined here aligns with a practical, parts-aware mindset: replace worn components, verify alignment, and test comprehensively before declaring the job done. If the play persists after addressing the obvious wear items, consider a deeper look at the transmission’s internal shift mechanism, but do not delay attending to the external linkage and interlock in the meantime. Outside of the immediate mechanical concerns, you’ll retain the truck’s original feel and reliability by choosing high-quality reproduction parts and by rechecking alignment after every adjustment. The road to a solid, confident shifting experience on a 1976 Chevy truck is paved with careful inspection, careful replacement, and careful calibration. It’s a process that rewards patience and offers a practical payoff in safer, more predictable gear changes every time you drive. External reference for broader kit specifics and restoration guidance can be found here: https://www.classicindustries.com/chevrolet/1970s-chevy-column-shifter-repair-kit
From Play to Precision: Rebuilding the Sloppy Column Shifter in a 1976 Chevy Automatic
A sloppy shifter can feel like a small defect with big consequences. In a 1976 Chevy truck with an automatic, the shift lever often carries a heavy load of responsibility beyond guiding the transmission from park to drive. When the feel of the lever becomes loose or vague, it isn’t just a matter of comfort; it can mask wear that, if ignored, leads to missed gears, misalignment with the gear indicator, and in some cases, an interlock issue that can prevent removing the key. This chapter follows a practical, cohesive path to diagnose and repair the root causes of that slop, focusing on the linkage, the pivot points, and the mechanism inside the cabin that often gets overlooked. The goal is a shifter that feels tight, precise, and reliable enough to make shifts deliberate rather than tentative. The path from diagnosis to a restored shifter hinges on careful inspection, replacement of worn components with correct sizing, and precise adjustment to align the lever with the dashboard indicator. The journey starts at the interface between the steering column, the shift lever, and the transmission. The amount of play observed as you move the shifter through detents indicates wear in multiple components. The shift linkage and its bushings can delaminate, crack, or wear thin, causing slop before the transmission changes gears. A bent shift rod, a cracked bracket, or loose mounting bolts can mimic looseness and mislead the eye. Pivot assemblies at the column can wear, allowing extra travel and a vague feel even when the linkage looks solid. The interlock that prevents key removal in Park may also be out of alignment and contribute to the sensation of looseness. Diagnosis proceeds with a methodical inspection of the linkage under the vehicle and in the cab. Look for loose bolts, cracked brackets, or bent rods. Check the pivot at the column base, the shifter housing, and the bushings in the shifter itself. Inspect the cable end and its adjustment points if your truck uses a cable. In the cab, remove the center console as needed to observe the shifter’s internals and verify the detents and mounting hardware are sound. Renewal centers on replacing worn parts with proper, OEM style components and reassembling with attention to stack up clearances. Replace worn bushings at the base of the column and inside the shifter housing, avoid cheap or ill fitting parts, and ensure the shift rod length matches the transmission linkage. If the lever or its mounting bracket shows grooves or wear, replace them. Recheck the pins, bolts, and rivets that hold the shifter together and tighten or replace fatigued hardware. After parts are replaced, realign the linkage so that Park, Drive, Neutral, and Reverse match the dashboard indicator and the transmission’s actual positions. Recheck the key removal condition in Park to confirm the interlock alignment. The final step is a careful reassembly and a staged test. Photograph or document the layout before disassembly, then reassemble with clean fasteners and a stable workspace. With the engine off, move the lever through every position and listen for binding or rough spots. Start the engine and verify the transmission’s response as you shift through the gears. The result should be a firm detent with no excess play, and a shifter that returns to center predictably. This kind of restoration preserves the truck’s character while restoring safety and reliability. By choosing well fitting parts, following a disciplined alignment process, and validating function through careful testing, you can regain the precise feel a factory setup intended. Readers are encouraged to see budgeting for routine truck maintenance for planning. See budgeting for routine truck maintenance. https://mastertruckrepairllc.com/budgeting-for-routine-truck-maintenance/ External reference: https://www.classicindustries.com/blog/how-to-repair-a-loose-shifter-in-a-1970s-chevy-truck
From Slop to Precision: Restoring Confidence in the 76 Chevy Truck’s Automatic Shifter
A loose, imprecise shifter in a 1976 Chevy truck with an automatic transmission can undermine both safety and driving enjoyment. The feeling of a shifter that refuses to engage exactly when you expect it, or one that seems to have more play than a idle garden hinge, is a signal that the linkage, pivot points, or the shift mechanism itself is worn. The goal in repairing this setup is not to chase a perfect new-car feel, but to restore reliable, predictable gear engagement with a measured, methodical repair that respects the aging design of a 1970s column shifter. The work rewards you with steadier shifts, more confident park engagements, and less anxiety while driving through traffic or maneuvering in tight spaces. The process begins with diagnosis, moves through careful replacement of worn components, and closes with precise realignment and testing so the shifter line up with the transmission’s actual gear positions once more. The aim is a cohesive, durable repair that preserves the character of the old truck while delivering the reliability you expect from an automatic transmission.
Diagnosing a sloppy shifter in a classic column setup starts with a careful, feel-based assessment. Begin by observing how much play exists in the shift linkage—the steel rod that connects the steering column’s shifter lever to the transmission’s selector mechanism. With the engine off and the key out, move the shifter through its full range. Pay attention to where the feel changes: is there a noticeable gap before the lever engages a gear, or does the lever feel loose and sloppy as it travels between positions? The rod itself can be bent, twisted, or worn at the bushings, especially where the rod enters or exits the shift column area. If you can see or feel play at the rod end, that’s a strong clue that the problem lies in the linkage and not solely in the transmission.
Next, inspect the pivot points and bushings that live at the base of the column shifter and along the lever’s mounting bracket. Worn bushings—often made of brass or nylon in classic designs—can develop cracks or looseness after decades of use. This wear translates into a tangible “slop” when you move the lever, and it can be hard to pin down exactly which component is the culprit because several parts wear in tandem. A visual inspection may reveal cracks, looseness, or a shift lever that has simply sagged from its original position. If you see or feel movement when you push on the shifter lever while the column is restrained, you’ve identified a likely source of the looseness.
An additional consideration is the park interlock mechanism, which is designed to prevent the key from being removed unless the shifter is in Park. If the mechanism is misaligned or worn, you might find it difficult to place the shifter in Park or to remove the key, even though the other gears seem to engage normally. Misalignment in this system can mimic a sloppy shifter in every gear because the interlock components fail to register the actual lever position. During diagnosis, test Park and the other gate positions to confirm that the interlock is not contributing to the perceived looseness. A misadjusted interlock is often corrected by realigning a few components rather than replacing the entire assembly, which preserves the authenticity of the original manual and reduces cost.
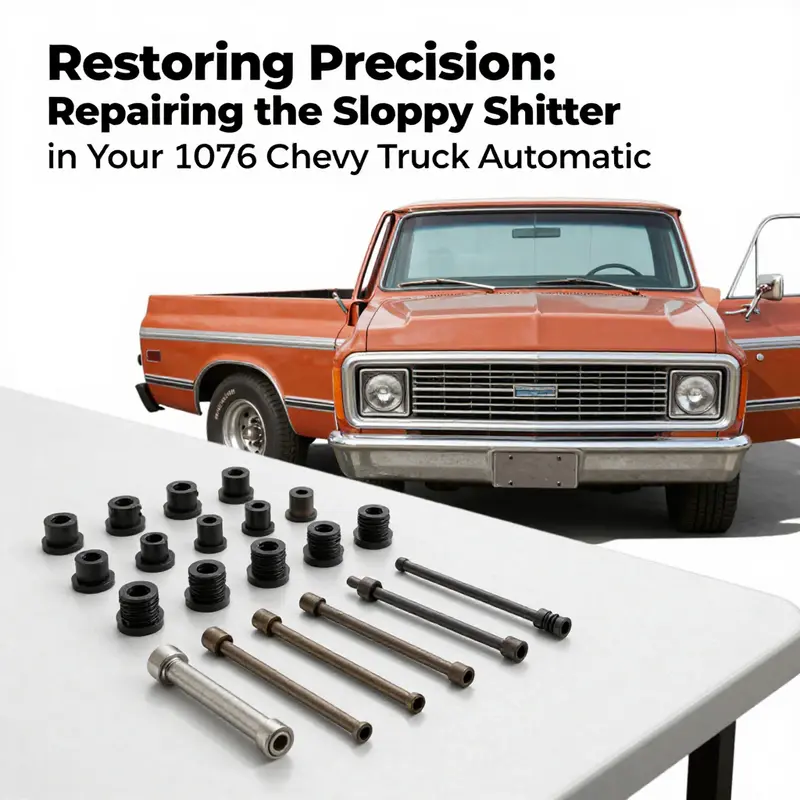
With a clear sense of where the looseness originates, you can plan the repair with a calm, measured approach. Replacement options begin with the pivot bushings, which are among the most common wear items. These bushings are typically pressed into the column base or the shifter bracket and serve to keep the lever’s pivot tight and precise as it travels through the detent positions. If bushings are the culprit, the fix is straightforward: replace worn bushings with equivalents that match the original geometry and material properties. In a 1970s Chevy, choosing high-quality replacement bushings—whether brass, bronze, or nylon variants—helps restore the lever’s firm, tactile feedback. The replacement process requires removing the column trim to access the bushings and the lever’s mounting hardware, then pressing the old bushings out and pressing new ones in. Precision matters here; a slightly oversized bushing can bind, while an undersized one will quickly show wear again.
If the shift rod itself shows visible signs of wear or bending, it’s prudent to replace it rather than chase incremental play. A bent rod can throw the linkage out of alignment, causing the shifter to overshoot into a gear or not fully engage a chosen position. When replacing the rod, ensure you obtain the correct length and fitment for your model year and drivetrain configuration. It’s worth double-checking the rod’s end fittings to confirm compatibility with the lever and the transmission link at the mount point. Likewise, if the shift lever or its mounting bracket has grooves worn into it by years of use, replacement is a sensible option to restore engagement precision. Even though this is an older design, a reproduction lever or bracket crafted to OEM geometry can deliver a noticeably cleaner feel without creating new alignment challenges.
A more nuanced replacement step is addressing the transmission’s shift linkage itself. The linkage between the shifter and the transmission can accumulate wear along its joints and mounting points. Replacing or reinforcing this link improves the lever’s directness and reduces the need for over-enthusiastic movement to reach the desired gear. If you replace the rod and bushings, you should also inspect the linkage’s end fittings and the mounts for any deformation that would trap unwanted play in the system. Realistically, a combination of bushings, a slightly reinforced linkage, and a straight, undamaged rod provides a substantial improvement that feels like a more modern shift while keeping the old truck’s character intact.
Once you have identified and replaced worn components, the next phase is realignment and adjustment. Realignment is not a mystical art; it’s a carefully measured process of ensuring that the shifter’s positions correspond to the transmission’s actual gear engagements. Begin with the column end: verify that the shifter lever’s detent positions line up with the indicator on the dashboard or console. If the digits or the indicator’s alignment look off, you’ll need to adjust the linkage so that each engagement point matches its corresponding gear. This often means loosening a mounting bolt or two, gently repositioning the linkage, and re-tightening once you’ve confirmed that the position aligns with the actual gear in the transmission. It’s essential to test a full range of motion through all gears, paying special attention to Park. A reliable Park position is crucial for both securing the vehicle and allowing the ignition key to be removed without resistance.
The role of the transmission selector cable, if your 76 Chevy uses one in your configuration, cannot be overlooked. On many older trucks, a cable provides a direct signal from the shifter to the transmission. Over time, the cable can stretch, kink, or become misrouted, contributing to imprecise gear engagement. Inspect the cable for fraying or stiff sections, especially near the ends where it attaches to the shifter lever and the transmission lever. If the cable shows signs of wear, replace it with a unit that matches the original length and travel. If it appears to be intact but misaligned, inspect the routing and endpoints to ensure the cable follows the intended path without sharp bends that could degrade movement. After verifying the cable, re-check the linkage alignment with the transmission mount point. A properly secured cable can transform the feel of the shifter, making each gear command a direct, predictable action rather than a guess.
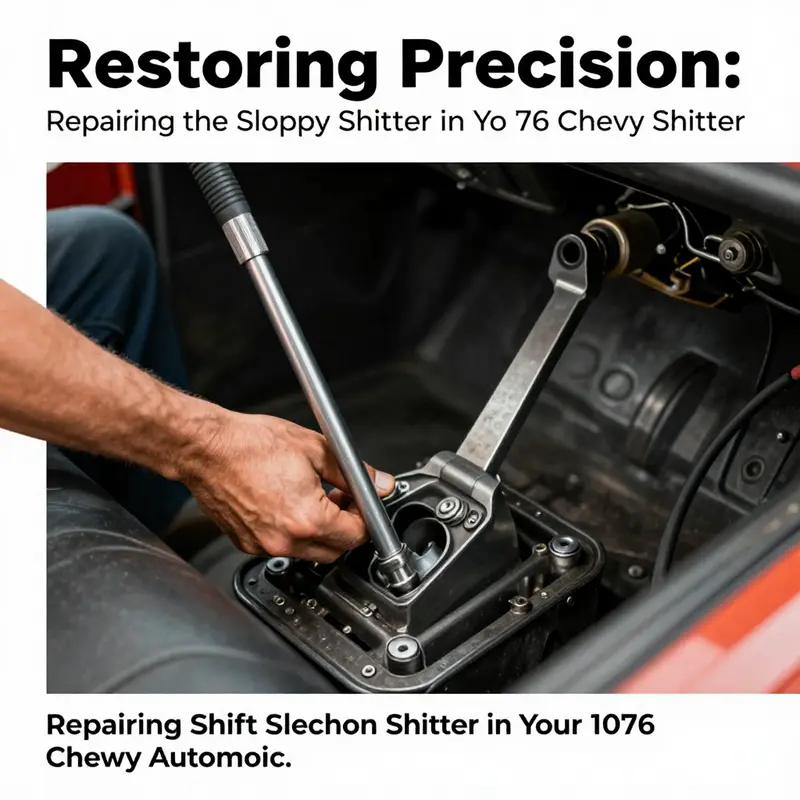
Adjustment of the linkage at the transmission mount point can sometimes salvage a system that is otherwise sound. Loosen the mounting bolts, and reposition the linkage so the transmission’s internal detents and the shifter’s detents are in agreement. The goal is a clean, linear correspondence: when you move the shifter to Park, the transmission should be in Park; when you select Drive, the transmission should actually engage Drive. Take your time during this step. Subtle movements of a few degrees can be the difference between a shifter that feels loose and a shifter that feels firm and confident. Once you see a consistent match between the gear selector and the transmission’s engagement, tighten the bolts while holding the alignment. Don’t rush through this stage; the payoff is a shifter that feels linear rather than impulsive, with a solid return into each position and reduced risk of misalignment under load.
In all of this, the quality and compatibility of replacement parts matter more than the sheer number of parts you install. Use OEM-style or high-quality reproduction components that respect the original geometry and material properties. This preserves the truck’s historic feel while delivering improved durability and a more consistent shift profile. When selecting parts, focus on bushings that resist wear in a column-mounted environment, rods that are straight and properly finished, and brackets that allow precise alignment without binding. If you perform the work with care and patience, you’ll find a substantial improvement in the shifter’s tactile feedback—the lever will respond more crisply, the shifts will seat more positively, and the transmission will stay more consistently in the chosen gear.
A practical approach to this kind of project includes a small, organized plan: document the original state with photos for reference while disassembling, then set a logical order for replacement so you don’t lose track of which bushing belongs where. This is especially helpful when you reassemble a complex, multi-piece linkage. The restoration is not about achieving a showroom finish; it’s about building back the dependable, predictable behavior that makes a classic truck enjoyable to drive every day. After the mechanical work, the real proof of success lies in the road test. Move through the gears slowly at first, confirm that Park holds when you expect, and then drive through a familiar stretch to feel how the new components behave under load. If anything feels off, revisit the alignment and confirm that the shift linkage, cable, and park interlock are all working in harmony. A well-executed sequence will deliver a shifter that feels tight, with a crisp, linear movement from one gear to the next and a solid, unmistakable click into each position.
For readers who want further practical pointers as they work through this repair, a concise, hands-on reference available from the wider repair community can be a helpful companion. The Master Truck Repair blog provides practical, experience-based guidance that complements the steps described here. Master Truck Repair blog This resource can offer tips on handling aging hardware, dealing with stubborn bushings, and organizing parts and photos for a smoother restoration project. It’s a good idea to check that hub of practical advice to supplement the specific steps outlined in this chapter, ensuring you approach the repair methodically and with proper safety precautions in mind.
If, after replacing worn components and realigning the linkage, the shifter still feels loose or fails to engage correctly, there may be internal wear within the transmission’s shift mechanism itself. While this is less common in older trucks where external linkage bears most of the responsibility for shift feel, it is not impossible. In such cases, the fault lies deeper than the external hardware and may require more extensive inspection by a knowledgeable transmission technician. Before proceeding to that more involved route, confirm that all external linkage components are within tolerance, correctly installed, and properly adjusted. In many cases, a stubborn wobble or misalignment is resolved by a thorough re-check of the bushings, rod, and cable rather than by expensive, invasive transmission work.
Finally, remember that restoration work like this benefits from a measured, patient approach. The column shift in a 1976 truck is a relic of its era, and it responds best to careful adjustments and respect for the original geometry. If you feel uncertain at any point, slow down, re-check the fundamental alignments, and verify each connection’s tightness before moving on. The payoff for that careful approach is a shifter that finally communicates what you intend, without the need for violent wrenches or jarring movements. The result is a truck that feels more confident to drive, with a shift action that is predictable and repeatable rather than sloppy and inconsistent. In the end, this modest restoration can restore the quiet confidence of a classic daily driver and keep the 76 Chevy on the road with a shift feel that matches the pride of owning a vintage pickup.
External resources can provide a more formal reference to the exact service procedures used in this era of trucks. For a detailed official manual reference, see the Chevrolet service manual specifically for 1976 trucks. Chevrolet Service Manual for 1976 Trucks. This resource offers step-by-step procedures and diagrams that can help confirm the alignment points and gear positions described here, ensuring that your repairs align with the factory design intent and the long-term reliability of the transmission’s shift mechanism.
Guarding the Gate: Restoring Precision to the Sloppy Column Shifter in a 76 Chevy Truck Automatic
A loose, sloppy column shifter in a 1976 Chevrolet truck with an automatic transmission is more than a nuisance. It undermines confidence, slows the rhythm of a daily drive, and, in worst-case scenarios, can leave you stranded with the key stuck or the trans refusing to engage in the right gear. The problem usually isn’t the whole transmission; it’s the linkage and pivot points that have worn through the decades. What begins as a little wiggle in the shifter often cascades into misalignment of gear positions, erroneous park engagement, and a sense that the truck can’t be trusted to respond when you command it. The goal here is not to replace the entire shifter system but to restore the precision that the original design promised. It’s a craft of careful inspection, measured replacement, and patient reassembly, all aimed at bringing back that firm, direct feel between operator input and transmission response. The fix hinges on three core ideas: diagnose accurately, replace selectively with high-quality parts, and adjust the linkage until each gear position lines up with the indicator and, crucially, Park really does lock the transmission and allow removal of the key when you set it there.
When diagnosing a loose shifter, begin with the path that connects your hands to the gears: the shift linkage. The rod that travels from the steering column’s shift lever to the transmission is a simple, robust piece in good condition, but it’s also a component that bears the most wear in these old GM trucks. Look for wear in the rod ends and bushings, for any looseness that allows the rod to drift out of alignment, and for any bending that you can feel as you gently move the shifter through the range of motion. A common symptom is that the shifter feels loose or vague as you move it; the indicator on the dash might not correspond precisely to the actual gear selected, which is a telltale sign that there’s play somewhere along the linkage. In addition to the rod, the pivot points on the column shifter mechanism—especially at the base where the lever pivots—are notorious for cracking, loosening, and wearing down. Those pivot bushings can become cracked or displaced, creating a subtle but persistent wobble that translates into the same fatigue in the transmission’s response. Finally, don’t overlook the Park interlock mechanism. If you struggle to get the lever into Park or to remove the key even when the lever appears to be in Park, misalignment or worn components in the interlock can mimic a sloppy shifter. A thoughtful diagnostic approach—inspect the linkage for play, verify the pivot bushings, and test the interlock’s operation—will set you on a clear path to repair rather than replacement.
The diagnostic process doesn’t stop with a visual inspection. It involves a careful physical assessment of the shift linkage as a system. With the engine off and the steering wheel centered, move the shifter slowly through each position from Park to Drive and back, feeling for any unusual resistance, loose play, or a mismatch between the gear indicator and the actual position of the transmission. Any time you feel more than a negligible amount of slack, you’ve identified a section of the chain that needs attention. If the lever seems to “rattle” or feel detached from the transmission for several inches of travel, the rod and its bushings are likely the culprit. The park position deserves special attention. Park serves two critical roles: it locks the transmission and, if the interlock is functioning, allows removal of the key. If those two actions aren’t reliable, realignment of the linkage is in order. As you proceed, document the current arrangement with photos or notes. A visual record of how the components are mated helps you reassemble correctly and reduces the risk of reintroducing the same issue after reassembly. This is a step where a quick reference can save hours of fiddling.
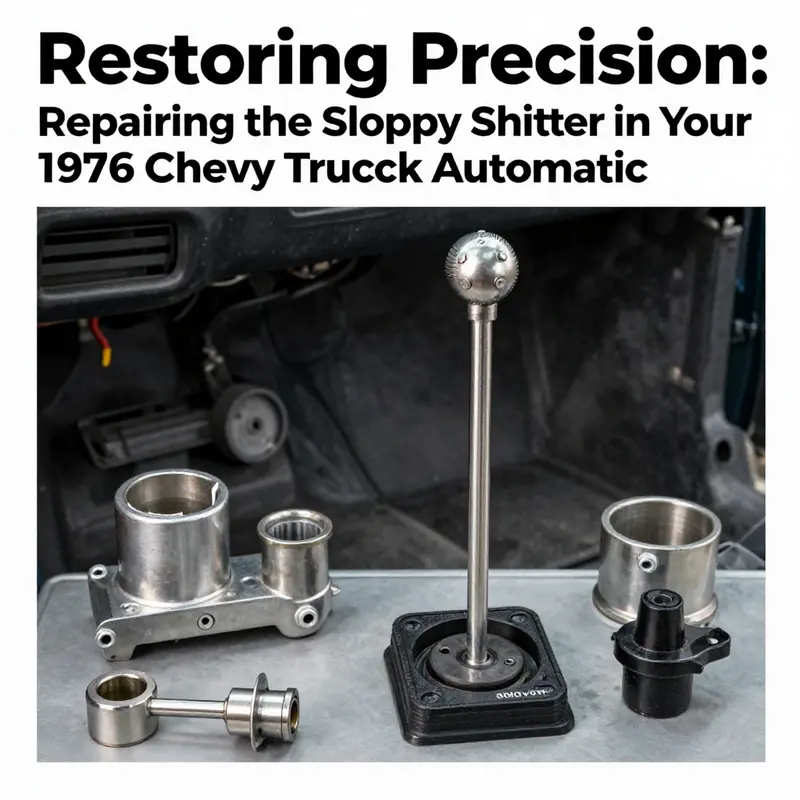
Pivot bushings deserve special consideration because they are the quiet engine of the shifter’s precision. Located at the base of the column shifter mechanism, these bushings cushion the movement as the shifter arm pivots. Over time, vibration, temperature changes, and general wear cause them to lose their shape and their grip on their mounting points. The result is a subtle wobble that translates into a variety of symptoms—slack in the lever, inconsistent gear engagement, and occasionally a shift that feels “soft” in the hand. To assess bushings, gently rock the shifter back and forth while watching the anchor points and listening for any clunking sounds that might indicate wear. If a bushing is cracked, deformed, or has separated from its housing, replacement is required. Removing the column trim is usually necessary to access these bushings, and the process benefits from patience and a clean work environment. The bushings themselves are typically of brass or nylon, materials that resist wear while maintaining a smooth surface for the lever to pivot. Replacing them correctly involves pressing the new bushings into place with appropriate tools, ensuring they seat flush and align with the pivot points. The payoff is immediate: a tighter feel at the lever, less play in the linkage, and a direct, confirmable response when you move the shifter.
Once you’ve identified worn bushings as a primary contributor, you move to the practical part: replacement. Replacing pivot bushings and the shift rod is a job that many enthusiasts tackle in their own garage with basic hand tools and a little care. The bushings are pressed into their housings, and the lever’s pivot must align with the bushing’s bore precisely. If the rod ends show wear or if the rod itself has a bend or bend-induced wear pattern, replacing the rod with a new, correctly manufactured piece is prudent. The correct length and fitment are essential; a rod that is too long or too short creates misalignment across the entire linkage, never allowing the indicator to track correctly with the actual gear selection. When you reassemble, recheck that the end of the shift rod mates cleanly with the transmission linkage so there’s no binding or premature wear as soon as you begin to move the shifter. During this phase, it is prudent to replace any worn lever or bracket with a reproduction or OEM-style piece that adheres to the original geometry. Such parts are designed to replicate the original fit and are manufactured to tighter tolerances than some off-brand components, which helps ensure longevity and reliability in a vehicle that is decades old.
With the new components in place, the next step is to adjust and realign the shift mechanism. This is where the mental model of the system—the way the shifter position maps onto the transmission range—comes into clear view. Realigning the linkage involves adjusting the position of the shift rod at the transaxle end or the column end so that each gear position aligns with the corresponding indicator. A precise alignment ensures that when you select Park, the transmission is truly in the Park position, and the key can be removed without resistance. The alignment process should be performed gradually, with the vehicle parked and the engine off. Move the lever through each gear position slowly, then return to Park and check that the key can be removed freely. If you notice any misalignment after the first test, tweak the rod’s mounting points or the bracket position a little at a time and retest. It’s common to need a couple of cycles to settle in when replacing bushings or rods, because the new parts need to coach the lever into the correct arc of motion. A good practice is to note the travel arc of the shifter in each gear and cross-check the arc against the indicator dial. The aim is for a one-to-one correspondence: each shifter position should precisely match the gear indicated on the dial, with Park reliable enough to allow the key to come out without hesitation. This approach keeps you from chasing a moving target and provides a durable baseline for future adjustments.
The importance of using high-quality parts cannot be overstated. In a vehicle as old as a 1976 GM truck, the goal is not a quick, cheap fix but a durable restoration of function. OEM-style or premium reproduction parts are designed to meet original specifications while using modern materials to improve wear resistance and consistency. When selecting replacement components, look for parts that fit exactly in the original geometry and have tight tolerances around their mating surfaces. A successful shifter repair depends on this fit, because even a small discrepancy in length, angle, or bush size can send the linkage out of alignment again after a few miles of driving. A disciplined approach to parts selection helps you avoid a recurring problem and extends the life of the shifter linkage without prematurely wearing out the new bushings or rod. During the process, it’s helpful to maintain a catalog of the parts replaced and the conditions under which they were installed. This habit pays dividends if you ever need to revisit the repair, especially on a vehicle with a long service life and consistent use.
Throughout this journey, there is value in thinking about the broader maintenance plan. Engaging in a repair of this nature is not merely about the current drive but about the long arc of reliability for your old truck. As you plan, consider how this repair fits into a broader schedule of routine maintenance. For instance, budgeting for routine truck maintenance makes it easier to handle unexpected issues without resorting to improvisation that can compromise reliability. A small, regular investment toward quality parts, lubricants, and the tools needed for alignment pays big dividends when your daily driver is a classic with a history of use. Practically, that means allocating funds for things like front-end bushings, steering column components, or even a full diagnostic once every year or so to catch wear before it becomes a problem. It’s a sensible approach that aligns with the spirit of responsible classic-truck ownership and helps ensure that every drive remains predictable and safe. For more on this approach, you can explore a resource focused on budgeting for routine truck maintenance, which offers practical guidance on planning and spending for wear-prone systems like the column shifter.budgeting for routine truck maintenance.
If, after careful replacement and adjustment, the shifter still feels sloppy, it’s time to broaden the inspection to the other side of the equation: the transmission’s internal shift mechanism. In older GM trucks, wear can accumulate not just in the external linkage but also within the internal shift linkage and the valve train that sits behind the familiar floor or column controls. While this is notably less often the cause than external linkage wear, it remains a possibility, particularly in high-mileage trucks that have experienced many shifts and many cycles of heat and cold. Diagnosing internal wear often requires more invasive inspection or test procedures, and in some cases a professional evaluation becomes the most sensible course of action. If you reach this point, treat it as an extension of the diagnostic process rather than a separate problem. A precise diagnosis reduces the risk of unnecessary disassembly or misalignment that could compound wear in the long run.
In synthesis, the repair of a sloppy shifter in a 76 Chevy truck with an automatic transmission is a careful blend of diagnosis, selective replacement, and meticulous adjustment. The crux lies in restoring the relationship between the driver’s input and the transmission’s response, ensuring that each lever throw corresponds exactly to the intended gear, and that the Park interlock functions reliably so that the key can be removed without hesitation. The path to reliability begins with a thorough inspection of the shift linkage and pivot bushings, continues with the replacement of worn components using OEM-style or premium reproduction parts, and culminates in a precise realignment that binds the system into a single, predictable arc. The process respects the vehicle’s age and design while embracing durable materials and thoughtful maintenance practices, so the truck remains a trusted companion on the road. The final measure of success is not just a firmer lever in the hand but the certainty that the shifter and the transmission are working as a coordinated system, offering crisp, repeatable shifts and an unmistakable sense of control that modern cars can only imitate. As you reassemble and test, remember that patience and documentation are as valuable as any tool in your toolbox. A few photos taken before you start, a careful step-by-step check of each component, and a calm test through the full range of gears can save you hours and spare you the frustration of chasing a misalignment that stubbornly resists your best efforts. With those habits, your 1976 Chevrolet’s column shifter will regain the tight feel it had when new, and the truck will once again deliver the confident, reliable shifting experience that made these trucks beloved in their era and still appreciated by enthusiasts today. For a detailed, step-by-step guide on shift lever replacement, you can consult a dedicated technical guide that provides structured, field-tested instructions tailored to the Chevy truck’s shifting system. (External resource: https://www.summitracing.com/technical/repair-articles/4238/chevy-truck-shift-lever-replacement-guide)
Final thoughts
In summary, addressing the issue of a sloppy shifter in a 1976 Chevy truck automatic is essential for maintaining vehicle performance and ensuring safety on the road. Through proper diagnosis of the shift linkage, replacement of worn components, adjustment of the shift mechanism, and sourcing quality parts, fleet managers and operators can effectively restore the precision and reliability of their trucks. Taking these steps not only enhances operational efficiency but also prolongs the life of the vehicle, ultimately leading to cost savings and better service delivery.