Truck bed covers are vital for protecting cargo and enhancing vehicle aesthetics in fleet operations. For fleet managers and trucking company owners, maintaining these covers is crucial to ensure the longevity of both the cover and the truck itself. Damage such as small tears, edge peeling, large holes, and structural cracks can occur due to environmental factors or rough handling. Understanding how to effectively assess and repair these issues not only extends the life of your truck bed cover but also safeguards your cargo and provides a polished appearance on the road. This article outlines a structured approach to repairing truck bed covers, from addressing minor fabric damage to intricacies of rigid cover repairs. Each chapter provides targeted advice, actionable steps, and preventive strategies to equip fleet personnel with the knowledge needed for effective maintenance and repair.
Restoring Fabric Tonneau Integrity: A Thoughtful, Stepwise Repair for Small Tears and Holes
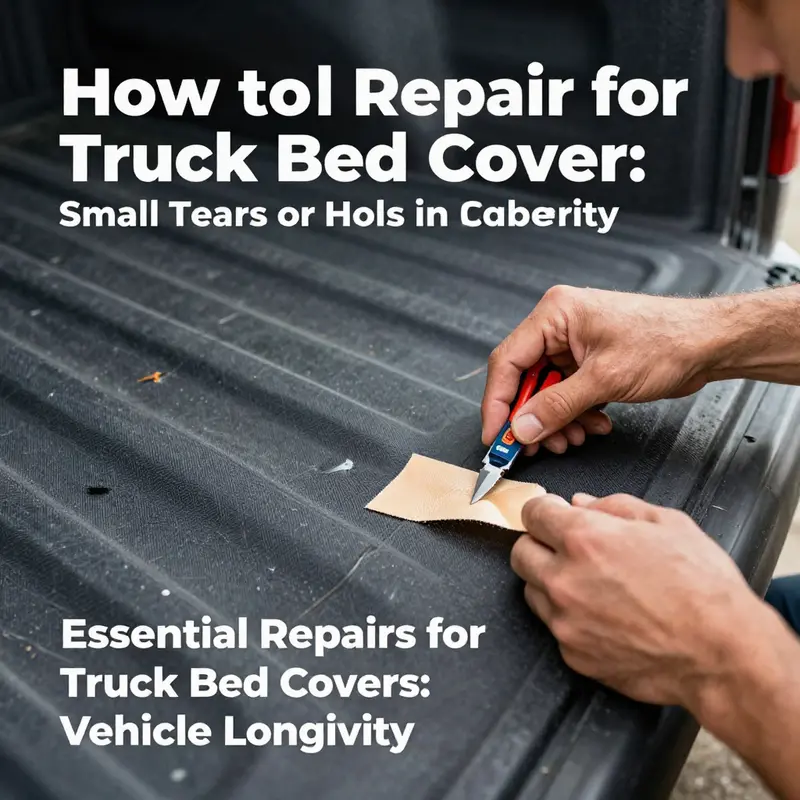
Repairing a fabric truck bed cover begins with a measured mindset. A small tear or puncture isn’t a verdict on the cover’s entire life, but an invitation to apply careful patching that preserves weather resistance and keeps cargo protected. The craft lies in understanding the material you’re working with—whether vinyl-coated fabric, a plain canvas-like surface, or a woven textile used by certain tonneau systems—and then choosing techniques that respect both flexibility and strength. You approach the repair like a precise restoration, not a quick fix, selecting an adhesive and patch that match the fabric’s response to sun, heat, and moisture. The outcome isn’t merely cosmetic; it’s functional, aimed at restoring a continuous barrier against rain and dust while maintaining the cover’s airflow and tension. You can accomplish this with everyday tools, a little patience, and a calm workspace. The result should feel like part of the original design—a durable, weather-ready patch that becomes almost invisible with the right materials and technique. This mindset makes the repair efficient and repeatable, whether you’re patching a tiny nick or a more expansive but still manageable hole.
Begin by taking a careful diagnostic of the tear. Look at the edges: are they clean, or do fibers fray around the wound? If you spot fraying, trim back loose threads with small scissors so the repair can span a stable edge. Next, assess the material’s compatibility with a repair kit. A dedicated fabric patch kit designed for truck bed covers typically includes a patch and a compatible adhesive. Clean the area around the tear thoroughly with isopropyl alcohol or a mild cleaner to remove oils, dirt, and old residue. Let the surface dry completely. Any lingering moisture or oils can undermine the bond and reduce the patch’s longevity. The cleaning step is not decorative; it’s foundational. If your kit includes a backing or release liner, plan your patch placement before removing it so you can align the patch precisely without slippage. The entire process hinges on surface preparation, because a clean, dry foundation is what makes the adhesive grab and stay.
With the surface prepared, apply a thin, even layer of the recommended adhesive to both the back of the patch and the torn area. A light coating prevents excessive squeeze-out that can create lumps and misalignment. Allow the adhesive to become tacky—usually five to ten minutes—so it bonds quickly when the patch is pressed into place. If you’re patching a small hole, your goal is to create a strong, seamless interface that distributes stress across the patch and the surrounding fabric. When you’re ready, position the patch over the tear with careful alignment. Start at the center and gently press outward, using a plastic squeegee or clean cloth to push out air bubbles. The center-to-edge method helps avoid air pockets that can harbor moisture and lead to delamination. Take your time with alignment; a well-placed patch reduces the risk of peeling at the margins later on.
Once the patch is seated, weight the area. Place something heavy—like a hardcover book or a flat, sturdy object—directly over the patch for two to four hours. This step gives the adhesive a chance to cure under steady pressure and helps the bond take hold across the patch and surrounding fabric. After the initial bond, inspect the edges. If any edge lifts, apply a thin bead of adhesive along the perimeter and re-press. A secondary tap with the squeegee can help ensure uniform contact. Remember that curing extends beyond the initial set; many fabric adhesives require a full cure time to achieve maximum strength. In dry, moderate conditions, plan for at least 24 hours before exposing the repair to rain, sun, or heavy use. During this period, avoid twisting the cover or forcing it to fold, which could stress the patch and undermine the bond. If color matching is important, choose patches that blend with the cover’s hue and texture. A patch that seamlessly hides in daylight reduces the visual sign of repair and helps protect the patch from UV exposure.
For scenarios where you need a faster, temporary solution, two options can bridge the gap until a proper patch is available. Waterproof tape designed for fabrics can seal a small tear and prevent water intrusion during a rain shower or while you arrange a proper patch. While helpful, this method is not permanent and may degrade under UV exposure or with temperature cycles. If your cover is made from a heat-activated material or uses heat-activated adhesives, a patch that bonds with heat can be applied using a household iron or heat gun, following the product guidelines. Heat can accelerate the bonding process, but it also risks scorching if misapplied. Always test on a small, inconspicuous area first and keep the heat source moving to avoid hotspots. As with all repairs, a temporary fix should be treated as a stopgap, not a lasting replacement.
Edge peeling or detachment around seams deserves its own consideration, especially after years of exposure. If the edge has peeled away from the bed rail, start by cleaning the base surface and the underside of the cover edge. Lightly roughen the contact area with a fine grit, wipe clean, then apply an automotive-grade fabric adhesive along the edge. Press the edge firmly back into place and hold for about 30 seconds. Use clamps, tape, or weights to secure the bond for four to six hours, and avoid driving during the cure window. If the edge continues to lift after curing, consider reinforcing with a seam sealant or additional stitching along the seam. The goal is a durable, water-tight edge that resists the sun’s drying heat and the cargo’s flexing.
For fabric covers, the difference between a routine patch and a longer-term solution often comes down to tension and edge integrity. If a repair becomes a recurring event, it’s worth evaluating whether the cover’s overall condition warrants replacement or a move to a higher-tension design that better distributes load and resists tearing. In these cases, you may also explore internal supports or reinforcement that help maintain fabric tension along stress points. Even when you replace or reinforce, commit to preventive habits: clean with mild soap and water, avoid harsh solvents, and park in shade or cover the bed when possible to minimize UV and heat exposure. A routine schedule of checks—every few months or before seasonal use—can reveal wear before it becomes a major tear. If you do the math, patching small tears not only preserves the cover but also extends the utility of the truck bed and helps protect valuables, keeping cargo secure and dry for everyday tasks or weekend ventures.
As you gain experience, you’ll begin to recognize the differences between prep work, patching, and curing across cover types. Document the repair with a quick photo log, noting the fabric type, adhesive used, patch size, and cure duration. A simple record helps you compare results under different weather and cargo conditions and informs future repairs. If you’re seeking broader guidance that aligns with model-specific designs and factory-approved methods, you can explore additional resources that consolidate repairs, parts, and maintenance tips. A well-executed patch, coupled with thoughtful maintenance, ensures your fabric tonneau remains a dependable shield against the elements and a practical companion for work and travel. For a more structured, model-aware approach and to see step-by-step tutorials, consider visiting a comprehensive repair hub such as the Master Truck Repair Blog. It offers context, diagrams, and references that complement the hands-on technique described here. (Internal link) Master Truck Repair Blog
When outcomes matter most, turn to established guides that map the repair landscape for fabric covers. An external resource with model-agnostic strategies provides a broader view of materials, bonding agents, and cure timelines. The goal is not to chase perfection in craft; it is to secure a durable, adaptable repair that respects the cover’s original design while standing up to real-world use. If you’re curious about deeper, model-specific steps and a downloadable reference, you can consult the following external guide: https://www.autozone.com/repairguides/Truck-Bed-Covers/Repairing-a-Truck-Bed-Cover/107598621075986210759862
Edge to Edge Repair: Restoring Seal and Strength to a Truck Bed Cover
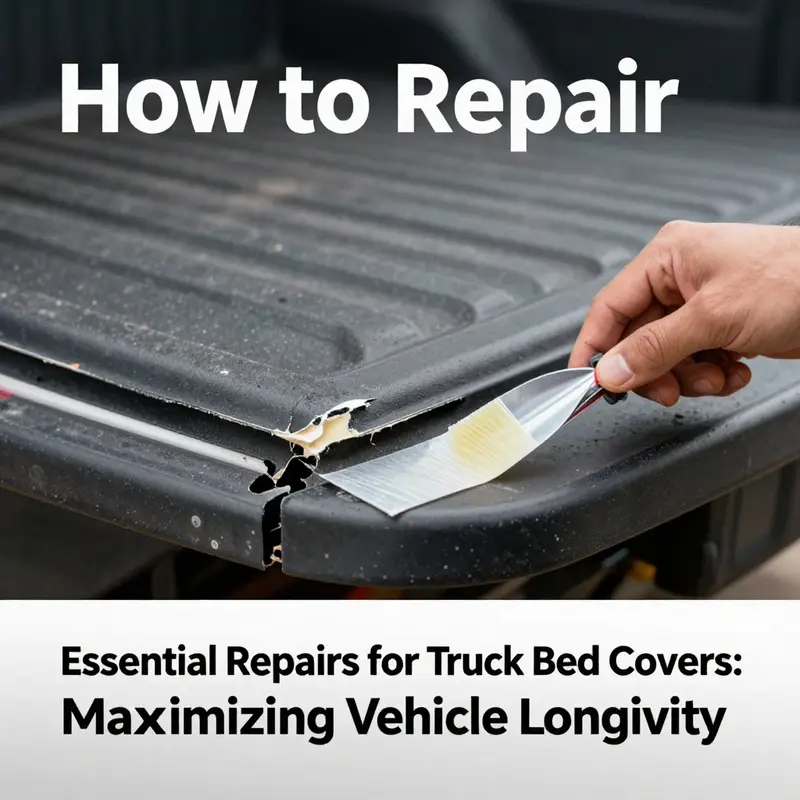
A truck bed cover keeps valuables dry, cargo secure, and the truck’s silhouette tidy. When the fabric edge begins to peel or an area along the seam lifts, the sense of inviolability fades fast. Edge peeling and partial detachment are more than cosmetic problems; they compromise weather resistance and tension, inviting moisture, wind noise, and further wear. Yet with patience, the right approach, and a careful hand, you can restore the seal and regain the cover’s integrity. The repair mindset here is simple: treat the damaged edge as a seam that needs a fresh bond, not as a lost cause. Start by recognizing that the extent of the damage matters. A small lift along a seam where adhesive failed from sun, heat, or moisture is very different from a broad area that has detached and sagged. The fix is a tailored one, guided by the same principles that govern any weatherproof repair: clean, restore, adhere, clamp, cure, and re-test. This chapter walks you through a unified process that blends practical surface prep with careful adhesive selection, all while keeping the repair anchored in common-sense maintenance rather than a hurried patchwork.
Begin with a calm assessment. Look closely at the edge where peeling occurs and follow the seam along the bed rail. If you notice only a narrow strip lifting with solid material underneath, that points to adhesive failure at the joint rather than a torn fabric panel. If the fabric itself has frayed or if the edge has begun to separate in multiple spots, the damage is more extensive and may require more thorough reinforcement or, in some cases, replacement. In any scenario, plan your steps around clean surfaces, solid bonding, and a cure time that respects the adhesive you choose. The aim is a bond that remains flexible, UV-resistant, and weather-tight through seasons of sun and spray.
Gather your materials in advance and choose them with the same care you would give to a critical patch on a sail. You’ll need a clean cloth or microfiber, a mild soap solution or vinyl-safe cleaner, and a plastic scraper to remove old residue without gouging the surface. For the bond, select a high-quality outdoor-rated adhesive designed for vinyl or fabric-to-metal bonding. Polyurethane-based formulations are common choices for their flexibility and moisture resistance. Avoid general-purpose glues and anything that dries rigidly or cracks with temperature shift, as those failures are exactly what you’re trying to prevent. Have a patch ready if the tear or lift is small but has a clean, bounded edge; the patch should extend beyond the damaged area by at least a half-inch in all directions and ideally match the texture and color of the original cover so the repair remains visually discreet. A plastic or rubber squeegee helps you press out air pockets and distribute adhesive evenly. Clamps, tape, or weighted objects are essential to hold the edge in place during cure, especially along the rail where sunlight and wind can work against a steady bond.
Surface preparation is more art than science, because the longevity of the repair hinges on how well you remove contaminants. Start by cleaning the entire edge and the corresponding bed surface with a vinyl-safe cleaner or a gentle soap solution. Rinse well and dry completely. Even a thin film of oil or wax will break the bond, so wipe down again with a clean, alcohol-free cloth. The goal is a surface that looks dull under light and feels slightly tacky when touched—this tack is what adhesive needs to grab onto. If you encounter old adhesive or residue along the seam, remove it with a plastic scraper rather than a metal blade to avoid scoring the cover or bed rail. After residue removal, wipe again and let the surfaces dry fully before proceeding.
When you apply the new adhesive, work in a well-ventilated area and keep the temperature in a moderate range. Cold or overly humid conditions can slow cure times and weaken the final bond. Apply a thin, consistent bead of adhesive to both surfaces: the underside of the peeling edge and the corresponding edge on the bed frame, or wherever the cover meets the rail. Don’t glob the adhesive, and don’t apply it past the seam line—overspill can create a lumpy seal that invites moisture in the next rain. Allow the adhesive to become tacky, usually 5 to 10 minutes, so it adheres quickly when you press the patch or edge into place. If you’re repairing a small edge lift, you can apply a matched patch over the damaged area, centering it precisely and pressing from the center outward to push out air. For larger detachments, you may bond the entire edge in one continuous motion, then secure it with a few clamps along the seam to keep the adhesive from sliding as it cures.
Alignment is the secret to a durable repair. The key is not to rush the position of the edge. Use your eyes to ensure the patch or edge sits flush against the bed rail with no gaps or ripples. A good trick is to work in small sections, pressing firmly and testing for air pockets with the edge of the squeegee or a clean cloth. Once aligned, apply consistent pressure from the center outward toward the ends, then place clamps, weights, or tape to maintain contact. The curing time matters almost as much as the bond itself. Do not drive the truck or subject the cover to wind or movement during cure. Heed the adhesive’s prescribed cure time—often 24 hours for maximum strength—and protect the area from direct weather during this period.
Even after a successful bond, think about longevity. Edge peeling repeatedly returns when UV exposure and heat cycle through seasons. To extend the life of the repair, consider applying a protective UV sealant or clear coat designed for exterior fabrics. Keep the area out of direct sun as much as possible during the cure window, and later, aim to schedule regular washes with a gentle cleanser that won’t degrade the adhesive or the patch. Regular inspection should become part of your routine: every few months, run a visual check along the seam and the edge. If you notice any new lift or changes in tension near the repair, address them promptly. Small adjustments early on can prevent a larger failure later, especially if the cover remains in service through seasonal transitions.
For larger-scale sagging or significant detachments, the repair logic shifts. The middle of the cover may sag when the underlying tension has weakened or when the zip or seal hardware along the back edge is compromised. In such cases, you may need to reinforce the structure by adding internal supports that work with your model’s design, such as lightweight rods that resist sag and help maintain tension across the fabric. If the damage is widespread or the fabric has stretched beyond simple recovery, replacement of the cover or a professional re-tensioning system installed by a specialist could be the wiser path. It’s not a failure of your technique to recognize when the problem exceeds a patch; it’s a prudent judgment about who should carry the burden of restoration, especially when the vehicle’s utility and weather protection are at stake.
The repair mindset for edge peeling applies whether you’re repairing a basic fabric tonneau or one with more elaborate edge hardware. You can also adapt the approach if your cover uses a different fastening method along the seam, such as a zipper or a seal along the rails. The core steps stay the same: clean, prepare, adhere, align, clamp, cure, and re-test. If you ever confront a scenario where more than half the cover shows signs of compromise, or if the underlying frame shows bending or cracking, seek professional help. A shop with experience in tonneau systems can examine tension points, verify that the seal is uniformly tight around the entire perimeter, and advise on whether a full replacement or a tensioning upgrade is required. The stability of the payload relies on the reliability of that edge seal.
Even as you repair, keep in mind the broader maintenance picture. Avoid extreme heat whenever possible, park in shade when you can, and use mild cleaners rather than harsh solvents. Periodic inspections reduce the likelihood of large, unexpected repairs. A bed liner or protective mat can also help by absorbing abrasion from cargo and reducing wear on the cover’s edge where it meets the bed rails. These small steps preserve not just the repair but the overall life of the cover, providing a stable, weatherproof seal that keeps the bed dry and the cargo secure—qualities that define a well-maintained investment.
If you want more practical maintenance ideas or guidance on related repairs, you can explore additional tips on the Master Truck Repair blog. For broader reference on repair and maintenance practices that extend beyond a single repair, consult a trusted external resource dedicated to tonneau cover care and installation. External guidance can offer complementary viewpoints and diagrams that enrich your understanding of how the various components come together and why certain steps matter in the long run. As you continue to learn and apply these techniques, you’ll find the process becomes more intuitive and the results more dependable. The goal is a repair that stands up to the next storm rather than a quick patch that dissolves under sun and spray. By treating edge peeling and partial detachment as a repairable seam rather than a fatal flaw, you preserve the cover’s purpose and protect the payload you rely on every day.
External resource: https://www.truxedo.com/support/repair-and-maintenance/
When the Cap Slumps: Mastering Large Tears and Sagging in Truck Bed Covers
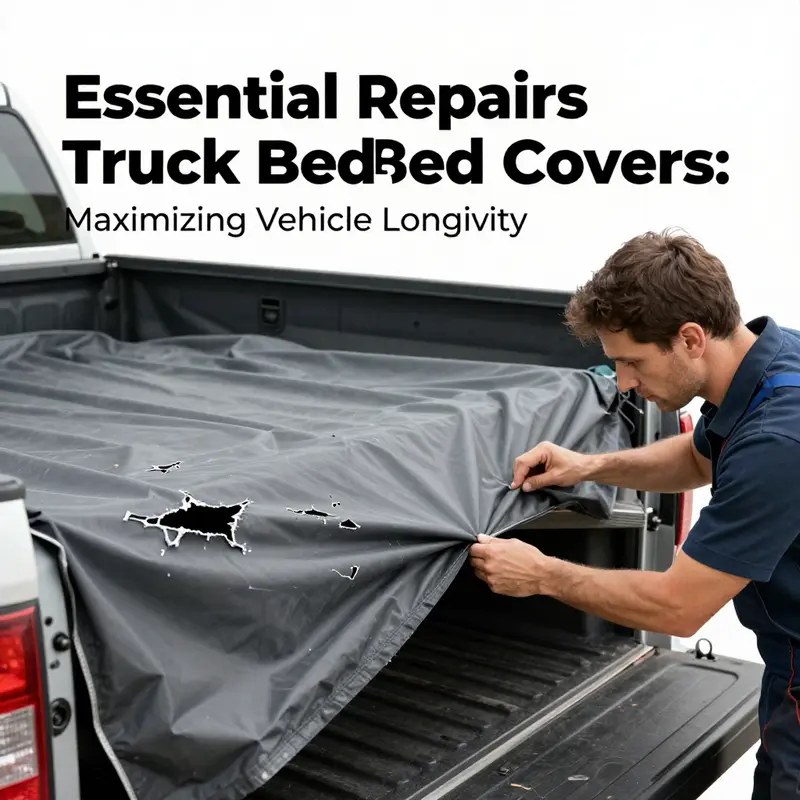
Tight cargo security and weather resistance hinge on the integrity of your truck bed cover, and nothing tests that more than a large tear or a sagging panel. In the world of tonneau covers, damage like this isn’t just a cosmetic blemish; it can expose cargo, invite water intrusion, and accelerate wear on both the cover and the truck bed itself. The path from diagnosis to a durable fix is not a rush job but a careful sequence that respects the material you’re working with and the way the cover is mounted. A practical mindset helps you decide whether you can patch and reinforce, or whether it’s wiser to replace the affected section or the entire cover. This approach blends an eye for fabric behavior with a methodical check of the underlying support system, so you restore strength without sacrificing flexibility or fit. When you’re facing large tears, start by locating the tear’s position and assessing whether the damage is concentrated in a high-stress region—near hinges, along seams, or at the edges where folding and rolling occur. If the tear sits in a location that endures the most movement, a patch might be a temporary fix, but it should be treated as a patch with a plan for reinforcement rather than a cure for widespread fatigue. If you’re managing ongoing maintenance, it’s helpful to keep a steady eye on the larger picture of upkeep. A practical touchpoint is budgeting for routine truck maintenance to cover eventualities like this; there is value in planning ahead for fabric wear, hardware fatigue, and occasional replacements. (Budgeting for Routine Truck Maintenance) This isn’t a sales pitch for an endless cycle of repairs. It is a reminder that proactive care distributes cost and time, so you’re not caught off guard when the next tough weather event or heavy load tests the cover’s limits. The moment you confirm a large tear has compromised the fabric, you must decide if patching will hold long enough to justify a longer, more deliberate fix or if replacement is the wiser long-term choice. If the tear is in a high-stress area or near a seam, the adhesive might not deliver the bond you need, and the edges can peel again under sun, heat, and repeated flexing. In such cases, patching can be a temporary measure only, followed by a full cover replacement for reliable protection. For readers who want to plan ahead, a quick reminder: a single, larger tear is not the only signal. Sagging is a telltale sign that the system supporting the cover has stretched or weakened. Sagging often can be traced to worn or broken internal support rods, loose mounting hardware, or a cover that has stretched and lost its tension over time. Open the cover carefully and inspect the internal framework. Look at the rods, brackets, and bolts that anchor the cover to the bed. Bent or cracked rods are a common source of sag, and loose bolts or misaligned hinges can let the entire panel droop. While patching addresses surface damage, sagging speaks to the structure beneath. The dual nature of the problem means you should address both the fabric integrity and the support system in a coordinated way. Begin with the tear assessment, then shift to the support system, and only then return to the fabric solution. If the tear is not near any hinge and the patch has a full inch of overlap beyond the damaged edge on all sides, you set yourself up for a more durable repair. The adhesive should be allowed to reach a tacky stage before the patch is placed, and even then you must apply even pressure from the center outward to push out air pockets and achieve a uniform bond. The process is simple in principle but requires patience: clean thoroughly, dry completely, apply the adhesive to both patch and damaged area, wait the recommended tack time, position the patch precisely, smooth out air, and weight it down for several hours. A heavy, flat object helps keep the patch in full contact during cure. In practice, the cure time is often the longest part of the job; many automotive-grade adhesives require a full 24 hours of quiet, undisturbed curing before weather exposure or daily use. The patch’s color match also matters for durability, because UV exposure can degrade mismatched patches more quickly. A color- and texture-matched patch improves not only aesthetics but long-term performance, as UV-stable adhesives and patches designed for outdoor use resist fading and cracking over time. When tearing is severe or multiple tears appear across the same panel, a patch may no longer be a reliable fix. In such cases, replacing the panel or the entire cover can restore both protection and appearance more cost-effectively than a patch-and-reinforce approach. Large tears close to or across seams are particularly challenging; the patch can fail where the fabric has already weakened, and seam integrity may be compromised. This is the moment to consider a complete replacement of the cover or to consult a professional who can evaluate whether a more robust reinforcement or a new model with better tension control would serve you longer. Sagging demands a parallel line of action. Start by verifying the support hardware: are the rods straight, unbroken, and properly seated in their brackets? Are the mounting points secure? If a rod is bent, it should be replaced with a compatible component that matches the original system. If brackets or bolts appear worn or loose, tightening them is a first line of defense, followed by replacing missing or damaged hardware. Some systems offer tension adjustment; if that option exists, consult the owner’s manual for the precise method to restore tautness without over-stressing the cover. In many cases, sagging emerges from a combination of minor problems—slightly loose hardware and a stretched fabric, or a few bent rods that accumulate enough slack to sag the middle. Address every loose fastener, then re-check the entire structure. If the cover remains lax after hardware is tightened and rods are replaced, you may need to replace the rods with a longer version or install a more robust support framework. A careful evaluation weighs cost, function, and longevity. Repairing large tears can be a meaningful stopgap, but if the cover is old, brittle, or has suffered repeated damage in the same area, replacing the cover is often the most reliable path to restore performance and aesthetics. It minimizes recurring patches, reduces the risk of a sudden failure on the highway, and typically returns the original protection level. For those who want to keep options open, it helps to document the process, photograph the damaged areas, and keep notes on what was tightened or replaced. This record is useful if a professional evaluation becomes necessary down the line or if you decide to pursue a longer-term investment in a new cover with improved materials and fit. As you work through the repair sequence, it’s essential to respect the manufacturer’s guidelines for your particular model. The fit, the overlap needed for patch adhesion, the recommended cure times, and the tolerances for tension can vary. When you’re unsure, err on the side of conservative repair and consider contacting a professional for a model-specific assessment. A well-executed repair plan keeps your truck’s bed intact and your cargo secure, while poorly executed fixes can lead to water intrusion, rust, or more extensive fabric failure down the road. Preventive maintenance remains a quiet but powerful ally. Regular cleaning with mild soap and water, avoiding harsh chemicals, and steering clear of high-pressure washing near seams help preserve fabric integrity. A bed liner or mat can cushion cargo and protect underlying fabric from abrasion that accelerates wear. Periodic inspections every few months—looking for signs of peeling, cracking, or loosening hardware—can catch small issues before they become bigger problems. If you’re unsure about the repair process or the damage seems to exceed half of the cover’s integrity, the safer course is professional evaluation. A shop with experience in tonneau covers can provide a precise assessment, fit, and warranty options, so you’re not weathering the next season with uncertain protection. For those who want to continue learning in parallel with hands-on work, a general maintenance guide for truck components can offer broader context on how to integrate cover care into your overall vehicle upkeep. In addition, model-specific repair resources provide step-by-step tutorials and parts lookups that align with your exact truck and cover configuration. External resources can supplement the hands-on work, and one reputable guide series offers detailed, model-focused repair protocols to complement the practical steps described here. If you want a broader reference framework, consider visiting a comprehensive repair guide hub and exploring the model-specific sections that correspond to your cover. For deeper, model-specific repair protocols and parts information, see the official repair guide at: https://www.truxedo.com/support/repair-and-maintenance/ . This external resource can offer video tutorials, downloadable PDFs, and parts lookup that align with your truck and cover configuration. To help with planning and ongoing upkeep, you may also look to a general maintenance resource that discusses routine truck maintenance and budgeting as part of a proactive maintenance mindset. The tone of this guidance remains practical and grounded in the best practices developed for both fabric and hard covers, with attention to sagging and large tears as the chief challenges that test the durability of your system. If you decide that a professional assessment is warranted, you’ll find that many auto body shops and specialized tonneau cover services offer replacement options and warranties—commonly in the 2- to 3-year range—providing a path to restored performance and peace of mind. In sum, large tears call for precise patching when the damage is moderate and location-friendly, or for full cover replacement when fatigue has set in near a seam or hinge. Sagging signals a more fundamental shift in the cover’s tension and support, demanding a careful check of rods, brackets, and anchors, followed by tightening, replacing, or adjusting as required. The strongest repairs blend surface restoration with a robust reinforcement strategy, so the cover remains weatherproof, secure, and capable of carrying cargo with the same confidence you expect from a newly installed unit. Internal link for readers planning ahead: Budgeting for Routine Truck Maintenance. External reference: https://www.truxedo.com/support/repair-and-maintenance/.
Restoring the Shield: Mastering Cracks and Breaks in Rigid Truck Bed Covers
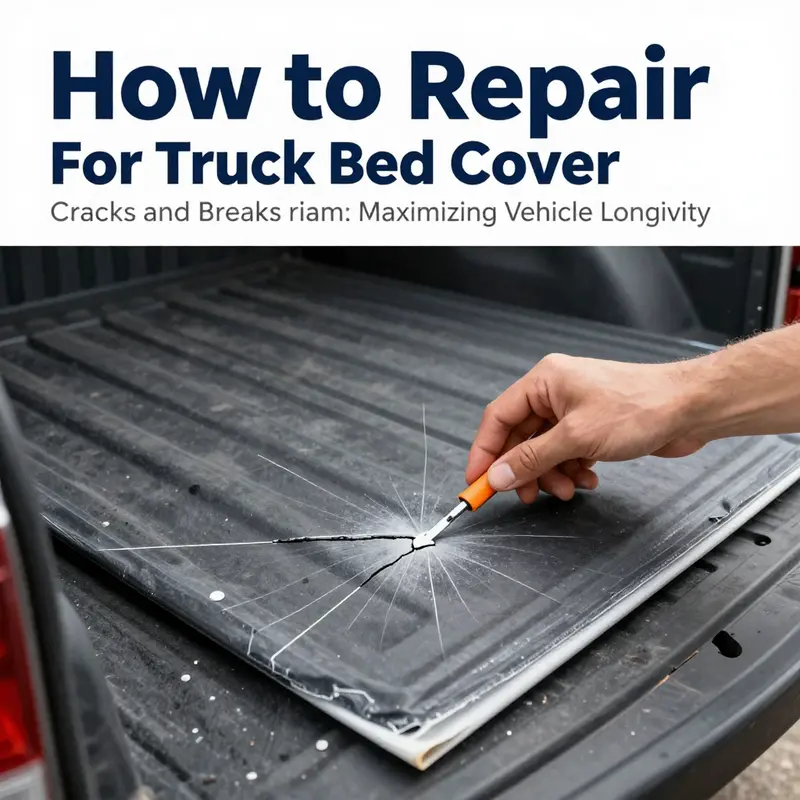
Rigid truck bed covers present a different set of repair challenges than their fabric counterparts. When a hard tonneau shows cracks or breaks, the path to restoration hinges on what the cover is made of—fiberglass, aluminum, or polyethylene—and how severe the damage is. Each material carries its own repair language, its own compatible resins, patches, and curing quirks. The aim is not simply to close a crack but to restore the cover’s structure, waterproof seal, and long-term performance under sun, rain, and shifting cargo. Start with a candid assessment: is the crack superficial, or does it compromise the panel’s integrity? Is there any looseness in the mounting system that needs addressing? Answering these questions early helps you choose a repair route that will endure beyond the next road trip and prevent a larger failure down the line. The most reliable repairs hinge on adherence to the material’s properties and the manufacturer’s guidance, but a clear understanding of general principles can save time and money before you reach a shop or decide to replace the cover altogether.
Fiberglass covers demand particular care because the resin matrix can be brittle after impact, and the surface may show spiderweb cracks that seem minor but threaten waterproofing. For minor cracks, the first move is to prepare the area. Cleanliness is nonnegotiable: remove dust, oils, and waxy residues with a clean cloth and a mild solvent or degreaser, then dry completely. Lightly sand the crack edges to create a rough micro-surface that helps the repair materials grip. The repair itself uses a two-part epoxy resin formulated for fiberglass work. Mix exactly as the manufacturer instructs, then apply a thin layer to both the damaged area and a patch that will cover it. A patch should roughly extend beyond the crack by at least half an inch in all directions and ideally match the original finish for better UV resilience. Place the patch over the crack, press from the center outward to expel air pockets, and squeegee smooth. Let the assembly cure, ideally under controlled temperature, for the period specified by the product. A second, light layer can be added to ensure a flush, even surface. The last mile is finishing: sand until smooth and then paint or color-match to blend with the rest of the cover. This step matters less for aesthetics than for protecting the repair from UV degradation, which can cause a re-crack if left unchecked. A practical note: avoid rushing curing times, especially if the weather is humid or cool. Compromised curing is a frequent culprit in weak bonds that fail under sun exposure or rain.
When a fiberglass crack grows into a larger break or when the layup shows signs of delamination, the repair becomes more involved. A repair strategy often includes reinforcing the damaged area with fiberglass cloth and resin to restore not only surface integrity but the panel’s stiffness. This is not a quick patch; it is a layered rebuild. After cleaning and roughening the entire affected region, lay a piece of fiberglass cloth over the crack with resin saturating it per the kit’s instructions. Smooth it carefully, avoiding air pockets, and allow it to cure fully before adding another layer if needed. The goal is a tapered, continuous repair that distributes stress across the repaired zone. After curing, a final sanding and color-matching paint job helps the repair resist UV rays and resist seepage on future flex cycles caused by cargo loading. In some cases, for very large breaks, professional involvement may be the wiser choice to ensure structural integrity and a seamless finish.
Aluminum covers pose a different set of considerations. A crack or split in an aluminum panel can often be addressed with welding when the break is significant and threatens the cover’s rigidity or seal. Welding aluminum requires proper equipment, technique, and heat control; without those, the area can warp or develop a new fault around the weld. If you’re faced with a notable crack, the safest route is to engage a qualified technician who has experience with aluminum alloys and the specific thickness of your panel. In some situations, a patch plate welded over the damaged area can restore strength, but this is a task best left to professionals who can ensure the patch sits flush and creates a continuous seam with the original contour. For small imperfections or surface-level concerns, there may be non-welding options, but any approach that fails to restore the panel’s cross-section or seal can lead to leaks and accelerated corrosion. The overarching principle with aluminum is to preserve structural continuity while avoiding heat- or stress-induced warping that can alter the cover’s fit against the bed rails.
Polyethylene or other plastic-based rigid covers add another layer of complexity. These materials are resilient but sensitive to heat and certain solvents. For cracks in polyethylene, a heat-based repair can be effective when applied carefully. That means warming the cracked area with a controlled heat source—such as a heat gun—just enough to soften the plastic and allow a compatible patch or filler to fuse as it cools. The patch itself must be designed for plastic repair and should be applied while the surface remains warm enough to bond, but not so hot that it deforms. Once the patch is pressed into place, allow it to cool and cure as directed by the patch manufacturer. It’s essential to use a patch material formulated specifically for polyethylene and to follow a precise curing window; otherwise, the bond will falter with temperature fluctuations or exposure to sunlight. If the crack is long or the structural integrity of the panel is compromised, replacement may deliver a longer-lasting seal and better protection for cargo.
Across all rigid materials, watchfulness for warping, loosening, and water intrusion is central to deciding whether a repair will endure. Even a well-executed crack repair can fail if the surrounding resin matrix or metal continues to flex under heavy loads or extreme temperatures, or if the seal around the edge where the bed meets the panel remains compromised. In those cases, a partial repair becomes a prelude to larger repairs or a full replacement. The repair should be viewed as part of an integrated system: you’re restoring not only the crack but the panel’s ability to resist water intrusion, to carry the intended load, and to maintain a clean, weatherproof seam with the truck bed. This is why it makes sense to consult the manufacturer’s repair instructions or to seek out a shop with experience in tonneau cover repairs. The official guides often include model-specific instructions, suggesting the right materials, surface preparation steps, cure times, and finish coats that preserve color and UV resistance over years of use.
At this point, you may be tempted to improvise with generic glues or quick fixes. It’s tempting because it saves time and money in the short term, but generic adhesives and flash repairs rarely stand up to the rigors of outdoor exposure and temperature cycling. Certain products simply aren’t compatible with fiberglass resins, aluminum alloys, or polyethylene plastics. The warning to avoid using solvent-based glues or super glues is consistent with professional advice because these agents can fail under UV light, heat, and cold cycles, causing the crack to reopen or the patch to detach. By sticking to material-specific resins and patches, you’re investing in a repair that preserves the original engineering intent of the cover and maintains the protective seal that keeps cargo secure and dry.
If you’re seeking a broader, maintenance-forward perspective that complements repairs, consider exploring in-house maintenance resources that cover routine checks, alignment, and mounting hardware care. A practical, integrated approach is to view cracking and breaking as symptoms of larger maintenance needs. A cautious, preventative mindset—inspecting for mounting tightness, edge adhesion, and the overall fit against the bed rails—helps catch creeping problems before a crack becomes a break. For more on this holistic maintenance approach, you can consult an in-house truck maintenance guide that offers a comprehensive routine for preserving your tonneau and other truck components over time.
When to call in professionals is a judgment call grounded in the damage’s scope and the cover’s value. If the crack exposes the interior layers to moisture, or if the panel is structurally compromised or water leaks persist after a repair, professional evaluation is prudent. Likewise, if the repair requires welding on aluminum or a full replacement due to large or multiple breaks, a shop with the right equipment and guarantees can save you money and downtime in the long run. Manufacturer-approved repair paths and warranties can also provide confidence that the repair won’t void the existing warranty or undermine the cover’s performance. In the end, the aim is a repair that preserves the cover’s protective role without inviting future failures.
For readers who want a broader maintenance framework beyond material-specific fixes, consider the value of ongoing, practical resources that address routine care and proactive maintenance. In addition to model-specific guidance, you may find it helpful to read broader maintenance guides and in-depth articles that discuss how to budget for repairs, how to approach routine inspections, and how to plan preventive measures that extend the life of a tonneau and keep cargo secure. If you wish to explore related topics on in-house maintenance and routine truck care, you can visit the In-House Truck Maintenance resource. It provides a cohesive view of preventive maintenance that complements the technical repairs discussed here. In-House Truck Maintenance
Ultimately, the repair path you choose should align with the cover’s material realities and the damage’s severity. The goal is not merely to close a crack but to restore the panel’s stiffness, seal, and fit, so that it functions as the protective shield it was designed to be. If the loss of integrity is extensive, or if the repair cannot guarantee a durable seal against the elements, replacing the cover can be a more reliable option. While replacements involve cost, they offer fresh strength, predictable performance, and a new warranty that mitigates future risk. As with any structural repair, the important outcomes are a restored seal, preserved cargo protection, and a return to dependable use on the next job site. For readers who want visual, step-by-step guidance tailored to tonneau repair, consult the external resource that consolidates best practices across materials and repair scenarios. It offers practical demonstrations and cautions that echo the principles discussed here and can serve as a valuable reference as you work through a repair project. https://www.autorepair.com/tonneau-cover-repair-guide
Tighten the Seal: A Seamless Path from Tiny Tears to Lasting Protection for Your Truck Bed Cover
Repairing a truck bed cover is less about grand, weaponized fixes and more about reading the material you’re working with and treating it with a patient, methodical hand. A tonneau cover—whether it’s fabric, vinyl, or a rigid folding or retractable style—speaks to how it was built to endure the weather, cargo, and the sun. The approach you take hinges on two core factors: the type of damage and the material of the cover. In practice, you’ll move through a spectrum from small, temporary mends to more substantial repairs that restore strength and maintain waterproofing. The goal is not only to stop a current leak or tear but to extend the cover’s working life so it continues to protect the load and keep aerodynamic efficiency stable. This chapter threads those ideas into a cohesive process you can follow without needing a shop full of specialized tools, yet with enough discipline to avoid repeating mistakes that lead to longer downtime or costlier fixes later on.
When fabric covers suffer small tears or worn areas, the repair strategy is intimate and local. You start with a clean field, because the bond you’re about to create will only be as strong as the surface it adheres to. A simple, effective routine begins with thorough cleaning using mild soap and water to remove dirt, oil, and any old residue that could hinder adhesion. After drying, you select a patch that matches both the material and the color as closely as possible. The patch is cut to cover the tear with a margin that extends beyond the edges to ensure a robust bond. The adhesive—engineered for automotive weather exposure, typically polyurethane or a similar flexible compound—gets applied thinly to both the patch backing and the torn area. The key is to wait until the adhesive becomes tacky, not wet, so the patch can seat itself without seeping or wrinkling.
As you press the patch into place, start at the center and work outward, expelling any trapped air with a roller or a clean cloth. Air pockets are the enemies of a durable repair; they can create weak points that peel later. Once the patch is smoothed, you weight the area with a heavy book or a flat, sturdy object for several hours. The purpose here is simple: gravity helps the bond set evenly and minimizes the risk of bubbles or misalignment. After the initial cure, you give the adhesive a full cure period—often at least 24 hours—before exposing the repaired area to weather. Patience matters because a rushed cure invites premature failure and another patch soon after.
Edge peeling and partial detachment often trace back to aging adhesive, sun exposure, and the regular flex and shear the edge experiences with each opening and closing cycle. The repair is still straightforward, but it requires a careful reattachment of the edge onto the bed rail or frame. Clean both surfaces thoroughly, then lay a bead of adhesive along the edge where the cover meets the bed. Press firmly into place and hold briefly, followed by securing methods such as clamps, tape, or weights to sustain contact while the adhesive cures. In most cases, you’ll avoid driving for a full day to protect the bond from movement and heat that could degrade the tackiness. The result is a more reliable seam, better weather sealing, and a longer window before the next edge issue presents itself.
For more ambitious wear, such as sagging in the middle or a cover that has seen significant use, you’ll be weighing two options: replace or reinforce. A sagging panel indicates compromised tensioning or worn internal supports that no longer hold the sail tight. If you’re committed to DIY, an option exists to reinforce the fabric or vinyl with internal supports—such as lightweight aluminum or fiberglass rods—that are compatible with your cover’s design. This isn’t universal, so you check your model’s compatibility before purchasing materials. If the damage is widespread, replacing the cover with a model that offers better tension control or more robust edge finishes could yield a longer life and a more predictable seal. The overarching idea is to restore a uniform tension across the surface so rain and wind do not find easy paths through weak points.
When the cover is rigid—think ABS plastic, fiberglass, or composite panels—the repair language shifts. Cracks require a precise approach. Clean and lightly sand the damaged area to create a rough surface that can receive adhesive. Epoxy resin is a common choice for plastic repairs; it binds well to most rigid materials and can be shaped smoothly with a putty knife. After applying the epoxy into the crack, you carefully smooth it level with the surrounding surface and allow it to cure fully, typically 24 hours or more. A subsequent light sanding and a color-matching paint layer can help disguise the repaired area and restore a seamless exterior. It’s important to avoid improvising with super glues or general-purpose adhesives, which often fail under the temperature swings and UV exposure that a truck bed cover endures. The goal with rigid covers is not merely to close a crack but to reestablish the panel’s structural integrity so the lid can return to its original alignment and seal.
Loose or misaligned panels on rigid covers call for a more mechanical touch. Fasteners—bolts, clips, hinges—are the lifelines that maintain proper geometry. A patient inspection reveals whether any fasteners are loose or missing and whether alignment tools, if provided by the manufacturer, are needed to recalibrate how the panels sit when closed. Warped panels present a trickier challenge; sometimes the fix is replacement of the panel or a careful readjustment with the manufacturer’s guidance. The tension system that keeps a folding or retractable cover tight is delicate: tighten, test, and re-check alignment repeatedly to avoid over-tightening that can crack or distort the panel’s profile. A well-tuned system returns you to a weather-tight seal with dependable operation, which is the heart of the repair’s value.
Alongside the technical steps, ongoing care shapes how long repairs last. Preventive maintenance—regular cleaning, careful operation, and timely address of small issues before they become big ones—transforms a repair into lasting protection. Dirt and moisture are friendly to wear, so a soft brush and mild detergent paired with gentle water rinses every few months do more good than aggressive scrubbing with harsh cleaners or high-pressure jets. Harsh chemicals can degrade the fabric or plastic, accelerating wear rather than slowing it. Once a clean surface is achieved, inspect seams, edges, and fasteners; note any cracking, peeling, or loosening that indicates the next preventive action is due. When not in use, consider storage practices that shield the cover from the worst of the elements. In winter, for example, some owners remove the cover and store it indoors to minimize UV exposure and temperature cycling that can brittle or loosen materials. Keeping cargo protected under a properly maintained cover reduces abrasion and keeps the seal tight over time.
Even with careful DIY, some scenarios clearly call for professional attention. If the damage reaches beyond minor wear—such as more than half of the cover affected, or when the underlying structure shows signs of compromise—professional servicing becomes prudent. A shop specializing in tonneau covers can assess hidden damage, replace faulty seals, and restore complex mechanical systems that govern retractable or folding designs. Warranty considerations also matter here; if the cover is under warranty, attempting patches on certain components could void it. A qualified technician can provide a warranty-backed repair or replacement path that ensures the investment remains protected and the manufacturer’s design intentions are respected. In such cases, the technician’s expertise reduces the risk of accelerating future problems and preserves the cover’s water resistance and security features that might be compromised by an improvised repair.
As you navigate these repairs, a quiet discipline underpins success. Take time to verify the compatibility of any patch or reinforcement with your specific model. The patch size, adhesive type, and cure time must align with the cover’s material—fabric, vinyl, ABS, fiberglass, or composite—and the local climate, which can alter cure times and adhesive performance. In the course of repair, you might find yourself revisiting a familiar refrain: attention to detail reduces headaches later. A smooth surface with no air pockets, evenly tightened edges, and a uniform tension across the panel translate into a seal that stands up to rain and road spray. The goal is not a single fix but a rhythm of inspection, care, and timely intervention that keeps the cover performing as it did on day one.
For readers who want to continue learning practical steps or see demonstrations, a practical resource that condenses these ideas into accessible guidance is available through an overarching maintenance hub. There, you’ll find step-by-step video tutorials, downloadable PDFs, and a parts lookup to help you match the right components to your exact model. This living guide supports ongoing maintenance and provides a pathway to a repair that respects the original design while accommodating the realities of daily use. It’s a reminder that repair and maintenance are not isolated acts but part of a broader, preventive mindset that protects both cargo and investment. To broaden your understanding beyond the immediate repair tasks, you can explore more hands-on tips and community-tested practices in the Master Truck Repair blog. Master Truck Repair blog.
If you want a deeper, model-specific reference that walks through materials, curing times, and techniques tailored to the type of cover you own, you’ll find credible, manufacturer-informed guidance on dedicated repair and maintenance platforms. Such resources emphasize the importance of selecting appropriate adhesives, compatible patches, and the right cure environment. They also underline the value of aligning your repair with the cover’s original performance characteristics to preserve both waterproofing and wind resistance. While the toolbox for repairs should stay simple, consulting a trusted, technical guide helps you avoid common pitfalls—like using a bond that fails under sun exposure or picking a patch that won’t flex with movement. The careful reader will recognize that the strongest repairs are the ones that respect the material’s limits and the conditions it will endure season after season.
Ultimately, the decision to repair versus replace hinges on a balanced assessment of cost, time, and risk. Minor tears and loose edges often reward a patient, well-executed patch and resecuring, returning the cover to service with minimal downtime. Moderate issues, such as sagging or multiple small tears, may justify reinforcement or selective replacement of critical sections, with a clear eye toward ongoing maintenance to prevent recurrence. Major damage, especially to structural components, argues for professional intervention, where a technician can offer a warranty-backed service that restores integrity and maintains the warranty status. In all cases, the core principle remains constant: treat each restoration as an opportunity to renew the seal, preserve cargo protection, and extend the life of the cover beyond its current wear. That approach is not merely about fixing what’s broken; it’s about preserving the material’s memory of the road—how it keeps the load dry and secure—through thoughtful, deliberate care that respects the design and the practical realities of daily use.
External resources can provide additional context and technical reassurance when you’re ready to dive deeper. For a detailed, step-by-step technical guide that complements these insights, you can consult a trusted repair resource with formal instructions and diagrams. This external reference supports the practical steps outlined here and helps you verify your method against established standards. https://www.truxedo.com/support/repair-and-maintenance/
Final thoughts
Understanding the various aspects of repairing truck bed covers will empower fleet managers and trucking company owners to maintain the functionality and aesthetic appeal of their vehicles. From addressing minor tears in fabric covers to tackling significant cracks in rigid designs, these repairs are essential for operational efficiency and cargo protection. Regular assessments and proactive maintenance can prevent small issues from escalating into costly repairs. Should the extent of damage exceed manageable levels, don’t hesitate to seek professional assistance. Investing in repairs contributes to the longevity of the truck and helps safeguard your investment.