Maintaining the integrity of a truck’s rear tailgate is crucial for fleet managers and trucking company owners, particularly in industries like construction, mining, and logistics. Tailgates endure significant wear and tear due to frequent loading and unloading, making them susceptible to damage ranging from minor dents to severe structural issues. This guide delves deeply into the methods of repairing truck rear tailgates based on varying levels of damage. Each chapter is designed to equip you with the knowledge necessary to address and resolve specific issues, ensuring optimal performance and safety in your operations.
Back to Flat: Mastering Minor Dents on the Truck’s Rear Tailgate Without Breaking the Paint
A dent on the rear tailgate of a work truck can feel like a small battle wound. It doesn’t threaten the whole vehicle, yet it sticks out every time you walk around to reach a toolbox or load a pallet. Minor dents and slight deformation are common after long days on rough lots, off-road stretches, or the accidental nudge from a loading dock gate. The good news is that most of these issues can be addressed with careful, patient work that respects the material of the panel and preserves the finish. The approach changes with material and age. A metal tailgate, especially if it is thicker gauge steel, behaves differently from a modern plastic tailgate skin, and both look deceptively simple but demand respect for the paint and underlying structure. When you start, you’re not just trying to pop a dent out. You’re balancing the shape, the integrity of the hinge area, the alignment of the latches, and the way light catches the surface after repair. The aim is a smooth surface that looks right from a distance and, more importantly, remains stable under the daily stresses of a loaded tailgate.
Understanding the material is the first, most practical step. Metal panels, even when they appear pristine, can develop microbuckling or paint stretching around the dent. Plastic tailgates, on the other hand, respond to heat and pressure differently; they can warp or soften if the heat is excessive or if the bond between the paint and the substrate has begun to fail. In both cases, the rule of thumb is to start light, progress slowly, and keep the surface clean. Before you even touch the dent, wash the area thoroughly to remove dust, grease, and any abrasive compounds that could trap grit between the repair tool and the panel. A clean surface reduces the chance of scratching and helps any adhesive or filler adhere properly if you end up needing it.
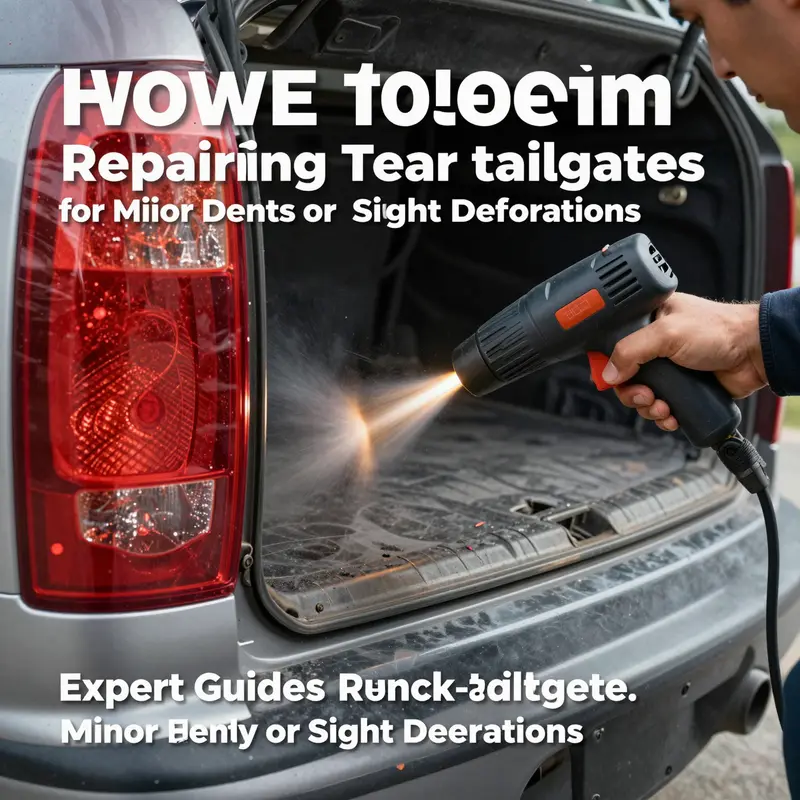
For minor dents on metal tailgates, the simplest and most accessible method begins with heat and a controlled push. The heat softens the metal slightly, allowing the material to relax its internal stresses and spring back toward a flat contour. A heat gun is ideal for this job because it provides measured, directional heat without introducing flame or scorching. If a heat gun isn’t available, hot water can work as a gentler alternative for plastic or lightly deformed metal areas. The goal is not to melt or scorch but to coax the metal to yield under your pressure. When heat has done its job, you’ll use your hands or a padded tool to push the dent from the inside or from the backside if you have access. The pressure should be gentle and progressive. It is better to work in small increments, pausing to observe how the surface responds to each tap or push. A light touch matters here; you’re trying to persuade the metal to reflow into its original plane without creating new lows or high spots around the edge of the dent.
A suction cup can be surprisingly effective for shallow, well-defined dents that are accessible. Modern suction cups are designed for quick grip and controlled pulling. The technique is straightforward but patient: apply a clean suction cup directly over the dent, ensure the adhesive is sealed to the metal surface, and then pull steadily. The force should be gentle at first and gradually increased as the dent begins to release. It’s important to monitor progress often. If the dent is stubborn, a series of small pulls can be more effective than a single hard tug, which risks pulling paint or creating further warping. Suction-based methods work best when the paint surface is intact and the dent lies on a flat plane where the suction cup can grab securely. If the surrounding paint is cracked, chipped, or flaking, this method can lift paint and complicate the repair. In that case, you’ll want to consider other strategies or slow, careful gel-assisted pulling with a specialized tool that spreads the force more evenly.
If you prefer a more mechanical approach, a puller kit or traction bridge system offers another pathway to trueing a dent, especially when the area is a bit stubborn or when you’re working on a tailgate with a deeper dent. The setup is simple in concept: you clean and dry the dent, affix a pad or anchor over the center of the dent, and then attach a puller that applies tension gradually as you tighten a nut on a threaded rod. The tension draws the metal back toward its original contour from the inside out, which helps to minimize the look of the dent and reduce pull marks on the surface. The advantage here is control and repeatability; the process can be paused, inspected, and adjusted as needed. You’ll want to work slowly, especially near edges or along surfaces where the metal may already be thinned by the impact. After the dent appears to have leveled, you’ll remove the puller and pad, then clean away any adhesive residue with a suitable remover and a scraper. It’s a small, artful sequence that rewards patience with an almost seamless correction.
While metal remains the most common scenario for minor dents, plastic tailgates deserve equal respect in terms of approach. Plastic deforms differently and can tolerate heat in a more flexible way, but it also presents its own hazards: overheating can melt the surface or distort the finish, and some plastics can develop a haze or softened edge that looks worse after work. For slightly warped plastic tailgates, a controlled application of heat—via warm water or a heat gun set to a low temperature—can restore pliability. The plastic must be warmed evenly to avoid creating hot spots that could cause warping. Once it is warm, you can gently push or pull the deformed area with your hands or a padded block to guide it back toward its original shape. Allow the piece to cool slowly in place to set the new contour. The cooling phase helps the material settle into the corrected position and reduces the risk of a rebound where the plastic tries to snap back to the deformation.
If the dent is more complex or the surrounding finish shows signs of damage, you may consider a slightly different path. Sometimes the easiest route is to stabilize the area with a light hand, then use a filler designed for automotive use to level the surface after the metal has been coaxed back into shape. This step is not a cosmetic shortcut; it’s a means to even out high and low spots that can catch light unevenly or cause a rough feel when running your hand over the tailgate. Spot putty or a lightweight filler, applied in thin coats and cured according to the product’s directions, can bridge minor irregularities. After hardening, you’ll sand the area flat with a progression of grits—from a coarser to a fine finish—so the patched zone becomes indistinguishable from the surrounding metal or plastic. Sanding is a critical phase because even slight grain lines or scratch marks can telegraph through subsequent paint layers. The emphasis should be on uniformity: a single, smooth plane that respects the tailgate’s original curvature and line work.
Color and finish bring the repair from functional to seamless. If you have a single-stage paint system, you’ll need to reprime the repaired area and then match the color and finish. The process typically starts with a clean, dust-free surface and a light, uniform coat of primer that builds a base for the color. Color matching can be challenging, especially if the tailgate faces external exposure that caused weathering or if the original paint has aged unevenly. In a controlled environment, a spray gun can lay down color with a consistent coat density and an even distribution, producing a finish that merges with the rest of the panel. A clear coat, or protective layer, is often added to lock in color and to provide a shield against future chips and scratches. In many shops, a paint booth is preferred for its controlled temperature and humidity, which supports even curing and reduces the likelihood of solvent entrapment or ghosting under the clear coat. If you’re repairing a commercial tailgate that sees frequent exposure to sun, salt, and road grime, consider a topcoat with a UV-resistant clear layer that can slow color fade and help prevent micro-scratches from becoming visible.
The finishing steps extend beyond color. A practical, finishing touch is a light protective film or a clear wrap on the most exposed portions of the tailgate. This film acts as a sacrificial shield against future dents and chips, preserving the corrected surface and helping the repair age more gracefully. When protecting the repaired tailgate, it’s important to consider the environment where the truck operates. If you work in a high-dust area or frequently encounter gravel roads, the extra protection pays dividends in the long run, reducing the likelihood of repeat touch-ups for minor dings and preventing small chips from turning into larger paint problems.
As you undertake a minor dent repair, keep a steady eye on the area’s alignment with the rest of the tailgate and with the door seal. A tailgate that sits high or low at the latch area can indicate that the internal structure or the hinge line was affected by the impact, even if the skin looks good. It’s worth verifying that the tailgate closes smoothly, that the latch aligns with the striker plate, and that there’s no interference with the weather seal. If you notice misalignment, there’s a good chance a more comprehensive repair is required, potentially including hinge adjustment or even frame inspection in extreme cases. In the context of a minor dent, most of the attention should remain on surface flattening and finish, but never overlook the possibility that a small cosmetic issue may mask a more significant structural concern.
If you’re moving through this process with a curious mind and a careful hand, you’ll likely find that simple, incremental work yields the best results. The first pass may eliminate most of the visible dent; the second pass can address subtle low spots left behind. It’s a bit of trial and error, but with each pass, you learn more about how your tailgate module responds to heat, pressure, and adhesives. A steady approach also reduces the chance of creating new damage during the repair. Throughout the process, keep the area well ventilated and wear appropriate safety gear when heating materials or handling solvents. If you’re unsure at any point, stepping back and re-evaluating the approach is wiser than forcing the panel back into shape. The ultimate objective is a tailgate that looks and feels like new, or at least like the original, with a paint finish that remains uniform and resilient under daily wear.
For readers who want further guidance while planning repairs, a trusted resource on DIY bodywork can provide practical steps and additional safety considerations. You can explore a broad range of tips and techniques in the Master Truck Repair blog, which offers accessible guidance tailored to truck owners who value reliability on the jobsite and on the road. See the Master Truck Repair blog for more hands-on strategies and community-tested tips that align with the approach described here. Master Truck Repair blog
The path from dent to a smooth surface is not about heroic fixes; it’s about disciplined, methodical work that respects the material and the finish. When you finish, take a moment to assess the repair under various lighting conditions. Some dents reveal their presence only under certain angles or when the paint catches the light. If you still notice a hint of irregularity, a light touch with a dab of filler and another round of sanding and painting may be warranted. The best repairs tend to be the ones you can live with every day—quiet, durable, and visually indistinguishable from the rest of the tailgate. And if a repair seems beyond your comfort zone, you’re not alone. Many commercial applications benefit from a professional body shop’s eye for precision and color matching. They can ensure the repair is structurally sound, the paint matches perfectly, and the tailgate remains fully functional under load.
The core message is clear: minor dents and slight deformation on a truck tailgate are usually approachable with patient, technique-driven methods. Start with careful assessment of material and extent, proceed with controlled heat and pressure for metal, or heat-assisted reshaping for plastic, and always finish with a plan for paint, protection, and long-term durability. If the damage is limited to surface irregularities and paint integrity is intact, you can often achieve a near-perfect restoration without the cost and downtime of a full panel replacement. Remember to prioritize safety—do not rush the repair, avoid over-heating, protect surrounding areas, and know when to step back and call in a pro. By combining a calm approach with the right tools and a clear plan, you can bring a dented tailgate back to a smooth, professional-looking finish that supports the truck’s work ethic as well as its appearance.
Back Gate Recovery: Realigning and Reinforcing a Moderately Warped Truck Tailgate
A moderate deformation or structural warp in a truck’s rear tailgate rarely looks catastrophic at first glance. A dented skin, a slightly bent edge, or a tailgate that no longer lines up perfectly with the bed sides can creep from inconvenience to a safety concern in a short drive. The tailgate is not merely a lockable access door; it is a critical part of the truck’s suspension and load path when closed. It helps seal the cargo area, supports weather protection, and contributes to the overall stiffness of the rear end. When bending has progressed past cosmetic damage, a careful, professional approach becomes essential. The goal is not just to restore appearance but to recover real-world strength and alignment so the tailgate can operate as designed, with predictable latch engagement, even load bearing, and proper sealing against the weather and road debris. With that aim, the repair path centers on assessment, structural correction, panel repair, reinforcement, finishing, and a final alignment check that confirms the tailgate sits flush, closes securely, and panels remaining on the truck body stay aligned under use.
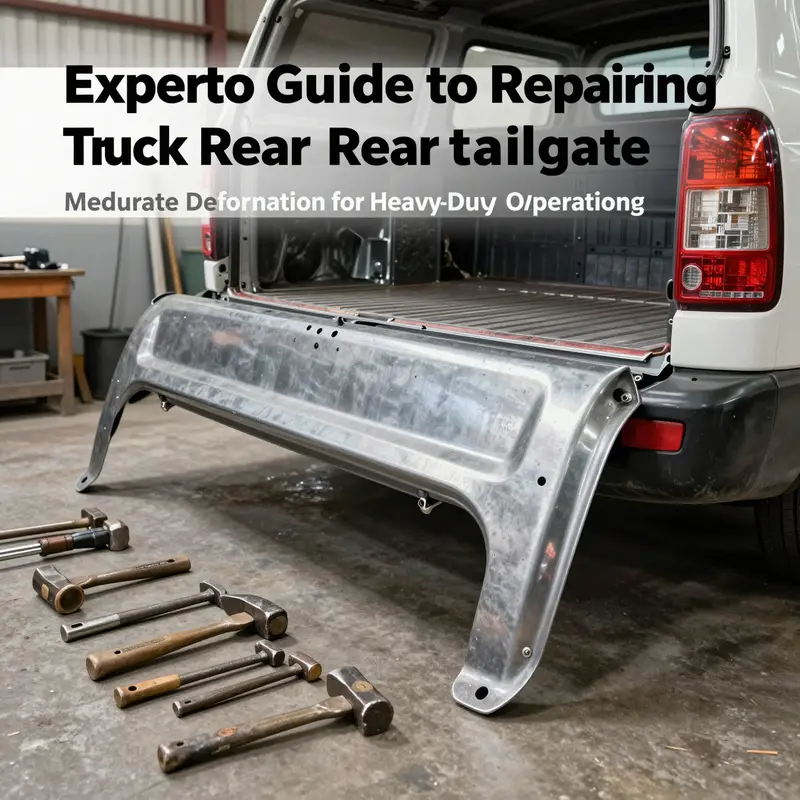
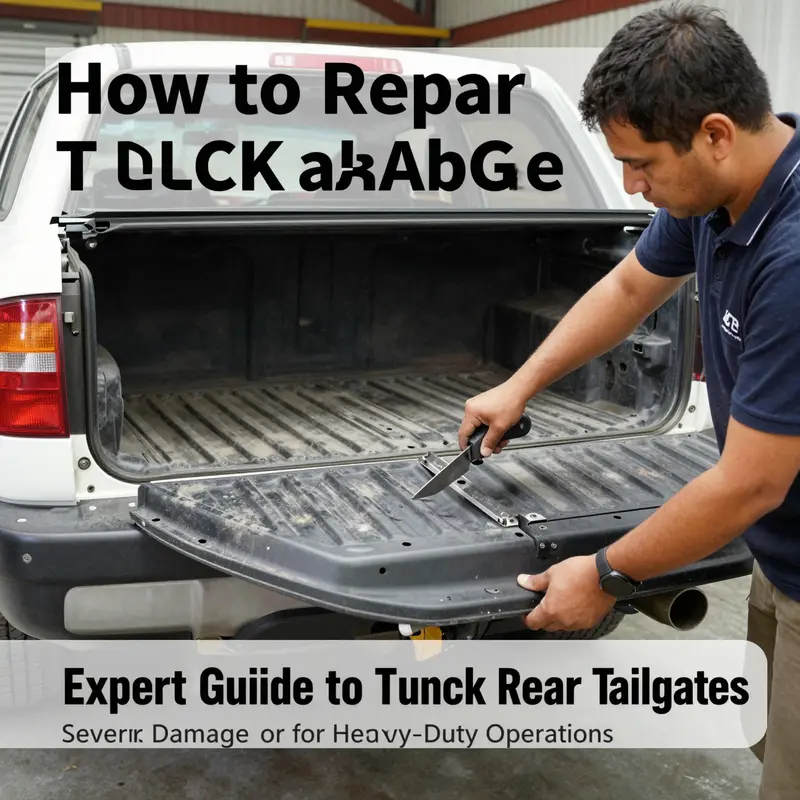
A technician begins with a thorough assessment, an artful blend of visual inspection and measurement. The tailgate is removed from the vehicle when access is blocked by the bent frame or when the hinges are misaligned enough to hinder evaluation. This removal is not a glamour shot of DIY artistry; it is a method that gives the craftsman clear lines of sight to the frame, the rails, and the connection points that anchor the tailgate to the truck. The removal also minimizes the risk of inflicting further damage to skin during manipulation. Once off, the tailgate—and, if necessary, its frame—undergoes a series of measurements: the skin’s surface contour, the frame’s straightness, and the alignment of hinge posts. The technician checks the vertical and horizontal planes, ensuring the centerline matches the vehicle’s body and that the gaps around the tailgate edge are consistent along the entire perimeter. If the deformation is significant, the tailgate may be placed in a controlled fixture to prevent random movement during correction. In some cases, the deformation extends to the frame that supports the tailgate, which makes removal not merely convenient but essential for true restoration.
For metal frames or structural elements that show a bend or warp, specialists turn to controlled correction equipment. Hydraulic presses and frame straightening machines become the sculptor’s tools in this stage. The process resembles a precise medicine for a cunning ailment: power is applied in measured increments, enough to coax the metal back toward its original geometry without creating new distortions. The operator uses a combination of straightening jigs, reference points, and sometimes digital measurement to track progress. The aim is to reestablish the tailgate’s nominal width, height, and face alignment with the truck body. It’s a careful dance between stern discipline and patient finesse; the machine does the heavy lifting, but the technician guides the outcome with eyes that know what true alignment feels like when the tailgate closes, latches, and seals neatly. A critical part of this step is confirming that the deformation is not so severe that the tailgate’s skin will simply crack under normal use after being bent back. If the metal has work-hardened or developed micro-cracks at the bend, those areas must be treated with additional care, perhaps by cooling and re-annealing or by reinforcing with a stitch weld and post-weld treatment to relieve residual stresses.
Once the frame is coaxed back toward its designed geometry, the next phase addresses the tailgate’s outer skin. In many cases, a warping of the skin occurs alongside frame distortion. Gentle pulling with specialized pullers anchored to stable points can coax the skin to reflow into its intended contour. Pulling is most effective when combined with hammer-and-dolly work on the facing edge and the crown of any bulged panels. The hammering must be controlled; the goal is to flatten the high spots without creating new dents or uneven surfaces. In moderate cases, this technique brings the panel back to a near-original silhouette. If the skin shows creases or stretched areas that cannot be smoothed without thinning the metal, replacement of those sections becomes a more reliable route. The decision to repair versus replace the panel is never a roll of the dice; it relies on evaluating the structural integrity of the sheet metal in the affected zone. If the metal has been stretched beyond its elastic limit, or if the warp has created a weakened skin with potential future cracks under flex or vibration, replacement becomes the better long-term choice.
In some shops, the repair path for the damaged panel may include the use of anchors and pulls to reposition the sheet metal while a dolly is used on the reverse side to support the work. This coordinated pull-and-dolly approach helps maintain a smooth curvature and preserves the tailgate’s edge geometry. For more complex shapes or if the panel has multiple distortion points, technicians may create temporary jigging to secure the panel as the corrections proceed. The result should be a uniform surface with a consistent line where the tailgate meets the bed and the frame. With the skin closer to its original contour, the repair moves into reinforcement and skin integrity checks.
If the deformation is accompanied by a compromised hinge region—where the tailgate meets the bed via the hinges—the repair crew pays careful attention to the hinge alignment. Hinges are not simply fasteners; they are the pivot that coordinates the door’s opening and closing with the latching system. A misaligned hinge can produce uneven gaps and cause the latch striker to bind. When the deformation has affected the hinge area, the technician may have to adjust or replace the hinges, or in more serious cases, the mounting posts themselves. This adjustment may require reaming or re-threading the hinge bolt holes and aligning the hinge side of the frame to ensure the tailgate sits squarely when closed. At times a set of low-torque checks is performed to ensure fasteners thread properly and that no cracks develop in the metal near the hinge bosses.
The repair process then extends to the reinforced structure around the tailgate. Even if the external skin looks nearly restored, the channel rails and side members can bear the brunt of the damage. In such instances, technicians reinforce the affected sections with carefully chosen brackets or plates welded to the interior. These reinforcements create a stronger backstop for the tailgate, minimizing future deflection when the tailgate is loaded with cargo or when it experiences vibration from rough roads. In more severe cases, the structural members may require replacement. When repair routes involve replacing side rails or internal supports, the work becomes more intricate and demands exacting measurements for the new parts to fit perfectly with the truck’s body. The replacement work often includes cutting, aligning, and welding new steel pieces then sealing and finishing. The joining must be clean, with the correct welds to maintain strength and avoid future fatigue cracking.
All along this journey, the finishing steps anchor the transformation from patched to polished. After the major corrections, the surface requires careful attention to texture and smoothness. Sanding begins with coarser grits to flatten the higher spots and smooth transitions, then progresses to progressively finer grits to achieve an even, factory-like surface. Spot putty may be used to fill tiny imperfections, followed by another round of sanding to ensure uniformity. The goal is a seamless canvas that will accept paint with even coverage. Primer is laid down to seal the repaired areas and create an ideal bonding surface for the topcoat. The color match is not merely about shade; it’s about achieving an even gloss and a finish that blends with the rest of the tailgate and the truck body under various lighting conditions. The painting environment matters as well. A spray booth or a controlled area with proper ventilation and dust control helps ensure the finish is durable and free of dust nibs that mar the surface. Clear coats are applied for protection against UV exposure and road hazards, and a protective wrap or film can be considered in regions with particularly harsh weather or frequent minor impacts.
Throughout the process, precision is the north star. The tailgate must align with the truck body along its entire length with consistent gaps that do not invite water intrusion or wind noise. The latching system must engage smoothly, and the sealing gasket should maintain a tight seal once closed. If any test reveals misalignment after finishing, a fine-tuning pass may be necessary. In some contexts, the tailgate’s performance is verified with a full function test: opening and closing under simulated loads, examining how the tailgate behaves under wind pressure at speed, and confirming the latch locks without ambiguity. These checks ensure the tailgate remains reliable over the long term rather than serving as a temporary fix. This is especially important for commercial fleets, where a tailgate is a working component that endures constant use and exposure to weather, debris, and heavy loads.
An important reality sits at the edge of the workbench: even a well-executed repair can be insufficient if the underlying materials have been compromised beyond the point of reliable service. When the deformation has caused cracks in the paint that extend into the primer or, more critically, when the structural frame has sustained metal fatigue or compromised welds, the safest and most economical long-term choice may be to replace the chosen components rather than to keep patching them. The decision to repair or replace hinges, panels, and frame members hinges on measurable criteria—how much of the original material remains, whether the remaining structure still meets safety criteria, and whether there is a reasonable expectation of enduring performance. It is a nuanced balance between restoring function and ensuring the vehicle’s safety and warranty obligations are maintained. The professional repair path emphasized here favors restoration when feasible but defaults to replacement when necessary to avoid latent defects that could threaten safety in the future. This view aligns with established automotive repair guidance which emphasizes safe, responsible restoration and the value of adhering to proper repair practices. For a more in-depth, official approach to repairing damaged truck body panels, see the external resource linked at the end of this chapter.
All of these steps can appear meticulous, and they are. Yet this is the realm where experience matters. The moderate deformation pathway demands a disciplined sequence of diagnostic checks, careful material handling, and precise execution. It is not a matter of pushing metal back into shape and calling it a day; it is a craft that requires understanding how metal behaves under heat, pressure, and the repeated cycle of bending and unbending. It requires the assistant of gauges, clamps, and reference fixtures that can hold the tailgate in the correct orientation while corrections are made. It calls for an understanding of how a tailgate interacts with the weather seal, the bed, and the truck’s body so that once the job is complete, the tailgate not only looks aligned but behaves as a coherent part of the vehicle once more. In this sense, moderate deformation is a boundary case that sits between cosmetic restoration and structural repair, a line that demands judgment, technique, and a clear plan for what constitutes a durable repair.
The human factor is not to be overlooked. The technician’s judgment guides the selection between correction techniques and component replacement. Experience matters when deciding how much force to apply with a hydraulic press, where to anchor a puller so that the surface remains pristine, and how to sequence the work to prevent heat damage in adjacent areas. The craft is less about a single heroic move and more about a methodical, incremental approach that builds toward a stable end state. Even with modern tools, this remains a skills-driven process where the outcome depends on the builder’s hands, eyes, and plan. The final result is more than a fixed door; it is a restored interface between the truck and its payload, a return to reliable operation, and a safeguard against future misalignment that could complicate maintenance or compromise safety.
In formal repair guidelines, this path is typically accompanied by explicit validation checks and documentation. The technician records measurements before and after, notes any parts replaced, and logs the test results from function checks. This documentation becomes invaluable for warranty purposes and for future maintenance records. It also aids fleet managers who must track the condition of vehicles across a fleet and plan for scheduled maintenance or replacements as needed. In all of this, the underlying philosophy remains consistent: restore alignment and structural integrity first, then address cosmetic appearance so the tailgate looks and functions like a part of the original design. The end result should feel trustworthy and perform predictably, from the smooth action of the hinges to the solid seal along the tailgate’s perimeter.
For readers seeking a broader framework on how professionals approach damaged truck body panels, external guidance provides additional perspectives and practical steps that echo the method described here. The emphasis on controlled correction, proper welding when needed, and careful finishing reflects consensus across professional resources. If you would like a deeper dive into official repair considerations and more technical detail, refer to the reputable guide from an automotive care authority, which outlines tips for damaged truck body panels and related repair strategies. This external resource reinforces the idea that moderate deformation requires planning, precise execution, and a strong emphasis on safety and structural integrity.
As a practical takeaway, remember that a tailgate with moderate deformation is not a doomed problem, but a solvable one when approached with the right sequence and tools. The path to restoration is a blend of mechanical correction, careful reinforcement, and high-quality finishing. And the best outcomes come from professional evaluation when the tailgate’s structural role is at stake or when the restoration must meet operating and safety standards for a heavy-use vehicle. If you’re preparing for a repair like this, you can lean on the community knowledge and documented approaches that stress measured force, alignment-first thinking, and the selective use of panel replacement when the skin’s integrity is in doubt. The result is a tailgate that closes properly, seals well, and remains dependable across miles of service.
For readers who want to explore this topic further with broader context, internal references and ongoing discussions from practical repair communities can be helpful. A valuable resource for continuing education and practical insights can be found in the MasterTruckRepairLLC blog, which covers a wide range of truck maintenance topics and repair experiences. You can visit the blog here: MasterTruckRepairLLC Blog.
In closing the technical arc of moderate deformation, the skilled path is clear: assess, correct with restraint, reinforce if needed, finish with care, and verify through function and fit. The tailgate’s return to reliable operation depends on this disciplined sequence, not on a single flashy fix. When done properly, a moderately warped tailgate can be transformed from a symptom of impact into a restored, dependable part of the truck’s rear end, ready to handle cargo and weather with renewed confidence.
External reference for further guidance on repair principles is available at an automotive care resource that compiles practical tips for damaged truck body panels. This resource provides additional, professional context on the repair steps described here and emphasizes safety and structural considerations crucial to any tailgate restoration: https://www.autocare.org/repair-tips-for-damaged-truck-body-panels
null
null
Final thoughts
In summary, addressing the repair of truck rear tailgates is essential for maintaining safety and functionality in commercial settings. Fleet managers and operators must assess the level of damage accurately and apply the appropriate repair methods. From simple dent removals to more complex structural repairs, having the right knowledge and approach ensures the longevity and reliability of your fleet. Prioritize regular maintenance and prompt repairs to prevent minor issues from escalating into significant safety hazards.

