Repairing a fiberglass truck hood is a critical skill for fleet managers and trucking company owners, directly impacting vehicle longevity and operational efficiency. Whether addressing minor chips or significant cracks, understanding both DIY techniques and professional repair options can save time and minimize costs. This article outlines practical approaches and the necessary tools to ensure a successful repair process. Chapters will cover DIY techniques, professional methods, essential materials, and a cost-effectiveness analysis to equip managers with the knowledge to make informed decisions.
Hands-On Fiberglass Hood Repair: Practical DIY Techniques for Truck Owners
Repair workflow and practical tips
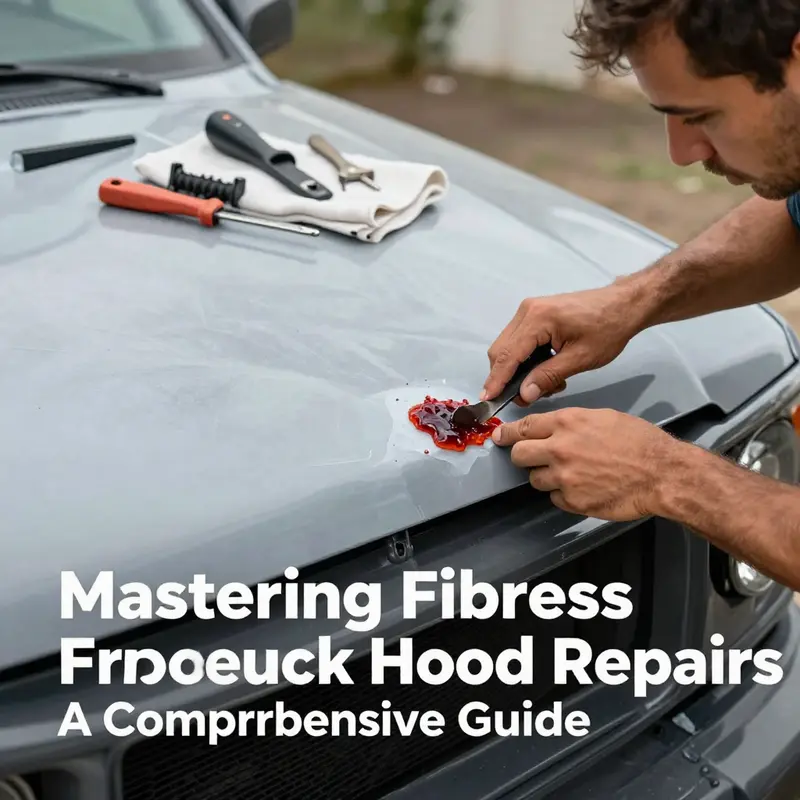
Repairing a fiberglass truck hood takes methodical work, not luck. This chapter walks through a single, integrated workflow that covers preparation, repair techniques for both minor and extensive damage, and finishing touches that deliver a durable, near-professional result. Read each step carefully and move deliberately. Keep the repaired area clean and controlled at every stage to prevent weak bonds and visible flaws later.
Start by assessing the damage visually and by touch. Run your hand gently over the dent, crack, or hole. Look for soft spots, delamination, and loose fragments that indicate the hood has separated into layers. Small surface chips and hairline cracks are repaired with filler and resin. Deep crushes, holes, or large delamination need layered fiberglass cloth and resin to restore strength. Make this judgment before you gather materials; the repair method follows the damage type.
Begin every repair with proper preparation. Remove any decals, trim, or hardware near the damaged area. Mask or remove paint around the site to reveal bare fiberglass. Next, clean the area thoroughly with a solvent such as acetone. This removes wax, grease, and road grime that block adhesion. After cleaning, use a sanding block to roughen the surface. Sand a generous area around the damage—several inches beyond the visible crack or chip—to create a consistent bonding surface. For hairline cracks, sand a V-groove along the crack to increase resin penetration and mechanical bonding. For larger voids, sand the interior edges to remove loose fibers and expose solid laminate.
Safety is part of preparation. Work in a well-ventilated space. Wear gloves, eye protection, and a respirator rated for organic vapors and particulates. Fiberglass dust is an irritant. Two-part resins emit fumes and can cause skin sensitivity. Keep a fire extinguisher on hand when mixing resins, as some hardeners are flammable.
For light surface damage, a fiberglass filler system or a two-part epoxy repair compound is often sufficient. Mix the filler or resin precisely according to the manufacturer’s instructions. Small errors in mix ratio reduce strength and increase cure time. Apply the compound into the crack or chip with a plastic spreader. Work the material firmly into the damaged area to displace trapped air. Overfill slightly to allow room for sanding to a flush finish. Let the filler cure completely; cure times depend on temperature and catalyst amount. After curing, block-sand the repair with progressively finer grits until it sits flush with the hood’s profile.
When the damage is structural, such as a hole, large crack, or crushed section, build the repair with fiberglass cloth and resin. Cut the cloth into nested patches. The smallest patch should go into the deepest part of the damage. The largest piece should overlap the sound laminate by at least two inches. Mix a batch of resin and saturate the cloth piece by piece. Apply resin to the surface first, lay the cloth, then wet the cloth with more resin to remove air pockets. Use a plastic spreader or squeegee to work out bubbles. Add layers until the repaired area rises slightly above the surrounding hood. This ensures you can sand it back to the proper contour after full cure.
For holes with loose or crushed backing, create a temporary support. A simple backing can be fashioned from rigid foam, cardboard covered in tape, or a lightweight wooden form. Fasten the backing from inside the hood if possible, leaving a smooth surface to lay the fiberglass on. When access from the back is limited, fill the void with a quick-setting foam or use a peel-away support that you remove once the outer laminate has cured. The goal is to keep the outer laminate in the correct shape while it cures and to restore the hood’s structural continuity.
Curing matters. Allow layered fiberglass repairs to cure long enough to reach full strength. Temperature and humidity affect cure. Accelerate cure with higher ambient temperature, but avoid direct sunlight on wet resin, which can cause uneven cure and a brittle surface. Do not rush the sanding stage; premature sanding can pull fibers and leave a weak, fuzzy surface.
After the composite has cured, shape it carefully. Start with coarse sanding to remove high spots. Move to a block sander for flatter areas and hand-sand contoured areas to retain the hood’s profile. Once the major shape is re-established, use a thin polyester or epoxy body filler to feather and smooth transitions. Apply filler in thin coats, build only as much as needed, and sand progressively finer. Keep strokes even and check the contour frequently by eye and touch. Minor imperfections will show under primer, so spend time here to avoid more work later.
Prime and paint for a seamless finish. Select an automotive primer compatible with your filler and paint system. Apply primer in light, even coats and allow proper flash time. Wet-sand the primer with fine-grit paper to remove orange peel and minor surface defects. Clean thoroughly after sanding to remove dust before applying color. Use color-matched automotive paint and a clear coat if needed. Apply multiple, thin coats rather than a single heavy coat to avoid runs and drips. Finish with a proper cure and polishing stage to blend the new paint into the surrounding panel.
Pay attention to bonding and edge detail. Many DIY repairs fail at the transition between old and new material. Feather the edges of old paint and old laminate so new resin and filler meet gradually. Avoid abrupt steps; they concentrate stress and crack again. If a crack travels under paint, open it slightly and bridge it with resin and cloth rather than simply filling the surface. Reinforcing the area under the paint with a small patch of cloth prevents the crack from returning.
Use tools and materials that match the scale of the job. For small chips and hairline cracks, syringes or small mixing sticks are adequate for applying resin. For larger areas, use a brush for resin application and a squeegee to remove trapped air. A quality respirator, disposable mixing pots, and plastic spreaders make the task cleaner and safer. Keep a small wet-vac or tack cloth on hand to control dust during sanding.
Expect common pitfalls and know how to avoid them. Under-mixing resin weakens the repair. Over-sanding into the laminate removes strength. Working in dusty, oily, or humid conditions compromises adhesion. Curing under direct sunlight can cause surface heat spots and uneven stiffness. Plan the repair sequence, organize materials, and pick a clean, shaded workspace with stable temperature.
Strength matters more than cosmetics. When in doubt, add another layer of cloth or a protein of resin under the outermost surface. A slightly thicker patch that is well-bonded will outperform a thin cosmetic fix. If the hood carries heavy loads, or if the repaired area is near a mounting point, reinforce behind the repaired laminate. A lightweight aluminum or composite plate bonded to the inner surface distributes stress and reduces the chance of the repair failing again.
Small details make a big difference in appearance. Match the final sanding pattern to the surrounding factory finish. When block-sanding, use a rubber-backed sanding block and change grits progressively. After primer, inspect under different lighting angles. Small pinholes or gloss differences are easier to fix before color coat than after. When painting, blend the color beyond the repair limits. Slight overspray and careful blending hide the repair seam and result in a more unified finish.
Finally, maintain the repaired hood. Allow paint and clear coat to fully cure before exposing the hood to heavy use. Avoid pressure washing at close range for the first week. Periodically inspect the repair for stress signs. Small cracks or shrinkage can be caught early and repaired before they worsen. Routine inspection and preventive care add years to your repair.
For more on routine truck maintenance and repair planning, see the Master Truck Repair blog for practical guidance and related DIY topics: Master Truck Repair blog.
For a step-by-step illustrated guide that complements the techniques described here, refer to this external tutorial: https://www.instructables.com/How-to-Repair-and-Paint-a-Fiberglass-Hood/.
Professional Methods for Restoring a Fiberglass Truck Hood: Structural Repair, Surface Refinement, and Paint Integration
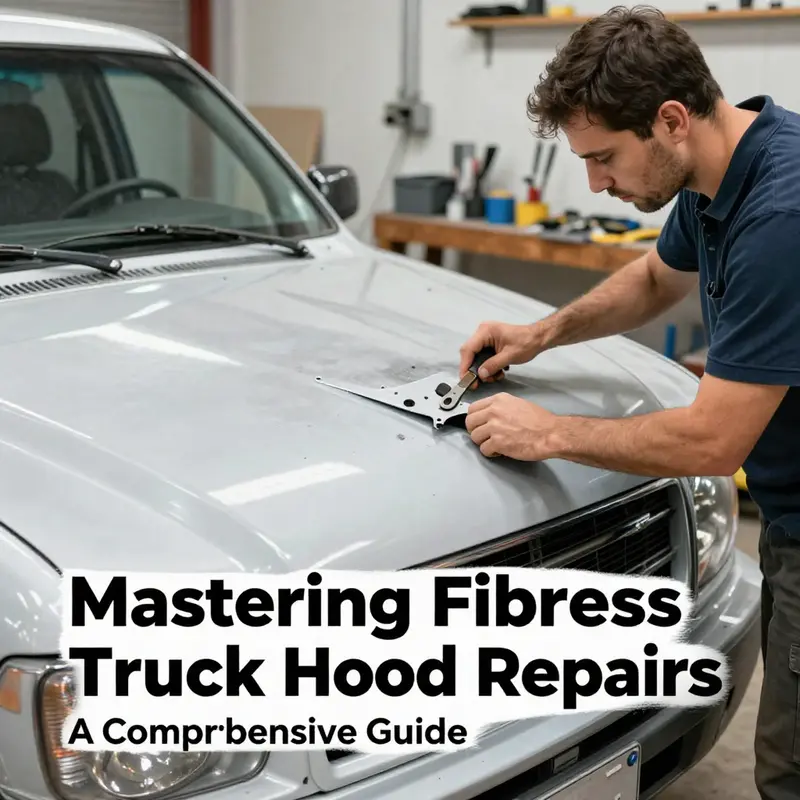
Repairing a fiberglass truck hood to professional standards requires more than quick patchwork. It demands a deliberate sequence of assessment, surface preparation, structural rebuilding, and a finish process that restores both strength and appearance. Professionals follow a workflow designed to control adhesion, eliminate visible defects, and produce a finish that matches the rest of the vehicle. The following narrative describes that workflow in detail, with practical steps, rationale for material choices, and methods that help ensure long-term durability.
A careful inspection starts every repair. Identify the type of damage: surface scratches, shallow chips, hairline cracks, deep splits, or punctures. Surface damage often needs cosmetic treatment only, while deeper damage can compromise the hood’s structural integrity. Professionals check both sides of the hood when possible. A crack visible on the outer skin may have delaminated layers or damage on the underside. Pinpointing the full extent of compromised laminate guides whether the repair will use filler alone or require reinforcing layers of fiberglass cloth or mat.
Surface preparation is the foundation of any durable repair. Professionals begin by removing any decals, adhesive residue, and loose paint around the damage. Solvents are used judiciously to clean oil, wax, and grease. After degreasing, the area is block sanded to remove loose gelcoat and to expose a uniform substrate. This creates a keyed surface for resin and filler to adhere to. Sanding typically starts with a coarse grit to remove failed material and transitions to finer grits for feathering the surrounding paint. Feathering the edge prevents a hard step that will telegraph through subsequent layers. On larger repairs, technicians will sand several inches beyond the visible damage so the new laminate can overlap onto solid, uncontaminated fiberglass.
When the issue is limited to light surface damage, a professional will often use a purpose-made filler or gelcoat designed for composite repairs. These materials are formulated to match the physical properties of fiberglass and to sand readily. The technician mixes the filler to the correct ratio, applies it in thin layers, and allows proper cure between coats. Each coat is sanded with progressively finer grits—typically moving from 120 up to 400 grit—to create a smooth finish that blends seamlessly into the surrounding surface. This multistep sanding prevents sinkage and keeps the repaired area level with the existing contour of the hood.
Deeper cracks or splits require rebuilding the laminate. Here, the technician prepares layers of woven fiberglass cloth or chopped strand mat and selects an appropriate resin system. Choice of resin matters: polyester resin is commonly used for classic fiberglass repairs because it is economical and chemically compatible with many existing hoods. Epoxy resin, while costlier, offers better adhesion and superior mechanical properties. Where the hood has undergone previous repairs with polyester, a professional will evaluate compatibility before using epoxy; they may abrade the surface to ensure bonding or choose polyester for better chemical match. When structural strength is a priority, epoxy often becomes the preferred option.
Reinforcement follows a planned layering method. The technician cuts cloth patches slightly larger than the damaged area and mixes just enough resin to wet out each piece. Patches are applied from smallest to largest, ensuring good consolidation with a roller or adhesive spreader to remove air bubbles. Each layer is allowed to cure sufficiently before the next goes on. On the underside of the hood, reinforcement can be heavier and extend farther from the damaged zone to distribute loads. On the cosmetic side, thinner layers maintain the hood’s contours. Professionals watch ambient temperature and humidity to ensure predictable cure times and avoid problems like excessive exotherm or incomplete cure.
Once the laminate has fully cured, the next step is fairing and shaping. Fairing compound, formulated for fiberglass, fills minor surface imperfections and builds back the exact profile of the hood. Technicians apply the compound in thin passes, sanding between coats. A block sander is used to maintain the hood’s curvature while eliminating high and low spots. The goal is to produce a surface that requires minimal primer build and that will match the factory panel lines and contours after painting. Professionals will inspect the hood under strong light and different viewing angles to catch any remaining imperfections.
Paint preparation begins with a final wipe down using a suitable solvent to remove dust and contaminants. Applying a primer surfacer levels small remaining defects and provides a uniform base for color application. Professionals often use primers formulated for composites, which adhere well to gelcoat and common fillers. After priming and sanding to attain a smooth texture, technicians perform a test spray to check adhesion and surface uniformity. This pre-paint check helps catch issues like fisheyes, solvent pop, or incomplete sanding before costly color coats are applied.
Color matching is a crucial step for a factory-like result. Professionals use electronic color-matching tools and physical swatches to select the correct base coat. They consider factors such as the vehicle’s age and sun exposure because original paint may have faded. When a perfect match is critical, technicians will blend transitional panels or feather the new paint into adjacent areas to eliminate visible seams. Application of base coats follows careful spray technique: multiple thin passes, appropriate flash times between coats, and control of environmental conditions to prevent runs or orange peel. Once the base is correct, several layers of clear coat are applied to protect the paint and add depth. The clear coat is chosen for UV resistance and flexibility to match the hood’s expected movement.
Curing and finishing complete the professional process. After paint and clear coat have cured, technicians wet sand with progressively finer grits to remove any minor surface texture. Final buffing and polishing bring out a glossy, OEM-like finish. Professionals use controlled polishing compounds and pads to avoid burning through the clear coat. A thorough inspection follows, checking adhesion, color match, and structural integrity. The hood is re-mounted and hardware is checked for fit and alignment.
Safety and environmental control are non-negotiable in professional shops. Proper ventilation and personal protective equipment are essential when working with resins, solvents, and paints. Respirators rated for organic vapors, chemical-resistant gloves, and eye protection reduce health risks. Shops also manage waste responsibly, following local regulations for disposal of solvents and resin-contaminated materials.
Several practical tips separate durable, professional repairs from temporary fixes. Always work on a clean substrate. Match resin chemistry to existing materials where possible. Apply reinforcement layers that extend beyond the visible damage. Allow full cure times between steps. Control temperature and humidity during lamination and paint work. Test-fit and re-check panel alignment after reinstallation. Maintain consistent sanding patterns to preserve contours. When in doubt about compatibility or structural integrity, consult a specialist.
A professional repair will usually cost more than a DIY patch, but it buys longevity and a finish that blends with the vehicle. For fleet managers and operators evaluating whether to send a hood out or perform in-house work, consider the complexity of the damage, available tools, and staff experience. Some organizations have found value in building internal capability for composite repairs; for an example of how shops incorporate such maintenance into their programs, see Turnage Sons in-house truck maintenance. Investing in training, proper ventilation, and quality materials reduces long-term costs and minimizes downtime.
Knowing when to involve a specialist matters. If the hood has extensive delamination, large structural failure, or damage to mounting points, a seasoned technician should handle the repair. Similarly, when color matching a high-value vehicle or restoring a show-quality finish, professional paint and blending techniques deliver superior results.
Finally, plan for future protection. After a professional repair and refinish, take steps to protect the hood from chips and UV damage. Regular washing, waxing, and using paint protection films or clear bras where appropriate can extend the repair’s life. Periodic inspections catch early signs of failure so minor issues can be corrected before they worsen.
For a practical, step-by-step visual reference that complements these professional methods, refer to this comprehensive guide: https://www.instructables.com/How-to-Repair-and-Paint-a-Fiberglass-Hood/
By following the professional workflow described here—meticulous inspection, disciplined surface preparation, correct resin and reinforcement selection, careful fairing, and expert paint integration—you restore both the structural integrity and the appearance of a fiberglass truck hood. The result is a repair that holds up under road stresses and maintains a factory-level finish.
Patchwork with Purpose: Mastering Materials and Tools to Repair a Fiberglass Truck Hood
A fiberglass truck hood is a unique blend of light weight and resilience, but when it suffers a chip or a crack it demands a careful approach. The repair of such a panel hinges on choosing the right materials and having the proper tools ready before the first dab of resin touches the surface. This chapter focuses on those essentials—the substances that actually bind the patch, the fabrics that reinforce it, and the instruments that shape a seamless finish. The goal is not just to stop a crack from growing, but to restore the hood to a state where paint and primer can sit atop a homogenous, grainless surface. The process begins with honest assessment, because the extent of damage drives the material choices and the build sequence. Small cracks that do not run through the entire thickness can be treated with a relatively simple patch, while larger areas demand a layered approach that blends structural reinforcement with surface fill. In any case, success rests on a clean start, a well measured hand, and an understanding of how fiberglass behaves under stress and heat. The materials and tools described here chart a path from rough damage to a finish that stands up to road grit and sun, while also offering a practical route for a do it yourself repair that preserves the look and function of the hood.
Essential Materials for Fiberglass Hood Repair
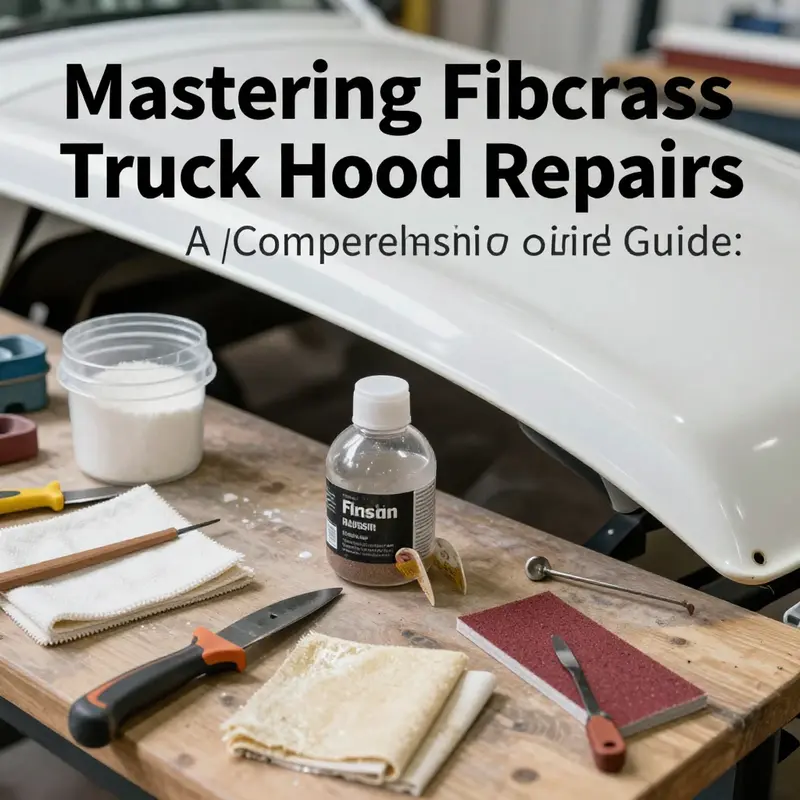
Fiberglass is a composite, and its repair follows the logic of that construction. The key bonding agent is a resin system that cures into a hard, durable skin, but the resin alone cannot carry the load. It must be paired with a reinforcing material, most commonly a cloth or mat that matches the hood’s original weave. The resin type is a pivotal choice. Epoxy resin brings superior strength and stiffness, and it cures with a tougher, more heat resistant network. It is, however, slower to cure and more expensive, which makes it a favored option for critical repairs or vehicles that endure demanding use. Polyester resin is the workhorse for many field repairs. It is less costly, sets up quickly, and is easier to sand and feather into surrounding material. For a sturdy, long lasting repair on a fiberglass hood that may experience temperature swings and impacts, many technicians blend practical resin selection with local conditions, sometimes starting with polyester for the initial patch and finishing with a thinner epoxy top layer to improve durability.
The reinforcing fabric—fiberglass cloth or mat—serves as the skeleton of the repair. It is laid into the resin so that each layer interlocks with the last, creating a patch that mimics the hood’s original structural behavior. The cloth is cut to size, with extra material overlapped beyond the damaged area to guarantee good coverage after shaping. The hardener or activator is the catalyst that starts the resin’s cure. The correct mixing ratio is essential; even slight deviation can lead to under cure, soft spots, or a brittle patch. The filler is used to approximate the original contour before sanding. A microfiller offers a fine texture that sands smoothly, while a gel coat filler provides a tinted or color matched surface for the final finish. A gel coat is often applied as the final coat to seal the repair and provide a color and texture that can be matched to the hood’s surrounding area.
Sanding supplies are the steady, patient workers of the process. Coarser grits help remove damaged material quickly, while progressively finer grits prepare the surface for paint or gel coat. The cleaning stage relies on solvents that cut through wax, grease, and other contaminants that would otherwise sabotage adhesion. Acetone is the go to solvent for this task, because it evaporates quickly and leaves little residue if used judiciously. Protecting the skin, eyes, and lungs during cleaning and resin work is not optional—safety gear is part of the job, not an afterthought. Goggles, gloves, and a respirator or proper ventilation keep the work environment safe as fumes rise from resin and hardener.
The tools that carry the work from chaos to control are the practical bridge between material science and a smooth finish. Mixing cups and stir sticks ensure resin and hardener are combined accurately, a detail that pays off in a predictable cure. Brushes and rollers apply resin and filler across the surface; a small brush handles tight corners, while a roller can cover broader swaths efficiently. A sanding block or an orbital sander accelerates the roughing and finishing stages without tearing the surface. A utility knife or razor blades trim cloth to size and snip excess repair material. A heat gun or hair dryer can gently accelerate curing in cooler environments or soften the resin for shaping. Measuring tapes and straight edges keep the patch aligned with the hood’s contours, reducing the risk of distortion when the surface is re formed. Finally, for a professional feel at the end, polishing compounds and a buffer are used to bring the repaired area to a gloss that blends with the surrounding paint.
The actual patching sequence follows a simple, repeatable pattern. Start with a thorough wipe down using acetone to remove wax and oils that could stand in the way of adhesion. Then lightly scuff the damaged edges with a fine abrasive so the resin has a rough surface to grip. Mix the resin and hardener according to the manufacturer’s instructions, which include a precise ratio and a specified temperature window for curing. Apply a thin layer of resin over the damaged area and press a piece of fiberglass cloth into the resin. Add more resin to saturate the cloth and overlap the patch onto the surrounding undamaged surface. If the damage is deeper or wider, lay a second or third layer of cloth, each time letting the resin saturate the cloth and cure to a tacky firmness before adding the next layer. Allow the patch to cure fully, which may require a longer time in cooler environments; patience here prevents pinholes and air pockets from forming in the finish.
Once the initial patch has cured, a layer of filler is used to flatten the patch and begin to restore the hood’s original curvature. Microfillers are good when the patch is small and the surrounding area is relatively level, while a gel coat filler helps sculpt a smoother transition for larger repairs. Sanding starts with a coarser grit to remove high spots and shape the patch to the adjacent surface, then moves to progressively finer grits for a feathered edge that will not be obvious after painting. As the surface becomes more uniform, it is time to consider color and texture. A gel coat or color matched filler lays down a homogeneous surface that can be finished with a polish to mimic the hood’s existing sheen. This can be done in stages, with additional passes of resin and filler as needed to maintain a uniform contour across the entire repaired area.
A key point in this process is the accuracy of the alignment and the consistency of the repair thickness. Misalignment can create pulling forces that distort the hood once the paint is applied, while an uneven thickness can show through as a dull patch after finishing. The practical rule is to work from the inside out, building the patch so that it mirrors the hood’s original surface, then feathering the edge until it disappears under paint. The final cosmetic step involves a thorough polish using the right sequence of compounds and a buffer. The goal is not to create a shiny patch but to blend the repair so the light catches the surface evenly, making the patch nearly invisible to the eye. The process requires patience and a careful touch; rushed work is the surest path to a patch that cracks again or fails to accept the new paint properly.
A note on timing and environment is essential. Temperature and humidity influence cure times, especially with epoxy. When working in a cold or damp setting, curing can be slower and the resin may behave differently, leading to a patch that sits high or cures with a tacky feel. In such cases, giving extra time to cure and occasionally warming the surface with a low heat source can help the resin reach its intended hardness. Ventilation remains crucial because solvents and resin early stages release fumes that can irritate eyes and lungs. Protective gear should stay on during surface prep and cure stages, then be removed in a clean, ventilated area after curing to avoid any residual odors until the finish is fully stable.
Practical integration with broader truck repair knowledge is the aim here. The fiberglass hood presents a different challenge than metal surfaces. It can flex, it can flex under load and heat, and it can show paint bond issues if the surface is not perfectly prepared. The careful choice of materials helps address these differences. If a reader wants a broader sense of how simple repairs can fit into a larger DIY restoration or maintenance plan, there is value in exploring related topics such as windshields or other lightweight panel repairs. For further reading beyond this chapter, consider the general pool of truck repair resources available in the blog hub, which offers guidance on related topics and hands on tips for durable DIY work. As you widen your repair repertoire, you may also find it useful to read the DIY windshield repair guide for truck owners, which shares practical problem solving and material handling similar to hood repairs. For more on that, see the DIY windshield repair guide for truck owners.
In the spirit of careful workmanship, the final step is to step back and assess the repaired area against the surrounding hood. A well executed repair should sit flush with the adjacent surface, maintain a consistent line with the hood curvature, and accept glaze, primer, and paint without showing the repair line. If the patch still reveals edges or lacks uniformity after initial polishing, it may be necessary to go back to the sanding stage and re feather the transition. The goal is a finish that looks like one continuous shell rather than a patch that is visible under direct light. The right combination of materials and tools makes that outcome achievable for a dedicated DIYer, and with practice the process becomes a reliable routine rather than a daunting one.
Internal resources and relevance
For readers who want to broaden their DIY approach to truck repairs, there is value in connecting with related content that maintains the same practical focus and hands on mindset. A linked resource that complements this chapter is a general blog hub offering how to guides and repair tips for truck owners. This central resource can help you locate additional tutorials, checklists, and project plans that align with the goals of repairing and maintaining fiberglass components as part of a broader maintenance strategy. The hub provides a straightforward path to practical knowledge and reinforces the idea that careful preparation, precise technique, and patient curing are the core of any successful repair. If you are exploring multiple repair scenarios, you can also consult the windshield repair guide for truck owners, which parallels the approach of measuring, cleaning, and patching in a different context but with the same emphasis on surface preparation and resin handling. This cross reference can help you build a cohesive DIY skill set that transfers across components and panels.
External reference and closing view
For a broader professional overview of the process and techniques used in repairing fiberglass truck hoods, a detailed external resource offers a thorough step by step that mirrors the approach described here. It presents the same sequence of surface preparation, patch application, layering, curing, sanding, and finishing, and it reinforces the importance of correct resin choice, reinforcement, and finishing. You can consult that resource to compare methods, note any nuances in cure times, and see how a professional workflow addresses the same repair challenges discussed in this chapter. External reference: https://www.motortrend.com/cars/how-to-repair-a-fiberglass-truck-hood/
Repair or Replace: Navigating the Cost-Value Equation for Fiberglass Truck Hoods
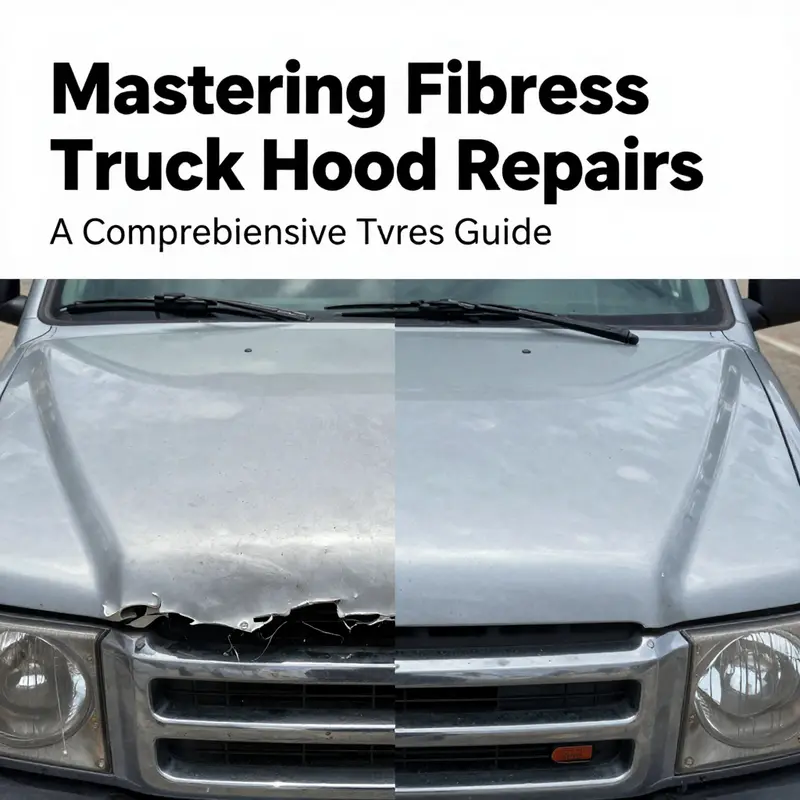
When a fiberglass truck hood shows the first signs of trouble, the decision to repair or replace often hinges on more than a single scratch or crack. It becomes a practical exercise in balancing cost, time, fit, and long-term performance. The glossy surface that once defied the elements now bears the marks of road debris, temperature swings, and the occasional off-road encounter. In the real world, minor damage—small cracks, chips, or surface scratches—tends to respond best to repair. The math is straightforward: repair costs tend to be lower than replacement, and a skilled hand can restore the hood’s strength and appearance without sending the wallet into a tailspin. Yet the equation shifts quickly as damage becomes more extensive. Large structural cracks, deep dents, or warping can loom as warning signs that a repair may not hold or that color and contour should be considered anew. In those moments, the value of a replacement hood—while higher upfront—might offer greater reliability, a better fit, and the peace of mind of a fresh start. The overall cost discussion is not abstract. It is anchored in the numbers—labor, materials, and the often-overlooked cost of downtime and paint work—and in the practical realities of the work required to return the hood to a reliable, road-ready state. For a handy reference on the broader budgeting side of truck maintenance, many readers find it useful to explore practical guidance at the Master Truck Repair blog, which compiles insights from shop floors and road tests into actionable plans for owners who want to keep trucks rolling without breaking the bank. Master Truck Repair blog. Understanding the cost dynamics requires a clear-eyed look at what a repair entails and what a replacement delivers. Repairing a fiberglass hood begins with a surgical assessment of the damage. Minor cracks, chips, or surface blemishes are the bread and butter of DIY-worthy work, especially when the rest of the panel is sound and the paint is in decent shape. A typical repair for these light defects centers on three pillars: proper cleanup, sound adhesion preparation, and a staged buildup of reinforcement that resumes the hood’s structural integrity. Cleanup is more than cleaning off dirt. It means stripping away oils, wax, and any residual road grime that can inhibit adhesion. Acetone is a common choice because it evaporates quickly and leaves a clean, residue-free surface. After the area dries, the edges of a crack are lightly sanded to create micro-roughness. This roughened edge isn’t cosmetic; it’s an essential step that gives resin and fiberglass something to bite into. The patch itself often begins with a two-part epoxy resin, mixed per manufacturer instructions to achieve the right cure characteristics for a structural repair. This resin is applied into the crack with a plastic spreader, filling the void and starting the repair’s backbone. But epoxy alone isn’t the end. Fiberglass cloth is laid over the resin to provide reinforcement, often in multiple thin layers. Each layer is wetted with resin and smoothed out to remove air pockets. The goal is to create a seamless bond that carries the load rather than a fragile surface patch. The process is iterative: you lay a layer, cure, assess, add another if needed, and cure again. When the final layers have cured, the surface is shaped and feathered to blend with the surrounding hood. The epoxy and fiberglass work together to restore stiffness and resist cracking under heat and impact, but the job doesn’t end there. A thin filler is used to even out any irregularities and to smooth the transition between repaired areas and the original surface. After filling, light sanding begins with progressively finer grits to create a smooth, paint-friendly surface. Priming follows, with an eye toward matching the hood’s original color and texture. The painting step introduces its own set of considerations. If color matching is imperfect, the risk of a patchy finish becomes real, especially under sunlight and changing temperatures. In such cases, professionals often recommend repainting the entire hood to ensure uniform gloss, depth, and shade. The paint is followed by a clear coat or topcoat to seal the surface and provide UV protection, which is especially important for fiberglass exposed to harsh sun and road salts. With repairs completed, the hood is reinstalled and the alignment checked. Hood fitment isn’t a trivial matter; a poor alignment can lead to gaps, wind noise, and wear on latch hardware. When done properly, a repair can deliver a finish that looks and feels like the original, while preserving the structural integrity that underpins long-term durability. The financial calculation, though, remains central. For minor damage, repairing typically costs less than replacing because the material costs—resin, hardener, filler, and a few layers of fiberglass cloth—are modest, and labor is concentrated in precision work rather than wholesale removal and reinstallation. A rough budget for minor repairs might span roughly 150 to 400 dollars, depending on the local labor market, the extent of the damage, and the time required to achieve a seamless finish. This figure often proves more economical than replacement, which can run from 300 to 800 dollars for a factory or aftermarket fiberglass hood, with installation costs adding another 100 to 200 dollars. The numbers aren’t just about the hood itself. Warranties, paint matching, and future maintenance all factor into the total cost of ownership. A new hood can come with a warranty that covers manufacturing defects or premature failure, which can provide long-term financial reassurance. However, replacement may entail better fitment and a smoother finish across the entire panel, reducing ongoing touch-ups and the potential for mismatched paint when the rest of the truck ages. Even when a repair remains a viable option, some scenarios push the decision toward replacement. If the damage is extensive enough to require multiple layers of reinforcement, reshaping, or significant reshaping to restore aerodynamics and ease of closing, the repair cost can exceed the price of a new hood. In those cases, the labor intensity grows, and the restoration may stretch beyond the scope of a single weekend project. Additional factors come into play beyond raw materials and labor. Paint color matching is a practical challenge that can introduce extra costs and time, especially on a vehicle with a custom or rare color previously applied. A hood that needs to be repainted to match the rest of the vehicle as a whole might necessitate repainting adjacent panels to preserve visual harmony, further increasing the bill. Fitment is another practical consideration. Replacement hoods may come with improved fit regardless of their origin, whether OEM or aftermarket. A well-fit hood reduces gaps, wind noise, and water intrusion, and it can simplify future maintenance tasks. On the other hand, a repair that keeps the original hood in service helps preserve the truck’s historical or aesthetic continuity and can be a smart choice for owners who value preserving stock components. A critical, often understated factor is the expertise of the repair technician. A skilled fiberglass technician can deliver a repair that rivals the original strength and appearance, but the same is not guaranteed if the work is rushed or poorly planned. That is why many owners prefer professional shops that specialize in fiberglass work for the more challenging repairs. They bring a measured approach to evaluating the damage, selecting the right reinforcement strategy, and executing a finish that stands up to years of exposure. Given these dynamics, a practical approach is to start with a careful damage assessment and a realistic budget. If the damage is confined to a small area, involves no structural compromise, and the color is close enough to match, a repair is usually the best first option. If, however, the damage spans large portions of the hood, or if the curvature and aerodynamics of the hood are affected, replacement often provides a longer-lasting, more predictable result and may reduce the risk of recurrent issues. A thorough estimate from a professional shop—outlining material costs, labor hours, required layers of reinforcement, and the anticipated paint work—can illuminate the path clearly. In the end, the decision should be guided by the severity of the damage, the availability of a matching paint color, and the repair technician’s expertise. For optimal outcomes, many owners opt for a professional auto body shop that specializes in fiberglass work. A seasoned technician not only gives you an accurate estimate but also helps you weigh the long-term value of repair versus replacement in light of your vehicle’s usage, mileage, and expected life. When I consider the typical life of a fiberglass hood in a fleet or a daily-driver scenario, the calculus becomes a matter of durability and return on investment. If the hood is a high-use component on a work truck that must endure constant exposure to heat, rain, and road debris, a durable repair can be a compelling choice. If the hood has already absorbed multiple impacts and has developed deep structural flaws, replacement may deliver safer operation and a consistent finish that reduces downtime. The decision isn’t only financial; it also reflects the owner’s priorities—preservation of original parts, appearance, and long-term reliability. For readers who want to expand their hands-on knowledge or explore related maintenance topics, the linked Master Truck Repair blog serves as a repository of guidance on routine maintenance, budgeting for repairs, and other practical topics that truck owners encounter in day-to-day operations. The broader message remains consistent: the value of repairing versus replacing comes down to a clear assessment of damage, a realistic budget, and a trusted specialist who can translate plans into a durable, road-ready result. For readers seeking a more formal, technique-focused overview of fiberglass repair methods, a comprehensive external resource provides detailed guidance on resin curing, lamination techniques, and finishing work. See https://www.popularmechanics.com/cars/how-to/a37299679/fiberglass-repair-tips/ for additional context on techniques that have stood the test of time in automotive repair. The practical takeaway is simple: start with precise diagnosis, choose the method that aligns with the damage scale, and respect the interplay between structural integrity, appearance, and long-term maintenance. When you do, you’ll arrive at a repair or replacement decision that makes sense for your truck, your budget, and the demands of your work on the road.
Final thoughts
Understanding the repair process for fiberglass truck hoods enhances operational efficiency and extends vehicle life. Both DIY techniques and professional approaches can be effectively employed depending on the severity of damage and budget considerations. By selecting the right materials and weighing the cost-effectiveness of repair versus replacement, fleet and logistics professionals can achieve substantial savings. This knowledge not only empowers repair strategies but also enhances overall fleet management practices.

