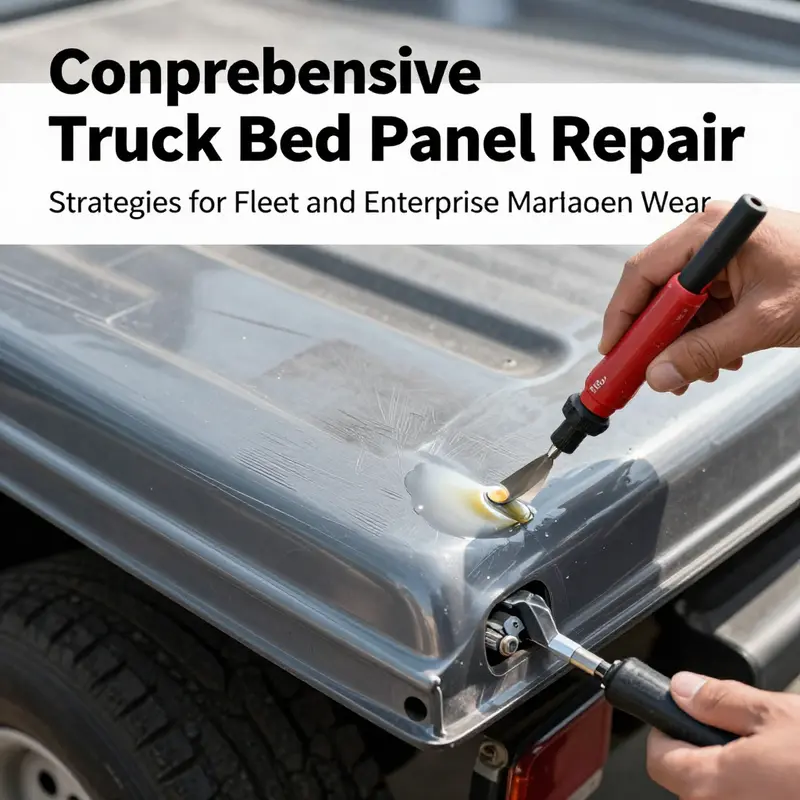
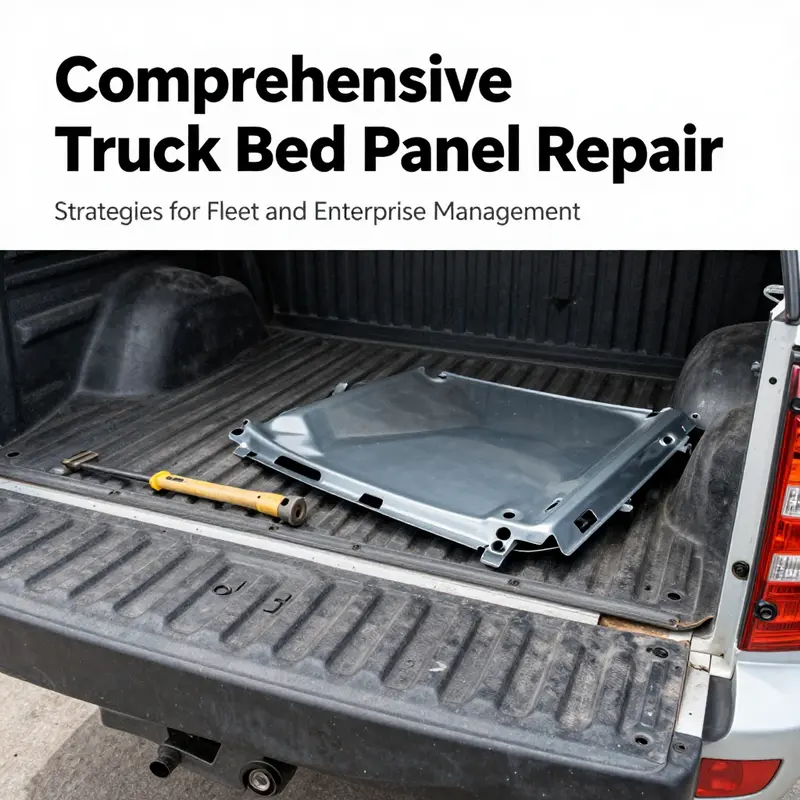
For Fleet Managers, Trucking Company Owners, and Operators in Construction and Mining, maintaining the integrity of truck bed panels is critical to ensuring operational efficiency and safety. With trucks often subjected to harsh conditions and heavy loads, damage to bed panels is common and can range from minor surface wear to severe structural issues. This article breaks down effective repair methods tailored for various types of damage, enabling decisions that protect investments and uphold safety standards. The repairs will be dissected into three main categories: addressing minor damage, techniques for managing dents and depressions, and effective replacement solutions for severe damage. Each chapter will equip you with practical insights to effectively maintain your fleet’s trucks, minimizing downtime and maximizing performance.
Surface-Smart Repairs for Truck Bed Panels: Gentle Fixes that Preserve Strength and Value
Minor wear on a truck bed panel can feel like a small nuisance, but it often foreshadows bigger problems if left unchecked. A careful, methodical approach to surface damage keeps corrosion at bay and preserves the bed’s structural integrity. This chapter focuses on practical, budget-friendly techniques that repair the surface layer without turning back the clock on the whole panel. The aim is to restore smoothness, keep the protective coating intact, and maintain the bed’s ability to carry loads with confidence. When damage is limited to the surface, it is possible to preserve the original paint and finish while extending the life of the panel. The process begins with discipline in cleaning, followed by targeted restoration that respects the metal beneath. By taking small, deliberate steps, you can slow down deterioration and buy time before more involved repairs become necessary. In this work, the goal is not to erase every mark but to restore a uniform surface that resists moisture, hides imperfections, and remains capable of performing its job on a daily basis. Each technique described here is chosen for its balance of effectiveness, cost, and compatibility with common bed materials like steel and aluminum. As you read, imagine the bed as a protected work surface: clean, dry, and ready to withstand the next haul without inviting rust or weakening. The right sequence matters. Start with the simplest, least invasive method before advancing to more involved options, and always assess whether the underlying metal shows through or if the coating is intact. If the coating is compromised, you may need to adjust methods to prevent moisture ingress. The approach to minor damage should feel like a routine maintenance routine, not a full restoration project. When done properly, these steps create a durable barrier that resists future wear and keeps your truck looking pragmatic and well cared for.
Tiny scratches are among the most common forms of surface wear. They can accumulate from narrow objects sliding along the bed or from loading and unloading gear. The cleanest first move is always to remove dirt, dust, and any residue that can interfere with adhesion. Use a mild detergent solution to wash the area, then rinse thoroughly and dry completely. A dry surface is essential because moisture trapped under repair materials can lead to future peeling or rust spots. Once the area is dry, evaluate the scratch depth. Light surface scratches that do not penetrate the coating can often be addressed with careful smoothing rather than a full repaint. Gently buff the area with fine-grit sandpaper, typically around 1000 to 1500 grit, using a light touch and small, overlapping motions. The goal is to flatten the high points without removing material or altering the contour. Keep the sanding motion consistent, and avoid circling the same spot aggressively. After sanding, wipe away the residue with a damp cloth and ensure the surface is completely dry before proceeding.
With a clean, dry surface prepared, touch-up paint becomes a precise and important step. Select a color closely matched to the original bed panel. Apply thin coats using a small brush or applicator to avoid building up a noticeable ridge. Allow each coat to dry fully according to the manufacturer’s instructions before applying a subsequent coat. This approach minimizes the appearance of the scratch and helps protect the base metal beneath from moisture. In some cases, a very light coat of clear topcoat can be added over the color to create a continuous, glossy barrier that resists UV damage and further oxidation. The key is patience: multiple thin layers cure more reliably than a single heavy layer, and the final finish will look far more seamless. If the scratch has gone through the clear coat but remains shallow overall, this method can restore visual uniformity without the need for a full panel repaint. For added longevity, consider a wax or sealant after the paint has fully cured. A protective layer reduces future dirt adherence and helps shield the repaired area from the elements.
Dents or shallow depressions present a somewhat different challenge, but they are still within the realm of surface-level repair when the metal has not stretched or cracked. The first step remains thorough cleaning and drying. A dent that has not breached the finish is a good candidate for a noninvasive realignment method. A suction cup, when used correctly, can generate enough force to pop a shallow dent back toward the original contour. Position the suction cup at the center of the dent, apply steady pressure to create a seal, and then pull smoothly to lift the metal back toward its intended shape. This technique preserves factory paint and minimizes the risk of further damage. Practice and patience matter here; aggressive pulling can cause additional creases or edge cracking. If the dent is stubborn or if the paint shows micro-cracking, stop and reassess. Sometimes multiple gentle attempts yield the best result, but it is essential to avoid overdoing it and creating new deformations.
Surface wear is not limited to scratches and dents; fading, dullness, and minor oxidation are signs that the panel’s outer shield is thinning. Begin with a thorough cleaning using an automotive cleaner designed for exterior paints to remove environmental contaminants. Once clean, a light polishing step helps restore gloss and remove micro-scratches from the surface layer. Use a fine polishing compound on a soft applicator or microfiber pad, applying gentle pressure with a slow, even motion. The objective is not to remove material but to flatten the micro-roughness that scatters light in all directions, which produces that chalky, faded appearance. After polishing, wipe clean and inspect the reflectivity. The second line of defense is a protective layer: wax or a paint sealant that bonds to the surface and shields it from UV rays and moisture. A well-applied wax creates a slick, water-repellent surface that reduces the rate of further oxidation and helps maintain a uniform appearance through the season. Reapply according to the product’s schedule, typically every few months, depending on climate and exposure.
In some situations, when surface imperfections are present but the panel is otherwise sound, a thin layer of epoxy resin or an automotive-grade adhesive can be used to fill micro-imperfections. This approach should be used sparingly and only on areas where the coating has worn away and the metal is still protected by a good underlying layer. The repair steps are straightforward: ensure the area is clean and dry, apply a conservative bead of resin to the damaged spot, and smooth it with a plastic spreader or a fine tool to ensure a level surface. Allow curing fully per the resin’s instructions, then sand lightly with a very fine grit to remove any raised edges. Finally, feather the repair with touch-up paint and a light sealant coat to integrate it with the surrounding area. This technique is most effective for pinholes or tiny irregularities rather than large patches of wear. It is not intended to replace more substantial repairs but to fill minor blemishes that would otherwise invite moisture penetration and rust.
A recurring theme in minor repairs is the importance of a comprehensive approach that respects the existing finish. Even when the top layer looks only lightly damaged, moisture can migrate beneath patches that are not well-bonded. Therefore, a final protective step is worth considering, especially in climates with heavy precipitation or road salt exposure. A high-quality sealant or wax provides a hydrophobic layer that repels water and helps prevent dirt and salts from sticking to the surface. Reapplying sealant after the panel has cured helps extend the life of the repair and reduces the frequency of rework. In all cases, avoid aggressive chemical cleaners or abrasives that can strip the protective coating or thin the metal. If a cleaner is too harsh for the finish, it can leave micro-scratches that compromise the repair.
Maintenance is the invisible backbone of long-term panel health. Regular inspections should become part of routine vehicle care. A simple monthly check can reveal early signs of wear, such as new scratches, small dents, or fading, enabling prompt action before a larger repair is needed. Distribute cargo evenly to minimize localized stress on any one section of the bed. Avoid sliding heavy or sharp-edged items directly along the surface; instead, use protective mats or steps to reduce direct abrasion. Keep an eye on the edges and corners, where impacts and scrapes are more likely to occur. While minor repairs can address visible issues, preventing new damage is the most economical strategy in the long run.
When damage progresses beyond surface wear, higher-level repairs become necessary. In the broader arc of bed panel restoration, minor fixes act as a first line of defense, delaying the moment when a replacement or patch repair is required. If you encounter larger rust patches, significant structural deformation, or deep cracks, professional repair or panel replacement is strongly recommended to ensure safety and long-term durability. The ideas discussed here are intended to empower a vehicle owner to handle small, non-structural blemishes with confidence and without turning a simple job into a costly project. For readers seeking broader guidance or more detailed case studies, the Master Truck Repair Blog offers additional perspectives and practical advice on related topics. Master Truck Repair Blog.
In the broader context of this article, addressing minor damage and surface wear paves the way for more comprehensive repairs if needed. The main objective remains keeping the bed intact, minimizing the potential for moisture intrusion, and preserving the bed’s capacity to perform under load. A steady rhythm of care, prompt attention to small issues, and the thoughtful use of simple materials can extend the life of truck bed panels substantially. The sequence outlined here—clean, assess, smooth, protect, and maintain—offers a practical framework for owners who want to stay ahead of the wear and keep their trucks reliable and visually presentable. As you move toward more involved repairs in other chapters, the confidence gained from mastering these minor fixes will carry over, making any larger repair easier to plan, execute, and justify. This approach aligns with the broader philosophy of responsible maintenance: act early, use the right tools, and respect the original design and materials of the panel.
External reference: Autobody Scratch Repair Guide
Repairing Dents and Deformations in Truck Bed Panels

A practical guide to repairing dents and deformations in truck bed panels. Begin with a thorough assessment, including surface cleanliness and access to the back side of the panel. Remove bed liners, brackets, and trim that block access, and document the damage with photos and notes. Clean, dry metal ensures predictable bonding for any filler or patches that may be required.
For small, shallow dents, hammer-and-dolly work from the outside with a dolly behind the dent to minimize high spots. Work from the edge toward the center and check reflections in bright light to gauge planarity. For larger flat areas, shrinking or controlled pulling may be necessary. If pulling, do so gradually and measure after each pull to avoid overcorrecting.
If the metal is stretched, do not rely on filler alone. Use controlled shrinking with heat and rapid cooling to restore the crown before filling. The aim is to reestablish a uniform contour that mirrors the factory geometry.
When filler is used, apply it only to depressions deeper than about 1/16 inch and in thin, layered increments. Feather the edges and sand progressively, first with 80 or 120 grit to establish a flush plane, then 180 to 220 grit for a smooth finish. Allow adequate cure time and wipe with a prep solvent before coating.
Finish with light sanding, check for pinholes or uneven reflections, and protect exposed edges with primer and underseal as needed. Finally, verify fit against adjacent panels and ensure the repaired area does not compromise strength, sealing, or rust protection. Adopting a methodical approach that prioritizes metalwork and careful finishing yields durable, factory-like results rather than shortcuts that rely heavily on filler.
Restoring Strength: Replacement Strategies for Severely Damaged Truck Bed Panels and Structural Integrity
When a truck bed panel has suffered severe damage—large dents that compromise the panel’s shape, cracks that breach the protective skin, or structural compromise that touches the bed’s load-carrying capability—the decision to replace rather than patch becomes more than a choice. It is a creed of safety and reliability. The bed is not merely a container for cargo; it is a critical interface between the truck’s frame, its suspension geometry, and the controls that keep loads secure and transportable. In scenarios where the damage extends beyond cosmetic blemishes, a replacement panel is often the only path to restoring factory-like strength, predictable load distribution, and long-term durability. Repair by patching may buy time, but when the metal has stretched, fractured, or grown weak under repeated stress, the channel that truly returns the bed to its original performance is a properly selected replacement. This is not about vanity aesthetics; it is about ensuring the vehicle maintains its designed safety margins for every mile and every load. The process requires careful assessment, not haste, because a wrong panel choice or a misfit can set off a chain of problems—from misalignment with the frame and compromised seals to accelerated corrosion and compromised handling when the bed bears weight. In that light, replacement becomes more than a fix; it is a restoration of the bed’s engineered integrity and the chassis’s ability to perform under real-world conditions.
Replacement is also a decision that must harmonize with the truck’s overall platform. A severely damaged bed panel can illuminate broader concerns about the body structure, cross-members, weld seams, and the way the sheet metal transfers impact loads across the bed. When the damage is extensive, the goal shifts from merely sealing leaks to returning the bed to the original geometry so that the bed sits correctly against the frame, aligns with the wheel wells, and accommodates the tailgate, lights, and rails without forcing the rest of the body to compensate for a misshapen panel. The alignment matters because improper fitment can crack paint, trap moisture in seams, and create stress concentrations that crack the adjacent metal. A correctly chosen replacement panel is measured not only for width and length but also for edge profiles, fastening patterns, and the possibility of matching those features to the truck’s existing edge rails and mounting points. The aim is to achieve a tight, uniform assembly where rivets or bolts can secure the panel without warping the sheet metal, and where fastener locations align with existing structure to preserve the bed’s load path.
Beyond geometry, what matters is material behavior under service. Replacement panels are often offered in reinforced versions of common metals, typically high-strength steel or aluminum alloys. Each material brings trade-offs. Steel generally offers greater abrasion resistance and a higher resistance to denting in heavy-duty service, but it invites corrosion if coatings fail and moisture sits in joints. Aluminum, lighter and naturally resistant to corrosion, can be an excellent choice where weight and rust resistance are priorities, but it may require different fastening strategies and a matching edge profile to achieve a leak-free seal. In either case, the replacement panel should not just fill the space; it must engage with the body’s protective layers—sealants, undercoatings, and primers—to maintain a barrier against water, salt, and abrasion. That is why the selection process is so consequential: it is about choosing a panel that will maintain the truck’s structural envelope and provide predictable performance years after installation. The replacement approach must also respect the practical realities of labor time and the feasibility of achieving a proper seal and alignment without introducing new forms of distortion. For many owners, a non-welding installation, using precisely engineered repair panels designed to mirror OEM dimensions and edge profiles, offers a practical route that preserves metal properties and minimizes heat-affected zones. This approach can deliver robust joints while avoiding the risks that come with welding near load-bearing lines or around critical cross-members. A well-chosen repair panel, when installed with mechanical fasteners and sealed with high-quality gasket and sealant materials, can recreate the bed’s original stiffness and protect against moisture intrusion that accelerates corrosion.
To understand replacement as a structured choice, it helps to consider the options in terms of how closely they replicate the vehicle’s original build while offering practical benefits in the workshop. OEM panels provide an exact match to the factory specifications, ensuring a perfect fit and alignment with existing edges and mounting points. They are a straightforward path to restoring the bed to its intended performance, but they can come at a premium and may have longer lead times. Aftermarket panels offer a cost-conscious alternative that can still meet precise dimensions and edge designs when sourced from reputable suppliers. The risk here is variability—quality can differ between brands, and some panels may require careful verification of tolerance and curvature to avoid misalignment after installation. Custom-fabricated panels, though less common, serve niche needs such as unusual bed configurations, specialized coatings, or unique load demands. They demand a skilled fabricator capable of reproducing OEM curvature, ensuring edge compatibility, and delivering fasteners that won’t jeopardize the bed’s integrity.
Material choice, of course, remains central to the replacement decision. Some manufacturers now offer reinforced panels that use high-strength steel or specialized aluminum alloys to improve impact resistance and reduce the risk of future deformation. The selection should reflect the expected load demands, the vehicle’s typical operating environment, and how much weight is removed or added by the replacement panel itself. Additionally, it is essential to assess whether the damage extends beyond the visible surface. Hidden fractures can travel through a panel and, if left unaddressed, may propagate under stress, especially when the bed is loaded. The replacement philosophy must account for these possibilities by ensuring the chosen panel and its mounting method provide a continuous load path and do not introduce stress risers at holes and rivet lines. A thoughtful evaluation will also consider how a new panel interacts with existing protective layers and coatings. Without proper surface preparation and sealant strategies, even a perfect panel can succumb to moisture ingress and corrosion around the seams.
From a practical standpoint, a welding-free replacement can offer profound advantages in terms of preserving material properties and reducing heat-affected zones. Modern repair panels are engineered to match OEM dimensions and edge profiles, enabling a secure fit with mechanical fasteners such as bolts or rivets. This approach often shortens installation time, minimizes distortion risk, and keeps the structural behavior of the bed closer to its original state. Pre-drilled holes and standardized edge contours simplify alignment and reduce trial-and-error fitting. However, the success of a welding-free route hinges on meticulous measurement, accurate cutting, and frictionless assembly. It requires the installer to verify that the replacement panel matches the curvature along the bed’s zones, aligns with cross-members, and sits flush against the frame rails and bed rails. Any misalignment can create gaps where moisture collects, or seams open under load, undermining the very purpose of the replacement. When these elements are executed with precision, the panel behaves like a factory-integrated component rather than a field add-on, preserving the bed’s structural continuity and load-bearing characteristics.
The installation itself is a choreography of measurement, fitting, and reinforcement. The process begins with the careful removal of the damaged portion, followed by a clean, prepared surface that resists moisture ingress and paint lift. The replacement panel is then positioned, and a proper set of fasteners is chosen to distribute load evenly along the mounting points. It is essential to drill or confirm the locations for bolts or rivets in alignment with the bed’s frame and cross-members, ensuring that the fasteners do not clash with any hidden channels or components. As the panel arcs into position, the edges should meet with a precise seam that can be sealed using a rubberized sealant or silicone-based compound designed for automotive and industrial use. This seal is not merely cosmetic; it is the primary defense against moisture, salt, and debris that would otherwise find their way into the seam and accelerate corrosion. A robust sealant system works in concert with an undercoating or protective finish to provide a moisture barrier that endures in challenging environments. The final step in a non-welding replacement is to verify alignment with the tailgate and with the bed’s wheel arches, ensuring that the new panel does not rub or contact other components as the suspension moves under load. The result should be a panel that feels like a natural extension of the bed rather than a patched addition—one that preserves the bed’s original geometry and structural behavior while delivering predictable performance across hundreds of loaded trips.
In the long arc of maintenance, replacement panels demand careful regard for ongoing protection. After installation, a protective coating, sealant inspection, and targeted undercoating can significantly extend the life of the new panel. The choice of coating should be compatible with the metal type and any coatings already present on the vehicle, ensuring that the adhesion remains strong and that the coating does not trap moisture in a way that encourages corrosion. Regular inspection remains indispensable: check the seams for cracking sealant, verify fastener torque, and keep an eye on the area around mounting points for signs of fatigue or loosening. A well-executed replacement is not the end of care but the beginning of a disciplined maintenance phase that preserves the bed’s integrity across years of service. This involves not just periodic visual checks but proactive measures such as avoiding overloading, distributing cargo evenly, and scheduling routine bed inspections as part of an overarching maintenance program. Doing so helps ensure that the replacement continues to meet its intended performance envelope, and that any emerging issues are caught before they evolve into costly repair cycles.
A broader systems perspective is also important. The bed does not exist in isolation; it anchors to the frame, cross-members, and rails, and it interacts with the truck’s body mounting and suspension. When a panel is replaced, attention to alignment with the frame and to the interface with the tailgate, the side rails, and the inner bed walls becomes essential. Proper fitment helps distribute forces—whether from a heavy load, a sudden impact, or the vibrations of road travel—across a continuous path rather than concentrating them at a single location. A replacement panel that respects this path helps preserve the bed’s overall stiffness and reduces the risk that a future impact will cause a buckle or a crack that propagates into adjacent panels. In that sense, replacement is not just a repair; it is a restoration of the bed’s functional rhythm and the vehicle’s safety margins.
For readers seeking practical, non-welding paths to replacement, the conversation centers on the availability of repair panels engineered to OEM dimensions and compatibility. The emphasis is on ensuring the fit is exact, the edge profiles align, and the fasteners secure without introducing undue stress into the surrounding metal. In this approach, the technician or owner must verify the source’s credibility, confirm the panel’s material grade, and ensure that the replacement aligns with the truck’s unique configuration. The result is a restored bed that looks right, feels right, and carries loads with confidence, backed by a system that resists moisture intrusion and resists deformation under typical work-site conditions.
Continuing the learning journey on structural restoration can be valuable for those who want to explore related repair domains. For ongoing reading and related repair topics, you can visit the Master Truck Repair blog. Master Truck Repair blog.
External resource for deeper guidance on installation without welding: for a practical, step-by-step reference on replacing a truck bed panel without welding, see https://www.autoblog.com/how-to-replace-truck-bed-panel-practical-guide.
Final thoughts
Repairing truck bed panels is an essential practice for maintaining the integrity and value of your fleet. Understanding the appropriate methods to address minor scratches, significant dents, and severe structural damages ensures fleet managers can make informed decisions that minimize downtime and costs. Regular maintenance and prompt repair actions not only enhance the longevity of vehicle assets but also promote safety and efficiency in operations. By implementing the techniques outlined in this article, you can sustain the performance of your trucks and ensure reliable service in demanding work environments.