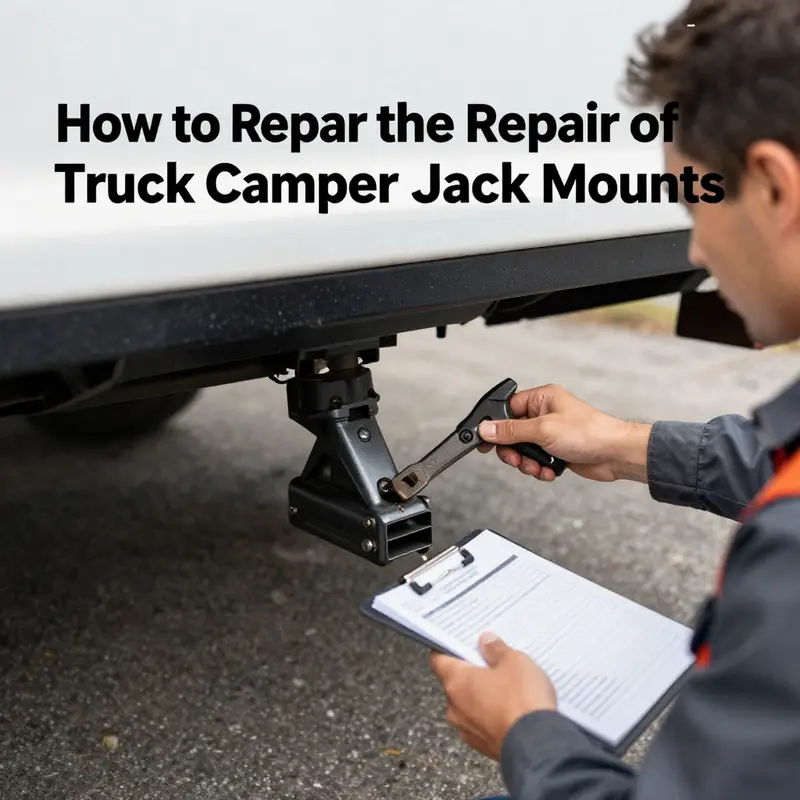
Truck camper jack mounts are critical components that support significant weight and stress during travel. For fleet managers, trucking company owners, and operators in construction and logistics, the effective maintenance of these components is paramount in ensuring safety and operational continuity. This article delves into the intricacies of repairing truck camper jack mounts, guiding you through assessing damage, ensuring safety during repairs, exploring repair options, understanding the importance of professional assistance, and adhering to preventive maintenance practices. Each chapter offers actionable insights to help you navigate the repair process seamlessly, safeguarding your operations and the integrity of your vehicles.
Before You Repair: A Practical, Step-by-Step Diagnosis of Jack Mount Damage
Assessing the Damage: What to Look For and How to Decide
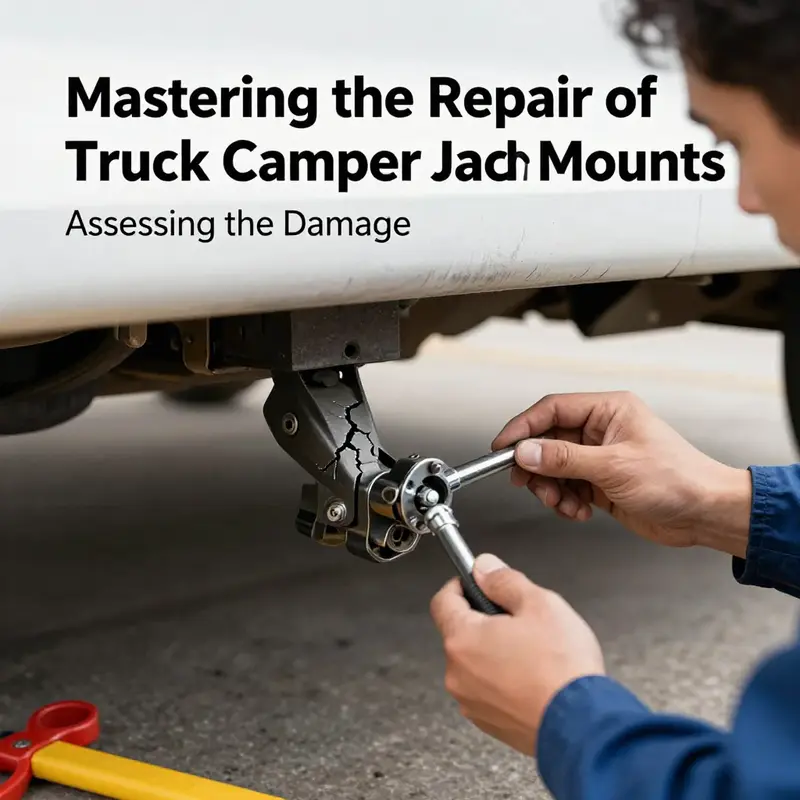
The moment you spot trouble with a truck camper jack mount, you must stop and assess. This bracket or plate anchors significant loads. A poor diagnosis leads to an unsafe repair or a repeat failure. Move deliberately and work through a clear process. Use a flashlight, a straightedge, basic hand tools, and documentation tools like a phone or notebook. Keep all sentences, checks, and actions simple and safe.
Begin with a visual sweep. Stand back and view the mount from several angles. Look for obvious defects: cracks, bends, twisted plates, broken welds, and missing hardware. Note rust pockets and areas where paint has flaked away. Examine the weld seams closely. Welds are frequent failure points on mounts. Even a hairline crack along a weld means the joint can no longer carry full load.
After the visual check, probe for movement. With the camper supported safely on jack stands, apply moderate force to the mount by hand. Rock it, twist slightly, and feel for play. Any perceptible movement usually indicates loose fasteners, torn threads, a cracked bracket, or a failed weld. Mark the loose points with a marker and photograph them. Photographs help you track progression and provide a record for a fabricator or technician.
Inspect the fasteners and their seating. Remove dirt and grime with a wire brush so you see the bolt heads and threads clearly. Look for stripped heads, rounded corners, or missing lock washers. Check nut-to-bolt engagement. If nuts are floating on a few threads only, the joint has been pulled through or the hole has elongated. Small elongations often result from cyclic loading and can be repaired. Large, oblong holes may require replacement parts or reinforcement.
Check the truck bed where the mount attaches. Surface rust is cosmetic. Structural rust that has eaten through metal is serious. Tap suspect areas with a small hammer; a solid sound indicates intact metal. A dull or hollow sound suggests corrosion beneath. For wooden beds, probe for rot with a screwdriver and inspect mounting blocks. Compromised bed material undermines any mount repair and usually requires replacing mounting blocks or deciding on a different attachment strategy.
When you suspect cracks, use basic nondestructive tests. A bright flashlight at low angle reveals stress lines that you might miss head-on. Run a straightedge along welds and bracket edges to see gaps or bends. If you have access to a dye-penetrant kit, apply it to suspected areas. Penetrant testing highlights hairline cracks invisible to the naked eye. For steel, a basic magnetic particle inspection by a shop will pick up subsurface flaws if needed.
Document bolt sizes, thread patterns, and hole diameters. Capture serial numbers and stampings on the mount. These details help when sourcing replacements. Note the bolt grade if visible. Many mounts use high-strength bolts; swapping in a weaker bolt risks future failure. If you remove a bolt, keep it for comparison. Measure the distance from the mount to fixed reference points on the bed. That measurement helps verify alignment after any repair or replacement.
Assess corrosion and surface preparation needs. If rust covers the area, wire-brush or grind back to clean metal. Rust can hide cracks and makes inspection unreliable. Cleaning also reveals the true extent of metal loss. On cleaned metal, re-evaluate welds and plate thickness. If the remaining metal thickness is below a safe threshold, a simple weld patch might not be sufficient.
Decide the damage type and severity. Loose bolts and superficial corrosion are low-severity. These problems are often safe to repair yourself with proper tools and torque values. Cracked brackets, failed welds, bent plates, or elongated holes are medium to high severity. These conditions require welding, reinforcement, or part replacement. If the truck bed itself shows structural failure, treat that as high severity. Repairs to the bed or frame change load paths and need a professional assessment.
If you are weighing a DIY fix, ask three practical questions: Can I safely support the camper to work on the mount? Do I have the tools and skills to restore strength without creating stress risers? Can I source correct replacement parts and high-grade fasteners? If any answer is no, plan for professional help. Never improvise a solution that reduces the mount’s load capacity.
When minor issues are confirmed, follow disciplined small-step repairs. Tighten bolts using a calibrated torque wrench to manufacturer specifications. Replace corroded or damaged fasteners with rated grade hardware and proper locking devices. Apply anti-seize to threads where necessary to prevent galling. Clean and coat exposed metal with a rust inhibitor and high-quality paint. Re-check torque after the first cycle of use and at regular intervals.
For suspicious cracks and failed welds, the safest path is professional welding or replacement. A qualified welder will match filler metal to parent metal. They will prepare edges, repair penetration, and, if needed, install backing or reinforcement plates. In some cases, a professionally fitted replacement mount from an OEM or reputable aftermarket source is the better choice. Reinforcing plates or gussets can work well, but they must be designed to carry loads correctly and to avoid introducing new stress concentrations.
Be realistic about reinforcement. Adding a plate might seem simple, but it changes the way forces move through the bed. Poorly placed reinforcements can transfer stress to weaker areas. A certified technician will calculate load paths and weld or bolt reinforcement in a way that restores or exceeds the original strength.
Safety is central to every action. Never use a damaged mount or depend solely on a jack to hold the camper while you work. Use rated jack stands on solid ground or blocks under the frame. Keep bystanders clear. If you need to test the repaired mount under load, do so methodically and with the camper supported. Perform a road test at low speed after repair, and re-inspect after several trips.
When in doubt, collect detailed photos and measurements and consult a specialist. Sharing clear images and notes speeds diagnosis. If the repair is beyond basic fastener replacement, seek a shop experienced with truck campers. Budgeting for routine maintenance reduces emergency decisions later. If you want guidance on planning maintenance costs, read this short piece on budgeting for routine truck maintenance for owners.
A careful assessment ends with a clear decision: safe to tighten and protect, requires professional welding or replacement, or needs bed repair first. Make the right call. A properly diagnosed failure is easier to repair and far safer in the long run. For authoritative specifications, follow your camper maker’s technical manual and safety guidance. For broader vehicle safety standards, consult government guidance such as the NHTSA resource: https://www.nhtsa.gov
Secure Before You Repair: Stabilizing a Truck Camper for Safe Jack Mount Work
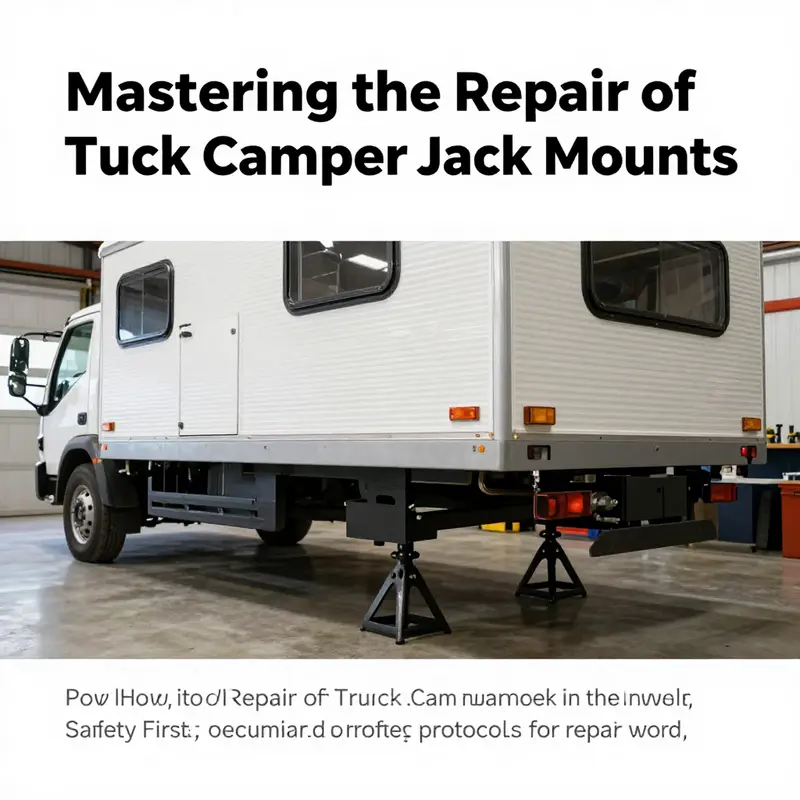
Repairing a truck camper jack mount begins long before any wrench turns or torch sparks. The moment you decide to address a mount issue, stability and control become your primary tools. A poorly supported camper can shift, fall, or collapse without warning. That endangers you, bystanders, and the camper itself. This chapter walks through the safety-first approach you must take to secure the vehicle, inspect load paths, and create a safe work environment for either a simple hardware fix or a major structural repair.
Start by choosing the right work location. Park on a firm, level surface that can bear the camper’s weight. Avoid soft ground, slopes, and uneven gravel. Engage the parking brake and place wheel chocks on both sides of at least two wheels. Chocks reduce the chance of any roll if the suspension unloads during jack use. Keep the engine off and keys away while you work.
Next, transfer the load off the jacks in a controlled way. If the camper is attached to the truck, consider disconnecting it to eliminate hitch tension. Lowering a supported camper without relieving hitch stress can bend mounts. But never lower a camper until you have robust secondary supports in place. Use a combination of heavy-duty jack stands and solid cribbing to accept the camper’s weight. Place stands directly under the camper’s structural frame members, not under sheeting or paneling. Two stands, one per side, are the minimum. For added safety, use a third support point or a stack of treated 4x4s under the centerline.
When positioning supports, distribute the load so no single stand carries excessive weight. If you must use blocks, make them full bearing squares with minimal gaps. Stack timber so grain runs horizontal, and avoid tapered or cracked pieces. A brief shake test helps confirm stability: gently rock the camper by hand to reveal any movement. If the camper shifts, rebalance and resecure until it remains immobile under light force.
Remember this rule: never work beneath a camper held only by jacks. Jacks are lifting devices, not long-term supports. Use them to raise or lower the camper, then immediately place jack stands. If the repair requires removing a mount that currently supports load, transfer the load to a dedicated support—never let the mount be the temporary holding point.
With the camper safely supported, perform a detailed inspection. Examine the jack mount and surrounding frame for cracks, rust, elongation of bolt holes, and bent brackets. Follow any visible stress lines into adjacent metal; the problem often spreads beyond the obvious area. Check all fasteners: nuts, bolts, washers, and lock devices. Look for missing spring washers, corroded hardware, and stripped threads. Where possible, measure torque on critical bolts with a calibrated torque wrench. Comparing readings to manufacturer values shows whether a bolt has been gradually loosening under load.
For minor hardware problems—loose bolts, surface corrosion, or small-scale thread damage—the repair path is straightforward. Clean the area with a wire brush and degreaser. Replace any badly corroded or stretched bolts with new, grade-matched fasteners. Use properly sized washers and lock nuts to avoid stress concentration. Tighten bolts with a torque wrench to the specified setting. If you do not have the correct spec, consult the manufacturer’s service manual or a reliable reference before final torqueing. After tightening, cycle the jacks up and down gently several times, then recheck torque.
If inspection reveals structural damage—cracked welds, bent plates, or elongated holes—do not improvise with temporary washers or oversized bolts. Structural repairs require full assessment and often welding by a qualified fabricator. A certified welder will identify the steel type, select compatible filler material, and apply the proper welding process. Improper welding, or welding without removing the load, can create heat-affected zones that weaken the mount. In some cases, a replacement mount built to original specifications is the safest choice. Reinforcing plates can be used, but only after an expert determines the correct plate thickness, weld pattern, and load path reconfiguration.
While you prepare or wait for professional work, take steps to protect the surrounding structure. Remove any combustible material from the area before welding. Use fire-resistant blankets and have a fire extinguisher at hand. Mark and photograph the damaged area for reference. Label removed fasteners and components to ensure accurate reassembly. Keep a log of torque values, bolt sizes, and repair steps. This documentation aids future inspections and helps a technician quickly understand what you found and attempted.
Testing the repair is as important as making it. After hardware tightening or replacement, slowly raise the camper on the jacks until the weight is briefly taken by the jacks. Lower it back onto the stands and look for movement, creaks, or changes in alignment. For welded or replaced mounts, the first on-road test should be short and at low speed. Recheck bolts and joints after a few miles. Listen and feel for looseness during turns, braking, and rough pavement. Repeat the visual inspection after the initial test drive to catch any settling or unexpected stress.
Maintenance prevents many failures. Incorporate a simple pre-trip check into your routine: verify tightness of mount bolts, inspect for fresh rust or new cracks, and confirm that jack stands and chocks are in serviceable condition. If you want more maintenance ideas, visit the Master Truck Repair blog for reminders and repair planning guidance: https://mastertruckrepairllc.com/blog/.
Finally, know your limits. Small jobs like replacing a corroded bolt or applying a rust inhibitor are reasonable DIY tasks if you have basic tools and knowledge. Structural work—cutting, welding, or replacing a load-bearing bracket—belongs to an experienced fabricator or trailer specialist. They have the tooling, testing equipment, and understanding of load paths to restore your camper safely. When in doubt, stop, support the vehicle, and seek professional evaluation.
Secure setups save lives. Take the time to stabilize before you touch a mount. Inspect methodically. Use correct tools and torque values. Document your work and test repairs under controlled conditions. That disciplined approach reduces risk, extends the life of the camper, and ensures any jack mount repair is a reliable one.
From Tightening to Rebuilding: How to Match Repair Methods to Jack Mount Damage
Matching repair strategy to the actual damage is the difference between a safe rig and a liability. Jack mounts are load-bearing components. They transfer the camper load to your truck during loading, transport, and setup. That means even small failures can grow into dangerous structural problems. This chapter walks through the spectrum of damage you will encounter, explains which repairs are appropriate, and highlights the practical steps and safety checks that follow each repair choice.
Start by diagnosing the problem accurately. A loose bolt may look like a broken mount if the camper shifts. A bent bracket can hide a cracked weld. Take time to inspect the mount from multiple angles. Look at the weld lines, the steel for deformation, and the frame where the mount attaches. Tap suspect areas with a hammer; a different sound can reveal internal cracks or rust pockets. Photograph and document what you see. Good documentation helps a fabricator decide whether repair or replacement is required.
For the simplest problems, the fix is straightforward and safe for most owners. If the mount is wobbly or noisy with no visible structural damage, start by checking every fastener. Use the correct grade of bolts and new washers when needed. Replacing worn hardware and tightening to the manufacturer torque is often all that is required. Don’t guess torque values; use a calibrated torque wrench and the specifications from the manufacturer or a reputable service manual. If bolt holes show elongation from repeated movement, do not force oversized hardware. Instead, reinforce the area. A standard repair is to weld a properly sized steel washer or backing plate over the worn hole. That restores clamping area and keeps the bolt from pulling through. This simple reinforcement is effective when the surrounding metal is sound.
When you find surface rust or minor corrosion, remove loose scale with a wire brush and clean the area. Apply a rust inhibitor and a protective coating to slow future corrosion. These steps extend the life of a mount and help you avoid more serious work later.
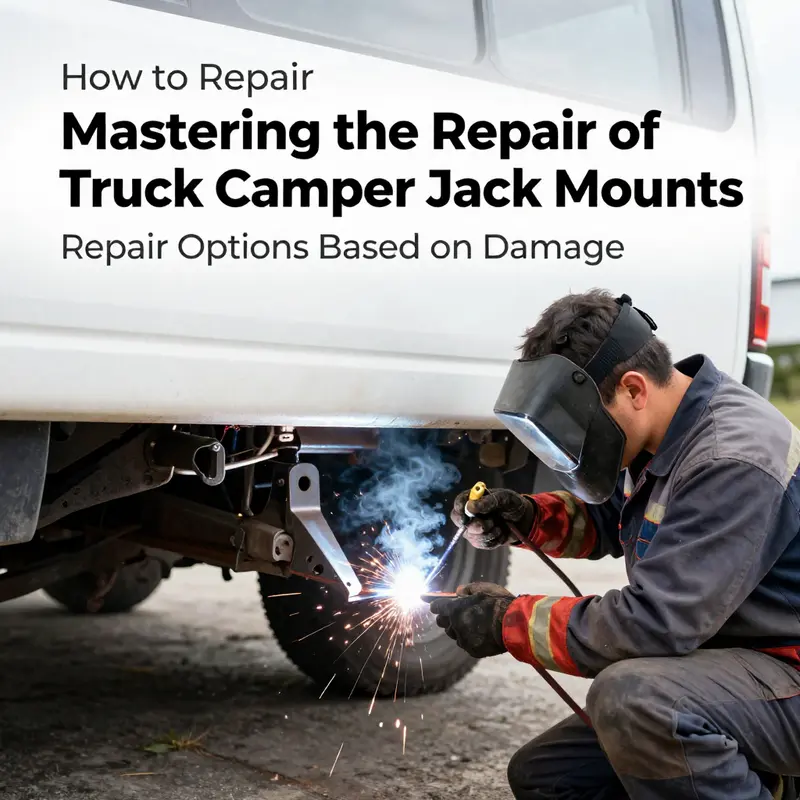
Cracks and broken welds demand a more serious response. A small, shallow crack in a non-load-bearing flare or plate might be treated temporarily for limited use with a quality structural adhesive or weld-on filler. Treat such fixes as temporary. For primary jack mounts, which carry the camper load, welding is usually the correct repair. Welding has to restore the geometry and original strength. That requires a qualified welder experienced in automotive or trailer frame work. The steel type, heat treatment, and weld technique all matter. A bad weld can be weaker than the original metal. When you take the rig to a professional, expect them to remove paint and rust to assess the full extent of the crack. They will grind back to clean metal and choose an appropriate filler and welding method. After welding, the repair should be ground and painted to prevent corrosion and to allow easier future inspection.
Severe damage—bent or twisted mounts, large fractures, or mounts that have shifted out of alignment—usually means replacement. You can fabricate a new mount from heavy-gauge steel and weld it into place, but alignment is crucial. A new mount that is slightly out of position concentrates stress in unexpected ways. A good fabricator will use gauges, jigs, and fixtures to ensure the new part matches the original geometry. Where possible, choose an OEM or a high-quality replacement part that matches the mounting pattern and dimensions of the original. If a custom mount is fabricated, ask for drawings or photos of the mock-up and final installation.
In situations where the frame around the mount is damaged, the decision becomes complex. If the frame is distorted or cracked, the whole mounting area may need reinforcement. Reinforcement can include welded plates, boxed sections, or support struts that redistribute the load across a larger frame area. These reinforcements must be engineered to carry the expected load. A properly reinforced area reduces the chance of repeat failures, especially if the camper is heavy or you often travel over rough roads.
For owners who frequently carry heavy loads, consider proactively strengthening mounts. Adding reinforcement brackets or gussets near jack mounts spreads load into stronger frame areas. These upgrades are best done during a professional repair so the reinforcements integrate with the new or repaired mount.
No matter the repair chosen, follow a clear checklist after work is complete. Visually inspect welds and fasteners. Verify bolt torque again after the first short trip. Re-check torque at scheduled intervals. Look for paint disruptions or new cracks that could indicate stress migration. If the repair included welded areas, monitor for corrosion beneath coatings and address it immediately. Where possible, perform a static load test before hitting the road. Support the camper on stands and apply weight gradually. Watch the repaired area under load for any movement or sound.
Deciding when to call a professional is a critical safety judgment. Tightening bolts and cleaning light corrosion are safe for many owners. Anything involving structural welding, frame reinforcement, or alignment should go to a specialist. Look for shops with experience in trailer or truck frame repairs. Ask about their welding procedures and inspection practices. Request references or photos of past work similar to yours. A reputable shop will explain their plan and the reasoning behind it.
Cost considerations matter, but they should not drive unsafe choices. Temporary fixes can buy time, but they increase risk under heavy use. If budget is a concern, plan and save for a proper repair. Good planning includes expecting inspection and maintenance costs. For help with estimating ongoing repair and maintenance expenses, see this guide on budgeting for routine truck maintenance.
Finally, build preventive habits. Regularly inspect mounts before trips. Avoid overloading and use rated jacks and stands. Keep mounting hardware tightened to specification. Address small corrosion or wear before it becomes structural. The right repair choice depends on the damage, the intended use of the rig, and how long you plan to keep the camper on that truck. When in doubt, choose the solution that restores original strength, aligns components precisely, and leaves clear evidence of a proper repair. For a deeper discussion and authoritative procedures on assessing and repairing jack mounts, consult this detailed resource: https://www.truckcamper.com/repairing-truck-camper-jack-mounts
When to Call a Pro: Ensuring Safe, Lasting Truck Camper Jack Mount Repairs
Why professional help matters — and what to expect
The jack mounts that hold a truck camper in place do more than connect metal to metal. They carry concentrated loads, resist dynamic forces while driving, and withstand weather and road vibration for years. Because of that, even a small flaw in a mount, a missed crack, or a poor repair can become a catastrophic failure under load. For anyone repairing truck camper jack mounts, recognizing when a job needs a skilled technician is essential for safety and long-term reliability.
Begin by understanding the scale of risk. Jack mounts are structural components. They transfer weight and torque between two heavy assemblies. A cracked bracket or a heat-damaged weld can fail suddenly. That failure can drop the camper, damage the truck bed, injure a person, or create a dangerous on-road situation. When a repair involves compromised metal, altered geometry, or structural welding, professional intervention is the safest choice.
A trained technician does more than fix what you see. They diagnose the root cause. Surface rust and a noisy fastener are often symptoms, not the problem. Excessive movement might be caused by fatigue in the mount, misalignment of the camper frame, or incorrect fastener grade. Professionals inspect surrounding areas for hidden damage. They evaluate welds with tools and methods you may not have. They also check for distortion introduced by previous repairs. This diagnosis prevents repeated failures and protects other parts of the camper and truck.
Material compatibility and repair method matter. Steel used in mounts often has specific strength and heat-treatment properties. Replacing or welding incompatible materials can produce a brittle joint or weakened area that fails under load. Professionals match metals and choose the correct filler and welding technique. They control heat input to avoid warping and to maintain tensile strength. When a mount is beyond repair, a proper technician will recommend a full replacement and install a part rated for the application.
Precision is another reason to hire a pro. Jack mounts must align precisely with lift points and fasteners. Missed alignment causes uneven loading and accelerated wear. Correct torque values are critical for fasteners. Professionals use calibrated torque tools and follow manufacturer specifications. These small details extend the life of the repair and reduce the chance of future breakdowns.
The tools and testing methods used by repair shops are also important. Shops bring heavy-duty welding equipment, jigs for alignment, and non-destructive testing options. Dye penetrant or magnetic particle inspection can reveal cracks invisible to the naked eye. Post-repair testing validates the work under controlled conditions. A DIY approach seldom includes these verification steps.
Insurance, liability, and documentation are practical reasons to prefer professional work. A documented repair from an established shop may be required for insurance claims after a failure. Certified shops follow accepted practices and provide a record of the work. If a shop provides a warranty, it shifts some risk away from you. DIY fixes may void warranties or leave you personally responsible for damages that follow.
Cost will always be a factor. Professional repairs cost more than a weekend job. However, compare that expense to the potential costs of a failed mount: camper replacement, truck bed repair, towing, or medical bills. Many owners find the investment in a proper repair is economical when viewed over time. If budget is a concern, discuss staged repairs or reinforcement options with the shop. They can prioritize safety-critical work now and schedule cosmetic or secondary repairs later. For help planning maintenance budgets and repair contingencies, consult this guide to budgeting for routine truck maintenance: https://mastertruckrepairllc.com/budgeting-for-routine-truck-maintenance/.
Choosing the right shop matters. Look for a facility experienced with truck campers, trailers, or heavy towing equipment. Ask about welding certifications, the types of metals they commonly work on, and whether they perform non-destructive testing. Request references or photos of similar repairs they have completed. A good technician explains options in clear terms and outlines risks, benefits, and expected service life for each solution.
Preparing your camper for a shop visit makes the process smoother. Securely support the camper before transport. If the camper must be moved, use a flatbed transporter to avoid stressing a compromised mount. Remove loose items and document pre-existing damage. Provide the technician with any history you have—previous repairs, unusual noises, or when the problem began. That history helps pinpoint causes faster.
There are safety-minded temporary measures that owners can take while arranging professional service. Tightening loose, undamaged fasteners to correct torque values can reduce movement. Cleaning corrosion and applying a rust inhibitor to slow deterioration is sensible. But never weld or attempt structural modifications unless you are a certified welder experienced with structural steel. Temporary blocks or additional supports should never be relied on as a permanent fix.
Professional repairs also include thoughtful reinforcement and prevention recommendations. A qualified technician can add reinforcing plates in a way that distributes loads properly. They might suggest upgraded fasteners or altered mounting geometry to reduce stress. They can also recommend regular inspection intervals and maintenance routines to catch fatigue early. These steps lengthen service life and reduce the frequency of costly repairs.
Finally, consider safety as an ongoing practice rather than a one-time fix. After a professional repair, follow the recommended inspection schedule. Check mounts and fasteners before every long trip. Be alert to new noises, movement, or floorboard distortion. Maintain records of inspections and repairs; those records help future diagnostics and protect resale value.
Entrusting jack mount repairs to a professional is not about avoiding DIY pride. It is about recognizing when the structure and safety of heavy equipment require specialist skills. Professionals bring diagnosis, matched materials, precise alignment, verified welding, and documentation. They help you avoid repeat failures and protect people and property. When in doubt, call a qualified technician—your camper, truck, and family will be safer for it.
External reference for a visual repair overview: https://www.youtube.com/watch?v=examplevideoid
Sturdy Ground, Safe Journeys: Repair, Prevent, and Maintain Truck Camper Jack Mounts
The jack mounts that anchor a truck camper to its host vehicle are more than a simple connection. They are the rigid interface between moving weight and stationary support, a junction where load, vibration, and weather converge. When they fail, the consequences travel with the camper—loss of stability, uneven weight distribution, or, in the worst case, a catastrophic collapse. Because these mounts bear the brunt of set-up and road stress, the approach to repair must blend careful inspection, a respect for structural integrity, and disciplined maintenance that fails only when the risks are unavoidable. A thoughtful chapter on repair cannot be reduced to a checklist; it must read like a careful dialogue with the metal itself, listening for the telltale signs of fatigue and honoring the limits of every component involved.
To begin, the landscape of a jack mount is not always obvious. A typical system relies on welded steel brackets that anchor to the truck bed or camper chassis, with hardware that holds the leg assemblies firmly in place. The most common issues arise from wear and tear that compounds over seasons: bolts that have worked loose through vibration, threads that have stripped or corroded, and welds that lose their grip after repeated flexing. The frame itself can warp if the load exceeds what the mount was designed to carry or if an impact or mounting misalignment has stressed a critical angle. These problems do not always reveal themselves at a casual glance. A sound assessment requires attention to both visible deformities and the quiet, creeping signs—quiet rust along weld lines, a subtle creak under load, or movement that wasn’t there before.
Safety is the first law of any repair. Before a single tool touches metal, the camper must be secured on solid ground with sturdy jack stands placed under the frame on each side. Relying on the jack alone invites a sudden collapse, turning a maintenance task into a dangerous accident. If possible, the camper should be disconnected from the truck to release any residual tension on the mounts. The goal is to create a stable, controlled environment where witnesses aren’t the only things that remain upright. Once the structure is immobilized, you can inspect with the confidence that further movement won’t shift the load unexpectedly.
The next phase centers on a precise, honest assessment of the damage. Begin by removing the jack legs so you can inspect the mounting brackets themselves. Look for hairline cracks in the weld seams, any waviness in the bracket’s plane, or signs that metal has been overworked at a bend. Corrosion demands equal scrutiny; rust can hide under paint, in crevices, or inside hollow sections of brackets. Check every bolt, nut, and washer for wear, stripping, and torque. The torque you apply to fasteners is not arbitrary; it must align with the manufacturer’s specifications. In practice, many setups require a torque range that falls roughly between eighty and one hundred twenty foot-pounds, but this can vary. When fasteners show signs of wear or corrosion, they should be replaced with high-strength hardware designed for the same load path. A single compromised fastener can undermine an otherwise solid repair.
Minor issues are often approachable with straightforward actions that preserve the original hardware and geometry. If bolts are merely loose, tighten them to the manufacturer’s torque specification using a calibrated torque wrench. Alongside tightening, clean the fastener threads and contact surfaces. Rust and grime are not just cosmetic problems; they create micro-creep paths that can expand under load. After cleaning, apply a rust-inhibiting coating or a protective layer to slow future corrosion. For found wear that doesn’t threaten the bracket’s geometry, consider replacing individual fasteners with grade 8 bolts and locking nuts, ensuring that every connection remains secure under vibration and load transfer.
Structural damage—cracks, bends, or broken welds—requires a more deliberate approach. Welding is the most effective fix for cracked or deformed mounts, but it is not a task to be taken lightly. A high-strength, heat-treated steel compatible with the original material is essential; a poor weld can become the next point of failure under load. Because the stakes are high, a qualified welder or a certified trailer or structural fabricator should perform any weld repair. After welding, smoothing the weld beads and addressing any heat-affected areas helps restore uniform strength and reduces stress risers. In some cases, the damage may be so extensive that repair is not feasible and replacement of the entire mount is warranted. OEM or high-quality aftermarket mounts should be chosen with compatibility to the truck model and camper configuration in mind. When a repair involves complex geometry or compromised structural members beyond the mount itself, reinforcement may be appropriate. Reinforcement plates or gussets can distribute load more evenly, but they must be designed and installed by someone who can evaluate the overall stiffness and integrity of the assembly.
Even when repair seems complete, the work does not end with the last grind and coat. Professional assistance remains strongly advised. The jack mount system is a critical load path, and improper repairs—especially welding or reinforcement done without the proper equipment, procedures, and testing—can mask a latent weakness that shows up at an inopportune moment. A reputable mechanic or trailer specialist can assess alignment, verify that the mounting geometry remains within design tolerances, and confirm that the repair does not introduce new points of failure. If the camper is under warranty, professional service may be required to preserve coverage. In all cases, a thorough post-repair inspection should be performed, including a test of the jack operation with the camper stabilized and supported, before any attempt to load or move the unit.
Maintenance and prevention are the best defense against repeated damage. Regular inspections—before every trip and again after long journeys—help catch issues while they are still manageable. The goal is to identify signs of stress long before a mounting joint or bracket gives way. Weight distribution is another crucial factor. Overloading the camper or concentrating weight on one corner can induce bending moments that the mounts were not designed to tolerate. Proper leveling practices are essential; never rely on a jack’s extension to bear the weight of the entire system while you work on it. Confirm that jacks are fully extended and locked, and that the geometry of the mounting remains consistent when the camper is on level ground. Corrosion protection should be a year-round habit, not a seasonal one. Clean the mounts after exposure to salt spray or harsh road chemicals, then apply a protective coating appropriate for metal surfaces in outdoor environments. If you operate in coastal or winter conditions, more frequent maintenance may be warranted.
To keep the system robust, consider preventive upgrades that match the demands of your setup. If the original mount shows recurring signs of fatigue or if you frequently travel with heavier loads, upgrading to heavier-duty mounts or adding reinforcing plates designed for higher capacities can reduce future risk. Any reinforcement should be preceded by a careful assessment of how weight and stress flow through the entire hitch-mount system. In some situations, replacing an aging mount with a modern, purpose-built design can deliver a substantial safety margin and a smoother setup process.
An important dimension of this chapter is linking practical maintenance to broader planning. A disciplined maintenance habit not only reduces risk but also helps you budget for the inevitable repairs that come with long-term use. This is where a broader maintenance mindset matters: budgeting for routine truck maintenance, as discussed in trusted industry guidance, can help you fund proactive inspections and timely replacements before a small problem becomes a dangerous one. Prioritizing a proactive approach—regular checks, orderly part replacements, and adherence to torque specs—keeps the system aligned with your travel schedule and peace of mind. For readers who want to anchor this practice in a broader plan, a link to budgeting for routine truck maintenance offers a helpful framework to think about parts, labor, and the time required to complete safe repairs.
In the end, the repair story for truck camper jack mounts is a narrative of respect for the structural path that carries your load. Minor issues can be managed with careful tightening, cleaning, and protection. Structural cracks or bends demand professional intervention, with welding or mounting replacement performed by technicians trained to restore safety and stiffness. Reinforcement and upgrade options exist, but they must be grounded in a proper assessment of the current geometry and load demands. Above all, safety governs every choice. Never work under a vehicle supported by only a single jack. Never drive with jacks deployed. Never assume that a quick fix will withstand the road’s unpredictable demands. The camper’s safety, and the safety of everyone around it, depends on the kind of disciplined care described here, carried out with attention, patience, and a respect for material limits.
For readers seeking practical steps that partner with a broader maintenance strategy, the following point is a useful reference: Budgeting for Routine Truck Maintenance. This resource helps frame the costs and planning needed to keep jack mounts—and the entire mounting system—reliable over years of use. External resources and manuals can offer deeper technical detail on specific mounting configurations, load ratings, and installation procedures. As always, when in doubt, seek professional guidance before performing any repair that involves structural components or the truck bed frame. External reference: https://www.spartantrailers.com/
Final thoughts
Repairing truck camper jack mounts is not merely a technical task; it is a commitment to safety and operational efficiency. Each aspect, from assessing structural integrity to employing professional assistance, plays a vital role in extending the lifespan of your camper setup and ensuring safe travels. By integrating regular inspections and maintenance into your operational routine, you not only protect your investment but also promote a culture of safety within your fleet. Stay vigilant, educated, and proactive in your approach to truck camper jack mount repairs.

