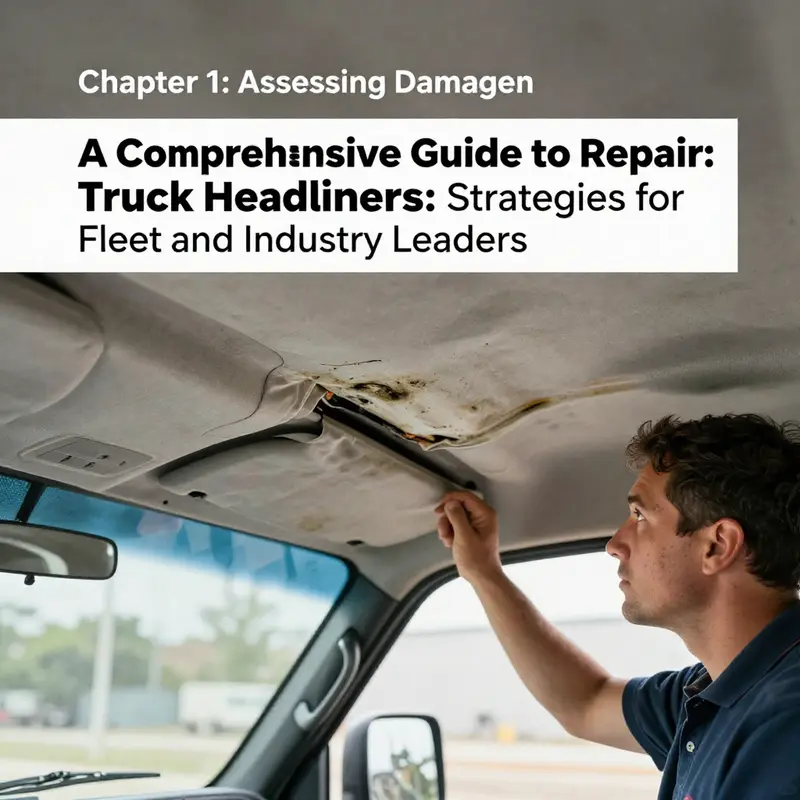
Maintaining the aesthetic and functional integrity of truck interiors is crucial for fleet managers and operators across industries such as construction, logistics, and mining. Damage to truck headliners—whether due to moisture, physical impact, or adhesive failure—not only detracts from the vehicle’s appearance but can also signal deeper issues that may compromise comfort and safety during transport. This guide provides a systematic approach to evaluating, repairing, or even replacing truck headliners, ensuring that your fleet remains professional-looking and operationally sound. Each chapter develops critical insights into assessing damage, selecting materials, executing repairs, weighing repair versus replacement options, and performing ongoing maintenance to maximize the longevity of your fleet’s interiors.
null
null
Chapter 2: Armory for the Ceiling—Tools, Materials, and the Craft of Truck Headliner Repair
Repairing a truck headliner is less a single move of glue and fabric than a careful orchestration of tools, materials, and patience. The ceiling inside a cab endures heat, humidity, and the constant rhythm of doors, sun, and vibrations. It stands as both a functional surface and a quiet interior finish that influences mood and perception on every drive. The first, most practical realization in headliner repair is that success rests on preparation: assembling the right kit, choosing materials that suit the environment inside a truck, and understanding how those choices translate into a durable bond and a seamless look. With the correct armory at hand, what begins as a loose fabric or sagging panel becomes a repair you can stand beside with confidence rather than a task that feels like a desperate improvisation. The list below is not a shopping spree but a purposeful lineup. The tools are not merely for the moment of repair; they shape the outcome, the curing time, and the long-term resilience against heat cycling and cabin movement. In a project like this, the mindset matters as much as the hardware. You’re constructing a secure, comfortable interior that will endure the rhythm of long trips and daily use, so you lean into tools that respect that environment and materials designed to endure it. For those who want a broader sense of DIY interior work and how it ties into a fleet’s upkeep, the practical guidance found in the online community at https://mastertruckrepairllc.com/blog/ can be a useful companion, offering context and shared experiences that complement this chapter’s focus on the specific headliner task.
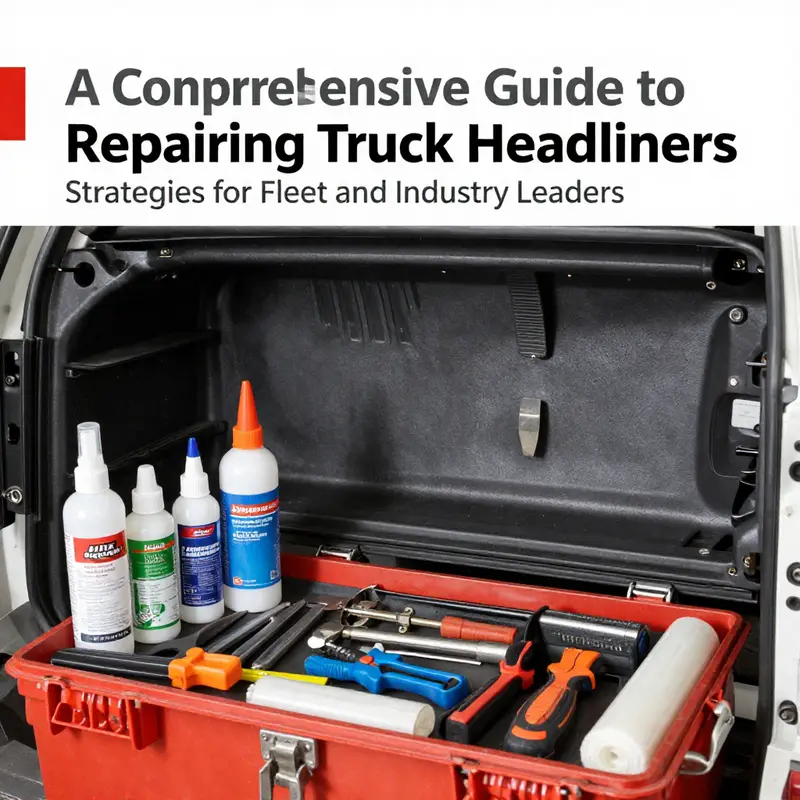
First comes the toolkit, modest in scope but essential in execution. A set of screwdrivers, both flathead and Phillips, is indispensable for removing trim pieces and fixtures that obscure access to the headliner. The trim around the edges—sun visors, overhead console panels, interior lighting housings—hides fasteners that, if pried with the wrong tool, can scratch plastic or bend metal. Plastic trim removal tools are worth every penny because they deliver a gentler touch than metal, reducing the risk of gouges and snapped clips as you release the headliner from its anchors. A utility knife or razor blade then becomes the precision instrument for trimming away old adhesive residue or cutting through deteriorated backing material when you’re aligning a patch or trimming a repair section. A small putty knife or plastic scraper helps lift and scrape without marring the roof panel, which is especially important when you’re dealing with delicate fabrics or a thin foam backing.
As the work advances, you’ll benefit from clean, controlled surfaces. A damp cloth and microfiber towels are your best friends for wiping away dust, oils, and old residue that can compromise adhesion. In a confined cab, even a small amount of grime can create micro-contaminants that prevent a fresh adhesive bond from taking hold evenly. A measuring tape and a pencil keep your alignment honest, especially if you’re pre-stitching a replacement fabric panel or re-positioning a large section of the headliner material. If you expect to work with stubborn old glue, a heat gun or a hair dryer set to a low warm setting can soften the adhesive enough to make removal cleaner and easier without overheating the roof liner. The point of heat is not to scorch but to enable a clean, even separation and to warm the new adhesive for a better initial tack.
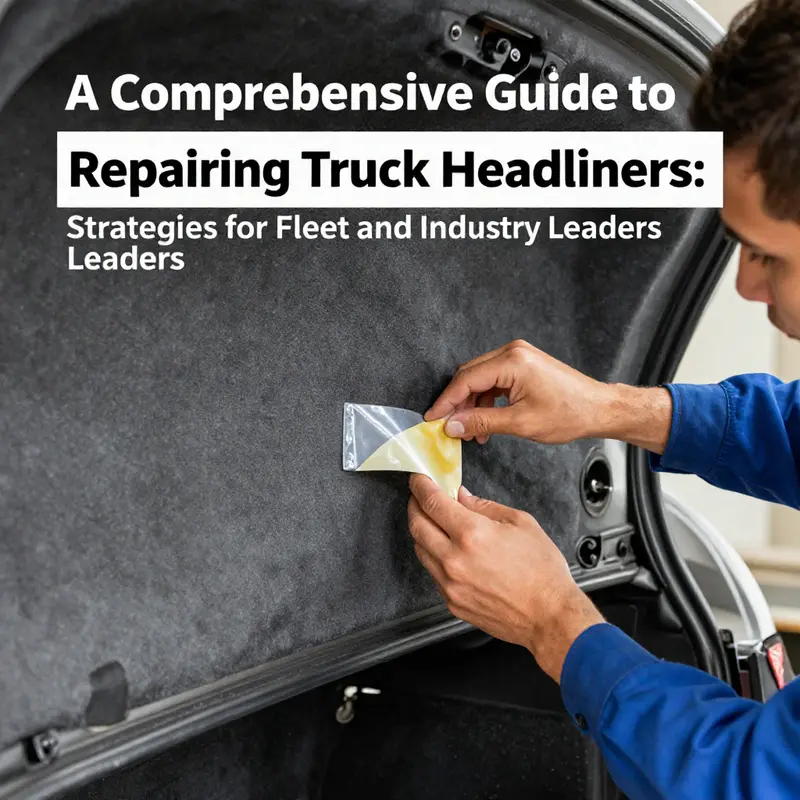
The heart of any headliner repair is the adhesive and the fabric. You’ll want a high-quality automotive adhesive designed specifically for headliners. The goal is a bond that is strong yet flexible, capable of withstanding the temperature extremes inside a truck cabin—from humid summer days to frosty mornings—and resilient to the stress of minor vibrations. Look for products labeled as high-temperature resistant and non-toxic. The exact formulation matters, because a brittle bond will crack as the roof flexes during driving, while an overly soft bond might sag again over time. If the damage is limited to a small tear or a localized detachment, you can opt for a repair adhesive kit that lets you press and hold the patch in place until it cures. In many cases, a repair is perfectly adequate, provided the backing and fabric surface are clean and dry, and the cure is allowed to take place in a controlled, undisturbed environment. For more extensive deterioration, however, a replacement headliner is often the wiser route. Replacing avoids the risk of catching a hidden moisture pocket or a mold-accumulated core that might not be visible until you’ve closed the doors and turned on the interior lights.
Materials beyond the adhesive complete the toolkit. Replacement headliner fabric or panel material should match the original in color, texture, and thickness so that the finish reads as a single surface rather than a patched area. Replacement headliner clips or fasteners are another small but critical component; over time these clips can wear, lose spring, or break, and the repaired panel relies on those connections to stay snug against the roofline. Adhesive tapes can be useful as a temporary hold during the initial positioning, preventing any shifting while the primary adhesive cures. Protective coverings—drop cloths or old sheets—keep spills and spray from reaching seats, dashboards, and carpets during the process. These materials may be simple in themselves, but they stave off complications that would otherwise extend the job and complicate the finish.
Beyond the hardware, the approach to the repair matters as much as the hardware itself. Preparation is more than clearing a workspace; it’s about creating an environment where the headliner can be removed and reinstalled without surprise. Park in a dry, well-ventilated area. Clear the cab of loose items and disconnect power to avoid triggering any interior lights or horns during the removal. The removal step should happen with measured care, releasing trim and fasteners in a systematic sequence so you don’t misplace a clip or bend a mounting bracket. The key during this phase is to keep the wiring harnesses intact and to label any electrical connectors you disconnect so you can reassemble smoothly. Once you have the old material down, inspect the roof panel for rust or signs of past leaks. If you find corrosion or a history of moisture intrusion, address those issues before you install a new headliner. Clean the surface thoroughly, let it dry completely, and re-evaluate whether a complete replacement remains the best course or whether a repaired headliner will suffice.
In choosing between repair and replacement, the decision often hinges on the extent of damage and the presence of moisture or mold. Minor detachment can be remedied with a strong, properly cured adhesive and a carefully positioned patch. But if the backing fabric is water-stained, the foam has deteriorated, or mold has taken hold, replacement makes more sense from a long-term perspective. The careful reader will appreciate that this is not a race to finish; it is a process that rewards patience, accurate surface preparation, and controlled curing. You want to avoid trapping moisture behind the fabric, which can lead to a second failure that looks similar to the original problem but is more stubborn to fix. When you reattach the headliner, secure all clips and fasteners with consistent, even pressure. Test electrical components only after the adhesive has fully cured and you’re confident the panel is stable and aligned with the roof edge. If the dome light, sun visors, or overhead consoles were removed, reinstall them with attention to the original mounting points and wiring routes. A misaligned headliner can creak or sag again, and the reinstallation becomes the most visible part of the repair, so aim for straight lines, uniform gaps, and a consistent seam along the edges.
The final checks are straightforward but essential. Look for any wrinkles, ensure the panel sits flat against the roof, and confirm there are no visible glue ridges or lumpy patches where the fabric has not taken properly. Run your hand along the edge to feel for any lifted zones, then perform a light, manual recheck of all trims and fixtures. If there’s a tiny gap at the periphery, a careful re-clamp or tack with a small amount of adhesive can seal it without creating stiffness in the surface. Once satisfied, you may bring in interior lighting and air circulation to test comfort and acoustics as well as the function of any overhead electronics. The work is complete when the headliner looks and behaves as a single, cohesive surface that respects the cabin’s proportions and the driver’s field of view. A well-executed repair not only restores appearance but also preserves insulation and sound dampening, contributing to a calmer ride even on rough roads.
For those who want to extend their learning beyond this specific repair, internal exploration of practical interior projects can be valuable. See the resources and community discussions available at https://mastertruckrepairllc.com/blog/. There you’ll find various perspectives and problem-solving approaches that can enrich your hands-on experience and help you make informed decisions about supplies, safety, and best practices. Remember, if the repair involves significant electrical components or if the structure reveals deeper damage, seeking professional upholstery or a body shop curatorial expert is a prudent step to ensure your vehicle remains safe and reliable.
External resource for further reference: https://www.autorepair.com/articles/repairing-a-sagging-truck-headliner
null
null
Repair or Replace: Making the Call on a Sagging Truck Headliner
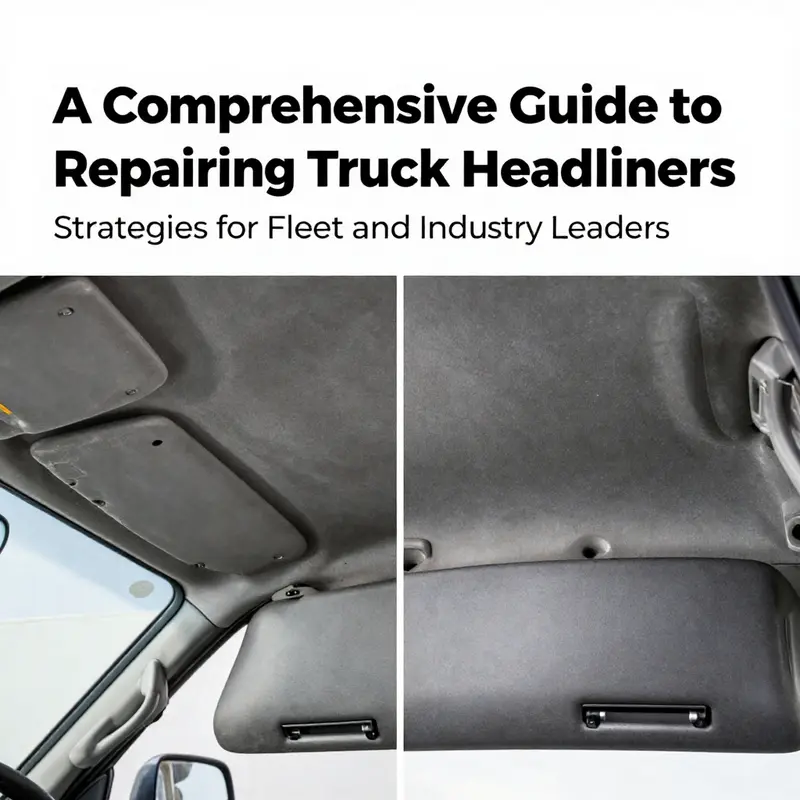
A sagging headliner in a pickup or work truck isn’t just an aesthetic issue. It can affect cabin acoustics, obscure dome lights, and signal deeper problems like moisture intrusion or aging adhesive. When you stand in the cab and feel the fabric pull away from the roof, the question isn’t simply how to patch a torn corner. It is how to weigh the root causes, the scope of damage, and the practical realities of cost, time, and vehicle value. The decision to repair or replace a truck headliner rests on a straightforward premise: repair for minor, reversible issues that preserve the original look and structure; replace when the damage is widespread or when the underlying panel is compromised. Understanding where your truck sits on that spectrum helps you avoid throwing good money after bad and keeps the interior functioning as it should.
Begin with a careful assessment. Sagging might be the last visible symptom of a deeper problem. Moisture intrusion from a roof leak, a failed adhesive over years of vibration, or a physical impact can loosen the board and the fabric, and in some cases, lead to staining, warping, or even mold growth behind the liner. A comprehensive check should cover the entire headliner, not just the most visible area. If you find extensive sagging, large tears, or water staining that covers extensive zones, the math often favors replacement. But if the damage is limited to a small patch and the roof under the fabric shows no active corrosion or moisture signs, a repair approach can restore comfort and appearance without replacing the whole assembly. This is a nuanced call, and the answer hinges on both the condition of the roof panel and the availability of material that matches the stock interior.
The cost and labor equation is not abstract. Labor for removal, prep, and reattachment can rival or exceed the price of a full headliner replacement in some cases, especially when multiple electrical connections are involved or the vehicle’s interior components share limited access. If your truck is older and carries the burden of other aging systems, the economics shift toward replacement as a way to refresh the entire interior and reduce the risk of recurring issues. Conversely, if the truck is newer or has a pristine cockpit otherwise, restoring the original headliner might be preferred to preserve resale value and the factory look. Material availability matters, too. If the exact ceiling fabric is scarce or discontinued, repairing with a compatible substitute could produce a mismatched finish that stands out on a clean interior. In such situations, replacement becomes the more prudent path.
A practical rule of thumb helps frame the decision: reserve repair for minor detachments, small tears, or localized staining where the underlying roof panel remains solid and dry. Consider replacement when the fabric is heavily creased, the foam backing has deteriorated, large sections are detached, or moisture has left behind persistent staining and a risk of mold. In the latter case, replacing the headliner not only renews the surface but also removes potential sources of odor and health concerns, especially in trucks that see irregular climates or frequent exposure to rain and humidity. It’s worth noting that mold or persistent moisture is a strong signal that the roof may have an ongoing leak or that the headliner has absorbed moisture repeatedly. If you suspect moisture issues, address those first, or you risk sacrificing the repair or replacement work soon after.
When you proceed to repair, the process is incremental and patient. Start by preparing the work area: park in a clean, dry, well-ventilated space and remove loose items from the cab. Power down the vehicle to avoid electrical hazards during any disassembly. The removal step, though straightforward in principle, requires care. Begin by removing trim pieces around the edges—sun visors, dome lights, speaker covers—using a plastic pry tool or a gentle screwdriver to release the clips without marring neighboring panels. Keep track of screws and harnesses, and disconnect any electrical connections, such as dome light wiring, before lowering the headliner. A rushed removal can compromise wiring or crack nearby panels, complicating the job.
Once the headliner is down, inspect the roof panel for rust, corrosion, or signs of past leaks. Clean the surface with a damp cloth and a mild cleaner, then allow it to dry completely. The inspection stage is not cosmetic; it informs whether the structural board underneath is compromised or whether underlying corrosion is present. If the roof is sound and dry, you can move toward a repair approach. If not, structural repair or even full replacement becomes a more reliable choice. For repairs that address minor detachment or small tears, you’ll typically use an automotive-grade adhesive. Apply the adhesive to the back of the fabric or to the roof panel, then reposition the headliner with steady, even pressure. Clamps or masking tape can help hold the material in place during curing, which can take up to a day depending on the product. For small fabric tears, a patch kit designed for headliners, carefully applied with adhesive, can seal the area without becoming conspicuous. The key is to press and hold until the adhesive gains a solid bond and the fabric lays flat against the surface.
If the decision is made to replace, you’ll procure a headliner that matches the model and interior trim as closely as possible. Replacement is more involved because it requires removing and reinstalling all lights, clips, and the internal mounting hardware to anchor the new panel securely. The process is essentially the reverse of removal: align the new headliner, engage the mounting points, reseat all clips, screws, and fasteners, and reconnect electrical components. Throughout, avoid over-tightening fasteners, which can distort the ceiling panel or warp the mounting points. After installation, reattach all edge trim and accessories, then test the dome lights, map lights, and any other electrical components to confirm they function correctly. A newly installed headliner should sit flush with no wrinkles or gaps, and the fabric should reflect a consistent color and texture across the entire surface.
In either scenario, finishing touches matter. If you repaired the headliner, inspect for any residual wrinkles and re-seat the fabric so it sits evenly. If you replaced it, take a moment to check alignment with adjacent panels and ensure that the headliner lines up with door openings and the overhead console. A consistent finish in color, texture, and seam placement helps preserve the truck’s interior value and reduces the likelihood that future issues will arise from a misfit panel. Safety should remain a constant priority throughout the job. Electrical tests should be conducted with the doors closed and the vehicle powered down, and any work involving wiring should be undertaken with care to avoid short circuits or interrupted circuits that could affect airbags, sensors, or lighting.
Throughout this decision-making and repair journey, consider the availability of material and the long-term outlook for the truck. If the vehicle is a daily workhorse with heavy use and exposure to dust, rain, or cargo, a robust headliner that stays put reduces maintenance headaches and supports safer indoor conditions for the driver. On the other hand, if the truck’s interior has other aging components that will soon require attention, replacing the headliner can be a strategic moment to refresh the cockpit and prevent a cascade of future interior repairs. For deeper guidance on assessing headliner conditions and repairing strategies, a broader resource can offer step-by-step context and product considerations. For broader guidance on evaluating headliner conditions, you can consult the MasterTruckRepairLLC blog. MasterTruckRepairLLC blog.
As you finalize the choice, keep in mind the practicalities of your situation. If you’re uncertain about handling electrical components or structural integrity, consulting a professional upholstery specialist or auto body shop is prudent. Improper installation can create safety hazards or cause further damage. A seasoned technician can confirm whether moisture is still entering the roof cavity, verify that the original headliner board is sound, and ensure that the new or repaired headliner is anchored correctly and evenly. The goal is not merely to cover a flaw but to restore a quiet, clean, and reliable cabin environment that supports both comfort and safety on the road. In that spirit, the decision to repair or replace should be grounded in a careful appraisal of damage, cost, and the long-term durability of the solution. For readers seeking additional perspectives and practical tips, an external resource offers a detailed discussion of car headliner repair approaches, including assessment and replacement considerations: https://www.autoblog.com/2023/06/15/car-headliner-repair-guide/.
From Repair to Resilience: Finishing Touches and Long-Term Care for a Truck Headliner
When the last fastener clicks back into place and the fabric settles against the roof, the instinct is to call the job done. Yet a headliner repair only truly finishes when the surface is as durable as it looks and its performance is predictable for months to come. This chapter is about the nuanced finish work and the routine care that protect your repair, extend its life, and keep the cabin feeling like a quiet, well-kept shop instead of a temporary patch. It is the seam where practical repair meets deliberate maintenance, and it requires the same patient attention you applied during removal and reattachment, just directed toward longevity and consistency in appearance.
The first step in final touches is to reestablish a clean, stable base for the headliner and the surrounding panels. Begin with a careful cleaning of the repaired section and any adjacent edges where adhesive, dust, or fingerprints may have accumulated during the repair process. Use a soft, lint-free cloth slightly dampened with a mild, pH-neutral cleaner. Wipe in gentle, even strokes, and avoid saturating the fabric. The goal is to remove residue rather than to soak the material, which can weaken the adhesive bond over time. Pay particular attention to the junctions where the new fabric meets the original headliner or roof panel. A seamless transition not only looks better but reduces the risk of edge lift or fiber fraying in the long run.
After cleaning, inspect the surface under bright light. Look for subtle signs that can become eyesores if left unattended: tiny bubbles tucked under the fabric, fine wrinkles that catch the light, imperfect seams where color or texture differs, and any slight color mismatch at the edge. Bubbles and wrinkles often indicate trapped air or uneven tension during reattachment. If you uncover any of these, reapply a small amount of adhesive in the affected area and gently smooth the fabric with a soft roller or clean gloved hand. The cure here is patience; don’t rush the smoothing trickery or over-tension the fabric, which can introduce new wrinkles and a stiff feel. The goal is a uniform, flat surface with no visible distortions when viewed from typical seating positions.
Beyond looks, the repair’s durability hinges on how well the surface is protected after the fact. A protective coating or treatment, formulated for automotive headliners, can help resist UV fading, moisture penetration, and minor abrasions. If you choose to apply a protective layer, follow the product’s directions precisely and ensure the environment is clean and well-ventilated. Apply in a light, even film and allow adequate drying time before exposing the headliner to heat or sunlight. The right coating should bond securely with the headliner’s fabric or vinyl without changing the texture or color noticeably. It is not a shield against deliberate abuse or severe moisture; it’s a preventive measure against everyday wear and sun exposure that can accumulate over months and years.
Repair finished surfaces deserve the same respect you give any high-traffic interior. However, care is not only about one-off treatments; it is a rhythm. Regular maintenance becomes a shield against future sagging or detachment. Cleaning should remain gentle and non-abrasive. When cleaning the interior, avoid harsh solvents, ammonia-based cleaners, or anything that could degrade polyurethane-backed fabrics or vinyl over time. For stubborn residues near seams, a mild cleaner diluted per label directions can be applied with a soft cloth, then wiped away with a light water rinse on a separate cloth to prevent residue buildup. The aim is to keep fibers flexible, color stable, and the adhesive layer from drying out or becoming brittle.
Seasonal checks are quietly powerful. A simple post-winter inspection can catch moisture issues early. If you notice dampness, musty odors, or water stains on the headliner, trace the source of intrusion. Roof leaks, clogged sunroof drains, or compromised weatherstripping can send moisture into the headliner and undermine repairs. Addressing the leak promptly protects the repaired surface from re-wetting and potential mold growth. If you’re unsure about the leak’s origin, enlist a professional to diagnose the roof interface and drainage paths. Even a perfectly applied headliner can fail if moisture events recur behind the scenes.
The practical side of long-term care also includes routine verification of the headliner’s attachment. Over time, vibrations, temperature swings, and door or sunroof activity can loosen mounting clips or trim fasteners. A quick, periodic check—especially after a long road trip or a period of extreme weather—can prevent a minor looseness from becoming a sag. When you re-seat components like dome lights, visors, or loudspeakers, ensure they are aligned and clipped securely without forcing parts beyond their tolerance. The aim is to preserve a quiet interior with minimal rattle or squeak; a stable headliner contributes to both comfort and perceived value of the vehicle.
Incorporating a mindset of preventive maintenance reduces the chance of repeat repairs and helps keep the interior looking fresh. If you choose to recondition the headliner’s surface periodically, think in terms of micro-surfacing rather than a full re-wrap. Lightly buffing edges, smoothing folds, and reapplying a protective layer at longer intervals can refresh the look without the cost of a full replacement. This approach is especially effective for headliners that cover long stretches of fabric or vinyl where wear tends to accumulate at seams and high-contact zones around the dome light or sun visors.
For those who want to grow their skill and confidence, there is value in documenting your maintenance routine. A simple log noting the date of the repair, the materials used, and the conditions observed during follow-up checks can be a practical reference. It helps you spot patterns—such as recurring edge lifting after heat waves or moisture events—and makes it easier to plan future interventions before small issues escalate. The habit of monitoring the headliner area keeps the interior cohesive and reduces the likelihood of dramatic surprises in extreme conditions.
As you close the maintenance loop, consider how your approach to the headliner mirrors wider vehicle care. The interior is a single system: it houses comfort, acoustics, and cabin climate control. When one element is compromised, others can be affected. A well-executed finish that addresses both appearance and resilience supports a more reliable and pleasant driving environment. The repair becomes less about a one-time fix and more about a sustainable enhancement that aligns with orderly maintenance in the rest of the truck.
If you’re looking for more practical tips on interior upkeep and how to extend the life of headliners and other trim components, you can explore further guidance on the Master Truck Repair blog. It’s a useful resource for owners who want steady, repeatable results without resorting to costly specialty services.
External resource: For a broader set of finishing techniques and long-term maintenance strategies, see this external reference: https://www.autoparts.com/blog/automotive-headliner-repair-tips-and-tricks
Final thoughts
Maintaining the integrity of truck headliners is not merely a cosmetic endeavor; it directly affects the comfort, safety, and image of your fleet. Understanding how to thoroughly assess damage, select appropriate tools and materials, follow an effective repair process, and make informed decisions about repair versus replacement will empower fleet managers and operators to maintain their vehicles effectively. Post-repair maintenance ensures the durability of these repairs, contributing to the overall professionalism and operational readiness of your fleet. Investing in the care of truck headliners speaks volumes to your commitment to quality service and customer satisfaction.

