Rust damage can significantly compromise the look and functionality of Chevy trucks, particularly for fleet managers and business operators. The continual exposure to weather elements can lead to rust spots, primarily around wheel wells and quarter panels. In addressing these issues, selecting the best-fit rust repair panels is paramount for achieving seamless restorations. This article delves into optimal choices for rust repair panels tailored for 2007–2014 Chevrolet Silverado models, discussing material quality, fitment importance, supplier comparisons, and installation guidance. Each chapter is designed to equip fleet managers and trucking operators with essential information, ensuring the longevity, safety, and aesthetic value of their vehicles.
Meticulous Fit, Lasting Restoration: Wheel Arch and Center-Frame Panels for Silverado 2007–2014 Rust Repair
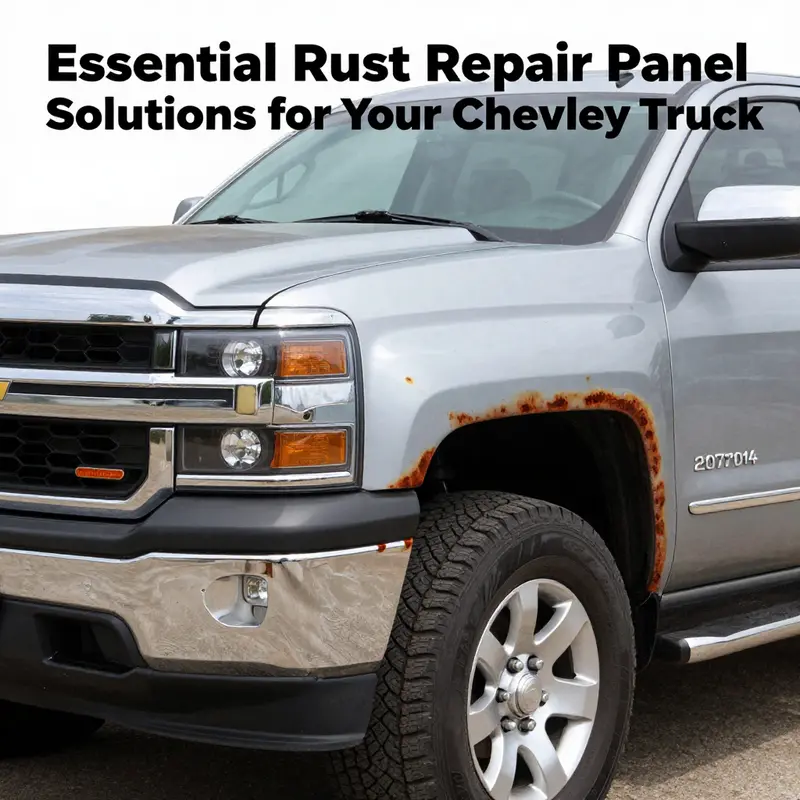
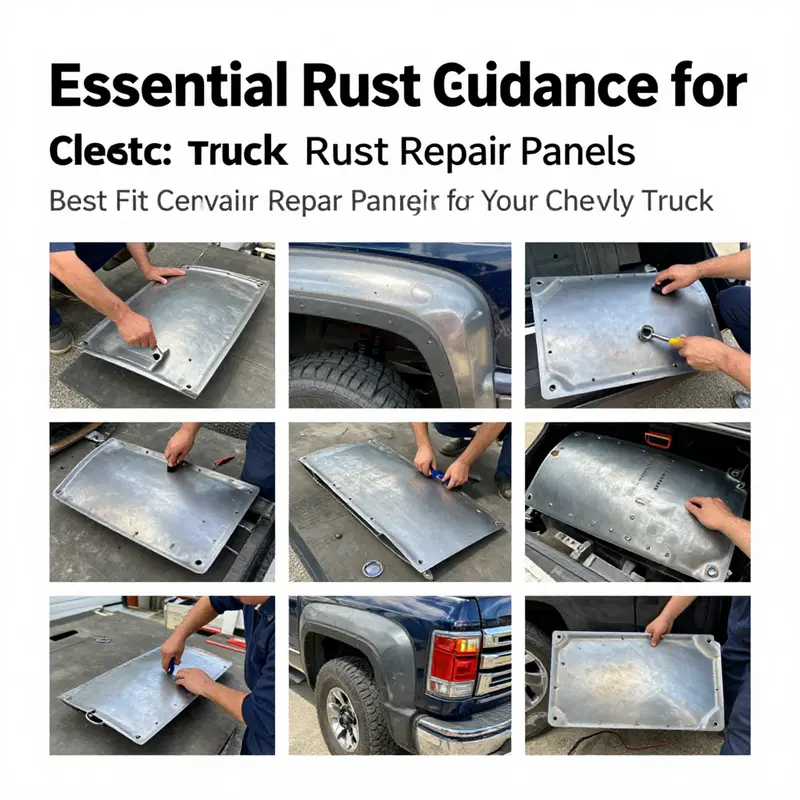
Restoring a Silverado from 2007 through 2014 demands more than patching surface rust. It requires patchwork that preserves alignment, preserves structural integrity, and preserves the truck’s original silhouette. In practice, the most reliable restorations hinge on choosing panels that are designed to fit the factory contours as closely as possible. Among the pieces most likely to determine a successful outcome are the wheel arch patches that repair the rear quarter area and the center-frame patches that address corrosion in the truck’s backbone. When these two repair targets are addressed with panels cut to OEM-like specifications, you gain a repair that stays consistent across the body lines, keeps doors and bed panels flush, and minimizes the risk of future moisture intrusion under paint. The goal is a repair that feels like a factory fix, not a temporary cosmetic patch that shifts as soon as vibration and heat return.
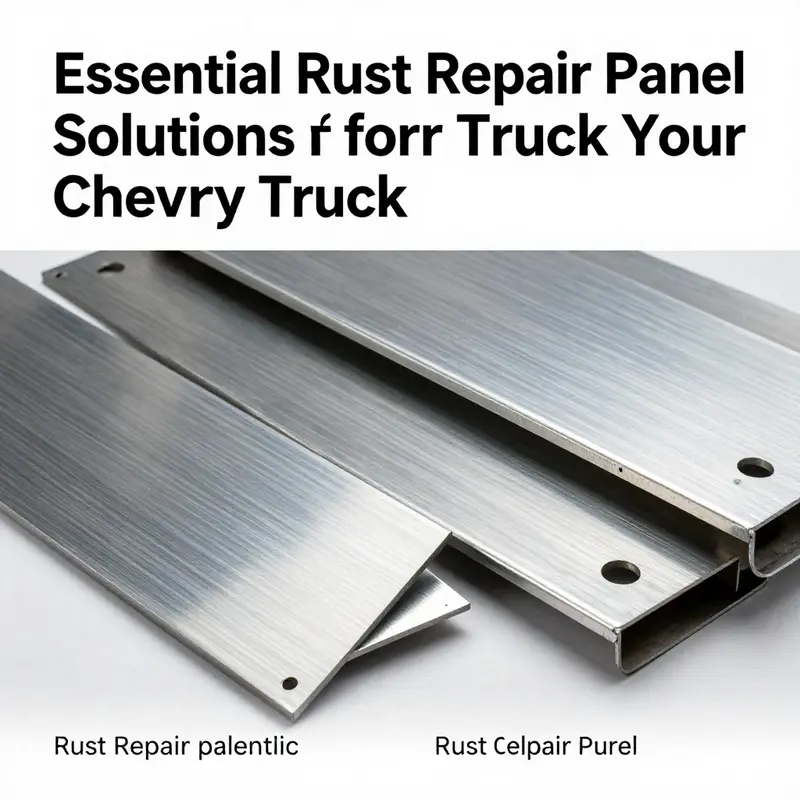
Wheel arch repair panels for these Silverado years are crafted to replicate the upper contour around the rear wheel well. The advantage of a panel that mirrors the original shape is immediately apparent during test-fit. A curved edge that flows into the fender and quarter panel reduces the need for aggressive reshaping or filler and helps the seam line align with the surrounding body lines. These patches are generally laser-cut to OEM-like dimensions and built from steel that will weld and take paint in a way that mirrors the surrounding metal. They often arrive with a coated surface or a finish that resists corrosion, minimizing prep work before welding. The patch is designed to be welded into place, followed by seam sealing and the application of a protective coating to form a durable, continuous barrier. The impact of a precise wheel arch patch goes beyond aesthetics; it keeps the rear quarter panel from pulling out of alignment, preserves the vehicle’s water shedding characteristics, and helps protect the inner structure from moisture that can accelerate rust under paint. A well-fit patch also reduces the likelihood of edge distortion after welding, which can otherwise create a micro-gap that traps moisture and accelerates corrosion.
In parallel, center-frame rust repair panels address a vulnerability that, if neglected, can compromise the vehicle’s load-bearing structure. For the 2007–2014 Silverado 1500 family and the corresponding Sierra variants, these patches are shaped to fit the central frame section with matching rails, bolt holes, and interfaces to cross-members. The promise of a correctly shaped center-frame repair is a precise alignment with the factory rails and the surrounding structural elements. When you lay the panel against the frame, you should see a flush edge without gaps and a bolt-pattern alignment that matches the original design. Fitting such a panel often entails careful measurement and controlled trimming, followed by welding that produces clean, continuous seams. After welding, the weld zones and adjacent metal benefit from rust-preventive coatings to halt any residual moisture from seeping into the frame. The frame’s straightness is not merely a matter of appearance; it affects steering geometry, braking behavior, and ride quality. A patch that distorts or shifts the rails can propagate misalignment through the entire chassis, amplifying vibration and reducing overall safety on the road.
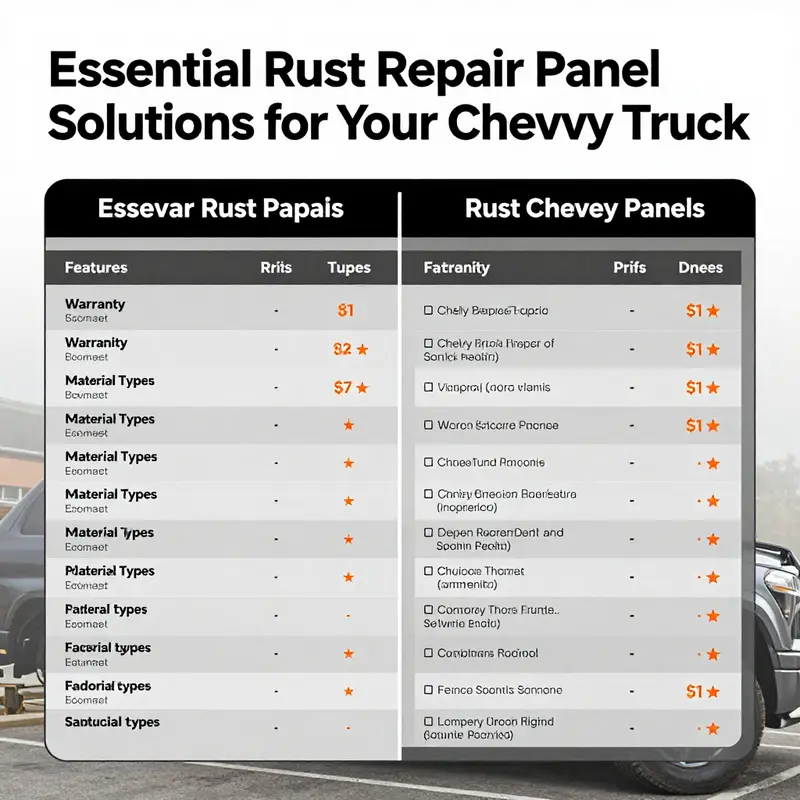
The practical truth about selecting these panels lies in recognizing that compatibility matters more than raw cost. Even within a single model year range, variations exist—from extended cabs to crew cabs, from different bed lengths to trim-specific differences—that can alter edge profiles, flange widths, and mounting holes. The safest course is to verify fit against your VIN or exact model year and trim, and to compare the panel’s edge shape and mounting features with what you remove. Reputable suppliers typically provide diagrams and installation notes that help with this assessment, and many offer warranties that cover manufacturing defects or fitment issues. When you settle on a pair of panels—the wheel arch piece and the center-frame piece—do not overlook the finish and protective coatings. Some panels arrive with a factory-like anti-corrosion coating that shortens prep time before painting, while others require primer and rust inhibitors as part of the repair workflow. The objective remains clear: a repair that vanishes beneath paint and underseal, while preserving the structural and sealing integrity of the original seam connections.
Beyond the physical fit, the repair’s overall feasibility rests on a clear installation plan. A precise wheel arch patch, coupled with a correctly shaped center-frame patch, typically demands minimal compensatory hammering or drastic flattening of contours. Plan for comprehensive surface preparation—rust removal down to clean metal, use of weld-through primer, and careful clamping to minimize heat distortion during welding. Take time to study seam geometry and flange interfaces before a single bead of weld is laid. Ensure that the alignment with fenders, doors, and bed sides remains intact as you progress. The best results come from methodical work: test-fit, mark, trim, test-fit again, and then proceed with controlled welding and sealing. When the planning phase is executed with care, you reduce the likelihood of post-repair gaps and paint cracking and preserve the vehicle’s original integrity.
If you are weighing options and want to cross-check compatibility, keep in mind that official fitment databases and reputable supplier guides can be invaluable. You can find fitment details and installation guidance through catalog listings maintained by major auto parts platforms. While product naming can vary, the core principle remains the same: panels manufactured to OEM-like dimensions, designed to replicate the exact contour of the Silverado’s wheel arch and center-frame geometry, and backed by warranties that provide reassurance during restoration. The restoration journey benefits from approaching the project as a system repair. The wheel arch and center-frame panels are not isolated fixes; they are integral to restoring both the vehicle’s aesthetics and its structural behavior under load, which, in turn, preserves the truck’s value and safety over time. For readers seeking broader context and practical considerations during planning, the Master Truck Repair blog offers a repository of insights that can help align this rust repair work with broader maintenance and repair goals. Master Truck Repair blog.
For further practical reference on current product availability and verified fitment details, you can consult the official listing on the retailer’s site, which provides up-to-date specifications, customer reviews, and installation guidance. External resources can complement the planning stage, giving you a real-world sense of how these patches perform in the field and what common pitfalls to avoid. External reference: https://www.amazon.com/dp/B0CQZJW9XG
Material Matters: Selecting the Right Rust-Repair Panels for Chevy Trucks
When you restore a Chevy truck, the rust repair panel you choose isn’t merely a sheet to patch a hole. It is the quiet keystone that preserves original form, supports future integrity, and shapes how the finished rover of a project will behave under load, vibration, and the elements. The broader article on best-fit Chevy truck rust repair panels hinges on a simple, durable truth: material quality and how it is matched to the intended use determine long-term success as much as fit does. This is where the conversation moves from the impression of a clean patch to the reality of a robust repair that stands up to road salt, heat, and years of daily service. The choices you make here ripple through the entire restoration, affecting fit, finish, and longevity, and they should be driven by careful assessment rather than the quickest solution.
Across Chevy trucks, the most common rust hotspots have predictable patterns. The rear wheel arches, door bottoms, rocker panels, cab corners, and bed sides often narrate the same story of moisture exposure and salt exposure that compounds over years. For many restorers, the instinct is to seek patches that recreate the exact geometry of these areas with fidelity. The best-fit panels in this context aren’t just about matching exterior contours; they must align with the surrounding structure and demonstrate compatibility with the original metallurgy and coatings. In practical terms, that means looking for panels that come with thickness and finish that resemble factory standards, and that can be welded, sealed, and painted in a way that keeps moisture out and paint adhesion reliable.
Material quality matters for several reasons. Steel remains the backbone of most restoration panels because it provides predictable strength, weldability, and a finish that behaves like the parent sheet when you prime and topcoat. High-grade black steel or galvanized variants are favored for those aiming to preserve a classic look while still delivering corrosion resistance. A key point is that the panel should have consistent thickness and a coating or galvanization that matches the adjacent metal. When the panel thickness mimics the OEM specification, you’re less likely to encounter fit issues that cascade into misaligned gaps, mismatched panel edges, or a finish that flares at the weld line after paint. For modern restorations, this approach matters just as much as the curvature of the wheel arch or the precise radius of the cab corner—areas where even a small deviation in contour can be conspicuous in the final coat.
In addition to traditional steel, OEM-style replacement kits—especially for older Chevy/GMC bodies—offer a compelling path for historically accurate restorations. These sets are engineered to reproduce factory dimensions and metallurgy, so the inner and outer rocker panels or quarter-panel components align with the original frame rails and body lines. The advantage here is not merely cosmetic fidelity; it’s an assurance that the repair will resume the vehicle’s designed stiffness and load paths. The result is a restoration that preserves the vehicle’s structural soundness as well as its appearance. For builders aiming to retain a classic character, this approach minimizes the guesswork involved in re-creating factory dimensions and reduces the likelihood of compounding misalignment problems during reassembly.
Composite or reinforced-plastic panels are increasingly present in the aftermarket, drawn by the appeal of rust resistance and lighter weight. They can offer compelling advantages in environments where moisture and road debris are constant concerns. Yet these panels require a different approach to installation. Welding techniques may be altered, bonding methods might become a larger part of the process, and the long-term performance of coatings on composite surfaces can vary by manufacturer. For a project that seeks to maintain a stock appearance and preserve resale value, composites may be a sensible option in select applications, but they demand careful vetting of the supplier’s process, warranty, and compatibility with the vehicle’s paint system and structural joints.
Choosing the right material ultimately hinges on the project’s goals. OEM-quality steel panels are ideal for restoring stock appearance and preserving value. They behave, finish, and weld in ways that respect the vehicle’s original manufacturing choices. High-performance composites, meanwhile, may serve a niche role in off-road builds or high-horsepower routines where weight reduction and corrosion resistance are prioritized over exact factory replication. The key is to marry the material choice to the intended outcome: how the truck will be used, where it will live, and how long you expect the repair to endure before another round of maintenance becomes necessary.
Beyond material type, there are universal standards and practical checks that guide a reliable selection. Reputable suppliers often provide panels laser-cut to OEM specifications and accompanied by detailed fitment data. They strive to ensure compatibility with surrounding components such as fenders, doors, bed sides, and bed rails—areas where a slight mismatch can lead to edge gaps that trap moisture or require extra grinding and filler. Verifying compatibility with your vehicle’s VIN or specific model year and trim helps prevent the wrong contour from slipping into the build. This is not just about a pretty patch; it is about ensuring that the repair maintains the vehicle’s original geometry, which is critical for alignment with the chassis, wheel alignment, and the proper fitment of trim pieces that complete the look.
In the context of a Chevy Silverado’s 2007–2014 generation, a typical yet telling scenario involves the rear upper wheel arch patch work that restores the quarter-panel contour around the wheel wells. While the exact catalog naming varies by supplier, the essential idea is a two-piece or multi-piece patch that mirrors the factory curvature and seam placement around the wheel arch. This isn’t just a cosmetic patch; it is a structural interface that must hold up under the stresses of road use, maintain correct door and fender gaps, and accept the same paint and primer adhesion as the surrounding metal. The two-piece approach, when properly fitted, helps to preserve the original line of the body and reduces the likelihood of misalignment as the truck settles over time. A careful installer will test-fit the panel first, trim any edges that interfere with body lines, and use seam sealer and rust-inhibiting primers to establish a moisture barrier before finishing with color-mmatched paint.
The installation mindset mirrors the material logic. Preparation and precision are more important than the patch’s appearance. The rusted area must be removed back to sound metal, with edges cleaned to a true plane that accepts a patch flush against the surrounding skin. The welds should be clean and uniformly spaced, avoiding excessive heat that could warp the curvature. If a panel uses bonding methods rather than welding, the adhesive must be compatible with automotive coatings and provide a reliable seal against future moisture intrusion. After securing the patch, attention shifts to seam sealing and corrosion protection around the perimeter of the repair, followed by primer, sealer, and color to match the vehicle’s finish. The result should be an integrated field repair that reads like part of the original sheet, not a late-stage addition.
A practical reminder attaches to the decision-making: verify fitment through reliable guides and documentation supplied by the manufacturer or retailer. Detailed installation guides, warranty terms, and return policies matter. They reflect the supplier’s confidence in the product and their willingness to stand behind it. For enthusiasts who want to stay connected to broader guidance, the project can be complemented by regular reading and discussion in repair-focused resources such as the Master Truck Repair blog, which often discusses restoration workflows and material considerations in accessible terms. See the Master Truck Repair blog for broader context and practical tips that complement the choices described here.
Ultimately, the best-fit rust repair panels for a Chevy truck emerge when you align material properties with restoration aims, verify line-for-line fitment with OEM references, and commit to installation practices that protect the vehicle’s long-term integrity. The choices span traditional steel that honors the lineage of the truck, to OEM-style kits that guarantee dimensional accuracy for older restorations, to composites that offer modern resilience in specific use cases. The material decision is not an isolated step but a foundational choice that shapes how the project ages, how it withstands the elements, and how easy it will be to maintain a showroom-level appearance for years to come. The goal remains clear: a patch that disappears into the metalwork, a surface that accepts paint as if it were always part of the body, and a repair that preserves the vehicle’s original geometry so every subsequent step—panel alignment, trim installation, and final finish—proceeds with confidence.
External resource for further reference on catalog options and compatibility can be found here: https://www.rockauto.com/en/catalog/chevrolet/2010/silverado/1500/4dr-cab-2wd/1689/body+panels
When Fit Defines Forever: The Crucial Role of Precise Chevy Rust-Repair Panels in a Lasting Restoration
Choosing rust-repair panels for a Chevy pickup is not a side quest; it is the hinge on which a full restoration turns. The best-fit panel does more than fill a hole. It preserves the geometry of the body, supports proper paint coverage, and keeps doors, hoods, and beds aligned long after the welds have cooled. In practical terms, a panel that doesn’t match the surrounding metal forces you into compromises: gaps, uneven seams, and a schedule of rework that grows with every rain storm that seeps into the joints.
Chevy pickups, like many older chassis-based trucks, accumulate rust most aggressively around the rear wheel arches and adjacent seams. When those areas become pitted or thinned, replacing the patch with a generic cut of metal may feel right at first, but any deviation in contour or flange position will show up when you close a door or pull a bed side flush to the cab.
That is why the industry emphasizes exact-fit, OEM-replacement panels. These parts are stamped to match the factory lines, flange widths, and bolt holes so that the new sheet metal nests into the existing structure as the factory intended. The benefit is not only ease of installation but long-term durability. The repaired structure shares similar metal thickness, grain direction, and corrosion protection pathways, which helps seal seams more effectively. The result is a restoration that looks right and lasts.
Accuracy matters from the outset. Before welding a patch in place, you confirm compatibility with your vehicle’s VIN, year, and trim. Some panels are designed for specific trim levels or body configurations, and even within the same generation, a fraction of an inch can change alignment. A two-piece wheel-arch replacement, for instance, is crafted to reproduce the exact curvature and joint angles of the original patch, so the surrounding quarter panel, the fender, and the frame rails align when you sit the truck on a level surface. This level of precision pays dividends in paint adhesion, seam sealing, and future corrosion control.
An advantage of OEM or guaranteed aftermarket panels is the defined support network. Detailed install guides, fitment charts, and warranty coverage are common with reputable suppliers. That kind of backing helps you avoid the trap of choosing a sheet that looks close but fits poorly after it’s welded and sealed. The gap that you see in the first dry fit can become a trench of rust if you do not address it with the proper flange geometry and sealing methods.
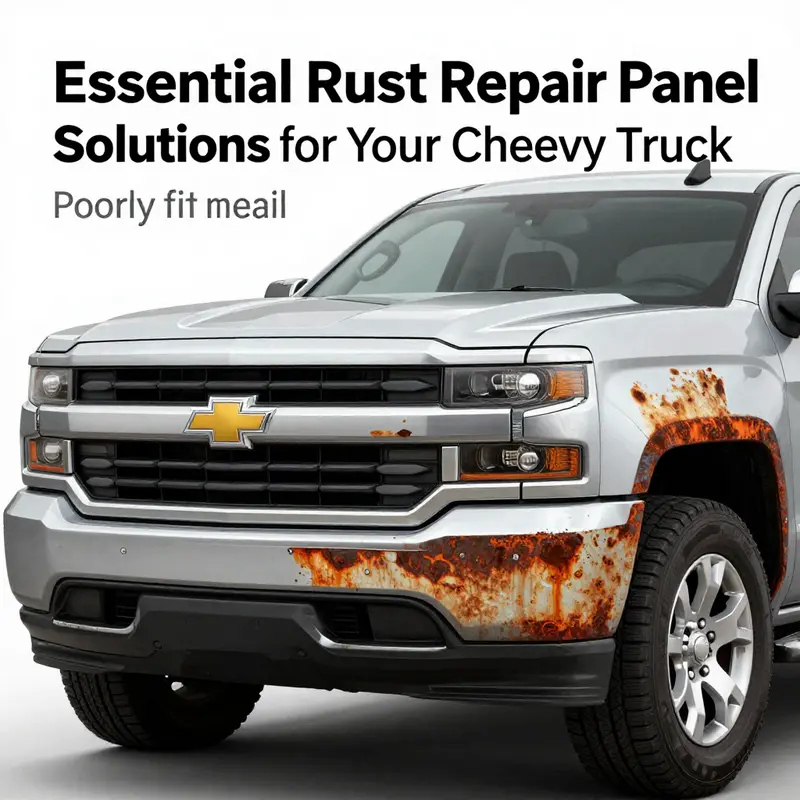
On the flip side, the consequences of poor fitment are more than cosmetic. Gaps trap moisture; moisture accelerates corrosion along weld lines and seam joints. Uneven surfaces complicate paint adhesion and primer sealer, and over time paint lift becomes a stubborn reminder of the misfit. If the patch sits off-line, it can alter the way doors seal or how the hood aligns with the cowl. Each misalignment compounds stress at the joints, potentially weakening the structure where the body meets the frame. The upshot is a costly cycle of rework that could have been avoided with a properly picked panel.
To avoid these outcomes, most restorers prioritize a precise match to OEM specifications. This is where the discussion shifts from ‘looks like metal’ to ‘fits like factory.’ The best approach is to secure panels that were stamped to the same tooling and tolerances as the originals. In practice this means sourcing from suppliers with documented OEM-equivalent or OEM-backed panels, ensuring the part’s contours, indentations, and mounting holes line up with the factory configurations, including fender, door, bed, and cab interfaces. A well-fit panel is not a guess; it is a verified component that offers predictable alignment and a straightforward seam-to-seam assembly process.
Before you begin welding, you use a careful fitment discipline: do a dry fit, remove and reposition, verify that the seam lines up with existing ribs and body lines, and check the backside for clearances with the frame and trim pieces. Professionals often create a small mock-up with clamps, then mark the weld zones. They favor clean metal, after removing corrosion and treating edges with a rust-preventive treatment. They also plan for appropriate seam sealer and corrosion protection after welding to create a water-tight joint that resists salt and moisture, a common threat in northern climates and on trucks that see heavy daily use.
Readers who want to dive deeper into the practicalities of body-panel fitment can visit the MasterTruckRepairLLC blog for general repair guidance. It offers broad, hands-on advice that complements OEM fitment principles without getting lost in vendor-specific conversations. MasterTruckRepairLLC blog.
Ultimately, the chapter would be incomplete without acknowledging the documented guidance from manufacturers on body-panel repair. The GM technical service documentation emphasizes that panels must be matched to factory specifications to maintain structural integrity and paint performance. This formal guidance underlines the point that fitment is not optional; it is a fundamental step in any rust repair plan. For those seeking authoritative documentation, consult the external resource linked below for a rigorous framework of fit and seamwork. External link: GM Technical Service Bulletin on body panels.
The Fine Art of Fit: Selecting Chevy Truck Rust Repair Panels for Seamless Restoration
Restoration work on a Chevy truck is as much about precision as it is about passion. The rust you see is more than a surface blemish; it is a signal that the panels around the wheel arches, door bottoms, and bed sides have borne the brunt of years in a harsh climate or a salty road. The path to a seamless repair starts with the right rust repair panels—panels engineered to match the contours, curves, and line work of the original metal. In practice, the best choice is a two-piece wheel-arch repair patch set that is designed to reproduce the exact shape of the rear wheel-well area. These panels are crafted to hug the quarter-panel profile, align with the surrounding bodywork, and provide a solid foundation for corrosion protection once welded into place. The goal is not just to cover a hole; it is to restore the structural rhythm of the sheet metal so that the repaired area looks and behaves like OEM steel again, from the line where the fender meets the door jam to the seam that runs along the bed. When rust eats into the wheel arch, the surrounding curvature is what gives the eye a sense of continuity. A patch designed to mirror that curvature helps the finished vehicle sit as it did when new, with gaps that remain tight and paint that lays down smoothly over the repaired surface. The emphasis on fitment is not merely cosmetic. A patch that doesn’t align with the existing quarter panel or fender can cause issues during reassembly, such as misaligned door gaps or a wheel arch that looks offset under the tire. For the restoration to be convincing, the panel must carry its share of the original load paths and maintain the vehicle’s structural integrity. This is especially true for trucks that see regular use, where a rust repair panel must resist the entry of moisture, match the factory seam locations, and hold paint well over time. The decision to adopt such a patch should be accompanied by a clear plan for how to treat the surrounding metal, which often includes surface prep, rust inhibitors, and a robust sealant strategy to keep moisture out of the restored seam. A practical approach begins with verifying that the patch is intended for the correct trim and era of the truck. For example, models from 2007 through 2014 in the Silverado range—covering the 1500, 2500HD, and 3500HD configurations—present a widely recognized need around the rear wheel wells. In restoration circles, these two-piece wheel-arch repair patches are frequently cited for their ability to reproduce the specific curvature and join lines found in the factory sheet metal. The emphasis on an exact fit is not merely theoretical; it translates into fewer hours of trial fitting, less guesswork during welding, and a more predictable paint line after finishing. When you hold a properly engineered patch up to the quarter panel, you can gauge how the contours tuck into the existing shape of the truck. The goal is to achieve a seamless transition, where the edge of the patch sits flush, the welds disappear under a filled seam, and the repair remains invisible to the casual observer once painted. Beyond the patch itself, the restoration plan should consider compatibility with surrounding components such as fenders, doors, and bed sides. Laser-cut to OEM specifications, these panels are designed to align with the factory bolt patterns and body lines, reducing the risk of misaligned gaps or mismatched profiles. The exact fit also means fewer mid-repair adjustments and less bending of adjacent panels, which can introduce distortion and compromise long-term durability. In the realm of materials, steel remains the workhorse of OEM and aftermarket panels due to its strength, formability, and cost efficiency. Steel is robust and forgiving during welding, a factor many restorers value when dealing with tight tolerances around wheel arches and other critical seams. Yet rust prevention cannot rely on steel alone. The same properties that make steel affordable also demand diligent corrosion protection after installation. Surface preparation, proper seam sealing, and a thoughtful rust-prevention regimen are essential to ensure the restored area holds up under moisture and road salts. Fiberglass panels offer an alternative path, particularly for non-structural applications or for enthusiasts chasing a lighter weight or a corrosion-resistant option in climates where moisture is persistent. Fiberglass patches can be easier to shape initially and are resistant to rust, which makes them appealing for spots where the original metal would be costly to replace or where authenticity is a lower priority than durability. They are not, however, a drop-in substitute for structural sections, and the engineering intuition behind a wheel-arch repair patch typically favors metal in the regions that bear load and contribute to the vehicle’s rigidity. For those pursuing authenticity in look and feel, OEM-style reproductions provide a bridge between original geometry and modern manufacturing. Availability of these reproductions spans a broad range of classic Chevy trucks, covering the decades from the mid-20th century through the late 1980s. The higher-quality reproductions, though priced accordingly, are often recommended for show-worthy restorations or long-term reliability where a precise crown and a consistent paint edge matter. The central point is not to chase the lowest price, but to secure a part that channels the original intent of the sheet metal, providing proper fit and consistent surface prep around the repair zone. In this landscape, a careful supplier evaluation becomes as important as choosing the patch itself. Material options, reproduce-ability of OEM contours, and the level of customer support all influence the eventual outcome. The steel-versus-fiberglass debate typically narrows to the project’s goals: if you prioritize long-term durability and a factory-like finish in a climate with heavy moisture, you may favor steel and meticulous finish work; if you are prioritizing corrosion resistance in a non-structural retrofit or a show vehicle, fiberglass could be a practical alternative for certain regions or builds. For those who insist on alignment with OEM standards, OEM-style reproductions—when produced with good tolerances and correct mounting points—offer a reliable path to restoration integrity. It is here that the broader supplier landscape becomes critical. A reputable supplier will not only stock panels but also provide compatibility information, installation guides, and clear warranty terms. The best-fitting panels for classic and modern Chevy trucks alike are those that come with detailed fitment data, including model-year-specific notes and, where possible, VIN-based verification. This is where practical guidance from industry sources becomes invaluable. A well-regarded industry overview emphasizes the importance of material choice, the availability of OEM-style reproductions, and the provider’s capacity to support the project with information and support. When planning a rust repair, you should approach the panel selection with a clear understanding of your restoration goals and a strategy for corrosion control that begins with the patch itself and extends through the finishing stages. The patch is a critical first move, but its success depends on the preparation, welding technique, seam sealing, and paint process that follow. A sound plan considers the repair as part of a coherent restoration narrative where the wheel arch, quarter panel, and surrounding body lines tell a single story of the truck’s history and its renewed future. For readers seeking practical context, a thorough resource is available that outlines the types, grades, and best practices related to Chevy classic truck body components. This overview helps frame the decision by balancing material advantages and the realities of installation, including the need for accurate fitment, robust corrosion protection, and thoughtful finishing. As you weigh options, keep in mind the importance of confirming panel compatibility with your vehicle’s specifics—year, trim, and, where available, VIN. A patch designed for a broad range of years may still require careful adaptation to align with the exact contours of your truck. The best approach blends a respect for OEM geometry with modern manufacturing precision, a strategy that reduces the guesswork and helps maintain the vehicle’s original character while improving its longevity. For ongoing maintenance considerations, it pays to stay aware of how your restoration choices interact with future servicing. Choose suppliers who offer clear documentation, responsive customer support, and warranties that reflect confidence in the product. A well-documented process and a reputable supplier network can shorten the restoration timeline, improve the final aesthetics, and help ensure that your repair panels will perform well for years to come. This is how restorations move from a collection of patches to a coherent, durable finish that honors the truck’s heritage while embracing modern engineering. Internal link reference to planning resources can support you in framing the broader maintenance and restoration plan as you move from initial purchase decisions to final paint and detailing. See Budgeting for Routine Truck Maintenance for a practical starting point on cost planning and project scoping. In the end, the smallest decisions—the right curvature, the cleanest weld, the most effective seam sealant—cohere into a restoration that looks right, feels solid, and ages gracefully with the road. External resources can further inform your approach, particularly those that provide an industry-wide perspective on parts categories and compatibility for Chevy truck body components. For a broader view of the current landscape and panel options, consider the Classic Truck Parts overview: https://www.classictruckparts.com
Perfecting the Fit: Installing Rust-Repair Panels on Chevy Trucks for a Seamless Restore
Restoration work on a Chevy truck that has succumbed to rust is as much about precision as it is about patience. The objective is not merely to patch a hole but to rebuild a panel that behaves like the original steel, carries its share of the frame’s load, and looks like it rolled off the factory floor. In practice, that starts with selecting rust-repair panels that are designed to fit the vehicle’s geometry and then installing them in a way that preserves the body lines, panel gaps, and structural integrity. When you approach the task with this mindset, the repair becomes less about cosmetic camouflage and more about restoring the truck’s long-term resilience and value. The process hinges on three core ideas: compatibility, careful preparation, and disciplined execution. Compatibility means panels that mirror OEM contours, weld surfaces, and mounting points. Preparation means cleaning, drying, and conditioning the repair zone so the panel seat is true and free of contaminants. Execution means welding with heat control, finishing with proper sealants and coatings, and verifying fitment after every stage. From the outset, it helps to think of the wheel arches as a common rust hotspot on many Chevy pickups. A two-piece wheel arch repair panel set, designed to follow the curvature of the original quarter panel, offers a practical approach to rebuilding that critical area. Such panels are engineered to align with the surrounding body lines and to integrate with adjacent components like fenders and bed sides. The aim is not to force a panel into place but to guide it into a position where small adjustments can achieve a factory-like seam. Of course, any restoration project benefits from cross-checking the panel against the vehicle’s VIN and the specific year and trim. This practice helps confirm that the panel’s stamped contours, mounting holes, and flange dimensions will align with the vehicle’s exact geometry. It is unwise to assume a one-size-fits-all solution, especially with trucks that evolved through multiple design revisions. When the right-fit panel is chosen, you can proceed with confidence that the repair will not create misalignment with the neighboring doors, fenders, or bed sides. The next step is to prepare the work area with the same care you apply to the rest of the truck. Begin by removing loose rust, paint, and debris from the repair zone. A wire brush can dislodge loose particles, while sandpaper helps clean the edges to a fresh, bright metal surface. In more severe cases, a media blaster may be employed to reach into crevices and to establish a uniform base for adhesion. Surface dryness is essential; moisture trapped under a patch invites corrosion between the new panel and the original metal. Once the area is clean and dry, the panel can be laid in place to check alignment. This is where clamps or temporary welds become invaluable. They hold the panel while you inspect the gaps and the contour against the truck’s body lines. The goal is to achieve a continuous seam that mirrors the surrounding panel geometry. If the contours appear off by more than a millimeter in any direction, light adjustments may be necessary. Minor reshaping is often accomplished with a hammer and dolly to coax the repair patch into closer contact with the existing metal. Edges may need a careful grind to ease the interface with the adjacent surface; this is not a job for brute force, but for controlled material modification that preserves the structural integrity of the patch and its ability to take welds cleanly. When the fit is satisfactory, the welding stage begins. A full bead along the seam is the standard approach, designed to fuse the patch to the sheet metal while maintaining even heat distribution along the joint. Welding technique matters as much as the weld itself. Short, steady passes help minimize heat buildup and reduce the risk of warping or distortion that could alter the hatchback or door lines. After the seam is welded, the welds must be ground and smoothed to produce a seamless transition. The goal is to have the patch disappear under a skim coat of filler or primer, leaving no visible line that betrays the repair. This step is critical for both aesthetics and corrosion protection. A robust finish includes a high-quality primer that inhibits rust formation and provides a good base for paint. The primer must be compatible with the chosen topcoat and with the metal type of both the original panel and the replacement patch. From there, the finish coat mirrors the truck’s original color and texture. The painter’s job is not to disguise the repair but to re-create the factory appearance, including the subtle reflections that distinguish a well-restored body panel from a patched surface. It’s worth noting that some restoration paths favor additional protective layers beyond primer and paint. A seam sealer applied along the joint can help seal micro-gaps and block moisture migration. In areas near the wheel arch, where splash and salt are common, this extra layer can contribute meaningfully to longevity. The entire process benefits from a disciplined workflow that respects the sequence: clean and dry, test fit, clamp, adjust, weld, grind, prime, and paint. Each stage reduces the risk of misalignment and ensures a smoother final appearance. It also pays to consult the vehicle’s service data and repair manuals for guidance on heat management, recommended welding settings, and material compatibility. Official repair data can provide the exact guidance technicians rely on when re-creating OEM geometry or when choosing between zinc-rich primers and epoxy-based coatings. While the repair data may come from the automaker’s information system, the essential practice remains universal: verify fit against the wider body, confirm that the patch sits flush against the surrounding panels, and respect the original panel gaps. In practice, many enthusiasts and professional shops alike adopt a mindset of double-checking the alignment after each major step. After welding and grinding, a careful inspection of the seam shows whether any micro-gaps remain or whether the panel’s edge has pulled slightly out of plane. If so, another light adjustment may be warranted before a second pass of finishing paint is applied. The finish must also address the substrate’s corrosion history. Areas previously treated for rust or coated with rust-inhibiting primers should be checked for compatibility with the new patch and the current finish. In short, the right-fit panel is only as good as the care you take to install it. A well-executed repair can restore not just appearance but also the structural integrity of a wheel arch and the surrounding quarter panel. The patch’s success is measured in how well it accepts the factory-sized fender openings, how evenly it mates with the door gaps, and how the seam remains invisible under the final coat. For readers seeking further context and practical reading on truck repair concepts, the Master Truck Repair community’s blog offers a broad spectrum of related topics that can support ongoing education and hands-on confidence. MasterTruckRepairLLC blog.
As a final note, for technicians pursuing deeper OEM procedures and data, it can be helpful to consult the automaker’s official service information portal. The detailed reference material there is designed to guide professionals through model-specific welding procedures, material compatibility checks, and documented assembly tolerances. External resources can provide the procedural exactness that complements practical on-bench experience, especially when dealing with rust repair in more complex locations or when restoring vehicles to their factory specifications. External resource: https://www.gm.com/service-information/gsis.html
Final thoughts
Selecting the best-fit rust repair panels for your Chevy trucks is not merely a choice for aesthetic appeal but a crucial step in ensuring the longevity and operational reliability of your fleet. The comprehensive insights provided throughout this article—from identifying suitable options for Silverado models to understanding material selection and installation methods—equip fleet managers, construction and mining operators, and logistics providers with the necessary knowledge for effective vehicle maintenance. Investing in high-quality repair panels can enhance not just the structural integrity of the trucks but also preserve their resale value and fleet image. Equip your fleet with the best solutions for optimal performance.

