Leather truck seats offer durability and comfort, essential for fleet managers and transport operators. However, wear and tear can lead to unsightly damage over time, presenting both aesthetic and functional challenges that require timely attention. Understanding how to assess damage on leather seats, using appropriate tools and materials, and knowing when to seek professional help will empower you to maintain your fleet’s vehicle interiors effectively. The following chapters will delve into each of these critical aspects, guiding you step-by-step in the process of protecting your investment and ensuring your vehicles remain in prime condition.
Diagnosing Tears: How to Assess Damage on a Leather Truck Seat Before Repair

Assessing the tear correctly is the foundation of any successful leather truck seat repair. Before you pick up glue, filler, or dye, take the time to evaluate precisely what you are dealing with. That careful assessment determines whether a simple DIY fix will hold up under daily use or whether the seat needs professional attention. This chapter walks through the full diagnostic process, explains what each sign means for repair strategy, and guides you to practical decisions that save time and money while delivering durable results.
Start by cleaning the area thoroughly. Dirt, oils, and road grime mask the true edge condition and can prevent adhesives and fillers from bonding properly. Use a mild, pH-neutral leather cleaner and a soft microfiber cloth. Work gently so you do not widen the tear. Remove all visible contaminants and then allow the leather to dry fully. Only when the surface is clean and dry will you see the exact shape of the damage and any hidden compromises in the surrounding leather.
Examine the tear in natural light from multiple angles. A small puncture in low light can look worse or better than it is; daylight reveals texture, grain lift, and fiber damage. Look for three critical things: the length and width of the tear, how far it penetrates through the leather layers, and whether it has exposed or damaged the foam beneath. Also check the surrounding leather for signs of weakening: creasing, thinning, or cracking that suggests the area is under stress and likely to fail again after a superficial repair.
Classify the damage as superficial, moderate, or severe. Superficial damage affects only the top grain or the dyed surface. These are usually small cracks, scuffs, or tiny splits where the leather film is broken but the underlying fibers remain intact. Moderate damage involves the leather fibers under the top layer or minor material loss. You may see a ragged edge or slight separation, or small holes where backing fibers show. Severe damage includes long rips, large holes, or tears that expose or damage the foam padding, and any damage located along seams, bolsters, or areas of heavy wear. Each classification points to a different repair path.
Measure the tear precisely. Length and width matter. Tears under about 5 mm across or less than roughly 2 cm in length are often suitable for filler-based repairs when the underlying leather and foam are intact. Larger tears, especially those over an inch or that expose foam, typically need a patch or reinforcement behind the leather. Document the measurements and take a clear photo from above. A photo helps you plan and, if you choose a professional later, allows for a faster, more accurate quote.
Assess edge condition. Ragged, frayed edges indicate fiber breakage. If the material around the tear has clean, tight edges, adhesives and fillers will have a greater chance of bonding and creating an invisible repair. If edges are curled, delaminating, or rolled back, you will likely need to trim loose fibers and possibly bond an interior backing before surface repair. Use a blunt tool to gently lift the edges and inspect the backside of the leather, looking for delamination or separate layers.
Check the stitch integrity nearby. Tears that occur near seams, piping, or stitch lines require special attention. The fabric underneath the stitch, thread condition, and whether the seam has pulled out will determine if you can simply repair the leather or must also re-stitch. When a seam has failed, a surface patch alone will not restore strength; the stitching will need repair or reinforcement behind the seam to return original durability.
Examine foam condition. Run a fingertip over the exposed foam. Soft, intact foam indicates the padding survived and a patch will protect it. Crumbled or collapsed foam suggests structural deterioration. In those cases, the foam should be repaired or replaced before any surface work so the leather is supported and tension is distributed evenly. Repairing the leather over damaged foam often leads to quick re-tearing because the surface no longer has stable backing.
Consider the seat location and expected stress. A small tear on the flat center of a seat faces different forces than one on the bolster, where occupants slide in and out and the material stretches repeatedly. High-stress areas demand stronger repairs: internal backing patches, reinforced adhesives, or professional hand-stitching. For bolsters and headrests, err toward conservative solutions; a homeowner repair that looks good on the bench may fail quickly in these zones.
Assess color and texture match complexity. If the leather finish has a distinctive grain, sheen, or two-tone pattern, blending a repair to be invisible becomes harder. Even with skillful color-matching, small repairs may remain detectable under close inspection. Consider how visible the repaired area will be and whether cosmetic perfection is required. If color and texture matching are critical — for example, in a nearly-new truck with a clearly visible tear — professional services with custom dye capabilities will deliver the best, longest-lasting results.
Evaluate the age and condition of the surrounding leather. Older leather that has lost flexibility or shows significant cracking across a wider area signals that the seat may continue to fail elsewhere. A single repair in a compromised seat will often be only a temporary fix; consider a broader restoration plan. If the leather is relatively new and supple, a local repair is more likely to integrate well and endure years of use.
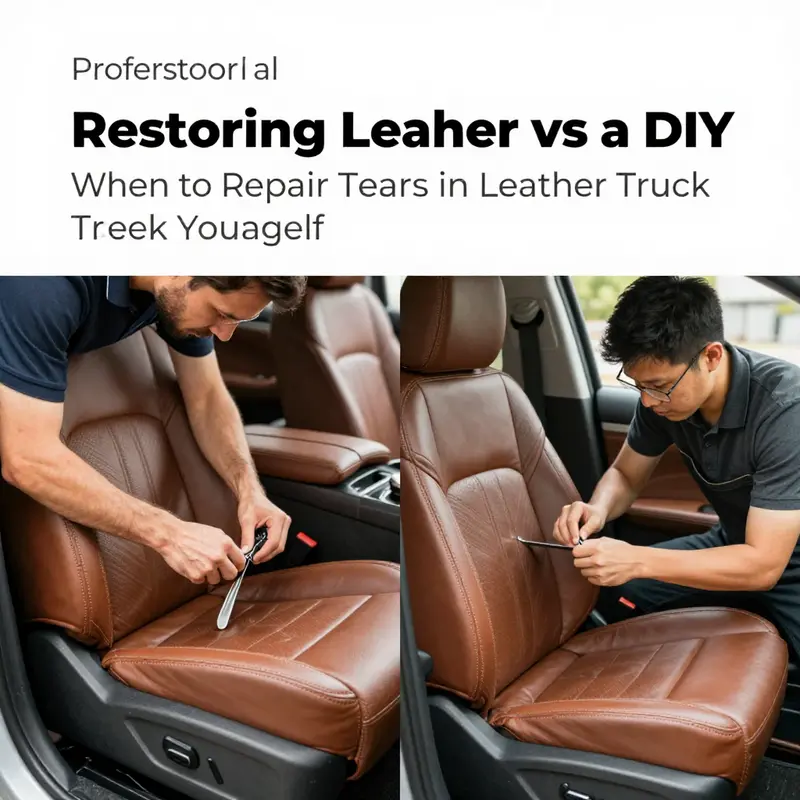
Decide on DIY versus professional repair. Use the combined findings — tear size, edge condition, foam status, location, and leather age — to make this choice. Small, clean-edge tears without foam exposure in low-stress areas often respond well to a careful DIY approach using filler, adhesive, and colorant. Large tears, seam failures, foam damage, or repairs in high-stress zones should be entrusted to professionals. Their tools and techniques — edge bonding, heat-assisted repair, hand-stitching, and interior reinforcement — produce stronger, more durable results than most consumer kits can deliver.
Plan the repair method based on your assessment. For superficial or small tears, plan to: clean and sand lightly, inject or press leather filler, build texture with a thin filler or grain paper, sand and color-match, then seal and condition. For larger tears with intact foam but poor edge condition, plan for an interior backing patch glued behind the leather, followed by edge bonding and filler to blend the seam. For tears exposing or degrading foam, include foam repair or replacement before skin repair. If seams are involved, factor in the need for re-stitching with matched thread and possibly seam reinforcement.
Gathering the right supplies follows naturally from the plan. Avoid cheap, generic products. Choose automotive-grade leather adhesives, flexible fillers designed for leather, and a dye system that allows gradual color build-up and testing. A small, flexible spatula, fine sandpaper, and a heat source to cure adhesives are basic tools. If you plan a patch, prepare a backing patch from a thin leather or fabric that will accept adhesive and lie flat behind the tear. Protective gloves and a well-lit workspace are essential.
Take test repairs on a spare leather scrap when possible. Matching texture and color is an iterative process. Use leftover leather or an inconspicuous area to test adhesive setting behavior, filler shrinkage, color layering, and finish sheen. That dry run prevents surprises when you work on the visible seat area. It also helps you judge the time required for drying and curing to plan the repair steps over a single session or multiple days.
Factor in the cure and relaxation times. Many repair materials need hours to set and longer to reach full strength. Leather adhesives often continue to strengthen over 24 to 48 hours. Fillers can shrink slightly as they cure and may need a second thin application. Avoid putting stress on the repair while materials are still curing. Plan vehicle use accordingly to reduce the risk of re-opening the tear during the crucial early hours and days.
Record your assessment and plan before you start work. A short checklist noting the tear size, foam condition, seam status, chosen repair technique, materials required, and an expected timeline keeps the process organized. This is especially useful when you need to step away and return later. For complex repairs, such a record makes communication with a professional easier if you decide to hand the project over.
Finally, know when to stop and consult an expert. If your inspection reveals extensive fiber failure, deep foam damage, multiple seam compromises, or you lack the time and materials to perform a robust repair, professional upholstery services are the right call. A shop can offer partial re-covering, custom color matching, and reinforcement that a short-term DIY fix cannot match. Prompt professional attention in these cases prevents the tear from worsening and prolongs the seat’s life.
For further detailed guidelines on assessing and matching repair techniques to specific damage types, a practical reference is available in an expert step-by-step guide on repairing automotive leather seats. That resource outlines the professional methods mentioned here and provides illustrative examples for accurate diagnosis and repair planning: https://www.pcar.com/repair/leather-car-seat-repair-guide/.
If you want ongoing advice and how-to resources for truck maintenance beyond upholstery — including routine upkeep and troubleshooting that keep your truck reliable and your repairs timely — see the Master Truck Repair blog for practical posts and owner-focused tips: https://mastertruckrepairllc.com/blog/.
A careful assessment saves time, spares frustration, and protects your investment. By cleaning, inspecting, measuring, and classifying the damage, you establish a repair plan that fits the situation. Whether you take on the repair yourself or hand it to a professional, the steps in this chapter ensure the method you choose matches the real condition of the seat and gives you the best chance of a long-lasting result.
null
null
null
null
Final thoughts
In conclusion, addressing tears in leather truck seats is crucial for maintaining the aesthetic and functional integrity of your fleet’s vehicles. By understanding how to assess the damage effectively, gathering the right tools and materials, and knowing when to engage a professional service, you can ensure that your investments remain appealing and durable over time. This knowledge not only enhances your fleet’s image but also contributes to the longevity of your vehicles. With the right approach, leather seat maintenance can become a straightforward part of your vehicle management strategy.