In the complex world of logistics and fleet management, ensuring the functionality of your vehicles is paramount. Within the context of ‘7 Days to Die’, the ability to repair a 4×4 truck efficiently can reflect on broader themes such as resource management and operational success. This guide will systematically explore the essential steps, from gathering necessary materials to effectively employing the repair interface. Through each chapter, readers will gain insight into the practical application of techniques necessary for sustaining your trucking operations in a challenging landscape. Prepare to enhance your skills and knowledge regarding truck repair in this dynamic and interactive survival environment.
Step 1: Gathering the Essential Repair Materials to Restore Your Truck in 7 Days to Die

When you take on the task of reviving a battered 4×4 in 7 Days to Die, the first step isn’t a flash of improvisation. It’s a deliberate gathering of the right repair materials, because a truck that’s been through a siege needs more than luck to come roaring back. This chapter follows Step 1 in a practical, player‑driven sequence: assembling the components that actually make a repair possible. The truck’s resilience hinges on the material you stockpile and the plan you follow, which means you begin not at the tool bench but at the scavenger’s ledger—the map, the loot, and the knowledge you’ve earned about vehicle construction. You’ll learn what to collect, where to look, and how to turn scavenged parts into a fleet‑worthy ride. The underlying truth is simple: repair in this world is a blend of resource management and skill progression, and understanding how the wheels, chassis, and engine come back to life is the hinge upon which every road trip swings.
The heart of any vehicle repair in this game is the wheel. A truck without wheels is just a tank of memories and rust, so your material focus should begin with the wheel’s recipe and the components that feed it. To craft wheels, you’ll need three forged iron, twenty‑four scrap polymer, two units of oil, fifteen units of coal, and one acid. Forged iron is not simply found ready to drop; it’s smelted from iron ore and clay in a furnace, a process that requires space, fuel, and time. Iron ore is abundant in mines and can also appear as loot in various containers, but turning ore into something usable demands the furnace and the discipline to wait for the melt. Scrap polymer comes from plastic waste scattered across the map—traffic cones, packaging, and the like—so a scavenger’s kit is incomplete without a dismantle tool to pry loose these plastics from electronics and vehicles. Oil typically rests in gas stations, auto shops, and industrial zones, occasionally tucked away inside decaying vehicles, while coal—found in coal mines—feeds the furnaces that smooth raw ore into usable metal forms. Acid, punctual yet elusive, appears in water tanks, garbage piles, certain trucks, and industrial pockets where chemical residues linger in the shadows.
The numbers matter, but the how matters even more. You gather, you smelt, you salvage, and you plan. The wheel recipe is a gatekeeper to reliable mobility, and it’s a gate you unlock only after a specific set of discoveries. To craft wheels, you must first unlock the crafting recipe. That unlock comes from reading a particular magazine—the Vehicle Adventures volume—which teaches the Vehicle Construction skill and pushes your character to the threshold where wheel blueprints become available. You don’t merely collect raw materials; you also invest in the knowledge that converts those materials into something movable. You must reach five points in Vehicle Construction to unlock the wheel and bicycle blueprints, and until that threshold is met, your scavenging is productive but not transformative. The magazine is more than a collectible; it’s your access pass to the kind of vehicle oddities that keep you on the road when supply lines falter. This is not mere lore; it is the practical glide path from scrap to steering, from wasteland to road run.
To maximize your gains, you’ll need to weave together multiple streams of collection. Start with the industrial zones and abandoned towns, where fuel, oil, and scrap polymer tend to accumulate. Carry a sturdy Dismantle Tool; it’s a compact treasure if you’re willing to pry apart electronics and vehicles for polymer, wiring, and other scrap. Keep an eye on the environment as you move: containers in derelict garages, crates in abandoned industrial sites, and the occasional trader’s stock can surprise you with subtle advantages. When you’re ready to invest in forged iron, the furnace becomes a workbench—coal as fuel, molten ore as fuel, and the patience to wait for the metal to transform. Each forged iron unit is a small victory, the building block that makes dozens of other repairs possible, and the scrap polymer is the glue that keeps your repair kit flexible and adaptable to other truck components beyond the wheel.
As you assemble the wheel components, you also assemble a broader maintenance philosophy. You begin to understand that repair isn’t only about one part; it’s about a network of parts that keep a vehicle alive on the road. To repair the truck, you’ll eventually need iron, steel, and mechanical parts as well, as the broader inventory of repair materials indicates. The steel and mechanical parts often come from refined or scavenged sources, and their presence in your repair plan signals a more complete restoration of health, not merely a patch job. The process is iterative: you collect, you test, you repair, you drive, and you discover new materials you hadn’t recognized before. The wheel blueprint unlock is a milestone, but it’s also a gateway to more complex vehicle builds, so don’t overlook the skill path that supports your broader goal of a fully functional truck.
The practical route to acquiring wheels—and the materials that feed them—can also be supplemented by alternative avenues. Some loot sources yield wheels directly, albeit with low probability. Traders sometimes stock wheels, though their price in the late-game economy can be steep, especially early on when your coin purse is still thin. For those who enjoy a touch of customization, mods can alter the collection process, streamlining some steps or increasing drop rates for specific components. If you’re playing with community or modded guidelines, always cross‑check the tooltips and install notes to keep your expectations realistic. Even with a trusty Dismantle Tool and a well‑stocked furnace, the overarching message remains: progress comes from persistence, not wishful thinking.
In this preparatory phase, remember that the repair interface is your final testing ground. When you have gathered the requisite materials, the moment you unlock the wheel recipe becomes the moment you transform your scavenging into momentum. Approach the damaged truck, press the interaction key, and open the repair interface. The game will present the vehicle’s condition and the repair options. If your materials align with the required components—iron, steel, and mechanical parts—you can place them into the repair window. The interface consumes these items and gradually returns health to the truck. If the repair still falls short, reassess your material mix and ensure that nothing is beyond repair. Some vehicles accrue damage beyond what a simple inventory can fix, requiring a broader set of parts or, in some cases, a complete chassis overhaul. The difference between a stubborn axle and a road‑worthy chassis can hinge on your understanding of the repair options and your ability to source the right materials at the right time.
As you calibrate your approach, consider how a wider maintenance mindset informs each choice. A simple, effective routine is to keep a running tally of the materials you find most frequently, and to prioritize those that unlock future capabilities. You’ll notice that the wheel’s recipe creates a ripple effect: once you can craft wheels, you can keep moving, which means the entire survival arc moves faster, too. This isn’t just about getting your truck back on the road; it’s about building a sustainable cycle of scavenging, crafting, repairing, and driving that keeps you self‑reliant for longer periods in the game’s unforgiving world. For players who want to explore broader maintenance strategies beyond immediate repair, there’s value in examining in‑house maintenance practices that echo the real‑world diligence of truck upkeep. See Turnage‑Sons in‑house truck maintenance for a practical, characterful example of how maintenance culture translates into in‑game discipline: Turnage-sons in-house truck maintenance.
This phase—collecting the right mix of forged iron, scrap polymer, oil, coal, and acid, and then layering in the unlocking of the wheel recipe—becomes the scaffolding for every subsequent repair in your playthrough. The process teaches you patience, measurement, and the value of planning ahead. It also highlights a core truth about repairing vehicles in a world where resources are scarce: resilience comes from turning fragments into function, from knowing where to look, and from recognizing when to slow down and craft the right piece at the right time. The repair isn’t complete until the truck’s health bar is restored and the wheels are spinning with purpose. The knowledge you’ve cultivated—where to find materials, how to smelt, how to unlock recipes, and how to integrate a repair into a longer journey—will inform every other chapter of your road‑trip narrative, guiding you toward a future where your 4×4 isn’t just a symbol of endurance but a reliable companion on the road ahead.
External resource for deeper details on wheel crafting and recipes: https://www.7daystodie.com/wiki/Truck_Wheels
Bridging Wrench and Road: Mastering the Truck Repair Interface in 7 Days to Die
In the harsh, wind-bitten world of 7 Days to Die, a patched-up 4×4 is more than a vehicle—it is a stubborn lifeline that keeps you moving toward safety, supplies, and a chance to outrun the next wave. The repair interface is the game’s way of translating real-world maintenance into a concise, vital ritual. It does not rely on flashy animations or dramatic cutscenes; it rests on a simple truth: your odds improve the moment you take control of the truck’s condition, select the right repair option, and feed the machine with the proper materials. This chapter invites you to treat the interface not as a background mechanic, but as a strategic station where planning, timing, and material judgment collide to restore balance between risk and progress. A repaired truck is a signal that you have turned a setback into a sustainable advantage, even when the night stretches before you like a black ribbon across the horizon.
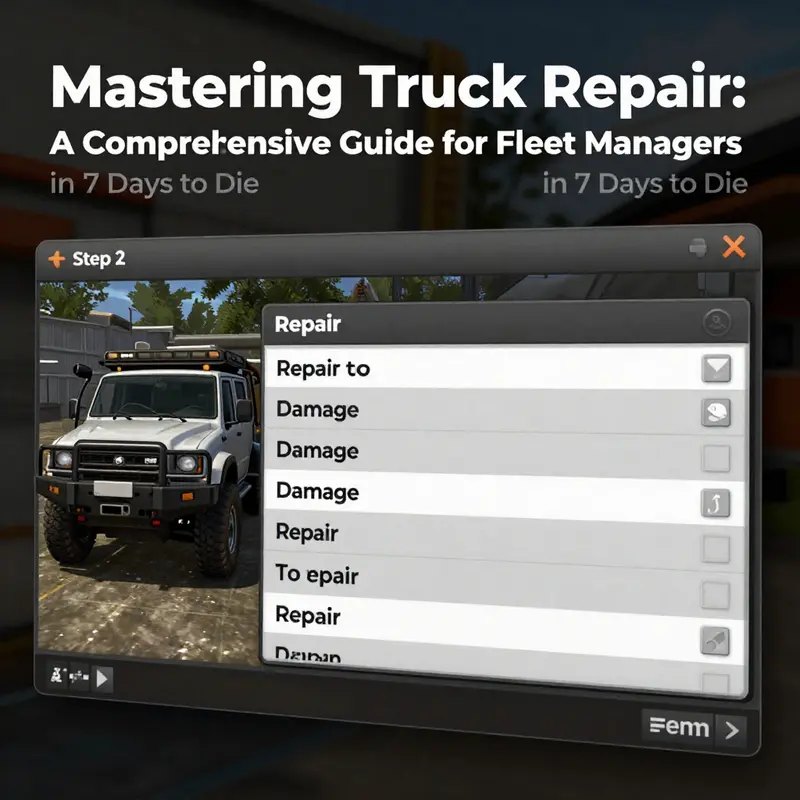
To begin, you must approach the damaged vehicle with purpose. The process is straightforward yet precise: walk up to the truck, read its silhouette in the dim light, and press the interaction key—typically E on PC—to open the Repair Interface. The moment the screen blooms to life, you are no longer wandering through rubble; you are entering a focused workspace where the vehicle’s health, durability, and the options for action are laid out in a clean, utilitarian layout. The interface’s first impression is a simple one: you will decide whether to adopt a quick patch or commit to a more thorough restoration. The choice hinges on the immediate needs of your journey and the quality of your materials. The game’s logic rewards deliberate action, so even before you tap the Repair option, you should scan the truck’s overall condition. Is it showing only minor wear, or is the chassis creaking under stress and the engine coughing in the cold night air? The answer dictates how aggressively you pursue the repair.
The heart of any repair in this world lies in the materials you bring to the interface. For the 4×4, the list is both familiar and unforgiving: Iron, Steel, and Mechanical Parts. Each component has its own contribution to the truck’s restored health, and the balance among them matters as surely as the balance of fuel in your canister. The guidance is practical: iron provides essential structural reinforcement, steel strengthens critical systems, and mechanical parts return the moving parts to their functional rhythm. If you wander into the interface with only scraps or with items that have seen better days, the repair may fail to deliver the full restoration you seek. The game’s logic accommodates that possibility; repairs are not guaranteed successes every time. A failed repair is not a moral failing on your part but a simple reminder that the vehicle’s recovery depends on the integrity of the materials you invest. This is why preparedness is not optional. You plan, you gather, you verify. You confirm that each item is intact and free from damage before loading it into the interface. When you place the correct items, the interface will consume them and apply their value to the truck’s health, gradually returning it toward a usable, drivable state.
As you initiate the repair sequence, the interface evolves from a static menu into a dynamic negotiation with the vehicle. The truck’s health bar gives you real-time feedback on progress, and the repair details illuminate which systems are receiving attention. You may notice that certain repairs take longer or require more substantial components. In practice, this means you could be tempted to skim the process if you are in a hurry, but the reality of the game rewards patience. If the engine appears to be the bottleneck or the suspension shows signs of stress, allocate the higher-quality materials to those components. The quality of your parts matters; reinforced steel and premium mechanical parts can yield a stronger restoration than their ordinary counterparts. In other words, the same materials that would suffice in a minor patch might fall short when you face a major failure. A thoughtful allocation of resources is a mark of a capable survivor and a wiser traveler. The rule is simple, and it bears repeating: the better the components, the greater the likelihood of a successful repair and a longer-term return to reliability.
Of course, the repair interface is not a magic box that treats all damage equally. The overall condition of the vehicle and the specific nature of the damage guide what is feasible in a single repair cycle. If the truck is nearing the brink—rusted, bent, or with critical failures in the drivetrain—the interface may not be able to restore it to full functionality in one pass. This is not a flaw in the mechanic’s design; it reflects the world’s stubborn physics. In such cases, you must first stabilize the vehicle enough to press forward. Sometimes this means making a targeted repair, focusing on the elements that keep the wheels turning rather than trying to return every component to pristine condition. The game’s logic reflects a practical approach to maintenance: you prioritize what keeps you moving, then revisit once you have more resources or time to devote to a deeper overhaul. If you find yourself stuck by repeated failures, double-check that you are using the correct materials and that they are not damaged or broken themselves. A broken iron ingot or a cracked mechanical part can sabotage even the most well-planned repair and waste precious resources. Vigilance in material quality is as critical as the repair technique itself.
An often-overlooked dimension of repair is how the environment and equipment interplay with your success. While the interface handles the core restoration, your broader setup—your inventory management, your camp’s supply lines, and your readiness for the next trek—dramatically influence outcomes. The optimal results, as many survivors have learned, come from using higher-grade components whenever possible. Reinforced steel, specialty mechanical parts, and consistently reliable iron serve not only to fix what is broken but to extend the time before you must perform another major intervention. This is a subtle but important part of long-term survival: the more you invest in durable materials, the less frequently you need to pause your journey for repairs. The peace of mind that follows a robust restoration allows you to plan longer routes, tackle more ambitious scavenging runs, and reduce the risk of getting stranded on a hostile road.
If you want to broaden your practical toolkit beyond the in-game repair, there is value in connecting with both real-world and in-game communities that discuss the craft of keeping machines in motion. For players who want to explore related maintenance skills in a broader context, a detailed guide on windshield repair offers useful parallels to how you approach a vehicle’s integrity—careful inspection, appropriate materials, and steady, methodical work. See the DIY windshield repair guide for truck owners for a discussion that reinforces the mindset of careful evaluation before applying any fix. DIY windshield repair guide for truck owners.
As you continue to use the Repair Interface, the big takeaway is that repair is a practice of balance. You balance resources against needs, risk against reward, and immediate fixes against long-term reliability. You balance speed with thoroughness, recognizing that sometimes a quicker patch gets you back on the road, while other times a slower, more deliberate approach preserves your mobility for days to come. The game’s challenge is not only to fix a truck but to learn when to invest and when to conserve. When you understand these rhythms, the act of repair becomes less an obstacle and more a strategic moment that shapes your journey. In the end, the truck’s restored health echoes your own progress: a small victory, a maintained line of travel, and the quiet confidence that you can face whatever the next darkness brings.
For those who seek broader perspectives on how vehicle maintenance threads through survival, community discussions can be a valuable companion. A range of threads and guides on vehicle repair in 7 Days to Die offer different angles—from optimizing repair material management to evaluating how mods can shift the repair dynamics. To dive deeper into those conversations, explore the Steam Community thread dedicated to 7 Days to Die repairs, where players exchange tactics, share tips, and troubleshoot persistent issues. https://steamcommunity.com/app/251570/discussions/
Material Alchemy: The Repair Phase That Restores the 4×4 Truck in 7 Days to Die
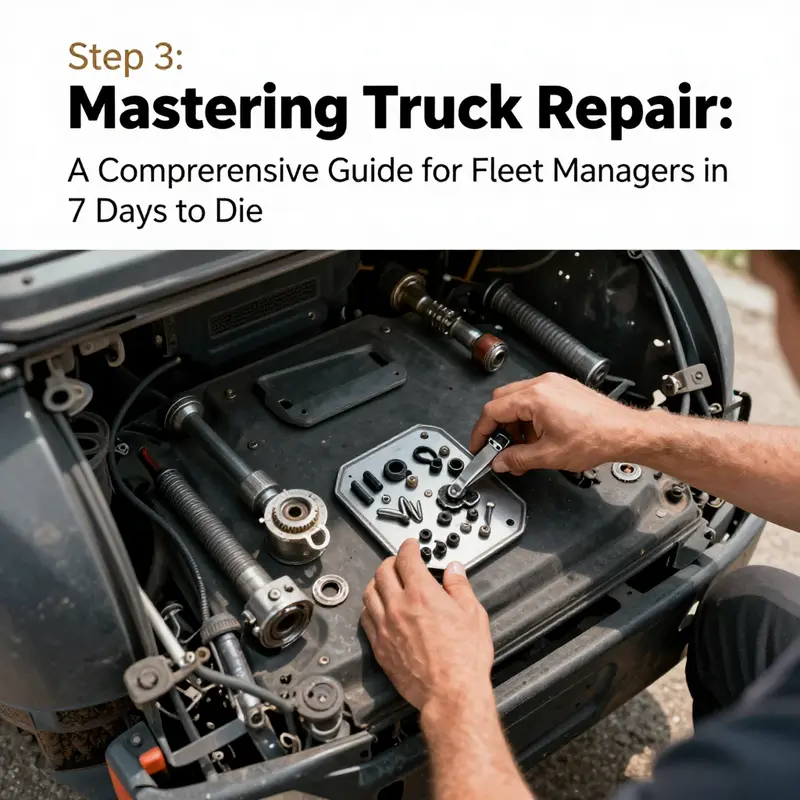
In the world of 7 Days to Die, the road back from wreckage to reliable transport is built on a quiet, stubborn ritual: supply, unlock, approach, and repair. The 4×4 truck is more than a frame and a hood; it is a lifeline, a moving shelter, and a charger of hope when the Horde stalks the horizon. The repair phase—often overlooked as a simple replenishment of health—is in fact a careful choreography of resources and timing. It asks you to treat the truck not as a scrap heap but as a patient patient, whose health is earned through deliberate choices and steady hands. The step we’re focusing on—applying repair materials—is the moment where your scavenging bears tangible fruit and the vehicle’s heartbeat stirs back to life. To perform this repair effectively, you must gather the right materials, unlock the appropriate schematics, and execute the repair with patience. Only then does the truck transition from damaged memory to drivable ally, ready to ferry you through a landscape that resists every reckless gesture with a price in fatigue and fuel.
First, the foundation. The repair materials you bring to the interface are not arbitrary. They are a deliberate blend of metal, polymer, liquid, and fuel that echoes the truck’s own durability and the harsh environments you’ll traverse. Specifically, you will need forged iron, recycled polymer, oil, coal, and acid in precise quantities. The forged iron provides the structural backbone, the recycled polymer forms essential interfaces and plastics, oil lubricates the engine and moving parts, coal fuels your forge and power needs during away-from-base repairs, and acid acts as a cleaner and a critical component in certain sealants and sensors. The exact recipe matters as much as the intention behind the repair because each item plays a unique role at different points in the repair interface. Bringing this exact mix ensures the repair progresses smoothly rather than stalling at a critical step.
To lay the groundwork, you must also unlock two key repair capabilities before you can even begin the process: wheel repair and vehicle repair. In the world’s logic, wheels are not a static asset you patch with a patch; they are a fundamental guarantee of safety and mobility. The vehicle repair recipe unlocks only once your proficiency grows to a certain threshold, and in this case, that threshold comes when your in-game skill with vehicles reaches five. The path to this unlocking is not a direct corridor but a study that rewards persistence: reading the magazine Vehicle Adventures. It is through the acts of reading and assimilating the knowledge within that your vehicle-making ability increases, and with that increase, the wheel and vehicle repair recipes unlock. This system nudges you toward a broader habit of learning, rather than a single recipe-driven sprint. The moment you have both the materials and the unlocks, the door to repair swings open, and you can turn your scavenged junkyard treasure into a functioning, drivable vehicle once more.
With materials in hand and the right recipes unlocked, you move to the truck itself. Approach the damaged vehicle and press the interaction key to open the repair interface. On PC, this is typically a specific key prompt, often labeled Repair. In the repair menu, you will see a visual summary of the truck’s current condition, its health, and the specific components that require attention. The interface is not a guesswork tool; it is a precise ledger that tells you exactly which items will bolster specific parts and how many you need to deposit to move the needle toward full health. The moment you select Begin Repair, the process consumes the materials you placed into the correct slots. It is both a transfer and a transformation: the game takes your forged iron, recycled polymer, oil, coal, and acid and, item by item, rebuilds the truck’s armor, frame integrity, seals, and moving parts.
The actual flow of the repair is a careful sequence rather than a single surge of restoration. The engine components, those that feed the airway and combustion of power, are prioritized. Without their solid repair, a repaired exterior means nothing; the truck will cry out in misfiring notes and stall at the worst moment. Once the engine and powertrain are in reasonable shape, the focus shifts to the wheels and suspension. Wheels are not merely cosmetic—without clean tires and true alignment, your fuel economy plummets, your acceleration falters, and your safety margin shrinks to a frightening degree. You might find that you need to perform these repairs in stages if the damage is severe. In some cases, the truck may require multiple passes, each pass calling for a subset of materials to rebuild an essential subsystem. The game’s logic recognizes a battered vehicle as a mosaic of harm, and repairing it piece by piece often yields the most stable baseline for driving again.
As you work through the interface, you will also notice that the repair process is not instantaneous. It unfolds over time, and during that window you are free to prepare additional materials, collect fuel, or scout for better parts. The repair burn time creates a window of opportunity to reorganize your inventory, plan your next route, or even reinforce your base while you watch the truck nurse itself back to life. One practical approach is to begin with a minimum viable repair—the set of fixes that will get the truck moving and allow you to gauge whether more extensive refurbishment is necessary. If the vehicle remains off the road despite the repairs, it is not a sign of failure but a signal to reassess. Perhaps you need more coal to fuel a bigger repair push, or to source a bit more acid for the sealing surfaces. The truck is a testament to your resourcefulness; its condition is a mirror of your readiness and your willingness to persist.
In this longer arc of play, the guidance offered by a methodical repair is essential. You learn to prioritize, to anticipate, and to adapt. The initial material requirements—three forged iron, twenty-four recycled polymer, two units of oil, fifteen units of coal, and one unit of acid—are not arbitrary numbers but a map of the truck’s life after the apocalypse. They reflect the multi-layered reality of a vehicle that has endured damaged fenders, frayed wiring, broken seals, and the stubborn stubbornness of metal that refuses to yield without patient coaxing. The balance between metal, polymer, fluid, and fuel is delicate. You must ensure you have the right items in the correct slots, ready to be ingested by the repair interface when you press Begin Repair. Once the mechanic’s work is complete, the truck’s health bar will rise, its drivability will improve, and its responses to steering and throttle will sharpen. The difference is tangible. You will feel the weight of the vehicle return as the throttle responds with precision and the clack of a properly seated wheel replaces the groan of misaligned axles.
For players who prefer a broader context, the repair journey does not happen in a vacuum. It sits within a larger cycle of scavenging, planning, and action that defines effective survival play. You search gas stations, repair shops, abandoned cars, and industrial sites for the materials you require, cultivating a rhythm of exploration and return that sustains your vehicle’s health. The presence of a reliable truck often changes your approach to exploration itself: the map expands, time becomes a resource, and the potential for return trips to base increases the odds of lasting safety. The process of unlocking and applying repair materials is as much about discipline as it is about procedure. It teaches patience, careful counting, and the humility to reassess when a repair does not go as planned. The truck tells you when you push too far without the proper parts; it rewards you when you hold back enough to gather what is needed and proceed with a calm, steady hand.
As a practical note, the journey toward a fully repaired truck can benefit from a broader knowledge base. Should you wish to explore more about long-term vehicle maintenance strategies beyond the immediate repair, consider visiting a general resource hub that collects practical insights for truck upkeep. mastertruckrepairllc.com/blog/ provides a repository of articles that can supplement your understanding of how to approach vehicle maintenance in a practical, down-to-earth way. While the article you’re reading focuses on in-game mechanics, the spirit of steady, methodical repair is universal and can be translated into any practical maintenance mindset. In the end, the act of repairing the truck is more than a technical achievement; it is a reminder that resilience comes from planning as much as from action, that resources, when managed with care, become real mobility and security in a world where both are scarce.
External resources can also enhance your knowledge with a visual guide. If you want a step-by-step display of the repair sequence, a detailed tutorial from the community can be invaluable. For a visual walkthrough of the broader repair process, you can consult this external resource: https://www.youtube.com/watch?v=Q6XlZ9mRvKg. The video offers concrete demonstrations of how the repair interface behaves, how to allocate materials efficiently, and how to judge whether the truck is ready to roll after the final click of Begin Repair. While video-specific steps may vary with patch changes or mods, the core logic—gather the right materials, unlock the needed craft recipes, place items in the interface accurately, and begin the repair with a clear plan—remains a reliable framework for success on the road ahead.
null

null
Roadworthy Again: A Practical Guide to Repairing the 4×4 Truck in 7 Days to Die
In the harsh world of 7 Days to Die, a 4×4 truck is more than a ride. It is a portable shelter, a crucial escape hatch from night raids, and a dependable means to haul water, food, and fuel across deteriorating landscapes. When the vehicle falters, it is not just the loss of mobility that stings; it is the risk of getting stranded far from a safe haven. Repairing such a machine is a measured craft, not a one-off tap of a button. The game makes this possible with a straightforward Repair Interface, backed by three dependable resources: iron, steel, and mechanical parts. The challenge is to accumulate the right mix, approach the truck with purpose, and execute the repair at a moment when you can afford the time and the stamina to stand and watch the repair take shape. When done right, a damaged truck can return to service as robust as new, ready to bear the weight of your next expedition through a landscape that seems bent on testing your endurance.\n\nFirst the materials. Iron provides the basic core of most repairs. Steel lends the heavy-duty resilience that keeps a truck from buckling under the weight of cargo and the stress of rugged terrain. Mechanical parts handle the closure of damaged systems, from engines to axles and fittings. Quantity matters, but so does timing. A lightly dinged chassis might require a modest infusion of iron and mechanical parts; a chassis with a blown radiator or a misaligned axle might demand more steel and a few spare components. The practical approach is to keep a small stock in reserve near the vehicle, or in a pack ready for a fix on the road. You salvage iron from ore nodes and scrap piles, steel from older vehicles and reinforced structures, and mechanical parts from failed machines and junk stacks. The balancing act is real: you need enough of these three to overcome the truck’s current state, but you also need to guard your stock for future repairs or for other critical tools you may need.\n\nOnce the materials are gathered, position yourself next to the damaged truck. The repair action is activated by the interact key, which on most setups is the key you press to interact. The Repair interface will pop up, showing the truck’s overall health, its status, and the available slots for materials. Choose the Repair option, and you will be prompted to place iron, steel, and mechanical parts into the appropriate slots. As you slot the items in, the game consumes them and the truck’s health climbs toward its maximum. You can watch the health meter rise in real time, a satisfying counterpoint to the tense moments of scavenging and fighting through the night. When the meter reaches full or near full, the repair is effectively complete, and you can step back to inspect the vehicle. If it still fails to function, double-check the materials you used and make sure you haven’t pushed beyond the truck’s repair limit. Some trucks, especially those heavily damaged or with multiple broken subsystems, may require more than a simple patch; at times you must swap out a component entirely or perform a specialized fix that goes beyond the basic repair menu. Knowing that boundary between patching and replacing is a key survival skill.\n\nAn important consideration is the damage state itself. The truck’s current status guides not only how many resources you need but whether you should bother attempting repairs in the field or pull back to base for a more thorough overhaul. If the vehicle is severely damaged, you may be forced to haul in more materials from distant stashes or even prioritize scavenging for a functional replacement part. In such cases, improvisation matters as much as the exact count of iron, steel, and mechanical parts. Another factor is the presence of mods. Some players run mods that alter how repairs are computed, speed up the repair process, or change the items required. If you are playing with mods, spend a moment to review their notes; the default balance may be shifted, and a repair that would be quick in vanilla could become a grind in a modded run. The core truth remains clear: repairs are a disciplined practice that rewards patience, planning, and careful resource management. When you treat your truck like a durable asset rather than a disposable tool, your survival odds improve significantly, especially on long journeys or into fog-laden nights when danger seems to lurk around every bend.\n\nTo keep repairs from feeling like a constant scramble, weave them into a simple playbook. Build a small, dependable stockpile near the vehicle or at a central outpost. Regularly audit what you carry and what you leave behind. If you know you will traverse long stretches, consider preemptive minor repairs after a successful scavenging run; repairing small issues now saves you from a larger setback later. In practice, you will find that some trips demand more attention to tires, radiators, or engine blocks than others. Salvaging spare tires or cracked radiators from wrecks can pay off later when you face bad weather and rough roads. The act of repair thus becomes part of a larger rhythm of exploration, confrontation, and return. You learn to gauge when a fix is feasible on the spot and when it is sensible to retreat, rest, and regroup before attempting another repair, especially if the next leg of your journey promises especially rough terrain or more aggressive hordes.\n\nDocumentation and community guidance can sharpen your instincts. For players seeking deeper dives into the mechanics beyond the basics, there exists a comprehensive guide on the official community hub that expands on repair nuances, edge cases, and player-tested strategies. The aim is not to replace your in-game experience but to broaden the mindset you bring to every repair, turning a moment of resource accounting into a confident, forward-looking choice about travel, safety, and efficiency.\n\nAs you move from one settlement to another and rely on a repaired truck to keep you ahead of the night, you will notice how the craft of repair echoes broader truths about survival. It is not just about patching a broken part but about maintaining a flexible, sustainable workflow. You learn to anticipate what might go wrong on your route, keep a buffer of essential components, and know when to push forward and when to pause. In that balance lies the value of repair, and with it, the steady confidence that your truck will accompany you through another cycle of daylight and darkness. You will find the rituals become routine, and routine in this world is a serious form of progress. Each successful repair, each decision to replace a component rather than just patch it, folds into a larger arc of self-reliance and strategic thinking that keeps you moving when the world itself is trying to slow you down.\n\nFinally, remember that the repair numbers you juggle are less important than the outcome you achieve: a truck that can start when you press the key, carry what you need, and bear up under the weight of your next expedition. The precise mix of iron, steel, and mechanical parts will vary with the damage, but the steps stay the same. Be near the vehicle, open the repair interface, insert the correct items, and verify the results. If at first you do not succeed, adjust and try again; your persistence matters as much as the materials you choose. This is how you translate a moment of failure into a longer chain of travel and safety in a world where every mile costs effort and every night demands vigilance.\n\nWith the truck reclaimed, you can set your sights on the next horizon, where fuel, water, and supply lines all hinge on keeping that machine in good order. External resource: https://www.7daystodie.com/community/forums/threads/truck-repair-guide.123456/
Final thoughts
Successfully repairing a truck in ‘7 Days to Die’ not only extends the life of your fleet but also empowers you as a fleet manager to face new challenges confidently. Each step—gathering materials, using the repair interface, applying the right resources, and checking vehicle status—forms a comprehensive guide to ensure your trucks remain operational in demanding situations. By integrating the strategies discussed in this guide, you will enhance your repair skills and operational strategy, ultimately contributing to the efficiency and efficacy of your fleet management endeavors.