For fleet managers and trucking company owners, the appearance and integrity of your trucks are paramount. Deep scratches not only mar the aesthetics of your vehicles but may also expose them to rust and long-term damage. Understanding how to assess and repair these scratches is crucial for maintaining the value and safety of your fleet. Each chapter of this guide will provide you with actionable insights—from assessing damage, executing immediate treatments, exploring professional repair techniques, to addressing minor scratches through DIY methods. Equip yourself with the knowledge necessary to uphold the standards of your trucking operations.
null
null
Swift, Safe Fixes for Deep Scratches: Stopping Rust and Restoring Your Truck’s Finish

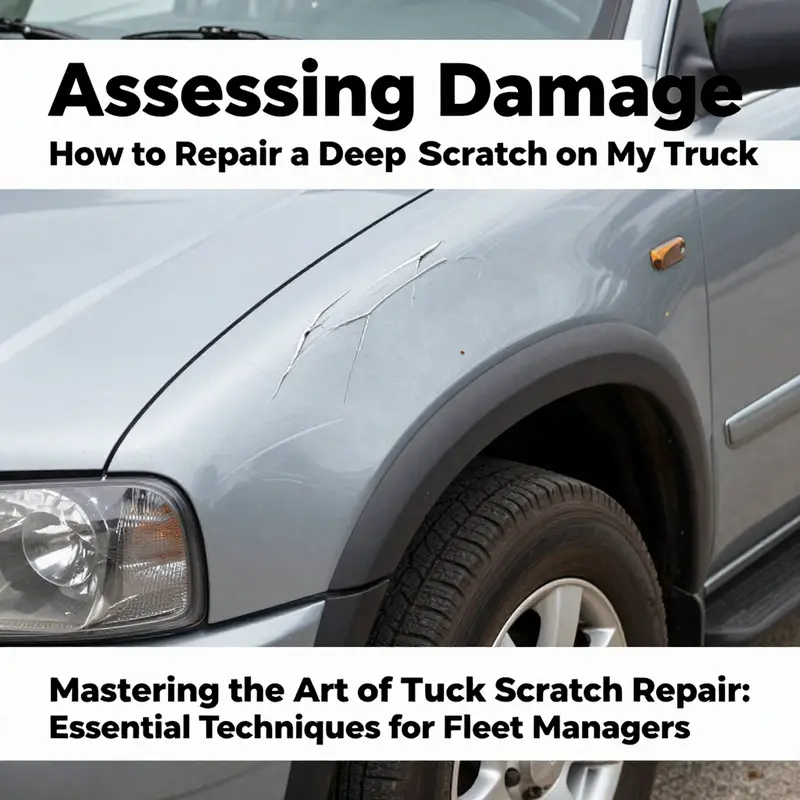
A deep scratch on a truck can feel more like a wound than a mere blemish. When the clear coat and color coat are breached and bare metal peeks through, the clock starts ticking. Moisture and oxygen become possible enemies, and rust can take hold far quicker than most owners expect. The goal of a repair in this situation is not just cosmetic restoration, but also long-term protection against corrosion. The approach must blend speed with precision, ensuring that every step preserves the integrity of the surrounding paint and prepares the surface for a durable, seamless finish. This chapter threads together the practical, decision-driven path a truck owner can follow when a deep scratch appears, from immediate action to whether a DIY approach is appropriate or a professional repair is warranted. It emphasizes a practical balance: act quickly to halt rust, prepare thoughtfully for adhesion and color matching, and choose a method that suits the scratch’s depth and visibility. While the path can vary with the size of the damaged patch and the exact location on the vehicle, the underlying principle remains the same: stabilize the area, protect the exposed substrate, and then recreate a uniform, factory-like appearance that will endure the next round of road exposure and weather cycles.
Begin with a thorough but careful assessment. Start by washing the area with a mild soap solution to remove dirt, grime, and chemical residues. A clean surface is essential because abrasives, wax, or cleaning agents can trap particles under new coatings. Dry the area completely, because even a tiny amount of moisture can skew color matching and adhesion. After cleaning, inspect the scratch with the sun at a low angle or use a flashlight. A deep scratch will reveal whether the metal beneath the paint is exposed and whether the primer layer is visible. When the metal is exposed, rust is a real risk, and the clock starts ticking from the moment the area dries. If you see any hint of rust, you must act quickly to neutralize it and seal the area before applying paint. The emergency step is simple in principle but requires careful execution: a rust-preventive primer must be applied to the exposed metal, creating a barrier against moisture and air. This is not a substitute for full repair, but it buys time and protects the substrate from corrosion while you decide on the best long-term path. The key guideline is to implement this protection within as close to 72 hours of damage as possible to minimize the chances that corrosion spreads beneath the paint layers.
When you confront a scratch that has breached the paint down to bare metal, the repair process becomes a two-track decision: either pursue a professional repair for a near-perfect color and texture match, or undertake a more involved DIY repair if the damage is confined to a small area and the metal is still protected behind a primer. The professional route pays off when the scratch is larger than about five square centimeters or when the exposed area sits on a highly visible panel like the door, fender, or hood. Professionals have access to controlled spray environments, calibrated color-matching tools, and curing methods that reduce the risk of texture variation and color drift. For the everyday vehicle owner, this means a repair that blends seamlessly with the surrounding factory finish, resists environmental wear, and returns the panel to a durable state that can hold up to washing, waxing, and sun exposure.
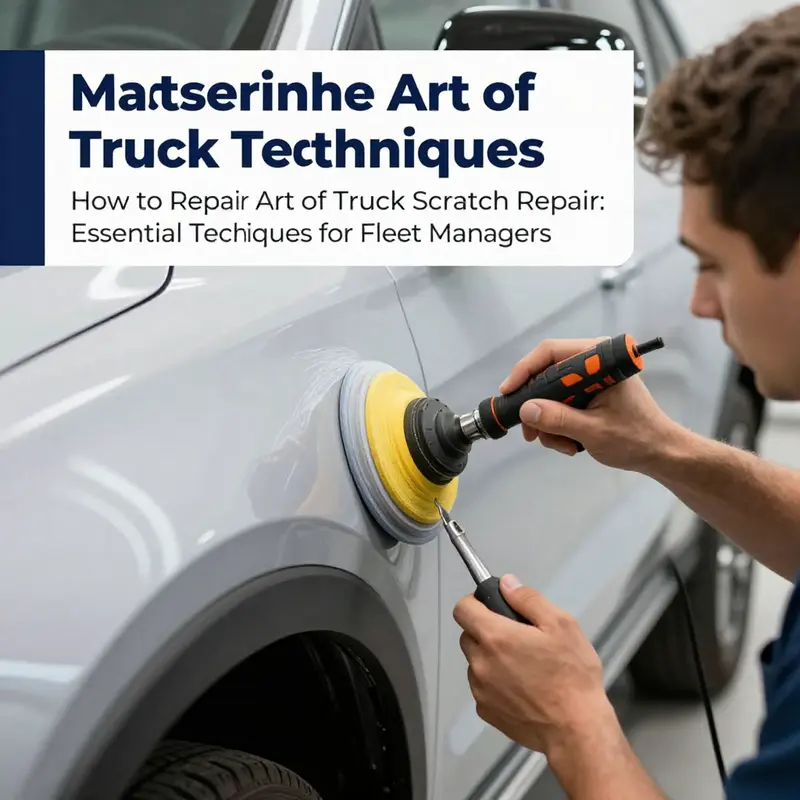
A professional repair typically begins with meticulous panel preparation. Technicians thoroughly clean the area and then carefully abrade the surface with progressively finer abrasives. This feathering step creates a micro-roughness that paint can grip, while also smoothing any edge transitions so the repair sits flat against the surrounding finish. After the surface has been prepared, a primer layer is applied. The primer serves two critical purposes: it seals the exposed substrate and provides an optimal base for the basecoat. With the surface primed, technicians evaluate the color match. They use stock color codes from the vehicle’s original manufacturer or rely on advanced color-matching software to blend the new color with the factory finish. The result should be a smooth, uniform field of paint with no discernible edge or grain that gives away the repair. The application then progresses through multiple thin coats of base color. Each coat must dry completely before the next is laid down, a practice that minimizes runs and helps to reproduce the radiance of the original paint. After the color coats, a clear topcoat is applied to protect the color and impart depth and gloss. Curing may occur in a controlled oven or through careful air drying, followed by a final polishing step. A professional polish typically uses a sequence of progressively finer compounds and pads to reduce any micro-unevenness and restore the seamless lustre of the surrounding panels. The combined effect is not merely cosmetic; it is a durable, long-lasting repair that stands up to washing, road salts, and UV exposure.
Why, then, consider a DIY approach at all when a professional job can produce flawless results? The answer lies in the scratch’s size and the owner’s willingness to invest time, patience, and the right, generic materials. For small scratches that reach the primer but do not expose bare metal, a DIY touch-up can be a practical, cost-effective option. It is essential to acknowledge the limitations of DIY methods: even with careful color matching and fine-sanded edges, the finished repair may not perfectly replicate the factory texture or color, and adhesion may not be as long-lasting as a professionally applied finish. That said, a well-executed DIY fix can still protect against moisture ingress, delay rust, and improve the overall appearance of the panel when the scratch is not prominent from usual viewing distances.
For a smaller, non-metal-exposed scratch, begin with a good cleaning to remove any wax or oils that could interfere with adhesion. Lightly sand the damaged area with a very fine grit paper—roughly in the 1000–1500 grit range—enough to create a micro-scratch profile that helps the new paint adhere but not so aggressively that you widen the scratch. Wipe away dust and let the surface dry completely. Next, apply a color-matched paint in thin, even layers. A single coat is rarely enough; apply several ultra-thin layers rather than one thick one to prevent runs. Allow each layer to dry fully before applying the next. After the color has built up to a level that visually blends with the surrounding paint, apply a clear protective layer. This sealant protects against UV light and minor abrasions and helps to preserve the repair over time. Once the clear is dry, you can perform a gentle, careful buffing with a fine polishing compound and a clean microfiber pad. The goal is to restore the gloss and evenness without removing too much of the surrounding paint. Patience is essential here. Rushing through the process increases the chance of edge halos or uneven texture that stands out on a curved surface.
It is important to temper expectations when attempting DIY fixes. The color match may vary with lighting and over time as the repair ages. The new paint may not perfectly mirror the factory shade under direct sunlight, and the texture might be slightly different in its micro-roughness compared to the original finish. These realities do not negate the value of a DIY repair; they simply underscore that the repair’s ultimate goal is to protect the exposed substrate and restore an even appearance until a more thorough professional refinish can be undertaken if the scratch is still visible or if rust has begun to appear again.
A practical path through all these choices rests on a few guardrails. First, act quickly when metal is exposed. The longer the surface remains unprotected, the more likely corrosion will spread and complicate subsequent refinishing. Second, be honest about the size and location of the damage. Large, high-visibility areas or scratches that cross body seams are prime candidates for professional attention. Third, make a plan for prevention. After any repair, the vehicle should be waxed to protect the new finish, and attention should be paid to washing methods that minimize micro-scratches and swirl marks. If the scratch is in a location frequently exposed to road grit, or if you regularly park under trees or near salty roads, you should consider a protective cover or a covered parking option whenever possible. These preventive steps extend the life of the repair and help keep your truck’s finish looking uniform over time.
For readers seeking further context and guidance beyond this chapter, a broader resource on deep-scratch repair provides a detailed workflow that aligns with the principles outlined here. For ongoing insights, you can explore additional guidance in our blog, which delves into maintenance routines, gear you might need for mid-range DIY tasks, and how to approach future repairs with confidence. mastertruckrepairllc.com/blog/
As you weigh your options, remember that the ultimate aim is a repair that is durable, visually cohesive with the rest of the panel, and resistant to the elements. Even with careful DIY work, there will be moments when a professional evaluation makes sense—particularly if the scratch is on a prominent panel, involves multiple layers or metal, or if rust has already begun to re-emerge. In those cases, a shop with the right tools and an experienced technician can ensure color accuracy, texture uniformity, and a finish that endures the next few seasons of driving. The decision between DIY and professional repair is not a failure of judgment; it is a strategic choice based on the severity of the damage, the vehicle’s visible areas, and the owner’s willingness to invest in long-term results.
If you want a direct source to supplement this guidance, consider checking an external reference that curates practical steps for deep scratches and emphasizes rust prevention as a core component of the repair process. It offers structured steps and cautions that complement the approach described here: https://www.autozone.com/repair-tips/fix-deep-scratches-on-your-truck/ .
From Bare Metal to Showroom Shine: Professional Deep Scratch Repair for Trucks
A deep scratch on a truck acts like an open wound in the finish. It penetrates through the clear coat and color to expose primer or bare metal, requiring a controlled repair that restores protection, adhesion, and a factory-style appearance. The goal is to re-create a durable surface that resists corrosion and blends invisibly with the surrounding panel. In many cases, especially when metal is exposed, a professional repair is the prudent path. While light scratches can sometimes be improved with DIY touch-up kits, a deep wound demands proper surface preparation, color matching, and layered coatings performed under controlled conditions.
Assessment and planning: evaluate depth, exposed material, and corrosion risk; decide between repair or panel replacement.
Preparation and cleaning: thorough cleaning to remove oils, waxes, and residues; protect adjacent panels; degrease to ensure good adhesion.
Feathered sanding: progressively refine the edge around the damaged zone using grits from roughly 800 up to 1500–2000 to create a feathered boundary that the new coatings can blend into.
Priming: apply a suitable rust-proofer primer to exposed metal or over the existing primer; allow to cure fully and lightly re-sand for a smooth foundation.
Color matching and basecoat: identify the exact shade using OEM codes or color-matching software, mix a precise basecoat, and apply in multiple light, wet coats to build even color.
Clearcoat and curing: apply clear coat for gloss and protection; cure in a controlled environment, with baking in some shops for a harder, more durable film.
Finishing and inspection: polish and buff to remove micro-scratches, verify color and texture match under various lighting, and recheck panel uniformity.
Professional vs. DIY: for scratches reaching primer or metal, the long-term durability and appearance typically favor professional repair, due to the need for controlled conditions, specialized tools, and skilled color matching.
Maintenance and care: after repair, wash with pH-balanced soap, wax regularly to protect the finish, and avoid abrasive tools that could disturb the new coating.
Conclusion: when the damage extends beyond the surface clear coat, partnering with a reputable shop offers the best chance of a factory-like result that resists corrosion and remains visually cohesive with the rest of the vehicle.
When a Scratch Runs Deep: Practical DIY Methods for Minor Scratches on Your Truck
A scratch on a truck can feel like a punch to the pride, especially when it runs deeper than you first think. You lean in, inspect the line, and suddenly the chrome of the metal beneath the clear coat is visible or the primer peeks through. The moment invites a decision: fix it DIY, or call in the pros. This chapter stays with the DIY mindset, but it also recognizes the limits of home repair. The goal here is not to present a glossy, perfect repaint on a weekend, but to navigate the realities of scratch depth, moisture exposure, and long term durability. A clear, actionable path emerges when you separate scratches by how deep they go and what lies beneath. The logic is simple: the shallower the scratch, the more likely you can improve it at home without sacrificing the integrity of the surrounding finish. The deeper the scratch, especially when metal or primer is exposed, the more urgent and careful the handling must become, because rust and mismatched color are real hazards that can escalate quickly if left unchecked.
First, it helps to understand what counts as a deep scratch. A deep scratch typically penetrates the clear coat and color layers and can expose the primer or the bare metal underneath. When you see bare metal, the clock starts ticking. Moisture and oxygen are at the doorstep, ready to begin rust formation. In this situation, the most important DIY move is to stop the corrosion from starting. You do not want to seal a rusting patch with a cosmetic touch-up and pretend the problem is solved. The right emergency step is to apply a high quality anti rust primer directly to the exposed metal. The essence of this step is protection, not cosmetic perfection. This primer acts as a barrier against moisture and air, buying you time to plan a proper repair and, crucially, preventing the progression of corrosion. Do not delay this step. The guidance common to many reputable sources emphasizes acting within a window of 48 to 72 hours, because once rust has taken root, the repair becomes more complex and expensive. In your own driveway, you can create a temporary shield that halts the process long enough to decide on the next move. It is a small but critical action that preserves your options.
Yet the scene rarely resolves itself with a primer alone. A scratch that exposes metal often signals that a full repair is on the horizon. The practical reality is that for scratches of a certain size or depth, a professional repair is the prudent, durable choice. When the occupation requires panel prep, color matching, and a multi layer finish that blends seamlessly with the rest of the vehicle, professional technicians bring tools and processes that are simply not accessible to most DIYers. They sand with machine-level precision, apply primers that are engineered for adhesion to the car’s original surface, and use color matching that relies on OEM codes or advanced software to recreate the factory look. They also bake or cure the paint and polish with specialized equipment that yields a gloss and texture indistinguishable from factory work. The comparison is clear: while you can achieve good results on small, shallow blemishes, deep scratches demand the expertise and environment of a spray booth to avoid a patchy, inconsistent finish or future rust.
Where the line falls between DIY fix and professional repair is often a question of surface preparation. If the scratch reveals metal or primer and covers more than a small patch, the recommended approach described in careful guides is to step back and consider professional service. In practice, the rule of thumb is that scratches larger than a few centimeters square or those that reveal the substrate call for professional attention. This is not simply about aesthetics; it is about long-term durability and color integrity. DIY can be satisfying and cost effective for shallow or moderately deep scratches that do not disrupt the underlying metal, but once you see the primer, you are stepping into a different realm. There is a reason auto body shops are equipped with dust-free spray booths, controlled humidity, and colorimeters. They are managing not just a color, but a long sequence of adhesion, curing, and finishing that a home setup cannot reliably reproduce. Still, understanding the procedure at a high level helps you make informed decisions and communicate clearly with a technician if you choose to proceed with professional service.
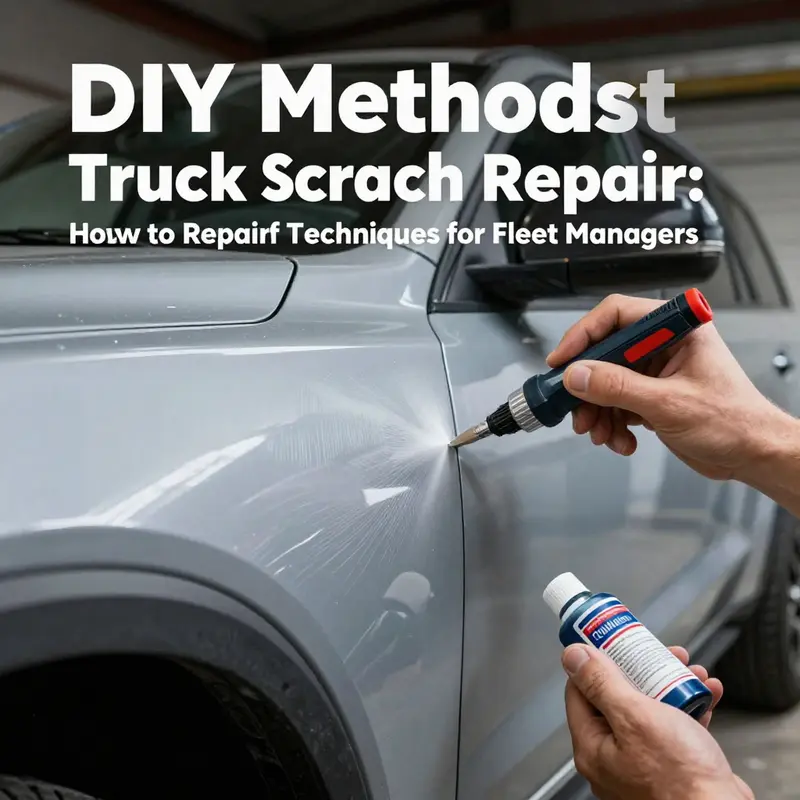
For those scratches that are still within the realm of repair at home, the treatment path for the deepest DIY scenario—when metal is exposed—begins with the emergency primer. You apply a thin coat of anti rust primer to the exposed metal using a clean tool, such as a small brush or cotton swab, ensuring you cover only the damaged area. The aim is to seal the metal from moisture and oxygen. This step is not a cosmetic fix; it is rust prevention. It is essential to complete this step within the advised time window, after which you can plan the next steps with a clearer perspective of the work that remains. If your scratch has penetrated the metal, you should view this as a signal that the long-term solution will likely involve a professional job, possibly a panel repair and color match. The primer is a temporary safeguard that buys you time to arrange a proper repair, and it reduces the risk that corrosion will undermine the eventual finish. When you inform yourself about this process, you realize the value of setting realistic expectations about DIY outcomes in cases of deep damage. The end result will rarely match the factory finish without a dedicated refinishing process.
In the more common scenario where the scratch has only reached the base coat or the color layer but has not yet pierced the metal, DIY efforts are more feasible and often remarkably effective if done with care. The preparation phase becomes the foundation. You begin with a thorough cleaning of the area to remove dust, oils, and any contaminants that could interfere with adhesion. Then you perform a light sanding to smooth the scratch edges and provide a gentle micro-plane for the next layers to bite into. A fine grit, such as 2000 grit, is used to create a polished interface with the neighboring paint. The objective is not to remove significant paint but to soften any ridges so that the new paint sits flush and blends with the surrounding area. After sanding, you apply a matching color paint using a touch-up pen or a small spray device if you have access to one. The coats must be thin and even, with careful attention to drying time between coats. In most cases, two to three light coats are enough for color, followed by a possible clear coat if the kit includes one. The middle ground between a perfect match and a durable finish lies in color accuracy, which can be challenging to achieve. The result is often a small visual difference under bright sun, a trade-off that many DIYers accept for the sake of cost savings and personal control over the repair. Once the color dries, a gentle polish or wax can be used to blend the repaired patch with the surrounding finish. A clear coat is optional if your kit includes one, and the absence of a clear coat can still yield a solid repair if the color layers are well controlled and the surface is polished to a smooth finish. The key is patience and precision. Rushing through the layers or skipping steps can lead to rough texture, uneven color, or a finish that ages poorly. It helps to measure your expectations against the reality that the best DIY paint work often shows minor color variation when viewed in direct sunlight. The alternative to accept a visually acceptable fix or to escalate to a professional panel respray becomes clear as you evaluate the scratch in terms of depth and size.
There is also a category of scratches that are considered very minor and involve the clear coat more than the pigment. In those cases, DIY remedies are straightforward. A scratch remover wax designed specifically for minor surface flaws can be applied following the product instructions. The wax fills micro-scratches and smooths the finish, providing a temporary but noticeable improvement. Another small money-saving trick suggested by many guides is the use of non abrasive toothpaste as a mild polish for very shallow marks. If you choose this route, you rub gently with a damp cloth in a circular motion, rinse, and buff dry with a microfiber cloth. The idea is to remove a thin layer of the clear coat just enough to even the surface, not to remove substantial paint. This approach is best reserved for tiny hairline scratches and is not a stand-alone replacement for more significant damage. It is often best to view these methods as a finish touch rather than a primary repair, especially on larger surfaces or where color matching is a concern.
The reality that emerges from all of this is that the DIY path is viable for minor scuffs and shallow scrapes, and it can also offer a first response to deeper damage by applying a protective primer to exposed metal. For anything beyond a small patch, the prudent choice is to consult with a professional auto body shop. The professionals bring a set of tools that enable a seamless blend with the existing paint, including color matching that relies on standardized codes and risers for accurate shade reproduction. They can also apply multiple layers, cure them properly, and polish to an almost invisible finish. You gain a long lasting outcome that withstands the elements and avoids the risk of rust lingering under the finish. The decision flow, then, is pragmatic: handle the emergency rust prevention quickly, assess the depth with a clear eye, and recognize when your best option is to seek professional help for a flawless restoration. This is especially important for large areas or complex shapes, such as curves around wheel arches or edges near doors where the finish is particularly sensitive to imperfections. In those cases, the short term cost of professional repair can pay off in the form of resale value, longevity, and the peace of mind that the job will be done right the first time.
If you want more practical, reader-tested tips and an expanded discussion of repair nuances, you can explore the Master Truck Repair blog for additional context and guidance. This resource provides ongoing coverage of common DIY questions, including how to plan a repair, what to expect from a professional, and how to keep a vehicle looking sharp between major refinishes. MasterTruckRepairLLC blog.
In closing, the approach to repairing a deep scratch on a truck, viewed through the lens of DIY methods for minor scratches, emphasizes a staged, disciplined process. Start with sealing exposed metal to stop rust, especially within a 48 to 72 hour window. If the damage is deeper than a surface scuff and involves primer or metal, plan for a professional repair to ensure color accuracy and long-term durability. For shallower scratches that do not reach metal, a careful, patient application of matching color, followed by finishing and polishing, can yield a satisfactory result. And for hairline scratches or slight clear coat damage, focused use of scratch remover wax or a mild polish provides a cost-effective improvement. The overall message is practical: know your scratch, respect the limits of home tools, and choose the path that best preserves the integrity of your truck’s finish and its value over time. For more on rust prevention and finishing techniques, consult reliable external guidance to understand the broader context of restoration and maintenance: https://www.autozone.com/repair-tips/fix-deep-scratches-on-your-truck/.
Final thoughts
Understanding how to address and repair deep scratches on your trucks is essential for maintaining the integrity of your fleet. Whether you choose to employ immediate treatments to prevent rust, engage professional services for a guaranteed flawless finish, or tackle minor scratches with DIY methods, being proactive in repairs not only enhances appearance but also extends the operational lifespan of your vehicles. Implementing these strategies will secure the value and safety of your fleet, ultimately boosting your business’s efficiency.

