Truck owners and fleet managers regularly encounter chipped or cracked windows, threatening not only vehicle aesthetics but also safety and regulatory compliance. This guide presents a thorough methodology for do-it-yourself (DIY) truck window repair: from assessing damage to selecting the appropriate repair kit and executing a step-by-step repair process. By leveraging these insights, trucking and equipment management professionals can enhance operational efficiency and reduce costs associated with window replacements.
Assessing Damage: The Critical First Step in DIY Truck Window Repair
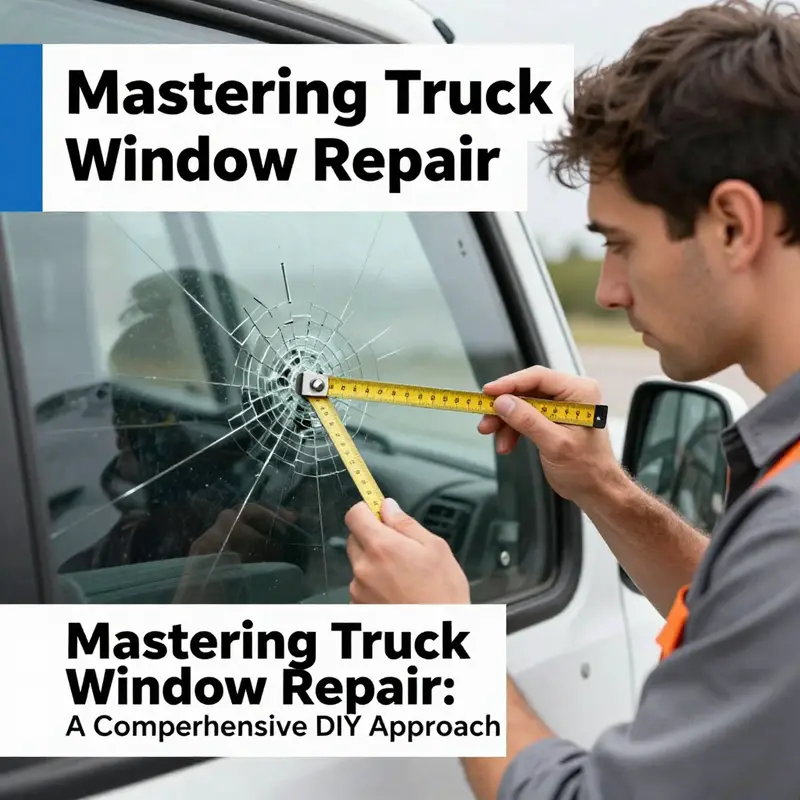
Damage assessment is more than a quick glance out the side window. It is a disciplined process that sets the trajectory for the entire repair, determines whether a patch will hold, and guards against safety risks on the road. In the world of do-it-yourself truck window repair, the first step matters as much as the last, because a misread of the damage can turn a simple fix into an expensive mistake. The truck’s windshield or side window is a structural element as well as a barrier against weather and debris, so approaching any crack or chip with respect for its potential consequences is essential. To begin, cultivate a careful, patient mindset. The goal is not speed but accuracy. A steady hand, a clear eye, and a well-prepared workspace can turn a small, repairable blemish into a durable, long-lasting seal. The assessment process starts with clean eyes and a clean surface—a combination that reduces guesswork and increases the odds of a solid repair outcome.
First comes thorough cleaning, which accomplishes two critical tasks at once. It removes dust, dirt, and oils that can obscure the true depth and spread of damage. It also reveals the actual edges of a chip or crack, which sometimes appear shorter or shallower than they are once dirt is removed. A dry microfiber cloth works best for this initial wipe, because it lifts particulates without leaving lint or residues behind. The goal is to see the line of damage clearly, so you can gauge its reach and whether it touches the edges of the glass. If you see any moisture, stray water droplets, or condensation in the damaged area, pause and dry the surface completely. Water trapped in the crack can complicate resin bonding later and may compromise the repair’s long-term clarity.
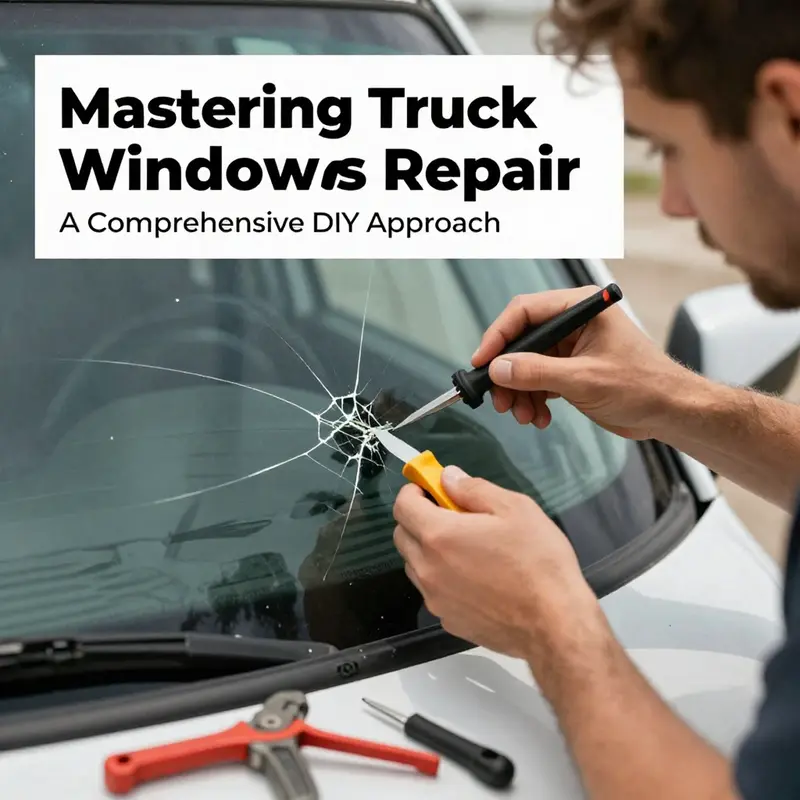
Once the surface is visibly clean, the next phase is physical debridement. This involves using a sharp razor blade to gently scrape away any loose fragments or old adhesive that surround the crack or chip. The technique is important: hold the blade at a shallow angle and work with the grain of the glass as much as possible to avoid introducing new micro-scratches. The objective is a smooth, even edge around the damage, not to gouge or widen the crack. This preparation step matters because any lingering fragments or adhesive can create irregularities that prevent the resin from forming a uniform seal. If you encounter a particularly stubborn edge, re-clean the area with the microfiber cloth and re-check with a bright light to confirm you’ve removed what could later become a failure point.
With the surface cleaned and prepped, you’ll examine the damage more closely. Chips smaller than a quarter inch and short cracks under three inches are typically the most forgiving for DIY repair, provided they are not located right at the edge or directly in the driver’s field of view. Edge cracks pose a higher risk because the stress concentrations at the boundary can propagate unexpectedly, and the resin’s ability to distribute stress is reduced. If the damage extends across the windshield or intrudes into the driver’s line of sight, replacement becomes a more prudent option. These judgments aren’t about fear of failure but about safety and legality. Driving with a compromised window can impair visibility and may violate road regulations, especially for commercial vehicles where inspections and compliance rules are strict. In those cases, patching may reduce the risk of further spread, but it does not guarantee a pass under all inspection standards.
Even when the mark on the glass seems minor, it’s wise to assess the surrounding area for additional stress points. A long, hairline crack or a stringer pattern that radiates from the center can indicate underlying micro-fractures that aren’t immediately visible. A failed repair can result in a return of the crack or the appearance of new fissures within days or weeks. The more you know about the damage, the better you can tailor the repair approach and the more realistic your expectations will be about the final result. During this stage, it can be helpful to consult a trusted guide that walks through the step-by-step mechanics of cleaning, patching, and curing. For a comprehensive, visual walkthrough, many truck owners turn to DIY video tutorials that show real-world examples and common pitfalls. This is not a substitute for your own careful assessment, but it does provide a practical reference for what a successful repair looks like in action. In particular, a detailed guide on how to approach cleaning and preparation offers concrete demonstrations of how to remove contaminants, how to handle the patch, and how to observe the resin as it begins to fill the damaged area. You can explore a reliable, step-by-step visual guide such as the one hosted on a widely used video-sharing platform, published mid-2024, which demonstrates the initial cleaning, the patch placement, and the resin application.
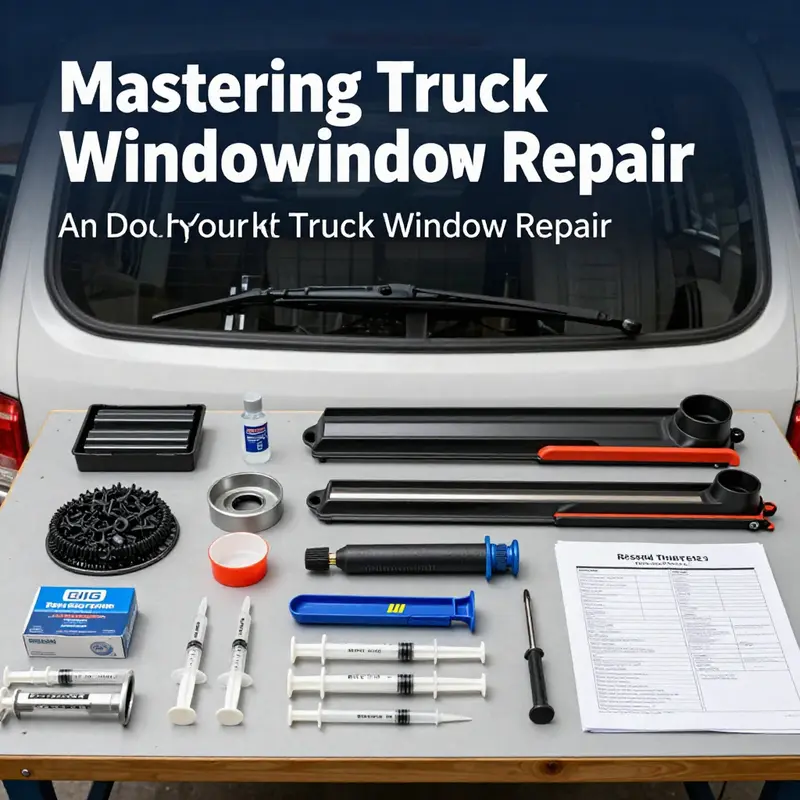
After you have completed the cleaning and debridement, the third phase centers on deciding the repair pathway. How you proceed hinges on the size and position of the damage, the age and type of the glass, and the presence of any pre-existing structural flaws. If the damage remains contained and does not disrupt the driver’s line of sight, you can proceed with a resin-based repair using a reputable DIY windshield repair kit. The kit typically includes a syringe, a plunger, a resin, a patch, and a mounting frame designed to create a controlled, vacuum-assisted flow of resin into the damaged area. The principle is straightforward: the resin is drawn into the crack by air pressure differentials, displacing air and moisture, and then sealing micro-voids and small cracks from within. When done correctly, the cured resin forms a clear, hard bond that restores the surface to a near-original condition and helps prevent the crack from spreading. It is essential to follow the kit’s instructions precisely, especially the curing time and any UV exposure requirements. In many cases, a cure is achieved in as little as 15 to 30 minutes with proper light exposure, although some resins require longer times or alternative curing methods. If your toolkit’s directions specify a different cure time, adhere to those specifications to maximize bond strength and optical clarity.
The reputation of the kit matters. A high-quality DIY windshield repair kit should provide a clear, color-matching resin and a reliable mechanism to apply and maintain pressure during the curing phase. It should also offer a straightforward, repeatable workflow so you can reproduce a consistent result on future repairs. When you encounter the resin, look for a product that promises an air-tight bond and a resin that cures clear, without leaving noticeable fogging or yellowing over time. While the overall goal is to restore structural integrity and visibility, you also want to preserve the glass’s optical clarity to minimize driver distraction. The process of filling in the chips and cracks is not merely cosmetic; it is a repair that, if done correctly, reduces the chance of crack growth and helps maintain your vehicle’s protective barrier against the elements and road debris.
As you move toward the actual repair steps, plan for a clean, well-lit workspace and consider your own safety. Wearing gloves and eye protection is prudent, as resin formulations can be messy, and you want to avoid contact with skin or eyes. Work on a flat surface away from direct sunlight to control heat and avoid rapid curing that can trap air or create uneven resin distribution. If you share a workspace with others, communicate clearly about timing. The resin needs uninterrupted time to cure, and interruptions can introduce dust or movement that undermines adhesion. When you place the patch over the chip or crack, make sure it sits flush against the glass so that the resin can be drawn evenly into the damaged area. The plunger and syringe are used to generate controlled suction, drawing the resin through the damaged fibers and into the voids created by the crack or chip. The movement should be steady, with the resin slowly infiltrating rather than being forced in with jerky, abrupt pressure. This careful, methodical approach makes the difference between a repair that looks decent and one that holds up under demanding road conditions.
After the resin has filled the damaged zone and the curing period has elapsed, the focus shifts to trimming and finishing. Remove the patch and any excess resin with a precise, clean edge. A razor blade is commonly employed for this step, followed by a gentle polishing with a dedicated glass polish or a soft abrasive agent. The aim is to smooth the surface so that the repaired area blends with the surrounding glass and does not catch the eye or create new optical distortions. The finishing touches reinforce the repair’s longevity and help ensure consistent visibility through that pane for miles on the highway. While some repairs may appear nearly invisible to the naked eye, others reveal a faint cloudiness if the resin did not fill perfectly or if there is residual micro-fracturing. If you notice anything unsatisfactory—persistent opacity, recurring cracks in the same location, or any new directional splits—reassess the damage. In some cases, a second repair attempt can seal additional micro-voids, or you may decide that the risk of further propagation warrants replacement rather than another patch.
Central to all of this is an honest appraisal of your own limits. DIY repairs can save time and money, but they are not foolproof solutions for every scenario. The decision to replace versus repair should be guided by the damage’s extent, position, and impact on safety. If there is any doubt about your ability to achieve a reliable seal, or if the damage resides near a critical field of vision or at a structural edge, seek a professional assessment. A seasoned technician can test the seal’s integrity, inspect unseen micro-fractures, and confirm whether the repair has achieved an acceptable optical result. A professional evaluation can also help you identify whether more extensive reinforcement or a full window replacement is warranted to preserve the vehicle’s integrity and comply with inspection standards.
When you are ready to explore additional guidance or to compare approaches, you can refer to a broader resource that offers a practical, written guide to DIY windshield repair for truck owners. This source provides a clear, step-by-step approach to assessing damage, selecting a kit, and performing the repair in a way that emphasizes safety, accuracy, and accountability. It also points toward visuals and demonstrations that enhance comprehension beyond text alone. For readers seeking actionable, community-driven insights, a well-regarded video guide published in mid-2024 demonstrates the initial cleaning and preparation phases, offering a visual complement to the descriptions above. It is useful to watch the video with the text in mind, focusing on how the surface is prepared, how the patch is aligned, and how the resin is drawn into the damaged area, all while maintaining a steady hand and patient pace. While a video cannot replace careful hands-on practice, it provides a valuable reference for recognizing common missteps and identifying the precise moments when the resin begins to fill the damage. The linked resource is an external guide that many DIY enthusiasts find approachable and informative for reinforcing the concepts discussed here.
In addition to the practical steps and safety considerations, keeping a small emergency fund for toolbox staples and replacement parts is prudent. Building an emergency repair fund for truck owners is a smart practice that absorbs the unpredictable costs that come with road travel and maintenance. A deliberate financial plan reduces stress when a repair becomes a temporary fix rather than a permanent solution. It also helps you budget for potential replacements or more advanced services if a DIY repair does not meet your safety standards or legal requirements. If you are developing a routine maintenance mindset, you’ll often find that keeping a well-curated set of tools and materials on hand saves both time and money in the long run. You can chart this out in a simple maintenance plan that covers inspection intervals, a basic stockpile of repair supplies, and a checklist for evaluating when to repair versus replace. This approach aligns with broader maintenance strategies that stress proactive upkeep and preparedness, rather than reactive, last-minute improvisation.
To close the loop, recall that the goal of assessing damage is not merely to decide whether a crack can be patched but to safeguard the driver, the vehicle, and the cargo. Proper assessment informs safe operation, keeps drivers protected from sudden visibility loss, and reduces the overall disruption that damaged glass can cause to a truck’s schedule. It also supports the broader ethos of responsible vehicle ownership: treat damage with the respect it deserves, document what you observe, and pursue the most reliable repair path. When in doubt, lean toward a cautious, safety-first approach. If you choose to pursue DIY repair, anchor your practice in preparation, patient execution, and a willingness to escalate to replacement when the risk of continued use is unacceptable. For readers who want a more visual, step-by-step reference, the DIY windshield repair guide for truck owners provides a comprehensive framework that complements the narrative above. The guide reinforces the importance of precise surface preparation, careful resin application, and rigorous curing protocols as the foundation of a high-quality repair. See the linked guide for an extended, user-friendly walkthrough that aligns with the principles outlined here.
Internal link: DIY windshield repair guide for truck owners
External resource: https://www.tiktok.com/@carrepairguide/video/735421890123456789
Choosing the Right Windshield Repair Kit for Do-It-Yourself Truck Window Repairs: A Fleet-Ready Guide
Choosing the right kit for do-it-yourself truck window repair means weighing the realities of heavy use, safety, and long-term reliability against a tight budget and limited downtime. For fleet operators, delivery services, or recreational vehicle conversions, the windshield is not a cosmetic feature; it is a critical barrier between the driver, the cargo, and the road. The decision you make about a repair kit will ripple through downtime, maintenance planning, and even insurance considerations. In this context, choosing a kit is less about chasing a miracle fix and more about selecting a durable, user-friendly system that gives you a trustworthy seal and a predictable cure. The emphasis here is not on a single brand or a glossy marketing claim, but on the practical alignment of the kit’s design with the type of damage you’re most likely to encounter on trucks, the glass construction you’re dealing with, and the rigors of daily operation across long hauls and harsh conditions.
First, assess the damage with care. The guidance holds true whether you own a light commercial van or a heavy-duty tractor-trailer: small chips and short cracks can often be mended in a way that restores visibility and reduces the risk of propagation. For minor damage—chips smaller than a quarter inch and cracks under three inches—a DIY resin-based repair kit can seal the defect and prevent moisture ingress. However, the moment you find a crack that runs across the field of vision, or one that runs near the edge of the glass, the math changes. In those cases, you should plan for replacement rather than repair. The choice hinges on safety and the legal requirement for a clear, unobstructed view. When you operate a fleet, replacing a window is not just about the vehicle’s safety; it’s also about keeping your drivers moving and your maintenance budgets on track. A robust kit that stands up to repeated use in a fleet context should emphasize durable components and a seal that remains airtight over time, under temperature swings and vibration.
For those who drive or manage fleets where reliability matters most, the kit selection should start with the kit’s core components and the quality of its resin system. A professional-grade kit designed for chipped and cracked windshields will typically include a repair syringe or injector, a plunger, a patch, and resin that cures into a solid, air-tight seal. The promise of a “permanent” seal hinges on two factors: the resin’s formulation and the integrity of the seal the kit helps form. In heavy-duty use, resin needs to resist repeated temperature cycling, maintain adhesion to laminated glass, and avoid shrinkage that could reopen the crack as the vehicle experiences sun, shade, night, and heavy loads. While some budget options promise quick fixes, a fleet-first approach favors durability and long-term performance over a quick, flashy result that might fail after a few miles of highway vibration.
The compatibility of the repair kit with the glass used in trucks is another essential consideration. Truck windshields are frequently laminated glass, designed to hold together even when the outer layer is compromised. A kit that works well on passenger car glass might not deliver the same results on laminated truck windshields. As you evaluate kits, look for explicit compatibility notes addressing laminated glass and the resin’s ability to create a monolithic seal within the damaged area. A kit that is sufficiently versatile will be marketed as suitable for both chipped and cracked laminated windshields, not just standard automotive glass, and it will provide clear instructions about surface preparation and curing conditions.
Ease of use matters just as much in a fleet context as it does in a home shop. A kit that is straightforward to operate saves time and reduces the chance of human error, particularly when a driver is involved in the repair after a long shift. You want a setup that is intuitive: a simple alignment of the patch, a controlled application of resin through a syringe or injector, and a predictable cure process. A well-designed system will guide you through pre-cleaning, patch placement, resin injection, and post-cure trimming in a sequence that minimizes steps and minimizes the risk of debris or moisture interfering with the bond. In the end, the best kit for a fleet is the one that the repair technician can execute with minimal training, yet with reliable results that endure through the next thousand miles and the next batch of potholes.
Durability and long-term performance are more than just how well a patch holds up. They also relate to how easily the kit can be used repeatably in a shop setting or on the side of the highway during a rest break. A robust system should feature a sturdy patch that adheres securely to a curved surface, a syringe or plunger mechanism that maintains consistent pressure during resin draw-in, and resin that remains effective across temperature extremes. The real-world test of durability comes not just from writing a big warranty on paper, but from seeing how the kit performs under the daily wear-and-tear of heavy-duty operation—dust, vibrations, heat, cold, and the occasional splash of rain or road grime. A kit built with these realities in mind should deliver consistent results after a wipe-down with glass cleaner and a dry surface, followed by careful resin application and curing under the conditions specified by the manufacturer.
When you compare options, also consider the overall value beyond the initial repair. The best choice for commercial use is not simply the kit with the strongest resin or the most convenient syringe; it is the option that minimizes downtime and maintenance headaches while delivering a repair that lasts. In fleets, downtime carries a direct cost: a vehicle out of service disrupts routes, delays deliveries, and adds risk to the operation. Therefore, your kit of choice should be one you can rely on to deliver a dependable seal, reducing the likelihood of subsequent cracks or fogging that would require another stop in the shop. A professional-grade system is typically designed with this in mind. By contrast, a budget kit, while appealing in upfront price, may not hold up to the demands of weekly use and the temperature swings common in heavy-duty work zones. If durability is compromised, a repair that fails requires a full window replacement, which is far more expensive and disruptive.
Beyond durability, the number of pieces and the completeness of the kit matter for practical use on trucks. A kit that includes everything needed for immediate application—resin, a patch, a syringe, a plunger, and clean-up tools—reduces the need to improvise with makeshift items. The nine-piece configuration cited in many professional-grade kits is deliberate: it gives you a complete toolkit to address the chip, seal the patch, manage air evacuation, and finish with trimming and polishing. For fleet operators, this completeness translates into fewer trips to the parts warehouse and less downtime due to missing components during a repair. When a kit is clearly laid out—from pre-cleaning to post-cure finishing—it also minimizes the risk of contamination. Cleanliness matters; glass surface contaminants such as dirt, oil, or moisture can interfere with adhesion and cure. A well designed kit anticipates these issues by providing clean-up cloths, alcohol wipes, or other tools to ensure a pristine surface prior to resin application.
In terms of the actual application process, the sequence matters for a reliable outcome. Begin with a thorough cleaning of the area surrounding the damage using a microfiber cloth and a glass cleaner to remove dirt and grease. The surface must be dry before applying resin, because moisture can trap air or create a weak bond. Then place the patch over the chip or crack and engage the resin injection system. The resin is drawn into the damaged area under controlled pressure, filling microvoids and creating a solid bridge across the crack. The curing period varies by resin formulation and lighting conditions; many systems cure quickly under UV light or sunlight, while others require a specific set time at room temperature. After curing, you remove the patch and trim any excess resin with a sharp blade, then polish the surface to restore clarity. Proper maintenance of the patch after curing—keeping it dry and free of road debris—will extend the life of the repair.
Even with a strong, well-fitted kit, there are situations where repair is simply not advisable. If the crack is long, if it travels across the driver’s line of sight, or if there is an impact pattern that suggests structural damage behind the glass, replacement is the prudent path. For commercial operators, replacing a damaged windshield may be more reliable and cost-effective in the long run than attempting a patch that could fail and necessitate another repair or an emergency towing situation. Legislation and safety standards also come into play; operating a vehicle with an obstructed view is not only dangerous, it can be illegal in many jurisdictions. Fleet managers should incorporate a policy that prioritizes safe visibility and timely window replacement when damage threatens the driver’s field of view or the integrity of the vehicle’s structure. For the sake of workforce safety and product longevity, it’s essential to recognize the limits of DIY repair and to have a clear escalation path as part of the maintenance program.
In selecting a kit, another practical angle is the brand’s reputation and the support structure behind the product. While it is prudent not to rely on marketing hype, you can still look for a kit that is backed by a credible maintenance ecosystem, clear documentation, and a track record of consistent performance for heavy-duty vehicles. A reputable system should come with clear, step-by-step instructions and a straightforward warranty or guarantee period that reflects confidence in the product’s durability under real-world conditions. For those managing fleets with diverse needs—urban deliveries, long-haul routes, or RV conversions—this support translates into faster troubleshooting, better maintenance planning, and a more predictable repair cycle.
To make this choice concrete, you can reference practical, hands-on resources that walk through the repair process with visuals and real-world commentary. An accessible, user-friendly guide for truck owners can supplement the decision-making process by translating the kit’s features into actionable steps. For a practical, visual companion, you can consult a comprehensive guide that focuses on DIY windshield repair for truck owners, which provides step-by-step demonstrations and real-world feedback from users who have performed repairs on larger vehicles. This resource complements the fleet-focused considerations here and helps ensure you understand how the kit behaves with larger windshields, heavier-duty glass, and the particular stresses of trucking life. To explore this practical guide, follow this link: DIY windshield repair guide for truck owners.
When you compare the options side by side, the criteria that matter most for trucks boil down to durability, compatibility, and ease of use, all wrapped in a reliable support network. Durability means the kit’s resin and seal survive temperature changes, frequent vibration, and road grit. Compatibility means the resin and patch work with laminated truck windshields and the vehicle’s design tolerances. Ease of use means the repair can be executed with minimal training and in a reasonable amount of time, even by drivers who may not be automotive technicians. The support network—clear instructions, accessible replacements, and reasonable warranty—helps ensure that a repair is not a single event but part of a reliable maintenance practice. In the end, the right kit is the one that aligns with your fleet’s schedule, your drivers’ safety, and your budget, while offering the best chance of a durable, long-lasting repair that keeps your wheels turning rather than idling in a shop.
As you finalize your decision, remember that the simplest heuristic is to favor a professional-grade kit whose design anticipates the realities of heavy-duty glass and harsh road conditions. The best option for commercial use balances sturdy hardware, a proven resin system, and intuitive operation that reduces the learning curve for drivers and technicians alike. A well-chosen kit becomes a practical tool in your maintenance toolkit, enabling timely, cost-effective repairs that preserve visibility, protect cargo, and maintain uptime. With the right kit in hand, you can approach DIY windshield repair as a disciplined, repeatable process that supports a broader maintenance strategy for fleets and heavy-duty operations. And when you pair the kit with the right procedural discipline—clean surface, proper resin handling, correct curing conditions, and careful trimming—you position yourself to achieve results that stand up to the demands of real-world trucking.
External resource: https://www.amazon.com/dp/B000WQ74B8
Seeing Clearly Again: A Cohesive, Hands-On Path to DIY Truck Window Repair
Damage to a truck window can feel like a roadblock, but with a measured approach you can restore visibility and preserve safety without rushing into a full replacement. This chapter lays out a practical, integrated path for do-it-yourself window repair that centers on minor damage—the kind you can manage with a quality repair kit, a clean workspace, and patience. The goal isn’t to erase every imperfection or pretend the glass has the same strength as new; it’s to stop the damage from spreading, restore a clear view, and keep you moving until a proper replacement can be scheduled if needed. In the world of heavy trucks, where miles accumulate and visibility matters every mile, a well-executed DIY repair can be a smart, time-efficient choice when the damage falls within safe limits.
Begin with the baseline rule of thumb that guides every DIY assessment: small chips and short cracks are the most tractable, while larger fractures, edge proximity, or cracks that threaten the driver’s line of sight usually demand professional service or a full window replacement. A chip under about an inch in diameter or a crack up to three inches long, provided it remains localized and not radiating in multiple directions, is typically a candidate for resin-based repair. When cracks extend, widen, or start to spider toward the edge, the glass’s structural integrity is compromised in ways that a resin seal cannot reliably restore. In those cases, replacing the pane is the safer path, and attempting a DIY fix could invite additional hazards, such as sudden pressure loss, compromised visibility, or shattering under sudden stress.
As you move from assessment to execution, preparation becomes as vital as the repair itself. The tools you select and the cleanliness of your workspace will determine whether the resin bonds properly and whether the cured area remains clear and free of distortions that could impede visibility. The resin kits designed for windshield repair rely on a precise sequence: clean, seal, inject, cure, trim, and polish. The resin fills microcracks and chips, then, under UV light or a specified curing condition, hardens into a clear, solid mass that helps slow further propagation of damage. The process requires attention to detail more than brute force; it rewards slow, careful work with a patient stance and a tidy bench.
A practical note about tools and materials helps set expectations. While you’ll hear about specialized repair kits, the core components are fairly consistent: a resin, a plunger or syringe for injection, a patch or seal to create a controlled cavity over the damage, a razor or scraper for trimming, and a microfiber cloth for cleanliness. It’s possible to perform this work with a generic kit purchased online or at an auto parts store, as long as the resin is designed for automotive glass and the kit provides clear instructions. The emphasis here is on choosing a kit that offers reliable resin viscosity, a good seal to prevent leaks during curing, and a straightforward curing protocol. Avoid rushing through the curing stage; curing times can vary, and exposure to heat, sunlight, or ambient moisture can affect the result. The intent is to achieve a solid bond that reduces risk of spreading, while maintaining clarity so you can see the road ahead clearly.
Starting the process with a careful, honest assessment is essential. Look at the damage from multiple angles under bright light, and note whether you can see through the crack or chip without distortion. A small chip may appear almost invisible when viewed straight on, but if light refracts through it or if the edges feel rough to the touch, it’s a sign to proceed with the repair rather than ignore it. The edge of the windshield is a critical boundary; the closer the damage is to that edge, the higher the probability that a resin repair will fail to contain the crack’s growth. When in doubt, err on the side of caution and opt for replacement, especially if the damage is near the edge or if you observe any ongoing spreading after a brief test of stabilization.
With the damage quantified and the decision to repair made, gather your materials in a clean, controlled workspace. A flat surface inside the cab, away from dust and wind drafts, is preferable to outdoors exposure where debris, temperature swings, and moisture can interfere with curing. Lay out the kit components: a clear resin, an applicator or syringe, a patch or seal, a razor blade or scraper, a microfiber cloth, isopropyl alcohol or glass cleaner, and optionally masking tape to secure the seal around the damaged area. Use fresh, lint-free cloths and ensure all surfaces are free of oils and grit that could contaminate the resin’s bond. The preparation step is not glamorous, but it is the hinge on which the success of the repair rests. Contaminants, even microscopic, hinder the resin’s ability to fill the crack and bond with the glass, which is why you wipe, inspect, and re-wipe with the same care you would apply to a critical maintenance task.
The cleaning sequence is straightforward but worth emphasizing. Start with a dry microfiber to remove surface dust and oils. Then, if needed, use a shallow pass with isopropyl alcohol to lift any stubborn residue; avoid soaking the area and never introduce water into the crack, as moisture can trap air and compromise the seal. Once the surface is impeccably dry, inspect for any loose glass fragments that could create air pockets or future failures. This is the moment to verify you’re working with a stable, dry surface; any lingering moisture or debris could undermine the resin’s bonding process and lead to a premature failure that resembles the initial damage—only worse.
Prepare the resin site by applying a thin masking layer around the chip or crack if your kit calls for it. The goal is to create a controlled space in which resin can be drawn into the damaged area without leaking outward and without trapping air. If your kit includes an adhesive patch, position it so that the damaged zone sits directly underneath the patch’s central opening. This arrangement helps maintain a flat, uniform surface during injection, which improves the resin’s ability to fill the crack completely. The patch acts as a guide and a containment valve, ensuring you don’t push resin past the edge or into unintended gaps. As you proceed, keep in mind the resin’s viscosity and the kit’s instructions; some resins require a short, patient wait after setup before injection begins, while others call for immediate syringe action.
Injecting the resin is a careful, deliberate action. Attach the syringe or applicator to the patch and begin drawing resin into the damaged area. Work slowly to avoid creating air pockets; if air bubbles appear, pause and gently press around the patch to release trapped air before continuing. The critical objective is to fill the entire damaged volume with resin, creating a continuous bond that spans the crack or chip. Most resins cure under UV exposure, so position the windshield in a way that sunlight can reach the repair site, or use a small UV light if your kit includes one. Cure times vary by product and environmental conditions, with many guides recommending 10–15 minutes in bright light; others may require a longer period. Do not rush this phase. A properly cured resin will be clear, with the crack visually filled and the surrounding glass appearing uniform and free of optical distortion.
After curing, remove the patch and trim any resin that has overflowed beyond the damaged area. A sharp razor or scraper works best for this, and you want to trim flush with the surrounding glass to maintain a smooth, level surface. Any excess resin that remains can create a visible bump or a slight distortion in the windshield’s plane, which is undesirable for obvious safety reasons. Immediately follow with a light polishing pass to restore the glass’s clarity. Use a soft cloth and a gentle polish to bring back the glass’s gloss and remove any micro-scratches left by the trimming process. The goal is a discreet repair—one that’s barely noticeable from a distance but robust enough to deter the crack from spreading under everyday stresses.
A final inspection rounds out the repair. Under bright light, evaluate the filled area for uniformity, transparency, and absence of visible air pockets. The chip or crack should appear filled, with the surrounding glass looking clear and evenly contoured. It’s important to set expectations honestly: even a well-executed DIY repair does not restore the glass to its original strength. The repaired section remains more vulnerable than pristine glass, particularly under thermal stress from sun exposure and temperature swings typical of truck operations. The intent is to prevent propagation and maintain safe visibility, not to recreate factory-grade glass strength. If you notice new cracks developing or the existing crack extending after the cure, treat the situation as a warning sign and seek professional help or move toward a full replacement.
In the broader context of truck maintenance, this approach aligns with a philosophy of practical self-reliance balanced by safety. DIY repairs are most valuable when they buy time, reduce downtime, and provide a temporary yet functional solution while awaiting professional service or a replacement window. For drivers who carry time-sensitive schedules or operate fleets where every hour counts, a well-executed DIY repair can translate into meaningful cost savings and reduced downtime—provided the damage falls within the safe repair criteria and you follow the procedure with discipline and care.
If you’re seeking additional guidance or a visual walkthrough that mirrors the steps described, you can consult a dedicated DIY windshield repair guide for truck owners. This resource offers step-by-step visuals and real-world examples that complement the narrative here and help you verify each stage of the process. DIY windshield repair guide for truck owners.
Before you finalize anything, acknowledge the safety and legal considerations that accompany any windshield work. Driving with a damaged windshield can create blind spots and unsafe conditions, particularly for commercial vehicles where regulations may govern window integrity and visibility. If the chip or crack runs across the driver’s line of sight, or if the damage is deep enough to compromise structural integrity, the prudent course is replacement rather than repair. The goal remains clear: a safer road ahead, not a rushed fix that could fail under stress.
To complement the practical steps described, ongoing maintenance and cautious driving after repair matters. Avoid car washes for at least a day or two if the resin has cured recently, as high-pressure water jets or aggressive cleaning can disrupt the bond or lead to micro-cracking around the repaired area. Park in a shaded, stable environment during the curing window when possible, and be mindful of temperature fluctuations that can affect curing dynamics. Keep the windshield clean and free of grit that could abrade the surface and compromise the resin’s integrity. A calm, deliberate approach after repair helps ensure the repair remains durable and less prone to re-cracking under normal road conditions.
In sum, DIY truck window repair, when applied to suitably small damage, can be a smart, cost-conscious option that buys time while maintaining road-ready visibility. The process emphasizes careful damage assessment, meticulous cleaning, disciplined resin application, and patient curing. It’s not a substitute for professional service when the damage calls for it, but it is a practical skill set for truck owners who value hands-on maintenance and an informed approach to minor windshield repairs. By following the steps outlined here and coupling them with trusted, kit-based materials, you can manage minor windshield blemishes with confidence and keep your truck on the road rather than sidelined by unexpected repair bills.
External resource for further guidance and visuals: https://www.autozone.com/repair-tips/fix-a-chip-in-your-car-windshield/
Final thoughts
Successful DIY truck window repairs can significantly reduce maintenance costs and downtime. Understanding how to accurately assess damage, select appropriate kits, and execute a precise repair procedure empowers fleet owners and operators to address common issues effectively. Such proactive measures not only extend the vehicle’s lifespan but also contribute to the overall safety and compliance of commercial operations. By adopting these methods, businesses can maintain their vehicles’ integrity without relying on professional assistance for every minor issue.