Truck bed covers serve critical functions in protecting cargo and enhancing vehicle aesthetics. For fleet managers and trucking company owners, maintaining these essential accessories is vital to ensure operational efficiency and to avoid costly replacements. Each chapter of this comprehensive guide will equip you with the knowledge to identify your truck bed cover type, address common repair issues, and adopt best practices for effective maintenance. By implementing these strategies, you can safeguard your investment and maximize the performance of your trucks in the field.
First Diagnosis: Identifying Your Truck Bed Cover Type to Unlock a Durable, Safe Repair
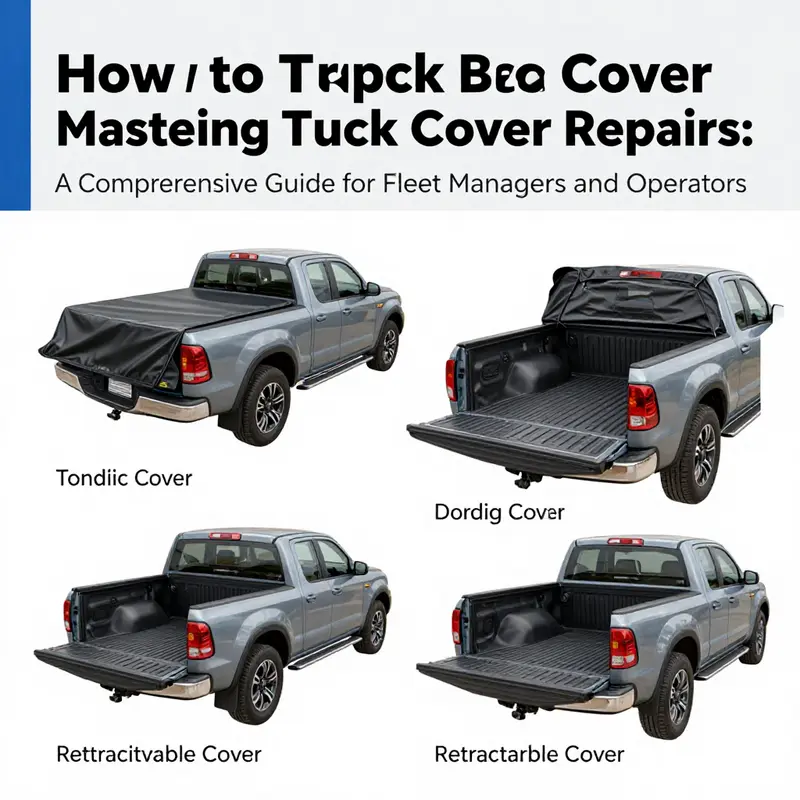
The repair journey for a truck bed cover begins not with glue or a patch, but with a clear identification of what you’re actually dealing with. The type of cover you have—whether it is soft, like a vinyl-tarp style that folds or rolls, or hard, such as a rigid panel or retractable system—sets the entire strategy for repairs. The same issue that threatens a soft fabric, a torn seam, or a bent arch can demand an absolutely different approach from a cracked panel or a misaligned track. In practice, the most reliable repairs start with a precise, almost diagnostic stage: what is the cover made of, how is it built, and what components are most likely to fail given your climate, usage, and age. This chapter aims to illuminate that diagnostic path, weaving together the realities of real-world use with the mechanics behind every repair action you might take. It is a guide not just to fixing what’s broken, but to understanding why the fix must fit the type, and how misidentifying the type can turn a simple patch into a more complex, less durable repair.
To begin the identification, you will want to pause before you reach for tools. Look for the most obvious cues: is the surface flexible and fabric-like, potentially vinyl or canvas, and does it fold along a series of arched bows or supports? Or is the cover a rigid slab that locks in place over the bed, perhaps with a track along each side and a set of rollers or hinges that guide its movement? This distinction matters because it translates into very different repair ecosystems. Soft covers—often light and adaptable—rely on fabrics, vinyl coatings, and flexible seals. They tend to require patch kits, specialized fabric or vinyl adhesives, and sometimes reinforcement from internal bows or supports that can be replaced piece by piece. In contrast, hard covers—whether they’re rigid fiberglass, aluminum, or a polymer composite—rely on panels, seals, and mechanical components like latches or hinges. Damaged hard covers may force you to replace panels or repair the track and roller systems. The differences go beyond appearance; they govern the materials you’ll need, the methods you’ll employ, and the time you’ll spend on the fix.
The first practical step is to identify where the cover’s system is most likely to fail. For soft covers, inspect the fabric surface for tears, punctures, or worn vinyl. Look at the seams along the edge and the attachment points where the fabric meets the bows or bows meet the frame. A torn surface, even a small one, can propagate if exposed to sun and rain. For hard covers, a keen eye must travel to the hinges, latches, and mounting points, along with any signs of movement or misalignment along the track. A crack in a panel is not just a surface issue; it may indicate structural stress that could worsen with loading or road vibration. Retractable designs add another layer of complexity: the track, the rollers, and the tightness of the retractable mechanism become critical. If the track is dirty or worn, or if rollers bind, the entire system can fail to seal properly, inviting water intrusion and increasing the chance of further damage. An accurate diagnosis begins with a simple inventory of the components you can see and the way the system behaves when you open and close it. Does the cover sit flush, or is there a gap along the seal? Do you hear a squeak from hinges, or does a side rail feel loosened when you apply gentle pressure? These observations are not just nuisances; they are signals that point you toward the right repair path.
It’s often helpful to bring the manual into this initial exploration, even if you don’t have the original paperwork. The manual typically includes a parts diagram and the names of components you’ll be replacing, from seals to latches to track segments. If the physical manual isn’t handy, many manufacturers publish installation and maintenance guides online. A reliable, model-specific installation guide can provide the exact terminology, torque specs for bolts, and recommended maintenance intervals. While the specifics vary from one design to the next, the fundamental principle is the same: precise identification eliminates guesswork, and guesswork is a leading cause of poor repairs. When you know whether you are dealing with a soft cover or a hard cover, you can tailor your toolset, your patching approach, and your timing. You’ll avoid buying a patch kit that won’t adhere to fabric, or a panel replacement that won’t match the dimensions of your roof line.
In this diagnostic moment, you will also consider the weather and the timing of the repair. A repair performed in heat and sun will cure differently than one done in damp air or near freezing temperatures. The ideal repair window for most bed cover work sits within a comfortable range, typically a mild day when the surface is dry and free of dew. Temperature plays into the curing processes of adhesives and sealants, and it affects the flexibility of fabrics and coatings. If you’re repairing a loose seam, for instance, you’ll want the adhesive to bond evenly across the seam without becoming overly tacky or brittle. If you’re patching a vinyl tear, you’ll want the material to seat smoothly beneath the patch so there are no air pockets between patch and substrate. This is why the diagnostic phase is more than a mental inventory; it is a practical scheduling exercise as well, aligning the right materials with the right atmospheric conditions to maximize durability.
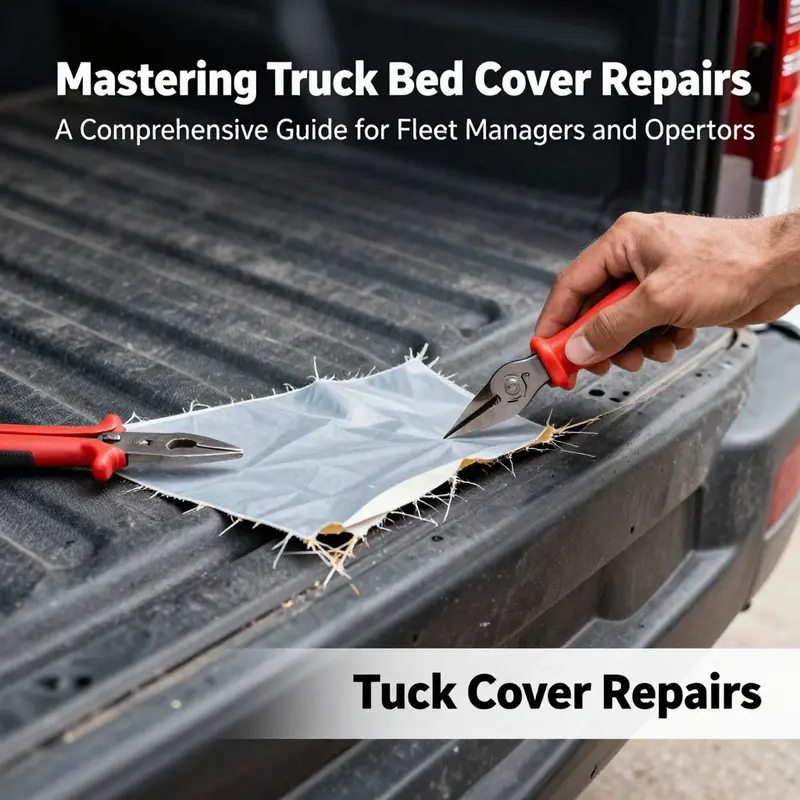
Once you have established the broad category of your cover—soft or hard—you can begin to map the likely repair scenarios you will face. For soft covers, the most common repairs center on fabric tears, edge fraying, or wear along the binding where the cover meets the bows or the rails. Tears in the material require a suitable vinyl or fabric patch kit designed for outdoor use, coupled with a compatible adhesive that remains flexible after curing. The repair technique is straightforward in theory: clean the damaged area, apply the patch with a slight overhang beyond the tear, and press firmly to expel air and ensure intimate contact. It is crucial to allow sufficient curing time, typically up to a day, before subjecting the area to moisture or traffic that could compromise the patch. Hydration is the enemy during curing; even water exposure in the early hours can debilitate the bond. A more advanced issue might be a bent or broken arched bow within a soft cover. These internal supports give structure to the fabric and help shed water to keep the bed dry. When bows fail, they can sometimes be replaced individually, restoring the original geometry and water-shedding performance without a full cover replacement. This replacement approach is a practical reminder that soft covers offer a degree of modularity that is not always available with hard covers.
Hard covers demand a different set of strategies. If you observe a crack in a rigid panel, your instinct will likely be to replace the damaged section. The feasibility of panel replacement depends on the design—some panels are modular and can be swapped, while others require a full panel set or even a new cover to restore integrity and weather sealing. For retractable hard covers, the system’s track and roller components are the heart of the repair logic. Misalignment, binding, or wear in these parts can produce uneven closing, gaps along the seal, and increased wind noise during driving. Lubricating the track with a compatible silicone or dry-liberating lubricant can improve movement; however, if wheels or rollers show wear, you may need to replace those components. It’s also important to check the alignment of the cover along the bed rails. A misaligned cover can damage gaskets, worsen water intrusion, and cause accelerated wear on the seal. In any hard-cover repair, you should consult the manufacturer’s guidance for the appropriate replacement parts and any torque specifications for mounting hardware. The temptation to improvise with generic fasteners can result in a misfit that invites future leaks or structural failures. A careful, model-aware approach is worth the extra time because it reduces the likelihood of a recurring problem.
This diagnostic framework also introduces a practical practice: verify compatibility and materials before you buy parts. Replacement components—be they seals, latches, panels, bows, or sliders—must match your specific truck’s model and the cover’s brand family. The world of truck bed covers uses a spectrum of designs, each with distinctive attachment methods and tolerances. Matching parts prevents fit issues that complicate installation and degrade performance. If the exact part is not available, many manufacturers offer suitable alternatives that maintain the same function and dimensions. In such cases, it becomes essential to consult the official catalog or support channels, and to document your model details—year, model, bed length, and any accessories that affect fit. The more precise your knowledge base, the more likely you are to secure a repair that lasts instead of one that falters after a few rain showers or road vibrations.
In the wake of identification and a clear sense of components, it’s useful to translate this into a repair plan rather than a pile of loose parts. A well-constructed plan begins with an honest assessment of the damage’s severity. Minor issues—small tears, loose seams, or light seal wear—are typically within the reach of a home repair kit and a patient, methodical approach. Moderate problems, such as a few damaged latches or a track that occasionally binds, may require a combination of parts replacement and lubrication, with attention to correct alignment and mounting torque. Severe damage—cracked panels, warped frames, or pervasive water intrusion—often signals that a repair may cross the line into replacement territory, or at least require professional service to guarantee safety and reliability on the road. The distinction between repair and replacement isn’t merely financial; it’s also a matter of safety and functional protection for your cargo. If a cover can no longer seal effectively or bears visible structural deformation, continuing to patch it could lead to unreliable weather protection or, in the worst-case scenario, a failure during transit that jeopardizes the load or road safety.
To close the diagnostic loop, turn toward the practical next steps that flow from type identification. If you decide the repair is within reach, gather the relevant tools and materials that align with the cover’s category. For soft covers, you’ll typically need a vinyl or fabric patch kit, a compatible adhesive with good elongation properties, a clean solvent for surface preparation, and a method for securing patches that ensures no air pockets. A mild cleaning solution will suffice for preparing the area; harsh chemicals can degrade fabric or coatings. After surface preparation, apply the patch using a technique that ensures complete contact around the edges and a uniform bond. For folds and seams, consider an edge treatment that strengthens the binding, and if necessary, reinforce weakened edges with a strip along the seam. In some cases, a heat-activated bonding method provides an additional level of seam integrity, but you must follow the adhesive’s heat guidelines to avoid scorching the fabric.
For hard covers, your toolkit will look different. You may need a torque driver for mounting hardware, replacements for hinges, latches, tracks, or rollers, and a seal or gasket material compatible with the cover system. Clean all contact surfaces to ensure proper bonding and fit, and verify that moving parts operate smoothly before reassembly. If a crack is present in a panel, you’ll want to inspect the surrounding frame for stress indicators that might warrant attention beyond the panel. Sometimes, the best approach is to replace a damaged panel with an equivalent module that maintains the original geometry and weatherproofing. For retractable designs, ensure the track is free of debris before reassembly, and replace worn rollers or seals as needed. Lubrication is part of ongoing maintenance, not just a one-time repair; a well-lubricated track prevents future misalignment and reduces resistance that could wear the system prematurely.
In the broader arc of repairs, the manual reference remains a steady compass. An official user manual or a manufacturer’s installation guide offers precise diagrams, torque specifications, and steps tailored to your exact model. This is not a mere formality; it’s the most direct route to a repair that returns to factory-like performance and withstands the test of time. A crucial corollary is the wisdom that certain situations demand professional service. If the damage is widespread or involves critical sealing interfaces, cost-effective patchwork may be tempting but may not address root causes. Recognizing when to call in a professional helps prevent temporary fixes from becoming recurring problems, especially for components like hydraulic arms, long track assemblies, or complex retractable mechanisms where misalignment can quickly escalate into water leaks or compromised security. In such cases, the intervention of a repair technician with access to OEM parts and model-specific procedures can safeguard your investment and support vehicle safety on the road.
This diagnostic and planning mindset also carries over into daily maintenance. The best repairs are preceded by a proactive habit: schedule routine inspections and cleaning that keep the cover performing as designed. For soft covers, periodic cleaning of the fabric and treating the vinyl with a protectant helps maintain flexibility and resistance to UV damage, reducing the likelihood of tearing under minor bending or wind shear. For hard covers, regular checks of the track and seals, plus lubrication of moving parts, delay creeping misalignment and sudden failure. The more consistently you monitor the system, the longer you can extend the life of both the cover and the underlying bed. Even small, incremental improvements—like ensuring proper clamping without overtightening and wiping away grit from the track—compound over time into a robust, weather-tight system that keeps your cargo safe and dry.
In sum, the path to durable repair begins with disciplined identification. By knowing whether you’re dealing with a soft, pliable fabric cover or a rigid, panel-based system, you set the foundation for selecting the right materials, applying the correct techniques, and choosing between repair and replacement with confidence. Your truck bed cover is a guardian of your cargo against the elements and against theft; understanding its construction and the mechanics behind its operation is not simply a DIY exercise, it’s a way to extend the life of your investment, reduce downtime, and maintain the practical value of your vehicle. If you keep this diagnostic habit—observing, aligning with the component family, consulting model-specific guidelines, and respecting the repair boundaries—you will approach every repair with calm efficiency rather than reactive scrambling. And in the quiet, practical art of identifying your cover type, you’ll discover the keystone of a repair strategy that sticks, season after season, mile after mile.
For those who want a broader repair mindset that applies across truck components, a useful reference is a DIY windshield repair guide for truck owners, which offers practical principles about evaluating damage, choosing the right repair path, and maintaining safety during repair work. See: DIY windshield repair guide for truck owners.
As you move toward actual repair work, you should also keep a few practical reminders close at hand. Always work in a clean, dry, well-ventilated area. Protect surrounding surfaces with drop cloths or masking tape to prevent accidental damage. If possible, remove the cover from the frame to gain easier access and a better view of all contact points. Never attempt repairs in extreme temperatures; aim for a comfortable range to ensure adhesives cure properly and metal components don’t become brittle or over-soft. And finally, remember the threshold that separates repair from replacement. If you encounter large tears beyond a couple of inches, significant warping, repeated failed repairs, or an age well beyond five to seven years, it is often more cost-effective and safer to replace the cover rather than continue chasing reliability. This is not just a financial decision; it is a judgment about how best to protect your cargo and maintain the integrity of your truck every time you hit the road.
The guidance above is designed to be practical and model-agnostic, focusing on principles rather than brand-specific steps. It aligns with the broader aim of effective, durable repair—an aim that requires you to identify the cover type first, then proceed with the repair strategy that matches its construction. You’ll find that understanding the nature of the cover unlocks a more precise, more durable approach to fixing it. If you invest the time in this initial identification phase, you will save time, money, and frustration later on, and you’ll be better prepared to handle future glitches with confidence rather than guesswork. The ultimate payoff is straightforward: a repaired cover that behaves as it should, a dry cargo area, and peace of mind when you’re on the road. For those who want the most authoritative step-by-step guidance tailored to specific models, the folding truck bed cover installation guide offers a detailed, model-specific blueprint that can guide your repair decisions and verify your results against the manufacturer’s expectations. External resource: https://www.manualsplus.com/realtruck-1146-folding-truck-bed-cover-installation-guide/
From Patch to Protection: A Practical Guide to Repairing Your Truck Bed Cover
A truck bed cover serves to protect cargo and keep weather and dirt at bay. When it leaks or misaligns, start by identifying the cover type and gathering model specific instructions from the manual. A patch can work for small fabric or vinyl damage, but larger tears or warped frames may require panel replacement or a full cover replacement. Begin with a clean surface, cut a patch that overlaps the damaged area, and use an automotive adhesive designed for exterior use to secure it. Allow the bond to cure fully before exposing the area to rain. For seams and edge bonds, remove old sealant, clean the rails, apply a fresh bead of sealant, and clamp until cured. Check alignment and operation before driving, and perform regular maintenance to extend life, such as cleaning, conditioning the surface, and inspecting seals. If multiple areas fail or the cover is near the end of its service life, replacement may be more economical in the long run. Always follow model specific torque and installation notes from the manual and consider professional help if unsure. The goal is a durable, weatherproof system that preserves cargo protection and vehicle value.
The Prep That Holds: Mastering General Preparation for Durable Truck Bed Cover Repairs
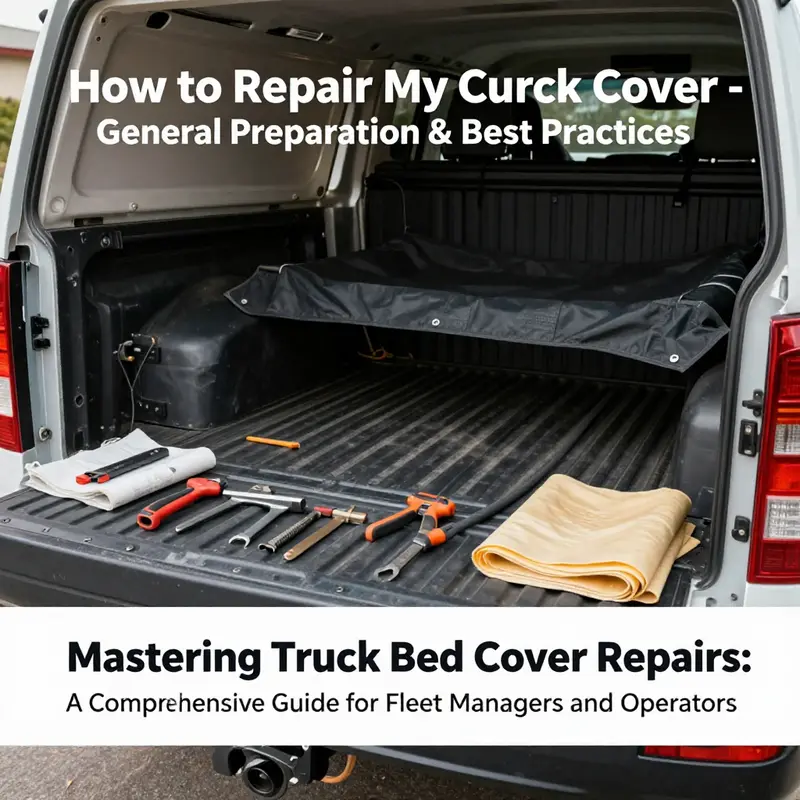
Repair starts long before any adhesive meets fabric. In fact, preparation is the difference between a repair that survives the first rainstorm and one that fails after a season of sun, dust, and road grime. This chapter offers a cohesive, practical view of how to approach the prep phase with a mindset that emphasizes durability, safety, and consistency. It’s not just about fixing a tear; it’s about setting a foundation that keeps your truck bed cover performing well for as long as possible. The way you prepare reflects in the bond you create, the surface you expose to weather, and the way the repair holds up when the elements return.
Begin with a clear assessment, even before you touch a tool. Confirm the type of cover you’re working with and the specific issue you face. The tape of understanding must align with the actual construction—vinyl surfaces, fabric-based layers, metal hinges, or a combination of these. Each material has its own demands when it comes to bonding, sealing, and resisting UV exposure. Even within the same broad category, a folding cover will behave differently from a retractable one when the adhesive cures or when the seam is stressed by wind. A model-specific guide can provide essential torque specs, alignment cues, and component fit checks, but the core principles of preparation apply across the board: clean, roughen, protect, and respect the cure times.
To begin gathering the right tools and materials, plan around the needs of automotive-grade bonding. You will want a compatible adhesive that is designed for outdoor, automotive use and that performs well on the materials involved. Heavy-duty epoxy or urethane-based adhesives are common choices because they cure to a strong, flexible bond that can withstand temperature shifts and rain. Have a patch material ready if the cover has a fabric or vinyl layer that needs reinforcement. A clean rag, a putty knife or plastic scraper, and protective gloves are standard, as is some medium-grit sandpaper. The goal is to create a surface that the adhesive can bite into, not a slick glaze that will peel away at the first touch of moisture. Remember to work in a well-ventilated area; fumes from solvent-based adhesives can be strong, so choose a space that is not crowded and has good air flow.
Before any repair, you must prepare the damaged area itself. Start by cleaning the area with mild soap and water to remove dirt, grease, and grime that could interfere with adhesion. Rinse thoroughly and allow the surface to dry completely. Moisture at the bonding surface is a silent killer of durability; even a small hint of dampness can compromise the adhesive’s grip, leading to a bond that weakens over time. After cleaning, inspect the edges of the damage. If you’re dealing with a tear, you may find frayed fibers or a slight delamination at the seam. The objective is to create a clean, stable base for bonding, so this is not a time for mercy on rough edges. A light wipe with isopropyl or rubbing alcohol can help remove residual oils, but you should avoid saturating the area to the point of leaving a damp film. Let the surface dry again before proceeding.
Roughening the bond line is a critical next step. Lightly sanding the area around the damage with a 120- to 150-grit sandpaper creates a microscopically rough surface that improves adhesive grip. This is not about removing large amounts of material; it is about creating a subtle texture that the adhesive can anchor to. After sanding, wipe away the dust with a clean cloth. Residual dust can act like tiny barriers, preventing the patch material from seating flush with the surface. The patch itself should be readily accessible and sized so that it covers the damaged area with a margin of several millimeters to each side. The extra space ensures the patch can span beyond the immediate edge and resist lift that can occur with wind and rain.
The environment in which you work matters just as much as the tools you use. A shaded, dry, temperate location is ideal. Direct sunlight can heat surfaces quickly, causing adhesives to cure too rapidly and form weak, brittle bonds. Very cold air or wind can slow curing, while humidity can interfere with solvent evaporation in some adhesive formulations. If you must work outdoors, choose a calm, overcast day and keep the vehicle out of direct sun, with the cover supported or removed to gain access. Temperature targets to aim for are roughly between 50°F and 90°F (10°C to 32°C). In that range, most automotive adhesives cure predictably and achieve their designed strength. If you cannot control the environment, consider delaying the repair until conditions improve. Adherence to manufacturer instructions for the chosen adhesive remains essential, including precise temperature and curing guidelines. The manufacturer’s guidance is not optional; it is the surest way to ensure the bond’s long-term performance.
Curing time is the quiet architect of durability. Once the adhesive is in place, resist the temptation to rush the process. The bond may seem set to the touch within minutes, but full strength often requires hours or even a full day. The exact timing varies with the product and the ambient conditions, but a conservative approach pays off. Plan for a cure time that allows the repair to reach its maximum strength before the cover is subjected to rain, UV exposure, or load. If you drive with the repair before the adhesive has fully cured, you risk weakening the bond, which can lead to the issue reappearing or, worse, creating a new failure path.
A general best practice is to clamp or weight the repaired edge while the adhesive cures. This holds the materials in perfect alignment and prevents any creeping movement that would undermine the bond as it sets. For seam work or edge repairs, a temporary clamp that applies even pressure across the bonded surface helps the adhesive seat and grip uniformly. After the cure, a light test by hand can confirm that the patch remains flush and secure. If you notice any edge lifting or slight movement after curing, reassess the bond and consider a secondary application of adhesive in a controlled, incremental manner. The idea is not to patch and walk away, but to cultivate a bond that stands up to weather and road vibrations over time.
When the repair involves a torn vinyl or fabric layer, the patching approach should prioritize compatibility with the carrier material. Use patch material designed for automotive use that matches the color, texture, and flexibility of the underlying layer if possible. The patch should cover the damaged area with a margin that extends well beyond the tear, and the adhesive should be applied evenly with a careful, consistent bead or layer. Press the patch from the center outward to minimize air pockets and ensure a seamless seal. For certain seam exposures, you may need to employ a heat-activated bonding option as a supplementary measure. A heat gun can soften the patch material enough to achieve a tighter bond along the edge, but it must be used with caution to avoid scorching the surface or fading the color. This method, when used properly, creates a bond that resists lifting at the seam and forms a cohesive, integrated surface that behaves as a single, continuous layer.
If your repair also involves hinges, latches, or support arms that have become detached or bent, you must treat the mechanical components with equal care. Start by inspecting the hardware and determining whether the issue is a simple looseness, misalignment, or a broken component. Replacing damaged hardware with OEM or compatible replacements is standard practice; however, the key is to ensure the mounting bolts are tightened to the manufacturer’s torque specifications and that the hardware aligns precisely with the mounting holes. Over-tightening bolts can strip threads and invite further movement, while under-tightening can allow wobbly operation. If you remove any hardware for replacement, keep track of the order in which fasteners come out so you don’t compromise alignment during reassembly. The alignment of hinges and supports is not a cosmetic concern; it directly affects how the cover seats against the truck bed and how water is shed at the joins. Correct alignment ensures that water runs off rather than pooling along the seam, which in turn reduces the risk of adhesive failure at the bond line.
For the wear and fading that often accompany long exposure to sun and weather, a protective regimen for the vinyl coating or fabric surface helps preserve the repair and extend its life. After you complete the repair, consider applying a dedicated vinyl cleaner and protector designed for automotive use. This step isn’t about restoring a new surface; it’s about slowing the natural degradation of the material and preserving flexibility. The cleaner removes dirt that could degrade the bond surface, while the protector helps shield the material from UV radiation and moisture. Reapply according to the manufacturer’s recommended interval, typically every few months depending on sun exposure and climate. Regular conditioning keeps the surface supple and less prone to cracking, which reduces the likelihood of future tears and simplifies any subsequent repairs.
Beyond the concrete steps, there are larger habits that support lasting repairs. Work in a clean, dry area, and protect surrounding surfaces you don’t want touched by adhesive or cleaners. If you can, remove the cover from the truck bed for easier access and better control over every movement of the parts. This is especially helpful when you must align hinges or re-seat seams. It also gives you the opportunity to inspect the underside of the cover and the bed rails for any signs of corrosion or debris that could compromise a new bond. Keeping the work zone free of debris is more than a tidy habit; it prevents small particles from lodging into seams, under patches, or around the cured adhesive, where they could later act as irritants to the bond.
A practical mindset for repairs is patient, deliberate, and incremental. Don’t try to salvage a failed bond with a single heavy-handed application. If a seam splits anew after a rain or a long drive, reassess the entire bond line. Sometimes the problem isn’t the patch itself but the underlying substrate—an edge that has begun to peel due to UV damage or a fiber that has become fatigued from repeated flexing. In those cases, you may need to reinforce with additional patches, adjust the edge alignment, or rework the surface with fresh sanding and cleaning. The goal is to create a repair that behaves as a single, cohesive surface rather than a patchy patchwork that invites moisture intrusion at the seams.
In the broader view, preparation also means recognizing when a repair is no longer a practical option. If you encounter large tears, significant warping, or a series of failed repairs across the same area, it may be time to consider replacement. While replacement involves a larger upfront cost, it can offer longer-term reliability and peace of mind, particularly if the cover protects valuable cargo and needs to withstand seasonal weather changes. A cover that has aged beyond an optimal lifespan—typically several years—often presents diminishing returns when repaired, as each fix can become progressively more fragile. Replacement decisions should balance cost, safety, and the likelihood of recurring issues that could compromise cargo protection or weather sealing.
Throughout the process, remember that the guidance of the official user manual for your specific model remains essential. The steps described here are foundational, but each model may have unique assembly relationships, torque values, or gasket designs that affect how you approach a repair. When you need model-specific instructions, consult the manufacturer’s installation and repair guide for precise steps, diagrams, and troubleshooting tips. These resources provide diagrams and alignment cues that help ensure your repair not only looks right but also functions correctly under real-world conditions. For readers seeking a detailed, model-specific reference, a comprehensive external resource is available that offers step-by-step installation and repair instructions, including troubleshooting and maintenance considerations. This external guide serves as a valuable companion to the general preparation framework described here, helping you translate principles into precise, model-aware actions.
To keep this practical and grounded in real-world practice, consider this path forward: begin with a careful assessment, assemble the right materials, and approach each facet of the repair with a calm, measured plan. Clean and prepare each surface, roughen where needed, and protect surrounding areas from any drips or overspray. Use the adhesive and patching methods that best suit the material, and always respect cure times. If you can, remove the cover to work more effectively, and take advantage of a stable, controlled environment. Finally, protect the finished repair with a vinyl cleaner/protector routine that extends the life of the bond and the surface itself. By following this preparation-focused approach, you build a repair that is not only functional in the moment but durable enough to endure the next season of weather, traffic, and wear.
For readers who want to explore more model-specific dynamics and troubleshooting beyond general preparation, a well-structured, model-specific installation guide can provide precise steps that align with your particular truck bed cover. Internal resources and authorial guidance from long-running repair communities can offer additional insights, ensuring that you stay aligned with best practices and evolving recommendations. For instance, an accessible internal hub provides a broad repository of repair notes, tips, and practical considerations that can help you adapt the general preparation framework to your exact cover and truck model. You can explore these practical discussions at the Master Truck Repair blog, which compiles hands-on guidance and user experiences that complement the technical details discussed here. See more at mastertruckrepairllc.com/blog/.
In summary, preparation is your strongest ally in any truck bed cover repair. It anchors the repair in reality, aligns expectations with what can be achieved practically, and creates a reliable baseline for the steps that follow. By prioritizing cleanliness, surface readiness, proper materials, a controlled environment, and cautious curing, you set up a repair that can resist the weather, wear, and road life that your cover endures every day. And when in doubt, turn to the combination of model-specific guidance and general, field-tested best practices—to create a repair that not only looks right but behaves right, too.
External reference: https://www.manualsplus.com/realtruck-1146-folding-truck-bed-cover-installation-guide/
Final thoughts
Success in truck bed cover maintenance demands not only prompt repairs but also a proactive approach towards identifying issues before they escalate. By understanding the specific cover type, knowing how to address common problems, and adhering to best preparation practices, fleet managers can ensure the longevity and reliability of their equipment. This strategy will not only keep your fleet running smoothly but also contribute to cost savings and enhanced productivity.

