Maintaining fleet vehicles in 7 Days to Die requires not only skill but also knowledge of the repair process. For fleet managers and logistics professionals, understanding how to efficiently repair a damaged 4×4 truck ensures minimal downtime and continued operational efficiency. This guide will take you through the essential steps of gathering materials, utilizing a workbench, initiating the repair, and troubleshooting common issues in the game. By following these structured chapters, you will enhance your understanding of vehicle maintenance within this survival game, ensuring your fleet remains in peak condition.
null
null
Restoring the Beast: Mastering Workbench Repairs for Your 4×4 in 7 Days to Die
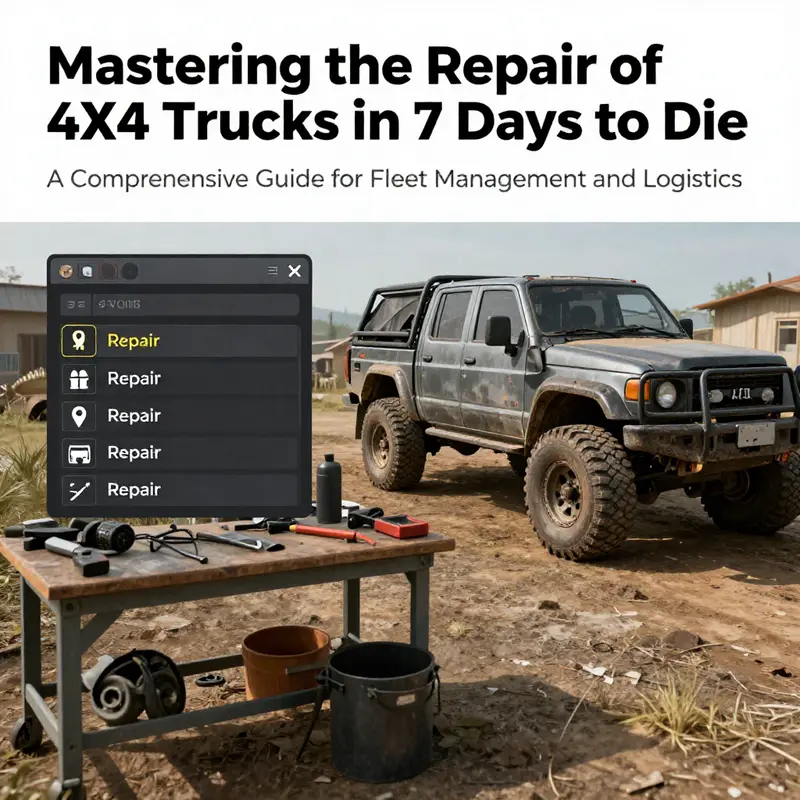
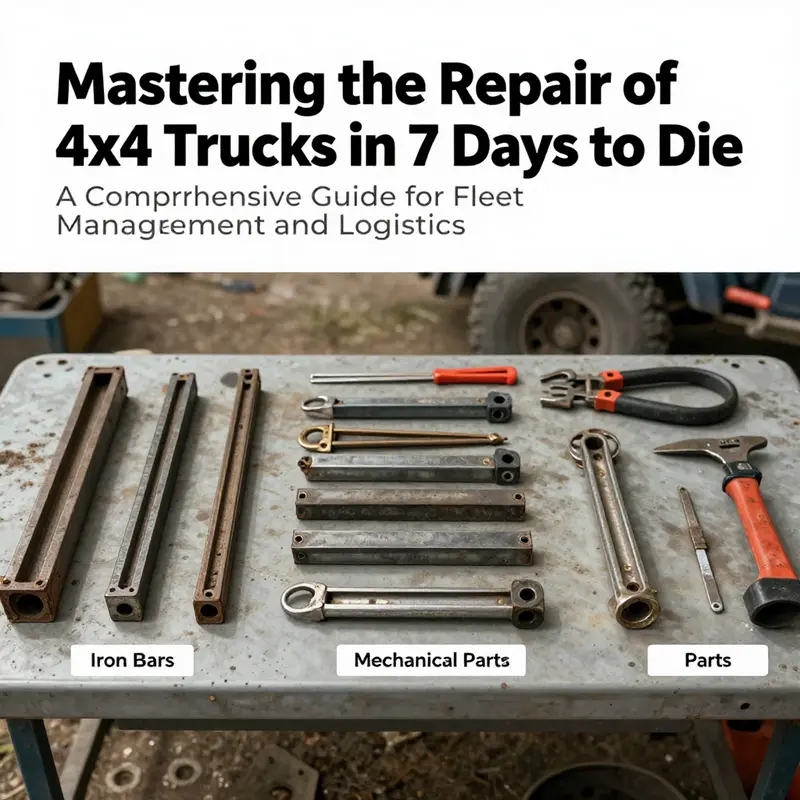
In the gritty survival world of 7 Days to Die, keeping your ride in fighting shape is as much a matter of planning as it is of luck. The 4×4 truck is your lifeline on long journeys, a mobile base that can carry supplies, armor you against wandering hordes, and give you the confidence to push farther into the map. The Workbench, also known as the Mechanic’s Bench in some restoration setups, sits at the intersection of resource management and practical skill. It is here that the broken steel frame can be coaxed back into a working machine, provided you have the right pieces, the right mindset, and a little patience for the process. The repair itself is straightforward in its recipe, but like any good repair job, it rewards preparation and attention to detail more than raw speed. You will need two iron bars, two steel bars, and two mechanical parts. The mechanical parts are not harvested from thin air; they are crafted from scrap metal and other components you’ve scavenged from the world or scavenged from wreckage. The exact path to those parts—how you gather scrap, what you salvage, and which components you combine—will vary with your playstyle and the seeding of your world, but the core requirement remains consistent. The iron and steel bars provide the structural backbone, the mechanical parts supply the moving heart of the vehicle, and the workbench provides the interface to bind them into an operational machine again. When you collect these materials, you should also consider the broader implications of repair as a strategic decision. More repairs mean more wear on your own stamina and more attention to inventory space, so plan ahead for future excursions and the possibility that you will need to perform additional fixes after encountering rough terrain or a close encounter with a zombie horde. This chapter is not just a how-to; it’s a reminder that every repair is part of a larger workflow, the everyday arithmetic of maintaining a trusty vehicle while also balancing weaponry, shelter, and fuel. Once you have your materials, the procedure becomes a careful ritual rather than a rushed sprint to the finish. Position the damaged 4×4 near a Workbench or Mechanic’s Bench. The vehicle’s proximity matters because the repair process is tethered to the bench’s interface; you will interact with the vehicle through the bench’s menu, so getting the truck close enough is the tiniest but most important step you’ll take. Open the workbench interface and look for the option labeled Repair Vehicle. This is your moment to choose the exact vehicle you intend to fix. If you have several vehicles nearby, pick the 4×4 from the list, making sure you are selecting the correct machine—one that has seen better days but still holds the promise of a long road ahead. Once the 4×4 is selected, you’ll be prompted to confirm the repair using the required materials. The game will deduct two iron bars, two steel bars, and two mechanical parts from your inventory, and then the repair process begins. The animation is simple, a few careful welds, a grind here, a seal there, and a quiet whirr as the engine block is coaxed back into life. When the repair completes, you’ll be rewarded with a restored vehicle to near full health, depending on the level of prior damage. The machine’s performance will reflect its post-repair condition: it might be pristine in some areas, while others show the cumulative toll of days spent wandering through zombie-infested streets. But you should not expect a miracle cure; the 4×4’s vitality is bound to its past and the roughness of the world you inhabit. This is all normal, and it’s worth understanding—your repair might restore the chassis and engine, but interior wear, tire tread, and fuel efficiency can still lag behind. In short, repairs breathe life into your ride, but they don’t erase the miles already logged or the battles that await beyond the next ridge. It is wise to plan for follow-up fixes and to save enough resources to address any lingering issues that emerge after a long, hard voyage. At this point, it is useful to acknowledge a persistent caveat in the maintenance landscape of this game: a subset of players encounter a recurring bug where the vehicle refuses to repair properly, even when a repair kit and Workbench are used correctly. The root of this issue lies in a strange infection mechanic that some vehicles can acquire, mirroring the zombie infection dynamics seen in players. When a vehicle becomes infected, standard repair methods may fail to take hold, leaving you with a truck that looks repaired but performs poorly or not at all. The development team is aware of this bug and is actively working on a fix, so the state of repair in your current session may improve with future patches. For players chasing a workaround in the cycle between patches, a practical—but not guaranteed—strategy has emerged: pick the vehicle up and place it in a storage container or a vehicle spawn point, effectively resetting the vehicle’s state and perhaps its infection status. When you bring the truck back into the world from storage or a fresh spawn point, you can attempt the repair again, usually with increased odds of success. It’s a reminder that even in a game built on mechanical truth, some glitches require adaptive thinking, a willingness to experiment with the environment, and a little luck as you navigate the uncertain patch history of the game. If you are exploring with mods installed, be aware that some mods alter repair requirements or add new mechanics that can complicate the process. A stricter or looser set of materials, altered repair interfaces, or different bench options can all appear through mod content. The safest course is to verify the exact recipe and process via in-game crafting menus or the official mod documentation. Modded experiences create new textures of challenge, and that is part of the appeal for many players, but it also means that a repair plan you rely on might not translate cleanly from one session to another. In addition to these practical cautions, you’ll want to ground your approach in reliable reference material. For the most precise and current repair instructions, consult the game’s wiki or community resources. These sources often offer step-by-step guides, troubleshooting tips, and user-tested workarounds that reflect the latest game state and patch notes. If you’re curious to anchor your repair strategy with a broader view of vehicle maintenance beyond the game’s walls, consider the real-world parallels in long-term upkeep and budget planning. A practical approach to resource allocation—how you plan for fuel, parts, and tools over multiple repair cycles—can improve your efficiency in the game just as it does in real life. For a broader perspective on the practicalities of routine vehicle upkeep, you can explore related discussions through a resource focused on budget-conscious truck maintenance. This reference can help you frame your in-game repair chores within a larger maintenance mindset and keep you organized for longer play sessions, especially when you’re juggling scavenging runs, base defense, and vehicle uptime. If you’re thinking through this, Budgeting for Routine Truck Maintenance offers a tidy, real-world lens that can inform how you approach repair planning in the game, reinforcing the idea that steady, thoughtful preparation outpaces last-minute improvisation. As always, cross-check the in-game menus for the exact repair recipe, particularly when mods are in play, and stay connected to the official forums for the latest fixes and community-tested solutions. The forum discussions are a living archive of patches, user experiences, and practical tips, and they can be an invaluable compass when you feel stuck at the edge of a patch’s tricky edge. In the end, the act of repairing a 4×4 in 7 Days to Die is more than a moment of mechanical restoration; it is a small ritual that binds your planning, scavenging, and risk-taking into a coherent strategy. The bench becomes a kind of workshop where you translate scrap and component luck into a working engine, a safer ride, and the promise of another day in a world that ends at dawn unless you fuel it with careful preparation. When you walk away from the bench with a repaired vehicle, you are not merely closing a circuit; you are affirming a approach to survival that balances immediate need with long-term readiness, a balance that will carry you through the next wave of threats and the next horizon of opportunity. For the curious reader, remember that patch notes, the wiki, and the community forums are your steady companions. They keep you aligned with the evolving realities of vehicle repair in a game that rewards patience, experimentation, and careful observation. The road ahead is never perfectly smooth, but with the right materials, the right bench, and a keen eye for the quirks of infection and modded variations, your 4×4 can be more than a means of transport—it can be a reliable, resilient partner in your ongoing struggle to stay alive and stay ahead. For further context on the repair ecosystem and up-to-date troubleshooting, the official community portal remains a beacon for players seeking guidance and confirmation of the best current practices.
Blueprints, Bench, and Battle-Ready Wheels: Repairing the 4×4 Truck in 7 Days to Die

In the world of 7 Days to Die, the road is a hostile ally at best and a blunt enemy at worst. The 4×4 truck stands as a crucial lifeline, a rolling fortress that bridges the gap between scavenging and surviving the next horde on the horizon. Repairing it is less a one-off click and more a measured act of maintenance that blends scavenged expertise with a careful inventory of parts. The moment you decide to bring a damaged machine back to life, you enter a rhythm that repeats across your campaign in the wasteland: assess, gather, verify, and restore. The first step is not simply to swing a wrench and hope for the best. It is to recognize that the truck’s restoration is rooted in a specific blend of skill, components, and the right workstation, all aligned under one mechanic’s discipline. The blueprint for this process rests on a simple truth: the vehicle you want to repair exists within a network of prerequisites that tie your character’s progression to the machine’s resilience. In practical terms, you must first unlock the blueprint. The Mechanic skill—also known as Repair Oil Monkey by some players—must reach level four. It is here that the repairs stop being guesswork and become a deliberate craft. Level four grants access to the vehicle’s blueprint, a map that tells you not only what you can fix but also what you must bring to the bench to conjure a functioning 4×4 once more. This is more than a guideline; it’s a threshold that marks the transition from scavenger to improvised engineer. Without that unlock, the act of repair remains a distant dream, a gleaming objective that cannot be materialized in your current frame. Once the blueprint is in your grasp, the road forward hinges on a precise inventory of components. The kit for the build phase—an earlier, preparatory moment that makes the repair possible—demands a careful collection of engine, tires, steering wheel, chassis, and a body panel. Each component is not merely a part but a story of how you’ve traversed the map to gather it. Engines sing with potential, tires endure the jagged logic of the road, steering wheels offer control in a world that loves chaos, chassis forms the frame of resilience, and a body panel shields the internals from the unkind weather of the apocalypse. These parts are not abstract; they come from wrecked vehicles, loot crates, and even traders who still hold a thread of civilization. Your backpack grows heavier, but so does your certainty that your 4×4 can endure what the road throws at it. When you return to the repair bench, the relief and the responsibility arrive together. The bench—whether the standard Workbench or the Mechanic’s Bench, often called a Vehicle Repair Bench—becomes the theater where intention meets capability. The interface presents the option to repair vehicles, and you will select your 4×4 Truck from the roster of nearby machines or from your inventory. This moment, simple in its on-screen presentation, is the culmination of a chain of decisions: the skill you trained, the blueprint you unlocked, and the parts you hunted. The act itself is understated yet decisive. You confirm the repair with the required materials, and the machine is coaxed back toward form. Depending on how damaged the truck is, the restoration will swing toward full repair or leave you with a near-full condition that is still robust enough to carry you through the next leg of your journey. The iron and steel bars you carried, the mechanical parts you forged from scrap, all converge to rebuild not only the vehicle’s frame but its confidence. The repair is not a ritual of transformation alone; it is a check on the truck’s lived history. After the initial restoration, it’s wise to monitor three critical threads: fuel levels, engine health, and tire integrity. The fuel gauge can betray you as you wander from one side of the map to another, and an engine that runs hot or rough is a sign that broader maintenance is due. Tires, too, give warnings; punctures and wear can undermine traction at the moment you need grip most. In this sense, maintenance becomes a recurring commitment rather than a one-off triumph. The same careful attention you apply to a vehicle in the real world translates well here. Keep a stock of spare parts and repair tools, not as a superstition but as a discipline. The 4×4’s reliability relies not on a single repair session but on a cadence of vigilance. It is reasonable to schedule quick checks before long expeditions, scanning for fuel efficiency, engine debris, and tire wear. If you are venturing into difficult terrain, you may consider additional reinforcements or storage upgrades, which some players explore through mods. Speaking of mods, the scene around vehicle repair can shift when you introduce them. Some mods adjust repair requirements or add new mechanics, and the caution with online play remains persistent: disable Easy Anti-Cheat when using unofficial modifications. The game’s core supports a robust, sandbox approach to repair that invites you to experiment within safe bounds, but it also asks you to respect the system’s limitations. If you embark on a mods-enabled path, be prepared for a different supply chain, possibly altered repair recipes, and the need to consult mod documentation for exact recipes. In the full arc of repairing the 4×4, knowledge of both the build and the repair phases matters. The build phase, following from the Mechanic level four unlock, is where you gather the engine, tires, steering wheel, chassis, and body panel. This set is not arbitrary; each element contributes to the truck’s fundamental ability to traverse the terrain with a blend of speed, control, and durability. The repair phase, on the other hand, uses different resources—commonly iron bars, steel bars, and mechanical parts—to restore damaged components. Those materials are the spare stitches that seal the wear and tear of travel. The exact recipe and its components can vary with game updates and any installed mods, so it is always prudent to verify the current in-game crafting menus or consult the official wiki for the most up-to-date guidance. In this way the repair becomes a dynamic process, not a static checklist. The game rewards players who balance practical scavenging with thoughtful maintenance. As you progress, you begin to recognize the implications of keeping the vehicle functioning: a well-kept 4×4 reduces downtime, accelerates your return to dangerous zones, and preserves valuable time you could otherwise spend scavenging for critical resources. The sense of security that comes with a reliable vehicle transforms how you plan routes, how you allocate your resources, and how you approach risks. There is a narrative thread here that extends beyond a single repair: the vehicle becomes a trusted partner in your survival story. It accompanies you through fog-drenched dawns, through the hum of the engine as you navigate the undead-laced highways, and through the quiet moments when you pause to plan your next foraging run. For players who want to ground this experience in more practical, real-world analogs, there are parallels to be drawn in how one might approach maintenance tasks in an actual workshop. The craft of gathering the right parts, choosing the proper bench, and carefully applying materials mirrors the discipline a skilled technician brings to any mechanical repair. In-game, that discipline translates into confidence—the confidence to know when a repair is within reach and when a component needs to be replaced rather than merely patched. It is this balance that keeps the journey humane, even as the world around you refuses to be humane. If you are looking for additional depth in how collaborations between vehicles and players unfold in the broader ecosystem of 7 Days to Die, you can consult the well-documented vehicle crafting guides in the official wiki, which lay out the broader context of how vehicles evolve within the game’s progression. For more detailed, game-specific references on vehicle crafting, see the Vehicle Crafting page on the official wiki. To deepen your understanding of how the mechanics behind the repair ecosystem functions in practice, you can explore this external resource: https://7daystodie.fandom.com/wiki/Vehicle_Crafting. And for a touch of real-world context that resonates with the mindset of a sturdy repair job, consider a practical guide on windshield and related truck repairs available at DIY windshield repair guide for truck owners. This blend of in-game precision and real-world practicality helps anchor the repair process in a larger framework of maintenance and readiness, reminding players that even in a pixelated apocalypse, careful preparation and ongoing upkeep pay off in the long run.
Wrench and Worry: Diagnosing Why the 4×4 Won’t Repair in 7 Days to Die
Repair in 7 Days to Die is a test of patience and resource management. The 4×4 truck can be stubborn, and a successful repair requires the exact materials and the correct bench. In vanilla play you need two iron bars, two steel bars, and two mechanical parts, then you open the Vehicle Repair Bench and initiate the repair. The bench consumes the parts and updates the truck’s health. If the vehicle is badly damaged, warped, or if a mod changes the repair recipe, the repair may not register. In such cases verify the exact recipe in your crafting menu, check the vehicle condition and placement, and consider logging out and back in to recalibrate the repair engine. With careful preparation the repair can become predictable rather than chaotic.
Final thoughts
Repairing the 4×4 truck in 7 Days to Die is a vital skill for any fleet manager, logistics operator, or construction site supervisor within the game. By understanding the materials needed, how to effectively use the workbench, and the correct steps to initiate repairs, players can maintain their operational efficiency even in challenging environments. Additionally, being equipped to troubleshoot common issues ensures that repairs can be completed swiftly and effectively, minimizing downtime and maximizing productivity. A well-functioning fleet translates to better resource management and a competitive edge in survival scenarios.

