Maintaining a truck’s aesthetic appeal and structural integrity is paramount for fleet managers, trucking company owners, and operators in industries like construction and logistics. Peeling clear coat not only detracts from the visual value of your vehicles but can also lead to underlying damage if left unaddressed. Understanding how to assess the damage, prepare the surface, choose the right repair methods, and implement preventive measures is crucial in preserving your fleet’s appearance and longevity. This guide is structured to illuminate each aspect of the repair process, ensuring that readers can make informed decisions that enhance the maintenance practices and overall lifecycle of their vehicles.
Reading the Surface: Diagnosing Peeling Clear Coat on a Truck and Pathways to Restoration
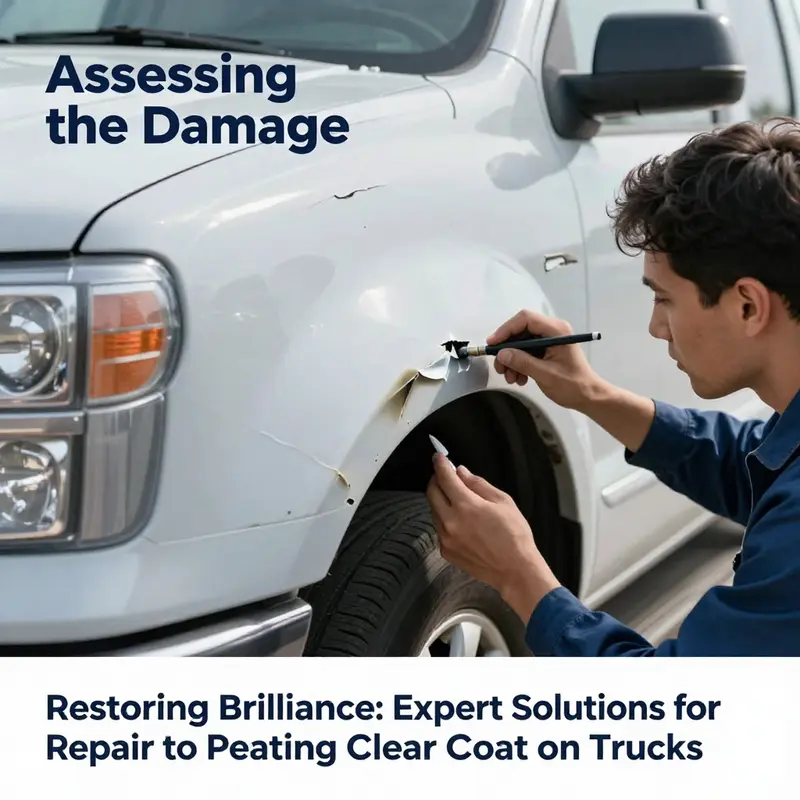
The moment you notice peeling clear coat on a truck, you’re looking at the surface telling a story about exposure, aging, and the choices you make to preserve what lies beneath. Clear coat is more than just a glossy shell; it protects the color layer from UV rays, acid rain, and everyday road hazards. When it starts to peel, the damage rarely stays isolated to a single spot. It spreads, sometimes slowly, sometimes in patches, and the next decision you make will shape not only the truck’s appearance but its long-term protection as well. The first step, therefore, is assessment. You need to understand how extensive the peeling is, whether the base coat beneath is intact, and how much moisture or contaminants have found their way into the compromised layer. This careful evaluation determines whether a DIY fix can hold up over time or if professional attention is warranted to prevent a recurring problem, including color mismatch or visible seams after the repair.
For a vehicle that shows only small, isolated peeling—perhaps a few bubbles near a rock chip or a minor sunspot—the door to a careful, do-it-yourself repair opens wider. The key is to slow down and build the repair from the ground up: clean, feather, rebuild, and seal. Start with a thorough cleaning that removes every trace of dirt, grease, wax, or old residues that would prevent new coatings from bonding. A dedicated automotive cleaner is a wise choice here, followed by a rinse with water and a complete dry. Any leftover moisture or solvent can undermine adhesion, leaving you with a repair that lifts again when exposed to heat or rain. Once the area is dry, you’ll need to feather the edges to create a smooth transition between the repaired spot and the surrounding paint. Lightly sanding the edges with very fine-grit paper—around 2000 grit—helps to blend the border so the repair doesn’t sit as a rigid patch. The objective is a seamless interface that, once cured, reflects the same depth and gloss as the rest of the panel.
The repair itself, in a small, controlled patch, benefits from a color-matched approach. A high-quality, color-matched touch-up paint kit—designed for automotive use and specific to your truck’s color family—lets you lay down thin, careful layers. Each layer should dry fully before the next is applied. The base color, when dry, is not the final step; you must then lay down a transparent layer to restore gloss and seal the newly repaired zone. A clear coat applied over the repaired spot is crucial; it finishes the job by improving the gloss level and creating a protective barrier against future damage. After curing, a light polish helps to blend the repaired area with its surroundings, reducing any minor difference in reflectivity and color that can draw attention to the repair.
If the peeling extends beyond a few tiny areas or if the underlying base coat or primer is exposed, the DIY fix becomes more challenging and the likelihood of a lasting mismatch increases. In such cases, local professional repair usually offers better results. A skilled technician will begin by removing loose material and sanding the damaged zone down to solid, intact paint. The goal is to create a stable, adherent surface for the new materials. A primer is then applied to promote adhesion and to provide a uniform base for the new paint. Color matching follows, using a controlled spray process to ensure a seamless blend with the adjacent panels. This is not simply a touch-up; it involves precise control of spray patterns, booth temperature, and curing conditions so that the new color integrates with the surrounding finish. Finally, a fresh layer of clear coat is applied across the repaired panel or targeted area, depending on the extent of the work. The final steps of polishing, blending, and waxing are essential to restore the reflective quality of the finish and to shield the new clear coat from the elements. In these scenarios, the investment and time are higher, but the results are typically more durable and visually cohesive than a DIY patch on a larger scale.
When the damage becomes widespread or particularly deep, a full repaint may become the most prudent option. A full repaint is more than a color choice; it’s a complete restoration of the finish that includes meticulous surface preparation, removal of old finishes, and careful layering of primer, base color, and clear coat. The advantages are not merely aesthetic; a full repaint can halt the progression of corrosion in exposed metal and restore uniform protection across the entire surface. The process demands a controlled environment, often a paint booth, where dust control, temperature, and humidity are optimized to achieve a flawless finish. The decision to repaint on a large scale should consider the vehicle’s age, value, and the long-term cost of ongoing spot repairs versus a complete, uniform solution.
Throughout this decision-making sequence, prevention remains the best strategy. The moment you accept that the clear coat is one line of defense against a harsh environment, the more you appreciate the value of consistent maintenance. Regular washing removes abrasive pollutants and compounds that can degrade the coating. A wax or paint sealant applied every few months creates a sacrificial, protective layer that helps resist UV damage, acid rain, and airborne contaminants. Harsh household cleaners are off-limits; they can strip or dull the finish and degrade adhesion for any future repair. Parking in shade or in a garage whenever possible reduces sun exposure, a primary driver of clear coat degradation. The simple habit of routine care—gentle washing, careful drying with microfiber towels, and controlled application of protective products—extends the life of the clear coat and reduces the frequency and scope of future peeling.
As you navigate the repair decision, you may find that you want a practical reference to guide your approach. For a broader perspective on DIY car and truck repairs that informs handling in a home setting, you can explore a related guide focused on windshield repair for truck owners. This resource provides a framework for evaluating damage, preparing the affected area, and applying careful, precise repairs in a non-professional setting. DIY windshield repair guide for truck owners.
No matter which path you choose, the core principles remain constant. Thorough cleaning ensures a clean bonding surface. Feathering and smoothing the edges reduce the chance of a visible seam. Thin, controlled layers of color and clear coat prevent buildup and help the repair blend in. Curing times are not negotiable; they grant the finish the opportunity to harden and resist future peels. If you ever doubt your technique, err on the side of patience and seek professional insight for the more complex scenarios. A fresh, well-integrated clear coat isn’t just about aesthetics; it’s a durable shield that keeps moisture out and prevents rust—the real enemy beneath peeling finishes.
In the end, your truck’s appearance and protection hinge on the careful assessment you perform before picking a repair path. A small, isolated peel invites a measured DIY approach with feathered edges and thin, precise layers followed by a protective sealant. A larger area or damage that reveals base coats calls for professional refinishing, where adhesion, color matching, and controlled curing deliver a seamless transition. And when the damage extends to a full panel or multiple panels, the option of a full repaint—though more demanding—offers the most reliable long-term protection and a uniform finish that looks factory-fresh. With this understanding, you can approach each peeling occurrence with a plan, not a guess, and you’ll be better prepared to extend the life of your truck’s finish while maintaining its value and curb appeal.
For readers who want to deepen their understanding of professional paint and clear coat restoration techniques, authoritative guidance from industry professionals can be a valuable resource. A reputable external reference provides vetted procedures and safety considerations, including surface preparation, materials compatibility, and curing protocols. See the external resource for a detailed, standards-aligned overview: https://www.ase.com
Groundwork for a Glossy Finish: The Critical Surface Prep Behind Repairing Peeling Clear Coat on a Truck
When you face peeling clear coat, the most important decisions happen before any paint is mixed or sprayed. The quality of the prep work beneath the new clear coat often dictates whether the repair lasts or dissolves into another peel within weeks. Surface preparation is not a cosmetic flourish; it is the foundation that determines adhesion, film integrity, and long-term durability. If you approach this task with patience and precision, you’ll discover that even small patches respond well, while larger repairs benefit from a deliberate, methodical plan. A well-prepared surface not only accepts new material; it also keeps that material from failing at the seams where old and new layers meet.
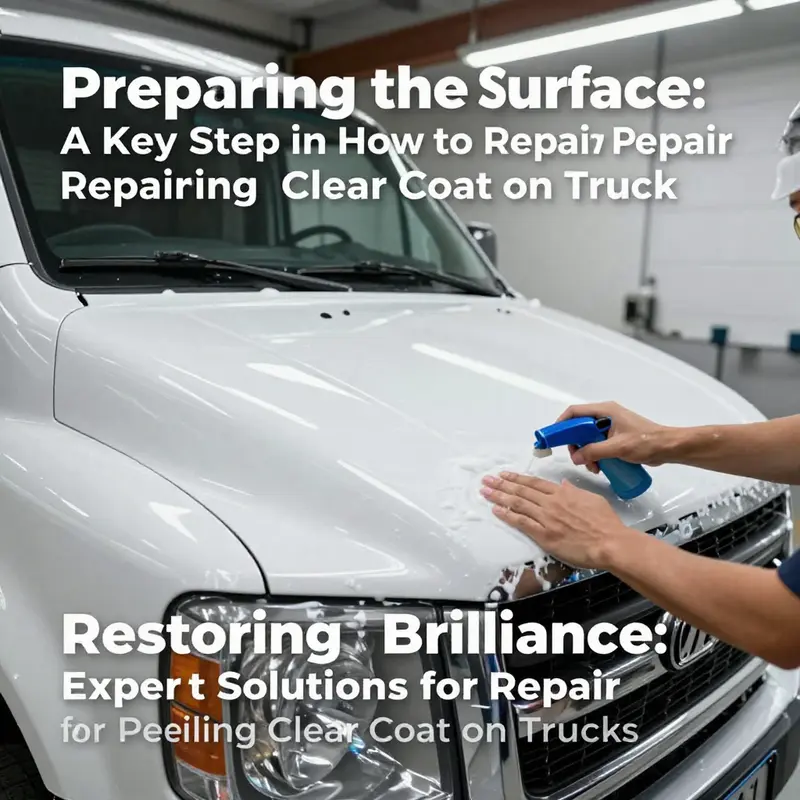
Begin with a thorough cleaning. Peeling rarely sits in isolation; it sits on top of a layer of contaminants that can sabotage adhesion. Dirt, grease, wax, and old debris can create a barrier that prevents the fresh clear coat from bonding evenly. Use a dedicated automotive cleaner or degreaser formulated for painted surfaces. Apply it generously to the peeling area and extend coverage to the surrounding zone. This helps ensure that any micro-contaminants carried by the adjacent paint aren’t left behind to complicate bonding later. Rinse completely with clean water and dry with a lint-free cloth. A surface that feels clean to the touch and looks clear of residue is your first green light to proceed. If you skip this step, you risk an immediate re-peel or a dull finish that never quite glistens the way a proper cure should.
After cleaning, take a moment to assess the damage with a practical eye. If the base coat underneath is still in good condition and the peeling is localized, you may be able to salvage the area with targeted sanding, a color-matched touch-up, and a fresh clear coat. If the underlying paint shows wear, fading, or bubbling beyond the clear, that signals a broader repair that might require priming, blending, and more controlled paint application. The distinction is real: a small patch can sometimes be repaired with minimal disruption, but a larger peel often demands a more comprehensive approach to avoid visible seams and color mismatches. This isn’t pessimism; it’s prudent planning that reduces the odds of a repeat failure.
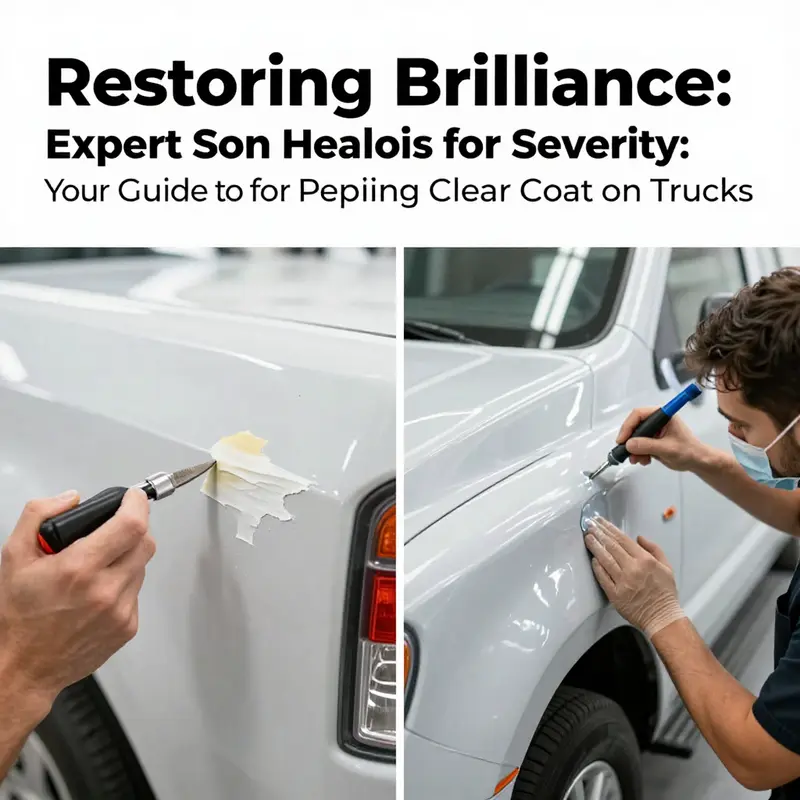
Sanding is the heart of the repair’s prep. The goal is not to scour away all color but to create a smooth, feathered transition so the new clear coat can lay down evenly and blend with the surrounding finish. Use fine-grit sandpaper in the 1200 to 2000 range. Work with light, even strokes and keep the surface slightly damp to minimize heat and limit dust creation. Wet sanding also helps protect the underlying paint from micro-etching and ensures a more uniform texture when the clear is applied. As you work, frequently check the edge of the repaired area with your fingers. A true feather—soft, gradual, and barely perceptible—will vanish once the final gloss is applied; a harsh edge will betray the repair at the first glare of sunlight. The sanding step is the bridge between removal of damaged material and the application of something new that will stick and shine.
Feathering must be complemented by careful masking. The surrounding panels and adjacent paint should be protected from accidental contact, dust, or solvent creep. Tape off the border precisely, taking care to create a clean boundary that won’t leave a visible line once the finish cures. Good masking keeps the repair contained, but it also helps the rest of the panel retain its original gloss and color depth. If you’re working within a panel and you’re concerned about overspray, double-check the masking beyond the immediate repair zone. It’s small, almost invisible, but it’s the difference between a repair that looks like a patch and one that looks like it belonged there all along.
Dust control is more than a nuisance; it’s a quality gate. Sanding creates fine particles that can cling to the surface and ruin the clarity of a freshly applied clear coat. After you finish sanding, wipe the area with a tack cloth to remove the dust and fine fibers. If any specks resist removal, repeat the tack cloth pass until the surface feels smooth to the touch. This step may seem tedious, but it’s essential for a uniform gloss. Dust-free preparation not only helps the current repair look better; it also reduces the likelihood of dust becoming trapped in the curing clear and creating a cloudy, milky finish.
Environmental conditions can make or break a repair as it cures. Temperature, humidity, and air movement influence how well the clear coat flows and how evenly it cures. A space that’s too cold slows curing and can lead to longer dry times or hard edges. Excessive humidity can cause solvent entrapment and a dull shine. Direct sun can heat the surface too quickly, leading to micro-cracking or shrinkage. Whenever possible, work in a controlled environment: moderate temperature, low humidity, and ample ventilation. If you’re working outdoors, try to choose a shady, wind-free window. Consider a portable shelter or tent that keeps the area shielded from sun and contaminants without trapping solvent fumes. Great prep work in a bad environment yields poor results; good prep work in a good environment yields a durable, even finish.
The guidance you follow at this stage should align with the product’s instructions. Each system—whether you use a patch kit for small repairs or a more comprehensive, paint-and-clear process—has its own micro-requirements. The stated drying times, the recommended grit, the amount of sanding pressure, and the specific sequence can vary. Adhering closely to the manufacturer’s guidelines reduces the risk of solvent incompatibility, poor adhesion, or a finish that fails prematurely. If your plan calls for priming on the prepared area, apply primer as directed, making sure it is fully dry before proceeding to base coat or clear. When in doubt, pause and seek professional input. This is especially true if the underlying paint has been compromised deeply or if the color match is critical for the panel’s aesthetics.
Throughout this process, the mindset you bring matters as much as the steps you perform. Treat the repair as a careful restoration rather than a quick fix. The more you respect the surface you’re rebuilding, the more forgiving the subsequent steps will be. With practice, you’ll begin to recognize how a feathered edge feels different from a scratch line, how evenly the sand looks under a bright light, and how the surface should feel after a clean wipe and a tack cloth pass. This intuition grows with each project and is the practical wealth of experience that pays off with a showroom-like finish rather than a patchy quick fix.
As you near the end of the prep stage, you’ll notice that the surface is not only clean but ready to accept a new clear coat with confidence. The appearance will be matte and uniform after sanding, but the surface should still be clean and dry before any additional coats are applied. In this moment, the preparation stops being a checklist and becomes a diagnostic, ensuring that the next steps—whether a DIY touch-up or a professional application—will deliver reliable adhesion and a glossy, durable finish. If you want to see this approach demonstrated in a broader context, the Master Truck Repair blog offers related maintenance and repair guidance that complements the foundation you’ve just laid. You can access it here: mastertruckrepairllc.com/blog/.
For readers seeking a formal, technical treatment of the broader peeling-clear-coat challenge, the same underlying logic applies: confirm the damage scope, clean thoroughly, sand with care to feather, prime if required, apply color with precise blending, and finish with a protective clear coat. Preparation is the hinge on which the rest of the process pivots. If you master it, you gain predictable results regardless of the repair’s scale. The goal is not to present a flawless miracle in one day but to establish a durable baseline that stands up to sun, rain, and road grime over time.
In closing, consider this: a well-prepared substrate makes the subsequent steps easier, faster, and more predictable. It also reduces the likelihood of re-peel, color mismatch, or gloss differences that can ruin the overall appearance. The more disciplined you are about cleaning, assessing, sanding, masking, and dust control, the higher the probability that your repaired panel will blend with the rest of the vehicle, both visually and structurally. With patience and attention to detail, you’ll see the glossy, even sheen you’re after returning to your truck, and you’ll enjoy that confidence for years to come.
External reference for deeper understanding: https://www.meguiars.com/how-to/repair-peeling-clear-coat/
null
null
Guarding the Glassy Shield: Prevention and Long-Term Care to Stop Peeling Clear Coat on Your Truck
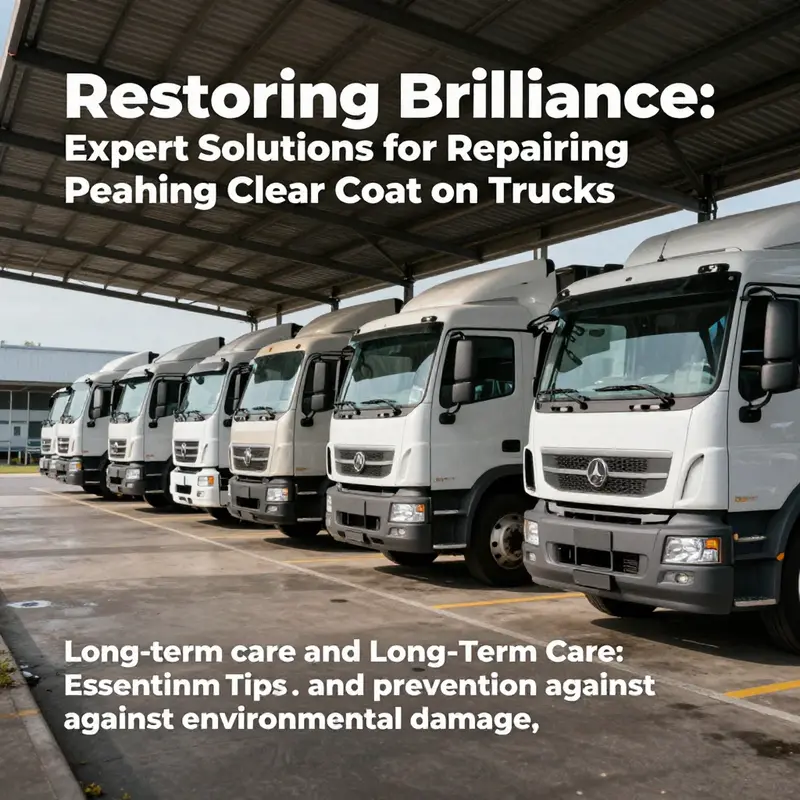
The clear coat that seals a truck’s paint is more than a glossy layer. It’s a shield against UV, chemical attack, moisture, and the small, relentless abrasions from roads, weather, and road debris. When that shield starts to peel, the problem isn’t just cosmetic; it signals the possibility of deeper damage beneath the surface. The best defense is prevention, carried out through consistent, mindful maintenance that respects the finish as a living layer of the vehicle. In this chapter, you’ll find a unified view of how to guard the finish, how daily habits translate into long-term results, and how to recognize early signs of trouble before a repair becomes invasive or expensive. The aim is to keep the finish looking near new for as long as possible and to make any eventual repair simpler, cleaner, and more durable. This approach ties directly into the broader topic of repairing peeling clear coat: prevention reduces the scale of repair, lowers the risk of color mismatch, and preserves resale value by minimizing structural exposure and corrosion risk. A practical starting point for planning is budgeting for routine truck maintenance, which helps you allocate time and funds for the small steps that keep big problems away. See Budgeting for Routine Truck Maintenance for a clear framework you can adapt to your own schedule and finances.
Maintaining a pristine finish begins with clean, controlled surfaces. Dirt, grease, wax residues, and environmental contaminants create a slick barrier that prevents repair products from bonding properly when a repair is needed. Even if you don’t see obvious dirt, a light film can alter how a polish or sealant sits on the surface. Start with a thorough wash using a neutral pH car wash soap and plenty of water. Use a dedicated microfiber towel or a gentle chamois to avoid grinding particles into the finish. In the field, the instinct to rush a wash can backfire because rushed cleaning leaves behind microabrasions that become focal points for peeling. The same care applies to dry time; drying should be complete before any inspection or any subsequent step. A surface that dries with residual moisture invites water spots and can complicate adhesion for any future sealant or coating.
Beyond cleaning, the habit of regular inspection is your early warning system. Look for tiny hazing, fine cracking, or dull areas that don’t quite reflect light the way the rest of the panel does. Those subtle cues often precede actual peel. When you detect them, move deliberately but calmly. It isn’t a signal to panic or perform an aggressive intervention; rather, it’s a cue to refresh protection in a controlled way. A light polish or compound can remove micro-imperfections and restore a temporary uniform gloss, but only if you ensure the area is clean and dry, with no oils or residues that could interfere with bonding. After polishing, reapply a protective layer—whether a high-quality wax, a paint sealant, or a compatible ceramic-like coating—so the surface has a renewed barrier against the elements.
A key distinction in prevention is choosing how to protect the finish over time. A traditional wax gives a warm gloss and ease of use, but its longevity is limited and it can be less resilient against UV and weathering in harsher climates. A modern sealant offers longer protection with a hydrophobic effect that repels water and some contaminants. A ceramic or ceramic-like coating, when properly applied and cured, can provide substantial longevity and an exceptionally hard surface that resists scratching and chemical etching. The choice depends on your climate, how you use the truck, and how much effort you want to invest in maintenance. Regardless of the option you select, the prep work remains fundamental. Any coating, sealant, or wax is only as good as the surface it bonds to. If cleaning, drying, and finishing steps aren’t done meticulously, you’ll magnify imperfections rather than prevent them. The final look should be a smooth, uniform plane with a reflective gloss, not a patchwork of restored spots that betray the work you’ve put in.
Environmental exposure is one of the largest variables driving peel risk. Ultraviolet light, heat cycles, rain, snow, road salt, and industrial fallout all contribute to the slow degradation of the clear coat. In sunny, dry regions, UV radiation can cause oxidation and chalking, softening the surface and making it more prone to micro-damage. In coastal or winter-prone areas, salt and moisture work together to corrode exposed metal at the first sign of base coat exposure, creating a perfect pit for paint failure if the clear coat peels or cracks. The protection strategy here is layered and practical. Park in shade whenever possible. Use a garage or carport when available. In winter, wash more frequently to remove road salt and brine that cling to the surface. In the rain or after exposure to industrial fallout, rinse the area promptly to reduce the chance that contaminants bake into the finish. These habits aren’t just about aesthetics; they’re about preserving the adhesive integrity of the topcoat system and preventing tiny defects from becoming larger peeling areas.
The maintenance cadence you adopt should align with how you use the truck. If it serves as a daily commuter, a routine of washing every two to three weeks, followed by a protective coating every four to six months, can maintain a healthy gloss. If you subject the vehicle to harsh road conditions, more frequent washing and a more durable protective layer may be warranted. The goal is to keep the surface free of particles that act as sandpaper under wind and contact. Regularly removing tree sap, insect residues, bird droppings, and industrial fallout is essential because those substances are acidic or caustic and can etch into finishes over time. If something sits on the finish for too long, a simple wash may not suffice to prevent micro-damage. In those moments, a targeted cleaning followed by reapplication of protection can keep the finish resilient and uniform.
Seasonality also informs the care routine. In dry and sunny months, you’re laying down protective layers more frequently to counter rapid UV-driven drying. In wet or snowy seasons, you’re countering moisture intrusion and salt exposure with more frequent washing and a robust sealant or coating. If you’re storing the truck for extended periods, use a breathable cover and store it in a cool, sheltered space to minimize condensation and humidity that can seep under a cover and promote surface staining or corrosion at seams. The preventive system is not a one-off effort; it’s a continuous loop of cleaning, protecting, and reassessing. As you perform routine care, you’ll naturally spot signs that a peel might be developing or that a spot requires more attention. Those are the moments that show the value of preventive maintenance: you’ve identified a potential problem while it’s still manageable.
A practical note on repairs ties directly to prevention. When peeling is minor and isolated, a careful, localized repair can be effective. But even then, prevention dictates how you approach afterward. If you repair a small area, you must restore a seamless gloss on the entire panel to avoid a patchy look. That means re-emphasizing protection after a repair—re-waxing, re-sealing, and buffing to a uniform finish. The goal is to preserve symmetry and depth of shine so the repair remains invisible to the casual observer. By contrast, neglecting maintenance after a repair invites another peel, potentially from adjacent areas that didn’t receive adequate protection. This cycle underscores why prevention is not merely a preface to repair; it is the continuous partner that sustains results over years.
To reinforce the mindset of prevention, consider a simple, recurring ritual. At the end of each wash, apply a protective layer over the entire body—or at least over exposed panels—then inspect the surface under good lighting. If you notice any new hazing, flaking, or dullness, address it promptly with a light polish and an additional protective coat. The ritual is not about chasing perfection; it’s about consistency. A steady rhythm of cleaning, protection, and inspection yields a surface that remains visually cohesive while reducing the likelihood that small issues escalate into larger problems. In the long run, that discipline proves cheaper, faster, and more predictable than repeating repairs after deep peeling has begun.
This approach also dovetails with the idea that professional refinishing remains valuable for more significant damage. When peeling covers large areas or reaches the base color or metal, a professional shop can ensure precise color matching, uniform clear coating, and proper curing. But ongoing prevention minimizes the frequency and scope of those visits, preserving the finish’s clarity and reducing the risk of color seams or mismatches that can occur when repairs are driven by haste rather than a careful plan. The combination of disciplined daily care and selective professional intervention when warranted offers a practical path to a durable, showroom-worthy finish that stands up to the demands of a working truck. For those who want a concrete starting point in their planning, a focused review of maintenance budgeting can help align expectations with reality and make preventive care a sustainable habit.
As a final emphasis, the story of finish care is not about chasing perfection in every moment but about creating resilient mirrors of your truck’s true aesthetic. When the surface is consistently clean, well protected, and carefully monitored, peeling becomes a rare event, and repairs—when needed—are smaller, cleaner, and more likely to blend with the surrounding paint. The long view is simple: treat the clear coat as a critical asset, protect it with diligent, climate-conscious routines, and stay vigilant for early signs of wear. In that mindset, your truck’s finish can endure with lasting gloss and depth, and the need for invasive repair can be dramatically reduced. For more practical planning resources, you may find value in exploring budgeting guides that address routine truck maintenance, which help you translate daily care into long-term savings and better outcomes for your vehicle’s appearance. External resource: https://www.ase.com/automotive-resources/paint-protection-and-care-guidelines
Final thoughts
Repairing peeling clear coat on trucks is an important aspect of vehicle maintenance that directly influences appearance, resale value, and long-term durability. By accurately assessing damage and properly preparing surfaces for repair, fleet managers and operators can tackle minor issues in-house while knowing when to engage professionals for extensive damage. Furthermore, ongoing preventive care will not only extend the life of your truck’s finish but also enhance the overall aesthetic of your fleet. Armed with the knowledge from this guide, you can effectively manage repair processes, ensuring your vehicles remain in peak condition throughout their service.

