Maintaining a fleet of trucks requires diligence and attention to detail, particularly when it comes to rust repairs on truck fenders. Rust not only detracts from a vehicle’s appearance but can compromise structural integrity, leading to increased repair costs and safety concerns. This guide provides invaluable insights on managing rust impacts on truck fenders, ensuring operational efficiency and vehicle longevity. Each chapter dives into a critical aspect of the repair process—from assessing the damage to final painting techniques—enabling fleet managers and operators to implement effective maintenance strategies that uphold the standards of their operations.
From Rust to Resilience: A Thorough Assessment and Repair Path for a Truck Fender
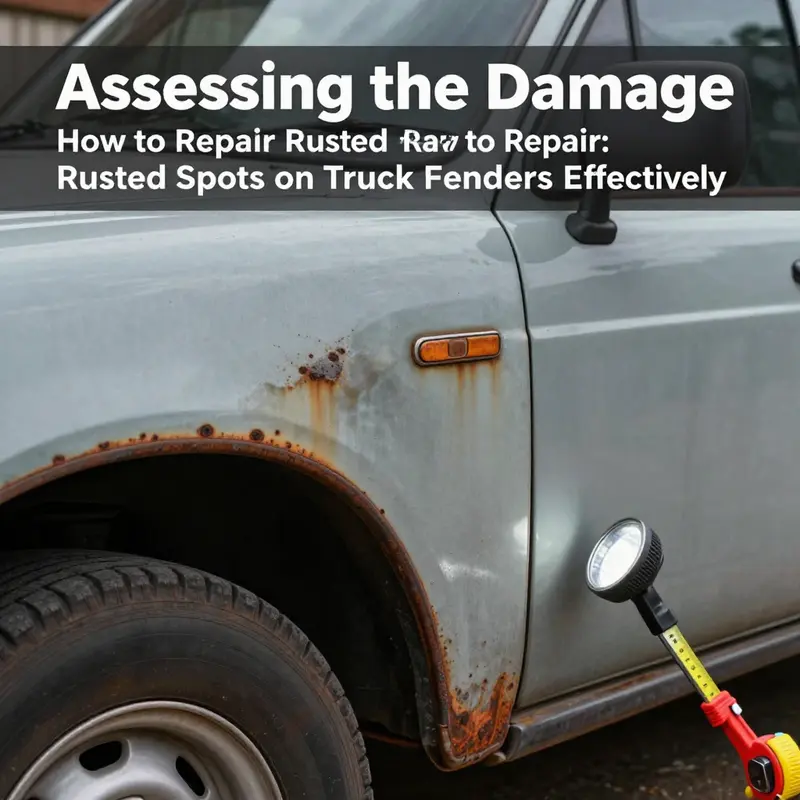
A dented fender with a stubborn rust spot is more than a cosmetic nuisance; it is a signal that the metal beneath may be compromised. When you pull into a driveway after a long trip or park under a stubborn sunbreak, you might notice a brownish bloom or flaking paint that tells a story of moisture, salt, and time. The objective of this chapter is not to rush into patching, but to map a careful, layered assessment that stops rust in its tracks and rebuilds the fender’s surface with a seamless finish. A calm, methodical approach preserves the fender’s integrity and keeps the truck looking steady on the road. The first move is always to understand the scope of the damage, because the difference between a simple repaint and a structural repair can be vast. Lighting plays a crucial role here. A bright, steady light helps reveal hidden pits and softer edge areas that might not catch the eye in ordinary daylight. When you stand back and look at the area, you can imagine how far the rust has spread and whether paint lifting, blistering, or roughness extends beyond the visible spot. From the outset, the aim is to separate three realities: surface rust, rust that has penetrated the metal, and any subsequent structural concerns that could affect the fender’s strength or mounting points. This triage guides every decision that follows, from cleaning to priming to painting. The risk with rushing through the inspection is that a promising-looking fix can become a longer and more expensive project if hidden corrosion surfaces once you start cutting or welding. The disciplined path begins with a clean slate: remove dirt, grease, and loose material so you can see clean, bare metal. Start with a thorough wash using water and a degreasing agent; a high-pressure rinse is helpful, but avoid blasting the area with so much force that you lift surrounding paint. A careful wash loosens road grime, salt crystals, and old wax residues that otherwise would hinder adhesion later. After the area dries, recheck the spot under good lighting. If you see chalky halos or orange-peel texture extending outward, you may be dealing with a boundary line between sound metal and compromised patches. Surface rust often appears as a dull, rough film where the paint has loosened but still adheres to the metal. In this scenario, the rust can be knocked back with mechanical removal, exposing clean metal beneath. If the rust has eaten through, you will feel soft spots when you press with a thumbnail; you may also notice pinholes or a thin, fragile edge that gives way under slight pressure. Any sign of penetration beyond the first layer signals a shift from cosmetic repair to structural planning, because holes or weakened points may require patching or even panel work. The next stage is removal of the visible rust, which is where the art of careful grinding and sanding comes into play. A sturdy hand tool, such as a wire brush or a flap-disc equipped grinder, can physically remove loose rust until you reach clean metal. Work in small, controlled areas, and keep the tool moving to prevent heat buildup that could warp the metal or transform the surrounding paint into a fragile edge. Progressively smooth the surface with sanding in stages: start with a coarser grit to strip away the obvious rust and rough edges, and then move to finer grits to reveal a uniform, satin-smooth plane ready for adhesion. As you sand, periodically wipe the area with a tack cloth to remove dust; this keeps the working surface visible and reduces the chance of trapping abrasive particles under subsequent coatings. When the bare metal shines through, you’ve crossed a threshold from rust removal to preservation. For rust that has not penetrated deeply, this is the point at which a rust converter or rust-removing solution can be applied to neutralize any remaining micro-rust particles. Follow the product instructions to the letter, applying with a cloth or brush and allowing the prescribed dwell time before wiping away. This step is a guard against slow, creeping corrosion that can reappear under fresh paint if left untreated. If the rust has penetrated and created weak spots or pits, you may need to address that with metal restoration techniques. In more advanced scenarios, cutting away the most compromised section and replacing it with a patch or a section of new metal can restore the fender’s strength. This approach requires careful measurement, cutting with precision tools, and a means to secure the new piece in place, followed by smoothing the seam so it remains flush with the surrounding surface. The goal is to produce a union between old and new metal that won’t be visible after painting. Once you have achieved a solid base, you move into priming and, if necessary, filling to restore a perfectly even canvas. A rust-inhibiting primer seals the surface and creates a protective barrier that helps prevent future corrosion. The primer should be applied in thin, even coats, with time allotted between coats for full drying. The exact dry time can vary with climate and product, but a common window is a couple of hours between passes. If the underlying shape has a notable irregularity after metalwork, a filler may be used to level the surface. This is especially important if you have performed cuts or added patch panels; the filler fills minor imperfections and helps the subsequent paint layer adhere uniformly. After the filler cures, sand it with progressively finer grits until the surface is smooth and flat with its surroundings. The painting stage follows, and here the objective is color match and even application rather than a heavy-handed spray. If you have access to the vehicle’s color code, you can match the fender paint with a color-matched can or professional equipment; otherwise, a careful color blending technique will be required to approximate the original shade. Apply several thin coats rather than one thick coat, allowing appropriate drying time between passes. Thick layers tend to run or sag, and they trap dust in the surface, which disrupts the final texture. Each coat should be applied with consistent technique and coverage, gradually building toward an even tone that blends with the surrounding panel. Once the base color is cured, many owners choose to add a clear coat for extra protection and shine. A clear coat helps seal the paint and resists minor scratching, UV damage, and fading from sun exposure. The clear layer should be applied in light, even coats, with attention to avoiding orange-peel texture and runs. After the finish has cured fully—typically 24 to 48 hours, depending on conditions—come the final cosmetic steps. A gentle polish can help blend the repaired area with the neighboring paint, and a light wax provides a protective top layer that helps repel moisture and contaminants. The overall result should be a fender that looks like it belonged to the vehicle all along, with an even sheen and a surface free of rough patches. Beyond the visible repair, a disciplined maintenance routine supports longevity. Wash the undercarriage and wheel wells to remove salt and dirt that promote corrosion. If you notice early signs of rust again, address them promptly rather than waiting for a larger problem to develop. Regular inspection is a short-term investment with long-term payoff. This process also invites a broader sense of vehicle care. Planning for rust prevention can be as important as the repair itself. Keep the vehicle clean, dry, and protected from moisture where possible, and consider treating vulnerable areas with a rust-inhibiting protective layer. While the repair sequence described here is thorough, it is not a one-size-fits-all solution. Some fenders have complex curves or recessed sections where access is limited. In such cases, you may need to adapt the methods to the geometry. The essential idea remains the same: remove the rust, repair any damaged metal, seal with primer, restore with paint, protect with a finish coat, and maintain with a routine that reduces the likelihood of recurrence. If you’re seeking additional step-by-step insights or visual demonstrations of similar rust-repair workflows, the Master Truck Repair blog offers a series of posts that align with this approach and provide practical tips for DIY enthusiasts. Master Truck Repair Blog. For readers who want a broader, visually guided reference on rust repair techniques for vehicles, an external resource presents detailed methods and step-by-step examples that complement the process described here. It is worth reviewing the illustrated guide to see how the same principles translate across different vehicle bodies and severity levels: https://www.autoblog.com/2025/09/16/how-to-repair-rust-on-a-truck-fender/.
From Rust Spot to Renewed Fender: A Practical DIY Guide
A rust spot on a truck fender is more than a cosmetic blemish. It can be a sign that moisture has found a way into the metal. The right approach is practical, patient, and focused on stopping corrosion and preventing return. The repair sequence moves in clear steps: assess the damage, clean and neutralize the area, prepare the surface, apply primer, fill if needed, repaint to match, and seal with a clear coat and wax. When done with care, the area looks integrated and the panel remains protected. This guide aims to be accessible to a determined DIYer while still stressing precision and timing.\n\nThe first step is evaluation. Superficial rust affects only the paint, while deeper rust may have eaten into the metal. A careful inspection helps determine how deep it goes. Light pitting or discoloration may respond to surface prep and priming, whereas holes or flaking metal require more extensive work. If the rust is extensive, you may consider professional help for the structural repair, but small spots are well within DIY reach if you follow the steps.\n\nNext comes cleaning. A thorough wash with automotive detergent and a soft cloth removes dirt and salts that trap moisture. Rinse completely and dry with a lint-free towel. Moisture under primer or paint leads to poor adhesion and can invite new rust, so drying time matters.\n\nSurface preparation follows. Use progressively finer sandpaper to remove surface rust and expose clean metal. Start around 800-1000 grit and move up to 2000-3000 grit for a smooth finish. Sand in a consistent pattern, wipe with a damp rag to remove dust, then finish with a tack cloth. If oils linger, use a degreaser or isopropyl alcohol to ensure a clean bonding surface.\n\nPriming comes next. Apply a rust-inhibiting primer in thin, even coats, allowing each coat to dry per the manufacturer’s instructions. A good primer provides a uniform base for color and helps prevent future corrosion. If you found a hole, a body filler may be used after priming to restore contour, followed by light sanding.\n\nIf needed, apply body filler to any dents or holes. Mix, apply, and let cure fully, then sand in stages from roughly 180 to 320 grit until the surface is level with the surrounding panel. Wipe away dust and keep the area dry as you proceed.\n\nPainting follows. Use the vehicle’s color code to match shade. Apply several thin coats rather than a single thick layer, allowing adequate drying time between coats. A well-executed paint job achieves a natural color match and a smooth, even finish. In some setups, an airbrush, spray can, or spray gun may be used depending on equipment and skill.\n\nAfter color cures, apply a clear coat for gloss and extra protection. Let it cure fully, then buff lightly with a fine compound to blend the repaired area with surrounding paint. Finish with a light wax to seal and protect the surface.\n\nThis approach isn’t just about appearance. Proper rust repair protects structural integrity and helps extend the life of the fender. For trucks that see harsh conditions, regular inspection and prompt touch-up of new rust spots are good preventive habits. If the rust has spread or compromised the metal, seek professional assessment. Otherwise, with careful prep and patience, a small rust spot can be restored to a durable, factory-like finish.\n\nExternal resources and further learning can be found in reputable automotive maintenance guides and DIY repair communities.
Rust Vanished: A Practical Journey to Repair a Rusted Spot on a Truck Fender
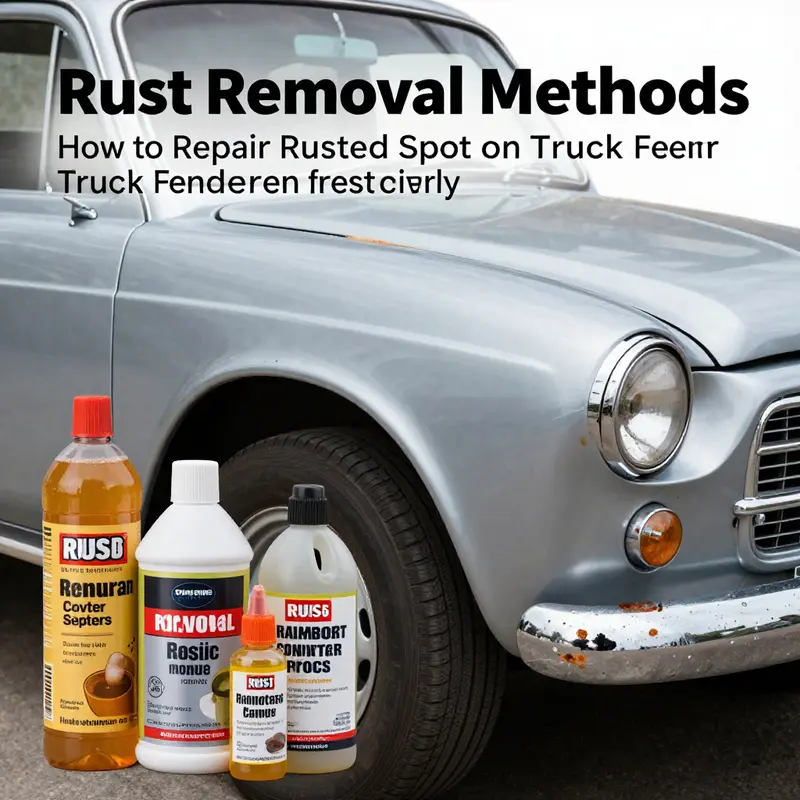
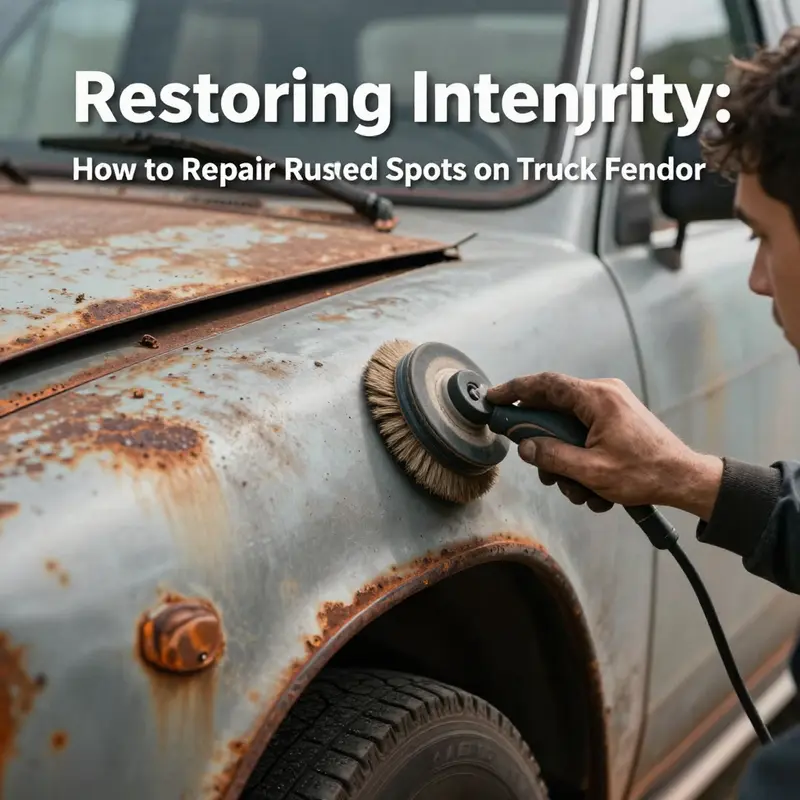
Rust on a truck fender is more than an eye sore; it is a signal that metal is under attack and needs a careful, well-timed response. A small spot can spread quickly if left untreated, so the repair philosophy is simple: halt the corrosion, restore the metal, and seal the surface so the fender can stand up to road salt, stones, and the sun. The process is not a single trick or a quick spray, but a measured progression that blends metalwork, chemistry, and paint science into a cohesive repair. As you begin, remind yourself that this is a learning exercise in restraint as much as restoration. You’ll start with a careful assessment, then move through cleaning, rust neutralization, smoothing, priming, filling if needed, color matching, painting, sealing, and finally a protective finish. The aim is to make the spot disappear while maintaining the integrity of the surrounding panel and ensuring the repair will last through seasons of use. If you want a broader set of practical guidance sprinkled with additional tips, the Master Truck Repair blog offers a range of related tutorials that can complement this chapter: Master Truck Repair blog. For further reading on rust removal techniques from automotive repair sources, a detailed external reference is available at the end of this chapter.\n\nThe first step is a sober assessment. Surface rust that lives only on the paint can be treated differently from rust that has penetrated the metal. If you can see through the paint to bare metal or feel pits with your fingernail, the damage has moved beyond superficial. In such cases you’ll likely need to remove more material, address any holes or deeper corrosion, and perhaps apply a filler before finishing. Conversely, if rust proves superficial, you can often restore the fender with less aggressive intervention, but even then the goal remains to stop further spread. The assessment also includes determining the area to be worked on. A fender is a curved, often hard-to-reach surface, so you’ll want to work methodically, from the edges toward the center, ensuring no hidden pockets of rust are left behind.\n\nWith the severity established, the next move is thorough cleaning. Start with soap and water to wash away dirt, grease, and debris. Dry the area completely; moisture left on metal invites rust to reassert itself just as you think you’ve won. Once dry, inspect the surface closely. If the rust is airborne or only lightly entrenched in the paint, you might be able to lift it with gentle abrasion. For tougher spots, employ a wire brush or a hand-held grinder with a multi-flute bit to knock away loose flakes and scale. The mechanical removal should reveal clean, bare metal around the rust pocket. The aim here is not to chase every speck of rust into oblivion, but to eliminate the fizzing, porous edge where corrosion retreats inward. This phase also tests the area for any lift or delamination in the paint that would indicate moisture has found a way under the finish. If you encounter that, plan for more than cosmetic repair — moisture intrusion can undermine adhesion later if not addressed.\n\nAfter you have exposed solid metal, it’s time to neutralize whatever remains. A rust converter or remover solution is applied to the exposed area according to the product instructions, then left to work for a short interval before removal. The purpose is twofold: to halt the activity of any micro-rust left behind and to prepare the surface for primer by stabilizing the metal. As you follow the chemical treatment, keep the area well-ventilated and protect yourself with gloves and eye protection. Once the solution has done its job, wipe the area clean and allow it to dry. This dry interval is not a moment to rush; a well-dried surface increases the odds that the subsequent layers will bond correctly and not lift later on.\n\nDryness paves the way for smoother preparation. A light sanding with finer grits, typically in the 180–220 range, creates a micro-roughness that gives primer something to bite into. After sanding, wipe away the dust with a tack cloth or a damp rag and let the surface dry. The goal here is not to remove every shimmer of shine, but to produce a uniform, slightly rough texture that will hold primer and paint without hiding behind micro imperfections. If you are working on a curved or highly contoured area, you may switch to a small block sander or pad that conforms to the curve, ensuring you do not gouge the metal in the process. A careful, patient approach is essential; rushing the sanding can create low spots that become prime targets for future rust or paint cracks.\n\nThe primer stage is pivotal. Apply a rust-inhibiting primer to the bare metal and any surrounding edge where the paint has been removed. The primer acts as a barrier against moisture and also as an adhesive bridge for the paint that follows. Apply thin, even coats, allowing each coat to dry thoroughly before the next. Thick coats tend to peel or trap solvent and moisture, undermining the adhesion you are trying to achieve. The drying times will vary with temperature and humidity, but a typical window of one to two hours per coat is common. Be mindful of dust in the air and keep the shop or outdoor space free of airborne debris during this critical phase. If the rust has created holes or shallow dents, you may need to address these with a body filler. The goal is to create a smooth, continuous surface that resembles the plane of the surrounding fender. Mix the filler according to its instructions, apply it to the defect, and let it cure fully before smoothing with progressively finer grits. Start with a medium grit to level the repair, then work down to a fine grit to achieve a seamless blend with the surrounding metal. The sequence of grits—180, then 220, and finally 320—helps you avoid creating new unevenness while gradually closing any minor surface irregularities.\n\nColor matching follows once the surface is flat, dry, and clean. Matching the original paint color may require you to obtain the vehicle’s paint code from the VIN, or at least to bring a small sample to the auto parts store or body shop for color matching. With the color code or matched formula in hand, you can choose between spray paint and an airbrush approach, depending on your equipment, skill level, and the complexity of the surrounding paint job. The process calls for multiple thin coats rather than a single heavy layer. Each coat should dry completely before the next, which often means 15 to 20 minutes between coats in mild conditions. Patience here pays off: the goal is to lay color that is uniform in tone and free of runs, sags, or orange-peel texture. The paint should gently blend into the adjacent panels to avoid a telltale edge where the repair ends.\n\nIn many restorations, a clear coat is not merely decorative but therapeutic. A clear coat seals the new paint, adds gloss, and provides an extra layer of protection against UV exposure and minor abrasions. If you decide to apply it, follow the same discipline as the color coats: several thin layers that build a solid, even finish. Allow each layer to cure, then cure the entire panel fully according to the product’s instructions before handling or washing the vehicle. The extra protection helps ensure the repair remains vibrant and resistant to future chipping or fading, particularly in harsher climates or under frequent sun exposure.\n\nThe final touches can make or break a repair’s perceived quality. After the paint has cured for a day or two, a light pass with a fine polishing compound can help blend the repaired area with the rest of the fender. This step smooths any minor texture differences and enhances the luster, making the repair almost disappear under reflection. A careful hand with a soft cloth and gentle pressure minimizes the risk of removing the new paint. A wax treatment afterward adds another protective layer and helps maintain the surface’s lustre. It is tempting to rush to use the fender for work, but a full cure period of 24 to 48 hours is a prudent window before heavy washing or exposure to harsh conditions. The goal is a repair that not only looks right but holds up under real-world use.\n\nEvery rust repair carries with it a broader responsibility: prevention. Rust rarely strikes in isolation; it is a signal that the vehicle’s under-body or wheel wells are exposed to moisture over time. Regular inspections and preventive maintenance are the quiet guardians of your investment. Simple routines such as washing undercarriages, applying rust inhibitors where appropriate, and promptly addressing any new spots will extend the life of the repair and reduce future costs. A deliberate approach to prevention keeps you from revisiting the same spot year after year. If you want to dive deeper into maintenance strategies and fleet-level considerations that can reduce overall rust-related maintenance costs, the linked blog hub offers additional insights and practical tips. For a broader frame of reference, you can also consult external resources focused on rust removal techniques and repair methods that expand on the methods described here: https://www.autorepair.com/rust-removal-and-repair-tips-for-truck-fenders.\n
Sanding and Priming the Steel Skin: A Smooth Path to Repairing a Rusted Truck Fender
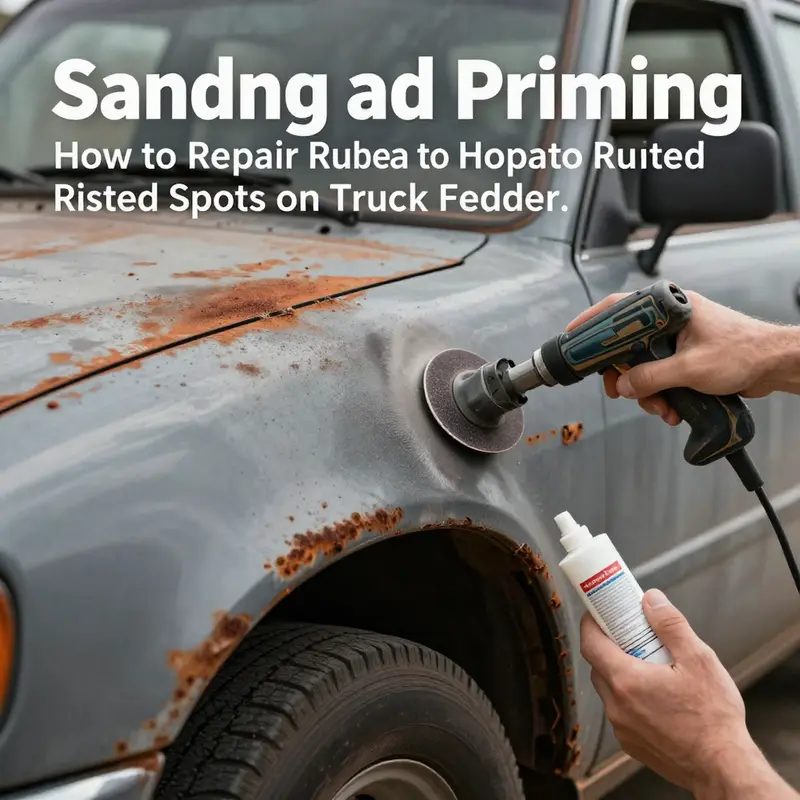
Rust on a truck fender is less a cosmetic nuisance and more a signal that the metal beneath needs protection and a fresh seal. The stage between removing corrosion and applying durable paint is sanding and priming, where you transform a rough, pitted spot into a clean, receptive surface. When done with care, this transition not only stops the rust in its tracks but also lays a foundation that makes the final paint layer look seamless and long lasting. The process hinges on patient, disciplined sanding, thorough cleaning, and a primer that can bite into the bare metal and hold fast through years of road salt, chips, and sunlight.
Begin with the right start: dry or wet sanding? In this context, the aim is to remove surface rust without aggressively chewing into healthy metal. A careful approach uses very fine wet sandpaper—typically 2000 grit or finer—and a light touch. Wet sanding helps keep dust down and reduces heat buildup that could warp or thin the metal. Move the sander or sanding pad in a single direction rather than back and forth, which helps avoid creating swirl marks that will show through paint. As the rust recedes, you should see clean metal emerge, quiet and bright enough to reflect light rather than a dull edge. This is the moment where you can tell you’ve reached the right depth: the area under the rust should feel smooth to the touch, with no jagged edges catching on your fingernail. It can feel tedious, but the payoff is a paint job that adheres well and lasts longer than a quick touch-up.
After the initial pass comes a crucial transition: cleaning. Dust, grease, and fingerprints are the enemy of adhesion. Wipe the entire area with a degreaser to cut through oil and wax, then follow with isopropyl alcohol to dry and sterilize the surface. Any residue left behind can form a barrier that weakens primer bonding, which in turn compromises corrosion resistance. You should perform this cleaning steadily and thoroughly, ensuring the area feels dry and utterly clean to the touch before moving forward. The cleaner the surface, the better the primer will bite into the metal, and the more seamless the subsequent paint will appear once cured.
With a clean surface ready, you apply a high-quality rust-inhibiting primer. An epoxy-based or rust reforming primer works best here because it is designed to adhere to bare metal and to resist the initial push of new rust forming under the paint film. The key to primer is even coverage: apply thin, uniform coats rather than a single thick layer. Allow each coat to dry completely according to the manufacturer’s instructions, which may range from one to several hours depending on temperature and humidity. A good practice is to let the primer cure until it feels firm to the touch and starts to show a uniform color, signaling that the underlying metal is protected and ready for the next step. Skipping this patience step can lead to pinholes, lifted edges, or primer peeling later on, especially in areas that face splashes and road spray.
Once the primer is dry, the surface must be prepared again for paint. Lightly wet sand the primed area with a finer grit—typically 1000 to 1500 grit—just enough to smooth any texture the primer might have left. This step helps the paint adhere evenly and reduces the risk of small imperfections that would stand out after coating. After sanding, wipe the area once more to remove any dust left by the finishing pass. The cycle of cleaning, priming, and gentle sanding is designed to produce a surface that looks flat and uniform when viewed from a few feet away, not just under a bright lamp up close.
Painting follows as the visual milestone of the repair. You’ll want a color match that aligns with your vehicle’s paint code. The right approach is to use thin, even coats rather than a heavy application that can run or sag. If you have access to a spray gun, skill and patience will yield the most even laydown, but many repairs can also be accomplished with a high-quality spray can or a touch-up pen for smaller spots. Apply multiple light coats, allowing each to dry according to the product’s guidance—typically 15 to 20 minutes between coats—to build up a solid, uniform color. This staged approach helps prevent drips and uneven texture, which are more noticeable on a curved surface like a fender.
The decision to add a clear coat is optional but often wise. A clear top layer improves gloss, depth, and UV resistance, thereby prolonging the finish’s life and resisting color fade. When used, apply it in thin, even layers and let each coat cure as directed. The clear coat also serves as a sacrificial shield for the colored base, taking on scratches and minor abrasion so the pigment underneath remains pristine. If you choose to forego a clear coat, you’ll still want to blend the edges well at the final polish stage and consider a wax or sealant to preserve the new finish.
The era after painting is the era of patience. The repaired spot will require a full cure period, during which you should avoid aggressive washing or contact that might disrupt the new film. A typical window ranges from 24 to 48 hours for basic curing, with longer times recommended for any climate that features humidity, temperature swings, or direct sun. When cured, you can evaluate the repair by looking for uniform color; any subtle difference in shade can be minimized with a light polish. The final polish should be targeted and gentle, designed to refine the transition between old and new paint without stripping color or removing too much clear coat from the edges. In the end, a well-executed sanding and priming sequence produces a repaired area that feels solid to the touch, looks smooth under inspection, and, crucially, resists the next wave of rust and corrosion.
This chapter’s emphasis on careful prep and patient layering is not just a technique but a philosophy. It values preparation as the foundation of durability; it recognizes that a rust spot is not a single moment of damage but a wear pattern that requires respect for the metal beneath. That respect translates into steps that, while meticulous, pay dividends in longevity and appearance. If you are approaching this as part of ongoing fleet maintenance or a personal restoration project, it helps to plan ahead. For long-range maintenance budgeting and scheduling that keeps rust from becoming a recurring headache, you might consider the broader strategy described in articles focused on routine truck care, such as Budgeting for Routine Truck Maintenance, which can help you align your toolset, materials, and timing for future repairs.
For readers who want to broaden their understanding or see a step-by-step with visual cues, there are reliable external guides that walk through similar processes. A comprehensive reference that many find useful covers the progression from surface rust to a sealed finish, including practical tips for avoiding common mistakes and selecting compatible products. You can explore that deeper dive here: https://www.autogeek.net/repair-rust-truck-fender/ .
In summary, sanding and priming are the hinge moments that convert a rusted spot into a durable, paint-ready surface. The discipline of precise sanding, the cleanliness of the surface, and the bite of a well-chosen primer set the stage for color and clear coat to look even and endure. When you approach this work with patience and attention to detail, the repaired fender becomes not just a patch but a lasting shield against future corrosion, one that keeps your truck looking sharp and performing safely mile after mile.
From Bare Metal to Brilliant Shine: A Seamless Finish for a Rusted Truck Fender
Finishing a rust repair on a truck fender isn’t merely about hiding a blemish. It is the last act in a careful sequence that stops corrosion in its tracks and returns the panel to a uniform, durable surface. The painted finish must do more than look right; it should resist moisture, UV exposure, and minor abrasions that occur on the road. That means treating the rust at its source, then building a barrier that adheres to metal and provides a predictable surface for color and gloss. When done well, a repaired fender can look nearly seamless with the rest of the body, and more importantly, it stays solid for years. The practical rhythm starts with diagnosing the damage, progresses through precise preparation, and culminates in paint and a clear coat that bond to the metal and flex with the panel as the truck moves.
The choices made during finishing—primer type, sanding grits, and the sequence of coats—shape not only aesthetics but longevity. Any shortcut now, such as skipping the primer or rushing the cure time, can invite new rust or a dull, uneven finish as the years go by. The goal is a finish that stands up to the daily rigors of hauling, highway speeds, and exposure to humidity and road salt. Because vehicles are constantly exposed to the elements, the finishing stage deserves the same care as the initial paint job. Even if the rust was limited to a shallow layer of paint, or if the metal is only slightly pitted, the steps you take during finishing will determine whether the repair stays hidden or becomes a maintenance anchor next season.
Begin with a clean slate. Degrease the area to remove oils from hand work and grease that can contaminate adhesion. After washing, let the surface dry completely. The rust removal itself is the core of the job. If the rust has not breached the metal, you can approach with surface prep—a combination of light sanding with fine-grit paper and careful brushing to lift all loose rust without touching uncorroded paint. If there is deeper penetration or pitting, you will need to grind back to sound metal. The choice of grit matters: a gentle pass with finer paper for surface rust preserves original paint nearby while exposing clean metal for priming, whereas a more aggressive pass is necessary to flatten deeper pits and create a uniform plane for filler or primer.
As you remove rust, keep the area as flat as possible. You may notice small craters or holes if the corrosion has eaten through. Those spots must be treated with appropriate methods before color is laid down. In some cases, you can use a body filler to rebuild the surface after the metal is stabilized with primer, but this requires discipline: fillers need a clean, dry substrate and careful shaping. The aim is to produce a panel with a smooth, continuous contour that the eye cannot distinguish from the rest of the fender. If the metal surface remains uneven after filler, a light pass with very fine sandpaper will help you achieve feathered edges that disappear once the color arrives.
With bare metal revealed and free of loose rust, the next move is priming. A rust-inhibiting primer—preferably one designed for bare metal and for use under paint—creates the anchor that stops the cycle of moisture reaching the substrate. Apply in thin, even coats; multiple light passes are better than a single heavy application. Let each coat dry per the manufacturer’s guidelines before applying the next. The primer serves two critical functions: adhesion and corrosion resistance. Without it, paint may cling poorly, and any residual moisture can find a path to the metal, restarting the rust process. If the repair involved holes or dents, the primer also helps seal the repaired area and provides a uniform base for subsequent filler and paint. After the final coat, a brief cure helps the primer form a solid, impermeable surface that can accept paint with predictable adhesion. The role of the primer is foundational; it is not merely a color underlay but a shield that maintains the repair through seasons of use.
Fill and smooth as needed. If you used filler to address holes or deformations, mix and apply according to instructions. Allow curing fully, then lightly sand with progressively finer grits until the repaired region lies flush with the surrounding metal. Begin with a mid-range grit to shape, then move to finer grits to erase scratch lines. In all cases, wipe away dust with a tack cloth to avoid trapping particles under primer or paint. If the metal is uneven only in small areas, you may skip filler and rely on the primer and paint to compensate through thin, precise coats. The key is to maintain a feathered edge where the new material meets the old surface so that nothing looks abrupt once the color is applied. When you achieve a truly smooth feather, the eye will read the repaired zone as a single, continuous surface rather than a patch.
Color matching is a subtle but essential part of the finishing sequence. You may need to pull the paint code from the vehicle’s VIN—laboratories and manufacturers often provide digital references for a precise match. Use a spray gun or a quality spray can to deliver thin layers that dry quickly between passes. Offer multiple light coats rather than a single heavy one. This approach reduces runs and ensures even color deposition. Between coats, briefly inspect the surface for sags, dust specks, or orange peel. If any imperfection shows, address it in the next pass rather than letting it bake into the finish. The ritual of color application is part science and part craft: the eye judges how close the hue is, while the hands manage spray technique to avoid pooling. Consistency in pressure, distance from the panel, and motion governs the final result more than any single stroke. A steady room temperature and minimal drafts help the paint lay down evenly, avoiding edge halos where the repaired area meets the original paint.
After the color has cured (this can be a matter of hours or a day, depending on environmental conditions), adding a clear coat is optional but highly recommended. The clear layer seals the pigment, adds a protective UV shield, and gives the gloss that blends with the rest of the truck’s finish. Apply several light coats, allowing each to dry before the next. Rushing this step can cloud the finish or create hazy spots that catch the light unnaturally. The final gloss depends on your spray technique and the surface preparation you performed previously. A clear coat also helps the repair resist minor scratches and the long arc of exposure to road salt and water that the truck will inevitably encounter between wash cycles and salt seasons. Do not skip the clear coat if you want a finish that resists dulling and maintains its depth over time.
With the base and the clear coat cured, the restoration moves into refinement. Wet-sanding with ultra-fine grits removes minor texture differences and cultivates a smooth, mirror-like surface. This step must be done with patience—the material is thin and the goal is to level the area without eroding the surrounding paint. A dual-action polisher with a gentle polish can bring out the deep luster and help the finish blend with the adjacent panel. The polishing stage reveals the work’s success: a uniform surface that reads as one with the rest of the fender, not as a repaired patch. Finally, a light coat of wax adds an extra layer of protection, sealing the surface against smudges, bird droppings, and environmental fallout. The wax also acts as a barrier that makes future cleaning easier and keeps the finish bright for longer. A well-polished surface reflects more light and masks minor texture differences, making the repair nearly invisible to casual observers.
Throughout the process, ventilation and safety cannot be neglected. Work in a well-ventilated area and wear protective equipment to guard against fumes, dust, and splinters. Temperature and humidity influence drying times, so be mindful of air movement and enclosed spaces. If rust has already progressed deeply and caused severe pitting or structural weakness, more substantial repairs such as metal replacement or professional welding may be necessary. In those cases, approaching the job with patience and seeking professional guidance can save time and money in the long run. Even when the damage seems cosmetic, treating it seriously from the start offers the best chance that the finish will be durable and visually satisfying over many miles. The finishing stage, then, is not a mere cosmetic flourish but a measure of how well intent meets execution on a vehicle that will keep moving mile after mile.
Beyond the immediate repair, consider this finishing phase as a corridor to broader preventive care. The same attention you give to color and shine translates into better long-term protection for the fender and the rest of the body. Regular washing to remove salt and grime, followed by a rust-inhibiting treatment on vulnerable edges and seams, can dramatically extend the life of a repair. If you keep an eye on the undercarriage, you will catch rust early, and the cost of maintenance will stay manageable. Those small, patient acts—inspecting, cleaning, and reapplying protective coatings when needed—form a quiet discipline that preserves value and appearance. The finish you achieve today sets a standard for the next time rust reappears, because the same principles of preparation, gradual layers, and gentle finishing govern any future repairs.
To keep the narrative cohesive: the rust finishes you achieve are not about chasing perfection but about creating a durable, aesthetically harmonious surface that serves the truck’s many miles. The finishing stage is the bridge between repair and reliability, and it demands the same methodical approach that characterized the rust removal and priming stages. When you follow the sequence—careful assessment, clean preparation, controlled rust removal, dependable priming, thoughtful filling, delicate color application, prudent clear coating, and patient refinement—you build a repair that looks right and lasts. If the goal is a fender that you can rely on, the finish is the final, decisive layer that seals the deal. For readers seeking deeper context on broader maintenance topics, our own blog offers practical guidance and a broader picture of preventive care, which you can explore here: mastertruckrepairllc.com/blog/.
External reference: https://www.autorepair.com/repair-guides/rust-repair
Final thoughts
In conclusion, addressing rust on truck fenders is a critical aspect of maintaining a fleet’s integrity and appearances. By following the detailed steps outlined in this guide—from assessing damage to applying final paint—you can ensure a thorough repair that not only prolongs the vehicle’s life but also enhances its safety and aesthetic appeal. Regular inspections and proactive maintenance are essential strategies to combat rust and safeguard your fleet’s operations.

