Rusted-out rocker panels can significantly compromise the structural integrity and visual appeal of a Chevrolet Silverado—a concern shared among fleet managers, trucking company owners, and operators in construction, mining, and logistics. Understanding how to assess the damage accurately, install replacement panels correctly, and apply finishing touches responsibly not only mitigates expenses but also ensures vehicles remain compliant and safe. This article delves into a systematic approach to tackle rocker panel repair, enhancing fleet durability and performance while keeping operational costs in check. Each chapter takes you through essential steps: assessing damage, installing replacement panels, and executing finishing touches—equipping you with actionable insights tailored to your operational needs.
From Diagnosis to Renewal: A Thorough, Practical Roadmap for Repairing a Rusted Silverado Rocker Panel
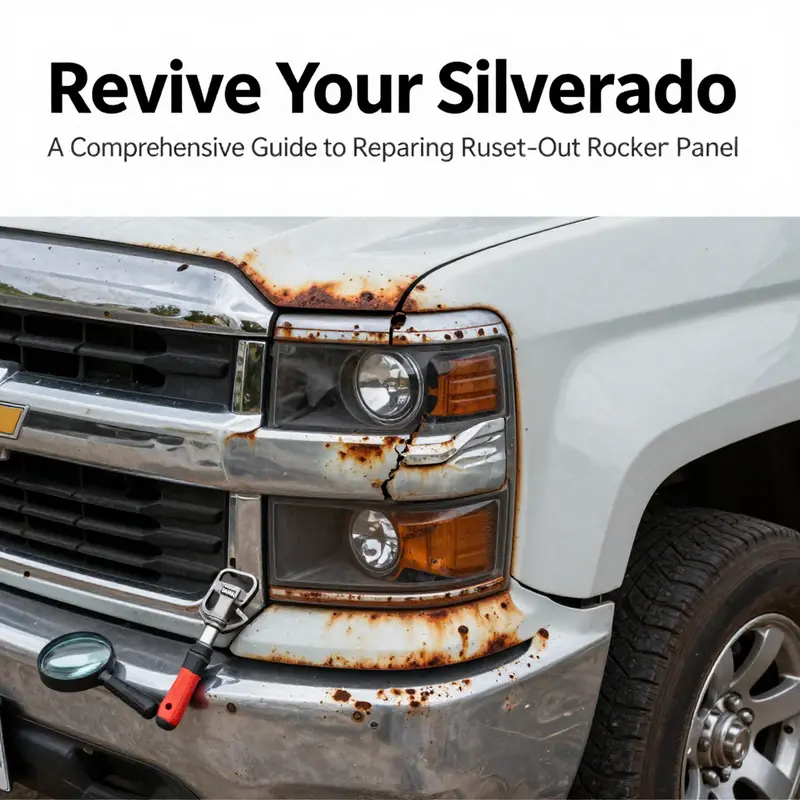
Rusted rocker panels can quietly undermine a truck’s structural integrity and its curb appeal, especially on a long-traveling Silverado that’s seen salt, snow, and road debris. The rocker panel isn’t just a cosmetic trim; it forms part of the vehicle’s side structure, helping to protect the floor and frame from impact and corrosion. When rust takes hold, the damage is rarely a single surface blemish. It tends to begin as small pits that gradually eat through metal, and if left unchecked, those pits can grow into holes that weaken the panel and complicate future repairs. The repair you undertake should begin with a clear-eyed assessment, continue with careful preparation, and culminate in a durable, aesthetically seamless restoration. The goal is not merely to stop the rust but to restore the rocker to approximate factory stiffness and appearance, while also ensuring long-term protection against future corrosion. This journey—from diagnosis to renewal—requires attention to detail, the right tools, and a plan that respects both the Silverado’s construction and your own time and budget.
The first step is a rigorous assessment of the damage. You’ll want to distinguish between cosmetic surface rust and rust that has penetrated the metal. Superficial rust that hasn’t penetrated through can often be treated in place with aggressive sanding, a rust converter, and a protective coating. In this gentler scenario, you might be able to preserve most of the existing panel by cleaning, treating, and resealing, with the caveat that you should still address any edge lifting or pitting to prevent future spread. More often, however, the rocker panel has deteriorated to the point where the metal has thinned or perforated. If you can poke a screwdriver through the metal or see daylight from the inside of the cab, that’s a sign to replace the section rather than patch it. A careful, honest assessment minimizes the risk of returning to the same failure after a hurried fix. To guide this process, you’ll gauge not only the visible corrosion but also how far it extends into the adjacent seams, flanges, and inner supports. The conclusion of this assessment will dictate whether you pursue a targeted patch repair or a full panel replacement.
Once you have determined the extent of the rust, you move into preparedness. Preparation is the hinge on which the entire repair turns. Start by removing any source of obstruction around the rocker area—trim, molding, and any interior kick panels that limit access to the inner edge. This not only gives you clear visibility but also reduces the risk of sparks traveling to hidden areas. Protect the interior with drop cloths or heavy plastic to keep dust and debris from migrating into the cab. With the area exposed, inspect the surrounding metal for any hidden corrosion that might not be immediately visible from the outside. Any soft, hollow or bubbling metal near the edges should raise a red flag and be incorporated into the repair plan.
Next, you must decide how you’ll handle the rust itself. If you’re dealing with surface rust, you can begin with mechanical removal using a grinder or die grinder fitted with an appropriate abrasive disc. The aim is to abrade away all rust and to expose clean, sound metal underneath. You’ll know you’ve reached solid metal when the surface is uniformly gray and lacks any orange-tinged pits. After removing the rust, clean the area thoroughly with a degreaser and allow it to dry completely. This step is essential; oil or grease left behind can prevent welds from penetrating properly and can compromise the bond between the new panel and the existing structure. Cleaning isn’t a one-and-done action. It’s a meticulous process that often requires wiping, degreasing, and repeating until the surface remains dry and free of residue.
If the damage is more extensive, you’ll eventually cut away the compromised section. This is a moment where accuracy matters as much as courage. Use a reciprocating saw or a plasma cutter to remove the damaged panel with clean, straight edges. Avoid wavering cuts or jagged edges, because a precise perimeter makes the fit of the replacement panel much easier and reduces the risk of gaps that trap moisture. As you cut, keep the work area under control to prevent sparks from reaching hidden flammable materials. After the cut, you should have a clear, smooth opening that matches the profile of the replacement patch as closely as possible. The edges should be deburred and cleaned to prevent any tearing or misalignment during installation.
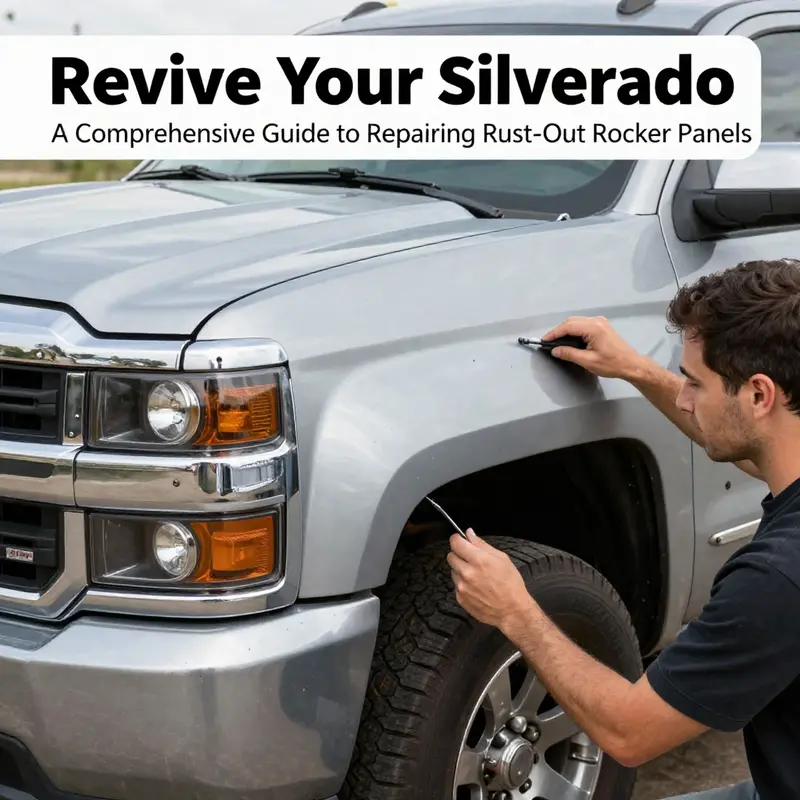
With the damaged portion removed, you’ll face the choice between fabricating a replacement panel or purchasing a pre-shaped, model-specific rocker panel. The Silverado has a market for correctly matched panels that reflect the exact year, bed length, and body style, so securing a replacement that mirrors your truck’s configuration is worth the effort. A correct fit matters not only for aesthetics but for structural integrity and for proper line-up with the door and wheel openings. Before a single weld is struck, test-fit the replacement panel. Place it in the opening, shim as needed, and verify that the edges align with existing body lines, joins, and mounting points. A dry fit that demonstrates clean contact along all edges reduces the likelihood of surprises during welding and helps keep repainting to a minimum.
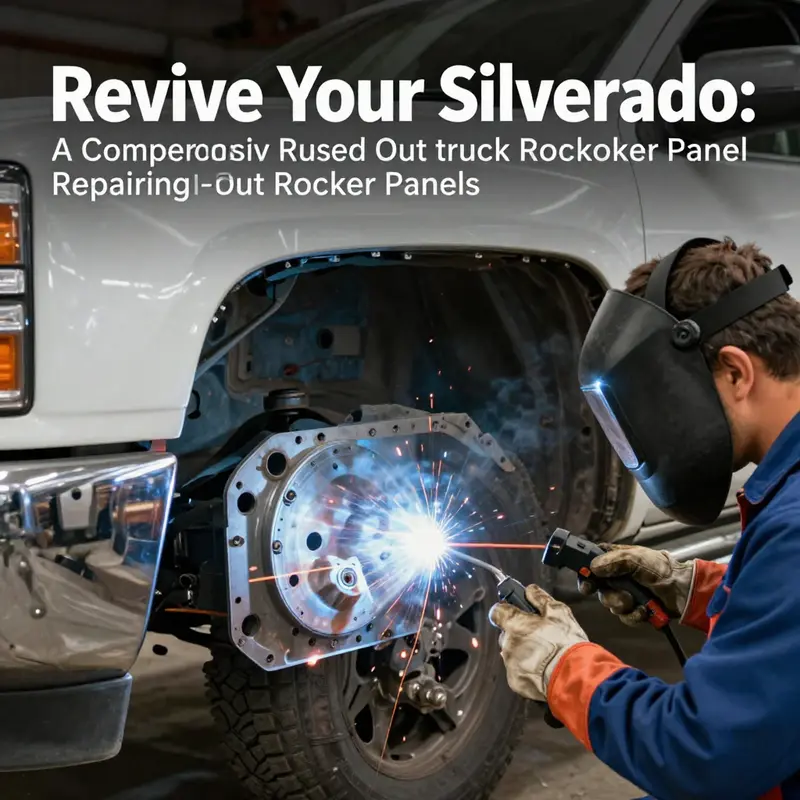
When it comes to attaching the new rocker panel, welding is the preferred method for structural repairs. A MIG welder creates strong, durable joints that can stand up to the same stresses the original panel endured. Welding from the inside keeps the weld seams out of sight on the exterior where they would be visible and could mar the finished look. A stitch-welding approach—placing small, controlled welds across the seam rather than a long continuous bead—helps minimize heat buildup that can warp metal. It also helps preserve the panel’s alignment by reducing the tendency for the sheet metal to pull in or out as it cools. You’ll want to perform a series of tacks to hold the panel in place, rechecking fit after each tack, then proceed with the full seam welds. If welding isn’t possible due to access limitations or personal safety concerns, an automotive-grade adhesive or structural bonding method can be considered in non-structural areas, but you should be mindful that this will not restore the same rigidity as a welded seam and may require additional reinforcement.
After the panel is welded in, the next phase is finishing. Grinding the welds smooth is essential if you want a clean base for painting. Use a flattop grinding disc to smooth the seam flush with the surrounding metal, then inspect for any gaps or low spots that could trap moisture. A meticulous finish reduces the need for heavy body filler and ensures a more uniform surface for primer. Once the seams are ground smooth, you’ll apply a rust-inhibiting primer to seal the raw metal and resist future corrosion. This primer acts as a barrier that stops moisture from wicking into the new panel, and it helps create a solid, uniform base for the color coat. You’ll then apply a high-quality automotive paint that matches the Silverado’s original color. The aim is to blend the repaired area with the surrounding sheet metal so that the repair becomes nearly invisible from a normal viewing distance. The process may require several coats, plus sanding between coats to achieve a seamless finish.
Protection doesn’t stop at paint. Long-term corrosion resistance depends on sealing and undercoating in vulnerable areas, especially along the rocker’s underside and any seam gaps near the wheel well. A rustproofing treatment or protective coating on the underside of the rocker and along the new joint provides an extra layer of defense against future moisture intrusion, road salt, and debris. The specific method you choose for long-term protection should consider the climate where you live, driving conditions, and how aggressively you plan to maintain the vehicle. While undercoating can help, you should also consider periodic inspections and touch-ups to catch early signs of new corrosion as soon as possible.
Throughout this process, prioritize safety. Welding, grinding, and cutting generate flying debris, heat, and fumes. Wear the proper PPE: heavy gloves, eye protection, a respirator or appropriate mask for particulates and fumes, and hearing protection where noise is a concern. Work in a well-ventilated area, keep a fire extinguisher nearby, and ensure that all flammables are cleared from the workspace. If you’re new to welding, consider practicing on scrap metal first to build your control and understand how the metal responds to heat. You’re not just repairing a piece of metal; you’re restoring a critical fold in the Silverado’s structure and ensuring the vehicle remains a safe, reliable platform for daily use or long road trips.
The final steps bring together precision, patience, and a forward-looking plan. After the paint has cured, perform a careful visual inspection for misaligned body lines, paint runs, or hidden gaps around the seam. Run your hand along the edge to feel for any burrs or irregularities that could snag clothing or snag road debris. If necessary, perform minor touch-ups and re-sand the primer and color surfaces to achieve a uniform sheen. It’s also wise to perform a moisture check in the repaired area after a few days of rain or washing. If you notice any dampness or staining, re-evaluate the seam and seals for potential leaks or breaches in the protective barrier. The aim is to complete a repair that not only looks right but holds up under the continuous stresses of road use and exposure to the elements.
All of this comes with the practical awareness that repairs of this type demand planning and sometimes a materials budget. A well-thought-out maintenance budget helps you prepare for this kind of repair and reduces the risk that a future rust issue catches you off guard. For a practical framework on budgeting for routine truck maintenance, you can explore resources that lay out the steps and cost considerations involved. budgeting for routine truck maintenance.
As you move from the planning stage through execution, you’ll find the process of repairing a rusted rocker panel is as much about discipline as it is about metal and welds. You’re not simply patching metal; you’re reestablishing a line of defense for the cab and restoring the Silverado’s visual harmony. When you’re finished, the repaired rocker should look as if it never rusted at all, or at least appear indistinguishable from the surrounding panels to an observer walking past the vehicle. Yet the appearance is only part of the objective. The more important achievement is renewing the structural integrity and extending the life of the truck so it can continue to serve reliably in everyday use or on demanding jobs. It’s a hands-on project that rewards careful work, precise measurements, and an eye for long-term durability over a quick fix.
For readers who want to broaden their understanding of metalwork techniques and to compare approaches to rust repair in different scenarios, there are reputable resources that detail the fundamentals of fabrication, seam preparation, and finish work. A broader reference point can help you anticipate challenges you might encounter on a future repair or a different body panel. While every vehicle has its own quirks, the core principles—thorough rust removal, precise cutting, proper fit, secure welding, and protective coating—translate across many applies and keep you moving toward a solid repair rather than a temporary bandage. External resources that cover these fundamentals can provide additional context and depth as you finalize the plan and execute the repair on your Silverado.
In closing, the road from diagnostic clarity to a durable, visually cohesive repair hinges on disciplined preparation, accurate cuts, and a welding approach that respects the panel’s geometry and the vehicle’s long-term needs. The Silverado’s rocker panel represents a crucial line of defense against the elements, and restoring it thoroughly is a practical act of vehicle stewardship. With careful assessment, a clean work environment, and a steady hand at the welder, you can recover the rocker’s integrity, protect the cab, and preserve the truck’s value for years to come. If you’re looking to expand this knowledge further, a broader reference on metalwork and rust repair can offer deeper insights into techniques that apply beyond a single panel or model.
External resource for broader context on metal fabrication and rust repair: https://autorepairhelp.com/
From Rust to Resilience: Replacing a Silverado Rocker Panel with Precision
Rusted rocker panels are not just an eyesore; they signal the structural skin’s decline where strength and protection matter most. The rocker forms part of the side structure and helps preserve floor integrity. When rot creates holes, a patch is rarely durable. A proper replacement begins with a careful assessment, followed by planning, and ends with the installation of a correctly contoured replacement panel. This chapter traces that path, balancing diagnosis, technique, and practical tips for the Silverado, translating general rocker-panel replacement principles into actionable steps.
First comes evaluation. Surface rust may be treated, but once rot has hollowed the metal, the structure is compromised. The decision to replace rather than repair is about the likelihood of a durable seam, hidden damage behind the skin, and reestablishing door-sill and floor continuity. Inspect in good light, probe with a tool to detect soft spots. Where metal yields under pressure, replacement becomes prudent. This assessment guides the subsequent steps; a new panel installed with care restores rigidity, value, and peace of mind.
With rust extent known, removal of the damaged rocker is the pivotal act. Follow factory seam lines where the sheet metal intersects to ensure a correct fit. The tool choice, reciprocating saw or angle grinder, depends on access and metal thickness. Trace the seam, make a clean cut, and deburr carefully. The removal reveals a boundary between sheet metal and the underbody support that deserves attention. It is a sequence of deliberate cuts that leaves a prepared anchor point for the new skin.
After removal, clean the surrounding area removing rust fragments, degreaser residue, and dust. Ensure the surface is dry for a strong bond with the new panel. The goal is a clean, dry workspace where the new skin can be positioned confidently.
Selecting a replacement rocker panel must match the Silverado’s model year and body style. Test-fit the replacement, verify alignment along the rocker line, door opening, and wheel arch. Confirm top edge aligns with the door sill and contour mirrors the lower body. A precise fit saves time and protects the seam from distortion.
Welding remains the preferred method for a durable bond; MIG welding with inside-out access yields a clean exterior seam. If welding is not feasible, rivets can provide a robust attachment; sealant and proper finish are essential. Whether weld or rivet, the panel should be anchored to resist flex and fatigue, with temporary clamps or spot welds used during final alignment.
Finishing involves smoothing the seam, grinding flush, and applying rust-inhibiting primer and paint. Protect the area with a durable undercoating. Ensure primer and color coat cure fully before handling. Consider reinforcing the panel with internal bracing if the design allows and treating the interior side with rust protection to guard hard-to-reach corners.
This sequence – cut, clean, align, weld or rivet, grind, prime, paint, reinforce – constitutes a robust rocker-panel replacement. It restores the cabin boundary, floor integrity, and external lines, returning the Silverado to confident road behavior.
For readers seeking external guidance, a well-documented, illustrated reference can complement this approach, and reputable automotive publications provide authoritative walkthroughs. MasterTruckRepair and similar resources can serve as a practical companion for planning and executing related repairs.
null
null
Final thoughts
By understanding the comprehensive process of assessing damage, installing replacement panels, and applying finishing touches, fleet managers and operators can effectively restore rusted rocker panels on Chevrolet Silverados. This not only preserves the integrity and durability of vehicles but also ensures compliance and functionality, ultimately reflecting positively on operational costs and vehicle aesthetics. Investing in quality repairs fosters long-term performance and reliability across your fleet, safeguarding your assets and enhancing productivity.

