Heavy-duty operations often lead to wear and tear on the vehicles that form the backbone of your fleet. One frequent issue that affects comfort and operator efficiency is degraded truck seat foam. As foam deteriorates, it compromises support, potentially affecting driver posture and reducing productivity. This guide will equip fleet managers and trucking company owners, along with construction, mining, and logistics operators, with practical solutions for repairing seat foam in old trucks, ensuring a comfortable and efficient driving experience. We will explore common issues associated with seat foam degradation and provide a step-by-step replacement guide, while also outlining professional repair options for complex situations.
null

null
From Sag to Support: A Practical Foam Replacement Guide for Restoring an Old Truck Seat
The ride in an old pickup isn’t just about torque and noise; it’s about the seat that holds you steady through long days behind the wheel. Over years of sun, sweat, and rough roads, the foam beneath the upholstery loses its spring. What used to cradle you now feels hollow, and every mile seems to remind you that comfort isn’t just a luxury—it’s a safety and focus issue. Restoring seat foam in an aging truck isn’t a glamorous task, but it’s one that pays off in the way the truck feels on burbling highways and backcountry lanes alike. The goal isn’t to recreate showroom perfection but to bring back a solid, supportive feel that keeps your hips and back from fatigue so you can pay attention to the road and your driving instinct. A careful repair follows a simple logic: if the foam still holds some shape, you can rebuild around it; if it’s collapsed beyond recognition, you replace. Either way, the process can be approached methodically, with respect for the seat’s structure and an eye for long-term durability.
Begin with a mindset that combines patience with practicality. This isn’t a race against time; it’s a careful restoration that rewards prep work. You’ll start with an assessment, then gather the exact materials you need, and proceed through disassembly, replacement or reinforcement, and reassembly. The narrative of this repair becomes a quiet one—the rhythm of measuring, cutting, bonding, and testing—until the seat finally feels right again. In old trucks, the seat is often the most used component that has aged unevenly. The cushion under the fabric may sag in the center of the seat, while the edges retain more support, or vice versa. Understanding these nuances helps you decide whether a simple insert will do, whether you should replace all the foam, or whether a targeted filling will even things out without a full reupholster job.
The first step is acceptance that you are dealing with aging materials. High-density polyurethane foam, the backbone of most automotive cushions, loses resilience under repeated compression. On a well-used truck seat, the outer fabric may still look presentable, but the inner foam can crack, crumble, or settle into a shape that is out of harmony with the seat frame. The difference between a seat that is merely tired and a seat that is past its useful life is sometimes a matter of how the foam behaves under load—that is, how it supports you when you shift or lean. Sagging often happens in the bottom of the cushion and along the backrest where the body exerts the most sustained pressure. A small dent here or there might be patched with a foam insert, but persistent, deep sag usually signals more extensive degradation that benefits from a complete foam replacement. The decision is practical: if you can see or feel the old foam compress too easily and doesn’t rebound quickly, replacement becomes the most reliable long-term solution. If the sagging is localized, you can often achieve a quick improvement by inserting new foam pieces into the sunken areas and blending them with the surrounding cushion.
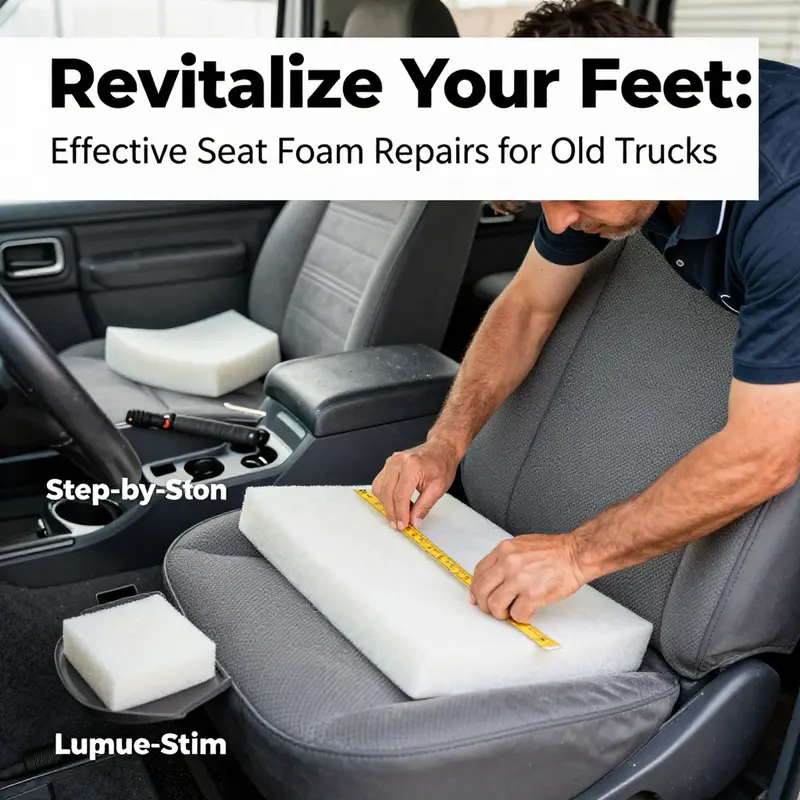
With that mindset, you move into the practical realm where measurements begin to matter. The aim is to replicate the original contour as closely as possible while ensuring the density and firmness align with your body and the seat’s geometry. In most cases, you want foam with a density that mirrors the original or is slightly higher to maintain proper support. The density range commonly used in automotive applications runs roughly from 1.8 to 2.5 pounds per cubic foot, with higher densities offering more support for heavier drivers or for long-haul comfort. Matching density is important not just for initial feel but for how the foam ages; a denser foam tends to resist softening from heat and wear better over time. If you can, measure the existing foam’s thickness and cross-section across the cushion and backrest. Use a firm straightedge to trace the foam’s shape on paper or cardboard, then transfer those measurements to the new foam so you can cut a piece that sits cleanly within the seat frame without threatening the fabric’s fit.
The materials you choose matter as much as the technique you use. A high-density polyurethane foam is the heart of the replacement, but you’ll also need an adhesive that is compatible with automotive interiors. The goal is a bond that stays flexible, resists heat and humidity, and endures through vibration and shifting over the long life of a vehicle. For the outer upholstery, you’ll either reuse the original fabric if it’s in good shape or consider a reupholster if the cover has torn or stretched beyond repair. If you’re keeping the same fabric, you’ll want to assess whether it can be stretched back into place without causing puckers or seams to fail. If the fabric shows signs of stretching or tearing, it may be wise to re-cover with a matching material, ensuring you get a clean, wrinkle-free surface that seats evenly over the foam. In this conversation with your future self, the emphasis is on a secure, lasting bond between foam and cover because a loosely bonded assembly creates uneven pressure points and accelerates wear.
The disassembly phase follows a careful, almost ceremonial rhythm. You’ll remove the seat from the truck, which usually entails loosening mounting bolts beneath the seat base. Keep track of hardware as you go, labeling screws if necessary so you don’t mix parts of the backrest with those of the cushion. Once the seat is free, you’ll peel back the fabric cover to reveal the foam beneath. Some seats are designed with zippers or access panels; others require you to cut along stitched seams to remove the foam. In either case, proceed slowly to avoid tearing the upholstery or damaging the seat frame. The process benefits from a patient hand and a clean workspace. Lay the old foam flat on a work surface, which makes it easier to study its shape and thickness. If the foam has a central depression, notice where it forms and consider how that region will be treated with the new material—whether you’ll use a full replacement or a composite approach that blends new and old foam.
Once the old foam is removed, you have a canvas for new comfort. The next step in the narrative is measurement and cutting. You’ll lay the old foam on a clean, flat surface and trace its outline onto the new foam with a pencil or marker. The edges should be crisp, without ragged lines that would invite gaps once the cushion is reassembled. A sharp utility knife or a compensating foam saw will help you slice through the foam cleanly. The key is to cut with smooth, deliberate strokes, applying even pressure, and using a straightedge as a guide to avoid wobbly edges. If you’re replacing only a portion of the cushion, you can cut the new foam in segments that fit together like a puzzle, taking care that the seams are not exposed to the surface in a way that would cause noticeable bumps when sitting.
Attaching the new foam is the moment where theory becomes reality. Spread a thin, even layer of automotive-grade adhesive on the foam’s bottom and along the contact area of the seat frame. The adhesive should remain flexible after curing and tolerate heat from sun exposure, since the seat often rests in a warm cabin and can heat up during operation. Carefully position the foam in the seat frame, aligning it with the frame edges and any internal supports. You’ll press it into place and then apply clamps or heavy objects to hold it steady while the bond cures. Plan for a curing window that gives the adhesive sufficient time to set—often several hours, depending on humidity and temperature. Do not rush the cure; a premature reassembly can lead to shifting foam, awkward contours, or a compromised bond that will show up under load.
With the foam bonded, you come to the reassembly phase. If the original fabric is usable, you’ll re-stretch it over the new foam with careful handwork, ensuring the grain and pattern line up and that there are no gathers or wrinkles along the seams. Secure the fabric with the traditional method that the seat originally used—staples, sewing, or Velcro—being mindful of the stitch tension and the fabric’s wear patterns. If the cover has seen better days, consider a reupholster or a full upholstery refresh to complement the new foam. The aim is to return the seat to a state where the surface feels smooth under your hands and the edges of the foam align flush with the seat’s outer shell. Reinstall the seat in the truck, reattach the mounting bolts firmly, and test the seat’s support by shifting weight and adjusting to your preferred driving position.
All along this journey, there are alternative paths that can suit different levels of damage and different budgets. For minor sagging that doesn’t justify a full foam replacement, inserting small pieces of new foam into the sunken areas can restore evenness and support. The technique requires careful cutting and blending so you don’t create noticeable lumps. It can buy a little time before a full replacement becomes necessary, especially if the upholstery is still sound and you’re aiming for a moderate improvement rather than a complete rebuild. There are also repair products on the market intended to revive some elasticity to aging foam. These sprays or foams can penetrate the material and occasionally restore partial resilience, but they are rarely a permanent fix for seriously degraded foam. They can, however, extend the life of the seat and improve comfort temporarily while you decide whether to pursue a longer-term solution.
Despite the allure of quick fixes, many owners ultimately opt for a full foam replacement when the cushion has collapsed or when back support is compromised over a broad area. A complete replacement lets you tailor density and thickness to your body and your driving style and gives you a clean slate with the new fabric, if you decide to reupholster. It’s worth noting that this process can become more involved if the seat includes a complex contour, multiple layers of padding, or a leather finish. In those cases, a professional auto upholstery shop can re-stuff, re-cover, or even replace the seat mechanism itself to restore both function and appearance. When you consider the investment of time, fit, and finish, a professional approach becomes attractive for those seeking a premium end result without the risk of misalignment or improper adhesion.
The practical rhythm of this repair is complemented by a handful of tips that help the result last. First, match the foam density as closely as possible to the original so you don’t create a mismatch in support that over time feels odd or induces fatigue. Second, verify the seating area’s thickness across the entire cushion to prevent a situation where one area feels high and another flat. Third, protect the new foam during the cure by keeping the area clean and free from dust or dirt, which can interfere with adhesion. Fourth, protect the interior of the seat with a breathable barrier if moisture could seep into the padding; moisture can degrade foam and encourage mold growth, especially in humid climates or in trucks that see frequent sun exposure. Fifth, after reassembly, consider a seat cover or pad to shield the foam from the sun’s rays and from daily wear; this simple step can extend the foam’s life and keep the interior upholstery from premature wear.
As you move through this process, you may want to consult additional guidance or see a few examples that help you visualize the steps. A dependable resource for auto seating repair can provide step-by-step visuals, safety tips, and density recommendations. For those who want to dive deeper into the process, you can visit the Master Truck Repair blog for related maintenance ideas and repair workflows. You can explore more at the following resource: mastertruckrepairllc.com/blog/. Keeping an eye on broader truck maintenance topics helps you plan the seat repair as part of a holistic approach to extending the life of an aging vehicle.
In the end, the goal is to finish with a seat that supports you properly and feels right when you sit down, not a project that lingers as a reminder of sagging decades. When the foam is well-matched, the cover sits neatly, and the seat clears the test of time under your weight and movements, you’ll notice a difference in how the truck handles day-to-day driving, long commutes, and rough gravel roads. The satisfaction comes not just from a job well done but from the improved posture, reduced fatigue, and the sense that this older vehicle still has plenty of life left in it. The path to that outcome lies in careful assessment, precise measurement, thoughtful material choice, and a steady hand as you rebuild the seat’s interior resilience.
For readers who want to extend the learning beyond the seat, there are practical opportunities to apply the same mindset to other components of the vehicle that wear with age. The same approach—assess, measure, replace, reassemble—can be adapted to windshields, door panels, or interior trim that has become loose or uncomfortable. It’s a reminder that the reliability you seek in an old truck isn’t a single fix but a series of informed decisions that keep the vehicle functional and comfortable. By treating seat foam repair as part of a broader maintenance philosophy, you’re investing in the vehicle’s present usability and its future value. The chapter of your old truck’s life that begins with a sagging cushion can evolve into one of practical, lasting improvements that restore not just comfort but confidence on every miles-long road ahead.
For further reading and deeper visuals, this chapter aligns with established DIY seat repair guidance that emphasizes density matching, controlled cutting, and proper adhesion. While the specifics of each seat shape will vary, the underlying principles remain constant: a well-fitted foam piece returns a seat to its intended support profile, a properly prepared surface ensures a durable bond, and careful reassembly delivers a smooth, consistent seating surface that won’t betray your comfort when you need it most. If you’re curious to explore more about how to optimize other aspects of truck maintenance, consider visiting the broader resources offered in the blog, where a range of maintenance topics are explored with the same emphasis on practical, cost-conscious solutions. For those who want to see extended case studies and practical demonstrations, you can follow the main blog hub and examine related posts on seat maintenance and upholstery matters.
External resource: https://www.carseatcushions.com
Reshaping Comfort: Professional Seat Foam Repairs for Old Trucks
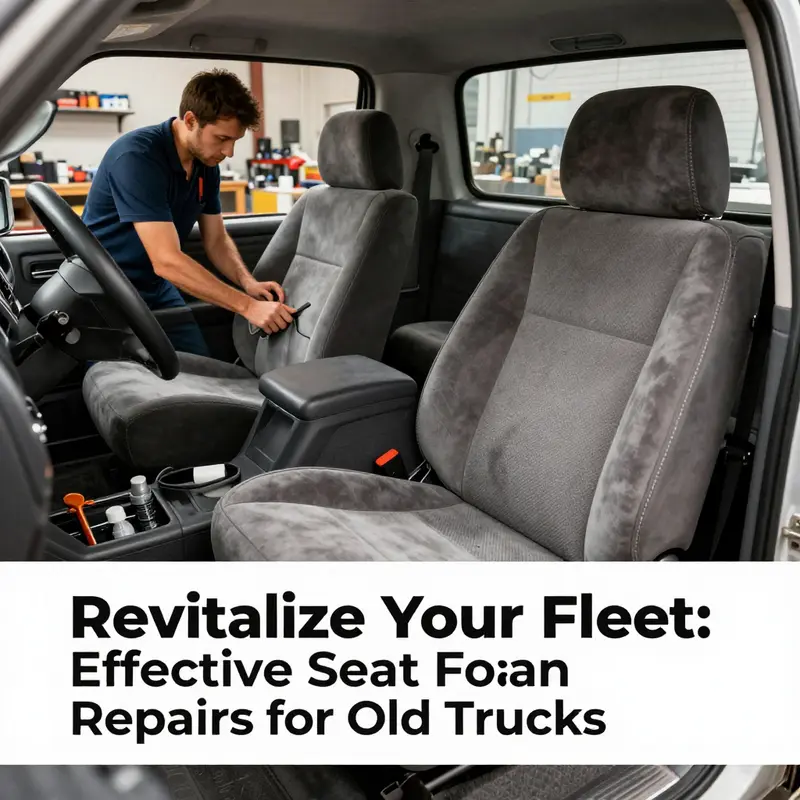
The miles have a way of writing themselves into comfort. In an aging workhorse, the seat is more than a place to sit; it is a systems component that influences posture, endurance, and even safety on long drives. When the foam beneath the upholstery has spent decades absorbing vibration, heat, and sun, quick DIY patches can only do so much. This chapter peers into the professional frontier of seat foam repair for old trucks, where skilled upholsterers treat the seat as a complete system rather than a single padding issue. The goal is not just to restore a cushion, but to recover the precise balance of support, contour, and retention that the original design promised. In many classic or high-mile trucks, that means rebuilding around the old frame, re-creating the seat’s natural curvature, and ensuring the upholstery remains taut and durable enough to handle years of use. The professional approach insists on assessing the whole seat assembly—foam, cover, frame, springs, and mounting hardware—before a decision is made about which path to take. And that prudent, system-wide mindset is what often distinguishes a temporary fix from a lasting restoration that preserves both comfort and value.
An initial assessment is rarely glamorous, but it is essential. A qualified upholstery professional will begin by inspecting the seat frame for rigidity, track alignment, and any signs of rust or bent components. They listen for telltale noises when the seat is moved, check for uneven resistance when adjustments are made, and feel the seat’s cushion surface for softness that betrays deeper collapse. They will test the lumbar region, the thigh support, and the edge contours where weight tends to compress first. This isn’t vanity. It’s safety: you want a seat that supports proper driving posture, keeps you well aligned with the pedals and steering wheel, and doesn’t shift unexpectedly during cornering or braking. If the cover shows cracking or tearing, the professional considers whether it can be preserved, stretched, and re-secured over a rebuilt foam core, or if it would be more practical to replace the cover entirely. A cover that’s loose or brittle can undermine the new foam’s performance by creating loose zones that cause rubbing, slipping, or hotspots. In some cases, the verdict is straightforward: the frame is sound, the foam has simply aged into sag, and a targeted intervention can restore shape without a full rebuild. In others, the examination reveals a compromised frame or compromised tracks that must be repaired or replaced before any foam work begins.
The range of professional options is broad, but the underlying logic remains the same: restore the seat’s geometry, then restore the surface that the driver feels daily. The most comprehensive route is full seat re-foaming, often described in shops as re-cushioning. Here, the trained technician removes the entire seat assembly from the truck for a meticulous rebuild. The old foam is stripped away in layers, and the cavity is measured to recreate the original silhouette. High-density foam is chosen to match or exceed the original density, with careful attention to how that density behaves under heat and load. The new block is carved or cut to mirror the seat’s contour—promoting even weight distribution across the back, hips, and thighs. Once the foam sits correctly, the upholstery is re-covered. The old cover can be re-stretched over the new foam if its fabric or leather remains sound and if the stitching and structure permit, or a custom cover can be crafted to fit the updated foam profile precisely. The professional uses automotive-grade adhesives and retainers to ensure that the fabric or leather remains securely anchored, wrinkle-free, and resistant to detachment through daily use. The result is a seat that feels new in the sense of restored ergonomics, with the comfort and support that the original design intended.
For many vehicles, complete re-foaming may be more than the owner needs or can justify. In these cases, a targeted, semi-permanent repair—often referred to as foam filling or reinforcement—offers a practical compromise. The technician identifies localized sagging or hollowed zones, typically near the seating edges or in the center where weight concentrates during long drives. Small, dense foam pieces are cut to shape and inserted into the hollowed areas. The pieces are bonded to the remaining original foam with an industrial-strength adhesive that fuses the joints and prevents shifting. The edges are carefully blended to merge with the surrounding surface, so visible seams don’t draw attention or create pressure points. This approach preserves most of the original structure and is less invasive than a full re-foam. It can be a smart choice for classic trucks whose owners want to retain the original seat character but need more consistent support. However, it is also a reminder that the underlying frame and cover must still be in decent shape; otherwise, the new foam can settle unevenly, and the cure becomes a moving target.
Seat cover replacement and upgrades form another meaningful option, particularly for owners who want a refreshed interior or who have a cover that is beyond practical repair. If the foam remains supportive and the frame is solid, you can choose to preserve the current foam via re-covering, or swap to a new cover that matches the vehicle’s era or upgrades the look with modern materials. A professional upholsterer will measure, cut, and attach new fabric or leather with precision to avoid puckering or misalignment. In the case of leather, the stitching, grain pattern, and color must harmonize with the rest of the cabin. For fabric, the select material should balance durability, breathability, and comfort. Upgrades can extend the lifespan of the seat while offering a fresh appearance that complements other restoration work. The result is a seat that is not only more comfortable but also more resilient to wear, with stitching that holds under tens of thousands of seat cycles and sun exposure.
There are also genetic relatives of professional repair—the foam repair kits and purist’s sprays that promise quick, if temporary, improvements. When a pro uses these, it’s typically as a first aid before more definitive work or as a maintenance step in a thorough restoration plan. Foam-lining sprays or injectables can fill gaps and stiffen the aging core, offering a modest bump in support and resilience. They are rarely positioned as standalone cures for deeply degraded foam in a truck seat, but they can buy time when parts are on backorder or when a vehicle must remain drivable during a restoration project. A skilled shop will weigh these options with the customer, explaining that while such products can help, they do not replace the need for a solid foam core, correct contour, and secure upholstery.
In some situations, the best course of action is a full seat replacement rather than re-foaming. This is not a lazy shortcut; it is a strategic decision when the seat’s geometry has been lost due to chronic sag, corrosion in the frame, or track misalignment that cannot be corrected economically. A new or refurbished seat assembly can be chosen to fit existing mounting points, but with modern foam formulations that deliver improved support, durability, and heat resistance. The process remains meticulous: the old seat is detached, the tracks are inspected and repaired or replaced as needed, and the new seat is mounted with careful alignment to ensure that the driver’s posture aligns with the steering wheel, pedals, and mirrors. A professional upholstery shop can supply seats that mirror the original look and texture while benefiting from contemporary materials. The payoff is not only comfort but an improved ergonomic baseline that reduces fatigue and enhances control, particularly important for trucks that demand long hours behind the wheel.
The practical considerations around timing, cost, and decision-making are essential for anyone contemplating professional work. A seasoned upholsterer will present a staged plan that aligns with the truck’s use, its value, and the owner’s goals. If the vehicle remains a daily driver for work, a quicker, less invasive option like targeted reinforcement or re-covering with a durable material may be the most sensible path. If the truck is a vintage or cherished restoration project, owners may prefer full re-foaming to recapture the original feel and longevity. Cost ranges vary with the scope of work, the seat type, and the specific materials chosen. A professional can outline a prognosis for several years of service after repair and provide maintenance steps to extend that lifespan. They will also consider the interaction between the seat and the vehicle’s interior climate. Older foam can sag more quickly in hot, humid climates if it lacks moisture resistance, so the selection of a foam with better heat stability and moisture resistance can be a wise investment.
Beyond the technicalities, working with a professional offers a peace of mind born from experience. An upholsterer who specializes in older trucks understands that these seats carry a history—perhaps a bench seat from a long-haul rig or a driver’s seat that has seen as many miles as the truck itself. They approach the project with a respect for the original design, while not shying away from modernization that can improve the seat’s performance. They can coordinate with cover specialists to ensure that the new foam and the upholstery meet the interior’s aesthetic. They can verify that safety considerations, such as seat belt anchorage and airbag compatibility in certain models, are not compromised by foam changes. They can also align the repair work with broader restoration plans, whether that includes updating the cab’s insulation, adding lumbar support tailored to the driver’s physique, or integrating seat adjustments that accommodate modern driving ergonomics without sacrificing the truck’s classic vibe.
For readers who want to anchor their decisions in a broader knowledge base, there is value in seeing how foam materials, density, and contouring play out in professional practice. If you want a primer on the basics—how density affects support, how contouring helps reduce fatigue, and how upholstery compatibility influences the final feel—the Master Truck Repair blog offers accessible context that can guide conversations with your upholsterer. This channel provides a bridge between the theory of seat foam science and the hands-on reality of repair work, helping vehicle owners make informed choices while staying mindful of the project’s scope and cost. You can explore more at the Master Truck Repair blog, where discussions about interior restoration intersect with practical, do-it-for-yourself wisdom and professional guidance. Master Truck Repair blog.
In the end, professional seat foam repair for an old truck is less about a single material fix and more about a holistic restoration of comfort and alignment. It’s a careful balance between preserving the vehicle’s original character and advancing its practicality for daily use or future value. A competent upholstery specialist will begin with the seat as a system: they will test and measure, source foam with appropriate density and resilience, and craft a result that feels natural to sit on and natural to look at. The choice among full re-foaming, selective reinforcement, cover replacement, or even seat replacement depends on the seat’s state, the owner’s expectations, and the truck’s role in daily life or show. For many owners, the decision is straightforward—a seat that weds durability with comfort can transform a tired ride into a dependable workhorse once again. For others, it is a careful shopping exercise, balancing the romance of a classic interior with the realities of modern driving demands. Either way, collaborating with a professional upholstery shop helps ensure that the investment yields a seat that supports long hours on the road, keeps you alert and comfortable, and preserves the truck’s story for years to come.
Final thoughts
Repairing seat foam in old trucks is a vital step in maintaining driver comfort and ensuring operational efficiency. By understanding the common issues, following a systematic replacement guide, and recognizing when to seek professional assistance, fleet managers and operators can effectively address concerns associated with degraded seat foam. Ensuring that your fleet remains comfortable and functional not only protects your investment but also enhances driver morale and productivity. Take action now to improve your vehicles and keep your operations running smoothly.

