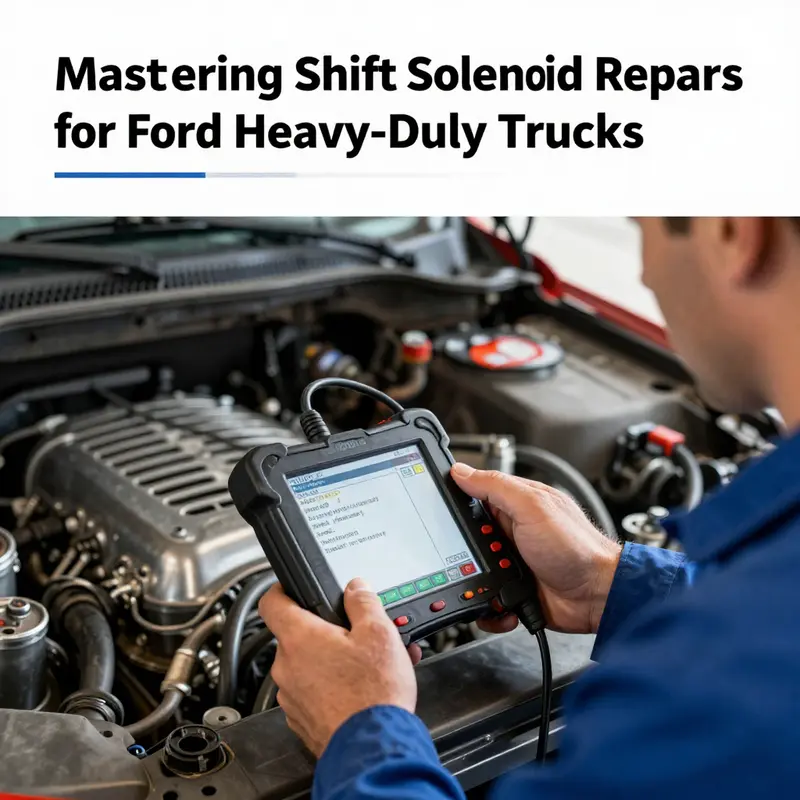
Shift solenoid failures in Ford heavy-duty trucks, such as the F-450 and F-550, can lead to severe operational disruptions, especially for fleet managers and trucking companies relying on these vehicles for day-to-day operations. Recognizing the importance of swift and effective repairs, this guide offers a structured approach to diagnosing issues, performing repairs, and testing functionality post-repair. Each chapter builds upon the last to ensure a thorough understanding of how to resolve one of the most critical elements of your truck’s transmission system.
Reading the Signals: A Thorough Guide to Diagnosing Shift Solenoid Troubles in Heavy-Duty Trucks
A shift solenoid doesn’t wear out in isolation. It lives at the intersection of electronics, hydraulics, and the controller that governs every gear change. In a heavy‑duty truck, where transmissions handle high torque and long-duty cycles, the solenoid’s job is to regulate the flow of fluid to the valve body so the transmission can select the proper gear smoothly and predictably. When the solenoid or its circuit falters, the result can range from occasional harsh shifts to the vehicle refusing to shift at all. Because the symptoms overlap with other transmission problems—slipping clutches, worn valves, dirty fluid, or pressure leaks—diagnosis must be systematic, patient, and tied to the real-world behavior of the truck. The goal is not only to confirm a faulty solenoid but to distinguish electrical faults, wiring problems, and hydraulic or mechanical wear from one another. A careful diagnostic journey begins with data from the vehicle’s onboard codes and ends with a repair plan that addresses the root cause, not just the symptom. To start, a technician will pull diagnostic trouble codes (DTCs) and review how they map to the transmission’s control logic. In many systems, codes such as those indicating a malfunction in the shift solenoid or in the torque converter clutch circuit point to a particular circuit or solenoid family. While the names and numbers of codes vary by model year and software level, the diagnostic logic remains consistent: code presence demands code-specific validation, then a check of the electrical path, the solenoid’s response, and finally the hydraulic side of the transmission. The result is a clear trail from fault indication to a repair decision, not a guess. The first waypoint on this trail is the fault code itself. A typical set of codes might include, for example, a general shift solenoid malfunction code alongside more specific ones tied to individual solenoids A through E. The broad family of codes helps narrow the field, but it does not replace the need for real-time verification. The importance of this step is twofold. First, it prevents unnecessary disassembly when the issue is purely electrical, a loose connector, or a ground problem. Second, it situates the fault within the controller’s expectations for how the solenoids should behave during commanded shifts. Within the diagnostic process, it is crucial to separate what the TCM is asking the solenoids to do from what the solenoids themselves are doing. A trained technician will validate the TCM’s output signals, not just read the codes. This validation typically involves a tool that can monitor the PWM—the pulse width modulation—duty cycle going to the solenoid at the moment a shift is commanded. The PWM is the heartbeat of the solenoid, directly translating a digital shift command into an analog hydraulic response. When the technician commands a shift and watches the PWM signal, several scenarios can unfold. If the PWM signal is present and stable, but the solenoid does not respond, the fault may lie with the solenoid itself, the wiring harness, or the electrical connection to the solenoid. If the PWM signal is present but exhibits a noticeable delay, jitter, or partial duty cycle during shifts, that is a strong indication that the control circuitry is not delivering a clean command, or the valve body is resisting the response because of internal leakage or mechanical wear. If the PWM signal is absent or erratic, the problem is more likely to reside in the TCM or its control circuitry, or in a compromised power supply feeding the module. These signal tests require careful observation and sometimes graphing of the Duty Cycle versus time, so the technician can correlate a shift event with the actual solenoid actuation. The signals themselves do not lie, but they require context. The context comes from the broader condition of the drivetrain and the transmission. A truck that has aged with high hours and unpredictable shifts may already have wear in other hydraulic components that can mimic a bad solenoid. Clutch packs degrade, valve body components wear, and passages become partially obstructed. The technician uses that context to interpret data. A veteran technician might say that software can mask physical wear by compensating in advanced control logic, but only to a point. Understanding this interplay between motor age and transmission health is essential; it guides the diagnostic path so the effort focuses on the real fault rather than chasing symptoms. This nuance—age, wear, and the limits of the control system—was emphasized by experienced technicians, who remind us that a thorough diagnosis requires more than code reading. The conversation around motor age matters because it helps decide whether a repair is likely to be a simple solenoid replacement or a sign of broader transmission issues that may require more extensive repair or even a teardown. The interplay between the electronic control and the hydraulic hardware becomes most evident when a vehicle with high mileage begins to shift irregularly. In such cases, the symptoms can reflect worn clutch packs or valve body components that only reveal themselves when you push the system to operate under load and through higher torque conditions. It’s a reminder that a solenoid replacement, while often effective for a brief period, may not resolve the root cause if the hydraulic side of the transmission has aged out of spec. To capture a complete diagnostic picture, technicians perform several targeted checks beyond the electrical tests. A fluid condition analysis looks for discoloration, burnt odors, or metallic particles that indicate wear or contamination. The color of the fluid can tell a story: clarity and a bright red hue often signal fresh fluid, while dark, muddy fluid with a burnt aroma can point to overheating or deteriorating clutch packs. The technician may also perform a pressure test to measure line pressure across a range of engine speeds and gear selections. If pressure readings are off, it suggests internal transmission issues that must be resolved before reliability can be restored. Sometimes a more direct path to understanding the state of the valve body is to perform a teardown evaluation, especially when the symptoms persist despite a properly functioning solenoid and clean fluid. A careful inspection of the valve body passages, the bore for the solenoid, and the presence of debris or sludge can uncover wear that is not evident from electrical tests alone. All these steps feed back into whether to proceed with a solenoid replacement or to pursue a broader hydraulic repair. The diagnostic journey does not stop at confirming a faulty solenoid. In many modern transmissions, the solenoid is one piece of a compact system—the valve body, the solenoids themselves, and the hydraulic circuits all work in concert. A false positive on the solenoid can lead to unnecessary replacement, which may not address the downstream issues. Therefore, technicians practice meticulous record‑keeping: noting which solenoid was removed, how the connectors were seated, and the orientation of the gasket and any seals. This discipline ensures the installation of a new solenoid occurs with the same care given to any other critical engine‑related component. When a decision to replace the solenoid is made, the process must be performed with equal care. The old transmission pan is removed to access the solenoids. Draining the transmission fluid is a prerequisite to avoid spills and to prevent contamination. Collecting and disposing of the old fluid is an important environmental step as well as a practical one. The solenoids are mounted on the valve body, usually in a fixed position that corresponds to the code diagnostic path. The connector is disconnected, and the faulty solenoid is removed with the appropriate socket or wrench, taking care to preserve the orientation and placement of the solenoid and its gasket. Inspecting the solenoid bore for debris or sludge, cleaning thoroughly with a lint-free cloth and a transmission‑safe cleaner, and avoiding harsh chemicals that could degrade seals is essential. A new solenoid is installed, aligned, and seated properly. The gasket, which often comes with the new solenoid, must be replaced to prevent leaks. The electrical connector is reattached securely, and the solenoid’s position is confirmed by a final visual check. Reassembly continues with replacing the transmission pan, torquing the bolts to manufacturer specifications, and refilling the transmission with the correct fluid type and quantity. After the mechanical and fluid sides are restored, a comprehensive test follows. The engine is started, and the diagnostic indicators are checked for warning lights. A careful test drive through all gears validates that shifting is smooth and predictable, with particular attention to transitions between lower gears and higher ranges if the vehicle uses a multi‑range transmission system. Any unusual noises, clunking, or hesitation is noted as a sign that there may be more work to do. In a modern heavy‑duty application, the diagnostic path may require access to the manufacturer’s service manual or diagnostic tools designed to read exact wiring diagrams and harness routing. The emphasis is on model‑specific guidance to ensure any wiring or controller faults are addressed with the correct procedures. This is where trusted, official resources become essential. The official service information database holds wiring diagrams, sequence steps, and detailed troubleshooting routes that align with a vehicle’s specialized software and hardware. It is through these resources that a technician confirms the exact steps for a given model year and transmission family, ensuring the repair adheres to the maker’s specifications. For readers seeking further background, the Master Truck Repair blog offers practical insights into routine and advanced maintenance approaches that reinforce the diagnostic mindset described here. You can explore more at the Master Truck Repair blog. Master Truck Repair blog. As with any complex repair, the path from symptom to solution rests on careful data gathering, disciplined testing, and a clear understanding of how electrical and hydraulic systems interact under load. The discussion here builds toward a practical, replicable workflow that you can apply in the field or in a shop setting without turning a simple solenoid replacement into a car‑teaser of guesswork. The steps outlined—reading and interpreting DTCs, validating control signals, analyzing the signal response, considering vehicle age and wear, and performing targeted hydraulic checks—form a cohesive diagnostic arc. They reinforce the principle that a clean, methodological approach yields the most reliable outcome. Beyond the action of replacement, the narrative recognizes that the best repair plan is one that minimizes downtime while maximizing long‑term reliability. That balance often requires a combination of precise solenoid replacement when warranted, coupled with a broader assessment of the transmission’s hydraulic health, fluid condition, and seal integrity. In practice, technicians may find themselves correlating several factors: a code pointing to a solenoid, a PWM signal that indicates a solid command, a fluid sample revealing contaminants, and pressure readings that show internal leakage under load. Each data point adds a layer of confidence to the final decision. It is this layered verification that separates a straightforward solenoid replacement from an incomplete repair that only masks a deeper issue. The science behind the shift solenoid is straightforward in principle: an electromagnetic device that modulates the hydraulic path by energizing or de-energizing valve channels. The complexity arises in how the electronic controls, the physical wiring harness, and the hydraulic assembly co‑operate under real world conditions. The practical takeaway for technicians and fleet operators alike is that diagnosing shift solenoid issues should be an optically and electronically integrated process. It requires clean, repeatable testing conditions, precise mechanical work, and respect for the transmission’s internal tolerances. It also demands honest appraisal of wear and service history. A truck with a robust maintenance record and clean, fresh fluid will have a different repair prognosis than one with long intervals between service or frequent heavy‑load operation. That recognition guides not only repairs but preventive strategies as well. When planning preventive maintenance, operators should prioritize consistency in fluid changes, fluid quality, and a proactive approach to monitor the transmission’s behavior in the field. A disciplined maintenance program reduces the likelihood of late‑stage solenoid issues by catching early signs of electrical resistance, hose wear, or connector corrosion before they escalate into more costly hydraulic problems. The diagnostic pathway described here is not a one‑time procedure but part of an ongoing maintenance discipline. It invites technicians to build a practical repository of patterns: typical PWM responses for healthy solenoids, common fault code progressions, and recognizable signs of electrical harness wear. Over time, this knowledge becomes a field‑tested intuition—an invaluable asset when every minute on the road matters. In the end, the strength of the diagnostic approach lies in its clarity and its humility. It acknowledges that a single faulty solenoid can be both a trigger and a symptom. It respects the idea that the transmission is a finely tuned system whose reliability depends on both the electronic brain and the mechanical heart. It also recognizes that proper repair integrates the correct technical steps with sound judgment about the vehicle’s overall condition. For those seeking authoritative, model‑specific details beyond this chapter, consulting the official service information database provides wiring diagrams, procedure sequences, and troubleshooting flowsheets tailored to a given transmission family and year. This ensures you’re operating with the most current guidance and reduces the risk of misinterpretation from outdated or incomplete information. As a practical closing note, remember that the best repairs combine accurate diagnosis with careful reassembly and precise fluid management. The solenoid replacement, when indicated, is a straightforward mechanical task, but its success hinges on the surrounding electrical and hydraulic context being sound. The sequence described here is designed to be followed in order, with attention to the subtle cues that separate a simple fix from a comprehensive service decision. If you are pursuing further reading or step‑by‑step references, you can explore more by visiting the Master Truck Repair blog for related maintenance topics and practical guidance on keeping heavy‑duty transmissions in reliable service. The blog provides a useful companion perspective on routine checks, troubleshooting approaches, and best practices that complement the technical procedures outlined in this chapter. For official, model‑specific service guidance and wiring diagrams, refer to the manufacturer’s technical information resources. These materials provide the definitive procedures and diagrams that align with your truck’s exact configuration and software level. External resources from the vehicle maker’s service information channel are essential when you need precise steps, torque specifications, and correct wiring color codes. To access these targeted resources, consult the official service information database via the following link: https://www.fordparts.com/technical-service-information. This external reference serves as a gateway to the most up‑to‑date, model‑specific service data, ensuring that any solenoid repair or related hydraulic work adheres to the manufacturer’s specifications and current diagnostic workflows. In sum, diagnosing shift solenoid issues in heavy‑duty trucks is a disciplined, evidence‑driven process that blends code interpretation, electrical signal validation, hydraulic health checks, and mechanical inspection. It is a cycle of verification, not a sprint to replacement. By maintaining a careful, data‑driven approach, technicians can deliver repairs that restore reliable shifting while preserving the longevity of the transmission and the uptime of the fleet.
Shifting Back to Reliability: A Thorough, Flowing Guide to Repairing Shift Solenoids in Heavy-Duty Trucks
When a heavy-duty truck hesitates at a gear, stalls between gears, or refuses to engage smoothly, the culprit can often be traced to the shift solenoid. These small electromechanical devices sit at the heart of the transmission’s ability to select gears in response to the driver’s commands and the engine’s conditions. A failing shift solenoid disrupts the precise balance of hydraulic pressure that creates clean, programmed shifts. The result is a transmission that clunks, slips, or lurches, and the driver feels the impact in every mile of roadway. This chapter follows a practical, repair-oriented path that prioritizes diagnostics, careful disassembly, precise replacement, and thorough verification. It is built to help a technician or a capable owner understand how to repair a shift solenoid without turning a routine maintenance task into a costly misstep. To connect these steps to a broader maintenance perspective, a good next stop is the MasterTruckRepair Blog, which offers a wide view of reliable repair practices and hands-on guidance for large-truck maintenance. MasterTruckRepair Blog.
The journey begins with a careful diagnosis. The transmission control system speaks in codes that guide the technician toward the real source of trouble, and the shift solenoid is just one potential relay in the chain. Diagnostic trouble codes related to torque converter clutch circuits or misfunctions in the various shift solenoids appear on the scan tool with a family resemblance but distinct meanings. For example, P0740 signals a torque converter clutch circuit malfunction, while codes in the P0750 to P0755 family point to malfunctions in one of the shift solenoids A through E, and P0760 indicates issues with solenoids D or E. These codes are not proof of a faulty solenoid by themselves; they signal that the transmission control system is not seeing the expected signals or operating pressures at the valve body. The next step is to verify that the problem resides in the solenoid rather than in a related electrical or hydraulic pathway. That means watching live data if available, confirming the solenoid’s resistance with a multimeter, and checking the electrical connector for corrosion, frayed wires, or poor grounding.
Once the diagnosis aligns with a likely solenoid issue, the technician can prepare the vehicle for work. The truck should be parked on a level surface, with the parking brake engaged. Disconnection of the negative battery terminal minimizes the risk of electrical shorts during work and prevents accidental solenoid cycling while the system is exposed. Cooling the transmission area before touching anything is prudent, especially if the fluid has been warm during the drive. If the plan is to drain the pan to access the valve body and solenoid pack, a suitable drain pan should be placed beneath the transmission, and the old fluid should be saved for proper disposal according to local regulations. A practical note emerges early: a clean workspace, correct tools, and the right replacement solenoid are the foundation of a repair that lasts.
Accessing the shift solenoid typically requires removing the transmission pan to reach the valve body area where the solenoids live. The path can vary between models and years, but the underlying principle remains the same. After draining fluid, the pan bolts are removed carefully, the pan lowered, and the electrical connector to the solenoid pack is disconnected. In many designs, the solenoids are labeled, color-coded, or arranged in a way that makes it possible to identify the specific solenoid associated with the fault code. Keeping track of which solenoid came from which bore ensures that, when reassembly occurs, the correct seal and bleed back into the hydraulic circuit are achieved. A neat, presentable workspace helps: lay out the solenoids in order, photograph connections, and note how each gasket sits against its bore. The goal is to maintain orientation and ensure that the gasket seating is square and undamaged. A large part of this stage is the careful inspection of the solenoid bore itself for debris, sludge, or tiny metal particles that might accompany a failing solenoid. Cleaning should be done with a lint-free cloth and an appropriate solvent compatible with transmission components. Harsh cleaners or solvents that could degrade rubber seals must be avoided, as they risk compromising the new gasket or the solenoid seat itself.
When the misbehavior is tied to a suspect solenoid, replacement becomes the most straightforward path to restore proper shifting. The new solenoid must be compatible with the specific transmission family and have the correct electrical characteristics for the valve body it is designed to operate within. The old solenoid is removed by unscrewing or releasing its retaining clip, depending on design, and the mounting area is cleaned with an electrical contact cleaner to remove any residue that could hamper conduction when the new unit is installed. The gasket or O-ring that seals the solenoid to the valve body is replaced as part of the install to prevent slow leaks that could allow hydraulic pressure to bleed away. The new solenoid is then seated and aligned with care; the electrical connector is reattached securely to prevent arcing or intermittent signals. Reassembly continues with the installation of the transmission pan, which should be tightened to the manufacturer’s torque specification. Some designs require a new pan gasket and a small bead of RTV sealant around the pan edges to ensure a leak-free seal. These steps are not just about preventing leaks; they ensure that the hydraulic circuits stay isolated where they belong, and that there is no unintended bypass of pressure that would undermine the solenoid’s function.
With the solenoid in place, the next phase is to restore the system to its proper state. Fluid fill becomes a precision task: the pan is reinstalled, and the correct amount and type of transmission fluid are added according to the owner’s manual or service guide for the vehicle. The rule of fuel and oil—do not overfill and do not underfill—applies here with particular force, because too much or too little fluid changes the hydraulic dynamics of the valve body and the pressure it creates in the manifolds that drive the gears. After the mechanical assembly is complete, the battery is reconnected, and the engine is started. The immediate checklist focuses on looking for leaks around the pan and solenoid area and listening for any abnormal sounds that could indicate misalignment or a gasket bite. The vehicle’s transmission control module should be commanded to perform its initial checks, and stored diagnostic trouble codes should be cleared if the repair has resolved the fault. A test drive that covers all gears and a range of loads helps verify not only that the shifting is smooth but that the system responds correctly to throttle input and load changes at both low and high speeds.
In practice, a repair of this type becomes a blend of method and judgment. Diagnostic evidence guides the technician toward the solenoid, but the actual repair hinges on meticulous mechanical work and careful attention to seal integrity. The valve body is a compact, high-precision chamber where the flow of transmission fluid, under pressure, is switched by the solenoids to produce the correct gear selections. Any misalignment, even minor, can cause delays or harsh shifts. The replacement process, then, rests on the discipline of verifying that the new solenoid is seated properly and that its electrical connection is secure. When in doubt, recheck the bore cleanliness, the gasket seating, and the path of the electrical harness to ensure that movement or vibration does not cause a loose connection over time.
The verification phase is critical. After reinstalling the pan and filling with the appropriate fluid, the drive cycle should begin with careful observation. The vehicle should be shifted through the gears, with particular attention paid to the transition between first and second gear and the transition between low and high range if the vehicle is configured with such gearing. The test should be conducted in a safe location that allows full movement through the gears under controlled conditions. The goal is to observe a smooth sequence of engagements without hesitation, slipping, or clunking. A well-executed test run should also reveal that the check engine light, if previously illuminated, has either cleared or remains absent if the fault has truly been resolved. If a DTC persists, a recheck of the electrical connections, wiring harness integrity, and the solenoid resistance is warranted. It is not unusual for a code to persist briefly while the battery is cycled or while the transmission’s internal controls recondition the system, but persistent codes indicate a need for further investigation.
In the grand scheme, the shift solenoid repair is a reminder of how much responsibility rests in the valve body and its task of regulating hydraulic pressure. The solenoids themselves are straightforward devices, but their performance hinges on the cleanliness of the hydraulic circuit, the reliability of the electrical connections, and the integrity of the gasket seals. A repair performed with attention to these details can yield a transmission that shifts with the quiet confidence that once characterized a well-maintained powertrain, even under heavy-duty operating conditions. The process is not simply about replacing a small part; it is about reinstating the precise choreography of electrical signals, hydraulic pressure, and mechanical movement that keeps a heavy-duty truck moving efficiently under load and across long hauls. As with any repair that touches the transmission, the execution matters as much as the diagnosis. A sloppy installation, an overlooked gasket, or a missed torque specification can undo the effort and invite leaks, misalignment, or future failures. Therefore, a professional perspective is encouraged if there is any doubt about the alignment, the seal seating, or the proper torque values.
To maintain credibility and consistency with best practices, technicians should consult the vehicle’s service manual for the most up-to-date torque specs and procedure notes. That manual provides the precise guidance for the specific transmission family in use, including valve body access, bore cleanliness standards, and the correct sequence for reassembly. It is also wise to remain aware of any service bulletins issued by the vehicle’s manufacturer that address shift solenoid behavior or valve body issues. These bulletins can introduce model-year-specific quirks or provide revised testing and replacement guidelines based on real-world field data. The pattern in those bulletins is clear: when a solenoid fails or exhibits abnormal resistance, the steps are identical in principle across a broad spectrum of heavy-duty transmissions, but the exact tolerances, seal types, and installation sequences can differ slightly from one platform to another. Keeping these nuances in mind helps ensure that the repair holds up under use and abuse in demanding conditions.
Beyond the mechanics of repair, there is a broader approach to responsible maintenance that can prevent a solenoid failure from becoming a larger problem. Regular transmission fluid checks and changes, aligned with the vehicle’s maintenance schedule, help keep the hydraulic circuit free of varnish, sludge, and metal wear debris that can overwhelm small solenoids. A clean environment inside the transmission reduces contaminant-induced wear, which in turn extends the life of the solenoids and the valve body components they control. In the context of heavy-duty operation, where a truck spends long hours under load, this discipline is not optional but essential. A well-maintained transmission, with clean fluid and properly functioning solenoids, contributes to predictable performance, stable shifting, and better fuel efficiency, all of which support the economic and operational objectives of the fleet.
As a final orientation, the repair of a shift solenoid should be seen as part of a broader diagnostic and maintenance workflow. If the initial symptoms persist or reappear after replacement, it is prudent to reassess the electrical harness routing, the grounds, and the possibility of a control module fault. In some cases, a stubborn issue that resembles a solenoid problem can instead be rooted in a faulty valve body assembly, a worn gear set, or an accelerating wear path in the hydraulic circuit. The diagnostic tools, scan data, and live observations during the test drive all contribute to a layered understanding of how the transmission responds in real-world conditions. When done carefully, the solenoid repair not only resolves the immediate fault but helps the technician build a profile of the vehicle that informs future maintenance decisions and planning. For readers seeking a broader context on transmission fundamentals and the role of solenoids within the hydraulic network, a general overview of automatic transmission technology can provide useful background knowledge: https://en.wikipedia.org/wiki/Automatic_transmission.
The path described here is designed to be practical and applicable to the common heavy-duty trucking scenarios in which shift solenoid failures surface. It emphasizes safety, cleanliness, precise part matching, and thorough testing. It respects the fact that the valve body is a precision component, and its correct operation depends on meticulous attention to every seam, gasket, and electrical connection. It also respects the realities of the workshop—space, time, and the availability of tools—while underscoring the value of methodical, repeatable steps that reduce the likelihood of rework. Finally, it keeps a clear line of communication with the broader maintenance ecosystem: this repair should feel integrated with other routine services rather than isolated as a one-off fix. If you want to explore the wider maintenance framework and see how a shift solenoid repair fits into a larger reliability strategy for heavy-duty fleets, consider following entry points in the industry literature and practitioner forums that discuss diagnostics, valve bodies, and hydraulic integrity in a practical, non-brand-specific way.
Verifying Shift Solenoid Repairs: A Practical Road-Test and Diagnostic Protocol for Ford Heavy-Duty Trucks

Post-Repair Verification and Road-Test Protocol
After you’ve diagnosed, removed, and replaced a shift solenoid on a Ford heavy-duty truck, the job isn’t complete until the system runs reliably under real-world conditions. This chapter walks through a practical, methodical verification process that blends visual checks, scanner-based testing, warm-up routines, controlled gear engagement, live-data interpretation, and road-testing. The goal is to confirm the root cause, ensure the replacement is properly installed, and catch any related issues that could cause recurrence. Keep your owner’s manual and service data handy, and work with patience and care.
Begin with a focused visual and electrical check. With the battery reconnected, follow every harness that ties into the transmission and solenoid. Look for pinched wires, chafing, broken insulation, or loose connectors. Ensure each connector clips fully into place; a half-seat or a dirty terminal can mimic a failed solenoid. Check for corrosion at terminals and pins. If you find contamination, clean contacts with a contact-safe cleaner and allow them to dry. Inspect the solenoid itself for proper orientation, secure mounting, and the presence of its sealing gasket. A misaligned solenoid or a missing gasket can cause leaks or pressure loss that affect shift timing.
Next, turn on the key and use an OBD-II scanner to interrogate the transmission control module. Clear any historical transmission fault codes, but first save a record of the codes and freeze frame data. These snapshots show the conditions present when the fault occurred. After clearing, do not immediately assume the problem is gone. Clearing codes resets learned behaviors and flags. You want to see if the code returns under test conditions, which indicates an unresolved issue, or stays clear, which supports a successful repair.
Warm the engine and transmission to normal operating temperature before performing dynamic checks. Transmission fluid viscosity and pressure change with temperature. Cold testing can hide or exaggerate issues. While the engine idles in Park, cycle each gear selector position slowly and notice the transmission response. Observe shift lever detents and any delay in engaging Park, Drive, Reverse, or Manual modes. This static gear engagement gives an early indication of hydraulic sealing and electrical control. If the truck has a selectable driving mode or a range selector for heavy-duty models, cycle through those settings as well.
Shift quality assessment must be deliberate. Start with low-speed maneuvers in a safe area. Accelerate gently from a stop and let the transmission transition through the first two gears. Listen for clunking, harsh engagement, or slipping. Then accelerate to moderate speeds and allow the transmission to upshift to overdrive. Pay attention to timing and smoothness. A replaced solenoid will typically correct hesitation or hard shifts associated with its circuit, but if you detect micro-slip or a soft engagement, consider checking fluid level and pressure. Low fluid level or contaminated fluid can mimic solenoid faults.
While testing, engage the scanner’s live data stream and watch solenoid-related parameters. Look at solenoid duty cycles and commanded states while the vehicle is shifting. The duty cycle should change predictably when the controller commands a shift. If the scanner shows the controller commanding a state but the solenoid’s reported response does not change, you have an electrical or mechanical mismatch. Also monitor transmission fluid temperature. Excessive temperature during a short road test points to internal issues such as slipping clutches, which can cause heat-related failures or mask solenoid problems.
A controlled road test should replicate a variety of real-world loads and speeds. Drive in low-gear city traffic, accelerate onto a highway, and hold steady cruise speeds. Test under light and moderate loads, including a gentle climb if possible. For heavy-duty trucks that tow or carry loads, simulate a loaded condition where safe to do so. Watch for limp-home modes during these tests. If the transmission controller detects a critical fault, it will default to a safe gear range. Confirm the truck remains out of limp mode during normal driving. If limp mode triggers, pull codes immediately; it indicates either the original issue persists or a new problem was introduced during repair.
Interpretation of live data is central to diagnosis. When a shift command is given, the controller typically modulates solenoid voltage as a duty cycle. You should observe the duty cycle move from idle to active values in step with shifts. If duty cycles remain flat or show abnormal oscillations, inspect wiring for intermittent shorts or poor ground connections. Use a breakout adapter or backprobe with care to monitor actual voltages at the solenoid connector while operating. Compare those voltages to the expected range provided in service information. If the controller supplies correct signals but the solenoid does not respond, the replacement part may be faulty, or debris in the bore may prevent movement.
Do not neglect the transmission fluid. Fluid level and condition change the hydraulic environment that solenoids operate within. After reinstalling the pan and refilling fluid, run the engine and let the transmission cycle through gears as the level stabilizes. Then recheck the level with the vehicle at the specified temperature and on a level surface. Overfilling causes foaming and poor shift quality. Underfilling reduces pressure and can cause harsh or delayed engagements. Also inspect the old fluid you drained earlier. Metal particles or a burnt smell indicate internal wear or overheating. If significant contamination is present, consider performing a fluid and filter change or further internal inspection.
If odd symptoms persist, apply a methodical approach to troubleshooting. Recheck installation first: torque values on the pan bolts, proper seating of the gasket, and any retained magnets or filters cleaned. Next, verify the integrity of wiring harnesses using a multimeter. Check continuity, resistance, and grounds against factory specifications. Pay special attention to shields and power feeds that run along the transmission harness. A high-resistance ground or intermittent connector will create sporadic codes and unpredictable shifting.
When electrical checks pass but issues continue, dig into hydraulic and mechanical causes. A stuck valve in the valve body or an accumulation of debris in hydraulic passages can prevent pressure from reaching the appropriate clutch packs. Use service procedures to test line pressures and regulator operation. If pressures fall outside tolerance, you may need a valve body service, a filter change, or a more extensive rebuild. Keep in mind that solenoid failures sometimes occur because of a failing clutch pack or torque converter that imposes abnormal loads on the system.
During verification, make a practice of validating repair with repeatability. Perform the same set of maneuvers multiple times, and observe whether faults recur under the same conditions. Persistent, repeatable faults are easier to isolate. Transient faults that do not repeat often point to intermittent wiring or temperature-dependent issues. Thermal testing can be informative: measure relevant resistances or functional responses at both cold and operating temperatures. An intermittent connector that only fails under heat will show its fault pattern during thermal cycles.
Document everything. Keep a log of pre-repair codes, actions taken, parts replaced, and post-repair test results. Record live-data snapshots and note the conditions for any returning faults. This documentation proves invaluable if you need to escalate the issue to a parts supplier, a warranty provider, or technical support from the manufacturer. It also gives you a baseline for future maintenance and helps identify patterns across a fleet.
If your truck belongs to a fleet or sees heavy duty cycles, consider scheduling a short follow-up inspection after a few hundred miles. Some issues only manifest after the system has run under load for extended periods. A quick re-scan and a fluid level check at that mile interval catch problems early and avoid more costly failures.
There are times when a single solenoid replacement does not resolve the issue. When that happens, broaden your inspection to include other solenoids, the transmission control module, and external sensors that provide input to shift scheduling. For example, vehicle speed sensors, brake light switches, and throttle position sensors can all affect shift timing. Faults in these systems can cause the controller to command unusual solenoid behavior, which mimics a bad solenoid.
Technical service bulletins and factory service information often contain useful updates and specific test values. Before you replace multiple components, consult the relevant bulletins for your truck model and transmission. These resources may list known issues and corrected procedures that save time and parts. They also provide official torque specs, diagnostic flowcharts, and wiring diagrams. For owners managing maintenance budgets, connecting repair actions to longer-term maintenance planning is wise. For practical guidance on planning and costing routine work, see Budgeting for Routine Truck Maintenance.
When you reach the end of the verification process and the vehicle demonstrates consistent, smooth shifts without returning codes, your repair is likely successful. Still, one final step is to clear any remaining historical codes and perform a final drive cycle while monitoring live data. Confirm that duty cycles behave predictably across gear changes and that fluid temperatures remain normal.
This verification routine reduces the risk of premature failures and ensures the truck returns to service in a safe, predictable state. If, after exhaustive testing, faults persist, escalate to deeper diagnostic paths or consult factory-level diagnostic tools and wiring diagrams. Factory tools expose more parameters and may allow module reprogramming or advanced tests not available on consumer-grade scanners.
External reference: For official post-repair testing procedures and the latest model-specific guidance, consult Ford’s service resources at https://www.ford.com/support/.
Final thoughts
In conclusion, timely diagnosis and effective repair of shift solenoids in Ford heavy-duty trucks is essential for maintaining operational efficiency. By following the systematic approach outlined in this guide—diagnosing issues, executing repairs, and testing functionality—you can ensure that your fleet operates smoothly, minimizing downtime and enhancing productivity. Engaging with professional resources and keeping abreast of updates from Ford will further fortify your repair processes.

