Effective fleet management heavily relies on the operational readiness of vehicles, where tire maintenance is critical to prevent costly downtimes. One prevalent issue that fleet managers and trucking company owners face is dealing with slow leaks in truck tires. Understanding how to identify and repair these leaks ensures not only the safety of your drivers but also enhances productivity and reduces operational costs. This guide outlines systematic approaches to identify the source of slow leaks, discusses practical repair techniques, emphasizes safety precautions, evaluates the pros and cons of DIY repairs versus professional interventions, and offers long-term solutions to prevent future leaks. Each chapter is designed to equip you with actionable insights aimed at improving your tire management strategies.
Tracing the Source: Pinpointing Slow Leaks in Heavy-Duty Truck Tires
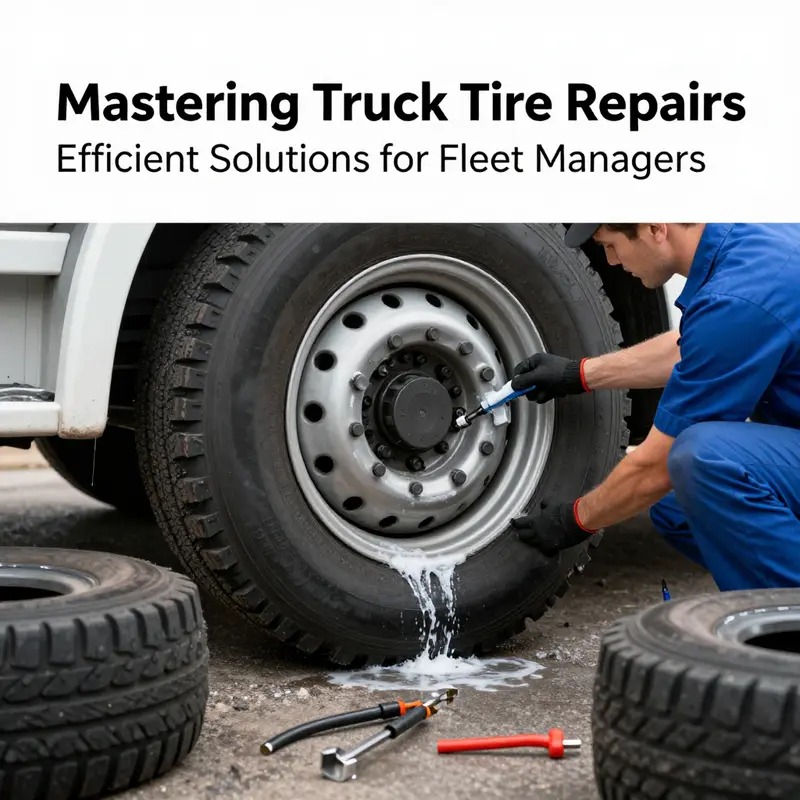
A slow tire leak on a heavy truck can feel like a quiet alarm, gnawing at uptime and safety at the same time. The sound of a tire softly losing air may go unnoticed for miles, until the gauge finally reminds you that a tire isn’t behaving the way it should. In these moments, the goal is not just to stop the air loss but to identify its origin with enough certainty to choose a repair that will hold under service conditions. The approach is methodical rather than magical: start with the simplest, most accessible clues and work toward the more complex possibilities, all while keeping safety the guiding principle. The first step is to park on a flat, clean surface and give the tire a careful, unhurried inspection. A visual scan, though basic, can reveal obvious culprits like embedded nails or screws, cracks in the tread or sidewall, and any bulges that hint at internal damage. In a vehicle designed for long hauls and heavy loads, even a small puncture can become a slow leak if it penetrates the tread in a way that does not immediately compromise the tire’s ability to hold air. Yet many slow leaks hide in less conspicuous spots—the valve stem, the bead seal where the tire meets the rim, or even the rim itself—so the inspection must extend beyond the visible surface. The soap and water test remains the most reliable DIY diagnostic tool, because it turns air loss into visual evidence. Inflate the tire to its recommended pressure and thoroughly spray a soapy solution over the entire surface, with particular attention to the valve stem, the bead line where the tire contacts the wheel, and the inner edge of the bead itself. Small, steady bubbles reveal the leak’s location. If the bubble activity concentrates at the rim bead area, the problem may lie in the seal between the tire and the wheel or in the rim’s sealing surface, a scenario common on trucks that see rough service or frequent mounting and demounting. In some cases, you may need to remove the tire from the rim to inspect the bead seat numerically and visually for rust, dirt, or an imperfect seating surface that could be preventing a true seal. For many fleets, this step is a signal that professional intervention is warranted; a properly trained technician can evaluate bead seating under pressure and, if needed, reseal or replace components with the correct equipment. When the test points to a leak at the valve stem, the fix is often straightforward: the valve core is worn or damaged, or the rubber gasket inside has deteriorated after heat and UV exposure. A valve core replacement is a quick, inexpensive task that can be accomplished with a small tool kit, and it often returns the tire to its intended performance without removing the tire from the rim. Drivers should also be mindful that a loose or damaged valve cap can contribute to a slow leak, though caps alone rarely account for major air loss; they are more often an indicator of a stem problem that needs attention. If the soapy test shows bubbles along the bead area but the rim edge itself looks clean after careful inspection, the issue may be dirt, corrosion, or a compromised bead seal. This is where a thorough rim cleaning and reseating procedure becomes crucial. Remove the tire from the wheel to gain access to the bead seat and clean the bead area with a wire brush, removing rust, old sealant, and debris. A damaged bead sealant or a rough bead seat can keep the tire from achieving a true seal, especially as the tire flexes under load. After cleaning, the tire is remounted and the bead is reseated with proper pressure and technique. If the rim seat shows corrosion, pitting, or dents, a seal cannot be guaranteed. In such cases, the rim itself may require repair or replacement. While minor rim dents can sometimes be worked out by a professional, severe damage or holes signal a replacement rather than a repair, because a compromised rim can lead to unsafe operation. These possibilities illustrate why not every slow leak is a simple patch job; some leaks are fundamentally linked to the structural integrity of the wheel assembly or to aging components that can no longer form a reliable seal. Aging tires introduce another layer of complexity. A tire that has endured years of service may develop micro-cracks in the sidewall or tread, sometimes invisible to the eye but fatal to air retention. These aging defects can produce slow leaks that do not respond to bead cleaning or patching because the damage exists below the surface. Detecting such issues often requires professional assessment, sometimes including specialized tests or imaging that reveal aging-related porosity. Similarly, installation quality matters. If a tire was mounted without proper lubrication, or if the bead did not align correctly with the rim, the resulting poor seal can generate a slow leak that mimics other problems. This is why post-service checks are essential after any tire work; even a well-meaning technician can overlook a bead misalignment if the tire is not inflated to the correct pressure for sealing and tested under load.
In practice, the diagnostic logic flows from the simplest explanation to the more complex, with safety never far from the center. If the leak is at the valve stem, a quick core replacement or cap adjustment can restore air retention. If the leak traces to the bead area, expect a more involved process. This could mean removing the tire, cleaning the rim thoroughly, reseating the bead, and possibly applying a bead sealant or replacing a compromised bead seal strip. Rim damage is the most consequential diagnosis: a cracked, bent, or perforated rim often requires repair or replacement and should trigger an immediate halt to driving until a professional confirms it is safe to proceed. When the leak remains elusive after standard checks, a professional shop may employ more advanced diagnostic tools, such as electronic leak detectors or a submersion test in a controlled water tank, to locate hidden or interior leaks that are not readily visible. These steps reinforce the central point: while many slow leaks can be diagnosed with careful inspection and the soap test, some scenarios demand professional evaluation to ensure reliability and safety under heavy load.
The decision path after identifying the leak source is straightforward but not trivial. A valve stem leak is usually the simplest fix—replace the valve core and take the tire for a recheck. For leaks at the bead or rim, the path is more guarded. Bead leaks require thorough rim cleaning and reseating, and sometimes replacing the bead sealant or the entire bead seating surface if corrosion or damage is present. If the rim shows cracks or deep dents, replacement is non-negotiable; attempting to repair such rims can compromise vehicle safety and overall wheel integrity. A puncture in the tread can often be addressed with a patch repair, but the patch must be applied from the inside and only if the puncture is in the tread area, away from the sidewall. Even then, professionals must perform the patching and vulcanization steps under controlled conditions to ensure a lasting seal.
To maintain momentum and safety on the road, the process of identifying and addressing a slow leak should be integrated into a broader maintenance mindset. If a leak is detected during a voyage, reduce speed and avoid high-traffic highways while planning a safe stop. Once parked, activate hazard signals and place warning markers if available. Never drive on a severely underinflated tire, as a blowout could endanger the crew and equipment. After diagnosing the source, consider documenting the event with a quick note and a follow-up inspection plan. This record helps track tire health across the fleet and can guide decisions about tire replacement timelines, shop visits, and budget planning for routine tire maintenance. For practitioners who want a concise reference, the diagnostic workflow aligns with the core idea: identify the leak with the soap test, verify the seal at the valve stem or bead, inspect the rim for damage, and escalate to professional service when the problem extends beyond simple fixes. If you want a deeper dive into how these diagnostics are applied in everyday maintenance and to explore practical guidance on running a tire-centric maintenance program, you can visit the blog for additional context and examples: mastertruckrepairllc.com/blog/.
In summary, a slow leak on a truck tire is rarely a single cause but a constellation of possibilities. By starting with a careful visual check and a thorough soap test, you can pinpoint whether the issue lies with the valve, the bead seal, the rim, or the tire itself. Each source has its own repair path, and knowing which one applies helps keep fleets safe, productive, and on the road with confidence.
From Soap to Seal: A Cohesive Path to Repairing Slow Leaks in Truck Tires
A slow leak in a truck tire is a signal that the tire is not performing at peak efficiency and, more importantly, that a safety margin is shrinking. The path from diagnosis to a durable seal is not a single maneuver but a coordinated sequence that begins with careful observation and ends with a repair that withstands the stresses of heavy use. The first move is often the most telling: a systematic assessment that combines simple field tests with a mindful inspection of every potential weak point—tread, sidewalls, bead area, valve stem, and rim. A flat and clean surface provides the quiet space needed to notice subtle changes, and a quick visual scan can reveal obvious punctures, embedded debris, or cracks that demand different responses. Yet many slow leaks hide in the spaces between components, making a thorough soap-and-water test the most reliable compass. When the tire is wetted generously, bubbles pinpoint the leak’s location with remarkable clarity. If the leak appears around the bead, you may need to lift the tire from the rim to inspect the bead seat for contamination, corrosion, or a compromised sealing strip. This is the kind of fix that benefits from a careful, methodical approach rather than a toolbox quick fix, especially on a vehicle that carries heavy loads and long miles on demanding roads.
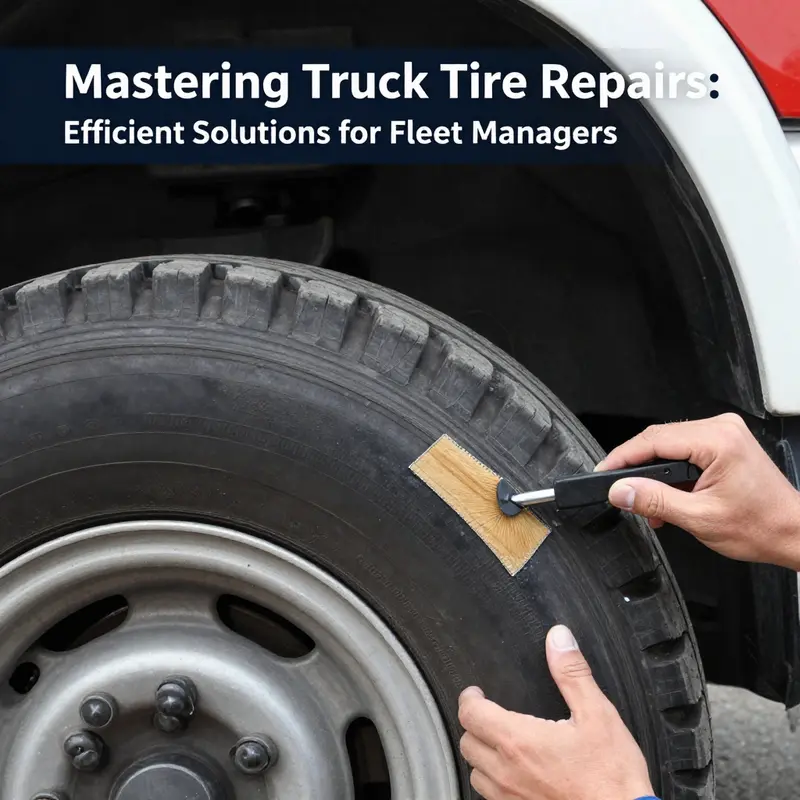
Once the leak’s location has been established, the repair path branches into a few dependable routes, each tied to a specific root cause. A puncture in the tread that is small and distant from the sidewall can be addressed with a patch-and-plug method, but this is a job that spesso belongs to a tire shop. The typical professional sequence begins with removing the tire from the wheel, then cleaning the interior surface to expose a pristine area for sealing. A patch is applied to the inner liner and vulcanized under heat and pressure to forge a lasting bond. The patch-and-plug tactic is effective when the integrity of the tread is intact and the hole is not near the shoulder, but it cannot cure every problem. For many operators, a cautious return to the road after a patch remains contingent on a professional inspection and pressure test to ensure there are no hidden weaknesses beneath the patch—weaknesses that could otherwise show up only after hours of service life have elapsed.
If the soapy test or a subsequent inspection points to the valve stem as the leak source, the repair can often be accomplished with a relatively simple core replacement. A worn or loose valve core invites slow leakage, and the fix is straightforward: unscrew the old core, install a new one, tighten it to the manufacturer’s specifications, and recheck for a steady, non-leaking seal. This is one of the few repairs that a mechanically inclined driver can undertake with basic tools, though it remains wise to confirm the result with a follow-up pressure hold test to confirm there is no residual seepage.
Bead-area leaks—where the tire meets the wheel rim—present a slightly more complex challenge. Dirt, rust, or old sealant residues can compromise the bead seal and give rise to a slow leak that is stubborn to confirm with surface tests alone. The remedy begins with removing the tire from the rim and thoroughly cleaning the bead seat. A wire brush or similar tool is used to strip away corrosion and contaminants that prevent a clean, uniform seal when the tire is remounted. After a clean bead seat is achieved, the tire is remounted, and the seal is reestablished. In some cases, a bead sealant might be applied to enhance the seal and provide a margin of safety against micro-leaks that could reappear under load. What matters most in this scenario is precision: a clean seating surface, correct bead alignment, and careful reseating under appropriate inflation pressures to verify the seal holds under the same load conditions the vehicle will experience on the road.
Repairing a damaged rim, by contrast, is the most consequential decision point in the leak equation. A rim that is cracked, dented, or perforated cannot reliably hold air even after a seal is restored. Minor dents might be addressed by a professional who can straighten the rim or perform a repair that preserves strength, but deformations or holes demand a rim replacement. Driving on a compromised rim is unsafe; the risk of a sudden tire failure becomes unacceptably high under heavy loads and at highway speeds. This reality reinforces the broader message that some problems are not simply fixable with patchwork. They require a structural remedy—often a replacement part—so the tire’s integrity, the wheel’s geometry, and the tire’s contact with the road are all preserved.
Across these scenarios, the overarching guidance remains consistent: many slow leaks demand professional handling for reliability, durability, and safety. A valve-core replacement and a bead-seat cleaning are among the more approachable tasks for skilled drivers with basic shop tools, but a full tire body repair or rim replacement belongs in a reputable tire service center. The line between a temporary fix and a durable repair is the line you must not cross when the tire is under load. If you suspect a leak during operation, slow down and move to a safe location rather than continuing to drive. Activate hazards and place a warning triangle to alert following traffic. The moment you notice underinflation, especially on a heavy vehicle, the prudent choice is to stop, inspect, and seek professional service.
In the search for a lasting seal, temporary measures have their place but only as a bridge to proper service. Tire sealants provide a stopgap that can help you reach a shop without a catastrophic air loss, yet these products are not a cure for the long term. They can complicate later repairs by altering the interior surface and, in some cases, by leaving residues that hinder patch or bead application. Maintenance routines become the backbone of preventing slow leaks from becoming sudden failures. Regular tire pressure checks, informed inspections for cuts or embedded objects, and attention to the rim’s bead seat are practical habits that can extend tire life and reduce the frequency of leaks. A disciplined maintenance mindset—paired with timely professional diagnosis—keeps fleets on the road and on the right side of safety regulations.
This chapter ties the diagnostic arc back to the broader narrative of truck maintenance. It’s not enough to fix the immediate leak; the goal is a seal that lasts through the next miles and the next seasons. That requires recognizing when a repair is feasible and when a component—be it the tire’s inner liner, the valve core, the bead seat, or the rim itself—needs more substantial service. To connect this immediate task to the bigger picture of fleet readiness, consider how everyday maintenance decisions influence uptime. Regular checks, early detection, and timely professional intervention together form a safety-first approach that protects drivers, preserves cargo, and sustains the fleet’s operating economics. For readers seeking a broader view of consistent upkeep and in-house maintenance practices, our in-house truck maintenance guide offers practical context and additional strategies to keep tires, wheels, and the rest of the drivetrain aligned with demand. in-house truck maintenance
As you carry this knowledge forward, remember the care that goes into diagnosing a slow leak is the care that keeps a truck moving safely. The best outcomes emerge when you treat the tire as a system, each part interdependent and each potential failure a signal pointing toward the right intervention. A patch, a valve core, a bead seal, or a rim replacement is not a single act but a moment in a continuous process of inspection, confirmation, and reassembly. In that process, the driver’s role blends steady observation with a readiness to involve skilled technicians when the situation exceeds the scope of routine maintenance. The slow leak becomes a guided lesson in equipment health, a reminder that safety, reliability, and efficiency hinge on disciplined diagnosis and appropriate action.
External resource: Tire Rack’s slow-leak techniques provide a thorough, authoritative overview of the diagnostic steps and repair options described here. https://www.tirerack.com/tires/tiretech/techpage.jsp?tech=slowleak
Guarding the Road: Safety-First Techniques for Repairing a Slow Leak in a Truck Tire
A slow leak in a truck tire often masquerades as a minor nuisance, but it is a condition that can escalate into a serious safety event if mishandled. The repair work that follows must be grounded in a disciplined respect for one simple fact: a heavy-duty tire and wheel assembly demands deliberate precautions as much as a precise repair. The path from a suspected leak to a safe, roadworthy tire is paved not only with the right steps but with a steadfast commitment to safety at every stage. When the terrain is flat, the surface clean, and the operation measured, the repair becomes less a gamble and more a controlled procedure that protects the driver, the vehicle, and others on the road. The broader objective is not to rush a fix but to ensure the repair holds under the pressures of highway speeds and heavy loads, which means safety measures must precede every action, and vigilance must accompany each movement.
Begin with the vehicle and the work area. Park on a flat, stable surface well away from traffic lanes or active ramps. Engage the parking brake fully and slide wheel chocks behind the tires that stay on the ground, even if you think you’ll be quick. A moment of hesitation with a shifting vehicle can translate into a dangerous slip, especially when a heavy truck is involved. The workspace should be free of oil, grease, or loose debris that could compromise footing or grip. In many yards and lots, dedicated repair bays are set up to account for the weight and size of truck tires; whenever you’re outside such an environment, treat the scene as a controlled workspace and clear bystanders from the perimeter. The chain of safety must remain intact from the first moment the truck is stopped to the moment the repair is complete and the vehicle is ready to return to the road.
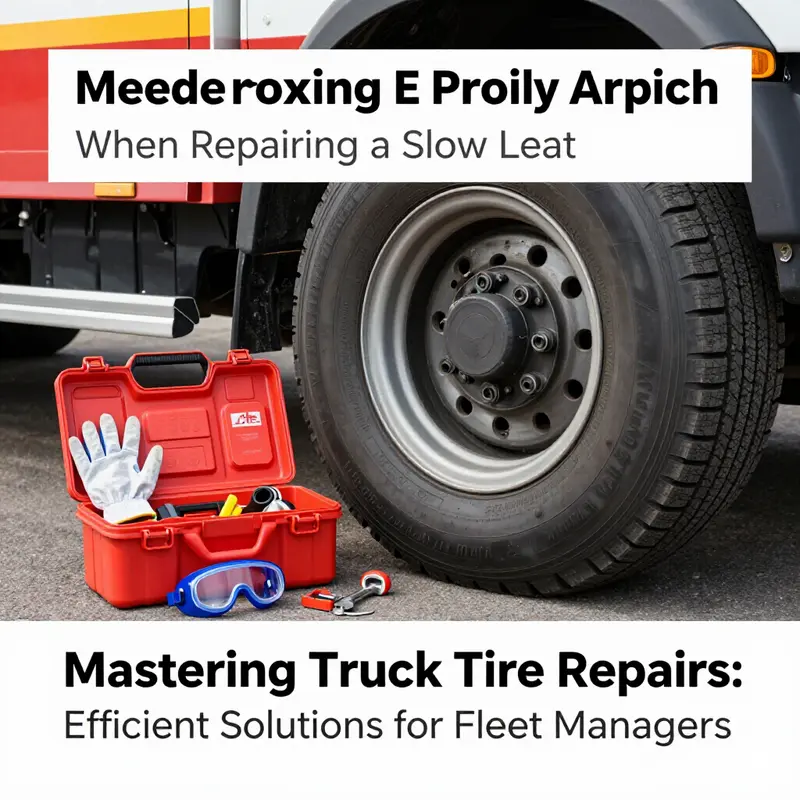
Tools and equipment also anchor safety. A high-quality, properly rated floor jack and jack stands are essential. A simple lift can fail under the weight of a truck, with catastrophic consequences. The correct tools—lug wrench, torque wrench, bead breaker, tire iron, and a reliable tire inflator—keep the operation steady and predictable. Before touching a single lug nut, verify that the jack points are sound and the stands are positioned to bear the vehicle’s weight securely. If any component shows signs of wear, corrosion, or damage, replace it rather than improvising. The value of prepared equipment cannot be overstated; it converts a potentially dangerous task into a manageable one and protects the hands, eyes, and torso from injury.
Pressure management is a core safety principle. Never attempt to work on a tire that is still pressurized. Depressurize fully before removing the wheel from the hub. A valve core tool can help release air swiftly, but the act itself must be supervised and deliberate. Even a momentary flare of pressure can send a wear-prone bead into a dangerous rebound, scattering debris and potentially injuring the operator. Visualize the air inside a tire as a store of energy that must be safely discharged before any breakdown of the containment occurs. This is not a step to skip or shorten; it is the line between controlled repair and a serious safety incident.
Personal protection is a small practice that yields large dividends. Safety glasses protect the eyes from flying particles or sharp metal edges—the kind of risk that becomes evident when a tire is being separated from the rim. Gloves shield the hands from pinches, cuts, or the gritty resistance of dirt, rust, and bead debris. Loose clothing, long hair, or jewelry should be secured away from the work zone to prevent entanglement with moving components or rotating parts. The emphasis here is not on dramatics but on prevention: a few well-chosen pieces of equipment and modest habits reduce the probability of a painful mishap and enable the job to proceed methodically.
Handling the tire and the rim is where the heels of the safety plan meet the realities of a heavy, stubborn assembly. The weight of a truck tire cannot be underestimated, and the rim edge presents sharp, unforgiving edges. Use proper lifting techniques and, when possible, mechanical assistance. A helper or a lift table can dramatically reduce the risk of back or shoulder injuries. When removing or installing the tire, stay mindful of the rim’s bead area. A stray tool or a sudden shift can lead to gouges or slippage that compromise the seal. The bead seat, the point where the tire bead meets the wheel, should be inspected for rust, corrosion, or debris that could hinder a proper seal. Any dirt or old sealant around the bead can become a culprit behind a slow leak. The cleaning process should be thorough and deliberate: use a suitable brush or scraper to clear away rust and old material, then wipe the area clean so the new sealant—or patched bead—seats evenly. If the rim is damaged, dented, or has holes, the risk rises substantially. It is not just a cosmetic issue; a compromised rim can prevent a safe, lasting seal and may require replacement rather than repair.
The decision to repair or replace is not a mere technical choice; it is a safety decision. For a slow leak caused by a puncture in the tread within the repairable range, a patch repair can be appropriate when performed by trained professionals who can assure the interior surface is properly prepared and vulcanized. For a leak at the bead, the process becomes more demanding. It may involve removing the tire, thoroughly cleaning the bead seat, and reseating the tire with bead sealant to restore the seal. In cases where the rim shows structural damage, the seal cannot be trusted, and replacement becomes the responsible option. The overarching safety message remains constant: repairs involving the tire body or the rim demand professional expertise, specialized tools, and controlled conditions. Attempting such repairs without the right environment and training increases the risk of a blowout, a wheel failure, or a catastrophic crash.
Even when the repair is within the scope of what a skilled driver can safely perform, adherence to a structured procedure matters for safety and for the repair’s longevity. After the tire has been reinstalled and inflated to the manufacturer’s torque specifications, the lug nuts must be retightened in the correct sequence. A star or crisscross pattern is standard practice because it ensures the wheel seats evenly against the hub and avoids warping the wheel or it becoming unbalanced. A torque wrench calibrated to the proper value is essential. Under-torquing can invite lug loosening under vibration and highway load; over-torquing can strip threads or distort the wheel studs. Once the wheel is securely fastened and the tire is at the correct pressure, the immediate post-repair steps are peaceful and methodical: perform a short, controlled test drive at a low speed while listening for unusual sounds and monitoring the feel of the steering and ride. If anything sounds off or the tire pressure shifts, stop and recheck the setup. The safety checks do not end with the test drive; recheck tire pressure again after the run, confirm the readings align with the recommended range, and confirm there is no ongoing leak.
The decision tree for a roadside fix versus a shop visit remains simple: if there is any doubt about the rim’s integrity, bead seating, or the interior patch’s reliability, seek professional assistance. The same applies when the leak source cannot be clearly identified or involves the bead seal or rim damage. A professional tire technician brings the proper tools, the controlled environment, and the experience to test and certify that the repair will withstand the demands of heavy-truck operation. Safety, in this chapter, is not a barrier to repair but a prerequisite that preserves the vehicle’s function and the operator’s well-being.
To support ongoing resilience, consider integrating maintenance planning that anticipates anomalies before they become emergencies. A practical step is budgeting for routine truck maintenance, which helps to cover unexpected issues like slow leaks and keeps you prepared for timely, safe interventions. For a framework that translates planning into action, see budgeting for routine truck maintenance. This approach reduces improvisation under pressure and reinforces safe, professional practice when a leak appears and safety hinges on careful decision-making and disciplined execution. As part of a broader safety culture, always pair your in-house precautions with credible safety resources and professional guidance when in doubt. For broader tire safety guidelines, refer to trusted safety resources such as NHTSA’s tire safety information. By prioritizing safety first and choosing the right path for repair, you keep the road safer for everyone and extend the life of the tire, the wheel, and the vehicle as a whole.
Road-Ready Judgments: Navigating When to DIY and When to Call the Pros for Slow-Leak Truck Tires
A slow tire leak on a heavy truck is a warning, not a nuisance. It asks you to evaluate risk, resources, and time. The choice between DIY tinkering and professional repair hinges on how the leak behaves, what part of the tire is affected, and how comfortable you are handling high-stakes maintenance. The road does not forgive a misstep, especially when a tire is carrying a heavy load at speed. Begin with a calm, methodical assessment, because the fix that seems simple at first can quickly spiral into a safety issue if the source is misidentified.
The first step is to identify where the leak is coming from. A thorough visual inspection on a flat, clean surface sets the stage. Look for a nail or embedded debris, any sidewall damage, cracks, or bulges that betray structural weakness. The tire bead area—where the tire meets the wheel rim—often hides a slow leak and can be overlooked in a quick glance. The most reliable confirmation usually comes from a soap and water test. Generously spray soapy water over the tire, including the tread, sidewalls, and the bead area. Watch for tiny bubbles forming at the leak site. A steady stream of small bubbles is the telltale sign of a slow leak. If the bubbles appear at the bead, you may need to separate the tire from the rim to inspect the bead seat more thoroughly. This is a job that requires careful handling and, often, specialized equipment, especially on a commercial truck.
Once the source is confirmed, the repair approach depends on exactly where the leak originates. A puncture in the tread, caused by a nail or sharp object, can be repaired with a patch from inside the tire if the hole is small and not too close to the sidewall. The clean interior, the patch, and the vulcanizing process create a durable seal. This is technically demanding work, and most fleets prefer to entrust patch repairs to a professional shop. A leak at the valve stem is typically a damaged or worn valve core. This is one of the few DIY-friendly fixes. Replacing the valve core is quick, inexpensive, and can be done with a basic toolkit. It’s essential to ensure the replacement seals properly because a loose valve core can lead to rapid deflation under load.
Leaks at the tire-to-rim seal, the bead area, are a frequent source of slow leaks and are often caused by dirt, rust, or a degraded bead sealant. Fixing this requires removing the tire from the rim to inspect the bead seat, clean the edge, and check for rim damage. A clean bead seat is critical for a reliable seal. After cleaning, reseating the tire on the rim and applying fresh bead sealant restores the seal. Bead seating must be precise; even a small misalignment can let air seep out. If the rim has dents or corrosion, the problem may be more than a sealant fix. In such cases, the rim itself may need straightening or replacement, and the tire should be repaired only after the rim is deemed sound. Severe rim damage is neither repairable nor safe to drive on; replacement is the safer option.
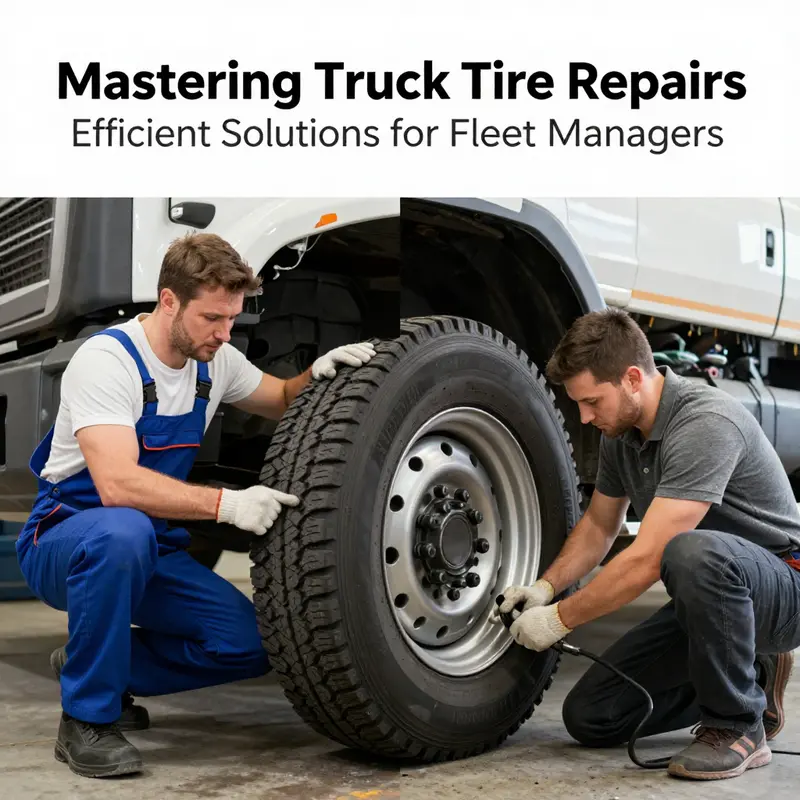
The role of the professional is clear in these scenarios. A trained technician brings the tools and procedures necessary to ensure a long-lasting repair. A typical pro approach uses equipment to carefully dismount the tire from the rim, locate the leak with precision, clean the interior surfaces, and apply a durable patch or plug in combination with proper vulcanization. The goal is a permanent fix that endures under highway speeds and heavy loads. This kind of repair demands adherence to standards, complete inspection, and pressure testing after the repair. A tire shop also evaluates the rim for hidden damage that might not be obvious during a roadside check. In contrast, many DIY options exist for smaller, less complex issues but come with caveats. Temporary sealants can stop a slow leak quickly, and puncture plugs may offer a stopgap solution. However, these methods carry reliability concerns, especially when the leak involves the sidewall, a critical area for structural integrity.
The decision to DIY should be guided by several factors. If the tire has been punctured by sharp objects, the leak is not near the tread center, or the object can be safely removed without enlarging the hole, a patch is still the best long-term solution—but only if you have the right interior access and methods. For the valve stem, a straightforward core replacement can be a viable initial fix. In all cases, the complexity increases dramatically when high speeds, heavy loads, or long service life is at stake. The safer and more reliable path, particularly for a commercial vehicle, remains a professional repair. Even when a DIY fix buys time, it is prudent to have the repair inspected by a professional to confirm its integrity and compliance with industry standards. The decision to pursue professional repair also aligns with broader fleet management goals, including fuel efficiency, handling, and road safety, all of which hinge on tire performance.
As you weigh the options, consider the broader maintenance context. DIY decisions should be supported by a clear maintenance plan and budget that accounts for the possibility you will need professional service soon after an initial fix. It’s helpful to view tire care as part of a disciplined routine rather than a one-off reaction to a stubborn leak. For readers who want to deepen their understanding of maintenance planning and in-house opportunities, exploring in-house truck maintenance can be a productive step. In-House Truck Maintenance provides a framework for evaluating what you can safely handle and when to bring in outside expertise.
Whatever path you choose, safety remains the priority. If a slow leak is suspected while driving, reduce speed, avoid highways, and move to a safe area. Once parked, activate hazard signals and set a warning triangle. Do not attempt to drive on a severely underinflated tire. The risk of a blowout is too great. The steps you take in the first minutes after identifying a leak shape the outcome of the repair. A measured approach reduces the chance of secondary damage, such as bead or rim harm, and preserves overall tire life.
Looking ahead, the question is not only how to fix a leak, but how to safeguard against future leaks. Regular tire maintenance, including inspection for embedded debris, sidewall cracks, bead sealant wear, and rim condition, helps catch problems before they escalate. Beyond individual tires, a fleet-wide focus on pressure management, load distribution, and routine maintenance reinforces road safety and efficiency. The practical takeaway is clear: while some minor fixes are within reach for a skilled technician or experienced driver, the robust, long-term solution for most truck tire leaks—especially those involving tread punctures, bead seals, or rims—comes from professional service. This is particularly true for commercial applications where tire integrity affects fuel economy, handling, and overall safety on busy highways.
For additional guidance and formal industry standards, readers can consult authoritative tire-repair guidelines from established sources. These guidelines emphasize proper procedures, correct installation, and thorough inspection after any repair. External resources can provide a useful benchmark as you assess your options and plan the next maintenance steps. https://www.bridgestone.com/en-us/truck-tires/technical-resources/tire-repair-guidelines
Guarding the Route: A Long-Term Blueprint to Prevent Slow Leaks on Truck Tires
In the world of heavy transportation, slow leaks are less dramatic than a blowout but just as costly. They undermine fuel efficiency, disrupt schedules, and creep into maintenance budgets as covert wear. The question, then, is not only how to repair a slow leak when you discover it, but how to build a lasting defense that makes slow leaks rarer and repairs less frequent. The answer lies in a holistic, long-term approach that blends technology, meticulous maintenance, and disciplined driving practices into a single preventive program. When viewed through this lens, tire integrity becomes less a reaction to trouble and more a continuous outcome of tested systems functioning in harmony.
The centerpiece of a durable prevention strategy is a Tire Pressure Monitoring System that tracks pressure and temperature in real time for every tire. A modern, properly configured TPMS does more than blink a light when a tire is low. It serves as an early warning system, alerting drivers and fleet managers to subtle pressure drops that may indicate a slow leak long before the tire reaches a dangerous threshold or a roadside emergency unfolds. When paired with fleet software, TPMS can automate maintenance scheduling, flag trends across multiple tires, and trigger proactive inspections. The value of consistent monitoring becomes even clearer when you consider the ripple effect: early detection reduces the risk of secondary damage, extends tire life, and minimizes the expensive downtime that comes with unexpected repairs on the road.
Alongside monitoring, there is a move toward more stable inflation gas—nitrogen—as a long-term companion to tire health. Nitrogen’s larger molecular size and lower permeability mean it escapes more slowly than standard air. In practice, this translates to slower gradual pressure loss, which helps maintain optimal contact with the road for longer periods and reduces the frequency of routine top-offs. It is not, however, a cure-all. Nitrogen cannot replace vigilance, proper inflation pressures, and timely inspections, but when used as part of a broader program, it reinforces the stability of tire pressure across the demanding cycles of long-haul service. The goal is not to eliminate all leaks instantly but to smooth out the pressure fluctuations that accumulate over miles traveled, enabling a more predictable maintenance cadence and fewer mid-route disruptions.
A rigorous maintenance and inspection program forms the backbone of long-term leak prevention. Every vehicle should follow a documented routine that covers befores and afters, not just at annual intervals. Regular visual checks remain essential: look for cuts, embedded objects, tread wear patterns, sidewall damage, bulges, and nails or glass that may have found their way into the tread. Beyond the eye, the mechanical health of the wheel and rim system must be prioritized. Wheel mounting torque cannot be left to chance; it must be tightened to the manufacturer’s specification with a calibrated torque wrench. Under-tightening invites wheel loosening and seal failures, while over-tightening can damage the rim or hub flange, creating a new set of leak sources. Valve stems deserve special attention. Worn or cracked stems can hide a leak that soap and water tests might miss until the issue grows. Where feasible, replacing rubber stems with more durable metal ones adds resilience against aging and environmental exposure. When new stems are installed, using a touch of lubricant or soap helps ensure a smooth, leak-free seating in tight ports.
The seal between tire and rim is another common origin of slow leaks, often arising from dirt, rust, or old bead sealant that interferes with a clean seal. A long-term fix in this area begins with prep work: removing the tire from the rim, thoroughly cleaning the bead seat with appropriate tools, and inspecting the rim for damage. If corrosion or dents are found, they must be addressed before the tire is remounted. In some cases, a bead sealant is reapplied to restore a reliable seal. For rims that show significant wear or structural compromise, replacement is the safer course. Driving with a compromised rim is not a risk you should take, as even a minor dent can propagate into a catastrophic failure under load and speed. The goal is a pristine, true bead seat that can hold pressure consistently through changes in temperature and road conditions.
The importance of a well-sealed bead also ties into broader practice: the cadence of inspections and the quality of components you choose. Inspect valve stems for cracks or corrosion; replace aging rubber with metal where practical; and routinely verify that the bead area is free of debris that could compromise seating. These steps weave into the fabric of an ongoing maintenance plan, shifting responsibility from episodic, catch-up repairs to a proactive discipline that catches problems before they escalate. A well-conceived maintenance program is not a burden; it is a financial safeguard. When teams document inspections, track outcomes, and schedule preventive tasks ahead of failures, the organization reduces expensive downtime and extends tire life across the fleet.
For fleets operating at scale, the human element becomes particularly significant. Driver behavior influences tire longevity as acutely as anything else. Gentle driving—avoiding potholes, curb scrapes, and hard cornering—reduces lateral stress on the tire sidewalls, preserves tread integrity, and diminishes the likelihood of impact damage that sews the seeds of slow leaks. Parking and loading practices matter too; plan routes and docking maneuvers that minimize contact with abrasive edges and avoid scraping the wheel rims against hard surfaces. When combined with a rotation schedule, these practices promote even wear across all tires, reducing the risk that a single, compromised tire becomes the source of a slow leak elsewhere in the system. A rotation program—carried out at sensible intervals, such as every few thousand miles or aligned with maintenance cycles—helps ensure that any residual weaknesses are detected early and that wear patterns stay symmetrical across the axle set.
Putting these elements together—the TPMS, nitrogen inflation as a stabilizing factor, a disciplined maintenance routine, rigorous rim and bead care, prudent driving practices, and strategic tire rotation—creates a comprehensive shield against slow leaks. The investment pays off in reliability, safety, and total cost of ownership. An effective long-term plan requires more than isolated fixes; it demands systems thinking. Data from monitoring devices informs inspections, which in turn guide parts replacement and service scheduling. The result is a feedback loop that continually tightens the wheel system’s integrity and reduces the frequency and severity of slow leaks over time. In practice, that means fewer roadside calls, less emergency downtime, and more predictable maintenance budgets that can be allocated to other safety and performance priorities.
To embed this approach into daily operations, fleets also benefit from formalizing knowledge and expectations around maintenance responsibilities. A documented, repeatable process ensures that every technician, driver, and supervisor operates from the same playbook. It also makes it easier to justify upgrades and investments, such as upgraded rims, more durable stems, or enhanced sealing materials, when the data clearly demonstrates risk points and return. When teams adopt a long-view perspective—one that values prevention as much as repair—the metric of success shifts from “can we fix this now?” to “how can we prevent this from becoming a problem again?” The difference is not merely philosophical; it is financially measurable and safety-critical. For organizations seeking to cultivate this mindset, a practical starting point is to link maintenance planning with budgeting in a way that reflects the true lifetime costs of tire systems, rather than treating them as recurring but separate line items. A simple, actionable way to begin is to integrate a budgeting mindset into routine maintenance planning and to explore resources that translate maintenance work into forecastable expenses and risk reduction. Budgeting for Routine Truck Maintenance is a useful reference for teams aiming to formalize these connections and to ensure that preventive measures stay funded alongside operations.
The path to fewer slow leaks is not a single fix but a concerted program that treats tire systems as integrated components of vehicle safety and reliability. By combining vigilant monitoring, stabilized inflation, meticulous sealing, proactive component replacement, disciplined driving, and regular rotation, the likelihood of persistent leaks declines markedly. This approach not only protects tires but also protects cargo, drivers, and the bottom line, creating a route that is safer, smoother, and more economical over the long haul.
Final thoughts
In conclusion, addressing slow leaks in truck tires is essential for efficient fleet management, ensuring safety, and minimizing operational disruptions. By mastering various methods to identify leak sources and applying the appropriate repair techniques, fleet and trucking company leaders can enhance the reliability of their vehicles. Furthermore, understanding the importance of safety precautions and the advantages of professional versus DIY repairs allows for informed decision-making. Finally, implementing long-term solutions will effectively prevent future leaks, allowing for smoother operations and improving the overall performance of your fleet. Prioritize tire maintenance as it significantly impacts the efficiency and safety of your operations.