Ensuring the security and functionality of truck bed boxes is paramount for fleet managers and industry operators alike. A malfunctioning spring lock can lead to loss of equipment, downtime, and increased operational costs. In this guide, we provide a thorough exploration of the critical steps involved in repairing the spring lock mechanism of truck bed boxes. From inspecting the lock mechanism to effectively cleaning and lubricating, adjusting latch positions, and ultimately replacing springs or assemblies, each chapter addresses a crucial aspect of maintenance that enhances the reliability of your trucks. Proper understanding and execution of these repairs will not only facilitate secure transportation but also minimize disruptions caused by lock failures.
Seeing the Spring Clearly: A Thorough, Integrated Look at Inspecting the Truck Bed Box Lock Mechanism
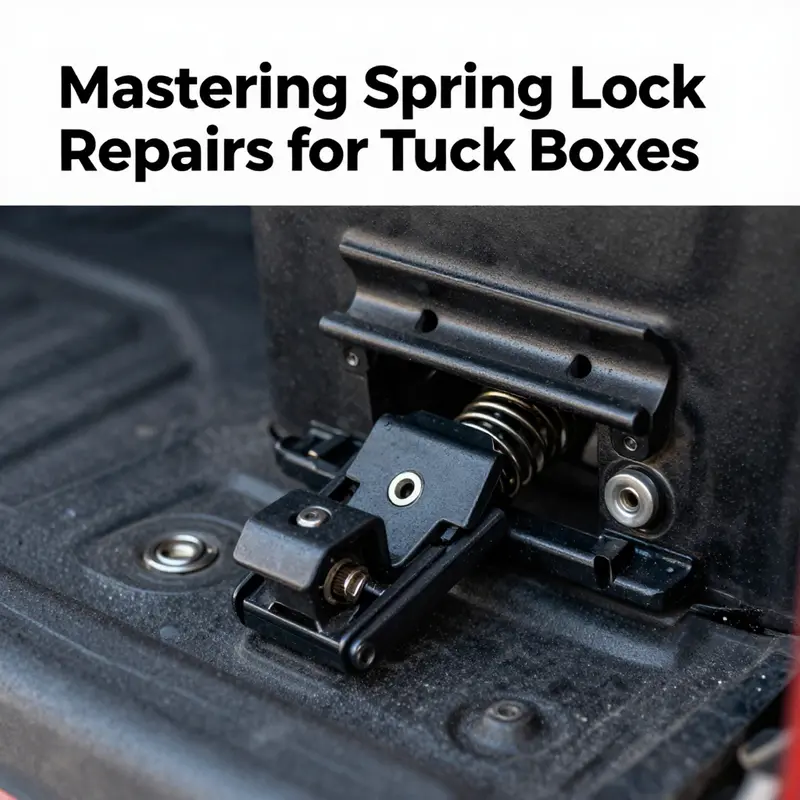
The spring lock that keeps a truck bed box secure is small, but its failure ripples through the day’s work. A latch that won’t catch, a lid that refuses to stay shut, or a box that only latches when you tug the handle—these symptoms point to a single truth. The mechanism within is either dirty, misaligned, worn, or occasionally damaged beyond simple adjustment. Repair begins with a careful, almost patient inspection. When you approach the job with curiosity rather than force, you can determine whether the fix is a quick clean and readjustment, or if a full replacement is required. The most effective repairs come from understanding the lock as a system: the spring, the core, the latch, the pivot points, and the mounting that holds everything in place. Each part influences the others, and the way they wear together tells a story about how the bed box has been used, what kind of load it has carried, and how well it has been treated over the years.
The first step is to open the bed box and observe. Look for obvious signs of trouble: a spring that looks bent, weakened, or detached; a lock core that seems seized or sluggish; or misalignment that makes the latch miss the striker every time. Dirt, rust, and grime are common culprits. They can keep moving parts from engaging smoothly and can hide more subtle damage beneath. While you inspect, keep a mental checklist of what you see and what you test. A thorough note helps you decide whether you should try a simple lubrication and realignment, or whether you’re facing worn components that need replacement. It also helps you explain the issue clearly if you need to consult a professional later on. Proactive documentation, in short, saves time and reduces guesswork later.
If the core or the spring feels tight in place yet reluctant to move, you may have a seized core. A seized core is not always a reason to panic, but it requires a careful approach. In many cases, the lock can be made to release by stabilizing the core and applying controlled pressure to disengage it. The goal is to free the mechanism without forcing components, which could cause cracks or chips that would weaken the entire assembly. One practical method is to secure the core in its upright position, with the opening facing up. This orientation helps gravity work with you as you attempt to move the latch and the handle or the release, giving you better feedback on whether the resistance comes from binding or from a more serious internal snag. If you have a soft mallet, a wooden or rubber one is ideal here. Tap gently on the side of the core while you carefully pull on the handle or latch. The idea is to encourage the core to shift just enough to release the hold it has gained, not to strike with force. Consistent, patient pressure is the key, because the lock is a small, tightly toleranced assembly, and the slightest misalignment can ripple into a larger problem.
Once the core releases, you can remove the lock body with a calm, methodical motion. This is the moment when your inspection deepens. Lay the pieces out on a clean surface and take stock of every component: the spring, the screws, the latch, the pivot points, and the seat where the spring rests. If any part shows wear, deformation, or corrosion, that part may be a candidate for replacement. A spring that has lost its tension or a latch that won’t sit neatly against its striker are two classic indicators that you’ve moved beyond simple cleaning and tightening.
Cleaning the parts is a step that often reveals what’s truly happening under the surface. With the lock body separated, wipe away oil, dust, and any rust that might have settled into the spring’s crevices or the latch’s tracks. Use gentle solvents if needed, followed by a dry cloth. Do not flood the mechanism with solvent, as excess moisture can lead to more corrosion. After cleaning, inspect each piece again. A clean part is a fairer test of fit and function. You might notice, for example, that the latch’s edge has become burr-ridden from excessive use, or that a small notch on the pivot is wearing unevenly. Such details guide your decision about whether to fix or replace.
Lubrication can restore smooth operation if the issue is sticking rather than structural. A light, compatible lubricant—often a silicone-based spray or a thin machine oil—can reduce friction on the moving parts without attracting excessive dust. The goal is to improve motion while leaving a dry, clean surface that resists dirt buildup. Apply sparingly to the spring’s windings, the latch’s contact surfaces, and the pivot points. Avoid over-lubrication; a heavy film on the exterior can attract dust and grit that accelerates wear. A well-lubricated lock often behaves like a new one, with a quiet, confident snap when the box closes and latches.
With the parts cleaned and lubricated, you can reassemble the lock body in the reverse order of disassembly. This reassembly is a delicate moment. If the spring was replaced or rotated during maintenance, ensure it sits in its seat and continues to push the latch toward engagement. A misaligned spring or an off-center latch during reassembly can doom the repair to failure in a few weeks. As you tighten the screws, you should feel a solid, stable engagement when you test the mechanism. The box should close with a clear, decisive latch, and the lid should stay shut when the box is in the locked position. If the mechanism still feels balky or if the latch isn’t catching, you’re likely facing a misalignment issue or internal wear that outpaces what cleaning and lubrication can fix.
Sometimes, the problem isn’t a mere misalignment or a sticking spring but a fundamental wear of the lock body itself. If the housing shows cracks near the pivot points, if the spring seat has become elongated, or if the latch has worn its contact surface to the point of misfitting the striker, replacement becomes the most practical path. A complete spring lock assembly designed for your specific bed box model is often the most reliable route. It ensures compatibility with the box’s mounting pattern, the striker’s position, and the door’s closing geometry. The replacement step is straightforward in principle: remove the old assembly entirely, transfer any nonessential parts if they are in good shape, and install the new unit in the exact same orientation. Then, test the mechanism with the box open, and finally with the box closed and locked. A well-matched replacement not only restores security but also smooth operation, saving time and frustration over the long haul.
Throughout this process, a broader awareness of the system helps. The lock is not a standalone part; it interacts with the bed box’s weather sealing, the lid’s weight, and the way the box is mounted to the truck bed. If you find that even after a replacement, the lid still binds or the latch appears to slip out of alignment, check the mounting hardware. Loose screws can allow micromovements that translate into misalignment under load. In many cases, re-tightening and rechecking the alignment after the initial test closes the loop on the repair. If, after several adjustments, the mechanism remains stubborn, it is prudent to step back and consider professional help. A locksmith or an auto parts technician with experience in cargo boxes can identify subtle issues—such as a bent striker or a misdrilled mounting hole—that would not be evident without a trained eye.
When you are confident enough to proceed on your own, remember the value of documentation. Take photos during disassembly and reassembly. Photos help you reproduce the exact order of parts, the orientation of the spring, and the position of any shims or spacers. This visual record is especially useful if you plan to replace parts in the future, or if you need to verify your work for a warranty claim. And when you select parts, prefer OEM-compatible or manufacturer-recommended replacements. The fit is critical for long-term reliability and safety, and the closer the match to factory specifications, the better the performance under varying weather and load conditions.
At this point, it’s useful to connect the practical steps you’ve learned to a broader maintenance mindset. Regular inspection is not a one-off chore but a habit. A quick once-over every few months—or after a heavy load season—can catch a developing issue long before it escalates into a failure. If you keep a simple routine, you’ll notice patterns: a spring that loses a little tension over time, a latch that drags slightly, or a mounting plate that shows signs of loosening. These early signals invite preventive action and minimize the risk of being stranded with a bed box that won’t close properly when you need it most. The goal is not to chase perfection, but to maintain reliable function with minimal disruption to your work schedule.
If you are still unsure after your inspection and attempts, seek professional help. A professional locksmith or an auto parts technician can perform a diagnostic with calibrated tools and experience that exceed a DIY inspection. They can confirm whether the spring is within tolerance, verify the latch’s geometry, and assess the mounting’s integrity. And if replacement is necessary, they can source a compatible assembly and complete the installation with precise alignment. This professional step, while adding cost, can spare you the downtime and risk of a botched repair that could compromise security and weather sealing for years to come.
To connect this chapter to practical learning, keep in mind a few consolidated pointers. First, the initial inspection is not a mere glance; it is a detailed assessment of how each part behaves, how it wears, and how it interacts with the others. Second, securing and freeing a stuck core should be done with gentle, controlled force, using upright positioning and a soft mallet rather than brute force. Third, when components reveal wear or deformation, replace them with parts that meet the bed box’s specifications and the vehicle’s environmental demands. Fourth, lubrication should be light and targeted, applied to the moving surfaces instead of the whole interior, to avoid attracting dirt. Fifth, reassembly requires careful orientation of the spring and latch to ensure they engage with the striker cleanly. Finally, do not hesitate to consult manuals or trusted tutorials that align with your box model and mounting configuration. These steps help create a repair path that balances reliability, safety, and practicality over the long term.
A practical way to expand your knowledge without committing to a full rebuild is to follow verified online guidance that mirrors the approach described here. For ongoing guidance and deeper dives into truck maintenance topics, the blog at mastertruckrepairllc.com/blog/ offers a repository of practical tips and illustrated explanations that echo the careful, hands-on spirit of this chapter. That resource can be a useful companion as you map out future repairs and preventive care for your truck’s cargo system. While the specifics of every bed box are unique, the core principles—careful inspection, controlled handling of the core and spring, precise alignment, and using compatible parts—remain consistent across most models.
In sum, inspecting the lock mechanism of a truck bed box is a disciplined, exploratory process. It asks you to observe closely, to think about how the parts fit together, and to decide whether the best path is cleaning and realigning, component replacement, or a complete assembly swap. The road-tested approach is to treat the lock as a small system with a big job: keeping your cargo secure, protecting its contents from the elements, and ensuring that the bed box behaves predictably when you need to load or unload. When you adopt that mindset, the repair becomes less about a single stubborn part and more about maintaining the integrity of the whole locking system. If results remain elusive after careful inspection and a measured repair, a professional touch can restore confidence and security with minimal downtime. And with proper documentation, careful reassembly, and a commitment to OEM-compatible parts, you extend the life of the lock and the reliability of your equipment for the many miles ahead.
External reference: For a broader look at managing a stuck lock mechanism beyond the truck bed box, you can consult this established guide: https://www.familyhandyman.com/article/how-to-fix-a-stuck-trunk-lock-mechanism/.
From Grime to Glide: Restoring the Spring Lock on a Truck Bed Box Through Cleaning, Lubrication, and Care

A truck bed box is a small fortress on wheels, and its spring lock is the quiet guardian of that fortress. When the mechanism works smoothly, you barely notice it. When it fouls, you notice everything: the door won’t stay shut, the latch sticks, and every whack with a hammer or wrench feels temporary and unsatisfying. Restoring the spring lock to reliable service is less about dramatic fixes and more about disciplined maintenance. The approach is simple in theory: inspect, clean, lubricate, adjust, and replace only what is necessary. In practice, you move through each step with a steady hand, knowing that the little spring sits at the heart of your cargo security. If you treat the lock with respect, it returns the favor by opening with a confident snap and closing with a reassuring snap back into place. The work is a blend of observation and patience, an exercise in understanding how the lock and its housing interact as the lid lifts and settles. And because a locked box protects more than just tools, the process deserves a careful, methodical rhythm rather than a rush to a quick fix.
Begin with a careful inspection. Open the box and take a long, slow look at the lock housing, the latch, and the mounting plate. The spring itself is usually tucked inside the lock body, but you can often see the signs of trouble by watching how the latch moves in relation to the striker on the lid. Look for visible damage: a broken or bent spring, a latch that sits high or low relative to the striker, or misalignment that causes the latch to rub rather than engage smoothly. If the box has seen salt air, road grime, or a lot of vibration on rough roads, dirt and rust can creep into the keyway and the pivot points. While you examine, take note of how the parts interact when you operate the handle or key. A difference between the action of the spring and the feel of the latch can point to where the problem lies. If you find obvious damage, you’re weighing replacement versus repair. A deformed housing or a cracked hinge area often means replacement rather than trying to coax life back into a worn part.
The next stage is cleaning, a step that can liberate a stubborn mechanism more than any amount of spraying. Clear away loose dust with a soft brush, then use a can of compressed air to dislodge debris from the crevices around the lock body and the keyway. Be mindful of the small parts; a gust of air can spin them out of place if you aren’t careful. After brushing and blowing, wipe with a clean, lint-free cloth to remove surface grime. Dirt is the adversary of smooth operation; removing it reduces friction and lowers the risk of future sticking. Do not soak the lock or the surrounding metal. Water can invite rust and swell parts that were otherwise in good shape. If you see stubborn grime in the keyway, a careful, gentle amount of non-corrosive cleaner can help, but avoid leaving any moisture behind. The goal is a dry, clean environment for the next step.
Lubrication is where the lock begins to glide rather than grind. The best lubricants for a spring lock on a truck bed box are silicone-based sprays or dry Teflon lubricants. Oil-based products may seem to ease movement at first, but they attract dust and grit over time, turning into a magnet for more clogging. Apply a light coat to the moving parts—particularly the spring seats, the latch pivots, and the inner surfaces of the housing where metal rubs metal during operation. A few careful bursts of spray, followed by a cycle of the latch and handle, helps distribute the lubricant evenly. Then wipe away any excess. Your aim is a film that reduces friction but doesn’t pool into the crevices where dirt can accumulate. If you’re working with a key-operated lock, insert the key and work it in and out several times after applying lubricant to the keyway. The motion helps distribute the lubricant through internal channels that the eye can’t see.
At this point, if the lock begins to behave better, you have confirmed cleaning and lubrication were the right moves. Yet not every issue resolves with oil and polish. If, after cleaning and lubrication, the latch still binds, or if the action remains uneven or cagey, you must consider alignment and the possibility of a deeper fault. Misalignment is a frequent culprit in spring-lock problems. The lock mounting plate on many boxes uses elongated or slotted holes to allow small adjustments. With the box open, loosen the mounting screws just enough to let the lock shift by a millimeter or two. Then test the latch against the striker on the lid. You want the latch to meet the striker cleanly, with no binding, and you want the lock to engage without requiring a twist of the wrist or a bounce of the lid. If you tighten too much, you risk overtightening and creating a new alignment issue. Small adjustments can make a large difference, especially in older boxes where wear has accumulated over years of use and exposure to the elements. Re-tighten the screws and test several times: close the lid, latch, open again, and listen for a crisp, unambiguous click.
If the lock still refuses to cooperate after careful cleaning, lubrication, and alignment, the spring may have lost its tension or the lock’s internal components may have worn to the point where the mechanism cannot reliably perform its function. Replacing the spring or the entire spring assembly becomes necessary. This process is a step deeper into the hardware’s interior. Start by removing the lock housing, which is typically secured with a handful of screws. Keep track of the screws and the order of the parts so reassembly happens without guesswork. Inside, you’ll find a small coiled spring seated in its seat. Carefully extract the old spring, noting its orientation and whether any special caps or pins accompany it. Install a new spring of the same size and strength, ensuring its ends seat properly in their respective grooves. Reassemble the lock in reverse order, paying close attention to the spring’s position as you reinsert the housing. A misaligned spring can immediately cause misbehavior once the assembly is back in service. If you suspect the housing is stretched or cracked, or if parts wear out quickly after a replacement, evaluate whether the lock body itself has become the weak link and needs replacement with a compatible unit designed for your specific truck bed box model.
Alongside the mechanical checks, inspect for any internal damage that might not be visible at a glance. A cracked housing, a worn pivot, or a damaged spring seat can thwart even the most deliberate repair. If you find any cracks around the pivot points or a rough, worn seat where the spring rests, replacement becomes the safer option. A new lock assembly designed to fit your box brings reliability that a field repair cannot guarantee. Don’t overlook the importance of matching the replacement to your box’s model and to the mounting pattern. Ill-fitting hardware invites repeated issues and may compromise security rather than improve it.
Safety remains a steady undercurrent through every repair. Park on a flat surface with the engine off and the keys out of reach. Works like this invite small mechanical movements, and slack can cause sudden shifts. Wear eye protection to guard against loose fasteners or unexpected snaps. If you’re disassembling the lock to replace internal components, keep a tray or magnetic mat handy to catch small springs, pins, and clips. It’s far easier to reassemble when nothing has rolled away to a dark corner under the workbench. Photos taken at each stage can become a lifesaver, helping you recall how pieces oriented themselves before disassembly. A simple set of reference photos reduces the risk of misplacement and speeds up reassembly, especially if you pause to step away and return later.
Though the repair path can be navigated with a careful hand, it is not a universal remedy. Some owners find that persistent sticking or failure to engage properly is a sign that the box’s overall mechanisms are showing their age. In those cases, replacing the entire lock assembly—rather than chasing after internal components—can deliver a longer, more reliable service life. If you opt for a replacement, verify compatibility with your box’s model and with the lid’s striker geometry. The goal remains a clean, decisive engagement that does not require wrestling with the latch or twisting the lid to coax it shut. A well-functioning lock should feel almost effortless in operation: you turn a key or press a latch and the lid releases or latches with the familiar, decisive sound.
Maintenance is the best insurance. Once you restore the spring lock to proper function, adopt a simple schedule that keeps dirt at bay and wear to a minimum. Clean and lubricate every six to twelve months, depending on how often you use the box and the environment in which it operates. Harsh conditions—dusty construction sites, salty coastal air, or frequent exposure to rain and mud—may demand more frequent attention. Keep an eye out for subtle changes: a faint grind in the latch, a reluctance to engage, or a lid that closes with a thunk rather than a smooth snap. Even small changes deserve a check, because they may foretell a future failure if left unaddressed. Consistency in care compounds over time, preserving the lock’s efficiency and the box’s security.
If the repair feels beyond your comfort zone, or if the problem persists after your best efforts, seek professional help. A qualified auto locksmith or a truck accessory repair service can diagnose worn components, confirm alignment, and ensure a correct replacement that preserves the box’s integrity and weather resistance. This is not a failure of effort but a prudent step when the risk of misassembly or improper sealing can affect cargo protection. In any case, consult the manufacturer’s manual or the replacement part’s installation guidelines to avoid incompatibilities that could undermine the lock’s performance.
For owners who want to stay proactive, a note on proactive maintenance can be helpful. A tidy, well-lubricated lock is easier to disassemble later, which reduces the chance of damage during future service. Photograph the setup before disassembly and again after reassembly. Keep a small, labeled container for forgotten screws and small parts. When you have a plan and the right tools, the task becomes repeatable rather than daunting. This mindset—treatment, not improvisation—lets you approach future maintenance with confidence and keeps your truck bed box in service when you need it most. If you want broader context on maintenance routines that extend beyond the lock itself, the MasterTruckRepairLLC blog provides practical perspectives on routine upkeep and preventive care. MasterTruckRepairLLC blog.
What all this adds up to is a practical philosophy: small, deliberate steps taken with care can keep a crucial security feature reliable for years. The spring lock is a simple device, but it has a personality shaped by its environment and its history of use. It learns from clean air, smooth motion, and a little patient attention. Your approach to restoring it—inspection, cleaning, lubrication, and precise adjustment—should reflect that philosophy. The aim is not to grind the mechanism back into a pristine factory condition but to restore its balance so it performs predictably under the daily pressures of work and weather. When you achieve that balance, you gain confidence that the box will open and close with the same assurance you use to secure the rest of your equipment. The pocket of effort you invest in the lock now pays back in years of dependable service, fewer unexpected jams, and less frustration in the field.
External resource for further guidance: https://www.carsaver.com/truck-bed-box-lock-repair
Precision in the Latch: Aligning a Spring-Loaded Truck Bed Box for Reliable Closure
A spring-loaded lock on a truck bed box may seem like a small component, yet it governs access to the cargo you rely on every day. When this latch starts to misbehave, it isn’t just an annoyance; it can compromise security, invite water or dust into the box, and force you to double-check hinges and latches every time you close the lid. The fix often lies in a careful, deliberate alignment of the latch with the striker plate on the bed lid. Reaching that alignment requires a calm, methodical approach, a handful of common tools, and a tolerance for a bit of tinkering. Rather than rushing to replace parts or abandoning the box to the weather, you can bring it back to proper operation by working through a sequence that centers on the latch position itself. In many cases, a precise adjustment will restore a solid, dependable closure without the need for more invasive repairs.
The first step is a thorough, patient inspection. Open the box and give the latch mechanism a close look. Examine the latch base and the mounting plate, paying particular attention to the elongated adjustment holes. These holes are designed to accommodate small changes in the latch’s position, allowing the latch to meet the striker plate on the bed lid accurately. Look for any obvious signs of wear: a base that looks cracked or stressed, a latch that sits unevenly, or a spring that appears relaxed or misaligned. Dirt, rust, or dried lubricant can also cause a latch to stick or fail to engage. As you inspect, imagine the path the lid takes as you close it. If the lid doesn’t travel squarely toward the latch, or if the latch doesn’t engage cleanly when the lid is fully shut, you have the two most telling signs of misalignment.
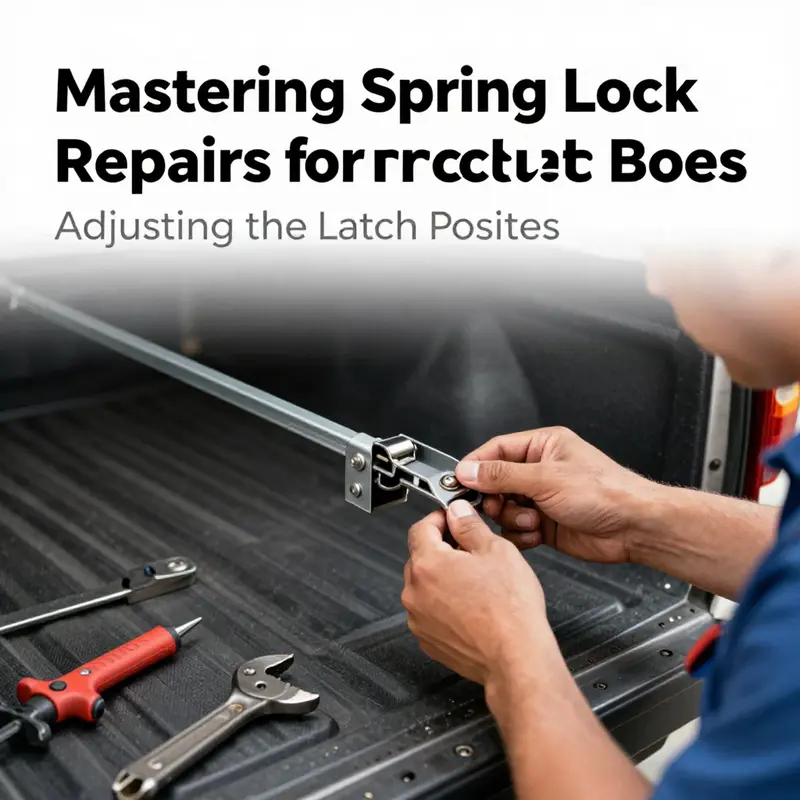
With the diagnostic picture in mind, you can begin the adjustment itself. The goal is not to force the latch into place but to coax it into proper alignment with the striker. Start by loosening the mounting screws just enough to allow a small amount of movement. You don’t need to remove the screws entirely; a few turns of the wrench will do. Once the screws are loose, test the latch by moving it slightly inward or outward. Make small, incremental adjustments and then retighten the screws just enough to hold the new position. The aim is to achieve a clean, direct path for the lid to close and for the latch to grab the striker with a satisfying, secure “thud.” If the latch is engaged but the lid still closes with hesitation or leaves a small gap, continue refining the position.
As you adjust, keep the striker plate in view. The striker is the metal piece mounted on the bed lid that the latch grabs when the lid closes. Misalignment between the latch and striker is a common culprit, especially after a jolt or a period of rough use. The adjustment process may require moving the latch slightly toward or away from the striker, or altering its angle so that the latch has a direct route to engage. After each micro-adjustment, close the lid and listen for a decisive, solid closure. A true engagement usually produces a distinct, firm sound—a telltale sign that the latch is meeting the striker squarely and the spring is taking up the tension properly. If you hear catchiness, grinding, or a soft, inconsistent snap, pause, and re-check the alignment. A good latch should feel quiet and confident, with the lid staying shut under typical bumps and vibrations.
Even when the alignment seems correct, it’s wise to check for other issues that could undermine the latch’s performance. Internal damage or wear inside the latch housing can negate alignment efforts. If the mechanism won’t hold despite precise positioning, the problem may lie in the spring itself or in a fatigued latch component that has lost its resilience. In such cases, you may need to disassemble the latch to inspect its internal parts. Before you do, prepare a clean, organized workspace and keep track of every screw and small piece. A simple trick to help reassemble later is to take photos during disassembly. This visual record can save time and prevent mistakes when you put the unit back together.
If the internal inspection reveals a damaged spring, replacement becomes the sensible course. Remove the lock housing carefully, noting how the interior parts sit in relation to one another. Springs are typically compact and coil-shaped; you’ll need to extract the old spring and install a new one that matches the original size and force rating. Replacing the spring is delicate work. Do not force components beyond their natural range. After installing the new spring, reassemble the lock exactly as you found it, ensuring the spring seats properly on its pin or seat, and that the latch rotates freely without binding. A careful reassembly reduces the risk of a future misalignment and helps ensure consistent engagement with the striker.
However, even with a fresh spring, a latch can fail to function if other components have worn or cracked. Pivot points—where the latch rotates—are especially susceptible to wear under repeated use. If the lock body or the latch itself shows visible wear, or if the latch binds during movement, it may be more cost-effective to replace the entire lock assembly with a compatible unit designed for your truck bed box model. In that scenario, the replacement should mirror the original mounting pattern, keeping the same hole spacing and screw size so you don’t have to modify the surrounding structure. When installing a replacement, re-check alignment by closing the lid slowly and feeling for the initial engagement. A well-matched replacement tends to deliver consistent operation from the first use.
Throughout this process, it helps to maintain a clean pathway for the latch. Dirt and corrosion can accumulate in the elongated holes or on the striker plate, creating micro-obstacles that mimic misalignment symptoms. A brief cleaning session between adjustments can help ensure that the latch moves smoothly and doesn’t seize when you close the lid. A light application of a silicone-based spray or a small amount of light machine oil on the moving parts can reduce friction. The key is restraint: a drop or two for the latch’s pivot and the spring seat is plenty. Excess lubricant can attract dust, dirt, and grit, which might eventually impede the mechanism’s operation.
As you refine the latch alignment, keep in mind that the objective is not merely to achieve an audible closure but to guarantee long-term reliability. A properly aligned latch closes with the lid staying firmly shut through typical road conditions, weather, and cargo movement. When you test, don’t perform a single trial. Close and reopen the lid several times to confirm that the latch seats consistently and that the striker plate remains engaged across multiple cycles. If you observe any looseness, rattling, or changes in the lid’s travel path, step back to the adjustment stage and refine the position again. If, after careful alignment and a few tests, the latch still fails, revisit the interior condition, as this is often the bottleneck.
The practical takeaway is a measured approach: align, test, adjust, and test again. This cycle should be completed with both hands free to manage the lid’s weight and the latch’s movement, especially if you’re working on a box mounted on a higher truck bed. In some cases, the entire assembly may be slightly offset by mounting hardware, or the striker plate can shift because of a loose lid hinge. If you suspect misalignment beyond the latch, inspect the lid’s mounting frame and the bed box’s mounting surface. Tighten any loose screws on the base and ensure the box sits square on the bed rails. A box that sits unevenly can place unusual stress on the latch, causing intermittent closure problems that look like a misalignment issue.
When the adjustment finally yields a reliable closure, make a practice of documenting the changes you made. A simple note or a photo record can be a valuable reference should you encounter this problem again. If you intend to preserve your knowledge for future upkeep, you can also share this method with others who might face the same challenge. For more hands-on maintenance guides, see the mastertruckrepairllc blog.
In the broader scope of vehicle maintenance, the latch alignment story underscores an essential principle: many mechanical hiccups stem from precise geometry rather than dramatic failures. A tiny shift in the latch’s position, a worn pivot, or a crusted striker plate can derail a perfectly good mechanism. The ability to diagnose and correct these issues with basic tools is a valuable skill for anyone who owns a truck with a bed box. It empowers you to extend the life of your equipment, keeps cargo secure, and reduces the likelihood of unexpected damage from a lid that won’t stay closed. The experience also reinforces the value of patience and methodical work in automotive repair. Rather than rushing to replace parts at every sign of trouble, taking the time to verify alignment and inspect related components pays dividends in reliability and cost.
If you’re curious about how this approach relates to other truck maintenance challenges, you will find parallels in the way small adjustments can affect larger systems. The same mindset—careful inspection, incremental changes, and thorough testing—can be applied to hinges, latches, seals, and even wiring that interacts with moving parts. The art of repair is often about reading behavior: listening for the right sound when the lid closes, watching for the exact path of movement, and noticing when a part doesn’t move as smoothly as it should. In practice, this translates into a steady, iterative process rather than a single, dramatic fix. By embracing that process, you gain confidence in your own ability to keep your truck and its cargo secure, year after year.
External resource: How to Fix a Truck Bed Latch That Won’t Stay Closed.
Beyond the Latch: Replacing the Spring Assembly to Restore a Truck Bed Box Lock

A spring lock on a truck bed box is a small yet critical component that governs secure closure and reliable operation. When the spring wears or the assembly becomes misaligned, the latch may hesitate, the lid may not close with a clean snap, or the box may feel springy in use. Replacing the spring or the entire spring assembly is often the most robust fix because it restores consistent force and proper geometry. This chapter outlines a practical, field-friendly replacement that emphasizes compatibility, safety, and long-term performance.
The spring’s role is to supply the returning force that centers the latch and gives the striker a reliable engagement. Fatigue, corrosion, or seat wear can reduce tension or alter alignment, leading to unpredictable closure. In many designs, replacing the whole spring assembly is the simplest path to a durable repair since it preserves the correct fit between spring, latch, and housing.
Assessment and planning: Open the bed box and look for obvious defects: broken coils, visible corrosion, or deformed spring seats. If mounting holes are elongated or pivots show wear, plan for replacement. Identify the correct parts by model number or precise measurements; OEM components fit most tightly, while aftermarket parts require careful comparison to the original specs.
Replacement steps: detach the lock mechanism from the box while keeping fasteners organized. Remove the old spring assembly and any retaining clips or pins. Install the new spring assembly, align with the seat and pivot, and reinstall clips or pins. Reassemble the lock housing and remount it to the bed box, checking that the latch lines up with the striker before tightening screws.
Testing and fine-tuning: operate the lid several times without cargo to confirm smooth travel and crisp engagement. If binding occurs, nudge the mounting plate or re-check alignment; elongated holes may offer small adjustments. Retighten fasteners after each adjustment and re-test until operation is consistent.
Maintenance reminders: after installation, apply a light lubricant to moving parts—latch, pivot, and spring seat—and avoid heavy lubrication that can attract dust. Keep the interior of the housing clean and dry, and document the repair for future reference. A correctly installed spring assembly should give years of reliable service under vibration and weather.
If you want to place this work in a broader maintenance context, see related articles from MasterTruckRepair for bed-box upkeep and spring-related guidance for latches and hinges.
Final thoughts
Maintaining the spring lock mechanism of truck bed boxes is essential for ensuring security and operational efficiency. By following the detailed steps outlined in this guide, fleet managers and trucking professionals can minimize downtime and enhance the functionality of their truck bed boxes. Regular inspection, cleaning, lubrication, adjustment, and timely replacements can prevent lock malfunctions that lead to significant losses. This proactive approach to maintenance will not only bolster security but also extend the lifespan of your truck bed boxes, ensuring they remain a reliable asset in your logistics operations.

