The proper functionality of truck doors is pivotal for fleet operations, impacting both safety and efficiency. When faced with sprung truck doors, it can lead to operational disruptions and added costs. Identifying and addressing the issue promptly is crucial for maintaining the integrity of your fleet. This article breaks down the comprehensive steps necessary to diagnose, access, inspect, and replace truck door springs for effective repairs. By following these structured approaches detailed in the subsequent chapters, fleet managers and operators can ensure their fleet remains operational and secure, ultimately enhancing overall productivity.
Diagnosing a Sprung Truck Door: From Faulty Tension to Smooth Closure
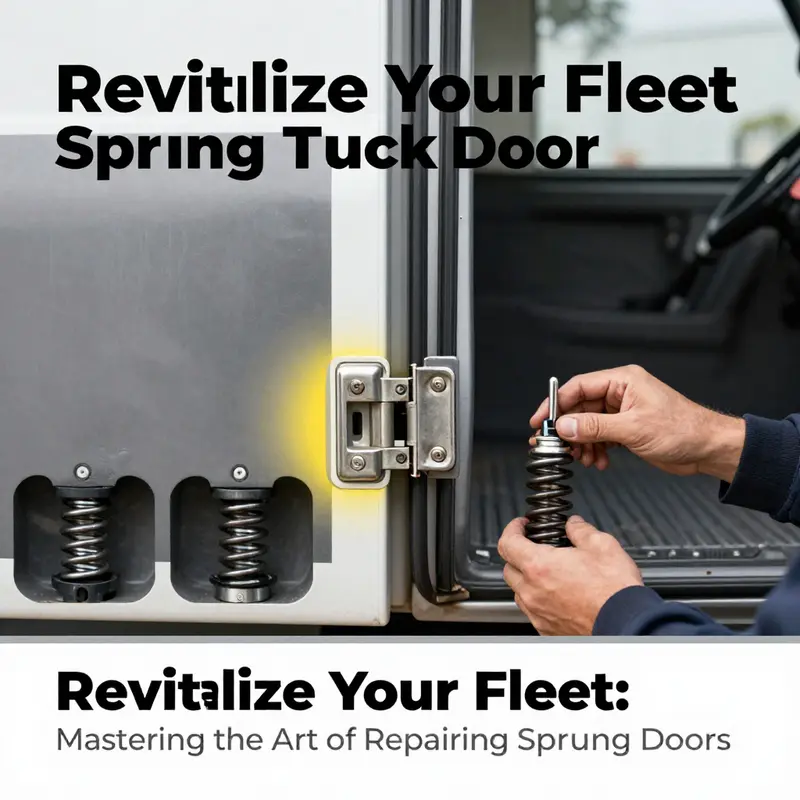
When a truck door starts to sag, fail to stay open, or slam shut with little warning, the culprit is often a compromised door spring. The spring in a sprung door controls the weight and position of the panel as it opens and closes. Over time, vibration, moisture, and repeated cycles can soften the spring, cause it to elongate, or even fracture a coil. Before you reach for a repair kit, you need to read the door as a system rather than as a single component. A sagging door is not just a nuisance; it signals a shift in the balance of the hinge mechanism that can stress the latch, strike, and frame. Diagnosis is the first honest step in any repair, because the wrong fix can compound wear or create a safety hazard.
To begin, observe several practical symptoms. Does the door begin to drop the moment you lift it, or does it slowly settle as if the springs have forgotten their job? If the door comes to rest at an angle or refuses to stay in the fully open position, the spring likely lacks proper tension or has a compromised connection. A door that feels unusually light when you push it, or one that resists opening, also points to the same issue. Visual inspection can confirm the suspicion: a spring that shows obvious cracks, a coil that has stretched too far, or corrosion along the wire path. If the spring appears broken, severed, or terribly rusted, replacement is not optional but necessary. If you notice only rust or slight deformation, you may delay the full replacement by treating the hinge and spring path with cleaning and lubrication, understanding this is a temporary measure rather than a cure.
With symptoms in hand, prepare the workspace and gather the tools. You will need a basic set of hand tools: a socket wrench or spanner, screwdrivers of both flavors, pliers, and a replacement door spring matched to the original’s length, diameter, mounting style, and tension rating. The emphasis on matching is important because too much or too little tension will force the hinges to work harder, shorten their life, or fail to hold the door in the desired positions. A can of penetrating oil can help free any stubborn fasteners or pivot points, while a light lubricant or silicone-based grease will keep moving parts from sticking in the years ahead. Personal protective gear is essential because the work involves springs under tension and confined spaces inside the door. Gloves and safety glasses protect hands and eyes from pinch points and flying debris if a component shifts unexpectedly.
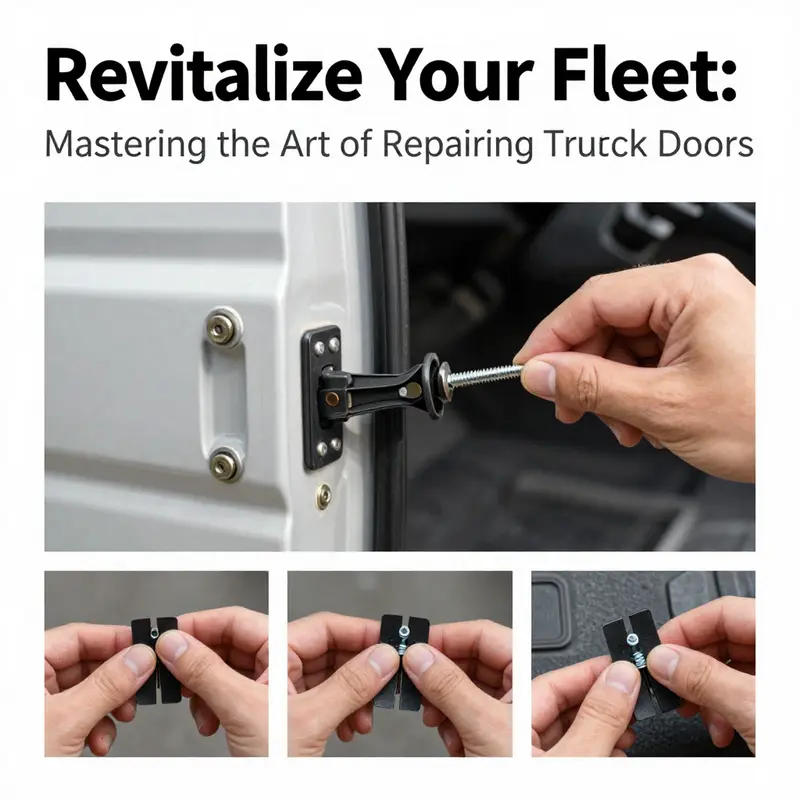
Accessing the door’s innards is a straightforward but delicate operation. Open the door fully to expose the interior panel. Work patiently to remove the panel; this usually means backing out screws from the armrest, the door handle trim, and any decorative pieces. A plastic trim tool helps lift the clips without scoring the paint. When the panel is free, you’ll see the hinge assembly and the spring or springs tied into the overall mechanism. In many trucks, the spring sits near the top hinge or tucked into a channel inside the door frame. Do not force anything; if a clip resists, re-check the fasteners rather than prying at the skin of the door. As soon as the panel comes away, you can approach the spring with a clearer view of how it is anchored and how it routes from the frame to the door.
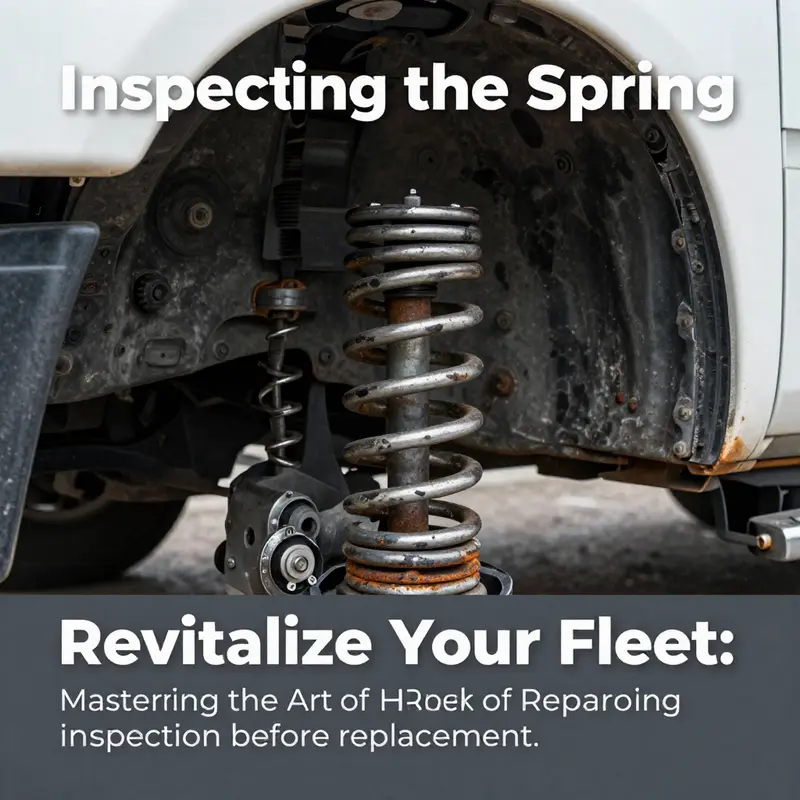
A careful inspection of the spring follows. Look for signs of functional fatigue: cracks across the coil, an elongated wire, or a spring that has lost its round, uniform shape. Rust is a common enemy, particularly in vehicles that spend time in damp or salty environments. Check that the spring remains connected to both its mounting points and that nothing has shifted out of place. A compromised connection is often the source of the problem; even a perfect spring can fail to do its job if one end has come loose. If you discover that the spring is broken or severely stretched beyond its intended tolerance, plan for replacement. If the spring shows only minor wear or surface rust, a careful cleaning and lubrication can restore basic function and slow further deterioration, but you should still monitor the door closely for any signs of recurring issues.
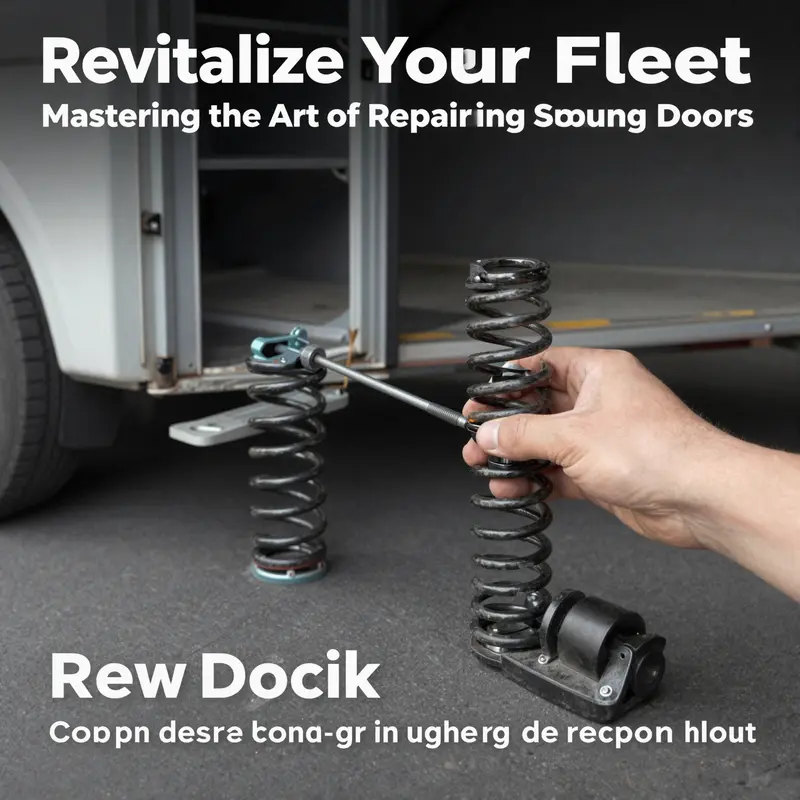
Replacing the spring, when necessary, demands precision and respect for the stored energy in the component. Begin by releasing any residual tension safely and removing the old spring from its anchors. Take careful note of how the spring is routed; a wrong path is a frequent cause of post-repair failure. Attach the new spring first to the frame or hinge bracket, then guide it through the door mechanism toward the opposite anchor. Finally, secure the other end. The goal is to restore a balanced pull that holds the door in an open or closed state as intended. After installation, inspect the alignment: the spring should lie flat with no twists or kinks along its path. If it appears bent or misaligned, disassemble and reposition, as a misrouted spring can bind the hinge and create wear. Once the spring is in the right place, reassemble the interior panel, making sure clips seat properly, wiring is clear of moving parts, and no fasteners are over-tightened.
Lubrication follows reassembly. A small dab on the spring’s contact points and on the hinge pins reduces friction, which in turn lessens future wear and rust. The lubrication should be light and compatible with metal-on-metal contact, avoiding any thick compounds that can attract dirt. After everything is back together, test the door thoroughly. Open it to a full extension and let it drop into its supported position, or hold it open at a chosen angle if that is its normal habit. Then close it and confirm a firm, controlled latch with no sudden slams or wobbly, uneven movement. Repeat several times, listening for any unfamiliar noises or feeling for vibrations that weren’t there before. If the door still seems off, double-check the spring’s termination points and track the route again to ensure nothing is pinching or misaligned.
A practical reminder to keep repairs realizable is to ensure the replacement spring matches the original in length, diameter, material, and tension rating. Using a spring that deviates in any of these core characteristics can set up a cascade of problems: increased wear on hinges, accelerated latch wear, and an unsettled door that never quite finds its place. When the task reaches the edge of your comfort zone, or when the spring’s tension is unknown, it is prudent to seek professional guidance or consult the relevant service manual that corresponds to the truck model you own. The path from diagnosis to repair is a careful, measured journey, not a rush to a quick fix.
For readers who want a broader frame of reference on truck maintenance, deeper documentation can be found in related maintenance resources. In the spirit of practical, hands-on learning, a trusted route to expand your knowledge is to explore in-house discussions and maintenance guides such as Turnage Sons in-house truck maintenance. This resource can be helpful as you evaluate your overall door repair project within the wider context of regular upkeep. For a broader reference on parts and installation details, external resources provide technical depth beyond the hands-on steps; see the external door hardware guide at https://www.autopartswarehouse.com/ for diagrams and part compatibility that can help with precise identification and model matching.
Foundations First: Thorough Preparation Before Repairing a Sprung Truck Door

When a truck door won’t behave as it should, the urge to dive straight into the fix can tempt you to rush. The most durable repairs begin in the preparation phase, where you set safety, accuracy, and clarity as the guiding principles. The goal is not to complete a repair in this step but to lay the conditions for a clean, precise fix that will hold up over time. This phase helps you understand what is truly wrong, which parts are involved, and how best to approach the job so the door operates smoothly once you are done.
Environment first. Park on a flat, stable surface with the engine off and the parking brake engaged. A level stance helps you notice how weight and balance affect the door, and it prevents misreading the cause of a problem. Clear the area around the door. Remove tools and clutter to avoid snagging or dropping parts. A tidy workspace reduces the risk of losing small pieces during interior panel work.
Safety is the overarching priority in preparation. Before you touch metal, disconnect the battery to prevent accidental engagement of electrical components. This is especially important for doors that share wiring with power windows, central locking, or electronic latches. Even if the door uses a simple mechanical latch, hidden cables can be damaged if you rush. With power isolated, you can work with a calmer mindset and avoid stray sparks or shorts.
A well prepared toolbox accelerates diagnosis and protects parts. Gather the tools you will need to inspect and work on the spring and its mounting points: a wrench set, a socket set, screwdrivers, pliers, and a rubber mallet. Keep spare fasteners and brackets within reach. Include penetrating oil for corroded fasteners and a light lubricant for hinge surfaces. Wear protective gloves and safety glasses to guard against sharp edges and rust particles.
Inspection is a diagnostic habit. Look for bent metal around the hinge area, rust on the spring, or wear on mounting points. Check the spring path for twists or kinks and verify that the spring remains engaged with both the door and the frame. A visibly damaged spring usually means replacement, but rust or seizure can distort movement even if the coil is intact. Inspect the hinge brackets and the latch pathway as misalignment there can masquerade as a spring problem. Decide early whether you will replace just the spring or also address a hinge, bracket, or anchor point.
Translate observation into a plan. If the door hangs oddly but the spring seems intact, you may need hinge alignment or tension adjustment rather than a full spring swap. If the spring shows fatigue or cracks, replacement is necessary. Map the spring route on paper or in your notes and note any unusual bends to avoid misrouting during reassembly. This documentation saves time and helps prevent interference with window glass, weatherstripping, or the latch.
Protect surfaces and finishes. When removing interior panels, use a plastic trim tool rather than a metal tool where possible. A rushed pry can crack a panel or nick paint. Use the rubber mallet judiciously to align components without hammering. Reassemble with the same care you used when taking it apart. A shielded interior panel protects the door’s insides and keeps moisture and dust from causing future issues.
Plan for the next steps. A clear sequence from panel removal to spring inspection to hinge and bracket evaluation guides your work and reduces detours. If you want to verify broader safety practices, consult reputable guidelines. For vehicle maintenance resources, the National Highway Traffic Safety Administration offers general guidance at https://www.nhtsa.gov. A broader maintenance mindset helps frame the door repair as part of a reliable, long term habit rather than a one shot fix.
Behind the Panel: Accessing the Door Mechanism in a Sprung Truck Door Repair
A sprung truck door can feel like a stubborn puzzle until you treat the door as a complete system rather than a single hinge.\nWhen a door will not stay open, will not latch properly, or seems oddly unresponsive, the culprit is often the spring loaded portion of the mechanism.\nThe spring and its mounting points regulate the door’s motion, provide counterbalance, and keep tension on the latch so the door can seal securely in a moving truck environment. Diagnosing this correctly requires a careful step by step approach that respects safety, preserves door alignment, and avoids creating new misalignments during disassembly. The goal is not just to fix a symptom but to restore the door’s balanced behavior so it performs reliably under varying loads and weather conditions. With patience, a clean workspace, and the right sequence of steps, you can access the door mechanism, verify the spring’s condition, and complete a proper replacement or adjustment that stands up to the rigors of daily use.\n\nBegin with a clear assessment. A door that sags when opened, refuses to stay put at an intermediate position, or slams shut can often point to the spring being fatigued, overstretched, or detached. Look for visible signs: cracks, breaks, rust, or springs that appear loose or misaligned. A spring that has lost tension may still hold some load, but it won’t provide the steady resistance you expect. Before any disassembly, ensure the vehicle is parked on a level surface, the ignition is off, and the area around the door is free of clutter. If the door is heavy to lift or if you notice unusual creaks or grinding, proceed with extra caution, as a compromised door can shift suddenly as you work. The diagnostic mindset matters: confirm whether the issue stems from the spring, the latch, the hinge, or the linkage; a misadjusted latch can masquerade as a spring problem, and addressing the wrong component will waste time and risk damaging the door or paneling.\n\nPreparation is more than gathering tools; it is creating a safe, controlled environment for access. You’ll need a basic set of hand tools—socket wrenches, screwdrivers, and pliers—plus a replacement door spring that matches the original in length, diameter, mounting type, and tension rating. Do not improvise with a spring of unknown strength, as an ill fitted spring can overload hinges or cause the door to snap shut violently during testing. Lubricants are essential too, but choose them thoughtfully: a light oil or silicone based grease can reduce friction and resist rust without attracting dust or grime. Protective gloves and safety glasses are non negotiable; removing or repositioning a spring can release stored energy suddenly, and you want to avoid any pinched skin or flying parts. Finally, have a clean workspace with good lighting, and consider using a small container to keep fasteners organized, because clips and screws can be easily misplaced when you work inside the door.\n\nAccessing the door mechanism begins with removing the interior trim panel. This step, though routine, benefits from a careful touch. Start by locating all screws or fasteners along the armrest, around the door handle, and along the trim’s periphery. Some fasteners hide behind a fabric panel or under small caps; you’ll need a plastic trim tool to release clips without leaving marks on the paint or tearing the panel. Once the panel is free, you’ll gain a view of the hinge area and the spring housing. With the interior exposed, inspect the door latch linkage and any spring loaded components that may control the mechanism. If the door handle cover is obstructing access to critical fasteners, carefully remove it as well, returning it to place during reassembly to ensure a clean, square fit. At this stage you should have a clear line of sight to the spring and its mounting points, whether the spring is located near the top hinge or tucked inside the door frame. It’s important to proceed slowly and avoid forcing any parts; the panel clips are designed to withstand repeated use, but forcing them can crack plastic and complicate reassembly.\n\nAs the mechanism becomes accessible, inspect the spring with a trained eye. A healthy spring lies along a straight path, with its coils evenly spaced and free from obvious corrosion or pitting. Look for broken coils, visible cracks, or signs that the spring has stretched beyond its original length. Check that both ends remain firmly attached to their mounting points and that the spring sits under proper tension not so tight that it strains the hinges, and not so loose that it fails to resist the door’s weight. Sometimes the apparent problem is not a broken spring but a misalignment of the mounting brackets or a pin that has shifted. If the spring appears compromised, you will need to replace it. If it is only dirty or slightly rusty, a thorough cleaning and a light lubrication can restore function temporarily, but you should still consider replacement if the tension or integrity is uncertain. When replacement is necessary, document how the spring was routed. The path through the mechanism matters greatly; an incorrectly routed spring can create bind or misalignment that may not be evident immediately but will reveal itself with use.\n\nReplacing the spring is a process that rewards patience and precision. Begin by safely removing the old spring from its mounting points. Depending on the design, you may need to disconnect a retaining clip, unbolt a bracket, or pry the spring away with pliers while supporting the door to prevent sudden movement. Take careful note of how the spring is anchored and how it travels through linkage components. This routing detail is essential for correct reinstallation. With the old spring out, scrub away rust and clean the mounting surfaces so the new spring sits evenly. Before you install the new spring, compare its size and strength to the original. A spring that is too short or too stiff can keep the door from closing properly, while one that is too long or too weak may fail to provide enough counterbalance for the door’s weight. Attach one end to the frame or hinge bracket first, then route it through the mechanism, securing the other end. As you tension the spring, test the door’s weight and balance in small increments. The goal is to achieve a smooth, controlled opening and a door that stays at a chosen position without sagging or slamming shut. The tension should feel balanced across the movement, with no binding or sudden resistance.\n\nAlignment and lubrication follow the actual install. Once the new spring is in place, check that the spring lies flat along its intended path, with no kinks or twists that could alter how it engages with the latch or linkage. Lubricate the spring and nearby moving parts with a light coat of silicone based grease or an equivalent lubricant to reduce friction and resist moisture. Lubrication helps prevent rust and extends the life of the components, but apply sparingly to avoid attracting dirt. With the interior panel reinstalled, release any clamps and ensure there are no pinched wires or hoses. Then reattach the trim and fasteners in reverse order of removal, making sure the panel seats evenly and the clips snap with a firm, satisfying click. The door’s final test is straightforward but critical: open and close it several times, and verify that it behaves consistently across a range of positions. It should open smoothly, hold at intermediate angles without drifting, and close with a satisfying, controlled motion rather than a harsh slam. If it doesn’t, revisit the spring installation, confirm that the latch is correctly aligned, and inspect the hinge for binding or misalignment.\n\nThroughout the process, one practical guideline anchors the work: always use a replacement spring that matches the original in length, diameter, material, and tension rating. Using a spring that deviates from the original can create safety hazards and accelerate wear on the hinges and latch. If you have doubts about the exact specifications, consult the vehicle’s service manual or a trusted repair resource that offers model specific guidance. For readers who want a broader view of ongoing truck maintenance and repair philosophy, the Master Truck Repair blog is a useful companion resource. It provides context on routine tasks that often intersect with door mechanisms, from hinge care to general preventive upkeep. You can explore that resource here: Master Truck Repair blog.\n\nBeyond the mechanical procedure, the repair emphasizes a philosophy of careful verification and patience. A sprung door is a system that rewards methodical work, not hasty improvisation. The door must feel balanced, remain in place without fighting against its own springs, and disengage cleanly when commanded to close. When the door’s behavior returns to a predictable rhythm, the vehicle feels safer and more reliable on the road, and the panel becomes a quiet partner in daily use rather than a daily puzzle.\n\nFor readers seeking deeper, model specific nuances or diagrams, consult official service manuals or reputable repair references that tailor guidance to a given make and year. A reliable external resource summarizes technical articles and repair procedures across various vehicle makes and models, including door mechanisms. This additional technical grounding complements the practical steps outlined here and helps confirm the most accurate route for your truck’s particular spring arrangement. External resource: https://www.autotechnician.co.uk.
The Tension Test: Inspecting and Calibrating the Truck Door Spring for a Safe, Secure Seal
A sprung door is more than an annoyance; it’s a sign that a critical piece of the door’s counterbalance system is not performing as designed. The spring is the quiet engine that keeps the door from slamming, holds it in the desired position when you prop it, and helps your hand move the door with controlled resistance. When a door sags, refuses to stay open, or closes with a sudden, unsettling speed, the spring or its mounting has likely lost its grip on the door’s fate. The inspection is not just a check of looks; it is the precise, careful determination of whether tension, alignment, and attachment are still in harmony. The path to a reliable repair begins with a calm, methodical inspection that treats the spring not as a separate component but as the hinge’s essential partner in balance. This is where a repair that lasts starts.
To begin, safety is your first anchor. Park the truck on level ground, chock the wheels, and turn off the engine. A door that’s under tension can snap or shift unexpectedly. You want to work with dry, clean hands and clear space. As you prepare to open the door fully, keep your gaze on the door’s weight and the way it moves. The spring lives near the top hinge or inside the door frame, tucked along a path designed to share the load with the hinge. Once you have access, you’ll perform a careful visual and tactile survey before you loosen a single bolt. Look for signs that scream disproportionate wear: rust that has eaten into the coating, cracks along the coil, or a spring that appears visibly stretched compared with the original contour. A spring that looks deformed or fatigued will rarely recover with a simple tightening; it’s a candidate for replacement. If the spring seems intact but the door still behaves poorly, the issue may lie with mounting points, brackets, or alignment. The distinction matters because it determines whether you adjust tension, resecure a loose fastener, or replace an entire spring assembly.
Access itself is a small surprise in terms of complexity. You’ll need the right tools to remove interior panels just enough to unveil the hinge mechanism and the spring. This is not the moment to improvise with improvised tools; a proper pry tool helps prevent scratches and keeps clips from snapping. As you gain access, keep the panel segments organized so you can reassemble without hunting for misplaced clips. With the mechanism exposed, a careful, hands-on examination begins. You should verify how the spring attaches to both the door and the frame. Are bolts loose? Do mounting brackets show signs of cracking or bending? Is the anchor point aligned, so the force path is straight, without angular misalignment that could cause rubbing? These questions are not theoretical; they surface at the moment you test the door’s motion and stop positions. When you test the movement, move slowly through the door’s range, noting any resistance that changes unexpectedly or any rubbing sounds that accompany the path.
The visual check should be paired with a tangible sense of tension. If the spring is broken or severely stretched, you will likely observe a sagging door or a failure to hold the door at any angle. A spring with adequate life will show a consistent pull when you hold the door in the open position and a smooth return when you release it. If tension is uneven along the path, or if the spring binds against other components during travel, the problem might be misalignment rather than a faulty coil. In those moments, the focus shifts from replacement to realignment and lubrication. It’s common to discover that a small misalignment—perhaps a bracket not seated perfectly or a bolt that has worked loose—creates the same symptoms you’d expect from a fatigued spring. A well-balanced system often responds to a careful tightening of mounting hardware and a light lubrication rather than a wholesale spring replacement.
If, after inspection, the spring appears intact but the tension is insufficient, the next step is a measured tension adjustment. Looseness is not cured by brute force; you’re aiming for a precise balance where the door stays open when it should and closes with a controlled speed. Use a wrench or socket—slowly, incrementally—to snug any loose fasteners that anchor the spring and its mounting hardware. Do not over-tighten; excessive preload can transfer strain to hinges, cause premature wear, or even distort the door’s travel. The adjustment should feel like a steady, deliberate pull on the door’s weight. You want the door to rise with controlled resistance, to settle in the open position without drooping, and to close with a predictable, gentle motion rather than a thud. If you feel resistance creeping into the mechanism or observe the spring rubbing against adjacent parts, stop and recheck the alignment. A binding spring wears faster and may fail unexpectedly, so resolve misalignment before repeating the test.
During this stage, it’s essential to keep the mechanism clean and free of corrosion. A light coat of silicone-based grease on the spring’s surface and on moving contact points helps minimize friction, reduce rust, and extend the life of the components. A dry, squeaky spring often signals both wear and the need for lubrication; a lightly oiled surface can quiet the hinge and improve the feel of the door’s movement. After any adjustment or lubrication, recheck the way the door travels from fully open to fully closed and back again. The test should feel consistent across several passes. If the door still behaves erratically, re-examine the path the spring follows, looking for twists, kinks, or misrouted sections that could create uneven tension. A well-routed spring lies flat and straight along its intended track, without twisting that would alter effective length or tension. Any such anomaly is a signal to pause and re-route correctly before proceeding.
Sometimes the most decisive insight comes from consulting the manual for your specific truck model. Torques, tension values, and routing diagrams are not universal; they are tuned to the design language of each vehicle line. If your inspection reveals anything close to ambiguity, the safest course is to verify against the manufacturer’s diagrams and torque recommendations to avoid inadvertently compromising the door’s safety. This is not a step to skip, especially when you are working with heavy hardware that could cause injury if it fails under load. When you feel uncertain, remember that professional help is available and prudent. A trained technician can confirm whether your spring is within spec and, if needed, perform a precise replacement with the right parts and mounting hardware.
If the spring is indeed the source of the problem and replacement becomes unavoidable, the removal and installation demand careful re-creation of the original routing. Documentation of how the old spring was connected is invaluable; it ensures the new spring is positioned in the same path and under the same strain so the door’s range stays predictable. The new spring must match the original in length, diameter, material, and tension rating. A mismatch here can shift the problem from a stubborn hinge to a hazardous situation where the door may fail to support its own weight or cause an unexpected drop when opened. As you install the new component, verify that the spring sits without kinks, that both ends anchor firmly to their points, and that the door’s travel path remains unobstructed. A final, patient test after reassembly confirms that the door now behaves as intended: smooth opening, stable hold in the open position, and a closing action that feels controlled rather than abrupt.
In reflecting on the inspection, a practical maxim emerges: treat the spring as part of a system rather than a standalone element. The goal is not simply to replace a worn coil but to reestablish the harmony between spring tension, mounting integrity, and door geometry. If any one of these threads is out of alignment, the entire mechanism destabilizes. The moment you restore shared tension and secure mounting, the door gains a predictable response that improves safety and usability. A note to remember is the importance of matching the replacement component exactly to the original. Using an improper spring can cascade into misalignment, increased wear, and even safety hazards. The discipline of inspection—calm analysis, careful adjustment, and tested validation—remains your most reliable toolkit for a sprung door. And when in doubt, a professional might be the last, best step to protect yourself and the vehicle.
For readers who want broader context or a model-specific map, see a detailed guide that aligns with industry practices and emphasizes part compatibility and precise installation sequences. This chapter leans on those principles—inspection first, then measured action, then verification—so that the door’s spring becomes a dependable ally again rather than a source of uncertainty. As you continue this journey, consider the broader maintenance framework: systematic lubrication, periodic checks of hinges and latches, and a reliable spare-part strategy that keeps critical components in good order. The door’s performance is a direct mirror of how attentively you monitor its counterbalance system.
In the spirit of practical, grounded repair, you can further expand your reference library through credible automotive repair resources and community-tested guides. For a broader look at the replacement process and part compatibility across models, the following external resource provides a comprehensive, model-aware perspective: https://www.autorepair.net/truck-door-spring-replacement-guide. You can also dive into more general maintenance guidance from a source that regularly chronicles hands-on truck repair experiences and practical tips: https://mastertruckrepairllc.com/blog/. This blend of detailed manuals and real-world insight supports a repair approach that respects the door’s essential role in safety and usability.
Restoring the Gatekeeper: A Thorough Replacement Procedure for a Sprung Truck Door
A sprung truck door can feel like a stubborn gatekeeper, threatening to drift closed or to slam shut with every gust of wind. The term often leads people to assume a simple hinge issue, but the real culprit is frequently the door spring itself or the way that spring is tensioned within the mechanism. When a door sags, won’t stay in the open position, or refuses to latch properly, the spring has probably lost its proper balance or has become damaged. The repair, therefore, is not merely about swapping a part; it is a careful, methodical procedure that restores the door to its intended function and, with it, the reliability and safety of the entire entry system. The approach described here emphasizes systematic diagnosis, precise alignment, and controlled replacement so the door behaves exactly as it should, in harmony with the truck’s body and weather sealing. By treating the project as a controlled sequence rather than a single, rushed fix, you reduce the chance of damaging the surrounding frame or misaligning the hinges, both of which can create far more trouble than the sprung spring itself.
The journey begins with a clear assessment. Before lifting a finger toward replacement, confirm that the spring is indeed the source of the problem. A door that sags when opened, or that does not hold an open position, often points to a weakened or broken spring, or to a tension setting that has shifted over time. Visible signs such as deformation, excessive rust, or a spring that appears to be stretched beyond its original length are telltale indicators. A careful inspection should also verify that the spring is properly anchored to both the door and the frame or hinge bracket. If the spring is merely loose or rusted, there may be temporary relief through cleaning and lubricating the mechanism; however, when damage is present, replacement becomes essential for safety and lasting performance. The opening thoughts extend beyond the single part; they remind us that the surrounding door frame, the hinges, and the latch must all be considered to ensure the new spring breathes with the right rhythm.
With the diagnosis confirmed, the path forward rests on preparation. Gather tools that cover the full arc of the job: a socket wrench set or spanner, a complete set of screwdrivers, several types of pliers, and a replacement door spring that matches the original in length, diameter, material, and tension rating. A penetrating oil helps when parts are stubborn, while a silicone-based grease or light oil keeps the moving surfaces gliding. Protective gloves and safety glasses are non-negotiable; proportional caution protects you and the truck from accidental slips during heavy lifting or prying around the hinges. As you prepare, plan to label and organize every bit of hardware you remove. The door’s interior panels, latch components, and hinge brackets come apart in an order that makes reassembly predictable. The meticulous labeling, though it can seem tedious, saves hours of trial-and-error when you rehang the door and seek to regain precise alignment. The preparation phase also involves understanding the exact routing of the spring. A misrouted spring can be counterproductive, creating additional stress on hinges and brackets. Before any removal, you should also set the vehicle in a stable position, with the door fully supported to prevent it from dropping or twisting unexpectedly once the fasteners begin to release.
Accessing the mechanism is the next critical step, and it requires a calm, methodical approach. Open the cargo or crew door fully and proceed to remove the interior door panel. This typically involves loosening screws around the armrest, the door handle, and trim pieces, followed by gentle prying with a plastic tool to avoid chipping paint or breaking clips. Once the panel is off, you will gain access to the hinge assembly and the spring conduit. If your truck door is power-operated, carefully disconnect electrical connections in a way that preserves their routing for reattachment later. As you expose the hinge and spring, take stock of how everything is arranged. Noting where the spring anchors, how the cable or linkage travels, and where any guiding brackets sit will help you reproduce the correct path with the new spring. It is here, in the quiet, hands-on evaluation, that you move from theory to practice. The door’s weight and the spring’s tension create a dynamic balance; misplacing even a single bracket can lead to misalignment that resists correction once the door is reassembled.
The inspection of the door frame and its surroundings follows with equal seriousness. You need a clean canvas before installing a replacement door. Begin by checking the frame for deformation, cracks, or any misalignment that could hamper a flush fit. Warped or bent structures often require realignment or repair before installing a new door. In some cases, the frame may be within tolerance, but the hinge mounting points show wear or elongation. If that is true, you may need to replace or reinforce the hinge or its brackets to restore the square, true perimeter required for a proper seal and smooth operation. The aim is straightforward: the new door must sit square in the opening, with consistent gaps around the edge and an even strike against the latch. If the frame shows hidden damage, addressing it now saves you from chasing recurring misalignment once the door is mounted. Remember that a misaligned frame will erode the door’s life, causing the spring to bear uneven loads and the latch to misfit, possibly allowing water or dust to intrude on the cab interior.
Positioning the new door is the heart of the operation. With a visually sound frame, maneuver the new door into place by aligning it with the hinge points. The hinges should line up with surgical precision, producing a door that sits flush against the body of the truck without gaps that catch air or wind. It is here that the prior labeling and organization pay off, as you’ll be reattaching the door to the same geometry that existed before, but with the new spring working in harmony. Begin by engaging the top hinge first, then loosely bolt the bottom hinge so the door can still move slightly as you fine-tune. Any misalignment at this stage will become more difficult to correct after the door is fully seated; therefore, take extra time to confirm that the mounting holes align, that the door edge makes even contact with the weather strip, and that the latch assembly clears the strike plate without binding. A good practice is to visually confirm that the door’s leading edge mirrors the body line, and that the top corner meets the frame with a small but even clearance. The process is less about force and more about incremental, measured adjustments until the door’s axis is true and stable across its entire arc of movement.
Securing the door follows, a step that tests your patience and your precision in equal measure. Tighten the hinges gradually and in an alternating sequence to avoid skewing the door’s stance. The goal is to create stable, repeatable contact between the door and the frame with even distribution of stress across the mounting points. Over-tightening too soon can twist the door or pinch weatherstripping, while under-tightening can permit stubborn movement or misalignment that returns after a few cycles of opening and closing. As you snug the fasteners, recheck the door’s alignment against the body lines and ensure the edge of the door remains parallel to the vehicle’s panels. This is not a one-and-done moment; it requires repeated checks during the early cycles of opening and closing. Once the door sits square, you can begin to reassemble the interior components, including the panels and latches, with careful attention to routing of the electrical harnesses and avoiding pinched wires. A quiet, steady approach here reduces the chance of creaking or rubbing noises after the door is back in service.
Adjustment and sealing are the next critical phase. After the door is mounted, you may still need to introduce shims or minor adjustments to the hinge bolts to achieve the perfect clearance. This stage ensures the door’s perimeter aligns uniformly with the weatherstripping, creating a seal that keeps moisture out and noise down. Reinstall weatherstripping along the door edge and frame with a light cycling of the door to confirm that the seal is smooth and continuous. Reconnect any electrical components that were disconnected during panel removal, then test all powered functions for the door—locks, windows, and courtesy lights—ensuring that none are compromised by the rehang. The window or vent guides should slide freely without binding as the door travels through its range. With the mechanicals settled, the alignment should be robust enough to withstand regular road vibrations without producing new gaps or leaks.
Testing the completed replacement closes the loop with a rigorous check. Open the door fully, then allow it to return to its resting position under its own weight. It should open smoothly to a full, stable position and, when released, stay there without drifting. The latch must engage cleanly with the strike, producing a solid close without requiring extra force. Listen for unusual noises that may indicate a binding hinge, misaligned latch, or a misrouted cable. If anything feels off during the test, return to the relevant fasteners or hinge points and re-evaluate the alignment. It is also prudent to re-check the door’s fit against the body after a few opening cycles to ensure that no creeping occurs as the mounting points settle. In practice, the most reliable repairs emerge from a blend of exacting standards and patient testing, rather than a rushed sequence that moves past subtle alignment cues.
A final note on the spring and the overall safety of the repair ties together the practical with the prudent. Replacement springs must match the original in length, diameter, material, and tension rating. A spring that is too tight can overtax hinges and frame brackets, while one that is too loose will fail to hold the door in its intended positions. The emphasis is on an exact match to the manufacturer’s specifications for the specific truck model and door configuration. This fidelity ensures the door operates with the same cadence and restraint as it did when new, avoiding both premature wear and unexpected failure on the road. The possibility of hidden damage in the surrounding structure should always be considered; if the frame or hinge posts show signs of bending or corrosion, addressing those issues in parallel with the spring replacement will yield a longer, safer service life for the entire door assembly. A moment of patience at this stage can save downstream headaches and costly reruns of the repair.
For readers who want to deepen their understanding or cross-check model-specific details, a reliable reminder comes from the industry literature and repair guidance communities. A reference point you can explore is the Master Truck Repair blog, which distills practical, hands-on advice from professionals working with heavy-duty doors and hinges. This resource, while not a substitute for the vehicle’s official manual, offers context on alignment strategies, fastener patterns, and how to approach door-related repairs with a cautious, methodical mindset. Master Truck Repair blog.
Finally, for readers seeking supplementary diagrams and step-by-step visuals that map directly to different door configurations, the Autolink Repair Database provides model-specific guidance that can illuminate your own project. See the detailed, model-adapted diagrams and procedures at Autolink Repair Database for deeper reference as you navigate the replacement process. External resource: https://www.autolink.com/repair-guides/truck-door-replacement-procedure
Final thoughts
In summary, the process of repairing a sprung truck door involves careful diagnosis, methodical access to the mechanism, thorough inspection of the spring, and precise replacement when necessary. By understanding and implementing these steps, fleet managers can ensure their trucks remain operational, safe, and efficient. Taking prompt action not only maintains vehicle integrity but also supports the overall productivity of logistics and transport operations. Adopt these practices to safeguard your investment and enhance the reliability of your fleet.

