The functionality and aesthetic appeal of steel hoods on old trucks significantly impact operational efficiency and vehicle longevity. As heavy-duty vehicles age, their hoods often suffer from dents, rust, and structural damage, requiring specialized repair techniques tailored to the severity of the faults. For fleet managers, trucking company owners, and construction and mining enterprise operators, understanding effective repair methodologies is crucial to maintaining their vehicle’s performance, ensuring safety, and optimizing maintenance costs. This guide delves into four essential chapters: the techniques for cold repairs and addressing minor dents, strategies for handling severe structural damage, methods for effective rust removal and prevention, and replacement options that guide the decision-making process when repairs are impractical. By equipping industry professionals with this knowledge, timely and effective triage of steel hood issues can be achieved, enhancing overall fleet reliability and service longevity.
Raising the Old Hood: Cold Repair Techniques for Small Dents and Rust-Safe Restoration of Steel Truck Hoods
Old trucks carry decades of road dust, weather shifting, and the small compromises that come with daily use. The steel hood is often the first banner a vehicle owner sees when a restoration project begins, a flat surface that carries the dents and the stories of every mile. The challenge for repair technicians is to restore that surface without compromising the metal or the paint, especially on a hood already strained by age. Cold repair methods, those that avoid heating the metal, offer a conservative path that preserves the hood’s original integrity while returning its contour to something close to factory lines. This approach is not a blanket solution for every ding or bend. It is a careful method chosen when the dent is shallow, the paint remains intact, and the panel is structurally sound enough to be reshaped rather than replaced. In those moments, the hood can be coaxed back toward its original shape through a patient sequence of manipulation, tapping, pulling, and precise back support. The underlying principle hinges on keeping the metal in its most natural state, avoiding heat that can soften or warp grain and cause tension to set in where it should not. The approach also respects that minor dents should be treated as opportunities to preserve the original sheet because maintaining the factory metal and finish has a practical payoff in alignment, fit, and long term durability.
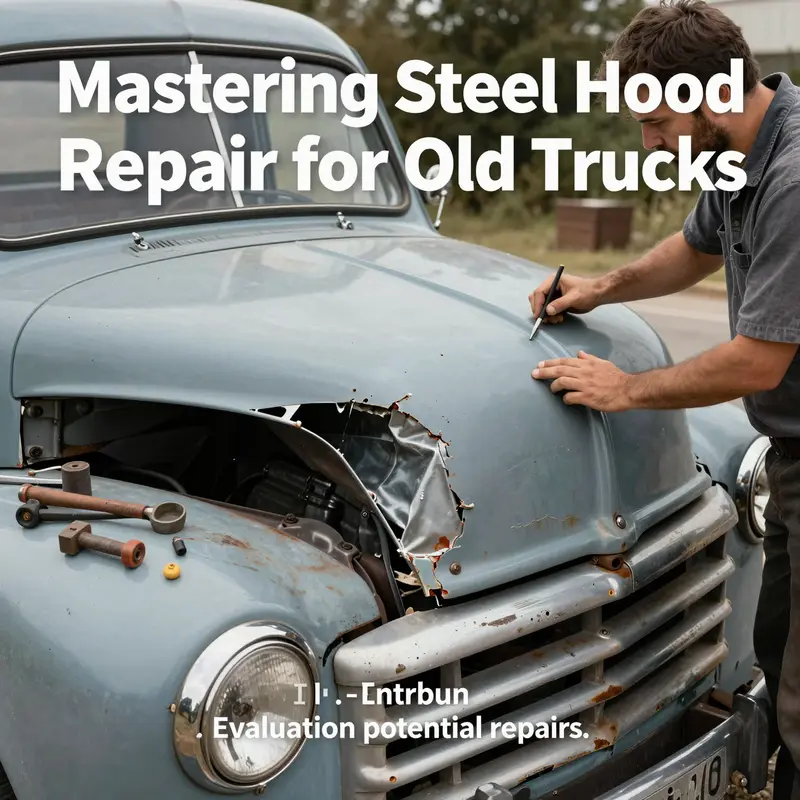
Assessment is the first and perhaps most decisive step. A dent emerges as a twofold problem: the surface indentation and the potential stretching of metal around the area. The paint, if intact, acts as a gauge. Any crack suggests that the metal may have stretched beyond recovery by simple cold methods, and deeper investigations should follow. Rust presence shifts the entire balance of the job. Where rust robs metal of its density and strength, any repair must begin with rust removal and stabilization. If the surface shows rust in the dent area, that rust must be addressed before any attempt to reshape. The importance of rust control cannot be overstated. A rusted patch is prone to continue deteriorating after the dent is coaxed back, and the risk of future leaks or perforation increases if the patch is left inadequately treated. The decision tree becomes a little simpler when rust is present in a localized area that is minor; it may still be possible to salvage with careful treatment. For more extensive rust damage or when the panel integrity is too compromised, replacement becomes the prudent path because it ensures safety and function, including proper hood alignment with the fenders and grille. When cold repair is appropriate, the method must stay faithful to the hood’s geometry, contours, and mounting points.
In practice, the process begins with a thorough inspection. The technician looks for the dent’s depth and location, the curvature near edges, and whether the paint show any signs of cracking or pigment separation. Small dents created by hail or minor impacts, particularly those that have not cracked the paint, lend themselves to noninvasive techniques. The first option is often a form of cold dent repair, also known in the trade as paintless dent repair. This technique uses specialized tools that work without heat to reverse the deformation. The tools may be metal rods that enter from behind the panel, glue pulling devices that grab a center of the dent, or a combination of tapping and pulling from the backside to coax the metal back toward its original contour. The glue puller method is particularly appealing when the access to the backside is sufficient and the dent’s edges still hold enough metal memory to spring back. Glue pulls require patience, a gradual approach, and a careful eye to ensure the pulled shape does not create new distortions. The aim is to restore the hood’s surface so that it remains flush with the adjacent panels and the paint barrier is preserved.
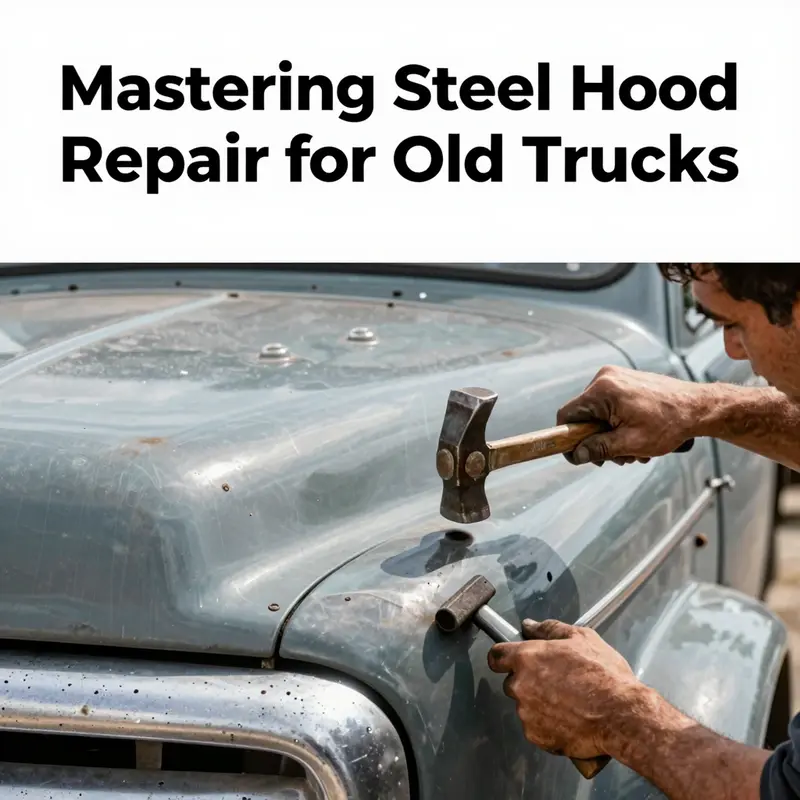
For slightly larger dents, yet still localized, a more hands-on procedure becomes practical. The classic approach uses a hammer and a dolly on the backside. The dolly is a shaped block placed directly behind the dent. The technician then taps the front of the panel with a hammer, starting at the outer edge of the dent and moving toward the center. The dolly acts as a counterform, guiding the metal as it stretches back toward its original shape. The process requires a steady rhythm of blows and a strategic sequence that prevents the metal from curling or warping. When done correctly, this technique allows the metal to revert to a smooth plane without creating a high-low discrepancy visible on the surface. The key is to keep the hammer strikes light and measured and to steadily move from the perimeter inward. When access to the underside is limited, a backer tool can be used to support the area while light taps encourage the metal’s natural memory to restore the contour.
Another effective option employs internal pushing with a dent puller or suction-based device. A center pull is placed on the dent’s deepest point, and the equipment is used to slowly pull the metal outward. Adhesive pullers, either hydraulic or vacuum-based, can create a controlled suction that lifts the dent without introducing heat. This method is especially useful when the dent sits in a curved area or within a recessed contour that makes direct hammering difficult. The suction cup or puller must be carefully aligned to avoid corner tearing or tearing at the paint edge. The process, though exterior in appearance, is an inner discipline of patience and repetition. Each micro-adjustment must be re-evaluated against the hood’s overall symmetry, ensuring that the repaired region remains congruent with neighboring panels and that there is no visible indication of the prior damage from a distance. For the technician, the satisfaction of a well-executed pull is the absence of new reflexive dings created by overzealous pulling.
In some dent configurations, especially those with more complex contours or a dent near a seam or edge, the restoration may require a blend of methods. A body hammer used with an adjustable dolly can enable region-specific shaping, sometimes called floating. It is a controlled ceremony of gradually moving the metal into alignment with the surrounding plane, guided by the contour of the hood and the constraints of the seams and panels that define its shape. In certain scenarios, suction-based tools applied directly to the surface can help lift the dent at its center, with larger quantities of the dent slowly released as the surrounding metal relaxes. Each method has its own set of checks and balances, and none should be rushed. The craft lies in maintaining the hood’s planarity and preserving the integrity of the paint. The goal is to achieve a consistent surface while keeping the structural relationship of the hood to the fenders and grille intact.
Post repair, a methodical inspection becomes the final act in the cold repair sequence. The metal’s internal stress, which may have been impacted by the repair, must be released through measured testing. A straightedge or laser measurement system can reveal any subtle warping that a quick glance might miss. It is common to re-check the smoothness by running a long straight edge across the repaired area and noting any gaps that reveal a ripple in the surface. If the paint has been disturbed during the process, prompt touch-up work is essential to prevent rust from gaining a foothold. The final finish should be a uniform plane with no visible indentations, and the surrounding paint should maintain a consistent sheen with the rest of the hood. The alignment relative to the fenders and grille is the ultimate functional test; a hood that sits out of alignment can invite wind noise, poor seal performance, and even hood opening issues during operation. Only after the hood sits cleanly against its supports should the restoration be considered complete, unless rust or structural concerns require action beyond the cold repair scope.
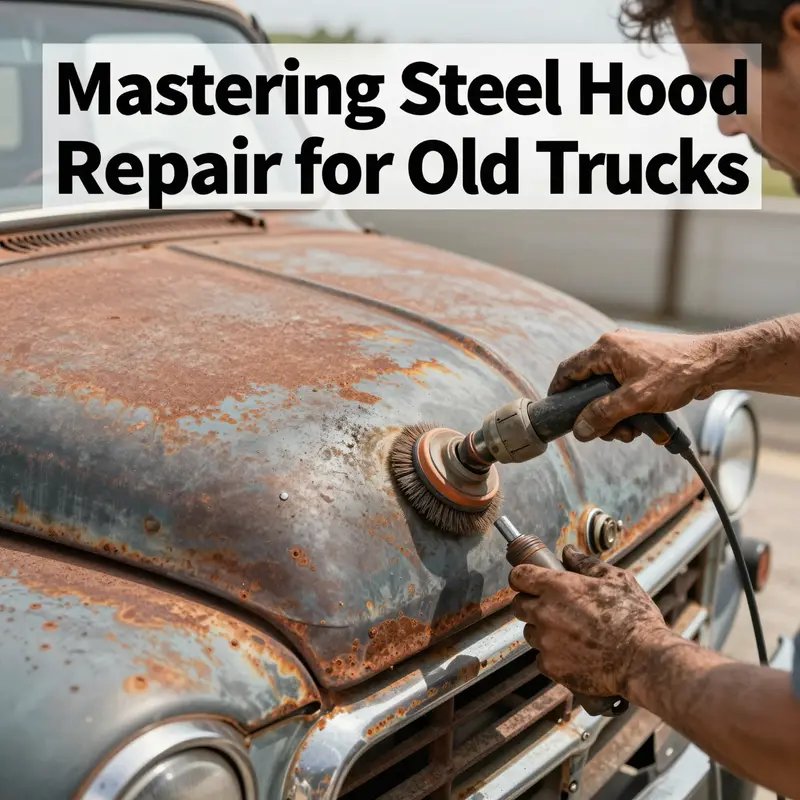
Rust, as a relentless adversary in this field, demands respect and a disciplined response. If rust is present, it must first be removed before any further repair is attempted. A rusted patch weakens the sheet metal and can reassert itself after a cold repair if not properly addressed. The traditional approach begins with removing rust using a wire brush to break loose the scale or by employing a sandblaster for more embedded particles. Once exposed metal is revealed, a rust inhibitor or anti corrosion primer should be applied to halt further oxidation. In areas where rust has created holes or through rust through, the choice is between filling with body filler for small rust-through spots or replacing the affected section with new steel. For patch work, the new panel must match the original hood’s shape and line to ensure a proper fit with the fenders and grille. When rust damage is widespread or the metal has thinned to the point where its structural integrity is compromised, replacement is the pragmatic route. A new hood, if properly matched and installed, will deliver better durability and alignment than a compromised panel could provide. The replacement process includes ensuring that the new hood mirrors the hood’s original geometry, including the curvature over the radiator support, the edge alignment along the fender lines, and the seating against the hinge mounts. Working within the guidelines of sound repair practice and the vehicle’s safety requirements, any rust remediation should progress with a clear plan, from rust removal to finish protection, and finally to alignment and sealing against the weather.
The broader aim of the cold repair approach is to preserve the hood’s original metal while restoring its visual and functional form. It is not a license to ignore structural issues or to force a panel beyond its capacity to return to a straight plane. If the hood has been involved in an accident or has bends and twists that compromise its rigidity, cold repair becomes increasingly risky. In such scenarios, professional assessment is prudent. The Automotive Repair Technology guidelines emphasize that severe structural damage should be evaluated by a professional, because an improper repair can compromise safety and fitment. A hood that fails to comply with structural integrity standards or alignment considerations can cause problems with wind resistance and hood latch performance, and in extreme cases may contribute to a misalignment with the vehicle’s front end. The seam alignment around the edge of the hood, its fit against the grille and fenders, and the hinge alignment must be maintained to avoid the hood popping open or not seating correctly. Thus, the conservative route remains the best path for most aging trucks where the dent is minor, the paint is intact, and the metal is not deeply compromised. In cases where the dent is near a bead, a fold, or a seam, extra care is taken to avoid tearing at the join line, which would create a need for more complex panel work.
To keep this approach practical and anchored in everyday repair work, it is useful to keep in mind a few guiding principles. First, never pursue a cold repair when the paint shows signs of deep cracking or when the dent has clearly stretched the metal beyond the ability of the panel to return to its original contour. In those cases, the risk of warping and misalignment is too high. Second, address rust early and decisively. Rust can quietly undermine the metal’s thickness and its response to any future shaping, making the repair less predictable and more prone to relapse. Third, measure after repair. A consistent surface and careful measurement of panel gaps ensure the hood will fit again with the rest of the truck’s front end assembly. Finally, maintain the hood’s geometry in context with the entire truck. The hood is not an isolated piece; it is part of a system that includes the fenders, the grille, the headlights, and the latch mechanism. A successful repair respects that system and ensures that the hood remains a functional, weatherproof, and aesthetically integrated component of the vehicle.
For readers seeking further practical maintenance context, the MasterTruckRepairLLC blog offers ongoing insights into hands-on truck care and restoration strategies that complement this chapter. For more practical maintenance guidance, check the blog.
External reference for further technical detail on cold repair specifics and minor dent removal methods is available in a broader industry resource, which provides up-to-date technique notes and post repair inspection protocols. See the external resource here: https://www.autorepairworld.com/tech-tips/cold-repair-techniques-for-minor-dents-on-truck-hoods
Restoring the Backbone: Rebuilding Severe Structural Integrity in Steel Hoods on Old Trucks
When a steel hood on an aging truck bears severe structural damage, the repair task moves beyond cosmetic dent pulling and surface rust cleanup. It becomes a test of engineering judgment, material science, and precise workmanship. The hood is not merely a shell; it plays a critical role in the truck’s front-end stiffness, aligns with the fenders and grille, and contributes to the protection of the engine bay from the elements. In older trucks, where metal fatigue and years of exposure have taken their toll, a proper repair must reestablish safety, fit, and longevity. The path from diagnosis to a restored hood is systematic and exacting, demanding a clear understanding of whether the damage is rust perforation, large-scale deformation, or a combination of both. Each scenario carries its own set of constraints and decisions, and the best outcome hinges on approaching the work with a plan as rigorous as the original manufacturing process.
Begin with a meticulous damage assessment. Severe rust or perforation cannot be safely ignored; it is the thief that weakens the hood from within and silently propagates until a crack or a bend reveals the truth. When perforations or extensive corrosion are found, cutting out the compromised section and replacing it with new steel becomes the preferred route. The replacement material must mirror the original in grade and thickness to preserve the hood’s load-bearing characteristics and its response to road dynamic loads. In practical terms, that means using a low-carbon, standard-grade steel—comparable to SAE 1008 or equivalent—so the new panel behaves similarly under heat, impact, and fatigue. The surgeon’s scalpel here is a plasma cutter or a sharp, controlled angle grinder, used with care to produce clean, straight edges that will weld tightly to the surrounding metal. Precision matters more than speed, because any miscalculation in edge fit translates into misalignment down the line, which can distort the hood’s geometry and hinder proper sealing with the fenders and grille.
Deformation introduces another layer of complexity. If the hood structure is visibly bent, twisted, or if load-bearing rails in the core framework show strains that could affect corrosion protection or crumple zones in an impact, a simple panel swap is not enough. In those cases, reinforcement becomes essential. The goal is not to stage a cosmetic fix but to restore or even improve rigidity where it matters for front-end integrity. A reinforced hood design calls for careful planning, often requiring thicker steel plates, larger angle brackets, or cross-members positioned to bear specific stress points. This is not a guesswork exercise. Engineers or technicians with experience in body-in-white repairs perform calculations to determine how the reinforcements will distribute loads, minimize new stress concentrations, and avoid interference with hood operation. The reinforcement elements must be integrated so they work with the original geometry rather than forcing the hood into a new, unconstrained shape.
With the plan in hand, apply the cutting and replacement phase. Cut away only what is damaged, leaving sound metal intact to preserve the hood’s original contour as much as possible. The fit of the replacement panel is critical: it must mirror the factory line and align with the surrounding panels for a seamless joint. Edge preparation is critical here. The welds need to be continuous and free from gaps that could harbor corrosion or permit moisture to seep under seam sealants. MIG or TIG welding can produce strong, clean joints, but they demand a skilled hand, strict control of heat input, and careful beveling of edges to ensure a tight seam. Warping is a constant risk when working with large panels; clamps, fixtures, and controlled heat input help keep the hood flat and true during welding. The welds themselves should be performed with consistent technique across the joint to avoid weak spots that could fail under future vibrations or weather cycles.
Post-welding treatment is where the repair truly distinguishes itself from a quick fix. Once welding is complete, the area must be ground smooth to a uniform plane, with care taken to minimize heat-affected zones that can become new sites for rust. A thorough anti-corrosion regimen follows. This begins with a robust priming layer and a rust-inhibiting coating that penetrates any micro-imperfections in the weld bead and the surrounding skin. Sealing is not merely cosmetic; it is a functional barrier against moisture and salts that architecture the kind of rust that undermines metal over years. After priming, finish layers should be applied to restore the hood’s appearance and to protect against chipping and UV degradation. Attention to seam sealing and weatherstripping is essential; if the hood’s seal has been compromised by deformation or replacement, water ingress can track along the joint and into the engine bay. In those cases, replacing weatherstripping is as important as reapplying primer and paint. The objective is to return the hood to a state where it behaves like a well-integrated part of the front end, not a standalone panel that’s just attached to the chassis.
Structural reinforcement, when necessary, must be designed with the same rigor applied to any load-bearing modification. The reinforcement plan should be engineered around the hood’s actual service conditions. Designers often specify the use of thicker cross-members or additional brackets at critical stress points, with welds that extend into the existing structure to create a coherent, rigid network. The emphasis is on reliability under real-world loads—handing the hood’s edge into the fender gap at a precise tolerance, ensuring that the grille and latch mechanism align after the restoration, and maintaining the hood’s ability to resist flex and fatigue through many cycles of opening and closing. Welding reinforcements requires equal attention to detail. Each pass must fuse with the base metal and any added members, creating a consistent mesh that behaves as a single piece under vibration.
Every stage of this work is performed within a framework of general considerations essential to safety and durability. The environment must be well-ventilated, with appropriate PPE for the technician. The process generates heat, fumes, and metal shavings; proper containment and cleanup reduce the risk of fire and exposure. The work area must house the hood in a stable position, with supports that prevent accidental movement during cutting or welding. When the hood is rebuilt, the final fit to the truck’s fenders and grille should be verified. The alignment affects the hood’s ability to seal and to close with the latch accurately. Even minor deviations can cascade into problems with water intrusion and wind noise, and they can alter the hood’s response to road debris and vibration.
The decision to undertake a repair of severe structural damage hinges on several practical considerations. If the rust damage has hollowed out substantial portions of the skin or if deformation compromises the assembly’s geometry beyond simple straightening, replacement becomes not just prudent but economical in the long run. Replacement may be the most cost-effective path when the structural cores show signs of fatigue, where the return on investment for an extensive repair would be lower than sourcing a hood with compatible contours and strength. The repair choice must preserve whoever is in the cab from worse outcomes in a collision scenario. A hood that has lost its rigidity may fail to distribute impact forces properly, and that is a risk no owner should overlook. The underlying principle is straightforward: the goal is a hood that returns to service with reliability, symmetry, and protected metal that resists the ravages of time and the elements.
To keep the discussion anchored in practical reality, it is helpful to balance the technical steps with a reminder about the broader context. The structural challenges discussed here are not unique to one truck line or era; they arise from the combined effects of aging steel, exposure, and the mechanical stress exerted by a front-end assembly that routinely bears wind pressure, road shocks, and the occasional minor collision. The root causes of severe structural damage often intertwine with how the vehicle has been used and maintained over decades. Overloading and uneven load distribution, for instance, can magnify stress on the body panels and rails, accelerating fatigue in a way that becomes visible first as small deformations and then as more significant misalignment. This context helps explain why a thorough assessment and a deliberate repair plan are necessary, rather than a hasty patch that may look acceptable at first glance but fail under real-world conditions. For professionals and seasoned hobbyists alike, this perspective reinforces the importance of methodical workmanship and the willingness to pursue replacement when the structural integrity is compromised beyond what a repair can safely restore.
In practice, the path from assessment to completion is as much about discipline as it is about technique. The sequence—identify damage, decide between full replacement or reinforcement, execute with precise cutting and clean edges, weld with control and skill, and finish with comprehensive anti-corrosion treatment and proper weatherproofing—reflects a philosophy of longevity. It is a philosophy that recognizes the hood as a critical component of a truck’s safety envelope, not a prove-it-once-and-hope-for-the-best cosmetic feature. The end result should be a hood that not only matches the old truck’s character but also performs like a modern panel in terms of strength, alignment, and resistance to the elements. In a field where the line between restoration and reconstruction can be thin, this disciplined approach offers a roadmap to a durable, repeatable outcome.
For readers seeking a broader DIY perspective that touches on surface preparation, measurement accuracy, and careful handling of curved panels during restoration, a related guide offers practical, field-tested insights. It serves as a reminder that even when the focus is structural, those who work with aging metal benefit from a measured, patient approach and from borrowing lessons that come from other repair disciplines. DIY windshield repair guide for truck owners can provide a complementary mindset about precision, surface prep, and safe handling of panels, reinforcing the importance of control at every stage of a hood repair project.
In closing, the repair of severe structural damage in steel hoods on old trucks is a demanding but ultimately rewarding endeavor. When executed with careful damage assessment, exact cutting and replacement, high-quality welding, thoughtful reinforcement where needed, and thorough anti-corrosion and sealing work, the hood can be restored to a state that supports safe operation and long service life. The lessons extend beyond the specific patch or panel. They reinforce a broader principle: respect for the metal, respect for the work, and respect for the vehicle’s role in the owner’s life. By adhering to disciplined methods and recognizing when a replacement makes more sense than a complex repair, owners and technicians can ensure that the front end remains robust, reliable, and quietly capable of weathering the many miles ahead. If readers want to situate this work within a broader framework of vehicle health and component longevity, keeping in mind how load and front-end stress interact with the body can inform better decisions about when to repair and when to replace, ultimately preserving safety and value for years to come. For context on how structural stresses can accumulate and contribute to damage, see related discussions on heavy-truck structural dynamics and safety implications at a broader industry level: https://www.chinatruck.org/2016/11/04/truck-suspension-systems-and-overloading/.
From Rust to Resilience: Restoring Steel Hoods on Vintage Trucks with Thoughtful Rust Removal and Lasting Protection
The steel hood on an old truck is more than a cover for the engine; it is a barometer of the vehicle’s history and a front line in its continued operation. When rust begins to take hold, it is rarely a simple blemish. It is a sign that moisture, salt, and time have been quietly working together to compromise the metal’s surface. Restoring a steel hood, therefore, demands a patient, methodical approach that centers on removing the corrosion first and then rebuilding the hood’s surface so it can endure another decade or more of exposure. The path from rust to resilience is not just about cosmetics; it is about maintaining structural integrity, ensuring proper alignment with the fenders and grille, and establishing a protective barrier that can stand up to road salt, humidity, and the inevitable bumps of daily driving. While the specifics will vary depending on the hood’s condition, the underlying principles stay constant: clean thoroughly, remove all rust, repair or replace as needed, prime for corrosion resistance, finish with durable paint, and establish a routine of prevention that keeps new rust at bay. In this sense, hood restoration becomes a convergence of craft and strategy, where each step supports the vehicle’s overall reliability and value.
The first stage in any rust-reduction project begins with honest assessment and meticulous cleaning. Dirt and grease are not mere aesthetics; they can trap moisture and disrupt adhesion, undermining any subsequent treatment. Begin with a neutral cleaner or a dedicated metal cleaner that is formulated to neutralize oils without attacking the underlying metal. Harsh soaps should be avoided because they can strip protective layers or leave residues that hinder bonding. After washing, the surface must be dried completely. A hood that still holds moisture invites corrosion to reassert itself as soon as the primer finds a home. Once the surface is dry, you can proceed to mechanical rust removal, which is the heart of the process for surface rust and light oxidation. Coarse-grit sandpaper, typically in the 80-120 range, is effective for removing the top layer of rust while leaving healthy metal intact. An electric grinder fitted with a wire wheel can speed the process, but it requires a steady hand and careful control to avoid gouging. The goal is to reach shiny, bare metal without creating pits that will later trap moisture or undermine paint adhesion. After this initial pass, clean the area again with a solvent such as denatured alcohol or a degreaser to remove any oils, dust, or residues left by the grinding. It is crucial to allow the surface to dry completely—no matter how long it takes—before applying primer. This drying window, often at least 24 to 48 hours depending on climate and humidity, ensures the bond between metal and coating will be durable and long-lasting. A poorly dried surface can trap moisture underneath the coating, leading to blistering, poor adhesion, and accelerated rusting down the line.
As the hood moves from bare metal to prepared surface, attention shifts to repairing the material that rust has compromised. Small holes or thinning metal require targeted intervention. For minor rust-through, a metal patch kit or a two-part auto body epoxy putty can fill the holes and recreate a uniform plane. The patch material should be chosen for its compatibility with steel and its resistance to heat, moisture, and UV exposure. After the patch cures, it should be sanded flush so the repair sits at the same plane as the surrounding metal. Larger areas that have thinned or rusted through may necessitate welding in new steel patches. This step is not optional when the structural integrity of the hood is at stake; replacing the compromised panel with new steel can be more cost-effective and reliable than attempting to coax life back into a panel that is too far gone. In any event, the repaired area must be indistinguishable in thickness and contour from the original metal to maintain proper hood lines and alignment with adjacent panels. If the hood has been involved in an accident or has developed bends or twists alongside rust, more extensive reshaping or panel replacement could be needed. In such cases, it is wise to consult or defer to a professional metalworker who can verify that the structure remains sound, as a warped hood can degrade safety and fitment with the grille and fenders. The principle remains: never rush the repair. If metal integrity is uncertain, replacement is often the most prudent course, preserving the hood’s ability to perform its primary fencing role against the engine and the passenger cabin.
Once holes are filled and the metal is restored to a uniform surface, the focus turns to corrosion inhibition and surface protection. The goal of this stage is to seal the hood from moisture and oxygen, two elements that drive rust once the bare metal is exposed to air. A high-quality anti-rust primer, ideally epoxy-based, should be applied to the entire cleaned and repaired area. The primer creates a robust barrier and improves paint adhesion, contributing to a longer-lasting finish. It should be applied in thin, even coats, allowing each layer to cure fully per the manufacturer’s instructions. Layering is essential; multiple light coats produce a more durable base than a single heavy application that can fail by bubbling or cracking. After the primer has fully cured, move to the topcoat. A spray finish is preferred for its even coverage and the ability to achieve a consistent texture and color. Apply several thin coats rather than a single thick one, again following proper drying times between applications. The final color can be chosen to either match the remainder of the truck or to celebrate the hood as a focal point of the vehicle’s aesthetic. A clear coat, if used, should be applied after the base color has cured. The clear layer provides another protective barrier, adding depth and gloss while helping resist UV damage, which can cause paint to fade and chalk over the years. The key is to keep the finish smooth and free of runs or sags. A careful hand with the spray gun and disciplined attention to curing times will yield a finish that looks almost factory-new and, more importantly, guards against future corrosion.
In the direction of long-term durability, the preventive measures taken after the paint has dried are as important as the repair work itself. Rust is not a one-time adversary but a condition that can creep back if moisture management and paint integrity are neglected. Washing the hood regularly is a small but powerful habit, especially after encountering road salt, winter spray, or muddy roads. Salt is particularly aggressive, promoting galvanic reactions that accelerate rust; frequent cleaning helps remove these salts before they can dwell in cracks or chip lines. After washing, it is vital to dry the hood completely. Residual water can settle into micro-cracks and later corrode the metal beneath the paint. A heat gun or a fan can assist in the drying process on damp days, but avoid overheating the paint, which could cause it to blister. Protecting the painted surface with a wax or sealant every few months forms a barrier that reduces moisture penetration. For vehicles that see heavy exposure to winter conditions, more robust protective strategies such as undercoating or rust-proofing can be considered, especially for areas known to be prone to corrosion, such as the lower hood edges and the hinge areas, where moisture tends to collect. Routine inspection is another cornerstone of prevention. Small scratches, chips, or micro-cracks should be addressed quickly—touch-up paint or minor filler repairs can prevent rapid rust initiation if left unattended. The sooner a new rust spot is treated, the less extensive the repair will need to be in the future, and the longer the hood will perform its function without structural compromise.
An important thread running through this process is alignment. The hood, after all, is a precise architectural element of the truck’s front end. When rust has compromised the panel, and especially if holes or patches have altered the hood’s thickness in localized areas, the fit to the fenders and grille may shift. For a vintage truck that is driven rather than displayed, the alignment issues matter less for aesthetics and more for function and safety. A hood that doesn’t sit properly can catch wind oddly, misalign with the latch mechanism, or create gaps that collect moisture and salt. Therefore, every repair decision—whether patching, welding, or panel replacement—should be evaluated not only for corrosion resistance and finish quality but also for how it will affect the hood’s geometry. In many cases, the care and craftsmanship invested in the rust removal and repair work will pay off only if the hood retains its original contour and tolerances, maintaining the lines that keep the front end looking balanced with the rest of the truck. The overarching goal is to restore not merely the appearance of a robust hood but its capacity to shield the engine bay and preserve the vehicle’s structural harmony over time.
To round out the chapter, consider the broader context of maintaining older trucks. Restoring a hood is a microcosm of the care required across the entire vehicle: metal that has survived decades deserves a resistance strategy that matches its endurance. The rust removal and prevention approach outlined here is not about chasing a perfect, new-car surface but about achieving a durable, reliable finish that respects the vehicle’s age while extending its life. This means choosing materials that withstand environmental exposure and applying them with the discipline of a craftsman. It also means recognizing limits. If a hood’s rust has penetrated deeply into the core structure, or if the cost of repair begins to rival or exceed the value of the vehicle, replacement becomes a practical, even prudent choice. In those instances, matching the new hood to the original shape and ensuring a precise fit with the fenders and grille remains critical, as improper fit can create a cascade of issues from misaligned gaps to functional latch misbehavior. For hobbyists and professionals alike, the best outcomes emerge from a thoughtful blend of meticulous rust removal, prudent repair or replacement, and disciplined protection that keeps the hood looking and performing like a resilient piece of a classic truck.
When you are ready to translate the lesson of rust removal and prevention into a regular maintenance plan, remember that the chapter you just read is part of a larger conversation about how to care for steel components in aging trucks. For a broader look at routine maintenance and practical guidance on keeping a truck’s body panels in good shape, consider visiting the Master Truck Repair blog, which distills field experience into accessible, actionable advice. This resource can help you translate the techniques in this chapter into a practical, ongoing regimen that keeps your vintage ride roadworthy and visually respected. In the end, the goal is not merely to erase the rust but to cultivate a habit of care that safeguards the hood, the engine, and the entire truck’s future.
External resource: for additional perspective on rust prevention strategies that complement the approach described here, see Car and Driver’s practical guide on rust prevention and maintenance, which offers field-tested tips that align with the goals of restoring and preserving steel panels on older vehicles. External Rust Prevention Resource
Between Patchwork and Preservation: Deciding When to Replace or Repair Steel Hoods on Classic Trucks
Old steel hoods on vintage and classic trucks tell a story of the road they’ve traveled. Their skin bears the memory of days under wind and weather, of minor fender benders, and the slow march of rust that comes with time. When a hood begins to show its age, owners are faced with a practical question that sits at the heart of any restoration project: should the hood be repaired, or is replacement the smarter path for reliability, alignment, and long-term durability? This question isn’t merely about cosmetics. A repaired hood that weakens with heat cycles, or a replacement panel that fails to align with the fenders and grille, can ripple across the entire front end. The decision rests on a balance of condition, heritage, and your needs for the vehicle’s future use. In many ways, it is a negotiation between preserving the truck’s character and ensuring that every hood line sits true again, both in appearance and in function.
To begin with, the extent of the damage is the most obvious compass. Minor dents, shallow scratches, or small rust pockets that have not penetrated the sheet metal might be tackled with traditional bodywork without altering the hood’s fundamental integrity. For these situations, techniques such as cold repair are well suited. They minimize thermal stress on the metal, reducing the risk of warping or work-hardening that can occur when heat is applied to a deformed shell. For these cases, a careful approach using a dolly and hammer to coax the metal back toward its original contour, or the use of a puller system to draw out dents from the backside, can restore the hood’s shape while preserving its overall strength. Even more precise on a small scale are glass- or glue-pull methods that offer gentle correction for shallow dents where the paint hasn’t cracked. The goal here is to return a smooth, even surface without scarring, while keeping the original panel’s structure intact.
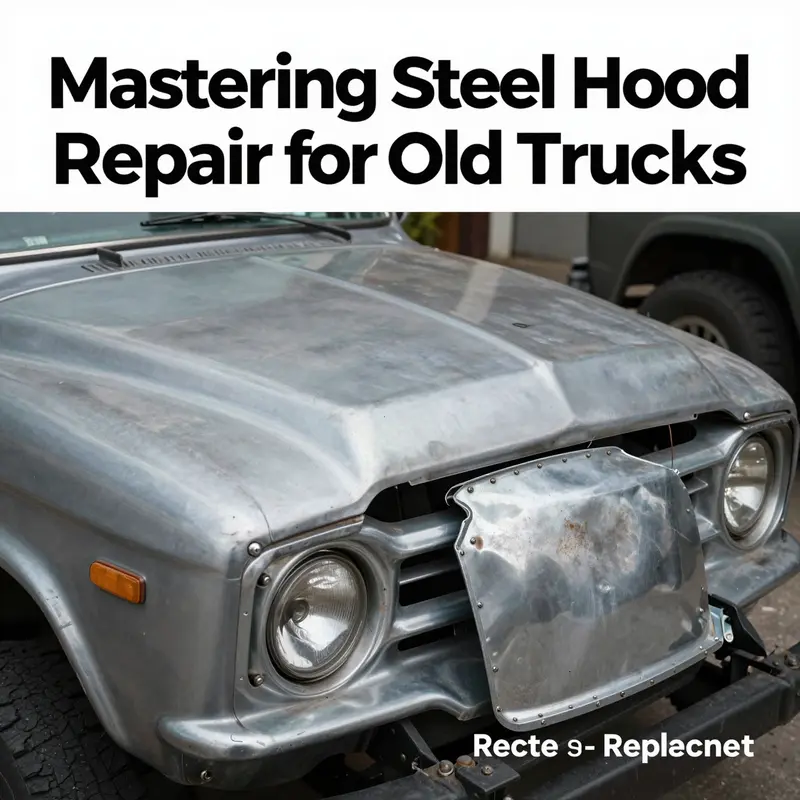
Rust, however, introduces a more complex calculus. Where rust has eaten through the skin or has created pits that undermine the panel’s tensile strength, a repair may not be the most durable choice. The first principle is to remove all corrosion thoroughly. A wire brush or controlled sandblasting can expose clean metal, after which a rust inhibitor or anti-corrosion primer should be applied to prevent recapitalization of the problem. Minor rust-through can sometimes be addressed with body filler to level the surface, but this is a stopgap: the underlying metal may still be compromised if the rust has progressed. In more serious cases, replacing the affected section with fresh steel becomes the practical path. The replacement approach may involve swapping in new steel panels cut to match the contours and curvature of the original hood, preserving the hood’s silhouette while removing the risk of future rust pockets expanding under a patched surface. If the rust is extensive enough that the panel cannot maintain structural integrity, replacement is often the only reliable solution. The replacement hood should mirror the original shape and fit to maintain proper alignment with the fenders and grille. Aligning hinges and ensuring the latch mechanism engages with consistent force are not cosmetic concerns; they directly affect daytime visibility, wind noise, and safety on the road. In this respect, replacement should not be seen as a defeat but as a pragmatic choice when longevity and safety are at stake.
When dent and rust assessment becomes more nuanced—when the damage extends beyond the obvious and hints at deeper structural concerns—the value of a professional evaluation increases. Industry guidelines emphasize that severe structural damage requires careful appraisal, as improper repair can jeopardize fitment and safety. This is especially true for older designs where the hood may contribute to the vehicle’s overall crash energy management, even in a bolster-just-for-looks sense. A detailed inspection can reveal whether the core of the hood, including its surrounding supports and mounting points, remains sound. If the hood’s shell holds its shape, but the mounting points are compromised, a repair might still be feasible with reinforced backing or new hardware; if not, the safest route is replacement with a hood that maintains the original geometry.
In the realm of authenticity, classic and vintage trucks present their own set of priorities. For many enthusiasts, maintaining the vehicle’s original aesthetic is a central goal. A genuine OEM hood or a high-quality reproduction hood carries a weight of authenticity that aftermarket replacements may not fully replicate. It is not only about the creases and crown of the hood but also about how the hood’s metal tolerances, stamping lines, and curvature align with the rest of the body. Modern manufacturing methods have progressed in ways that improve durability and corrosion resistance, offering longer-lived solutions even for parts that date back decades. Yet the aesthetic and tactile alignment—the way the panel meets the fenders and the grille—remains a key hiring standard for restoration work. A well-matched hood supports a seamless front-end finish, preserving the vehicle’s line and the owner’s sense of pride in the build.
Choosing between repair and replacement should be viewed through several practical lenses. First, consider the truck’s value in its current state and its projected use. A daily driver might justify a repair that preserves originality and minimizes upfront cost, while a show-quality restoration or a long-term investment in a collector’s item may argue for a fresh, properly engineered hood that minimizes ongoing maintenance. Second, think about the availability of parts. The more obscure the model year, the more likely it is that a replacement hood will come from a limited pool of OEM or high-quality reproductions. This reality can tilt the balance toward replacement when a repair would require custom fabrication that may introduce fitment risks or paint-match challenges. Finally, personal preference matters. Some owners want the look and feel of a completely original front end, even if it carries the burden of ongoing maintenance. Others prioritize reliability and ease of use, accepting a newer hood that benefits from modern protective finishes.
From a repair standpoint, the most economical path for minor dents and superficial damage often blends technique with restraint. Paintless Dent Repair (PDR) remains a valuable tool when you can coax metal back toward its original shape without disturbing the factory paint. It preserves the original clear coat and finish, which in turn reduces the risk of mismatches in color or texture after a repaint. When PDR isn’t enough, localized methods such as spot welding or carefully controlled heat-affected zones can address small isolated issues without resorting to a full hatch of replacement. The adage to remember is that every repair must be evaluated for its effect on the hood’s function. A dent that seems cosmetic could influence the panel’s rigidity, so the repair should restore the hood’s stiffness to a degree that it can withstand wind pressures at highway speeds and the repetitive stress of opening and closing.
On the replacement side, there is a clear logic that becomes more compelling as damage scales up. This is where the phrase replacement options isn’t a defeat but a plan for lasting performance. A hood that has been dented badly, or one that shows multiple failure points from rust creeping from edge to edge, should be weighed against the cost and availability of a suitable hood. An OEM hood typically ensures the best fit with factory mounting points and hinge alignments. Reproduction hoods can offer the same general dimensions but may vary slightly in exact curvature or crown. In both cases, ensuring compatibility with the surrounding structure—the fenders, grille, and header panel—is essential for a clean, professional look. The hood needs to sit at the correct height relative to the grille, and the gaps along the hood-to-cowl seams must be even and consistent. Poor fitment can worsen wind noise, reduce sealing against the elements, and create ongoing paint cracking around the edges where panels rub or flex under load.
The practical decision, then, weaves together structural safety, upkeep, and future use. If the front end has endured a heavy impact that deforms the core structure or if the metal has rusted through to a point where thinning is evident across large sections, replacement becomes the rational path. When you opt for replacement, you are not simply picking a new shell; you are selecting a partner in the truck’s ongoing life. The hood must be properly mass-produced or restored to match the original dimensions, and its finish must resist corrosion well into the vehicle’s next decades of service. A modern hood, when cared for with correct primers and topcoats, can deliver reduced maintenance compared with the older steel, which often required more frequent rust-control steps. Yet even in replacement, the aesthetic of the original front end matters. The goal is a seamless integration that makes the truck appear as if it emerged from the factory, not as if a mismatched panel was forced into service.
A well-balanced restoration often involves a hybrid approach: assess damage with a critical eye, repair where feasible, and replace when necessary to ensure safety and durability. The decision can be driven by the truck’s use—whether it wears the badge as a daily driver, a showpiece, or a show-quality restoration that will spend most of its life on display. It is not unusual for a project to begin with repair in mind, only to shift toward replacement after a deeper inspection reveals limitations that cannot be overcome by reshaping metal alone. In these cases, it can be wise to consult a restoration specialist who understands the subtle interplay between metalwork, paint, and fitment. They can provide a candid assessment of whether a certain hood, even a well-preserved one, will continue to perform reliably under the stresses of real-world use. The value of professional input often lies not in predicting the exact future but in identifying potential issues before they become costly setbacks.
For readers who crave a deeper, hands-on understanding of practical restoration choices, resources such as detailed guides and communal wisdom can be invaluable. The practical knowledge shared in reflective restoration conversations often mirrors the real-world decisions described here: assess, plan, and execute with an eye toward how the hood will function over years of operation rather than how it looks in the moment. If you are exploring these ideas with your own truck, a good starting point is to immerse yourself in broad, experience-based guidance that covers both repair and replacement options. A well-curated resource hub can offer case studies, diagrams, and stepwise processes that illuminate when a patch will hold and when a new panel is the better bet. It is also helpful to follow the shared experiences of other enthusiasts who have faced similar crossroads, as this community knowledge can provide a practical sense of cost, time, and outcome that pure theory cannot.
For ongoing, approachable guidance that complements the information in this chapter, you can visit the Master Truck Repair blog, which compiles practical tips and real-world anecdotes about keeping old trucks on the road. The conversations there echo the themes here: preserve what’s worth keeping, replace when it protects the long-term health of the vehicle, and approach each decision with an eye toward alignment, fit, and future reliability. You can explore more at the linked hub and see how other projects have weighed the balance between authenticity and performance. Master Truck Repair blog.
In the end, the choice between repair and replacement is multi-faceted rather than binary. It requires a grounded assessment of the hood’s structural integrity, a clear sense of how the truck will be used, and an honest appraisal of part availability and cost. Minor dents and surface rust can be managed with careful, non-invasive techniques that preserve originality while delivering a clean aesthetic. More significant issues—rust that has compromised metal thickness, extensive deformation from a collision, or hinges and latch areas that no longer hold alignment—make a strong case for replacement, especially if the end goal is reliability and long-term performance. For classic trucks, where authenticity remains a high value, this decision becomes a careful negotiation: preserve the personality of the era with an OEM or high-quality reproduction hood, or opt for a newer version that ensures consistent function and fewer maintenance headaches.
As you weigh your options, consider documenting the process from the outset. Take photos of dent patterns, rust spread, and hinge mounting locations. Note the fitment of the hood against the grille and fenders as you stand back to evaluate the overall silhouette. A thoughtful record not only clarifies your current choice but also helps when planning future maintenance or additional restoration work. It can also serve as a useful reference when talking with restoration shops, where precise measurements and a clear narrative about the hood’s history can influence the recommended path. Ultimately, the aim is a front end that looks correct, aligns properly, and remains durable under the daily demands of the road and the occasional show weekend. The choice to repair or replace should feel like a natural continuation of the truck’s life story, not a misunderstanding of its needs.
External perspective can also illuminate the path forward. For readers seeking a broader discussion about the trade-offs between hood replacement and repair, a well-regarded external reference offers a thoughtful synthesis of practical considerations and outcomes. External resource.
Final thoughts
Implementing effective repair strategies for steel hoods on old trucks is essential for maintaining vehicle integrity and performance. Understanding the differences between cold repairs and dealing with severe structural damage ensures that fleet managers and operators can make informed decisions to either repair or replace components, depending on the situation. Rust removal tactics and preventative measures further extend the life of these crucial components. By applying the insights from this guide, trucking and logistics professionals can foster operational efficiency and improve the overall safety and reliability of their fleets. Ensuring that repairs and maintenance are executed professionally will not only enhance the appearance of the trucks but will also contribute significantly to their performance longevity. A proactive approach in these repair strategies will yield better outcomes for fleet management.

