Truck interiors endure significant wear and tear from daily operations, making their maintenance and repair crucial for longevity and driver satisfaction. Fleet managers, trucking company owners, and operators in construction and mining sectors understand the importance of upholding both functionality and comfort within their vehicles. A well-kept truck interior not only enhances the driver experience but also reflects the professionalism of the operation. This guide outlines a structured approach to truck interior repair spanning cleaning and deodorization, upholstery methods, fixing structural components, advanced restoration techniques, and valuable resources to empower you in effectively managing your fleet’s interiors.
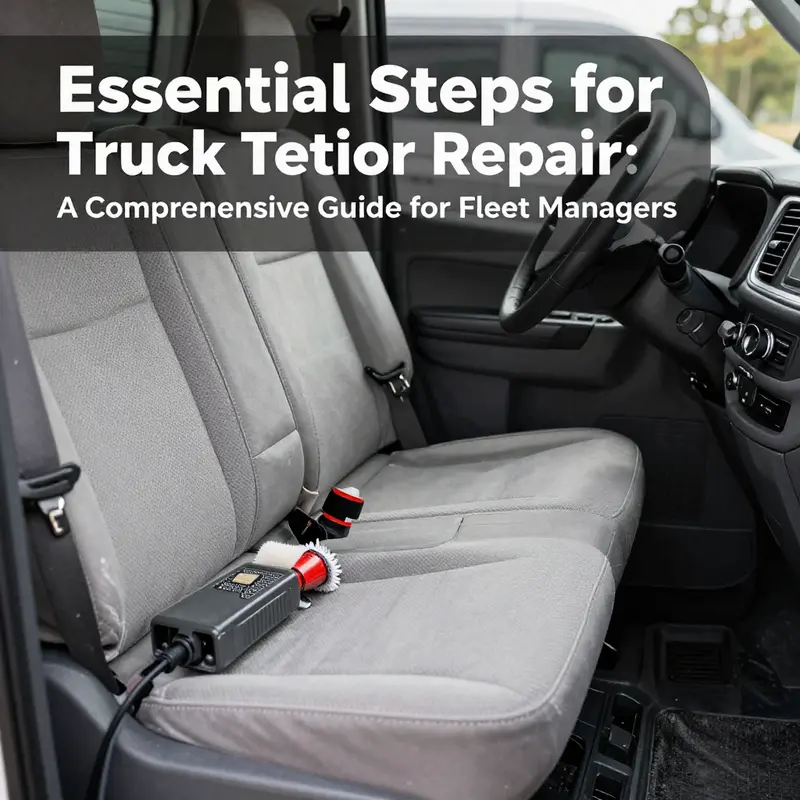
A Clean Cabin, A Better Ride: Deep Cleaning and Deodorizing as the Foundation of Truck Interior Repair
As you finalize the cleaning, remember that the goal is a durable, long-lasting interior that supports safer and more comfortable driving. A clean cabin reduces distraction, makes dashboards easier to read, and helps you assess other repair needs with a clearer eye. If you need to deepen your understanding of the cleaning and deodorizing sequence, you can consult additional resources that cover best practices for truck interior care. External reference: https://www.trucksupply.com/blog/what-is-the-best-way-to-clean-your-truck-interior
Precision Patching and Polished Panels: Mastering Upholstery Restoration for Truck Interiors
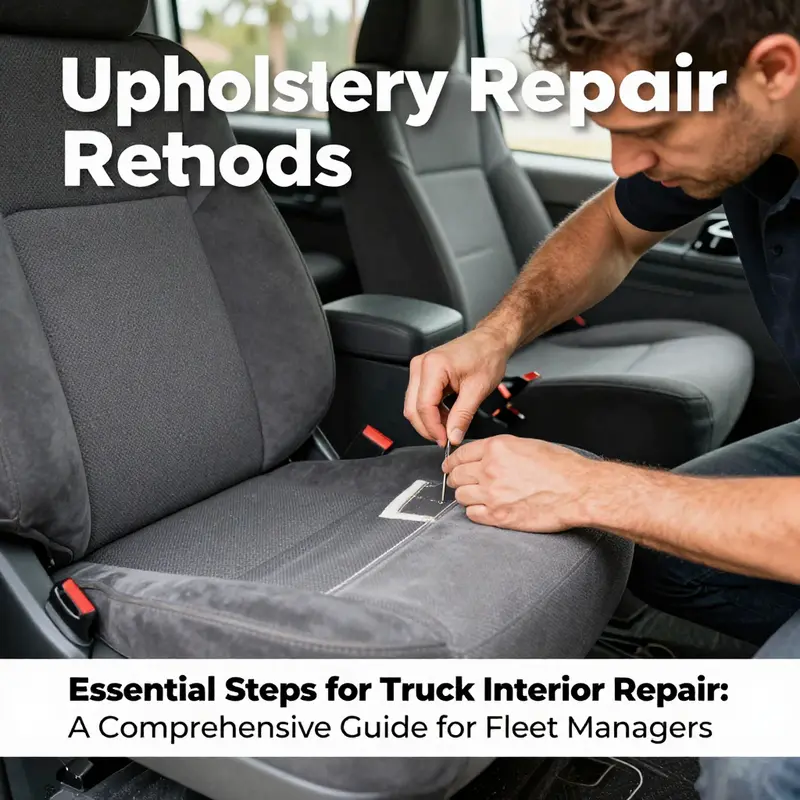
Upholstery is often the most visible sign of a truck’s soul on the road. When fabric fades to dull, vinyl peels at the seams, or leather creases with a crackle of age, the interior stops telling the story of every mile. Restoring it demands more than a quick wipe and a new seat cover. It requires a measured understanding of how each substrate behaves under heat, pressure, and time, and a method that respects the material’s natural tendencies. The heart of successful upholstery work lies in choosing the right adhesive for the right substrate and then guiding that bond through a careful, patient restoration. In practice, this means starting with clean, dry, and stable surfaces, then validating every decision on a hidden corner or scrap before applying it to a visible patch. A disciplined approach prevents discoloration, brittle joints, or rubbery peels and sets the stage for a finish that remains comfortable and durable over countless road miles.
The materials found inside a truck cab are a spectrum of textures and substrates. Fabric, often a blend of polyester or nylon, may ride over foam and a backing that’s designed to stay flexible. Vinyl, common on older or more utilitarian trims, looks simple but reacts to solvents with surprising sensitivity. Leather and synthetic leathers, including PU variants, demand adhesives that can form a strong, lasting bond without becoming brittle under sun, heat, or cold. Foam padding, which cushions every bump, compresses over time and needs bonding agents that are both tenacious and elastic enough to move with the foam as it re-fluffs beneath a repaired skin. Then there are plastic backings and panels—often polypropylene or ABS—where the adhesive must cure without softening or staining the surface. Each material has a voice, and the right adhesive is listening for it.
Within this landscape, a universal glue tends to be a compromise. It might grab and hold briefly, but it rarely honors the specific demands of furniture-grade fabrics, real or synthetic leather, or the delicate textures of high-mileage blends. The sensible route is substrate-aware bonding. That begins with testing a small amount of adhesive on a hidden area—inside a seat seam or under a door panel—so you can observe color change, texture, and flexibility after the solvent dries or the heat cycles through the cabin. The test is cheap insurance against a patch that looks good in the shop but ages poorly in the sun or under repeated flexing. When the bond passes the hidden-area test, you can proceed with confidence, knowing the risk of visible damage has been significantly reduced.
A single tear in fabric invites a practical choice: repair or replacement. For minor rips, fabric glue can seal the edge and preserve the surface; sewing with a needle and thread can close the gap while keeping the seam nearly invisible, especially if you can align the fibers and fold the fabric so that the repair sits beneath a natural creasing line. For larger damages, a patch becomes necessary. The patch should be cut slightly larger than the tear to ensure full coverage and to distribute stress away from the repaired edge. Adhesive choice follows the patch’s fabric. A fabric-backed patch over fabric seating uses a flexible, fabric-friendly adhesive that won’t stiffen; a vinyl patch on vinyl should bond with a solvent-friendly action but avoid any solvent that could craze the surrounding material. When reupholstering or replacing an entire panel, the skill is less about patching and more about re-creating the correct tension and alignment so that the new surface behaves like the original under every flex and fold.
Leather and synthetic leather demand even more careful handling. The bond must withstand bending, creasing, and exposure to the sun without drying out or delaminating. Adhesives must be chosen to bond without causing ongoing brittleness or yellowing. It’s not only about sticking; it’s about staying supple enough to endure seasonal shifts and the everyday tug of a seat belt, a mounting strap, or a human settling into the seat. For this work, you’ll often work a thin layer of adhesive along the back of the skin or patch, then press and hold until the bond begins to take hold. The goal is a bond that travels with the grain of the leather rather than creating a hard seam that will split or peel away. If the skin has seen heavy wear, re-padding inside the seat cushion can be a wise move, preserving the leather’s surface by reducing the tension that comes from an exhausted foam core.
Foam padding deserves special attention because it provides the underlying comfort that defines a truck’s interior experience. Old foam compresses, loses resilience, and can create an uneven surface that undermines even the most precisely placed skin. When re-padding, choose a foam density that matches the original feel and a bonding method that can survive repeated compression. A flexible adhesive that remains resilient after curing helps the new foam stay in place without rippling or bubbling under a seat cover. The key is to avoid over-wetting the foam or letting adhesive wick into the skin in a way that bleeds through, creating stains or a stiff patch. The patch or resection should consider the way the seat will bend and flex when someone sits down, shifts, or stands up—the bond needs to move with the surface, not resist it and create a visible ridge.
Plastic backing and interior panels also require careful alignment and a compatible adhesive. A panel repaired with an incompatible chemical can soften and warp, leaving gaps around edges where dust and moisture can accumulate. The approach here is measured: clean both surfaces thoroughly, ensure there is no grease or dust that would undermine the bond, and apply a thin, even layer of adhesive across the contact area. Press firmly, then clamp or weight down the panel so the bond cures evenly. The curing process matters as much as the initial tack. Heat, humidity, and air flow can all affect how a bond sets—too much heat may cause a cured edge to become tacky, while insufficient airflow can slow cure time and trap moisture under the surface.
Incorporating repair work into the broader interior restoration means recognizing that upholstery does not exist in isolation. Cleanliness, odor control, and structural fixes all interact with how fabrics and skins perform in daily use. A clean cabin supports long-term adhesion because dirt and oils can break down adhesives and shorten the life of a patch or reupholstery. Deodorizing correctly—by sealing the space to allow treatments to work—helps prevent residues from interfering with the bond. When you begin to re-seat or re-cover panels, you’re not just changing the look; you’re restoring the baseline that allows every component to function as the designer intended. The seal between material and bond is the unsung mechanic of interior repair.
For drivers who seek a broader, ongoing source of practical wisdom, a well-curated reference is available through a familiar hub of automotive restoration. The Master Truck Repair Blog offers a wide range of troubleshooting tips, maintenance strategies, and narrative guides that reinforce the decisions behind upholstery work. Reading there can help connect the hands-on patching you do in the cab with more comprehensive interior maintenance routines, ensuring the interior remains cohesive with the rest of the truck’s systems.
Beyond the basics of patching and sealing, there comes a moment when some interiors deserve more than repair. For those seeking high-end outcomes, luxury truck interior services provide bespoke options that go past the standard fixes. Full cab re-upholstery, custom curtains, designed floor mats, and personalized quilting can redefine the cabin’s character and comfort. These options are particularly appealing for commercial operators who spend long hours inside the cab and want to cultivate a professional, premium environment for drivers and clients alike. Any serious interior project should begin with a clear understanding of material choices, adhesive compatibility, and the texture you want your surfaces to attain when the miles accumulate.
The practical takeaway remains steady: a durable interior repair begins with exact material matching, careful surface preparation, and a restrained hand with adhesives. Test, measure, and re-test across hidden and visible areas to ensure color fidelity and bond integrity. If you can align the patch’s grain with the surrounding surface and allow the cure to complete without disturbance, you will extend the life of the repair and preserve the interior’s aesthetic identity. Internal and external resources can provide continuities of care—from routine maintenance to premium upgrades—that keep the cabin not only usable but inviting. For broader inspiration on premium options, explore external resources such as luxury interior guides that discuss how high-end trims achieve longevity and comfort under demanding conditions.
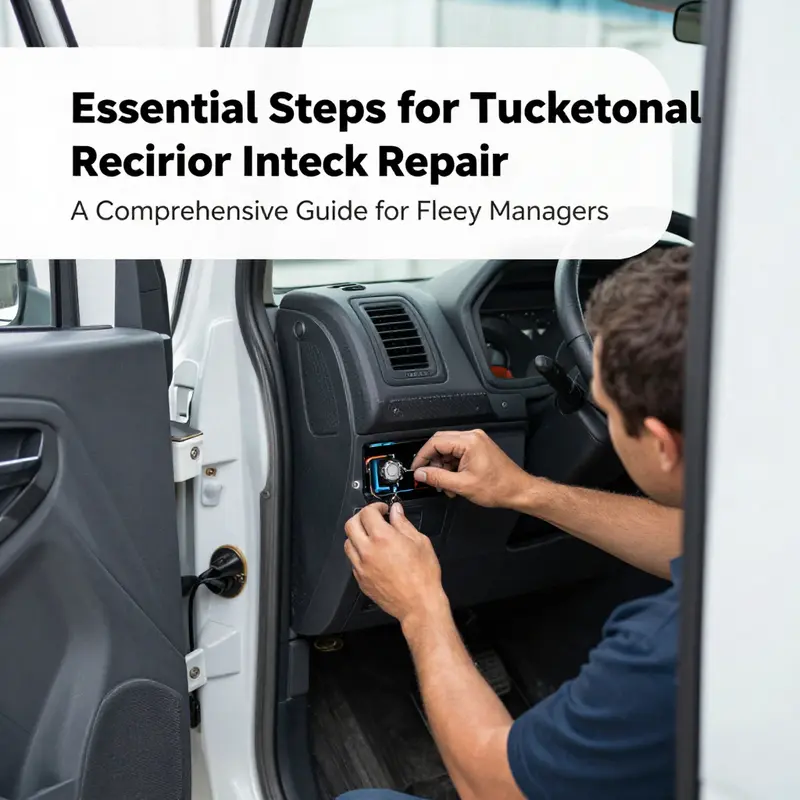
Rebuilding the Interior’s Backbone: Restoring Structural and Functional Systems in a Truck
Safety, Diagnosis, and System Restoration
Restoring a truck interior starts with more than upholstery and odor control. It demands rebuilding the bones and the systems that make the cabin safe and usable. Treat the interior as a working environment linked to mechanical systems. That mindset keeps repairs practical and lasting.
Begin with strict safety protocols. Wear gloves, eye protection, and a respirator when contaminants are present. For older trucks, consider full protective clothing. Seal the cabin when you apply cleaning chemicals or odor neutralizers. Work in a ventilated space when running mechanical tests. These steps protect you while you evaluate the interior for structural damage, wiring faults, and failing mechanisms.
A methodical diagnosis saves time. Start by listing items that affect structure and function: seat mounts, floor pans, door frames, window regulators, locking mechanisms, dash supports, wiring harnesses, and any controls tied into the engine or brakes. Inspect fasteners and mounting points visually, then test each moving part. Open and close doors, operate windows, shift seats, and engage locks. Listen for odd noises. Wiggle panels to check for looseness. Small signs often point to larger issues behind trim pieces.
Prioritize repairs by safety and frequency of use. A broken seat mount or a slipping seatbelt anchor is urgent. A cracked dash trim is cosmetic and lower priority. Addressing structural failures first prevents injuries and stops further interior damage.
When you find corroded or weakened metal, remove trim to get full access. Surface rust on brackets and seat rails can often be cleaned with wire brushes and treated with rust converter. If metal is perforated or thin, cut out the bad section and weld or rivet in a patch. Use body-grade materials and primer to slow future corrosion. For floor pans that show serious damage, replace panels rather than patching repeatedly. A patched floor is only a temporary fix when moisture and road salt continue to attack the steel.
Seat mounts and anchor points deserve special attention. Stress fractures can be hidden under carpet or padding. Remove the seats and inspect the underside. Replace stripped bolts and reinforce thin metal with plates or new brackets welded in place. Use grade-appropriate fasteners and torque them to spec. Never reuse a compromised anchor point for a seatbelt or child restraint.
Mechanical systems inside the cabin often connect to the engine or chassis. Lubrication is a simple fix that yields big returns. Grease hinges, window tracks, and sliding mechanisms. Apply lubricant to pedal pivots, hinge pins, and latch assemblies. Use a light touch to avoid attracting grime. Where grease fittings exist, use the correct grease and pump fittings until fresh lubricant appears at joints.
Addressing the engine and fluid systems is part of restoring the interior’s functional integrity when those systems affect the cabin. Draining old oil, replacing filters, and repairing fuel lines may sound like engine work, but they remove sources of odors and contaminants inside the truck. An engine with degraded oil or clogged filters can leak or vent fumes into the cab. Changing oil and filters, repairing lines, and correcting leaks improves cabin air quality and helps other interior systems function without corrosive residues.
Brake and air systems require careful attention. A damaged air line or leaking brake rod not only compromises safety but often leads to grease and grime inside the cabin where linkages pass through the firewall. Replace corroded rods, clutch and brake linkages, and any worn bushings. Ensure that rubber bellows and boots are intact to keep moisture and dirt out of pivot points. After mechanical repairs, bleed hydraulic lines and test air pressure systems to factory tolerances.
Electrical faults inside the cab can be subtle and frustrating. Start by checking fuse panels and grounds. Corrosion at ground points is a common cause of intermittent power failures. Clean grounds until bright metal shows and apply dielectric grease to prevent future corrosion. Trace wiring harnesses for brittle insulation, melted sections, and loose connectors. Repair damaged wires with soldered joints and heat-shrink tubing or with approved crimp connectors. Replace connectors that show signs of corrosion or heat damage.
When switches, gauges, or lights fail, confirm power at the component and at the switch. Faulty switches are often replaceable without removing large sections of the dash. For gauges that misread, inspect sender units at the engine or chassis before replacing the gauge. Verify that wiring runs are secure and routed away from heat and moving parts.
Seals and weatherstripping play a functional role beyond keeping water out. They reduce vibration, prevent rattles, and keep road noise and exhaust fumes from entering the cabin. Inspect door seals, window channels, and the cowl seal. Replace squashed or brittle seals with new material. For glass that binds in its channel, clean the tracks and check regulator alignment. Adjust regulators or replace worn rollers to restore smooth window operation.
Interior hardware such as glove box latches, cup holder trim, and dash clamps often hide larger problems. Loose trim can vibrate and accelerate wear on wiring and connectors. Secure panels with correct clips and fasteners. Replace broken clips and use backing plates when screws strip out plastic. When replacing trim, test access to wiring harnesses and vents to ensure that new pieces fit without pinching or stressing lines.
Insulation and soundproofing improve both comfort and longevity. Apply sound-deadening mats to floor and inner door skins after structural repairs. This reduces road noise and reinforces panels against flex. Add thermal insulation behind dash panels and under seats to protect wiring from engine heat. Ensure that any added materials do not block ventilation ducts or interfere with the operation of folding seats and airbags.
Reassembly is the moment to verify everything works together. Refit seats, test seat tracks, and ensure seatbelts retract properly. Run the engine and observe the cabin for new noises or smells. Check that all gauges read correctly and that warning lights behave as expected. Close doors and windows repeatedly to ensure proper alignment and sealing.
Document the repairs. Keep records of parts replaced, torque values used on critical fasteners, and any wiring changes. A clear log helps with future maintenance and can increase resale value.
Finally, adopt routine checks to preserve the work. Inspect fasteners and seals at regular intervals. Keep lubrication points serviced and clean wiring grounds. Small, scheduled checks prevent minor issues from becoming structural failures.
For guidance on maintaining repair practices in a fleet or shop setting, consult in-house maintenance resources such as the guide on the site about in-house truck maintenance practices for practical workflows and checklists: in-house truck maintenance practices. For a visual example of the kind of step-by-step restoration approach described here, see this illustrative restoration video: https://www.youtube.com/watch?v=examplevideoid
Mastering Advanced Interior Restoration: Techniques to Bring a Truck Cabin Back to Life
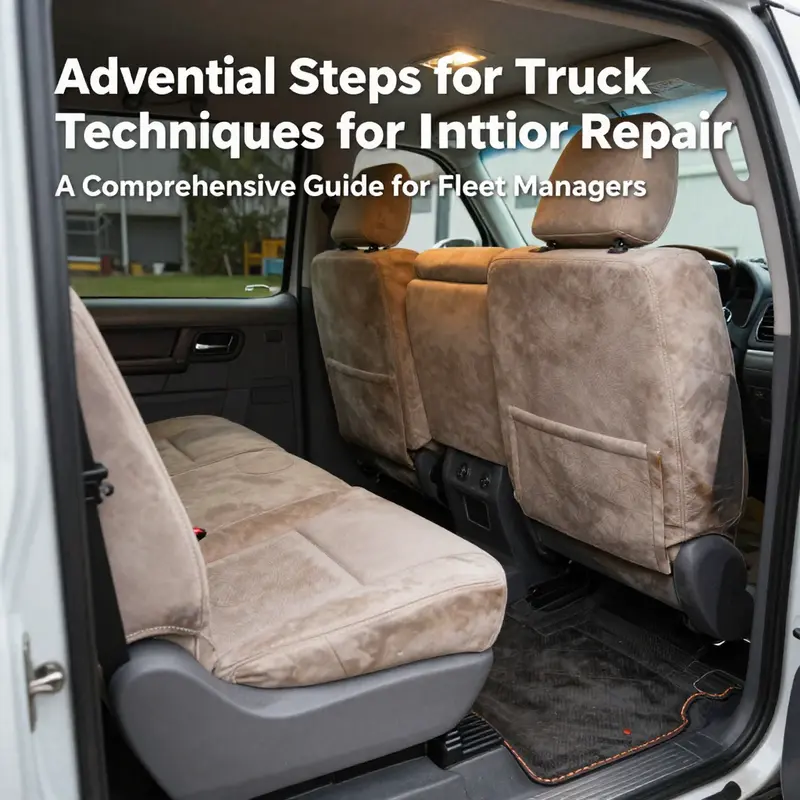
Restoring a truck interior at an advanced level moves beyond cleaning and basic patchwork. It requires a clear plan, the right materials, precise techniques, and patience. The work blends automotive repair, light upholstery, and cosmetic refinishing. This chapter walks through a cohesive approach to advanced restoration. It ties practical methods to the goals of durability, safety, and aesthetic harmony.
Begin by thinking in layers. The cabin is a system made of structural pieces, functional hardware, soft surfaces, plastics and trims, and finish details. Successful restoration treats problems from the inside out. Start with inspection and documentation. Photograph damage and create a priority list that separates safety issues from cosmetic ones. Structural or functional failures—corroded seat frames, broken seat adjusters, faulty window regulators, or exposed wiring—take precedence. Leaving them until last often wastes effort and risks redoing delicate cosmetic work.
Surface preparation is the foundation of any advanced restoration. Deep-cleaning removes contaminants that interfere with adhesives and finishes. Use appropriate cleaners for each material: gentle enzyme-based cleaners for fabrics, pH-balanced solutions for leather or vinyl, and specialized plastic cleaners for instrument panels. After cleaning, decontaminate with odor-neutralizing treatments. Allow full drying time; trapped moisture ruins upholstery repairs and interior adhesives.
Upholstery work often defines the final result. For foam interiors, assess the underlying padding before replacing covers. Old foam that has lost resilience needs replacement. Remove seat covers carefully to preserve zippers, clips, and fasteners. When refoaming, use density-appropriate polyurethane foam to match the original comfort level. Cut patterns precisely and test-fit before final gluing. Use contact adhesives sparingly and follow cure times to avoid soft spots or ridges. For stitched repairs, match thread weight and stitch density to existing seams. Invisible machine stitching looks best, but hand-stitching is useful for curved or awkward areas.
Leather and vinyl demand different tactics. Small cuts and punctures respond well to graded filler and color-matched dye. Clean the area, sand lightly to key the surface, apply a flexible filler, then texture and color-match with dye layers. For large sections or badly degraded panels, replace entire covers rather than attempt patching. Heat welding and seam-sealing techniques work well for synthetic covers; apply heat cautiously to avoid shrinking or burning the material.
Headliners and overhead trim are common trouble spots. A sagging headliner usually means the bonding adhesive has failed or the foam backing has deteriorated. Remove the headliner board and strip the old foam and fabric. Replace the foam with a thin, closed-cell layer that resists moisture. Use a high-quality spray adhesive rated for automotive headliners, and apply the fabric smoothly, avoiding wrinkles. Reinstall with attention to clips and trim to ensure a factory fit.
Plastic trim restoration restores perceived value. Faded dashboards and door panels regain life with careful refinishing. Start by cleaning and degreasing. Use plastic filler for cracks and sand progressively to smooth repairs. For textured surfaces, apply texture pads or stipple tools before painting. When painting, use adhesives and primers designed for flexible plastics. Thin, even coats prevent runs and maintain texture. Seal with a protective clear coat formulated for interiors to resist scratches and UV fading.
Electrical and functional restoration should be planned alongside cosmetic work. Faulty switches, dimming lights, or intermittent connections often hide behind panels. Label connectors during disassembly and test circuits with a multimeter before replacing components. When rewiring, use heat-shrink terminals and routed harnesses to prevent noise and abrasion. Upgrading grommets and rubber boots prevents future chafing. If adding modern conveniences—like supplemental lighting or USB power—integrate them with the truck’s electrical layout to avoid overloading circuits.
Sound deadening and thermal insulation deliver measurable comfort improvements. Sound-deadening mats, closed-cell insulators, and foam-backed barriers reduce road noise and vibration. Apply these materials to large flat metal areas under carpets and behind panels. Use a heat-resistant layer under the dashboard where necessary. Pay attention to cabin airflow; do not block vents or HVAC paths. Add insulation in thin, layered applications to keep the interior tight without crowding assemblies.
Color matching and finishing techniques create a cohesive look. Match dyes and paints under the cabin’s natural light. Test small areas to confirm hue and sheen. For two-tone interiors or custom accents, plan transitions with trim pieces rather than painted edges. Replacing decorative bezels, or reviving them with matched paint, results in cleaner lines than trying to paint around seams.
Hardware repair and replacement require a practical mindset. Seat frames and mechanisms can often be repaired by fabricating bushings, replacing pivot bolts, and straightening bent elements. Use corrosion-resistant coatings on exposed metal and lubricate all moving parts with the right grade of grease. Replace worn springs and ratchets; cheap fixes are temporary and reduce long-term value.
Adhesives and fasteners determine durability. Use adhesives suited to each material: flexible adhesives for vinyl, high-strength contact cement for foam-to-fabric bonds, and epoxy or plastic welding for broken rigid parts. Fasteners must match original specifications for length and thread. When replacing clips, use OEM-style retainers or high-grade aftermarket clips. Over-tightening plastic fasteners causes cracks and makes future disassembly difficult.
Tools matter. A basic advanced restoration toolkit includes a heat gun with temperature control, pneumatic or electric stapler, upholstery hog ring pliers, a small compressor for pneumatic tools, a selection of sandpapers and files, flexible filler compounds, and precision trim removal tools to avoid panel damage. Specialized tools—like an ultrasonic cleaner for small metal parts or a portable thermoplastic welder—pay off in complex repairs. Safety gear is essential: respirators for paints and adhesives, nitrile gloves for solvents, and eye protection.
Sourcing the right materials keeps the project efficient and cost-effective. Use upholstery-grade fabrics and automotive-grade vinyl or leather to withstand UV and abrasion. Consider sustainable options when available. Recycled or recyclable materials can offer good performance while reducing environmental impact. For rare parts, salvage yards and specialized online suppliers are valuable. Keep records of part numbers and patterns for future maintenance.
Workflow planning reduces rework. Follow a logical sequence: structural and electrical repairs first, then insulation and soundproofing, followed by upholstery and trim reinstallations, and finally fine finishing and detailing. Dry-fit components frequently. Allow adhesives and finishes to cure fully before stress testing seats or panels. Test all moving parts under load to ensure repair integrity.
Finally, document the restoration. Photograph before, during, and after stages. Note materials used, part sources, and cure times. This record helps future repairs and increases resale transparency. If you want examples from a shop that handles comprehensive in-house truck maintenance, see the Turnage Sons in-house truck maintenance resource for context and ideas: https://mastertruckrepairllc.com/turnage-sons-in-house-truck-maintenance/.
For further, step-by-step references and community troubleshooting guides, consult detailed tutorials available online. A broad repository of repair tutorials and diagrams can help with specific techniques and uncommon problems: https://www.carandtruckrepairhelp.com/.
From Guides to Practical Gains: Navigating Truck Interior Repair Resources for a Refreshed Cabin
Repairing a truck’s interior is less about a single fix and more about treating the cabin as a living space that carries your work, weather, and schedule. When approached as a coherent project, interior repair becomes a sequence of careful decisions that restore hygiene, comfort, and function without sacrificing safety. The work flows from one phase to the next, each step reinforcing the next, much like a well-planned maintenance routine. The starting point is not simply pulling out bad material but building a foundation of knowledge. This foundation helps you decide which tasks you can tackle yourself and where you should seek professional help. It also frames your choices in terms of long-term durability, which matters when you consider the truck as a mobile workspace. In this sense, gathering reliable resources is as crucial as selecting the right tools. A well-curated set of guides, tutorials, and reference materials ensures that you proceed with a clear map rather than a string of improvisations. The aim is to align hygiene, aesthetics, and function so the interior supports the demands of daily driving, long hauls, and quick pit stops alike. As you begin, the most practical mindset is to treat the project as a series of manageable tasks, each with its own safety considerations, time estimates, and potential trade-offs, rather than as an all-at-once overhaul of the entire cabin. A disciplined approach reduces the risk of cutting corners and creates a cohesive result that feels as solid as the truck itself when you step back into the cabin after a long day.
The path to a refreshed interior starts with the basics of cleanliness and odor control. If you have never performed a deep clean in such a space, you might be surprised at how much dirt, dust, and stale air accumulate in a few months of operation. Before you touch fabric, trim, or partitions, you want to create a clean, safe environment. Put on protective gear appropriate to the level of exposure you anticipate. This often includes a clean suit or old clothing that you don’t mind staining, gloves, and eye protection. The reason for this precaution is not merely dust. Over the years, cabins can harbor mold, mildew, or residues from spills and environmental exposure. Deodorizing is not about masking odor with a scent; it is about neutralizing the source and breaking down the compounds that cause the smell. A thorough approach involves sealing the cabin to trap volatile compounds, allowing treatment to saturate fibers and surfaces, and giving the product time to work. The overnight window is a practical rhythm for many owners because it balances effort with the cooling off period that helps deeper odors dissipate. As you work, document what you observe—staining patterns, leaks behind panels, or persistent dampness. This documentation becomes your reference for decisions about further restoration and what you might need to replace.
With the cabin clean and deodorized, attention shifts to what is visibly worn and what remains functional. The interior is a mosaic of components: seats and upholstery, floor coverings, panels, dashboards, and a network of switches and gauges. Start with the seats and floor mats because these elements absorb the most wear and directly affect comfort and posture on long drives. Fabric seats respond to routine cleaning, careful scrubbing with appropriate cleaners, and, when necessary, a steam refresh to lift stubborn stains. Tears and holes may be patched with fabric glue or needle-and-thread repairs for small breaches, while larger damage often warrants new seat covers or panels. Replacing worn mats is another straightforward upgrade that pays immediate dividends in cleanliness and foot comfort. The goal here is not to achieve showroom perfection but to create a durable, clean, and usable interior where the next mile feels easier than the last. You will inevitably encounter surfaces that resist simple cleaning—textured plastics, vinyl, and the dashboard can accumulate scuffs and fading. In those moments, you must weigh whether a conservative repair or a full panel replacement will deliver the best value and appearance over time. Materials selection matters, but you should also design for future maintenance: easy-to-clean textures, removable covers, and simple access to cleaning ports reduce the effort required for ongoing upkeep.
Attention to the structural and functional components of the interior is essential because these elements ensure safety and convenience in the cabin. Once you have established a clean baseline, inspect door handles, window regulators, latches, and other moving parts for looseness, sticking, or abnormal resistance. Structural integrity within the cabin means not just the obvious frame or panel alignment but the timing and reliability of window operation, glove box doors, and seat tracks. Electrical systems inside the cabin warrant careful inspection as well. Check switches, lights, gauges, and wiring for proper operation. Replacing or bypassing faulty fuses, relays, or connectors isn’t glamorous work, but it is necessary to prevent intermittent failures that can create unsafe conditions on the road. Lubrication becomes a practical detail here: hinges, locks, and sliding mechanisms benefit from a light, appropriate lubricant to restore smooth action and reduce noise. Window tracks, door seals, and glove box doors are often quiet drivers of comfort when they operate smoothly; neglecting them tends to magnify small irritations into bigger daily annoyances. This is where the project begins to reveal its longer-term value: the interior becomes a more reliable tool for work, not merely a space to endure.
For those who want to push beyond the basics, there are longer-term restoration options that transform the interior into something closer to a factory feel or a customized workspace. Reupholstering seats can dramatically improve comfort, reduce fatigue, and extend the life of the interior. Replacing worn trim—whether it’s around dashboards, doors, or seating—addresses cosmetic wear that, over time, can undermine the sense of durability you want from a work vehicle. Increasing insulation or adding soundproofing materials is another meaningful upgrade. These choices improve climate stability and cut road noise, which in turn reduces fatigue. The decision to pursue these enhancements depends on the truck’s usage, the climate, and how much you value a quieter cabin after hours on the road. If you embark on these enhancements, approach them with a plan: establish your budget, timeline, and the level of professional assistance you are willing to invest in. Some tasks, like precise upholstery work or panel replacement, may benefit from skilled trade input to ensure safe installation and long-term performance. The overall philosophy remains consistent: balance the reward of a refreshed cabin with the practicality of what you are prepared to accomplish and maintain.
In gathering resources for interior repair, the aim is to build a coherent framework rather than chasing scattered tips. Quality guides help you understand the limits of what you can achieve with your own hands and where you should call on a professional. The right tutorials or reference materials can save you from costly missteps and help you plan a staged approach that minimizes downtime. If you are starting from scratch, look for sources that explain the workflow in a logical sequence—from assessment to cleaning, then to repairs, and finally to upgrades that improve longevity and comfort. A consistent thread through reliable resources is the emphasis on safety. Removing panels, dealing with electrical components, or working around air systems requires a careful evaluation of risks and a plan to mitigate them. You should expect that some tasks will require specialized tools or the expertise of technicians trained to work with vehicle interiors. Facing a repair project with a realistic expectation about scope and time prevents frustration and encourages steady progress. A well-structured set of guides, preferably with diagrams, step-by-step instructions, and safety precautions, makes the effort feel manageable rather than overwhelming.
As you consult various resources, you start to notice a few recurring themes that help you gauge the quality and relevance of a guide. Clear, safety-first instruction matters. Step-by-step directions should match your vehicle’s layout and your own skill level. Visuals such as diagrams or photos that illustrate interior panels, fasteners, and wiring routes are invaluable. Access to diagrams or exploded views can be especially helpful when you move beyond cosmetic repairs into restoring the functional aspects of the cabin. The value of reputable, up-to-date information becomes even more apparent if you are dealing with models that span different eras. Different generations of trucks may use distinct fastening systems, trim pieces, or electrical configurations, and a good resource will acknowledge those variations rather than presenting a one-size-fits-all approach. As you accumulate knowledge, you also gain the ability to forecast the time and cost required for each phase of the project, which sharpens decision-making and helps you avoid scope creep.
To make this process concrete without becoming overwhelmed, consider weaving a steady loop of reading, assessment, and execution. Start each session with a quick check of safety, then review your current cabin state, and select the next action that will push the project toward a tangible improvement. Record your progress and any measurements you take—this becomes a practical reference for future maintenance and for any future interior tweaks. As you navigate more guides, you may discover a preferred method for certain tasks or a preferred sequence that aligns with your truck’s layout. The converging ideas across high-quality resources create a practical toolkit that supports better decisions during both planned upgrades and spontaneous fixes on the road.
In terms of practical navigation, you can leverage a centralized resource hub that offers tutorials, diagrams, and community support. This can serve as a reliable backbone for your interior repair journey, ensuring you are not piecing together information from disparate sources without coherence. For readers who want a straightforward starting point, the Master Truck Repair blog provides a broad range of insights and practical advice on truck maintenance and repair workflows. It consolidates core principles into approachable steps, and it can complement more model-specific manuals as you refine your plan. You can visit the Master Truck Repair blog to explore foundational topics and read about methods that resonate with your approach to interior work. Master Truck Repair blog
Beyond blogs and guides, you will also encounter reference materials that illuminate the more technical aspects of interior repair. These resources cover interior trim repair, acoustic treatment concepts, and the trade-offs between different insulation strategies. They can help you decide not only what to do but how to approach the project efficiently. When you translate these ideas into your truck, you begin to experience benefits in real terms: improved cleanliness, better climate control, and a cabin that feels less like a neglected space and more like a productive workspace. The cumulative effect of careful cleaning, thoughtful replacement, and strategic upgrades is a cabin that supports your schedule, protects your cargo, and contributes to safety and comfort on long journeys. In the end, the interior is not merely a background for the vehicle’s performance; it is an essential element of the overall driving experience.
If you want to extend the value of your interior project, consider building a small, ongoing maintenance plan that includes quarterly checks, seasonal deodorizing, and a budgeting framework for future improvements. It is tempting to pursue every upgrade at once, but incremental improvements with documented outcomes deliver more predictable results and help you stay on schedule and budget. The process you adopt for interior repair should be designed to be repeatable, so future maintenance or replacements can be handled with confidence and clarity. By embracing a structured approach and leveraging credible resources, you ensure that the interior repair you undertake remains aligned with your broader goals for vehicle reliability and operational efficiency. For readers who are ready to dive deeper into the mechanics of interior care and want a curated starting point, a skilled, credible guide collection becomes a valuable ally, reducing the risk of wasted effort and guiding you toward durable, practical improvements over time.
External resource: https://www.carandtruckrepairhelp.com/
Final thoughts
Repairing truck interiors is essential to maintaining the comfort, functionality, and safety of your fleet. The outlined methods — from thorough cleaning and deodorization to the intricate details of upholstery repair and structural modifications — provide a roadmap for preserving and enhancing the value of your vehicles. Implementing these strategies ensures that your team operates in a professional environment and optimized truck interiors contribute to overall fleet efficiency.

