Truck roof leaks can significantly disrupt operations, especially in industries reliant on fleet vehicles. A common source of these leaks is the sun visor area. Understanding how to identify, repair, and prevent leaks is crucial for fleet managers and trucking company owners. This guide offers a structured approach, spanning from leak identification to effective sealing techniques. Each chapter builds on practical insights to ensure a comprehensive understanding of the repair process, ultimately helping to maintain vehicle integrity and operational efficiency.
Seam to Seal: Tracing and Repairing a Truck Roof Leak Rooted in the Sun Visor
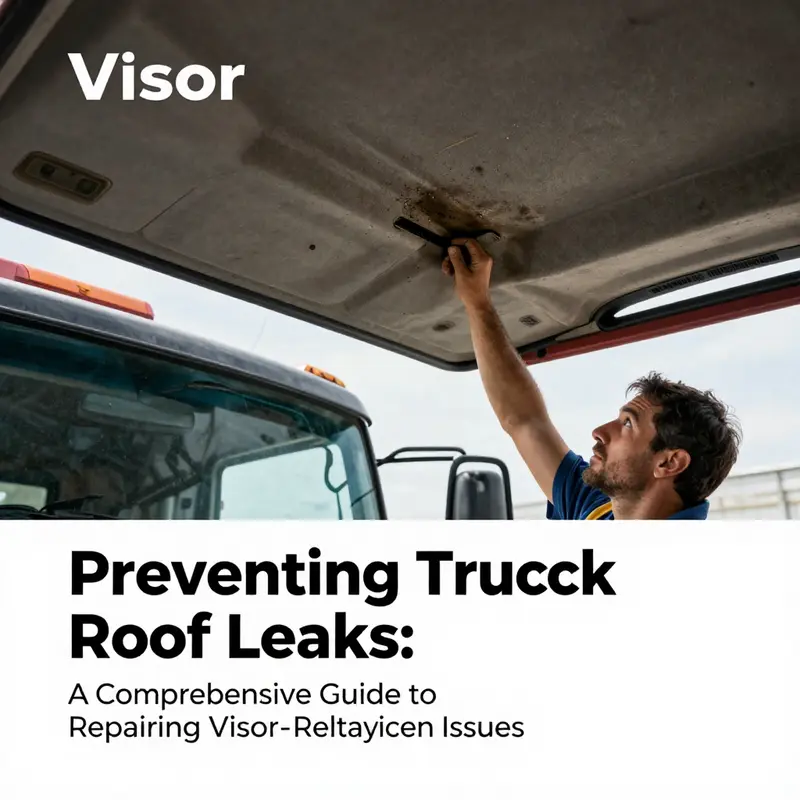
Water creeping through the roof around a sun visor can feel like a stealthy opponent—small at first, then stubborn enough to demand attention. In a truck, the visor sits at a critical junction where the high-wobble of daily use, wind-driven spray, and the aging of sealants all converge. The goal here is not a dramatic overhaul but a careful tracing of the leak’s path and a methodical restoration of the seal around the visor. A leak in this area often starts at the visor’s mounting points or at the line where the visor meets the roof panel. The signs may be subtle: a damp patch on the headliner near the visor, a faint musty odor, or blotchy spots that appear after a heavy rain. The approach is practical and surgical. It begins with a careful inspection, proceeds through targeted seal replacement, and ends with a thorough test that mimics real rain. The overall aim is a durable, long-lasting seal that keeps the interior dry and the headliner intact, without the need for a more invasive roof panel replacement. For those who want a broader view of exterior sealing tasks, the Master Truck Repair blog offers practical insights that complement this approach.
Begin with a visual and tactile survey of the visor assembly. Remove the immediate clutter around the area so you can see every seam and joint clearly. Look closely at the visor housing itself from multiple angles. Cracks in the plastic housing, chips at the corners, or a housing that has shifted from its original position can all create pathways for water to follow into the roof. Next, examine the rubber grommets and the seals around the bolts that secure the visor to the roof. These grommets take a lot of abuse from temperature changes, road debris, and repeated tightening and loosening during maintenance. Cracked, brittle, or flattened grommets are common culprits. Even when grommets look intact, the holes they anchor into can accumulate years of grime, which reduces their ability to form a tight seal. You should also inspect the seam where the visor meets the roof panel. This seam should be uniformly filled with a weatherproof sealant and not show gaps, voids, or separation. Any of these conditions invites water to weep into the vehicle interior. The water’s path often travels along the visor’s edge, then drips toward the headliner due to gravity, so the area beneath the visor is a natural focus for testing.
After the initial inspection, shift to cleaning. Dirt, dust, and old sealant residue can hide real damage and mask drainage problems. Use a degreaser to wipe the visor mounting points, the bolt holes, and the seam where the visor attaches to the roof. A clean surface ensures that new sealant bonds properly and that any drainage channels stay clear. As you clean, keep an eye on drainage paths that many visors include to divert water away from the interior. If you find clogged channels, remove the obstruction with a thin wire or by carefully blowing compressed air through the lines. A blocked drain is a common reason small leaks become larger problems after a heavy downpour. Then, inspect the fasteners. Tightness matters. If screws or bolts are loose, the visor can shift slightly, creating micro-gaps that allow water to creep in. Tighten to the manufacturer’s torque specification where possible, and ensure the grommets seat flush against the roof skin. When you test tightness, check for any visible gaps around the mounting hardware. You should also verify that the screws and the grommet seats align precisely with their holes; any offset can produce a leaky seam that is difficult to seal later.
If the visual and cleaning checks don’t reveal an obvious breach, the problem may be a compromised seal between the visor and the roof panel due to age-related fatigue. In such cases, resealing the entire perimeter with a high-quality automotive-grade silicone sealant designed for exterior use can resolve the issue. Apply the sealant evenly along the visor-to-roof seam and around each mounting point. Use a caulking gun to ensure a neat bead, and smooth it with a wet finger or a tool to form a continuous, watertight barrier. It’s important to apply the sealant in dry conditions and to give it ample curing time before testing. Don’t rush the process; a rushed seal invites microvoids once the sealant begins to shrink as it cures. As you work, keep the line of sealant steady and maintain a consistent depth around every edge. The goal is not merely to fill gaps but to create a resilient skin that remains flexible as the vehicle experiences temperature swings.
With the sealant set, reattach the visor securely. Reinstall the grommets so they are properly seated and the visor aligns with the roof plane. At this stage, the test becomes critical. A controlled water test is the only reliable proof that the repair will withstand rain. Have a capable helper inside the cab to observe the headliner and interior surfaces while you run a hose along the visor’s front edge and the adjoining roof area. Start with a gentle spray and gradually increase pressure while moving from the front toward the back. Shadow the water’s flow and watch for the first drops to appear on the headliner or anywhere inside the cab. The moment you observe moisture, stop the test and inspect the affected area. If water is seeping, identify whether it’s entering through a gasket, a seam, or a mounting hole. Sometimes a leak will reveal itself only at certain angles or during specific spray patterns, so test from multiple directions. If the leak persists, you may need to re-clean the mounting holes, apply a fresh bead of sealant, and reseal the joints again. The entire process is iterative and seeks a single, lasting solution rather than a temporary fix.
The voyage from surveillance to seal is as much about architecture as it is about materials. The visor’s mounting points are high-stress zones. They endure daily vibration, wind shear, and thermal expansion and contraction. These forces can cause grommets to crack, fasteners to loosen, or sealants to degrade unevenly. In some cases, the leak path originates at a corner where the visor frame meets the windshield frame or where the roof panel meets the visor housing. This is where a small bead of sealant and proper grommet seating can make a large difference. If you have ruled out obvious hardware failure and still see moisture, consider the possibility of micro-damage to the roof skin beneath the visor. A tiny puncture or peel in the paint can compromise the underlying sealant’s integrity. In such instances, you may need to clean the area again, treat the exposed substrate, and reapply a fresh sealant, ensuring full curing before the water test. The key is patience and thoroughness. A leak about which you are confident becomes a leak you can forget, and that confidence grows from repeated checks that the sealant remains flexible and free from cracking.
To connect this process to broader maintenance, remember that roof seal integrity is part of a larger habit of inspecting exterior joints and weather sealing as a routine practice. It’s not only about stopping a current leak but about preventing future water intrusion that can damage insulation, adhesives, and electrical components near the roof. If you want to explore related exterior sealing tasks and maintenance routines, consider visiting the Master Truck Repair blog for additional practical guidance. For manufacturer-specific interpretations and service references, you may also consult the official manufacturer resources, such as Freightliner Support, which provide guidance on exterior seals and visor installation.
In final terms, repairing a truck roof leak from the sun visor area requires a blend of careful inspection, sound sealing practice, and disciplined testing. Each step—from cleaning and gasket evaluation to precise sealant application and a methodical water test—builds toward a durable, long-lasting fix. This approach minimizes the risk of recurring leaks and protects the interior from moisture-related damage. When performed with attention to detail, the repair preserves not only the vehicle’s value but also the comfort and safety of everyone inside, especially on long-haul routes where a dry cabin matters as much as a reliable engine. For further reading and a broader context on similar exterior sealing tasks, refer to the linked resources and guides that accompany this chapter.
External resource: For manufacturer-specific guidance and repair manuals related to visor seals and exterior joints, you can review official support documentation at Freightliner Support: https://www.freightliner.com/support
Seal the Sun Visor: A Practical Guide to Repairing a Truck Roof Leak

The first drops that sneak past the visor on a work truck are more than a nuisance; they expose a moisture path that can threaten the headliner and wiring. Water intrusion here is common because the visor sits at a perched junction where the roof seam, mounting brackets, and seals meet. A durable repair starts with diagnosis, then careful sealing and proper mounting to restore the rain barrier.\n\nTo begin, inspect the visor housing and its mounting points. Look for cracks in the plastic, separation around brackets, and any loosened fasteners. Then check the grommets or seals around the visor bolts; worn, cracked, or deformed grommets are frequent leak sources. Finally examine the seam where the visor meets the roof panel; there should be a continuous, pliable seal without gaps. If dampness appears around these areas during a test spray, you have located the likely path of moisture.\n\nPreparation is the next step. Gather replacement seals appropriate for your truck model, fresh grommets if needed, a plastic trim tool, clean cloths, a mild degreaser, and a flexible automotive sealant. A sealant that stays pliable through heat cycles is essential. Set up a clean workspace and, if available, consult your vehicle’s service information for any model-specific guidance.\n\nWith area prepped, remove the visor to access the seals and mounting surfaces. Open the visor, gently release the fasteners with a plastic tool, and detach any wiring harness if present. Set the visor aside in a safe place. Clean the mounting surface thoroughly, removing debris and old sealant, then dry it completely before proceeding.\n\nInstall the new seals. Verify the seals fit the visor model, apply a thin bead of sealant along the inner edge if recommended, seat the seal evenly along its groove, and press to remove any wrinkles. Install the grommets and hardware, but do not overtighten, which may distort the seal. Re-align the visor so it sits square with the roof line and returns to its closed position smoothly.\n\nReinstall and test. Reconnect any wiring, reattach the visor, and check that it closes without binding and that the seal remains flush against the roof. Perform a controlled water test from multiple angles and pressures. Inside the cab, observe for any signs of moisture. If leaks persist, inspect seal seating and compression again and consider reseating or replacing the affected components.\n\nMaintenance and context. Regularly inspect the visor, mounting hardware, and surrounding roof seam to catch wear before it becomes a leak. Keep mounting holes clean and free of debris, and address any rust or deformation promptly. If the roof structure shows significant damage, consult a professional to prevent further issues.\n\nFor broader guidance and visuals, you can consult related maintenance content from trusted sources such as the Master Truck Repair blog. And for a model-specific repair walkthrough, refer to manufacturer instructions or reputable automotive guides as needed: https://mastertruckrepairllc.com/blog/
Guarding the Roof: Reclaiming a Leak-Free Truck Roof Around the Sun Visor
Water seeping in around a sun visor can feel like a small nuisance until it becomes a stubborn puddle that stains the headliner and accelerates corrosion. The sun visor sits at a junction where the roof panel, weather seals, and mounting hardware all converge, and over time those interfaces can fail. A leak here is not just a matter of dripping water; it is a signal that the roof interface around the visor has compromised integrity. The repair process is straightforward in principle but requires careful attention to surface preparation, sealant selection, and a methodical reassembly. When done properly, you restore a weatherproof seal that lasts through hot sun and cold rain, and you return the interior to a dry, quiet state.
To begin, you must identify where the intrusion originates. Start by inspecting the sun visor housing itself for cracks, holes, or a loose fit where the visor attaches to the roof. A visor that wobbles or shows a gap at the mounting points is a red flag. Next check the rubber grommets or seals around the bolts that secure the visor to the roof. These grommets are a common failure point because the constant exposure to heat, UV, and vibration causes them to crack or compress over time. Inspect the joint where the visor meets the roof panel as well; the seam should be continuous and sealed. If you see any gaps, the water is likely tracking through those paths, particularly during a heavy rain or when the vehicle is washed.
If you’ve confirmed moisture near the visor, the work proceeds in a practical sequence: remove the visor enough to access the mounting hardware and the sealing surfaces, clean thoroughly, replace worn grommets, reapply sealant, and reassemble with an eye toward a long-lasting seal. The goal is not merely to stop the current leak but to create a durable barrier that withstands the thermal expansion and contraction of the truck’s exterior. The repair steps below are guided by standard automotive practice and aim for a robust, repeatable result. For readers seeking a broader overview of weatherproofing approaches in truck work, a related step-by-step guide can be found in the DIY windshield repair guide for truck owners. https://mastertruckrepairllc.com/diy-windshield-repair-guide-for-truck-owners/.
With the visor removed enough to gain access, you can inspect the mounting holes and the grommets that anchor the visor to the roof. If the grommets are cracked, brittle, or sun-aged, they should be replaced. Carefully remove the old grommets and clean the mounting holes so there is no grit or old sealant to hinder a fresh seal. A clean, dry mounting surface is essential for the new seal to adhere properly. The mounting holes should be free of rust and burrs; if you find rough edges, a light deburring with a tiny file or a fine abrasive pad is appropriate. Once the hardware is removed and the area is clean, take a moment to inspect the visor’s edge where it meets the roof panel. Any visible gaps or irregularities here can also serve as entry points if the seal has failed.
Preparation is the backbone of a lasting seal. Start with a thorough cleaning of the entire area around the visor attachment. Remove dirt, grease, old sealant, and debris with a degreaser. Wipe everything dry and allow the surface to air-dry completely. Contaminants love to hide in nooks and crannies, and a single drop of oil or a layer of grime can prevent sealant from bonding. When the area is clean, lightly sand the edge of the visor bracket and the corresponding roof surface with fine-grit sandpaper, around 120 to 220 grit. The light abrasion creates a micro-rough surface that improves adhesion. After sanding, wipe away the dust with a lint-free cloth and let the area dry again. This surface preparation—clean, dry, and lightly abraded—sets the stage for a durable bond.
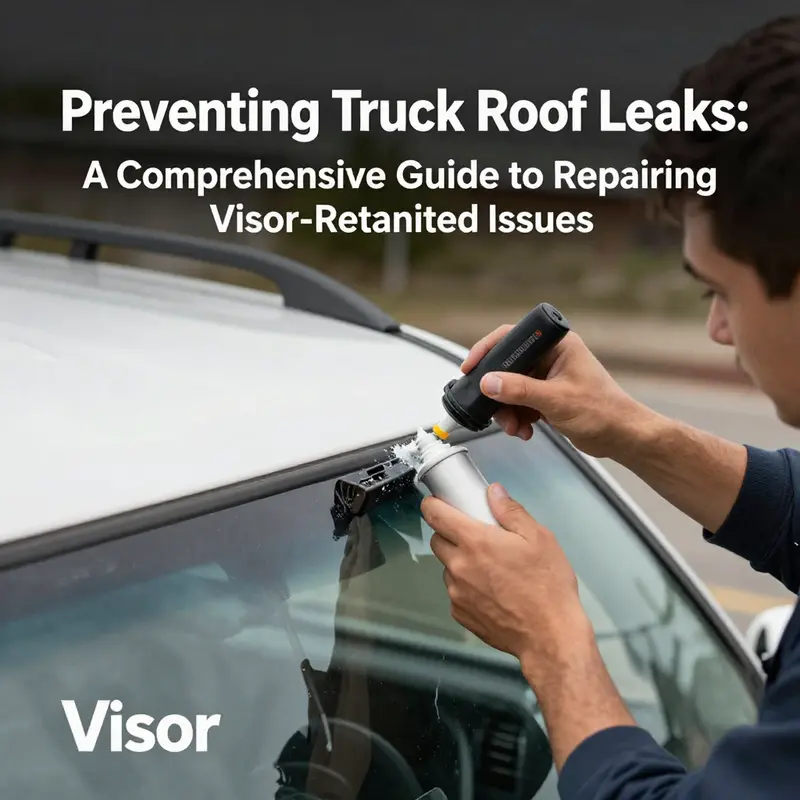
Choosing the right sealant is crucial. A high-performance, flexible automotive-grade sealant provides the best long-term results. Polyurethane-based sealants are favored in this application because they bond well to both metal and plastic, resist UV exposure, and maintain flexibility across temperature swings. These sealants form a durable, weather-resistant gasket around the joint where the visor meets the roof panel. It is wise to avoid standard silicone sealants here if the goal is a strong, long-lasting bond; silicone can suffer from lower adhesion on some painted or primed surfaces and may not hold up as well under temperature cycling. The general principle is straightforward: look for a polyurethane-based, OEM-compatible sealant that remains flexible and resists shrinkage. To keep the discussion practical and accessible, we’ll emphasize a uniform, continuous bead that covers every potential water entry point along the joint without creating excessive squeeze-out.
Applying the sealant is a careful, repeatable process. Begin at one end of the visor joint and run a continuous, even bead along the entire seam where the visor attaches to the roof. Maintain a steady hand and apply at room temperature in a well-ventilated area. A caulking gun helps achieve a neat, consistent line. Don’t rush; a smooth, uniform bead reduces the chance of gaps that can trap moisture or air pockets. After laying the bead, use a wetted finger or a dedicated sealant tool to smooth the bead along the joint. This smoothing step helps to push out any air pockets and creates a continuous, uniform seal that sits flush with both surfaces. Take care to fill all crevices and ensure the sealant completely bridges the gap between the visor bracket and the roof panel.
Once the sealant is laid, let it cure as per the manufacturer’s instructions. Curing times can vary, but a typical window is 24 to 48 hours before exposure to moisture or heavy rain. During this time, avoid washing the vehicle or exposing it to direct spray, and do not subject the seal to external stresses such as bending or jostling the visor. A controlled cure is essential; any movement during curing risks creating thin spots or misalignment in the seal, which could undermine the repair. The curing phase is a quiet, patient interval where the components bond and the sealant reaches its full resilience.
Reinstalling the visor with a renewed seal is the next important step. Reattach the visor using the new grommets and ensure they are seated properly in their mounting holes. If the visor or its mounting hardware shows signs of wear beyond the grommets—such as cracked brackets or bent bolts—it might be worth replacing those parts as part of a comprehensive repair. After reassembly, perform a controlled test to verify the repair. Have someone inside the cabin observe from beneath the visor area while you spray a deliberate stream of water over the roof near the visor. A thorough test should reveal no drips, no dampness along the seam, and no water migrating toward the headliner. If any moisture appears in this test, you may need to re-evaluate sealant coverage or inspect for additional gaps that may have developed around fasteners or along the junction with the roof panel.
While this approach is effective for many leaks, some conditions call for more extensive action. If the leak persists despite a fresh seal and grommet replacement, it may be necessary to replace the entire visor seal or even the visor itself if the bracket or housing has suffered structural damage. In that scenario, a careful evaluation of the cost and feasibility is wise, especially when considering future exposure to weather and road debris. The goal remains a robust, weatherproof interface that withstands daily use and environmental stressors. For those who have pursued broader weatherproofing efforts, a related resource details additional context and steps that can complement this work without duplicating it. The internal reference above serves as a bridge to a broader, practical approach to vehicle weatherproofing.
Even after a successful repair, ongoing maintenance can prevent future leaks. Regular inspections before and after winter and during seasonal transitions help catch early signs of sealant degradation, gasket hardening, or mounting creep. Look for small cracks around the visor’s mounting points, dried sealant at the seam, or any fresh gaps that could invite moisture. Keep the surface around the visor clean; debris or car wash detergents can degrade sealant surfaces over time. A light cleaning and re-inspection every six months, combined with a quick re-treat of the joint if you see signs of wear, can safeguard against recurring leaks. Remember that the roof’s exposure to sun and weather is cumulative; protecting the joint from cumulative damage means more consistent performance and a drier interior across years of use.
In sum, the repair around a truck’s sun visor hinges on thorough diagnosis, meticulous surface preparation, and a carefully applied polyurethane-based sealant that yields a flexible, durable bond. The process respects the materials involved—metal, plastic, and painted surfaces—while delivering a lasting barrier to moisture entry. When you reassemble and test, you’ll know the repair has stood up to real-world conditions. And with a disciplined maintenance routine, the visor area can remain watertight for years to come, turning what began as a nuisance into a solved, routine repair that keeps the interior dry and the structure sound. For readers seeking a broader, deeper dive into related weatherproofing techniques, this topic links to a broader set of maintenance guides that complement the visor-seal repair and reinforce practical, hands-on skills for truck owners.
Internal resource for related guidance: DIY windshield repair guide for truck owners.
External reference: https://www.jd.com/
Seal the Visor, Seal the Cab: A Unified Approach to Repairing Truck Roof Leaks From the Sun Visor
A truck roof leak that seems to originate at the sun visor area is rarely a single-crack problem. More often it is a sequence of small failures that align to let water creep into the cab. The visor—heavy with its mounting points and its own seal—acts as a wedge that can pry apart aged grommets, misaligned mounting holes, and deteriorated sealant. The repair work, therefore, needs to read the landscape of the roof as a single system rather than a collection of isolated parts. Start with a quiet, patient examination: inspect the visor housing for cracks or loose fit, check the grommets around the bolts that anchor the visor to the roof, and look at the seam where the visor meets the roof panel. Each of these elements can be a source of intrusion, and their interdependence means that a fix in one area may fail if another nearby gap remains. This approach treats the repair as a cohesive task, not a patchwork of quick fixes, and it sets the stage for a long-lasting seal that keeps the cab dry through the heaviest spray and the gentlest drizzle alike.
A practical repair begins with identifying the exact point of ingress, which in most trucks is a combination of worn seals and compromised mounting hardware. The sun visor is held by bolts that pass through rubber grommets and into the roof. Over time, those grommets can crack, become brittle, or shift under load, allowing water to wick along the bolt shaft and into the seam where the visor meets the metal roof. Even a seemingly minor misalignment can create a micro-gap that lets wind and water force their way in during a rain shower or a misty morning. A clean, thorough inspection is essential. If you detect signs of water on the inside of the headliner near the visor, or if you notice rust or corrosion around the mounting holes, treat those symptoms as part of the same problem. Wipe away any moisture, dry the area, and prepare to address both the source and the pathway of the leak.
With the source identified, the repair proceeds along a deliberate path that preserves the integrity of the roof and visor assembly. Begin by removing the visor to access the mounting holes fully. This step is not a luxury; it is a prerequisite for a truly effective seal. Once the visor is off, inspect the mounting hardware and the grommets. If any grommet is cracked, deformed, or perished, replace it with a new one that matches the truck’s model. Cleaning the mounting holes is crucial; dust, oil, and old sealant remnants can prevent a clean seat for the new grommets and create micro-gaps that invite leaks anew. After installing new grommets, re-check the alignment of the visor when reinstalled. A visor that sits askew will not only look out of line but will also stress the seal in ways that promote seepage over time. This alignment check should be performed with the visor loosely held in place so you can confirm that the hole pattern and the visor’s base fit flush with the roof plane.
The sealing phase is where the repair becomes a durable barrier against water. Before applying any sealant, thoroughly clean the entire area around the visor mounting points and the seam where the visor meets the roof panel. Degreasing is essential because oils from hands or cleaning solvents can sap the adhesion of sealants. Once the surface is clean and dry, apply a high-quality, flexible automotive-grade sealant along every joint and gap around the visor’s perimeter. Do not skimp on coverage—sealant should bridge the full circumference where the visor attaches to the roof and should also fill any seams between the visor base and the roof line. A caulking gun helps produce a neat, continuous bead; smoothing the bead with a wet finger or a dedicated tool ensures the sealant forms a uniform, watertight barrier without air pockets. The aim is not merely to cover a gap but to create a resilient, elastic seal that accommodates movement and temperature fluctuations without cracking.
After the sealant has been applied, the visor is reinstalled with care. Tighten the mounting screws or bolts to the manufacturer’s specified torque, and ensure the new grommets seat properly without crushing or pinching. Overtightening can deform the mounting holes or the visor base and ironically create new routes for water to enter. A correct torque keeps the visor solidly in place while preserving the integrity of the gasketed seal around the mounting points. At this stage, you may be tempted to declare victory, but a thorough test is essential to verify the repair’s effectiveness. The most reliable test is to simulate rain. Use a garden hose at a moderate spray setting to wet the area around the visor and its attachment points, taking care to cover the seam where the visor meets the roof. Have a second person inside the cab to watch for any drip, damp spot, or moisture traveling along the headliner. Water can travel in surprising ways, running along a bolt shaft or following the underside of the visor until a visible wet patch appears somewhere unexpected. Do not overlook the interior closely; water can seep through micro-gaps and collect behind trim, where you might not notice it immediately.
If the interior shows any sign of moisture, identify the precise source before reworking. Sometimes the initial leak reduces only to a nearby gap that wasn’t seen in the original inspection. It can be necessary to remove the visor again, reapply a fresh continuous bead of sealant along the clean, dry surface, and ensure no thin lines of uncured sealant remain. The curing time matters: allow the sealant to set fully according to the product instructions, which often means a full day before returning to rain testing. After re-cure, repeat the hose test, focusing on the same seam and the surrounding joints. In many cases, the second application yields a dry interior because the first pass removed underlying contaminants and established a more complete seal. If, after reapplication and curing, leaks persist at the original site, there is a need to trace the path of water more carefully. It could indicate another gap in close proximity, perhaps at a corner or along a nearby seam that feeds moisture toward the visor area. The goal is a seamless, continuous barrier that weatherproofs the entire roof-visor junction, not a patch that merely slows the flow.
When the test shows no leaks, the repair has achieved its purpose, yet a final, practical step helps safeguard the future. After a few days of operation in varied weather, perform a quick visual check to confirm that the sealant remains intact and that the visor remains firmly aligned. Regular maintenance reduces the chance of recurring leaks. It is wise to inspect the visor area during routine maintenance intervals and to keep an eye on the condition of the grommets and mounting hardware. If you notice any loosening or cracking, address it early before water finds a new path into the cab. For readers seeking broader, practical context on truck maintenance and repair, the Master Truck Repair Blog offers extended insights and related topics that complement this visor-based repair. Master Truck Repair Blog
External resources can provide additional confirmation of best practices. Consider a detailed guide on sealing roof joints and visor mounts from reputable automotive repair references, which discusses the importance of clean surfaces, appropriate sealant selection, and proper cure times. This external reference can help you compare approaches and verify that your method aligns with industry-standard recommendations. The emphasis remains the same: treat the visor area as a sealed interface, not a single crack to be patched, and ensure every step—from removal and grommet replacement to sealant application and reassembly—contributes to a single, durable waterproof barrier that protects the cab interior through every season. External guidance beyond this text should always be consulted to confirm that you are employing the correct sealant type for your climate and vehicle model, and to ensure compatibility with your roof finish and visor hardware. A well-executed sequence, performed with patience and attention to detail, yields a repair that stands up to the most demanding showers and keeps the headliner dry for the long haul.
From Sun Visor to Sealed Roof: A Thorough Repair Guide for Truck Roof Leaks

A truck roof leak that seems to originate at the sun visor area is not just a nuisance; it is a signal that a seam is letting moisture enter the cab and creep toward the headliner, carpets, and electrical components. The visor is more than a decorative mount; it acts as a boundary between the harsh exterior and the sheltered interior. Over time, the combination of weather exposure, road splash, and the flex of the roof can erode seals, loosen fasteners, and clog drainage paths. When moisture tracks along the visor mounting point, it can follow a path into the roof line and down into the cab. A calm, methodical approach helps you uncover the exact breach and restore a true seal that lasts through seasons of rain and sun alike. This chapter describes a cohesive, repair‑or‑test process that emphasizes identifying the leak source, securing the mounting area, and restoring a watertight interface without unnecessary detours or guesswork.
To begin, adopt a mindset of tracing the water rather than chasing symptoms. The easiest way to locate the intrusion is to observe the cab in wet conditions, but you can also reproduce the problem with a careful spray. Have a helper inside the truck and spray water over the visor area, watching for precisely where dampness appears on the ceiling or door frame. Look for signs that water collects not just at the visor but along the seam where the visor meets the roof panel. A stain or a faint damp patch that advances toward the windshield or toward a corner of the headliner is a telltale clue, but the path is often curved as water seeks the path of least resistance. The interior signs are as telling as exterior cues, so take note of any swelling or looseness in the headliner, any rust on fasteners, or any telltale corrosion around the visor brackets.
Once you confirm the general vicinity of the leak, you move into a careful inspection of the components that most often fail. Start with the visor itself: crack in the plastic housing, separation between the visor and its mounting points, or a loose trim piece can create or exaggerate a water intrusion. The rubber grommets or seals around the bolts that secure the visor to the roof are common failure points; these seals shrink, harden, or tear with age and exposure to UV light and temperature swings. While the visor is removed only briefly for inspection and work, you may find that the grommets are the true bottleneck, allowing moisture to seep in at the mounting holes. The edges where the visor meets the roof panel must present a clean, continuous seal. Any gap there invites water to wick along the seam and into the interior. A careful visual and tactile check of all these interfaces—visor housing, grommets, mounting points, and the seam to the roof—sets the stage for an effective repair.
Another critical area to assess is the drainage system designed to channel water away from the cab. Many visors incorporate built‑in drainage channels that carry water from the visor area toward the roof or away from the interior. If these channels become clogged with dirt, leaves, or debris, water can back up and find its way into the cab. A soft brush, compressed air, or a small flexible hook can clear these passages; test the flow by pouring a little water into the channel and watching for a clean exit. If a channel is blocked, the water pressure will back up into the mounting area and eventually into the headliner. Clearing the drainage paths is often a simple but overlooked step that dramatically reduces recurring leaks.
The mounting area itself deserves close scrutiny. Brackets, fasteners, and the roof sheet metal around the visor can develop gaps or rust that compromise a seal. A misaligned visor or a mounting bracket that has worked loose can create micro‑cracks in the sealant or even widen existing corrosion pockets. Any gap, even a hairline one, can form a path for water to travel from the exterior into the roof cavity and beyond. If you see corrosion around the mounting hardware or evidence of shifting, plan to reseal these joints as part of the repair. In some cases, if the metal has corroded significantly, the solution may require additional steps such as treating the rust, reinforcing the mounting structure, or in rare cases replacing portions of the roof edge—work that a professional can help with when needed.
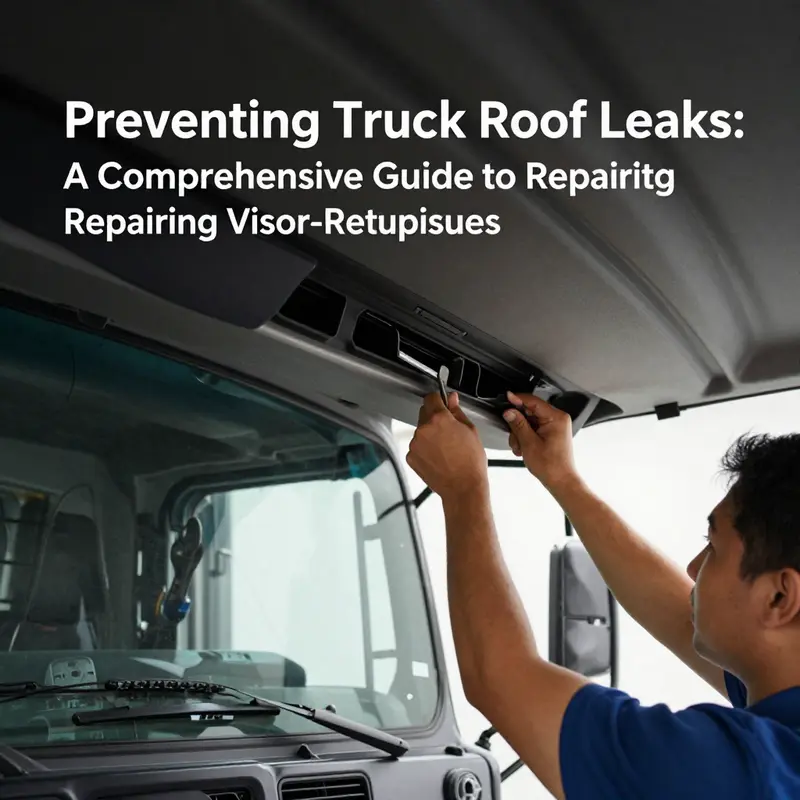
With the source identified, the repair unfolds in a straightforward sequence. First, remove the visor carefully to gain full access to the mounting hardware, grommets, and the sealant joints. Cleanliness is essential here; you want every contact surface free of old sealant, oil, grease, and dust. Clean mounting holes thoroughly to ensure the new grommets seat properly. If the grommets are cracked, brittle, or loose, replace them with new ones designed for your truck model. The goal is to restore a solid seal around each bolt hole, so the visor touches the roof only where the manufacturer intended and only with a seal that can flex with temperature changes.
Next comes sealing the joints that allow water to move from the exterior toward the interior. Use a high‑quality, flexible automotive sealant that remains supple in heat and cold. The sealant should be compatible with exterior metal and plastic, and it should maintain adhesion over a wide temperature range. Apply it to every gap and joint around the visor mounting perimeter. When applying, aim for a smooth, continuous bead rather than a jagged line, and work from the inside outward if possible so you can visually confirm that the seal fills the gap completely. A caulking gun helps you achieve a neat, uniform layer. After smoothing with a damp fingertip or a small tool, wipe away excess so that the surface remains even and paintable if needed. Don’t overfill; the bead should compress slightly as the visor is tightened down to ensure a watertight bond without forcing excess material into seams where it could shrink back and crack later.
Reinstalling the visor is the moment where careful attention pays off. Seat the grommets properly and ensure the hardware is snug but not overtightened, which can crush seals or distort the visor housing. After the visor is securely fastened, it is essential to test the repair under simulated rain conditions. Have a helper observe from inside the cab as you spray the area with a hose, beginning at a shallow angle and gradually increasing water pressure toward the visor seam. Watch for any signs of water inside the cab and listen for any hiss of escaping air that might indicate a residual crack. If you see a leak, pause, identify the new breach, and reseal with a fresh bead of sealant, ensuring the entire perimeter is covered. A successful test confirms a durable seal across a variety of angles and spray conditions.
Beyond the immediate fix, consider the long‑term maintenance steps that help prevent another leak. Regular cleaning around the visor mounting area keeps grit from abrading seals. Debris and dirt can harbor moisture and promote corrosion; a routine wipe with a mild cleaner and a soft cloth helps. Inspect the seals and grommets at least once a year, or more often in climates with extreme heat, cold, or heavy rain. If you notice any hardening, cracking, or loosening over time, replace the seals promptly. Check the drainage channels every season and clear any obstruction before the opportunity for a leak arises. Lubricating moving parts of the visor mechanism can also reduce wear that might force the visor away from its intended alignment and stress the seals. These preventive steps, performed with the same care you apply to the initial repair, form a shield against future leaks.
If the problem persists despite your best efforts, or if you encounter signs of deeper damage such as roof panel deformation or extensive rust that extends beyond the visor area, don’t hesitate to seek professional help. A body shop or a technician experienced with commercial trucks can assess whether there is hidden damage to the roof structure, confirm proper installation, and recommend more advanced repairs that preserve the integrity of the roof and the safety of the vehicle. The goal is to address not just the symptom but the root cause, so the seal remains reliable across rough roads and variable weather.
As you progress through the repair, you can supplement your hands‑on work with practical resources that reinforce the approach outlined here. For ongoing maintenance guidance and practical steps you can apply to other exterior seals on a truck, consider the detailed guidance and community‑driven tips found in the mastertruckrepairllc blog. This resource offers a broad spectrum of repair perspectives that complement the visor repair you are performing, helping you build a broader toolkit for fleet maintenance and individual truck upkeep. mastertruckrepairllc.com/blog/
In the broader context of truck roof maintenance, the visor area is one of several critical sealing points that, if neglected, can compromise interior comfort, electrical systems, and the longevity of the headliner. The practical steps described here—identify the leak source by testing and observation, inspect and replace seals and grommets, clean and restore drainage channels, reseal mounting points, and confirm with a thorough test—create a replicable, reliable repair process. When done with attention to detail, the repair offers more than just a short‑term fix; it restores the cab’s integrity and contributes to safer, more predictable vehicle performance in varying weather. To deepen your understanding of roof systems, visors, and sealing procedures, consult the authoritative manuals and service guidance provided by major truck manufacturers. A well‑maintained visor seal is not a one‑time fix but a long‑term investment in the durability and reliability of your truck’s roof system. For authoritative guidance, you can review the official maintenance resources available at the Freightliner owners manuals portal: https://www.freightliner.com/owners/manuals
Final thoughts
Addressing truck roof leaks originating from the sun visor area is not just about initial repairs; it’s about ensuring long-term durability and reliability. By systematically identifying the source of leaks, replacing compromised seals, applying quality sealants, and conducting thorough tests, fleet managers can prevent recurring issues. This proactive approach not only preserves vehicle integrity but also reduces downtime and repair costs. A commitment to regular inspections and maintenance can safeguard against future leaks, ensuring operational efficiency across your fleet.

