Understanding the vital role that a truck’s roll-up door plays in operational efficiency is paramount for fleet managers and trucking company owners. Damage, whether from daily wear or environmental factors, can significantly impact performance and safety. This guide will illuminate how to effectively repair cracks, scratches, dents, and failing seals in truck roll-up doors. Each chapter focuses on specific issues, offering solutions that address not only cosmetic concerns but also functional integrity, ensuring longevity and reliability for your vehicle fleet.
From Crack to Seal: Mastering Roll-Up Truck Door Panel Repairs in Plastic and Metal
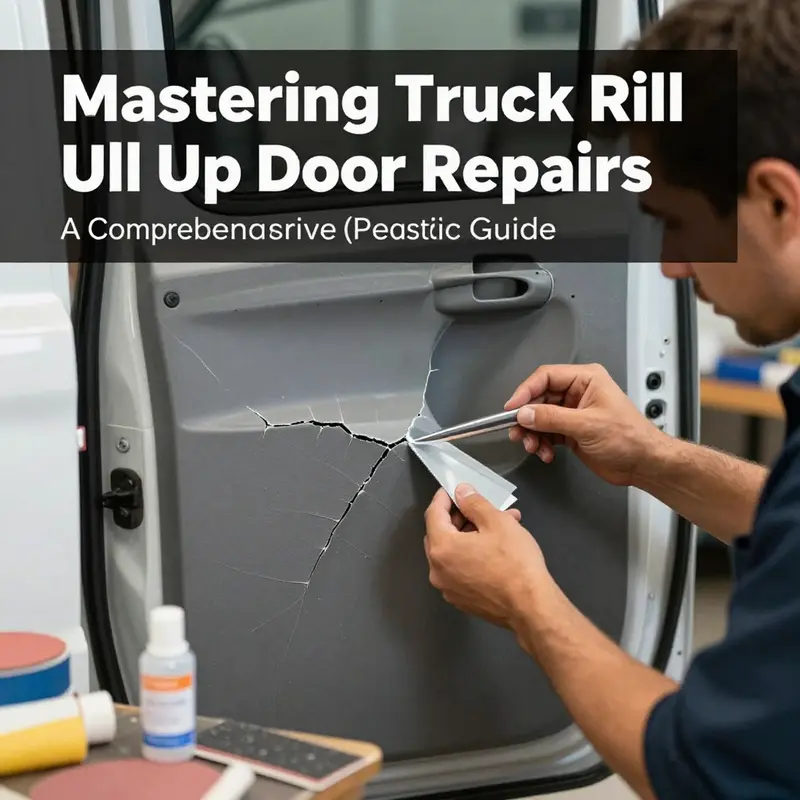
A roll-up truck door is more than just a moving part; it is a critical interface between the cargo you carry and the environment you travel through. When a crack appears in the door panel—whether the plastic skin or a metal section—the question quickly becomes how to restore strength, preserve weather tightness, and minimize downtime. The approach is not one-size-fits-all. It hinges on a clear assessment of the damage, a precise identification of the panel material, and a repair path that respects the door’s load paths and sealing surfaces. In practice, a well-executed repair begins with careful examination rather than a rush to fill or weld and ends with attention to finishing so the repair remains invisible to the casual observer while standing up to the next thousand miles of vibration, exposure, and daily use.
First, assess the damage with the eyes and the hands as your tools. Measuring the crack’s size and depth matters. A crack under a centimeter might be stable enough to seal or bond with a structural adhesive or a plastic filler, provided the surrounding area is clean and the joint is not under heavy flex. But once a crack grows beyond a few centimeters, or if it traverses a load-bearing region or a hinge line, the repair becomes more complex and often less cost-effective than replacement. The next step is to confirm the panel material. Roll-up doors on trucks use a couple of common constructions: plastic composites—such as polypropylene or ABS skins—or metal panels, typically steel or aluminum. Each material demands its own repair philosophy. Plastic, with its flexibility, can be mended with bonding agents or heat-based methods that fuse material back together. Metal, while tougher, demands welds, patches, or precise mechanical repairs if the crack is severe. The decision to repair or replace is shaped by safety considerations, the door’s role in keeping weather out and security in, and the economic calculus of repair versus patching and the downtime that comes with each option.
If the crack is in a plastic panel and remains superficial, the repair path emphasizes restoring continuity and resisting future propagation. A high-strength epoxy resin formulated for automotive plastics can be introduced into the crack after a thorough cleaning with isopropyl alcohol to remove grease and dust. The area should be dry, and the edges must be clamped or taped to hold the crack open slightly during cure. The cure time is not instantaneous; it typically requires a full day in a temperature-controlled environment to achieve maximum bonding strength and to minimize residual stress as the material cools. After curing, the surface can be sanded with progressively finer grits—starting around 400 and moving to 800 and beyond—until a smooth transition is achieved. Polishing then helps to blend the repair with the surrounding texture and sheen, reducing the likelihood that the repair catches the eye or the eye catches the repair during inspections.
For larger cracks or breaks in plastic panels, bonding alone may not deliver the durability needed for a door that experiences regular flexing and the weight of rolled components. Plastic welding emerges as the recommended solution, particularly when the original material is PP or ABS. The process involves heating the crack area and a filler rod of matching polymer, then pressing the molten material into the gap before it cools. The bond can be remarkably strong, often restoring a large share of the original strength when performed with proper technique and temperature control. However, it demands care: overheating can cause burn-through or warping, and cooling must be gradual to avoid new stresses forming as the material contracts. If welding equipment or technique is not available, a two-part plastic filler can serve as an alternative. It fills the crack and, after curing, is sanded and primed for painting. A note of caution is relevant here: general-purpose glues, including many cyanoacrylate formulations, tend to lack the flexibility required for plastics under ongoing stress. They can fail where the panel bends or flexes, so they should be avoided in structural repairs.
Once the structural or near-structural integrity is addressed in a plastic panel, finishing becomes the bridge between repair and return to service. A primer appropriate for automotive plastics sets the stage for color-matching paint. Computerized color-matching systems in professional settings can reproduce a precise shade, helping to maintain a uniform appearance across the panel and neighboring areas. The sequence—surface preparation, primer, color coat, and clear topcoat—follows standard automotive practice, but the environment is important. Temperature, humidity, and ventilation all influence cure times and the final result. After the topcoat dries, a light polish can help to erase micro-scratches and bring back the original luster. The goal is not a flawless cosmetic fix but a durable repair that can withstand the daily grind of opening and closing a roll-up door, exposure to sun, rain, road dust, and the occasional collision with a loading dock or pallet.
Turn now to metal panels, where cracks and fractures require a slightly different lens. Small cracks or holes with intact surrounding metal often respond well to spot welding or brazing in a controlled environment. Spot welding uses heat to fuse the thin metal edges, sometimes reinforced with a patch if the crack has progressed toward a weak point or through-thickness damage. Brazing, which uses a filler metal with a lower melting point, can be a good option for aluminum panels where traditional welding would risk distortion. In both cases, ventilation and protective gear are essential as fumes and radiant heat are real safety concerns. An alternative approach for metal panels is a repair kit that couples a metal reinforcement patch with an epoxy-based filler. The patch provides mechanical strength while the filler occupies the crack and helps to seal against moisture and air infiltration. The repair path here is a balance of restoring structure, preserving the door’s sealing capability, and achieving a finish that will not peel or rust under normal service.
When the crack is extensive, or when the repair would leave a visible seam in a region critical to the door’s performance, replacement often becomes the most economical and safest choice. Replacing a panel may involve matching thickness and grade, particularly if the rest of the door has aged or warped. A complete panel swap ensures the door’s alignment with the frame’s weather seals and its ability to roll smoothly in its tracks. In commercial applications where downtime is costly, having a plan for quick panel replacement—whether by keeping a spare roll-up section or by coordinating with a professional shop—can minimize the disruption to a fleet’s operation. The decision to replace should weigh not only the immediate repair costs but also the long-term reliability of the door’s seal against the elements and the door’s resistance to further cracking under repeated use.
Regardless of material, post-repair finishing is not merely cosmetic. The seal around the repaired edge plays a critical role in weather resistance and energy efficiency. Concrete steps in finishing include ensuring the surface is clean and dry, applying any necessary sealant around the repaired edge, and testing the door’s operation in a controlled manner before returning it to service. The sealant chosen should be flexible enough to tolerate door movement without cracking and should adhere well to the chosen substrate. In rolling doors that face frequent exposure to moisture or temperature swings, the sealant must hold its elasticity over time to prevent slow leaks that could affect cargo insulation or corrosion risk on metal panels.
The decision to repair versus replace is not made in a vacuum. Large-scale or structurally critical repairs should involve professional assessment. In particular, when the crack traverses a load-bearing section, compromises the hinge region, or the door’s ability to meet its tight seal is in question, a certified auto body or truck repair specialist should be consulted. The same holds when the repair would necessitate complex plastic welding or metal fabrication outside the skill set of a typical DIY project. A professional can evaluate tolerances, alignment, and the door’s interaction with its tracks and weather seals, ensuring the repair meets safety and warranty standards. In contexts such as commercial fleets, a pro can also help balance repair costs against downtime and the cost of replacement parts, offering a recommended path that minimizes operational disruption while maintaining reliability.
In practical terms, this approach to crack repair emphasizes two core ideas. One, the material dictates the method. Plastic panels respond to bonding and welding techniques that reestablish continuity without sacrificing flexibility. Metal panels respond to welded or patched solutions that respect the structural role of the panel while restoring its belly of integrity. Two, finishing and sealing are not optional add-ons but integral parts of the repair. A crack that is not properly sealed and painted can become a moisture channel, invite corrosion, or propagate again under load. Attention to primer selection, color matching, and sealing is what makes a repair durable, not merely visible. This is where the industry’s best practices converge with the practical realities of daily trucking: a repair that looks good and lasts beyond the next few trips.
If you are considering tackling a crack repair yourself, there is value in arming yourself with a disciplined plan. Start with a clean workspace that is free of dust and debris, and ensure you have a stable temperature environment for curing. Document the crack with photos and measurements before you begin, so you can monitor progress and communicate clearly with a shop if you decide to hand off the job. When working on plastic, keep the heat and filler materials controlled to avoid warping. When working on metal, maintain ventilation and use the appropriate heat settings to avoid altering the panel’s shape. And remember, the door’s sealing surfaces are not merely there for comfort; they are critical to preserving the interior environment and protecting cargo from the weather. If doubts arise, consult a professional rather than pushing the repair beyond its limits.
For readers who want to dive deeper into step-by-step techniques and professional guidelines, there are detailed resources that outline the techniques involved in crack repair, painting, and sealing. A structured repair approach—beginning with precise assessment, moving through targeted material-specific methods, and ending with meticulous finishing—can dramatically increase the likelihood of a durable, aesthetically matching fix. In the broader landscape of truck maintenance, these repairs sit alongside tasks like door seal renewal, dent removal, and routine inspection, all of which contribute to reliable operation and vehicle longevity. The overarching message is simple: treat the crack with respect for the door’s role, choose the method that aligns with the material, and finish with an emphasis on sealing and protection.
As you contemplate this work, you may find it helpful to reference additional practical guidance aimed at do-it-yourself reflectivity and response. For related insights and tips that extend beyond door cracks into broader truck maintenance topics, you can explore the Master Truck Repair blog, which provides a range of articles designed to support hands-on owners in navigating repairs and preventive upkeep. See the internal link for more practical, DIY-focused content: https://mastertruckrepairllc.com/diy-windshield-repair-guide-for-truck-owners/ (DIY windshield repair guide for truck owners).
In parallel with DIY considerations, keep in view the broader standards that guide professional practice. The best professional guides emphasize careful surface preparation, correct curing time, and controlled finishing to ensure the repair lasts. Even when you manage a repair yourself, treating each step with diligence helps you avoid the temptation to rush, which can compromise the door’s seal, alignment, and structural integrity. When in doubt, the safest path is to bring in a qualified technician who can verify fitment, confirm the door’s clearance with its tracks, and ensure the seal remains tight against the frame. A door that seals poorly does not just leak; it invites a cascade of downstream problems—from rust and corrosion to energy inefficiency and compromised security. The goal, finally, is a repair that is not obvious to the casual observer but clearly robust to the next set of miles beneath the tires.
External reference: For a broader professional reference on detailed door panel repair techniques, you can consult external resources that cover the steps from diagnosis through finishing and sealing. See the external guide linked here: https://www.autocare.com/articles/truck-door-panel-repair-guide
From Hairline to Deep Gouge: A Practical Path to Repair Truck Door Scratches and Paint Damage
A truck door carries more than cargo; it carries the story of miles driven, weather faced, and the occasional careless bump. When the finish on a door wears thin—whether it’s hairline scratches in the clear coat or deeper gouges that reveal bare metal—the decision to repair is never just cosmetic. It’s about protecting the panel, slowing the clock on corrosion, and preserving the job-ready look that a fleet or a single owner-operator depends on. The journey from noticing a mark to restoring a door to near its original state is a carefully paced process. It starts with honest assessment, proceeds through patient prep, and ends with finishes that blend so well you almost forget the damage existed in the first place. This chapter threads together practical steps with the logic that underpins successful repairs, so you can approach the task with confidence, whether you’re handling a weekend repair on a personal truck or guiding a shop task for a fleet vehicle.
When you examine a scratched door, the first question is depth. Hairline scratches that only touch the clear coat are the simplest, offering a straightforward fix without repainting. If the scratch has breached the clear coat but not the underlying base color, you’re in the shallow repair territory. Deeper scratches that expose metal demand more care, because rust can begin to creep in, and color-matching becomes a meticulous process. And the most severe cases—the gouges that pull away chunks of paint or dent the metal—may involve primer, color, and clear layers. Even then, a thoughtful sequence can yield results that extend the door’s life and its appearance. The guiding principle is to work cleanly, slowly, and with good materials. The goal is not perfection in every instance but a balanced repair that respects the door’s structural integrity and weather performance.
To navigate through these scenarios smoothly, it helps to map the repair path to the damage profile you’re facing. Start with the simplest, then move to more involved steps only as the surface reveals itself. For minor surface blemishes, your regimen is mostly about removal of surface contaminants and blending, followed by a protective wax to lock in the finish. For shallow scratches that have pierced the clear coat, you’ll typically apply targeted paint touch-ups and a protective topcoat, aiming for a seamless transition with the surrounding paint. For deeper scratches and any exposure of metal, you’ll layer primers and paints in precise stages, often requiring a rust-preventive step and careful curing between coats. And where dents accompany scratches, you might choose a combination approach: a dent repair technique that preserves paint where possible, and paint restoration to cover any accompanying scratch.
The actual toolkit you assemble will be modest, but the quality of the tools matters. A clean work area is essential. You’ll want microfiber fabrics that don’t shed fibers, fine sandpapers in the 1500–2000 grit range for light scuffing (and higher grits for finish polishing), a non-gel toothpaste or a mild abrasive polish for the gentler cleanups, isopropyl alcohol for surface prep, and proper buffers if you decide to polish with mechanical help. For color work, you’ll rely on color-matched touch-up pens for fine areas and perhaps a small can of spray paint with a compatible nozzle for broader patches. A rust-inhibiting primer becomes a necessary companion when metal is exposed, and a good clear coat is the capstone that seals the color and canvas alike. When you’re working with any repair, you also need to bring a careful eye for color accuracy. The color code of the vehicle, often found in the door jamb or owner’s manual, will guide you to a paint shade that most closely matches your truck’s original tone. If your color matching feels daunting, many auto parts stores or dealerships offer color matching assistance, sometimes through VIN-based lookup. The small investment in accuracy reduces the risk of a repair that stands out in a bad way.
The decision tree becomes: is this minor, is it shallow, is it deep, or is there metal showing? Each branch has a corresponding set of steps that you can perform with reasonable confidence, even if you’re not a professional body shop technician. It’s worth noting that while some remedies are accessible to do-at-home enthusiasts, certain situations are safer and more effective when handled by professionals—especially when structural damage is present or when you’re dealing with large areas of color-mismatched paint. If you’re unsure after your initial assessment, seeking a professional opinion is prudent. The door’s hinge lines, the weatherstrip around the opening, and the door’s alignment with the frame all play into how repair work should be approached. If your scratch is near the hinge or an area that may affect door operation, extra caution is warranted to avoid compromising safety or function.
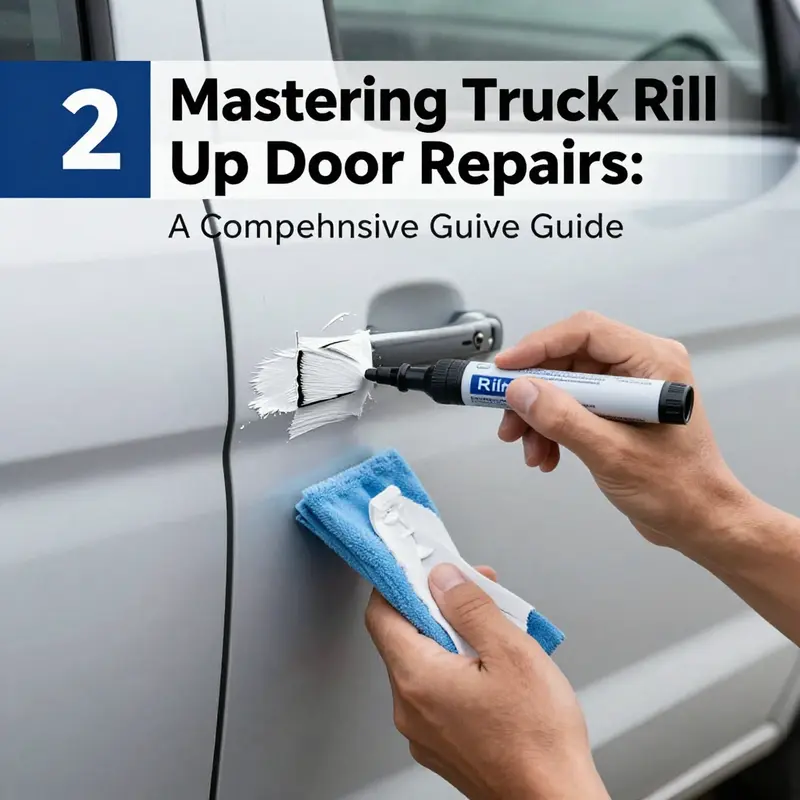
A useful waypoint in this journey is the distinction between water-clear guidance and real-world practice. For an at-a-glance sense of technique, you can look to authoritative repair resources that distill best practices into a practical sequence, with clear cautions about common missteps. For example, when you are addressing minor surface scratches, toothpaste can be a surprisingly effective, non-invasive first step. The mild abrasive action helps to smooth the micro-scratches that accumulate in the clear coat over time. It’s important to choose a non-gel toothpaste and to apply it with a soft cloth in gentle circular motions. After you rub in, you wipe clean with a damp cloth and let the area dry before deciding whether a wax or polish is needed. If the area looks uniform and the scratch has vanished under light reflection, you’ve achieved a successful, conservative repair that preserves the original finish without introducing a new texture. If the scratch remains perceptible, you can progress to a more deliberate intervention with a touch-up pen or a color-matched spray in thin layers. When applying paint, the technique of layering—thin, slow coats with ample drying time between passes—helps avoid runs and sags that create a more noticeable repair than the original scratch.
Within the spectrum of repairs, the practical nuance grows as you move from surface to depth. Shallow scratches that have pierced the clear coat but left the base color intact respond well to careful sanding with very fine grit (around 1500) after you’ve cleaned and lightly scuffed the area to improve paint adhesion. A light sanding helps to level the transition between the damaged area and the surrounding paint, reducing the chance of a visible edge where the repair begins. You then apply a thin layer of touch-up paint, followed by a clear coat to seal and protect. The layering sequence matters: each layer should be allowed to dry thoroughly, and you should sand between layers only if you observe a slightly rough surface. Collectively, these steps help to reproduce the gradual ramp of the surrounding paint rather than creating a stark patch that draws the eye. When you finish, a careful polish can help to restore the gloss and re-blend the repaired area with the rest of the door.
If the scratch is more aggressive—one that has removed color down to the metal or left a visible groove—you’ll want to approach with more caution. Start by degreasing the area to remove any waxes, oils, or dust that could interfere with adhesion. If metal is exposed, you should treat the area with a rust converter or anti-rust compound to neutralize any emerging corrosion. Then apply a rust-inhibiting primer, allowing it to cure fully. The base paint can follow in very thin, even coats, with the color-matching paint applied in small increments until you achieve a uniform appearance. Finally, a clear coat is essential to seal the newly painted surface and to help it weather the elements. In practice, you will often paint the repaired section in stages, letting each layer dry completely and inspecting the color match step by step. The goal is not only to cover the scratch but to create a seamless field that resembles the rest of the panel under normal daylight and driving conditions. If you find that the repair print stands out in certain lighting, a light, temporary polish can sometimes help to disguise minor incongruities until the paint fully cures and settles.
When a dent accompanies a scratch, you’ll encounter a related but distinct set of decisions. Paintless dent repair (PDR) is a valuable option for many small dents where the paint remains intact. If the dent can be coaxed back into place without disturbing the surrounding paint, PDR offers a way to restore the door’s contour with minimal risk. However, PDR doesn’t fix the scratch itself, and a subsequent touch-up painting step will often be necessary to address any color difference at the edge of the dent. If the dent has damaged the paint in the surrounding area, you may need to blend a small repaired panel rather than repaint the entire door. A careful approach, blending the repaired area into the adjacent panels with a professional-grade polish and, if needed, a fine color-matched blend, can deliver a roll-on match that remains visually discrete in normal daylight. It’s a balance between preserving as much original paint as possible and achieving a uniform appearance after the repair is complete.
The journey through these repair paths also invites attention to cumulative care. After you have completed the mechanical steps, you should reintroduce a protective regimen to prevent future damage. Cleaning the surface, performing a light polish, and applying a wax sealant are practical steps to reinstate a protective shield. The wax layer helps to resist further micro-scratches and holds the gloss. If you’ve treated the area with silicone-based products, ensure the surface is fully cured and buffed before applying any wax or sealant. Regular inspection of the painted surfaces becomes part of the maintenance routine, as early detection of micro-scratches or a small chip can save a lot of time and effort down the road. Minor blemishes, when caught early, respond well to repeated light-care steps rather than more invasive restoration.
As you navigate these challenges, it’s useful to reference established guidance while tailoring the approach to your truck’s specific situation. One pointer is to maintain a clean, dust-free environment during any repair. Dust and grit can get trapped in wet paint and ruin a finish that would otherwise blend seamlessly. A well-ventilated space reduces fumes and speeds up curing times, which in turn helps you avoid accidental damage from rushed handling. Another practical tip is to keep a small set of reference photos of the door before you start. A photo log can help you judge whether the repaired area truly matches the rest of the door, particularly under different lighting conditions, and it provides a record if you need to revisit a section later.
If you’re seeking further reader-centric guidance for DIY paint repair, the broader community of vehicle care resources offers step-by-step visuals and additional notes. For more reader-friendly guidance, see the MasterTruckRepairLLC blog. This resource hub provides broader context on maintenance and repair approaches that complement the door-specific techniques described here, and it can be a useful companion when you’re building a toolbox of skills for field and shop repair alike. MasterTruckRepairLLC Blog.
Ultimately, the paint repair path you choose should reflect both the severity of the damage and your capacity to match color, texture, and finish. Minor touch-ups in a single, controlled session can yield impressive results, while deeper repairs demand a measured approach with appropriate drying times and careful layering. The overarching aim remains consistent: to protect the door from further deterioration, to restore its appearance in a way that respects the rest of the vehicle, and to sustain the vehicle’s readiness for work, travel, and duty. In all these steps, remember that patience and precision pay off—shortcuts tend to show up as gloss mismatches, unblended edges, or premature wear. Your best allies are a clean work environment, good materials, honest assessment, and a steady hand. When in doubt, a professional repair is a sensible option, especially for hinges, structural concerns, or large paint sections, ensuring that safety and strength are not compromised in the pursuit of cosmetic perfection.
For readers who want a deeper dive into nuanced techniques or a broader set of case studies, refer to the external repair resources that underpin these recommendations. They provide practical tutorials and situational guidance that complements the hands-on steps described here. The value you gain from these resources lies in their ability to translate the theory of surface restoration into the reality of a truck door that looks and functions like new again. As you gain more experience with scratches, the color-matching process becomes more intuitive, the texture of your blended areas more natural, and your confidence as a repairer grows. This progression—from simple hairline scratches to more enduring paint and seal repairs—maps closely to the truck’s life, reminding us that even a small repair can represent a significant return on the time and care invested.
For additional insights and visual demonstrations, you can explore a reputable external reference that consolidates practical repair tips: https://www.carcarekiosk.com/.
In sum, repairing truck door scratches and paint damage is a layered discipline that blends diagnosis, preparation, technique, and finish. It rewards patience and precise execution, and it rewards the repairer with a door that looks solid, performs well, and continues to carry your vehicle’s working lifetime with pride. By approaching each damage type with the appropriate sequence, you set the stage for durable, visually coherent results that stand up to the rigors of road life and the unpredictability of the elements. The door, once scarred, can still reflect a story of resilience—your hands guiding it back toward a finish that meets the demands of work, weather, and time.
Gentle Reshaping: Repairing Small Dents in Truck Roll-Up Doors Without Paint Damage
Roll-up doors on work trucks take a beating. They slide, bang against loading dock corners, and at times bear the brunt of shifting cargo. When the dent is small and the paint remains intact, a careful hand and a few practical techniques can restore the door’s smooth line without risking paint cracks or warping. The approach here is deliberately non-invasive: work with the metal’s natural properties, not against them. The aim is to coax the dent back toward its original plane while keeping the surface pristine. This chapter weaves together three practical methods you can try in sequence or pick based on access to the panel, the door’s material, and the dent’s depth. Roll-up doors are usually aluminum or steel, and the choice of method depends in part on that metal. Aluminum tends to respond more readily to controlled heating, which softens the metal and invites gentle reshaping. Steel panels can respond to pulling and tapping, but the process must be executed with careful control to avoid kinking or paint damage. Above all, proceed with patience, protective measures, and a willingness to pause and seek professional help if something doesn’t feel right. For readers seeking broader DIY context and related repair techniques, the Master Truck Repair blog provides a wide range of practical guidance that complements this discussion. Master Truck Repair blog offers accessible, hands-on insights that many DIY enthusiasts find helpful as they expand their door repair toolbox. Master Truck Repair blog
The first decision in repairing a small dent on a roll-up door is understanding the panel’s material and the dent’s character. If the dent sits on an aluminum door panel and the surrounding paint shows no cracking, you have a favorable starting point for a heat-assisted reshaping approach. Aluminum is forgiving when heated and can be coaxed back toward flat with careful, gradual pressure. If the panel is steel, heat alone is less reliable; you may rely more on pulling and shaping techniques, with emphasis on avoiding any new distorting stresses that could propagate through the panel. Regardless of material, the overall rule is to avoid aggressive force that can crack the finish or introduce new distortions. A typical small dent might respond to one of three pathways: a controlled heat-and-push method, a suction cup pull, or a precise tapping and shaping approach. Each method has its own rationale, steps, and cautions, but they share a common theme: work slowly, test often, and keep the surface clean and dry to maintain good contact between the repair tools and the door surface.
A. The Heat & Push Method (For Aluminum Panels)
If your roll-up door is aluminum, heating the dent area slightly can make the metal more pliable and easier to reshape. This method emphasizes gentle heat and controlled pressure rather than brute force. You will need a heat source—ideally a heat gun set to a low to medium setting, or a household hair dryer in a pinch—plus a soft cloth, and a rubber or plastic pad to distribute pressure without marring the surface. Before you begin, protect the area around the dent with a soft cloth or a small towel to prevent accidental scratches from the tool or from contact with the work surface.
Start by applying heat evenly to the dented region for about 30 to 60 seconds. The goal is to raise the metal’s temperature just enough to relax the fibers and allow the metal to move more freely under pressure. Avoid overheating to the point of discoloration or paint damage. After heating, place the rubber or plastic pad over the dent. From the inside of the door if you have access, or from the outside if you don’t, apply steady, gentle pressure to push the dent outward. The pressure should be calm and measured rather than abrupt. Work in small increments, pausing to recheck the surface and cooling as needed. As the metal cools, it will retain the new shape. If the dent stubbornly resists, you can reapply a short burst of heat and try again, always keeping the heat application small and controlled. This method relies on the metal’s natural response to heat to minimize the amount of force required for reshaping, reducing the risk of paint cracking.
It is worth noting that even with aluminum, the heat-and-push technique carries a caveat: if the dent is near a seam, edge, or hinge, or if there are signs of thicker distortions, it is prudent to stop and consider a professional evaluation. The goal is a smooth surface with no ripples or hairline cracks in the paint. If you observe any cracking, flaking, or dulling of the finish, that’s a sign the method may have pushed the metal beyond its safe limit. In such cases, a professional repair might employ more controlled metal-working tools that minimize the margin for error. For readers who want a deeper dive into heat-based metal shaping techniques from a professional perspective, an external resource provides a thorough examination of temperature control, technique, and common pitfalls. See the linked guidance for a broader view of how heat can influence panel reshaping.
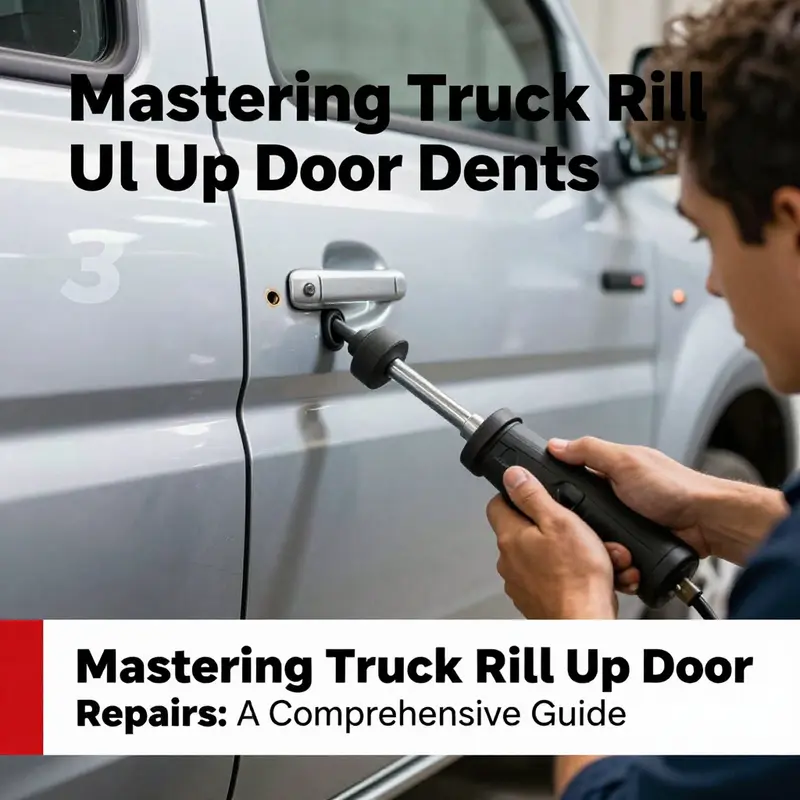
B. The Suction Cup (Puller) Method (Best for Accessible Dents)
The suction cup method remains a staple for many do-it-yourselfers because it is simple, inexpensive, and often effective for shallow, surface-level dents. The essential idea is to use suction to pull the dent outward, gradually relaxing the panel and restoring the original contour without removing paint or applying heat. Gather a dent puller with a durable suction cup and, if available, an extension handle to improve leverage. Start with a clean surface: wipe the dented area with a damp cloth to remove dust, grease, or grit that could undermine the seal. Dry thoroughly before proceeding.
Place the suction cup firmly over the center of the dent and press down hard to create a strong seal. Use a slow, steady pull on the handle, watching closely for the dent’s movement. If the dent does not release with a single pull, release the suction, reapply a dab of lubricant around the rim to improve adhesion, reseal the cup, and try again. For deeper dents, you may need to repeat the process several times, allowing the metal to relax between attempts. The suction method works best on smooth, rounded dents with a natural boundary to pull against. If the corner or edge of the dent is sharp or if you cannot achieve a clear seal due to irregularities in the panel, you should shift to a different technique and consider professional options. Lubricating around the cup rim with a mild, water-based lubricant can help maintain a strong seal and reduce friction that might otherwise lift paint during the pull.
Professional guidance and step-by-step tutorials reinforce this approach, including diagrams that show proper placement and pulling technique. For readers who want a broader, visuals-backed walkthrough, a detailed tutorial on dent pullers provides diagrams and precise steps to maximize success. The key with this method is patient repetition rather than forceful, rapid tugs. The goal is a gradual return to a flat surface, with the dent slowly reduced in depth and visible height. If you can access the inside of the door to apply gentle pressure from behind, this can improve results, though many roll-up doors do not permit direct interior access to the dent area. In those cases, external pulling is the safer, more practical route.
C. The Tapping & Shaping Method (For Very Small Dents)
For tiny imperfections where the dent is barely noticeable, a light tapping and shaping approach can coax the metal back toward a straight line without adding risk of paint damage. This technique relies on controlled tapping around the dent’s edges from the outside using a soft-faced hammer. Place a wooden block or dowel behind the dent inside the door to provide internal support and prevent puncture or deformations as you work. Start at the outer edge of the dent and gently tap toward the center, keeping taps light and evenly spaced. The aim is not to strike the exact center but to progressively push the metal outward so that the surrounding area carries the load and the dent disappears from the surface. Avoid heavy, direct blows and any attempt to flatten the dent in a single motion. The method requires a steady hand and a keen eye to avoid creating new distortions or bridging the panel with too much force. If you feel resistance or fear creating a new crease, stop. Small dents can be particularly sensitive to touch, and the difference between a clean repair and a new blemish can be a matter of a few careful taps.
This tapping approach has its advocates among professionals who perform meticulous, minimal-disruption repairs. It is not universal, but for those with the right touch and the proper backing support, it can yield excellent results on light cosmetic flaws without affecting the paint finish. If you are exploring this technique, consult a trusted mechanic or body shop technician who can demonstrate the correct angles and force levels for your specific door panel. A balanced combination of warmth, suction, and light tapping—applied judiciously—often yields the best results on small dents, especially when the paint remains intact and the panel shows no signs of cracking.
When to Seek Professional Help
Despite the effectiveness of these methods, there are times when professional help is the prudent choice. If the dent is deep or sharp, if it sits near a seam or joint, if the panel is difficult to access from the outside, or if attempts to repair have resulted in warping or distortion, a mobile repair service or auto body shop can provide a more controlled, precise repair. In such cases, professionals may use hydraulic pullers and specialized lighting to guide the repair, or they may have access to paintless dent removal (PDR) systems that preserve the finish while correcting the shape. If the door exhibits any stretching, sagging, or persistent ripple after attempts to repair, stepping back and seeking a professional evaluation protects both the door and the vehicle’s overall integrity.
Prevention Tips
Once you’ve achieved a smooth surface, think ahead about preventing future dents. Protective strips or edge bumpers along the sides of the truck, careful loading and unloading practices, and regular inspections for signs of surface wear can all contribute to longer-lasting door integrity. Small dents, left unattended, can become more challenging to address if subtle paint problems start to appear, so regular checks after heavy use are encouraged. Keep the door’s surface clean and free of grit before any repair attempt; a clean surface reduces the risk of introducing scratches during both the repair and the testing process. In addition, ensure proper alignment and lubrication of the roll-up mechanism itself, as a misaligned track or stiff roller can channel forces into the door panel during operation, increasing the likelihood of future dents.
A note on the repair mindset: patience is part of the process. The simplest, most conservative approach is often the best path to a paint-safe repair. Start with the least invasive method—typically the suction cup pull for accessible, shallow dents—then progress to heat-assisted reshaping for aluminum panels if needed. If your evaluation suggests that the dent has altered the panel’s geometry in a way that cannot be corrected with surface-level techniques, that is a strong signal to consult a professional.
Internal and external resources can augment your understanding and decision-making. For ongoing DIY guidance on related repairs, the Master Truck Repair blog offers practical articles that can expand your toolbox without turning a repair into a full-blown body shop project. Master Truck Repair blog. For readers who want a broader look at heat-based shaping techniques and their cautions, you can explore professional perspectives and step-by-step considerations in external automotive repair guidance. External reference: https://www.autoblog.com/2023/05/17/how-to-fix-small-dents-without-paint-damage/.
In sum, small dents on a truck roll-up door that do not breach the paint can often be addressed with three straightforward approaches—heat and push for aluminum panels, suction cup pulling for accessible dents, and careful tapping for very small imperfections. Each method prioritizes preserving the paint and maintaining the door’s structural integrity. Start with the least invasive technique, stay attentive to how the door responds, and don’t hesitate to seek professional assistance if the panel shows signs of distortion or if the dent proves stubborn. With patience, the right approach, and attention to detail, you can restore a smooth, even surface to a roll-up door without the need for repainting or major repair work.
Sealing the Roll: Repairing a Truck Roll-Up Door’s Failing Weatherstripping
The weatherstripping that lines a roll-up truck door is more than a simple strip of rubber. It is a perimeter defense against wind noise, water intrusion, dust, and cold air that can creep into the cab or cargo area. When the seal begins to fail, the entire driving experience changes. You may notice drafts around the door, rattling at highway speeds, or moisture pooling along the door sill after a rain. These symptoms aren’t just annoyances; they can foreshadow more costly issues, including accelerated wear on door hardware, rust spots where moisture sits, and fatigue in the door frame due to improper closure. Repairing a failing weatherstrip requires a careful, staged approach that respects the condition of the seal and the surrounding metal and plastics. This chapter guides you through a cohesive, field-ready method that respects the roll-up door’s design and the larger goal of keeping your truck quiet, dry, and efficient in all weather. The conversation here is practical and conservative: start with the simplest, least invasive option when the seal shows only minor signs of aging, and progress to replacement only when the seal has lost its ability to seal reliably.
Assessing the seal begins with a close look and a simple test. Light aging shows surface cracks, slight hardening, and a rubber that feels stiff but still flexible at the edges. Moderate damage reveals deeper cracks, small tears, or a firmness that makes the seal resist normal door movement. Severe damage is evident when large tears separate from the door frame, or when the seal is detached in several places or entirely missing in stretches. A practical rule of thumb is to treat any crack or tear that proves water or air can bypass the seal as a sign that action is needed. Your assessment should also consider the door’s operating environment: frequent exposure to extreme temperatures, road salt, direct sun, or heavy use. These factors accelerate aging and call for a more proactive maintenance routine. If a seal sits next to hinges or in a joint that experiences repeated contact with moving parts, the likelihood of progressive damage increases, and you should plan for a more robust repair or replacement rather than a quick fix.
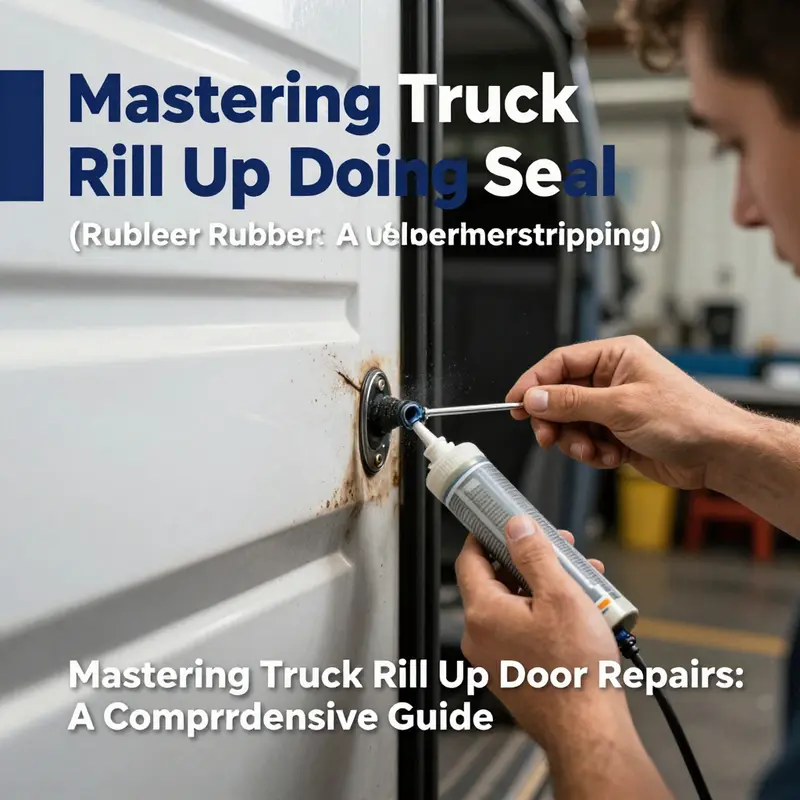
When you decide how to repair, you begin with the simplest, least invasive option that matches the severity. For light aging, cleaning and reconditioning the rubber can restore much of the original suppleness and improve sealing without altering the door geometry. Start by removing surface grime with a mild detergent and a soft brush, then rinse and dry thoroughly. The goal is to remove trapped dirt that interferes with the seal’s ability to flex and to prepare the surface for conditioning. After cleaning, apply a silicone-based rubber conditioner with a generous, even coat. Work it into the rubber with a clean cloth, let it soak in for several minutes, then wipe away any excess. Do not rush the cure; the conditioner needs time to penetrate small pores and replenish lost plasticizers that keep rubber pliant. Reclosing the door a few times after conditioning helps you feel whether the seal has regained some softness and whether the door closes more quietly. Schedule a quick test drive in calm weather to compare wind noise with and without the conditioner’s effect. The improvement may be subtle, but even a modest enhancement reduces fatigue and increases driving comfort. For ongoing maintenance, repeat conditioning every three to six months, particularly as temperatures shift toward winter or summer extremes.
If light aging persists beyond cleaning and conditioning, or if the seal shows deeper cracks but remains attached and flexible, a targeted repair can extend the life of the weatherstripping without a full replacement. A common approach is to apply a thin layer of a liquid rubber sealant to the damaged area. This coating acts as a flexible barrier that bridges small cracks and tears, maintaining adherence to the channel and frame while preserving sealing integrity. Clean and dry the area before application, then apply a thin, uniform layer using a precision applicator or small brush. Allow the coating to cure completely—this usually means a full day of drying in a dust-free environment. Avoid letting water or road spray contact the area during curing, as some sealants can shift or shrink with moisture. For small tears where the seal remains connected but has loosened near the edge, a high-strength adhesive designed for rubber-to-metal bonding can reattach the edge and restore a snug fit. Clean the bonding surface with isopropyl alcohol, apply a conservative amount of adhesive, press the edge in place, and hold it until initial tack sets. Then allow a full cure time, typically 24 hours, before subjected use. These localized repairs are practical when a full replacement would be unnecessary or cost-prohibitive, and they preserve the door’s original geometry while restoring function.
Yet there are times when the seal is beyond repair, and replacement becomes the only sensible option. Replacement is also the most reliable long-term solution for a roll-up door that experiences frequent water intrusion, severe cracking, or detachment across large sections. When planning a replacement, choose an OEM or high-quality aftermarket EPDM weatherstrip designed for your truck’s make and model. EPDM provides superior resistance to UV, ozone, heat, and cold, and it maintains elasticity across a wide temperature range. The installation begins with careful removal of the old seal. Use a trim tool or a thin, non-marring blade to lift and ease out the old seal, taking care not to scratch the door frame or channel. Next, thoroughly clean the channel, removing old adhesive and debris that could prevent a fresh seal from seating correctly. Dry the area completely before proceeding. Align the new seal with the channel, starting at a corner and pressing it into place along the entire length. At corners, gently stretch the material to maintain tension and prevent gaps. Push the seal firmly so it sits evenly and seals along its entire length. After installation, give the seal a gentle test by closing the door and listening for any air leaks or wind noise, and check that the door latches fully without requiring extra force. It is advisable to allow the new seal to settle for at least 72 hours before washing the truck or applying heavy door pressure, as this helps the seal conform to the door’s geometry over time. Also, verify that the door’s drainage holes remain clear; blocked drainage can trap moisture behind the seal and promote rust in the frame. Replacement may involve some trial fitting, as door frames are not perfectly uniform across every vehicle year, but the payoff is a consistently tight seal that resists moisture, cold drafts, and extraneous noise for years.
No matter which path you choose, post-repair testing is essential to confirm success. A simple, practical method is to close the door on a sheet of paper, such as an A4 page, and pull it out slowly. If the paper resists uniformly along most of the length, the seal is performing well. If you can pull the paper out easily in certain sections, inspect those areas for misalignment or gaps in the seal seating. Water testing can also be informative. In a controlled setting, gently spray the door seam with water from a hose at a low to moderate spray setting and observe for any seepage along the threshold or channels. Listen for any unusual wind noise at highway speeds, which can indicate that the seal’s geometry is off or that it isn’t in full contact with the door frame. If anomalies appear, readjust the seal position, reseat the channel, or reapply the coating or adhesive as needed. After any repair, it is wise to recheck the door’s operation. The door should latch without extra force, and it should open smoothly without binding. In the weeks after a replacement, check the edge contact with the frame again and ensure there is no misalignment that could cause wear on paint or the seal itself.
Maintenance after repair is not merely a memory of what you did once. It is a habit that preserves the seal’s life. Clean the seal monthly with a mild soap solution to remove salt, grime, and oils that can creep into the rubber. Avoid harsh solvents that can dry out or degrade the rubber. Regular conditioning keeps the seal supple, reducing the likelihood of cracks and tears. If you live in a climate with big temperature swings, consider scheduling conditioning more frequently, perhaps every two to four months, to maintain elasticity. Finally, be mindful of how you operate the door. Slamming the door or forcing it when the seal binds can accelerate wear and diminish the life of even a new weatherstrip. Encourage smooth, deliberate operation, and your repair will endure longer.
As you manage this repair process, you may find value in exploring related truck maintenance resources that address the broader scope of keeping a vehicle in good working order. For further guidance on related topics, you can consult a DIY windshield repair guide intended for truck owners. This internal resource can provide complementary techniques for assessing and maintaining the integrity of external and internal interfaces on a truck, ensuring that all critical seal points—from windshields to doors—receive thoughtful attention. DIY windshield repair guide for truck owners.
Ultimately, the goal is a seal that behaves like new, or at least like a factory-installed, long-wearing component. The decision to clean, coat, repair, or replace should be guided by a careful assessment of the seal’s condition, its impact on the door’s operation, and the total cost of each option. When you treat the weatherstripping as a living, evolving part of the door assembly—something that benefits from routine care rather than a one-time fix—you extend the life of the entire door system. This approach also reduces the risk of water intrusion that can lead to rust or mold in the cargo area and cab, and it improves interior comfort and fuel efficiency by minimizing air leakage. The process is iterative. You may begin with a gentle conditioning and re-seating. If that yields insufficient results, you move to a targeted sealant patch. If the seal shows persistent cracks and detachment, you commit to a full replacement. Each step is a sound investment in the door’s long-term performance, and each step you complete strengthens the roll-up door’s ability to perform as a seamless, integrated part of your truck’s envelope. This careful, staged strategy helps ensure that your truck remains comfortable, efficient, and protected from the elements, regardless of the weather outside.
External resource for additional reading on rubber weatherstripping care and replacement can be found here: https://www.amazon.com/dp/B000XQJL9I
Final thoughts
Proper maintenance and timely repairs of truck roll-up doors are essential strategies in minimizing operational disruptions and extending vehicle longevity. By addressing issues such as cracks, scratches, dents, and failing seals, fleet managers can ensure their trucks remain reliable and secure. Understanding these repair techniques not only saves on costly replacements but also enhances fleet efficiency, driving performance in logistics and transportation tasks.

