Repairing a detached or damaged headliner in trucks is crucial for maintaining the aesthetic and functional integrity of your vehicles. For fleet managers, truck owners, and operators in construction or logistics, an impressive headliner not only upgrades the overall look of the vehicle but also reflects professionalism to clients and drivers alike. This article delves into assessing the extent of the damage, employing effective localized repair techniques for small detachments, and executing full replacement methods for significantly affected headliners. Each chapter provides actionable insights to ensure your truck’s cab remains in premium condition, ultimately supporting the efficient operation of your fleet.
Reading the Roof: A Thorough Assessment Before Repairing a Truck Headliner
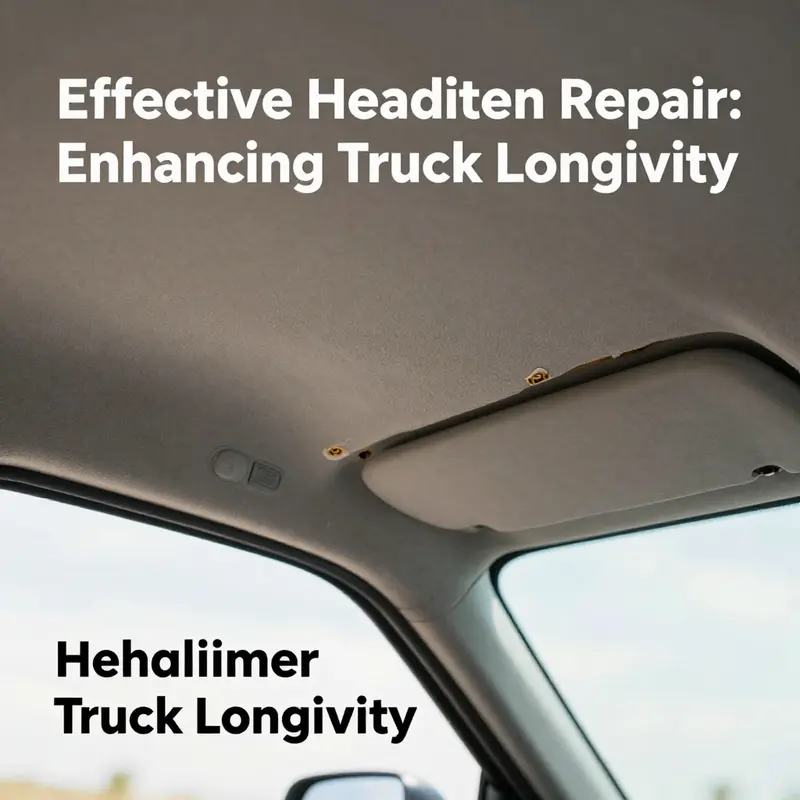
A truck headliner is more than a cosmetic layer tucked above the cabin. It is a quiet defender against heat, noise, and the rustle of loose fabric that can become a distraction on the road. The most important step in any headliner repair is not choosing a glue or a fabric pattern but conducting a careful, honest assessment of the damage. Only through a thoughtful survey can a vehicle owner decide whether a small patch will suffice or a full replacement is the wiser, longer-lasting course. When you begin with the right question—how extensive is the problem, and what is the underlying cause—you gain clarity that saving money today does not cost you in reliability tomorrow. The assessment itself is a skillful blend of observation, tactile examination, and an understanding of the headliner’s construction. Modern trucks often employ a fabric layer bonded to a rigid foam core, sometimes reinforced with a backing material. This architecture means that problems rarely appear as a single, isolated tear; more often they reveal a pattern of wear along seams, near mounting points, or in sections where heat and vibration have done their work over years of operation. A methodical check begins with the simple: is there sagging or detachment, and where is it most pronounced? Yet it quickly moves into more nuanced territory: is the fabric stained or moldy, is the foam collapsing, and is the roof lining itself still firmly anchored to its clips and adhesive. The difference between a localized peel and a headliner that has detached in large sections is not merely a question of aesthetics but of structural integrity and safety. A small area peeling at a corner may be a straightforward fix, a quick glue-and-press exercise with the right adhesive and a weighted press. But if more than a third of the headliner is affected, or if the foam is crumbling and the fabric is brittle, a replacement is often the more reliable solution. This distinction is not always obvious from a casual glance; it requires a careful inspection that respects both the visible surface and the hidden layers beneath. The first signs of trouble are often visible at the edges and seams, those points that bear the brunt of repeated door openings, sun exposure, and the micro-movements of the cabin during operation. A sagging edge may indicate that the mounting clips have loosened or that the adhesive bond between fabric and foam has degraded. Wrinkles and detachment in large areas can signal that the foam backing has lost its resilience, which changes the way the fabric behaves when heat cycles and vibration occur. If moisture has entered the roof cavity—perhaps from a leak around a sunroof, a damaged windshield, or from a failed seal around a roof antenna—mold can take hold and appear as dark spots or a musty odor. In such cases, the assessment must also account for possible water damage to the underlying structure and to any insulation or vapor barriers behind the headliner. The material itself tells a story. For fabric headliners, stains and mold colonies can undermine both appearance and long-term durability. For foam-based headliners, compression marks, crumbling foam, or a stiff, brittle feel under the fabric are alarming cues that the material has aged beyond a simple fix. The structural story is equally important. Behind the fabric lies a network of clips, retainers, and adhesive bonds. If those anchors show signs of corrosion, loosening, or fracture, the root cause of the problem may lie not in the fabric but in the way the roof panel is held in place. A competent assessment visualizes this entire system: fabric, foam, and the roof’s mounting framework as a single, interdependent structure rather than three separate layers. Once the surface conditions are understood, the material considerations come into play. The choice between repair and replacement is driven not only by the current state of the headliner but by the material’s vulnerability to future failure. A fabric headliner that is well-attached to a firm foam core and is free of moisture damage is a strong candidate for a localized repair. The process is straightforward: select an automotive-grade adhesive designed for headliners, prepare the surface by cleaning away dust and old adhesive residues, and apply a thin, even layer to both surfaces before rejoining the fabric. The key is to avoid over-adhesion and to let the bond cure properly. A fully functional fix in this scenario is achievable with patient pressure and time. Conversely, if the foam backing is compromised or the fabric shows widespread wear, a full replacement becomes more sensible. Modern headliner kits provide a new foam backing and fabric to re-create the original appearance and structural integrity. The replacement approach begins with removing interior trim pieces around the headliner—sun visors, reading lights, A-pillar and B-pillar trim panels—using plastic pry tools to minimize damage. The old headliner is then carefully detached, mindful of not tearing the roof lining or disturbing wiring harnesses that may be tucked behind the panel. Cleaning the roof surface becomes essential during this phase. Old adhesive residues must be scraped away, and the surface must be degreased with a suitable cleaner to ensure a fresh bond for the new foam and fabric. The adhesive is applied in a uniform layer to the roof panel before laying down the new foam backing. The fabric is then positioned with attention to wrinkle-free alignment; a roller or squeegee helps smooth any creases and ensures complete contact with the adhesive. The cure time is a period to respect rather than rush, typically a full day, during which the headliner remains undisturbed so the bond reaches its maximum strength. Reinstalling the interior components completes the cycle, returning the vehicle to its original interior geometry and feel. The decision to pursue a repair or a replacement is not merely technical; it is a financial calculation that weighs the cost of materials, the availability of matching fabrics and foam, and the time that the repair will require, against the expected longevity of the solution. In some cases, the original material may no longer be readily available, or the extent of wear makes a patchwork repair a temporary fix rather than a lasting solution. In such circumstances, replacement emerges as the safer bet for long-term reliability. This is especially true for trucks that endure harsh operating environments—extreme temperatures, high humidity, constant door movement, and vibration from off-road conditions can accelerate headliner degradation. A thorough assessment thus acts as a guardrail, directing the owner away from a fix that would fail soon or look inconsistent with the rest of the interior. It is also worth acknowledging the practical and time-related realities of repair work. A localized repair can be an economical option and may be completed in a single weekend with the right preparation, space, and patience. It is a good choice when the core structure remains sound, the backing foam is intact enough to provide loft and shape, and the fabric has not suffered extensive damage. A full replacement, while more resource-intensive, yields a professional-looking finish that closely mirrors the factory appearance and tends to deliver greater long-term stability. In weighing these options, it helps to document the condition with clear, organized notes and photographs. Track the areas that show the most wear, identify any signs of moisture intrusion, and note the condition of the mounting clips and adhesive bonds. This record not only clarifies the repair path but also assists if professional evaluation becomes necessary. If you have a history of interior repairs or you want to maintain a consistent interior finish as the vehicle ages, consider planning beyond the present repair. The chance of recurrent issues is real if heat, humidity, or sun exposure continues to stress the roof lining. Therefore, part of the assessment is contemplating preventative steps once the repair is complete. For instance, guarding against UV exposure with a sunshade or parking in shaded areas can prolong the life of the fabric and foam. Caring for the headliner with gentle, non-abrasive cleaners helps to maintain the fabric’s appearance and reduces the risk of further degradation from dust and contaminants. The assessment, then, becomes a continuous loop of observation, testing, and adjustment rather than a one-off task. If you are leaning toward a DIY repair after your assessment, you can find additional practical guidance on interior repair projects in a related resource here: DIY windshield repair guide for truck owners. This reference can provide a framework for handling disassembly, reassembly, and careful use of tools in confined spaces, though it should not replace the specific, material-aware steps for the headliner itself. At the same time, the process invites a careful balance between careful execution and realistic expectations. It is tempting to rush to a quick fix when the schedule is tight. Yet the best results often come from patience: letting the adhesive cure fully, pressing the edges to ensure a secure seal, and allowing the entire interior to settle with the new materials before using the truck under heavy load or in oppressive heat. Finally, the assessment frames not only what is happening to the headliner today but what could happen if a latent issue, such as a minor roof leak or a developing mold colony behind the fabric, is left unchecked. A thorough investigation helps prevent future failures and ensures that the repair, whether localized or full, restores not only aesthetics but a dependable, safe interior environment for the truck and its occupants. For deeper background on the structural considerations of headliner systems and more formal guidelines, readers may consult external resources that discuss the aging, replacement, and adhesive practices in headliner repair. Further reading can be found at: https://www.autoglass.com.au/blog/automotive-headliner-repair-and-replacement-guide
Edge by Edge: Localized Fix Techniques for Repairing a Truck Headliner
A truck’s headliner is one of those details that quietly defines the interior experience. It cools the feeling of the cabin, dampens noise, and gives the roof a clean, finished look. When the headliner starts to detach, or a patch of fabric lifts away from the foam backing, the problem can feel like a small nuisance until you realize it’s compromising comfort, insulation, and even the vehicle’s value. The repair approach should begin with a clear assessment of how much is affected. If only a corner or edge has peeled away, a localized fix can restore the interior’s appearance and functionality without the upheaval of a full roof lining replacement. If, on the other hand, more than a third of the headliner is loose or the fabric has become brittle and the foam backing crumbly, the prudent choice is a full replacement. The distinction matters, not only for the results but for the time, skill, and expense involved. This chapter focuses on the practical, localized path—how to reseat a small area with care, what to watch out for, and how to decide when to escalate to a complete rebuild. It’s a hands-on, patient approach that emphasizes control, cleanliness, and proper cure times since headliner adhesives rely on a stable bond that gains strength over hours and days, not minutes.
Localized headliner detachment tends to happen at the edges or corners, where the fabric weakens first due to stress from opening and closing doors, sun exposure, and the weight of the sun visors and accessories. The repair plan for these minor detachments is refreshingly straightforward if you approach it with the right materials and a careful method. Begin with a dedicated automotive headliner adhesive, a clean cloth, alcohol wipes, plastic trim tools, and a way to keep the fabric flat and pressure-treated during cure. The core idea is simple: reconnect the fabric to a sound roof surface, without creating new wrinkles or air pockets, and then let the bond set undisturbed. In practice, that means a clean, dust-free surface and a thin, even layer of adhesive on both the fabric backing and the roof surface. Allow the adhesive to become tacky—usually a short wait of five to fifteen minutes—before pressing the fabric back into place. It’s the fine balance between enough tack and not so much that you smear the glue or squeeze it through the fabric.
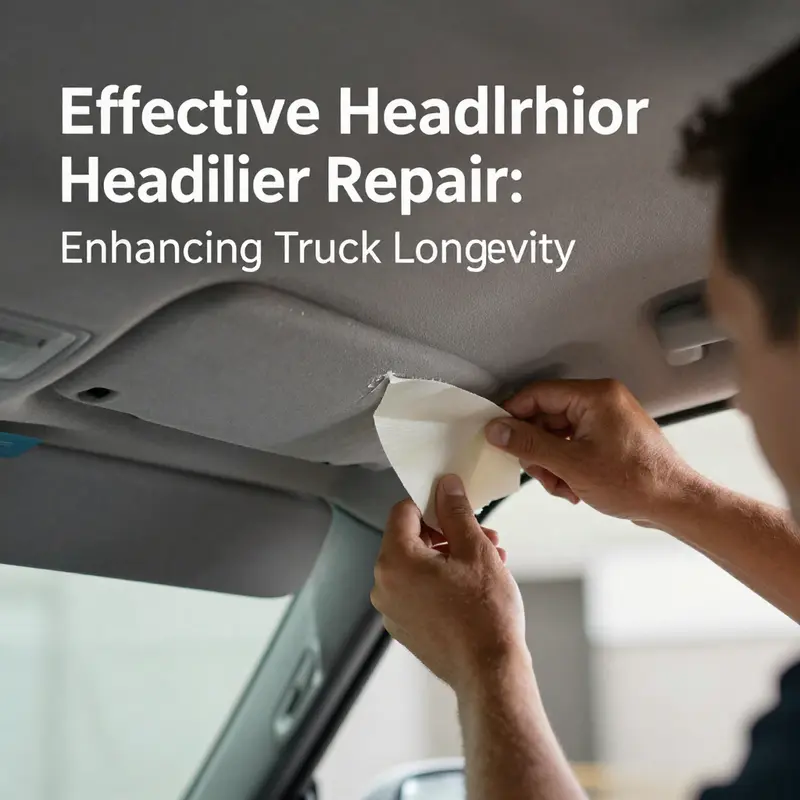
The process is intimate and tactile. The first step after diagnosing a small detachment is to gently lift the edge with a plastic trim tool, lifting only what’s necessary to gain access without tearing. Once the seam is exposed, you clean the area on both the roof and the back of the fabric. Dust, old adhesive residue, and any oils from hands can prevent a solid bond, so persistence with alcohol wipes and a dry cloth is worthwhile. When applying the new adhesive, spread a thin, even film on the roof surface. A heavy-handed approach—globs of glue or over-saturation—invites bubbles, wrinkles, and a bond that fails when heat or movement returns. The goal is a bond that is tacky and slightly sticky to the touch, not wet or runny. Waiting a few minutes lets the glue reach the right consistency, after which you press the fabric back into place with deliberate, steady pressure. A firm contact along the entire area is essential; you don’t want a patch that sticks in the center but lifts at the edges later. To maintain pressure during the cure, you can place heavy books or flat-topped objects across the panel. The weight acts as a gentle clamp, encouraging uniform contact while the adhesive cures. In many cases, a 24-hour undisturbed cure is the practical duration that yields a solid, long-lasting bond. This simple sequence—clean, glue, tack, press, weight—helps the fabric reattach cleanly and reduces the risk of new detachment forming in the same spot.
The beauty of a localized fix lies in its cost-effectiveness and speed. You’re addressing a problem that is typically isolated and temporary in nature. But the same strength that makes this approach practical also highlights a limitation: the underlying material may already be degraded. If the headliner fabric has become brittle or the foam backing has deteriorated, the localized method may only provide a short-term reprieve. In such cases, the fabric may lift again or the surface may remain uneven despite a solid initial bond. That’s the critical early warning that prompts a reassessment of the repair strategy. When the foam backing loses its integrity, or the fabric cannot hold a long-lasting bond, the best course is usually a full replacement, which replaces both fabric and foam with a fresh, uniform surface. Still, even within a localized repair, there are practical choices that can influence durability. For example, choosing an adhesive that’s specifically formulated for headliners helps ensure compatibility with both fabric and foam and reduces the risk of damaging either layer over time. It’s also worth planning for future heat and sun exposure. UV rays can slowly degrade the adhesive and the fabric’s fibers, so consider how your truck’s usual parking location and sun exposure might be shaping the likelihood of future detachment. An additive approach to maintenance—regular cleaning with a mild, non-abrasive cleaner, avoiding harsh solvents, and keeping interior surfaces shaded when the vehicle is parked for extended periods—can extend the headliner’s life. The prevention mindset becomes part of how you address detachment: you’re not just fixing what’s broken; you’re shaping the conditions that allow the repair to endure.
In some situations, you may need a temporary solution while you gather supplies or arrange a proper repair window. A quick, temporary fix can be accomplished with color-matched upholstery pins or small clips that secure the flapping fabric to the roof. These are strictly short-term tools—they keep the fabric from catching on open doors or snagging loose wires and light fixtures during travel, but they’re not durable over the long term. Pins and clips can leave small holes in the fabric or loosen during driving, especially if the vehicle experiences vibrations or long highway runs. The temporary option is a gesture of practicality, not a substitute for a proper bond. If you’re facing a tight schedule and a sudden downpour, this type of fix buys time, but plan to follow up with a proper repair as soon as possible. The important message is to avoid over-tightening during the temporary fix. Excess pressure can tear the fabric further or distort the underlying foam, making the eventual replacement more complicated.
When detachment grows beyond a localized patch—the boundary where a simple glue job becomes insufficient—the decision process shifts from repair to replacement. A full headliner replacement involves removing interior trim pieces, detaching the old headliner, cleaning the roof panel surface, and installing a new foam layer and fabric. This is not a casual weekend job. It requires careful disassembly of lights, visors, A-pillar and B-pillar trims, and a careful reassembly that preserves the alignments of light fixtures, grab handles, and sun visors. The replacement process begins with removing the interior components that anchor the headliner: sun visors, reading lights, and trim around the A and B pillars. Each piece is gently pried away with a plastic tool to avoid cracking or scratching. Once the fixtures are out, the old headliner can be carefully pulled down from its mounting points, with attention paid to not tearing the fabric or harming the roof liner in the process. The surface of the roof panel must then be cleaned of all old adhesive, dust, and debris to ensure a sound base for the new materials. This preparation matters because a clean, roughened surface helps the new adhesive bite effectively into the roof panel and the new foam backing. The actual application involves laying the new foam backing onto the roof, then placing the fabric over it. Smooth out wrinkles with a roller or squeegee and maintain even tension to avoid future sagging. The final step is to secure along the edges and give the adhesive ample time to cure—often about 24 hours—before reattaching the interior components. It’s a more involved process, but it yields a professional result and restores the cabin’s appearance and insulation to its intended state.
In parallel with understanding the mechanics of adhesive and fabric, the repair approach benefits from a calm, methodical mindset. Rushing through the removal or reattachment can invite mistakes that are not easily undone. The headliner is a delicate assembly that sits at the intersection of comfort, acoustics, and aesthetics. Treating it as a non-urgent, methodical project rather than a desperate fix will usually produce superior outcomes. The localized method allows a repair that is often invisible to casual inspection when done correctly. If you plan your steps and allow proper cure times, the repaired area will be nearly indistinguishable from the rest of the headliner. And while all this is happening, keep the rest of the interior as clean as possible. Dust, grease, and fingerprints can accumulate on the new bond or create an uneven surface under the fabric, which can affect how the fabric looks once it’s pressed into place. A quick, careful wipe-down of the roof panel before reattachment can pay dividends when you evaluate the final appearance.
The decision to pursue a localized fix versus a full replacement is rarely a single‑point judgment. It hinges on the extent of the damage, the condition of the foam backing, the pliability of the fabric, and the owner’s goals for durability and aesthetics. If the headliner has survived decades of sun exposure with only small detachments, a series of localized fixes may restore a pristine look for years to come. If it has endured repeated detachment, sagging, or a crumbling foam, a replacement is more likely to deliver a lasting, professional result. Even when you choose the early path of a local repair, the chapter’s refrain is to stay mindful of the long game. A small repair that fails early can cascade into a more expensive problem later, especially if moisture infiltrates behind the fabric or if the underlying foam continues to deteriorate undetected. Regular inspection after a repair—looking for new wrinkles, lift at the edges, or soft spots in the foam—helps catch issues before they escalate.
For readers who want a broader perspective on DIY interior repairs beyond headliners, there are resources that walk you through related tasks with a practical, garage-level approach. For a broader overview of DIY truck interior tasks, see the DIY Windshield Repair Guide for Truck Owners. This link offers a perspective on how small repairs across the interior can be approached with consistent methods and tools, reinforcing the principle that careful preparation and patient execution often yield the best results. DIY Windshield Repair Guide for Truck Owners.
In practice, the localized repair of a headliner becomes an art of balance: balance between the amount of adhesive used, the pressure applied during seating, and the time allowed for curing. It is an integrative task that connects with the vehicle’s overall maintenance philosophy. Keeping a close eye on the headliner’s condition, especially after a repair, helps ensure that the work lasts. Prevention is less glamorous than replacement, but it is a strategy that pays off. Park in shaded or covered areas to minimize UV exposure, avoid leaving windows open during rain, and consider a UV-protective sunshade when the truck sits in bright sun for extended periods. Regular, gentle cleaning of the headliner with non-abrasive cleaners can prevent the buildup of grime that complicates adhesion and finish. By weaving these practices into the routine maintenance of the truck, you extend the life of the headliner and, by extension, the comfort and value of the vehicle.
In summary, a small patch of detachment on a truck headliner can be a straightforward, reliable repair when approached with the right technique and materials. Start with a careful assessment of whether the issue is localized or part of a larger failure. For small detachments, a localized glue repair provides a cost-effective, durable fix if the foam backing is still sound and the fabric remains flexible. The steps are simple but precise: clean both surfaces, apply a thin, even layer of adhesive to both, wait for tackiness, press firmly, and maintain pressure with weight during a full cure. If the damage is more extensive or the foam has deteriorated, a full replacement will deliver a more lasting solution, albeit with greater time and skill requirements. Temporary fixes, such as color-matched pins or clips, can serve in an emergent situation but should not be mistaken for a lasting solution. Finally, adhere to preventive measures to reduce future detachment. With patience and careful work, you can restore the headliner’s appearance, maintain interior comfort, and keep the truck looking and feeling as well as it performs on the road.
External resource for further guidance on related interior repair techniques can be found here: https://www.amazon.com/dp/B0B6W7QJYD?th=1
Rebuilding the Roof’s Interior: A Complete Headliner Replacement Guide for Trucks
The headliner is more than a finished surface that dresses the ceiling of a truck cabin. It cushions sound, hides wires, and contributes to the overall atmosphere of the interior. When it sags, tears open to reveal the foam beneath, or the backing fails from decades of temperature swings and moisture, a full replacement becomes not just a cosmetics fix but a restoration project that can restore the vehicle’s character and your daily comfort. This chapter walks through a complete headliner replacement as a cohesive, practical process. It treats the job as a single, flowing effort rather than a checklist of isolated tasks, so you can picture each phase not as a separate hurdle but as part of a continuous craft. The aim is durability, proper fit, and a look that harmonizes with the truck’s era and style, especially for classics where authenticity matters to the finish.
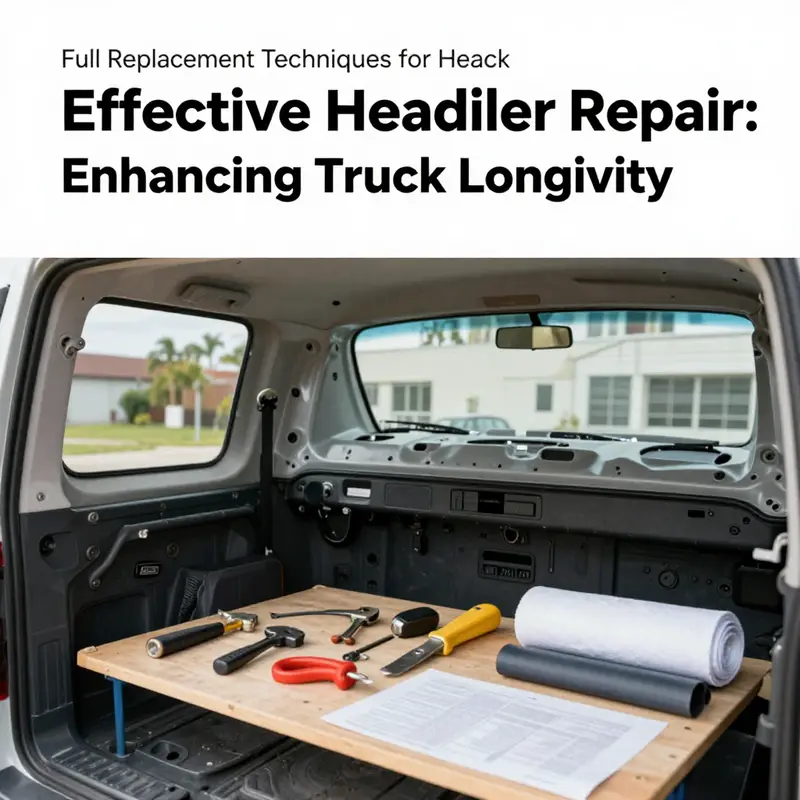
Begin with a plan that respects the vehicle’s structure and any existing corrosion or damage. A full replacement is appropriate when more than a third of the headliner is affected, the fabric is brittle, or the foam backing has deteriorated to dust. If the foam has crumbled away or the fabric has stretched badly, reusing the original material is rarely feasible. In these scenes of restoration, preparedness matters almost more than technique. You should measure the headliner area, decide whether you’ll reuse the original trim pieces or replace them, and order a replacement kit that includes the fabric and foam backing tailored to your truck’s year and cabin dimensions. For classic restorations, matching the texture, color, and grain of the original headliner can be essential to achieving a faithful look. A careful choice of materials — durable, rust-resistant fasteners and a foam backing of appropriate density — helps ensure that the interior remains stable for years to come. If in doubt, consult a restoration guide or specialist resource that emphasizes authenticity. While this chapter centers on the method, the principle remains straightforward: precision, patience, and a clean surface set the foundation for a lasting result.
Removing the old headliner is more than pulling on fabric. It requires a cautious sequence that minimizes damage to the roof panel and preserves fasteners and trim for reassembly. Start by removing interior fixtures that might obstruct the work: visors, dome lights, sunroof covers if present, and any A- or B-pillar trim pieces. Use only plastic tools designed for trim work to avoid gouging paint, plastic, or metal. The goal is to detach the fabric without tearing the roof lining or pulling loose wiring channels. Once the components are out of the way, gently release the headliner’s mounting points. Some trucks use clips, others rely on adhesive-backed borders or foam contact points. As you free the headliner, go slowly and support the panel so it doesn’t bend or crease. If the old fabric tears or stretches while you’re removing it, you’ll appreciate the extra patience in the next steps. After the panel is detached, remove the old adhesive and any debris from the roof surface with a scraper and a fabric-safe cleaner. A thorough cleaning is essential because even small adhesive remnants can cause the new panel to sit unevenly, creating wrinkles and air pockets that degrade both the appearance and durability.
Preparing the roof panel after removal is a delicate mix of inspection, repair, and preparation. Look for rust, pitting, or obvious imperfections in the metal. Small rust spots should be treated with rust converter and, if necessary, coated with a protective primer designed for automotive use. If you find any significant corrosion, address it before continuing. A smooth, dry surface ensures the foam backing and fabric will adhere evenly and maintain a consistent tension. Any irregularities in the roof panel can become visible through the headliner, so take the time to flatten high spots, seal pocked areas, and ensure the surface is dry. The next phase introduces the new foam backing. The foam is the backbone of the headliner, providing structure, insulation, and a soft feel under the fabric. Cut the foam to the precise dimensions of the roof panel, leaving a slight margin for edge alignment. It’s common to lay the foam onto the roof surface first, then lay the fabric over it. As you apply the foam, ensure it lies flat with no bubbles or creases. If the foam has a pattern or texture, align it so that the finished grain will read correctly when the fabric is applied. This step sets the tone for the finish and reduces the likelihood of wrinkles appearing later.
With the foam in place, the fabric comes into play. The choice of fabric for full restoration should reflect the truck’s era and interior styling. For classic trucks, you may seek materials that mimic the original texture and tone, whether it’s a soft suede-like finish, a smooth vinyl, or a fabric blend that reads as a period-appropriate textile. Lay the fabric over the foam, keeping the grain direction aligned with the vehicle’s lines so it appears natural inside the cabin. The fabric should be stretched evenly across the surface, with particular attention paid to the edges where the material folds over the panels or encloses around trim channels. Any wrinkles or slack spots here will become visible after installation, so pull gently and work from the center outward toward the edges. A roller or squeegee can help smooth the fabric, pushing out air and heat-bonding it to the foam. Work slowly to avoid oversaturation with adhesive and to prevent stretching beyond the fabric’s tolerance. This phase is where accuracy pays dividends in the final look and feel.
Adhesive application sits at the heart of the full replacement technique. An automotive-grade headliner adhesive is designed to remain flexible, cure cleanly, and endure the temperature swings common in a truck’s interior. Apply a thin, even layer to the roof panel, taking care not to oversaturate and cause the foam to warp or the fabric to bead. A tacky surface is the goal — not a slick, wet mess. After applying the adhesive, allow a short time for it to become tacky, typically around 10–15 minutes, before you place the fabric. Laying the fabric onto the adhesive should be done with a careful hand. Start at one edge or a corner, align it precisely with the mounting points, and gradually press the fabric down from the center outward, smoothing air pockets as you go. As you press, watch for wrinkles forming along the edges; if you see a wrinkle near a seam or acute corner, lift gently and reposition. A clean, deliberate touch prevents larger issues later in the curing stage.
Once the fabric is in place and free of major wrinkles, secure the edges to their mounting points. Each headliner is different in how it anchors at the border; some vehicles rely on edge trim that exerts gentle compression, others use a fringe of stitched fabric that hides a seam. In either case, you want the fabric to lay flat around the periphery. If your kit includes a border fabric or a separate edge trim, install it once the central section has adhered. A roller can help push the fabric into curves and along complex contours, ensuring an even tension that won’t sag as the adhesive cures. Allow the adhesive to cure fully, usually for a full 24 hours, with the headliner undisturbed. This waiting period is the quiet portion of the project, when the room becomes still and the materials settle into their final positions. It’s tempting to rush this stage, but even a brief disturbance can create micro-wrinkles or misalignments that are difficult to correct afterward.
Reassembly of interior components follows the curing phase. Begin by rehoming the sun visors, dome lights, and any trim pieces you removed at the start. The reinstallation sequence should mirror the removal sequence to minimize stress on the fabric and avoid pinching the edges. Double-check that any electrical connections behind the headliner are secure and correctly routed before you clip trim back into place. As you reattach, pay attention to the alignment of the headliner with the surrounding panels. The goal is a seamless transition between the headliner and the roofline, with no obvious gaps around the edges where the fabric folds into channels. If necessary, gently adjust the edges with a clean tool to achieve uniform tension and an uninterrupted border. In this phase, it helps to move slowly and verify the fit from multiple angles, including from seats and standing positions. The interior feel of the cabin is shaped by these subtler details, and taking time here makes a noticeable difference in the final result.
For classic trucks or restorations where authenticity matters, the choice of materials extends beyond color and texture. The foam backing should replicate the density you’d find in the original build, providing a familiar feel while ensuring durability. The fabric’s weave and nap direction should align with the vehicle’s year and model for a historically faithful appearance. In such projects, it’s worth investing in high-quality backing and fabric that match original specifications or a close archival alternative. You’ll appreciate the long-term resilience, especially in climates that swing between humidity and dryness. The final fit should read as smooth, continuous, and consistent with the rest of the interior. If any adjustments are needed after a week of use, address them with a light touch, avoiding the temptation to redo the entire panel again. Small shifts can occur as the headliner settles; a gentle recheck after a loading period can confirm everything sits correctly.
Beyond the mechanics of fit and the physical materials, there is a philosophical dimension to a full headliner replacement. It is a restoration that requires patience and a willingness to align modern techniques with classic aesthetics. When you’re restoring a truck that carries personal history or historical value, you are better served by approaching the project with an eye toward authenticity as well as practicality. That means selecting colors and textures that evoke the era without compromising the headliner’s structural integrity. It also means acknowledging the role of the headliner in regulating interior temperatures and dampening noise. A well-executed replacement not only improves the ceiling’s look but also enhances the driving experience by delivering a calmer, more refined cabin ambience. The time you invest in careful measurement, precise cutting, and meticulous adhesion pays back in the headliner’s stable performance and in the sense of pride that comes with a job well done.
During and after the project, a few preventive practices help extend the life of the new headliner. Avoid exposing the interior to direct, prolonged sunlight, which can fade fabrics and weaken adhesives over years. If possible, park in shaded areas or use UV-protective schemes for your windows. Keep the roof interior dry and avoid leaks from the windshield or sunroof seals that could saturate the fabric with moisture. Residual humidity inside the headliner can undermine the adhesive’s long-term bond and promote mold or odor development. Regular cleaning with non-abrasive products is prudent, but do not apply heavy moisture to the fabric. A light damp cloth and a mild cleaner suitable for fabrics can help maintain the surface without softening or degrading the material. If you do encounter an issue after installation — a creeping edge seam, a slight sag near a corner, or a minor wrinkle that stubbornly won’t smooth out — approach it with measured patience rather than aggressive force. Small corrections are easier to manage when addressed early, and they can preserve the overall integrity of the replacement.
This full-replacement approach is not merely about the immediate finish; it’s about creating an installation that will endure through weather, heat, and the daily rhythm of truck life. It is a craft that invites you to take your time, measure twice, cut once, and keep the mounting surfaces clean and level. The details matter as clearly in this context as they do in any other restoration work. If you are undertaking a classic restoration, your attention to subtlety — the texture, the nap direction, and the edge finishes — will contribute significantly to the perceived value and authenticity of the whole project. In that sense, the headliner becomes a keystone piece that anchors the interior’s visual and tactile language.
For readers who want more context or a deeper dive into the standards and material specifications associated with headliner work, consider cross-referencing professional guidelines from restoration-focused suppliers and historical resources. One practical route is to consult a comprehensive headliner replacement guide offered by a reputable restoration supplier. That guide covers detailed measurements, cutting templates, and methodical steps for edge finishing, all of which align with the careful approach described here. If you’re researching further, you may also find value in broad maintenance resources that explore how to maintain the integrity of the headliner as part of wider interior upkeep. The goal remains clear: create a durable, authentic finish that respects the truck’s history while delivering modern reliability.
As you close the project, take a moment to assess the finished surface with a critical eye. Look for uniform tension across the entire panel, clean edges at the borders, and a fabric that reads true to the intended texture and color. Hold the headliner up to the light in a few angles to verify that the fabric sits smoothly and that there are no shadowed wrinkles or sagging along the seams. When satisfied, reassemble the interior components with the same care you applied to removal, ensuring each clip and fastener nests securely in its pocket. The result should feel like a refined, cohesive interior rather than a patchwork of fixes. The truck’s cabin becomes not only more comfortable but also more faithful to its original character, which matters to drivers who care about the vehicle’s story as much as its performance.
If you’re seeking further insights and ongoing discussions about truck maintenance, refurbishment, and interior restoration, you can explore the broader blog section dedicated to these topics. This resource offers practical perspectives and community-driven tips that complement the method described here. Master Truck Repair blog
Finally, for a broader sense of technical standards and best practices, consult authoritative external resources that document headliner replacement methods and material specifications. A widely respected guide provides detailed steps and considerations for selecting foam backing, fabric, and adhesive that stand up to automotive use. This external resource complements the practical steps outlined in this chapter and can serve as a reference as you plan future restorations or revisits to the process. https://www.classictrucksupplies.com/headliner-replacement-guide
Final thoughts
Understanding how to appropriately assess and repair truck headliners is essential for maintaining the vehicle’s presentation and comfort. Whether addressing minor detachments or undertaking a complete headliner replacement, each step outlined in this guide serves to equip fleet managers and service providers with the knowledge necessary to ensure their trucks remain in top condition. By utilizing high-quality materials and following the recommended techniques, operators can extend the lifespan of their vehicle interiors, positively impacting their overall fleet management and operational success.

