Managing a fleet of trucks involves maintaining the vehicles in optimal condition, ensuring they are not only functional but also presentable. One of the minor yet significant challenges fleet managers face is handling dents on truck tailgates. When a dent occurs, it can affect not just the aesthetics but also the functionality of the tailgate, impacting day-to-day operations. Fleet managers, trucking company owners, and logistics professionals must be equipped with the knowledge of effective dent repair methods. This article explores various approaches to repairing dents on truck tailgates, detailing DIY methods such as suction cup dent pullers and paintless dent repair kits, as well as the advantages of professional services. Temporary fixes and final recommendations are also discussed, providing a holistic understanding of the best practices for maintaining truck tailgates.
Suction, Heat, and Patience: Restoring a Tailgate Dent with a Dent Puller
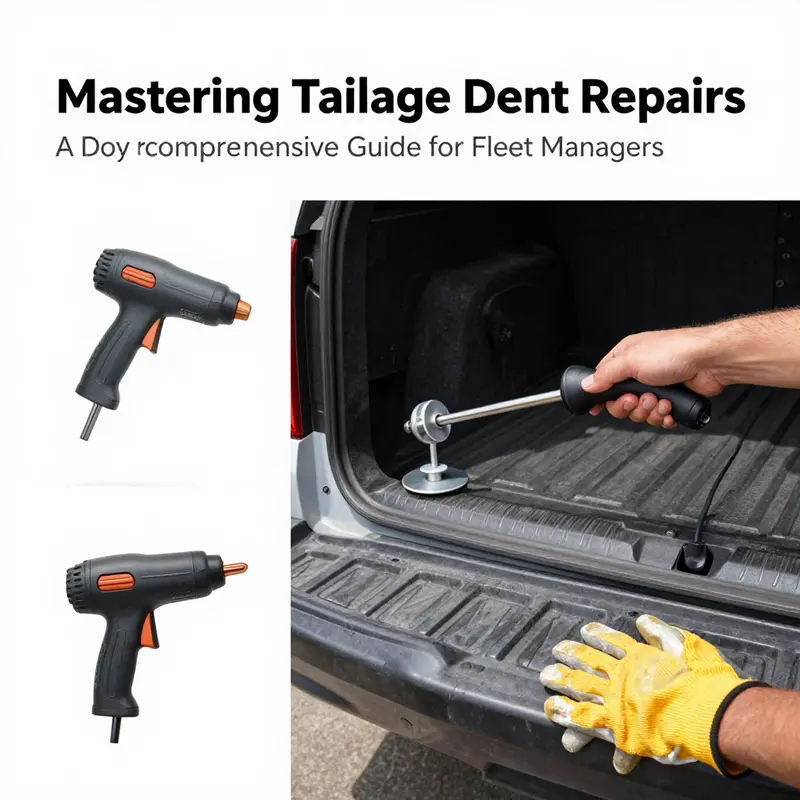
A dent on a truck tailgate can feel like a stubborn souvenir of a misjudged parking lot or a close call with a cargo pallet. The impulse to slam it back into shape with brute force is understandable, but the smarter path lies in a controlled, patient approach that respects the metal and the paint. Using a dent puller with a suction cup—when done carefully—can restore the tailgate’s smooth line without the risk of chipping or warping the finish. This chapter walks you through a measured, step-by-step process that centers on one reliable DIY method, while keeping in view the broader landscape of repair options discussed in the article. The goal is not just to erase a dent, but to do so in a way that preserves the integrity of the tailgate and provides a sense of confidence for future fixes.
Begin with cleanliness and preparation. Dirt, grease, and dust create a barrier that prevents a strong seal between the puller and the metal. Wash the dented area with soap and water, then wipe it dry with a clean microfiber cloth. Any residue left on the surface can compromise the suction cup’s grip and lead to uneven pulling. Once the area is dry, inspect the dent under bright light. Look for tiny paint chips or cracks that could indicate a deeper structural issue; this quick check helps you decide if the DIY route remains viable or if you should pause and seek a professional opinion.
Heat is the companion you want in this process. A heat gun or a standard hair dryer can be used to raise the temperature of the metal around the dent. The intent is not to soften the metal to a puddle, but to make it more pliable so the dent can spring back more readily when the suction pulls. A safe rule of thumb is to heat the area for 30 to 60 seconds, keeping the tool at a moderate distance to avoid scorching the paint or warping the surface. You’ll notice a subtle warmth, and sometimes a faint shimmer in the metal as it expands slightly. If the paint is already showing tiny cracks, stop and reassess. Heat can magnify flaws, and forcing the metal when the finish is compromised can invite chips or lift.
With the surface prepared and warmed, position the dent puller. Center the suction cup or pad directly over the middle of the dent. A secure seal is essential; if the cup isn’t fully attached, reheat and press again, ensuring the edge of the cup sits flush against clean metal. For pullers that use a threaded rod and a puller pad, attach the pad first, then align the rod with the pad’s opening. The goal is to create a robust connection between the tool and the metal so that when tension is applied, the pull is steady and controlled.
Tension is where patience pays off. Begin to apply outward pull by gradually tightening the puller’s mechanism. This is not a race; it’s a slow, deliberate process. Turn or crank gradually, and pause frequently to assess how the metal responds. Depending on the dent’s depth, the time required can range from a few minutes to several minutes of careful, incremental pulling. If you see the dent starting to pop out in stages, keep at it, but stop before you feel resistance through the paint or notice a new crease forming at the edges. The key is to let the metal rebound slowly rather than yank it back into place with force. If you don’t see progress after a few attempts, recheck the seal of the suction cup and consider reheating briefly before trying again.
As the dent begins to flatten, you’ll often hear a soft settling of metal as the panel returns toward its original shape. This sound should be gradual and even; a sudden snap or creak can signal that you’ve stressed the surrounding area. If the dent seems stubborn, a second cycle of heat and a renewed seal can help, but avoid extending the process’s duration beyond what the paint and metal can handle. The goal is a flush surface—no sharp edges or raised rims along the dent’s perimeter. When the area is nearly smooth, you may still notice a faint variation in the finish. Small surface irregularities can tighten up with time or with a touch of light hand sanding and a very careful application of touch-up paint later on. The aim is seamless integration, not a perfect, mirror-like gleam—though that can be the outcome if the dent is shallow and the surrounding paint remains intact.
Once the pull has reached a satisfactory point, it’s time to remove the tool and clean up. Gently reverse the tension, then loosen and remove the suction cup or pad. If adhesive or residue clings to the paint, wipe it away with a soft cloth dampened with isopropyl alcohol or a dedicated adhesive remover. A plastic or rubber scraper can help lift any stubborn bits without scratching the surface. Take a moment to inspect the area with oblique lighting to catch any tiny chips that might have been hidden during the pull. If you spot chips or micro scratches, a small amount of matching touch-up paint, applied with a fine brush, can help preserve the finish and prevent moisture infiltration along the edges of the dent repair.
The result of this method is often a tailgate that looks significantly better than before, with the panel’s contour restored and the paint untouched by heavy-handed hammering. Yet it’s important to recognize the limitations. Suction cup pulls work best for small to moderate dents where the paint remains intact and the metal hasn’t undergone deep stretching. Larger dents, or those near edges, frames, or areas where the paint shows cracks, may require more advanced techniques such as a paintless dent repair kit or a professional body shop. The decision point is safety and correctness: while this technique can save time and money for minor damage, forcing a dent that resists gentle pulling may create new imperfections or compromise the finish. In such cases, professional services that include frame alignment, metal shaping, sanding, priming, and paint matching offer a more reliable restoration.
To keep future repairs feasible, protect the repaired area with a tailgate cover and avoid placing sharp objects near the edge where the dent occurred. Practice can be valuable; if you’re new to using pullers or rods, practicing on a spare panel can build the feel for how much force is appropriate and how the metal responds to heat. Patience remains the most important tool in any DIY repair toolkit. When you approach your tailgate dent with measured steps, you give the metal a chance to recover its shape without inviting new damage. This approach aligns with the broader guidance of handling dents: small, well-executed DIY fixes can be effective when paint integrity is intact, while larger or more complex dents are better left to professionals.
For readers seeking broader context on DIY repairs, the Master Truck Repair Blog offers related tutorials and practical tips that complement this technique. Exploring additional explanations and real-world tips can enrich your understanding and improve results across different panels and situations. Master Truck Repair Blog
External reference for further reading on how to use a dent puller can provide a professional perspective and interactive demonstrations. See a detailed guide here: Dent Puller Guide on Car and Driver
Silent Fixes, Visible Results: Mastering Paintless Dent Repair for Your Truck Tailgate
A dent in the tailgate can feel like a small moment of defeat, especially when the rest of the truck still shines. Yet for many owners, a dent doesn t require a full panel replacement or a costly repaint. Paintless dent repair, or PDR, offers a path to restore the metal without disturbing the factory paint finish. The core idea is simple: if the paint isn t cracked and the dent remains shallow to moderate in depth, you can coax the metal back toward its original shape from behind or by carefully working the surface. The tailgate, with its relatively flat profile and accessible interior space, is a prime candidate for this approach. The success of a DIY PDR effort hinges less on bravado and more on choosing the right toolkit, understanding the dent s character, and moving with steady, patient motions. When those elements come together, the tailgate can recover a clean surface that reflects light rather than a crease that catches it. The decision to pursue PDR starts with a straightforward assessment of the dent itself. Minor dents that are small in diameter and shallow in depth stand out as ideal candidates. If the dent sits near the center of a broad panel, away from any edge or edge related deformation, the metal often responds well to a controlled inward push or a measured pull using glue tabs. The aim is to restore the metal s original contour while keeping the paint intact. In these scenarios, a well chosen PDR kit can be a cost efficient, fast, and satisfying DIY solution. It s important to acknowledge limits early, though. Dents that break the paint, stretch the metal around a crease, or sit very close to the tailgate s edge may defy DIY repair and warrant professional service. The difference between a good DIY result and a track of residual high and low spots is often a matter of subtle leverage and proper lighting to watch the metal move. A steady hand, accurate observation, and patience are essential. PDR kits come in levels that correspond to the dent s complexity and the user s experience. A basic kit is designed for small dents and door dings and usually includes glue pullers, tabs, and a heat source such as a heat gun. It offers a straightforward route: heat the dented area to relax the metal, attach a glue tab to the center of the dent, and use a pulling tool to coax the metal outward. The heating step is important because it softens the metal slightly, making the pull more effective and reducing the risk of cracking the paint. This approach works especially well when the paint is pristine and the dent s depth remains modest. For someone new to PDR, the basic kit provides a friendly starting point. The technique thrives on repeated, small adjustments rather than a single dramatic yank. If the dent doesn t respond immediately, reheat and reapply, then pull again in measured stages. The tailgate s broad surface makes it possible to see progress clearly under bright light, which helps prevent overpulling that could stress the surrounding paint. When a dent is a touch deeper or more irregular, an advanced PDR kit becomes practical. Advanced kits expand the toolkit with dent rods, specialized hammers, and precision tips that enable the user to work from behind or from the surface with finer control. These tools allow you to dissect how the metal has buckled and to encourage specific areas to relax back into place. The learning curve climbs with the kit, but so does the potential for a higher quality finish. A light box is often part of the setup too; it provides a consistent view of the dent s contours, showing you the high and low spots that still need adjustment. The tailgate benefits particularly from this level of detail because the area around the tailgate s hinges and latching mechanism can hide subtle deformations that only appear when light reflects at the right angle. For many DIYers, the journey from basic to advanced tools is a natural progression as confidence and results improve. A third option, the heavier duty glue tab approach, is reserved for deeper or more challenging dents. This path uses stronger tabs and more robust pulling force to address dents that have stubbornly refused lighter attempts. It works best on metal surfaces that have resisted gentle pressure and on areas where the dent s crest is pronounced. The trade off with heavier tabs is a greater risk of over pulling if you re not careful. It s essential to monitor pull direction, movement, and the amount of force applied. In some cases, you ll need to adjust the angle of attack or switch to a different tab size or shape to keep tension even and predictable. The tailgate, with its sometimes contoured geometry, can pose a challenge for heavier tab strategies, so proceed with caution and consider whether the interior access and lighting will allow for controlled pressure from behind. Regardless of the kit level, the repair flow remains consistent and governed by careful observation and deliberate action. Start with a clean surface; any dust or residue can mislead the eye as you assess the dent s depth. Use a heat source to warm the metal for a brief period, typically 30 to 60 seconds, depending on the metal type and ambient temperature. The aim is not to bake the paint but to soften the metal enough to respond to the pulling force. Place the tab over the center of the dent and apply a light, even pull. If you hear any cracking or see whitening around the edges, stop and reassess. Sometimes the dent will respond in one concerted movement; often, it requires a sequence of small, incremental pulls with periodic rewarming. The goal is a smooth, uniform surface where the light plays evenly across the tailgate, a reflection that tells you you ve coaxed the metal back toward its original shape. Aftercare matters just as much as technique. Once the dent has improved, remove any glue residue with isopropyl alcohol, then wipe the area clean and dry. A clean surface helps you assess whether further adjustment is needed and prevents any residue from marring the finish. Protecting the repaired area is also wise. A tailgate cover or a protective film can minimize the risk of future small dents while you continue using the truck. For those who want to deepen their DIY knowledge, our blog hosts broader discussions on related maintenance topics that complement dent repair. You can visit our blog for further reading at https://mastertruckrepairllc.com/blog/. The tailgate repair journey benefits from patience and practice; each attempt teaches you to read the metal s response more accurately, to plan your pulls more precisely, and to recognize when it s time to stop and seek professional help. There are moments when DIY is the right path and moments when the dent is beyond reach. Dents near an edge, or those with paint damage, or dents that have caused appreciable stretching of the metal, deserve professional attention. A body shop can offer frame alignment, precise metal shaping, and paint matching that keeps the repair invisible to most observers. The decision often comes down to timing and risk: the cost and turnaround time rise with the complexity, and the potential for further damage also increases if the process is rushed or miscalculated. If you choose to pursue the DIY route and your dent proves stubborn, rest assured that a professional repair remains a solid and reasonable option. In the end, the goal is a tailgate that looks as close to its original condition as possible, with a finish that stands up to the next hailstorm, road debris, or careless parking lot drama. For inspiration and a broader foundation on the DIY approach to dent work, consider exploring additional resources that explain the basics and guide you through the early steps of PDR. Remember, the best results come from a balance of technique, patience, and honest assessment of the dent s complexity. Practice on a spare panel if possible, keep your toolkit organized, and treat each dent as a small problem you can solve with careful observation and gentle, deliberate action. As you grow more comfortable with the process, you ll find that your tailgate can reclaim its smooth, flat surface, and the truck s overall appearance will reflect the careful care you invested in restoring it. External resources can deepen your understanding, and they sit alongside the practical experience you gain with each attempt. For a practical, beginner friendly overview, see an external guide that outlines the core steps and considerations of PDR. The link is at https://www.automd.com/paintless-dent-repair-for-beginners/
From Dings to Done: A Professional Roadmap for Repairing Dents on Your Truck Tailgate
A dent in the tailgate can seem like a minor nuisance, yet its implications extend beyond looks. The tailgate is a structural and functional gate that bears the daily wear of loading and unloading, exposure to the elements, and a history of bumps along the road. When the damage is visible, the question isn’t only how to erase the dent; it’s how to restore the tailgate’s integrity, preserve paint, and choose a path that aligns with your budget and expectations. A professional body shop offers a spectrum of solutions, tailored to the severity of the impact, the material of the tailgate, and the goal you have in mind—whether it is a flawless cosmetic finish or a dependable, long-term restoration. Understanding how these services work helps you decide when to steer toward a quick fix and when to commit to a more comprehensive repair.
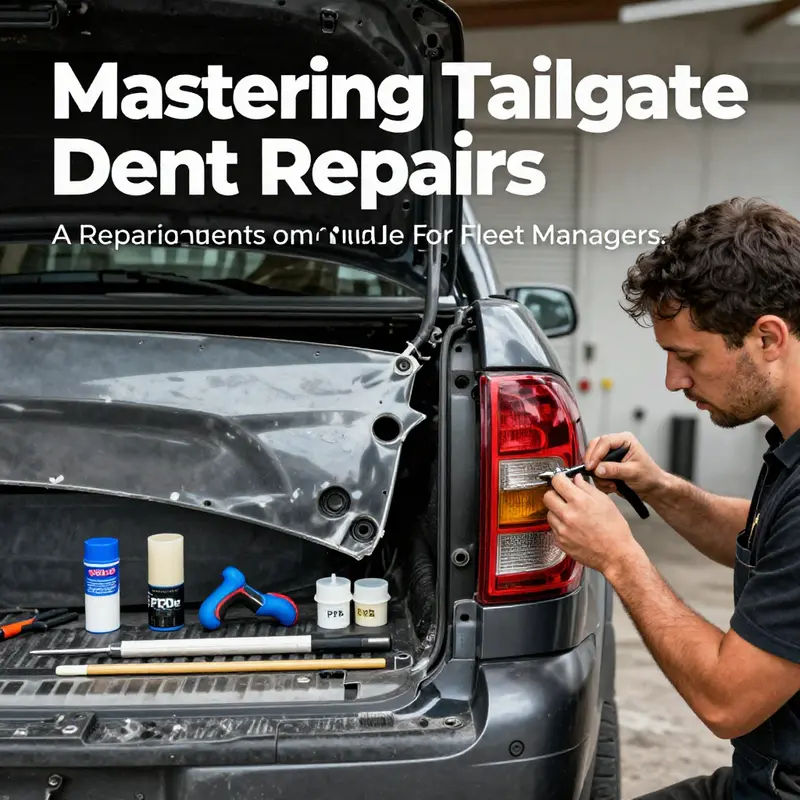
Before you summon a shop, the first step is a clear-eyed assessment of the damage. Small, shallow dents with no paint damage often fall into the realm of paintless dent repair, or PDR. In these cases, technicians can coax the metal back toward its original contour from behind the panel, using carefully chosen tools and the right amount of heat to keep the surface from cracking or stretching. PDR can be remarkably effective for dents under about an inch in diameter, but its success hinges on paint integrity and the accessibility of the dent from behind the panel. If the paint is cracked, chipped, or missing, or if the dent lies near a seam or edge, a simple PDR might not suffice. Here the job usually shifts toward traditional bodywork, where panels are massaged, reshaped, and sometimes replaced, followed by paint and finish work to achieve a seamless look. The tailgate’s material matters as well. Steel and aluminum react differently to tooling and heat, and composites introduce their own challenges. A skilled technician will weigh these factors during an initial inspection and provide a candid prognosis, including whether a cosmetic repair will preserve resale value or if a replacement would be more prudent in the long run.
When a professional body shop undertakes a dent repair, the approach is chosen not only for the dent’s size but for the arc of the repair itself. Paintless techniques preserve original factory paint and minimize downtime, which is appealing for small dents with intact finishes. In more involved cases—where the dent has creased the metal, stretched the paint, or compromised the surface—the shop may remove the tailgate from the truck, detach components if necessary, and perform traditional panel work. This process typically involves smoothing and straightening the metal with hammers and dollies, followed by sanding, priming, and repainting to match the vehicle’s color code. The goal is not just to fill or cover the dent but to restore the tailgate’s form and luster so that the repaired area blends invisibly with the rest of the panel. Depending on the complexity, an operation of this scale can take one to three days, and the costs reflect the labor intensity, the type of paint used, and whether OEM (original equipment manufacturer) finishes are employed. The range is broad: more conservative repairs with basic color-matching resins are less costly, while multi-coat finishes and meticulous color blending can push costs higher.
In discussing professional repair, it is important to consider the options available at different kinds of shops. A dealership or a high-end body shop typically offers the most comprehensive warranty and uses OEM parts and paints, which can be reassuring for owners who want the closest factory look and guaranteed color match. Independent body shops often provide excellent workmanship at a more moderate price, with a strong emphasis on skilled technicians and transparent pricing. Quick-fix shops, including some tire shops or storefronts that advertise rapid, low-cost services, may be the most affordable upfront but carry higher risks. The likelihood of paint peeling, miscoloration, or incomplete dent removal increases when the shop lacks specialized equipment or proven processes. When you select a service provider, ask about the shop’s certifications and experience with tailgate work, inquire whether they remove the tailgate for a full panel repair, and request a written estimate that itemizes the cost of dent removal, paint, and any necessary panel work. Certifications such as those associated with professional industry organizations can be a reliable signal of a shop’s commitment to quality and safety. A thoughtful shop will also discuss potential insurance considerations up front, guiding you through whether a claim makes sense given deductibles and premium implications.
A practical path to choosing a professional repair begins with a thorough assessment and ends with a clear plan. For minor dents with no paint damage, a PDR-first approach can restore the tailgate quickly and without repainting. The technician will explain whether the dent can be addressed behind the panel and whether any access points need to be opened to apply push tools or glue tabs. If the damage is more extensive, a traditional panel repair or, in rare cases, a tailgate replacement becomes the realistic option. The decision often hinges on a balance of cost, downtime, and the value you place on optimal color matching and structural integrity. In this decision-making journey, it helps to have a trusted figure to turn to—a professional who can translate the technical details into practical choices tied to your vehicle’s age, mileage, and overall condition.
Cost awareness is a critical part of the process. Minor PDR repairs might fall in a relatively modest range, while more elaborate repairs that involve reshaping the metal, repairing the paint, and achieving a precise color match can span a broader spectrum. Replacement, though less common, is a legitimate consideration when the dent is severe or when the cost to repair approaches or exceeds the value of the tailgate itself, which could shift the decision toward sourcing a suitable tailgate and performing a full installation. Insurance considerations also come into play. If the dent stems from an accident covered under comprehensive or collision, filing a claim can be a practical option to spread the cost, but it is wise to weigh potential premium changes against the repair cost and the value of the vehicle. A careful owner will request a written estimate, compare local shop quotes, and, if possible, obtain guidance on warranty coverage and the expected lifespan of the repair. The aim is to avoid a repeat of the same damage or a repair that fails to hold up under the stress of daily use.
As you navigate the path from assessment to completion, it is worth keeping in mind the value of learning from related experiences and literature. For ongoing maintenance ideas, procedure explanations, and broader context on how dent repairs fit into overall vehicle care, many readers find it helpful to consult the MasterTruckRepairLLC blog. It offers a repository of practical insights and professional perspectives that can complement the hands-on advice provided by a shop. You can explore these resources at the MasterTruckRepairLLC blog. MasterTruckRepairLLC blog.
In the end, the choice to pursue professional body shop services rests on a clear-eyed evaluation of the dent’s characteristics, the tailgate’s material, the desired outcome, and the budget you’re comfortable with. For small dents with pristine paint, a careful PDR session can restore the surface with minimal disruption. For larger or more complex cases, traditional panel work or even tailgate replacement may be warranted to guarantee structural integrity and aesthetic alignment. The best path is the one that minimizes risk, preserves the truck’s value, and delivers a finish that looks as good as new. When you approach a shop, bring photos, a concise description of how the dent occurred, note any vibrations or alignment issues you’ve observed, and be prepared to discuss your expectations for color matching and durability. A professional shop will translate these inputs into an actionable repair plan, provide a transparent timeline, and help you understand the trade-offs involved. The result should be a tailgate that not only looks uniform but functions smoothly through the daily routine of loading and unloading, all while preserving the vehicle’s overall appearance and value.
External reference: https://www.autocare.com/services/dent-repair
Temporary Patches and Safe Stopgaps: Quick DIY Fixes for a Dent on My Truck Tailgate
A dent on the tailgate can be more than a cosmetic annoyance. It can catch the eye, invite rust if the paint is chipped, and make you wonder what immediate steps you can take while you decide whether to DIY or book a shop. Temporary fixes exist not as a substitute for professional repair but as smart stopgaps that protect the panel, keep the tailgate functional, and buy you time. The key is to choose a method that matches the dent size, preserves paint, and stays within your comfort zone. This chapter focuses on practical, safe quick fixes you can perform at home, with clear boundaries on when to pivot to a pro.
For small to medium dents and paint that remains intact, a cupstyle suction approach is often enough. In many homes the simplest tool is a standard cup-style sink plunger you already have in a kitchen. The idea is to create a strong seal and coax the metal back toward its original shape by controlled suction rather than hammering. The trick lies in heat and patience: warming the area first softens the metal and helps the dent spring back with gentler pressure. Start with a gentle pass, hold the seal firmly, then pull or push the plunger straight outward. If the dent doesn’t pop, reheat a bit and try again, always keeping the strike area clean and dry so the seal holds.
To apply it cleanly, start by warming the dented area with a hair dryer or heat gun for about 30 to 60 seconds. Warming makes the metal a touch more pliable and helps the suction grab. Next, wipe away any dust or moisture so the suction can seal. Place the cup over the center of the dent and press down hard to form a tight seal. Then pull the plunger straight outward with steady, even pressure. It may take several gentle pulls spaced apart. If the dent refuses to move, rewarm for another round and re-seat the cup. The process demands patience, but when it works you should feel the metal pop back toward its original contour.
Because the tailgate is vertical, you might find the suction less forgiving than a horizontal surface. In that case you can work in stages, lifting slightly upward at each attempt to coax the metal back without tearing or stretching paint. Keep the seal intact and avoid twisting the plunger as you pull. If the paint has microcracks or you see raised edges after a pass, stop and revisit after cooling; pushing too hard can strain the finish rather than restore it.
For deeper but still paint-intact dents, a dedicated suction cup dent puller kit can be more effective than a kitchen plunger. With these tools you place the suction cup over the center, press to seal, and then gently pull in stages. Use the puller handle to apply measured tension and pause to reheat if necessary. The principle is the same as the plunger method, but the geometry of a dent and the efficiency of a proper puller can give you more control. Expect multiple passes, and remember to inspect the area after each pull.
If the dent is a little deeper—under an inch in diameter—and the paint remains uncracked, a basic paintless dent repair kit can work from behind with adhesive tabs and pulling rods. This approach requires patience and practice, because you are manipulating the metal from behind or with precision pushing. You might need a light to spot high spots and a gentle touch to flatten them back into place. This technique preserves the surface and avoids painting, but it does require a steady hand and a willingness to learn.
When a dent is large, deep, near the edge, or has cracked paint, professional repair is the safer route. A body shop can align the frame if necessary, reshape the metal with precision, sand, prime, and color-match the finish. The work typically takes a few days and can vary in cost depending on severity. These repairs restore both the look and the structural integrity of the tailgate, and they come with a warranty on the finish and the fit.
As a caveat, temporary cosmetics like decals or vinyl wraps can hide the dent until you fix it properly, but they aren’t a real repair. Avoid manipulating with heat or ice or hammering; those methods can warp or crack paint and create new problems that require heavier remedies later on. The aim of a stopgap is to protect and preserve, not to mask damage indefinitely.
For small dents under 1 inch in diameter, the suction cup approach often delivers a satisfactory result and is safe to try at home. For medium dents, you can lean toward a PDR kit or consult a professional if you feel uncertain. For large or complex dents, the judgment should lean toward the body shop to avoid compounding the damage. A practical tip is to practice on a spare panel if you have one, so you learn how much pressure and how many passes your tools require. Patience and precision are the secret ingredients.
For a broader DIY repair mindset and to see how other surfaces can respond to similar techniques, you can explore additional guides such as the DIY windshield repair guide for truck owners. This kind of cross referencing helps you stay within safe limits while expanding your toolkit and sharpening your technique.
For more on DIY dent repair methods and the range of approaches professionals use, you can consult an external resource that covers practical, step-by-step methods and cautions. https://www.popularmechanics.com/cars/how-to/g35497821/dent-repair-diy-methods/
Dent Repair on a Tailgate: A Practical Path from DIY Suction to a Pro Finish
A dent in the tailgate is more than a cosmetic nuisance; it is a reminder of the daily rhythm of work and load that trucks endure. For many owners, the impulse is to push, hammer, or simply live with a dent that seems to grow each time the tailgate is opened. Yet most dents can be substantially improved without turning the truck into a showroom project. The key lies in a careful assessment of size, depth, and location, matched with a plan that respects the metal and the paint. If you approach this with patience, you can often restore much of the original look with tools and methods that stay within your comfort zone and minimize risk. A practical repair mindset starts with a clear sense of what you’re up against and what outcome you hope to achieve.
Begin with an honest appraisal. Dents that measure an inch or less and that have not pierced the paint are usually good candidates for early, low-risk fixes. Dents near an edge or corner, or those accompanied by cracking paint or stretched metal, require more caution because the risk of introducing new damage climbs as you push, pull, or pry. The location matters: the tailgate is a relatively thin, curved surface that can respond unpredictably near folds or flex lines. If the paint is intact, you have a window to experiment with gentle methods before moving to more invasive repairs. If you detect any cracking or a clear separation between the metal and coating, the safer choice often is a professional assessment, since missteps here can lead to rust and worse distortion down the line.
For many owners the first stop is a do it yourself approach that leverages the suction cup puller. This option targets small to moderate dents that haven’t compromised the finish. The process begins with a careful heat. Warming the dented area with a heat source for about 30 to 60 seconds softens the metal, increasing its malleability and allowing the suction to grab hold more effectively. After heating, you center the suction cup over the dent and press firmly to seal. The pull is applied through a threaded rod or a handle that you turn with steady, even pressure. The aim is not a violent yank but a controlled gradual outward pull that coaxs the metal back toward its original contour. If the dent shows no movement right away, release the suction, reheat, and try again. Repetition in small increments is essential; patience here beats force.
As the dent reduces, you’ll often need to break the surface tension around the affected area. After the pull, inspect the finish for any adhesive residue or tiny scrapes. If residue remains, use a small amount of rubbing alcohol on a soft cloth to dissolve the glue and wipe the area clean. A plastic scraper can then be used to smooth any raised ridges or tiny high spots. The goal is a smooth, even surface that looks as if the tailgate never bore the impact. It’s common to need several rounds of heating and pulling, especially if the dent is stubborn, but the method preserves the original factory paint when the finish remains intact. The best results come from keeping the metal moving gradually and avoiding sudden, high-torque twists that can create micro-tears or paint micro-cracks.
If the suction method yields limited results or the dent is a touch deeper, a paintless dent repair approach may be appropriate. PDR uses specialized tools to work from behind the panel or from behind the edge where feasible. The essence of PDR is delicate manipulation: small, precise pushes with rods, or controlled pulls with tabs and adhesive so that the metal slides back into contour without harming the finish. This technique is particularly effective for dents under an inch in diameter that do not involve cracked paint. It rewards patience and practice; an inexperienced hand can still cause distortion if force is misapplied. A dedicated PDR setup typically includes a light box to highlight high and low spots, so you can monitor the progress in real time as you coax the metal toward a true line. Surfaces with high curvature or complex geometry pose more challenges, but the core principle remains the same: coax the metal back, not aggressively beat it back into shape.
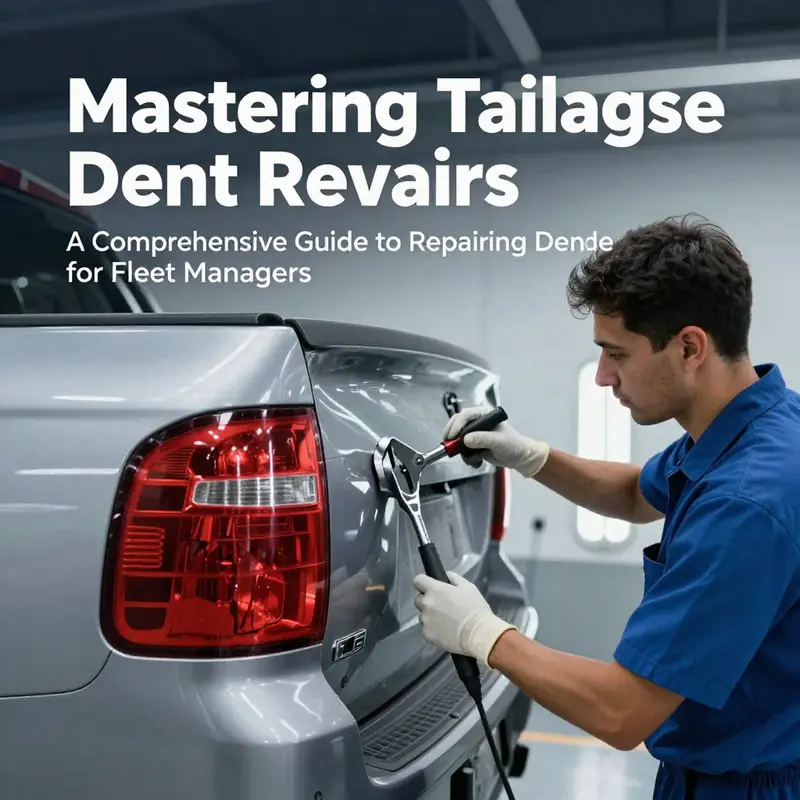
For dents that are large, deep, or adjacent to critical edges, or when paint damage is evident, professional repair becomes a prudent choice. Body shops bring formal expertise, controlled metal shaping, and paint finishing that ensures color match and long-term durability. The process can involve frame alignment if the dent has caused any misalignment in the supporting structure, metal shaping to refine the contour, and then sanding, priming, and repainting to restore uniform color and gloss. The typical turnaround spans a few days and the cost reflects the complexity of the work, the severity of the damage, and the need for color matching. In many cases the finish is guaranteed to blend seamlessly with the rest of the tailgate, and the repair comes with a warranty or service guarantee. While this path is more expensive and time-consuming, it removes much of the guesswork and risk that can accompany DIY fixes on more significant dents or compromised paint.
There are also practical, temporary fixes to consider when a dent is small or when time and budget constrain a repair. A sticker, decal, or vinyl wrap can visually mask a minor dent and disguise the irregularity until you address the underlying damage. But these cosmetic masks do not restore the metal’s shape, nor protect it from rust if moisture finds its way under the adhesive edges. More aggressive shortcuts such as tapping with tools, applying extreme temperatures, or hammering are not recommended and can make the problem worse by widening the area of impact or cracking the coating. The aim is to keep the tailgate surface stable and free from new damage until a proper repair can be completed.
Throughout this process, it helps to keep the overall plan simple and patient. Start with the lowest-risk method appropriate for the dent’s size and paint condition. If the first attempt does not fully recover the surface, reassess rather than escalate pressure. A successful outcome often hinges on recognizing when a repair has reached its practical limit. The final decision should balance the likelihood of achieving an almost flawless finish against the time, cost, and risk of additional damage.
As you consider whether to proceed with a DIY suction fix or progress to more advanced DIY techniques such as a paintless dent repair, think about your comfort level with the intricacies of metal manipulation. Practice on a spare panel if you have one, and proceed slowly while observing the responses of the metal. The tailgate is an integral part of the truck’s function, and the payoff of a careful, quantified approach is not just cosmetic. It is the preservation of structural integrity, load-bearing reliability, and long-term resilience against rust and wear. If you remain unsure or if the dent sits near a critical edge or involves paint damage, stepping up to a professional service often yields the most consistent, durable outcome.
For readers who want a broader context on DIY repairs and ongoing maintenance, the MasterTruckRepairLLC blog can be a helpful resource to explore planning and upkeep beyond a single dent scenario. You can visit the site here: MasterTruckRepairLLC blog.
External reference: https://www.carbibles.com/how-to-fix-a-small-dent-in-your-car-using-a-suction-cup/
Final thoughts
Denting of truck tailgates is a common issue that business operators should address promptly to maintain fleet professionalism and functionality. Understanding the various methods available—from DIY approaches like suction cup dent pullers and paintless dent repair kits to the value of professional services—enables fleet managers and trucking company owners to make informed decisions. Temporary fixes can help in a pinch, but they shouldn’t substitute for proper repairs. Prioritizing the methods outlined will not only keep your vehicles looking their best but also ensure their performance remains uncompromised for daily operations.

