In a simulated post-apocalyptic world where resources are scarce, maintaining operational fleet vehicles is critical for successful logistics and transportation. Understanding how to repair trucks in 7 Days to Die not only ensures the swift movement of goods but also supports the overall efficiency of construction and mining operations. This article delves into the key aspects of truck repair, providing fleet managers and trucking company owners with a strategic approach to optimize vehicle health. Each chapter will guide you through gathering materials, using repair stations, performing health checks, and troubleshooting common repair issues, laying the groundwork for a robust and reliable fleet.
Gathering Grit and Gears: Mastering Materials for Truck Repair in 7 Days to Die
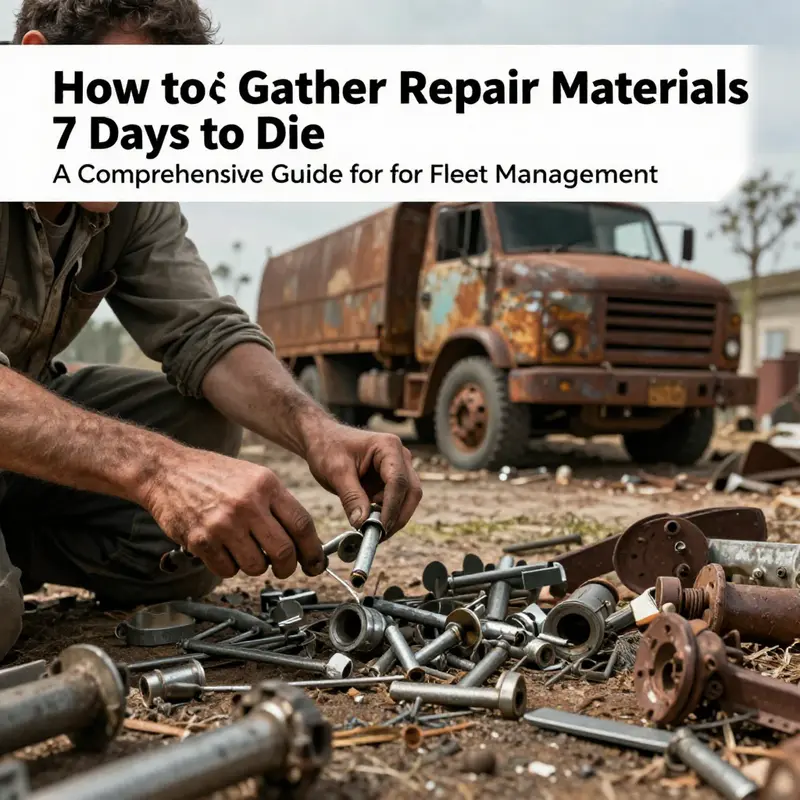
In the rugged world of 7 Days to Die, a truck isn’t just a ride; it’s a lifeline. A battered 4×4 can be the difference between escaping a horde or becoming another ruined wheel in the wasteland. The road to reliable transportation doesn’t begin with a single repair kit; it begins with gathering the right materials and knowing where to apply them. Materials matter as much as any weapon or armor, because without iron, steel, and mechanical parts, even the best repair station will leave you staring at a stubborn health bar. The beauty of this process is that it blends scavenging prowess with a practical workflow, turning a chaotic sandbox into a sequence of purposeful steps that restore a vehicle to service and keep it there as you push farther toward safety, loot, and shelter. To repair a truck, you’ll need to think like a scavenger and then act like a mechanic, moving from the world outside your base to a dedicated repair station, and finally back again with a vehicle that can face the next night’s challenges with confidence.\n\nEvery repair starts with materials. Iron, steel, and mechanical parts aren’t mysterious once you know where to look, and they’re the backbone of anything that rolls in a post-apocalyptic world. Iron is your raw backbone; steel is the stronger form that makes components durable, and mechanical parts are the connective tissue that slots into engines, dashboards, and chassis. This trio isn’t just a checklist; it’s a map of the game’s economy, a guide to what you’ll trade in, what you’ll carry, and how you’ll upgrade your repair station as you advance through the game’s stages. The journey to gathering these resources is as much about understanding the terrain as it is about understanding the repair bench. One honest rule holds across most playthroughs: the better you plan, the less you waste time while the night approaches.\n\nIron and steel can be found through a mix of careful looting and purposeful dismantling. Start with the most obvious targets: metal containers in industrial zones, factories, auto shops, and construction yards. These spaces are treasure maps for iron and steel, often offering iron ingots and scrap metals that you can refine into iron or steel. Beyond looting, you can break down scrap vehicles you encounter—their wreckage often yields metal scraps that convert into usable iron or steel with time at a forge, if you’ve already invested in a basic crafting setup. Mines and ore deposits also provide raw iron ore, which you mine and refine into usable ingots. The key is consistency: frequent stops at likely loot hubs, with a plan to extract and convert materials rather than collecting without purpose. As you accumulate enough, you’ll begin to appreciate the difference between raw ore and refined ingots, because in repair terms, iron ingots and steel ingots are the true currency of the repair bench.\n\nMechanical parts sit at the intersection of scavenging and vehicle lore. These components are most reliably found inside wrecks—junkyards, abandoned garages, gas stations, and the remnants of old fleets. You’ll also see chances to harvest mechanical parts from enemies who wear heavier armor or wield tools; farming those drops becomes a disciplined routine if your playthrough emphasizes combat and salvage. Traders, especially those focusing on vehicle upgrades, can carry mechanical parts as well, though the stock and reliability vary. In a world where fuel and ammunition often drive decisions, keeping an eye on mechanical parts ensures you don’t reach a critical repair moment and discover you’re short on the one item that makes any repair possible. To maximize your odds, combine scavenging with trading opportunities, and don’t neglect the occasional wreck you pass; even a single mechanical part can be the missing piece that brings a truck back from the brink.\n\nInventory discipline matters just as much as location scouting. When you’re traveling toward a repair station, you should be thinking ahead: how many repair cycles can I perform before returning to base? A repair cycle typically consumes a predictable set of resources, so carrying a small reserve of Iron, Steel, and Mechanical Parts becomes a reliable safety net. If you’re venturing into high-risk zones, consider creating a dedicated loot loadout: a bag or crate that stays with your repair materials so you don’t scramble when your truck’s health dips during a long ride or an ambush. The game’s balance rewards those who think in cycles—gather, refine, repair, and test—so you’re never left with a damaged vehicle and no way to fix it. Keeping a steady flow of material collection requires patience and practice, but it pays off whenever you’re asked to drive through a night that’s closer to terrifying than thrilling.\n\nThe actual repair process hinges on a Vehicle Repair Station, a device that, once powered and recognized, can perform the repair operation with a few decisive clicks. Not every repair station supports vehicles, so the first step is to locate a station that accepts vehicle repairs. When you approach, you’ll be greeted with the option to Repair Vehicle. Selecting your damaged ride—your 4×4 or any other vehicle you own—will prompt the game to consume the required materials and begin repairing. The repair itself is straightforward: as long as you have enough Iron, Steel, and Mechanical Parts, the health bar ticks upward, and the truck’s condition improves. It’s a clean mechanic, but the underlying complexity lies in ensuring you have enough of each resource to support the repair level you’re aiming for. It’s tempting to push for the maximum repair in one go, but the wiser path is to couple steady material collection with incremental repairs, anchoring your truck’s lifespan to reliability rather than brute luck.\n\nA practical nuance often overlooked by new survivors is the precise material requirement per repair level. The general rule in many playthroughs is that repairs consume a basic mix of Iron, Steel, and Mechanical Parts per cycle, though the exact quantities may vary with the truck’s damage state and the game’s version. If you attempt a repair while one material is scarce, you’ll encounter delays, wasted trips, and the hollow sound of a health bar that barely moves. The smarter approach is to maintain a rolling stock of each material—just enough to cover successive repairs—so you’re never caught with a damaged vehicle and an empty inventory. This discipline matters not only for day-to-day survival but also for long-term expeditions where you’ll rely on your truck to ferry resources back to your base, defend your position at night, and keep you mobile in a world where stuckedness invites danger.\n\nBeyond raw gathering, the world of vehicle repair has a surprising layer: enhancements and mods. Players frequently adopt mods to sharpen vehicle repair mechanics, increasing repair efficiency and allowing more granular customization. One standout example is a Better Vehicle Repair mod, which improves the repair process and, depending on your setup, can offer more options for tuning or upgrading your truck as you go. Installing such mods follows a simple pathway: place the mod file into the Mods folder within the game directory, then launch the game with EAC disabled if you’re using it. While mods can broaden what you can do with repairs, they also require careful compatibility checks and a willingness to adjust your playstyle, because they can shift how quickly you bring a vehicle back from the brink and how much you rely on stock repair recipes.\n\nFor players who want to streamline installation and management of mods, a mod manager can be a big help. A dedicated tool can catalog your games, manage mod files, and enable or disable them with a few clicks. If you’ve never used a mod manager before, you’ll likely appreciate the speed and order it brings to prep work before a long foray into the wasteland. The community around this game has long celebrated modding as a way to tailor the repair experience, whether you’re after enhanced repair speed, more detailed customization options for your truck, or a broader palette of materials and components that appear in loot caches. The modding scene’s vitality offers a practical promise: even when vanilla gameplay grows stale, a well-chosen mod set can refresh your approach to vehicle repair and extend your exploration without sacrificing balance.\n\nAs you weave through the repair workflow, a prudent inclusion is a built-in reference to your broader strategy. Real-world considerations, like budgeting for maintenance or preparing emergency reserves, can translate profitably into the game’s survival logic. If you’re looking for a concrete framework to align your in-game repair strategy with practical planning, you can explore guidance on building financial resilience in real-world truck maintenance projects such as emergency repair funds. The link below points to a resource framed for truck owners that emphasizes preparedness, budgeting, and routine upkeep—principles that map cleanly onto a survivor’s routine of scavenging, repairing, and backstaging repairs for the next run. building-emergency-repair-fund-truck-owners. This isn’t a direct instruction for game play, but it offers a mindset you can carry into your 7 Days to Die sessions: be deliberate about what you carry, what you repair, and how you allocate your time and resources so your vehicle remains a steady partner in your struggle to endure.\n\nIn the end, the road to a reliable truck is less about a single heroic salvage and more about a continuous cycle of vigilance, gathering, and application. Start with the essentials—Iron, Steel, and Mechanical Parts—as your fixed anchor. Route your scavenging toward the most reliable sources: industrial zones for iron and steel, junkyards and gas stations for mechanical parts, and scrap vehicles you encounter along the way for additional salvage. When you arrive at a Vehicle Repair Station, approach with a plan: confirm you’re using a station that actually repairs vehicles, verify you have enough materials for the intended repair level, and execute the repair in a measured sequence. If a repair stalls due to material shortages, return to the field with a refined sense of where to look for the missing piece, and don’t be discouraged by setbacks; the cycle will become smoother with time and practice. To stay adaptable, consider integrating a mod that adds a layer of depth to repair mechanics, but weigh the benefits against the need for compatibility and the potential for conflict with the game’s anti-cheat systems. The goal remains simple: keep your truck in motion, keep your options open for future expeditions, and let the repair process become a steady source of resilience rather than a rare event.\n\nExternal resource for deeper mechanics and official guidance can be found here: https://www.7daystodie.com/wiki/Repairing_Vehicles. This wiki offers a detailed look at the repair options, station requirements, and the nuances that determine whether a vehicle can be brought back from near-total ruin or must be replaced with a new chassis. While game patches can adjust numbers and drop rates, the core idea endures: repair is a thoughtful, resource-aware practice. As you grow more confident, you’ll notice that the most effective repair strategy is one that blends careful material gathering with a deliberate repair cadence. Your truck stops becoming a symbol of luck and becomes a designed asset—one you can rely on when night falls, the horde gathers, and the road ahead still promises a route to safety, supplies, and another sunrise.\n\nIn short, gathering repair materials for a truck in 7 Days to Die is a disciplined art. It rewards patience, planning, and a willingness to engage with every corner of the map in search of the key components—Iron, Steel, and Mechanical Parts—that bring a stubborn vehicle back to life. It’s a ritual that scales with your progress: as you upgrade your forge, improve your repair station, and perhaps adopt a mod that broadens your repair options, you’ll notice your ability to sustain a fleet of dependable transports grows alongside your confidence in traversing the world’s dangers. This is not merely about fixing a machine; it’s about shaping a reliable lifeline in a landscape that relentlessly tests your endurance, your resourcefulness, and your resolve to press on, repair by repair, mile by mile.
Vehicle Repair Station: Mastering Truck Repairs in 7 Days to Die
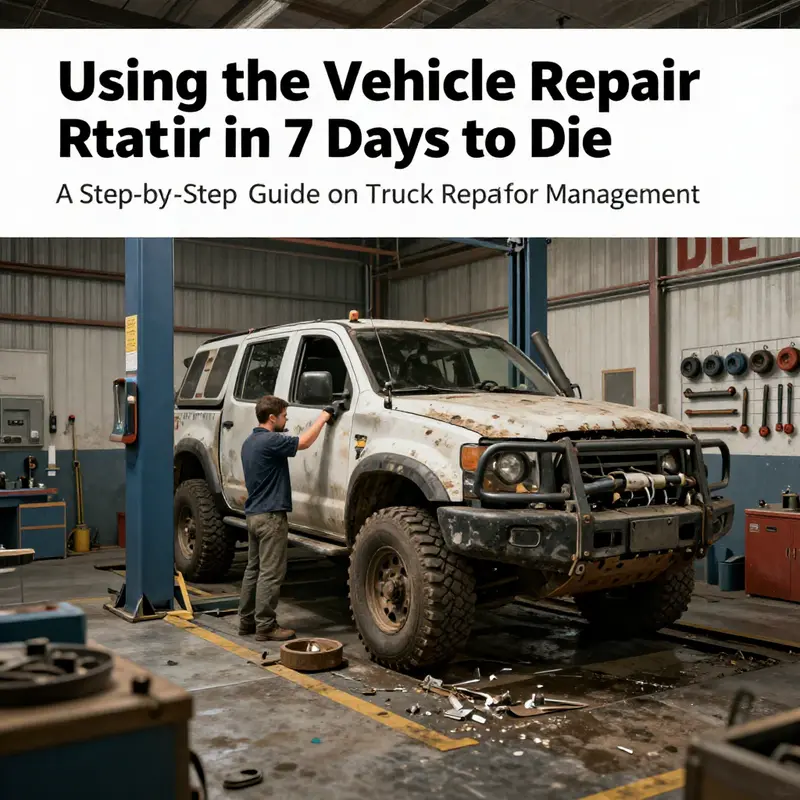
The world of 7 Days to Die rewards preparedness, and a trusted truck is your lifeline in a long night. The Vehicle Repair Station acts as a portable workshop—your bench on the road where Iron, Steel, and Mechanical Parts come together to restore your ride’s heartbeat.
Repair starts with a clear view of damage. More severe wear means higher material costs, so you should carry a balanced stock of Iron for structure, Steel for rigidity, and Mechanical Parts to reassemble joints and systems. Plan for the possibility of multiple passes if the damage exceeds a single repair capacity.
Approaching the station is simple: ready your materials, step close to the truck, and press the interaction key to open the menu. If the truck needs it, choose Repair or Repair Vehicle. The game will display the material costs for the current pass—the numbers scale with damage. Confirm to spend Iron, Steel, and Mechanical Parts, then watch the repair unfold as the truck’s health bar climbs and its wheels respond with renewed ease.
Afterward, recheck the vehicle: test the engine, inspect suspension, and verify steering. If anything still feels off, decide whether a partial repair, a full replacement, or another round of materials is needed. Not every station can repair every vehicle; if one can’t, move to another or scavenge components to suit your ride.
Maintenance is the quiet backbone of your journey: keep stockpiles of Iron, Steel, and Mechanical Parts, plan trips that improve your odds of finding replacements, and treat repair as an ongoing process rather than a single event. With discipline, your truck becomes a reliable partner that helps you push through the night, reach the next town, and keep moving when the world resists your advance.
null
null
Stalling in the Wasteland: A Practical, Fluid Guide to Troubleshooting Truck Repair in 7 Days to Die
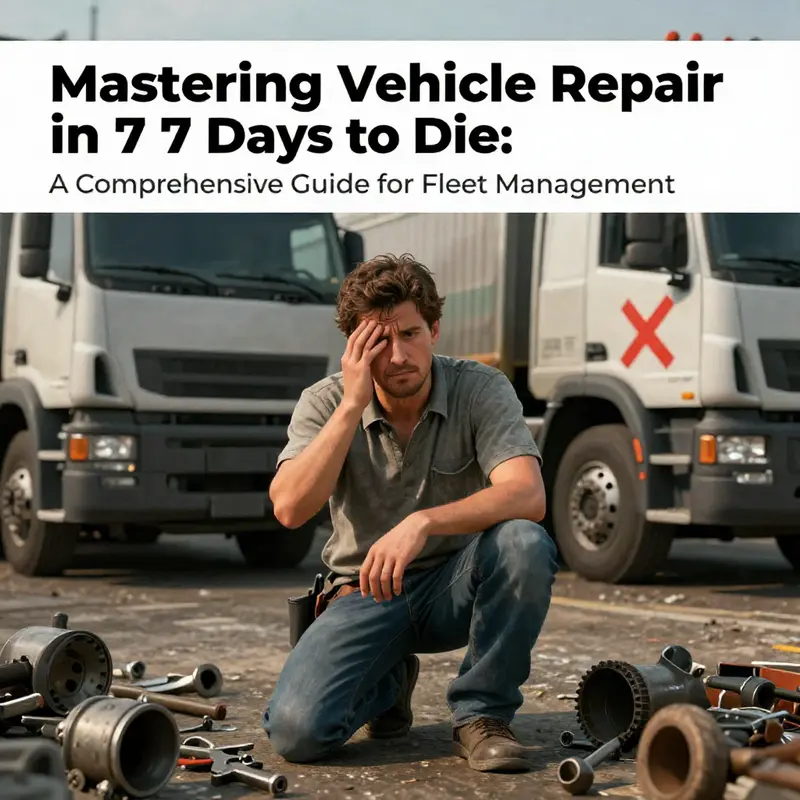
The road through the apocalypse is never smooth, and a trusted truck is more than a means of transport—it’s a lifeline. When a 4×4 carves its way through the dust, it carries your loot, your supplies, and your chances of surviving the next horde. But in 7 Days to Die, repair is never a mere matter of mechanic know-how alone; it’s a small test of resource management, interface know-how, and a clear-eyed assessment of the vehicle’s state. Troubleshooting isn’t about blind tinkering; it’s about reading the telltale signs the wasteland gives you—the flicker in the vehicle status, the absence of a repair option, the clank of missing parts when you try to start the engine—and turning those signs into a disciplined sequence of checks. When your truck won’t start, when repairs fail, or when a repair station refuses to cooperate, it’s easy to feel boxed in by the world’s harsh mechanics. Yet the path back to a drivable vehicle is usually straightforward, provided you approach it with patience, precise materials, and a clear sense of where the fault lies. The core of this process is simple yet precise: confirm you have the right materials, apply them through the correct repair interface, verify the vehicle’s health, and respect the boundaries of the game’s rules, especially as they change with updates and with any mods you might be running. The continuity of your journey depends on your ability to keep those steps in rhythm, even when the road is blocked by another broken axle or a stubborn interface that refuses to acknowledge your repair request. To begin, you should treat the repair as a small, well-defined operation rather than a grand undertaking. Gather the essential components—iron, steel, and mechanical parts—because these are the building blocks of vehicle restoration, the same trio that keeps your wheels spinning, your fuel door closed, and the engine’s heartbeat audible again. In most tested scenarios, you’ll want enough resources on hand to perform at least a couple of repairs, since wear and tear in this world is not linear. A practical baseline has emerged from community experience: roughly twenty units of iron, ten units of steel, and five mechanical parts will cover standard repair needs for a 4×4 under typical post-crash conditions. This isn’t an exact science; version changes may nudge those numbers up or down, but the logic remains the same: you must balance materials to match the damage’s level and never apply a repair when you don’t have the requisite components. The next layer of the puzzle rests on the tools and interface you use. The wrench is your primary instrument, the tool you wield to coax metal back into alignment. If your repair attempt fails, pause to confirm you’re operating the correct interface. In your inventory, hover the wrench over the truck and choose the “Repair” option. The game will solicit the materials, and when you confirm, it will consume what’s necessary and initiate the repair. If the game balks with a message like “cannot repair,” check your tool placement and ensure the cursor is precisely on the vehicle’s icon, not on the surrounding ground or a nearby object. It’s all too easy to misfire, especially when the UI is busy with loot, tools, and other repairs in progress. The repair process is not simply cosmetic. A vehicle that has been hammered by hoards or left to rust might be flagged as not repairable, in which case a rebuild becomes the only viable path. The distinction between repair and rebuild is subtle but essential: repairs restore what’s still present and functional, while rebuilds reconstruct from the ground up for vehicles that have suffered catastrophic damage. This nuance matters because it tells you how to prioritize your time and resources. If the truck is structurally compromised to the point of collapse, you’ll need to locate a workbench or garage and use more intensive repair or rebuild options. The repair station itself is a gatekeeper of the process. Vehicle Repair Stations exist in certain structures and can sometimes be crafted, but not every station accepts vehicle repairs. If you encounter a station that refuses to operate on vehicles, you’re looking at the wrong tool for the job. In these moments, you must relocate to an appropriate station or use a workbench with the correct functionality. The alignment of the right station with the correct vehicle type matters as much as the materials do. The story of repair, then, is a story of compatibility as much as quantity. As you move through the ritual of restoration, you should also perform a continuous health check. After the repair completes, open the vehicle status screen to confirm that the truck’s health has advanced from its prior disrepair state. If the health gain is modest or non-existent, re-evaluate the materials, verify the vehicle is in a repairable condition, and be mindful of potential edge cases introduced by mods. It’s worth noting that, in multiplayer games or heavily modded environments, you may encounter altered repair logic. Some mods add extra steps, require additional items, or adjust the repair points you’ll need to reach a functional vehicle again. If you suspect a mod is interfering with the repair process, the simplest diagnostic approach is reduction: disable non-core mods, return to base repair expectations, and test whether the stock repair logic behaves as the community expects. This is not just a precaution; it is a practical step that saves you time during a critical moment when every minute counts. Another layer concerns the broader system’s health outside the vehicle itself. Occasionally, you may encounter an error message that seems to originate beyond the game’s mechanical model. For some players, system-level issues, particularly those tied to drivers or OS components, manifest as odd symptoms: a message about a driver loaded in the system directory that doesn’t correspond to a tangible in-game fault. If you see something like a driver-related warning while you’re trying to repair, treat it as an operating-system concern rather than a vehicle concern. The remedy here is straightforward and not game-specific: reboot your computer to unload the errant driver, then use the Device Manager to inspect for devices with warning symbols, especially under categories like USB controllers or system devices. Uninstall the problematic driver if necessary and restart the machine, ensuring you have the latest compatible drivers installed after. This separation between game logic and system drivers is crucial. It keeps your expectations honest: fixes for in-game repair problems are usually found within the game’s systems, but some disruptions come from outside the game’s world altogether. The path through these issues is rarely dramatic. It’s about disciplined checks and a calm mind, not about brute force or random tinkering. The risk of pressing on with insufficient materials or the wrong repair interface is real. If you attempt to fix a broken truck with wooden boards or cloth as substitutes for metal components, the system will reject your effort, and you’ll delay recovery for a needless reason. The moral here is simple: respect the game’s resource taxonomy and the repair rules that govern vehicle restoration. Don’t shortcut the process because you’re impatient or due to a rumor you heard online. The next layer worth considering is the impact of the environment around you. If you’re near a forge or a workbench that specializes in vehicle repair, you might have to move the truck to an area that accepts vehicle work. Some repair stations are sensitive to placement, some require a certain proximity to a workbench, and some are simply unavailable in specific map sections. The logistics of getting the truck to the right station can be as crucial as the repair itself, particularly in survival scenarios where movement is constrained by daylight, hoards, or environmental hazards. A final practical note concerns documentation and community knowledge. The game’s official wiki is a reliable compass, offering up-to-date guidance on the exact repair recipes, the minimum health thresholds, and any version-specific changes. If you’re at a sticking point, consult that resource to confirm you’re applying the correct materials and engaging with the correct repair interface. Additionally, it’s wise to keep a mental map of the common failure modes: missing or insufficient materials, using the wrong repair interface, attempting to repair a vehicle that is beyond repair, or encountering mod-induced anomalies. Each of these has a distinct remedy, and recognizing which one you’re facing will save you time and preserve your resources. If you’re seeking a steady stream of related tips, you can explore broader discussions in the truck maintenance space and related repair techniques through the Master Truck Repair Blog, which serves as a practical hub for ideas and deeper dives into upkeep and restoration strategies. For readers who want a structured path to improving their in-game repair confidence, think of this as a cycle: prepare, engage, verify, and learn. Preparation is the material collection and station checking; engagement is the repair action itself; verification is the health check and test drive; learning is updating your approach for the next repair attempt based on the success or failure you’ve just observed. The cycle repeats as you expand your base, gather more resources, and encounter new patches or mods that alter the repair landscape. In the end, the skill isn’t simply about turning a wrench; it’s about building a reliable habit that turns a potentially devastating setback into a controllable event. You learn to read the indicators—the health bars, the material counts, the station compatibility—and you respond with quiet precision. The wasteland rewards restraint as much as it rewards courage; knowing when to push forward and when to pause, the moment to relocate, and the decision to rebuild rather than repair are all part of a seasoned player’s toolkit. If you want to see a practical synthesis of this approach, you can refer to the game’s broader repair guidelines and the collective experience of the community, which frequently converge on the same actionable steps that keep vehicles roadworthy. For a direct external reference to the official repair framework, see the vehicle repair guide on the game’s wiki. Further reading: https://www.7daystodie.com/wiki/Repairing_Vehicles. As you set out on your next trek, carry the right balance of iron, steel, and mechanical parts, and keep the repair station ready for action. Remember to verify the vehicle’s status after each repair, and place the truck in a location where the correct tools are accessible. If the repair stalls again, follow the same loop, and you’ll likely identify the bottleneck—material shortfall, wrong interface, or a damaged vehicle that requires rebuild rather than a simple fix. For players who want to deepen their practice, the broader blog ecosystem offers a continuous stream of insights, including topics on emergency repair funds, vehicle maintenance discipline, and how durability curves evolve with game updates. The practical takeaway is plain: in a world where every hour counts, your ability to troubleshoot calmly and methodically is as valuable as your axe, your rifle, or your map. To keep moving, keep learning, and keep your wrench in hand, ready to restore the heartbeat of your ride whenever the road asks for it. The road will test you, but with the right materials, the correct interface, and a steady approach, your 4×4 will once again answer the call of the open road. And when you finally hear the engine purr, you’ll know that the day’s repair was more than a moment’s fix—it was a disciplined act of survival, a quiet victory won through patience and precise action. For more practical context and to deepen your understanding of this domain, you might find value in visiting the internal resource hub linked earlier, which consolidates reader-focused guidance and community-tested practices. Master Truck Repair Blog.
Final thoughts
Maintaining a fleet of trucks in 7 Days to Die is an intricate process that integrates resource gathering, repair techniques, and ongoing maintenance checks. By understanding how to effectively source materials, utilize repair stations, and troubleshoot potential roadblocks, fleet managers can significantly enhance their operational capabilities within the game. A strategic approach to vehicle repair not only boosts efficiency but also ensures that your logistics run smoothly, paving the way for a successful journey through the challenges of the game.

