Proper maintenance of truck toolboxes is a vital component for fleet managers, trucking company owners, and operators in construction and logistics. Understanding how to repair various types of damage not only prolongs the life of your investment but ensures the efficiency of your operations. From minor dents and scratches that can compromise aesthetics to structural damages that can impact functionality, mastering the art of toolbox repair empowers professionals to maintain their equipment proactively. This guide delves into common repair scenarios, providing structured solutions for handling minor dents and scratches, fixing loose latches and handles, addressing rust and corrosion, and managing structural damage from cracks or holes. Each chapter will enhance your capacity to address these issues swiftly and effectively, ensuring your toolbox remains a dependable asset in the field.
Restoring Your Truck Toolbox: A Comprehensive Guide to Fixing Minor Dents and Scratches
When you look at your truck toolbox, its rugged appearance can be both a badge of honor and a source of concern when signs of wear start showing. Over time, minor dents and surface scratches can diminish its aesthetic and compromise the protective barrier against harsh weather and the inevitable wear of heavy use. This chapter delves into the practical yet methodical process of repairing minor dents and scratches on a truck toolbox, ensuring that you maintain not only the visual appeal of your equipment but also its durability and utility. By addressing these issues promptly and with care, you extend the lifespan of your toolbox and keep it ready for any task that comes its way.
At the outset, begin by carefully assessing the condition of your truck toolbox. Minor dents, such as shallow depressions or slight deformations of the metal, may initially seem inconsequential. However, these imperfections can lead to chipping of the paint and eventual exposure of the metal to the elements. Early intervention is key. In many cases, the dents do not represent severe structural damage but rather surface imperfections that can be remedied with a few basic tools and a bit of patience.
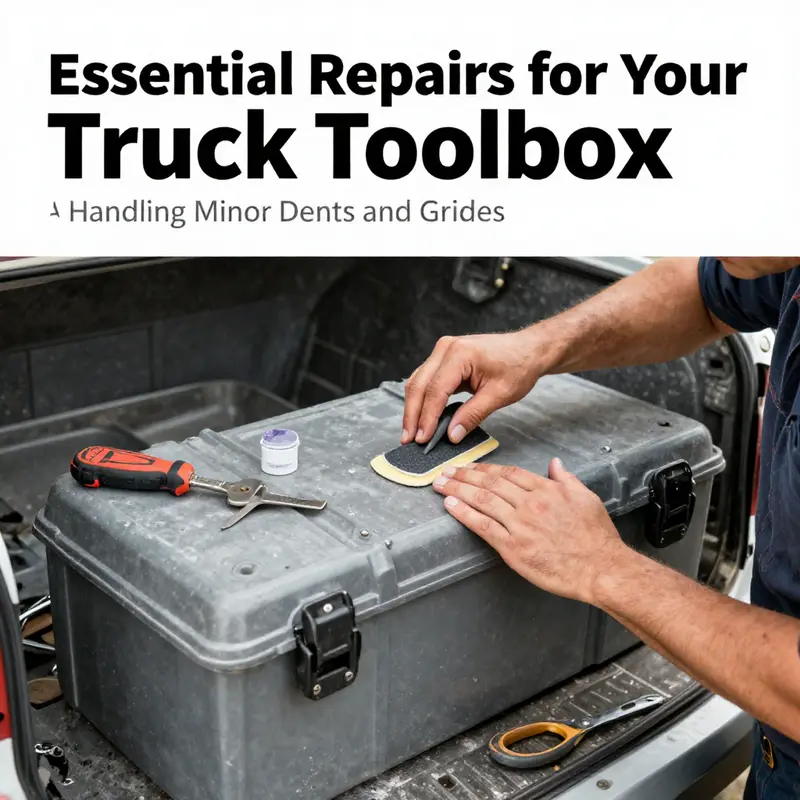
An essential first step is to thoroughly clean the toolbox. The accumulation of grease, dirt, and road grime over time can obscure the extent of the damage and interfere with the adhesion of any repair materials. Use a degreaser and a stiff brush to eliminate contaminants from the area around the dent or scratch. Once the debris is removed, rinse the surface with water and allow the toolbox to dry completely. The cleaning process not only prepares the surface for the repair but also gives you a clear view of any underlying issues that might require further attention.
For minor dents, one of the most effective techniques involves using a specialized dent removal tool. Often marketed as a dent puller or suction cup tool, this device works by creating a vacuum that gently lifts the dented metal back into shape. To utilize this method, firmly place the suction cup in the center of the dent. Applying steady, even pressure, gradually pull on the tool until the dent recedes and the metal appears level with the surrounding surface. It is important to work slowly and methodically, as aggressive pulling can cause further damage or distort the shape of the metal. This technique is particularly useful for shallow dents where the metal structure remains largely intact and the paint is still adhered to the surface.
In cases where the dent is extremely small or the surface tension of the metal is such that a dent puller is less effective, a heat-and-cool method may prove beneficial. By gently heating the area around the dent with a low-heat source such as a hairdryer, you allow the metal to expand slightly. Immediately replace the heat with a swift application of ice or cold water on the dent itself. The rapid contraction that follows can sometimes encourage the metal to return to its original position. While this method can be effective for very slight dents, it demands a careful balance between heat and cold. Excessive heat may damage the paint, and improper cooling may result in uneven surface tension. Therefore, it is recommended to test this method on a small section or inconspicuous area before attempting it on a visibly marred part of the toolbox.
Once the dents have been addressed, the focus shifts to remedying surface scratches. Although scratches may appear less problematic than dents, they carry the risk of exposing the underlying metal, which could lead to rust and further degradation if left untreated. The first action is to thoroughly clean the scratched area. Using a mild soap solution and a soft cloth, gently remove any debris or oil that may have accumulated. Rinsing the area with clean water and gently patting it dry ensures that the surface is free of dust and contaminants that could compromise the repair process.
After cleaning, the next step is to smooth the rough edges of the scratch with fine-grit sandpaper. A grit in the range of 1000 to 2000 is ideal for this purpose. Working in gentle, circular motions ensures that the edges of the scratch are blended with the surrounding area without removing more paint than necessary. This process not only softens the appearance of the scratch but also creates a surface that is more receptive to primer and touch-up paint.
If the scratch is deep enough to expose the bare metal beneath, applying a spot of automotive primer becomes necessary. The primer acts as a barrier, protecting the metal from corrosive elements and ensuring that the repair is long lasting. Select a high-quality automotive primer and apply it carefully over the exposed area, following the manufacturer’s instructions regarding drying time and treatment conditions. Allow the primer to set thoroughly before advancing to the next stage of the repair.
Matching the original color of your truck toolbox with touch-up paint is a crucial element of restoring its appearance. Whether you choose to use a small brush for precision or a spray can for a more uniform application, it is important to apply the paint in thin, even layers. Multiple thin coats are far superior to a single thick coat, as they reduce the risk of drips and irregularities in texture. Each layer should be allowed ample time to dry fully before the next is applied. This technique not only ensures a smooth and professional finish but also minimizes the likelihood of the paint peeling over time.
After the touch-up paint has been applied and dried, a final blending process helps integrate the repaired area seamlessly with the rest of the toolbox. Lightly sanding the area with ultra-fine sandpaper, typically around 2000 grit, can help remove any minor imperfections left by the repair. This step should be performed with a delicate touch, as excessive sanding might remove too much paint and expose the repair work. Once you are satisfied with the smoothness of the surface, thoroughly clean away all sanding dust. The final touch in this process is to apply a coat of wax or polish over the entire toolbox. Not only does this create a uniform shine, but it also adds an extra layer of protection by sealing the new paint against environmental factors such as moisture and UV rays.
Throughout the entire repair process, safety remains paramount. Whether you are using chemicals to clean the surface, applying primer and paint, or operating tools like a hairdryer or suction cup, it is essential to wear appropriate protective gear. Safety goggles, gloves, and a dust mask should be standard equipment during each phase of the repair process. Moreover, working in a well-ventilated area is crucial, especially during the application of paints and primers, which can release fumes harmful if inhaled in enclosed spaces. By taking these precautions, you ensure that your repair work is conducted safely and that the final results are both durable and visually appealing.
Another important consideration during this repair process is the assessment of underlying structural issues. Although this chapter focuses on minor dents and scratches, it is wise to inspect the entire toolbox for any signs of deeper damage. Over time, repeated impacts or prolonged exposure to harsh conditions can weaken the integrity of the metal. Small cracks or areas of rust may appear in regions that have been repeatedly stressed. In such instances, it might be necessary to undertake additional measures to reinforce or even replace a section of the toolbox. However, with prompt and regular maintenance, many of these structural complications can be prevented. Routine inspections, such as those discussed in various maintenance articles like those found on the Turnage Sons In-House Truck Maintenance page, can help you stay ahead of potential issues and avoid extensive repairs down the line.
For many truck owners, the process of repairing a toolbox is not just about maintaining an accessory; it is about preserving an essential tool that supports daily operations. Whether you use your truck for work, recreation, or both, the toolbox plays a critical role in keeping your equipment organized and readily accessible. By investing time in repairing minor dents and scratches, you not only improve the aesthetics of your truck but also reinforce its functionality. Each step, from cleaning to sanding to repainting, builds upon the underlying goal of protection. The metal of your toolbox, once properly restored, gains renewed resistance against the environmental stresses of road travel and laborious use.
In the broader scope of truck maintenance, paying attention to the small details often prevents the need for more significant repairs later. Minor cosmetic repairs, such as those addressed in this chapter, can be completed without extensive tools or specialized skills. With a little preparation and caution, you can breathe new life into an aging toolbox. The techniques outlined above emphasize the importance of patience. Rushing through any of these steps—whether it is the careful application of primer or the deliberate layering of touch-up paint—risks the overall integrity and appearance of the repair.
Attention to detail is especially important when touching up color and texture. Color matching is often the final hurdle, as even a slight discrepancy between the new paint and the original finish can be noticeable. It is advisable to test the touch-up paint on a small, hidden section of the toolbox before proceeding with the repair. Once you are confident in the match, apply the paint slowly and evenly over the blemished area. In many cases, this practice not only masks the damage but also reinforces the protective layer that guards against rust and corrosion. Each layer of paint contributes to a smoother finish that bridges the gap between the old and new surfaces.
Moreover, the act of repairing minor dents and scratches contributes to the longevity of your truck toolbox. The metal surrounding the repaired areas can be vulnerable to further deterioration if left exposed. A well-executed repair preserves the structural integrity of the toolbox. This preventive approach is especially critical for those who rely on their truck for heavy-duty work or frequent use over challenging terrains. The diligence you show in performing these repairs is an investment in the continued performance of your equipment.
For those who might be new to DIY repairs, the techniques described might seem daunting at first. However, with a little practice and the right tools at hand, even novice repair enthusiasts can achieve impressive results. Many truck owners find that the process is not only cost-effective compared to professional repairs but also immensely satisfying as it restores a critical asset to its former quality. The satisfaction derived from watching a worn, dented toolbox transform into a clean, restored piece of equipment is unmatched. Each repaired dent and concealed scratch stands as a testament to the adage that consistent care yields lasting rewards.
In addition to the technical aspects of repair, it is essential to consider the overall impact on your truck’s appearance and functionality. A well-maintained toolbox reflects the pride you take in your vehicle and the reliability you demand from it. The repaired surface not only improves the look of your truck but also contributes to its resale value. Potential buyers or users are more inclined to trust a truck that shows signs of careful, attentive maintenance. In this way, repairing minor defects is not isolated to immediate practical benefits but can also influence the long-term value of your investment.
The step-by-step methods outlined here, including the use of a dent puller and the alternative heat-and-cool technique, are designed to be accessible and effective. Each method caters to a particular set of circumstances defined by the condition of the toolbox. For example, while a dent puller is excellent for handling shallow indents, those small imperfections in the paint may best be treated with careful sanding and proper touch-up applications. Whichever method you adopt, the underlying principle remains the same: restore the toolbox to a state where it continues to serve its purpose reliably while also looking its best.
In conclusion, the art of repairing minor dents and scratches on your truck toolbox is a balance of precision, patience, and proactive care. By meticulously cleaning the surface, employing the appropriate techniques to remove dents, and carefully touching up scratches with matching primer and paint, you create a protective and lasting repair that defends against the progression of wear and tear. This comprehensive approach not only revitalizes the toolbox but also contributes to the overall maintenance regimen of your truck. For those interested in further techniques and insights, additional external resources such as the detailed guide available at Auto Repair Tips can provide extra tips to refine your repair skills.
In every phase of this process, safety and attention to detail are paramount. Protective gear, proper ventilation, and a steady hand ensure that your repairs are not only sound but also executed with care. The transformation of a seemingly worn-out toolbox into an asset that functions efficiently and looks polished is a rewarding experience for any truck owner. As you integrate these practices into your regular truck maintenance routine, you ensure that your toolbox remains as robust and dependable as the work it was designed to support. The journey from dented metal to seamlessly restored surfaces illustrates the effectiveness of hands-on care and emphasizes the principle that even minor repairs can solicit substantial benefits in the overall longevity and performance of your truck toolbox.
Securing Functionality: Mastering Loose Latches and Faulty Handles on Your Truck Toolbox
When your truck toolbox begins to betray you with loose latches or faulty handles, it is not just a minor inconvenience—it can seriously undermine the utility and security of your essential tools. Repairing these issues demands a measured approach that starts with a thorough inspection, continues with careful hands-on work, and completes with precise reassembly. This chapter offers an integrated narrative on how to tackle loose or broken latches and handles, ensuring that your truck toolbox regains its full functionality and longevity. Whether your troubles stem from loose fasteners, worn-out internal components, or cracked housing, the following comprehensive discussion guides you from initial diagnosis through to final testing.
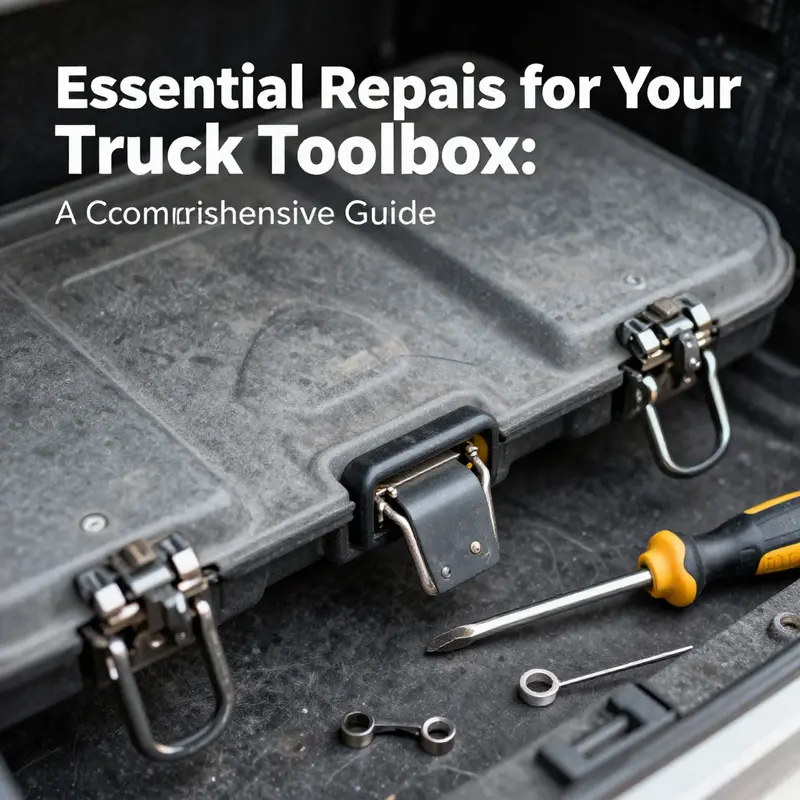
The first step in any effective repair is a meticulous assessment of the damage. It is essential to examine the toolbox both from the outside and inside, noting where the hardware has loosened or suffered structural failure. Over time, exposure to the elements and continual vibration can cause screws and bolts to loosen, and the latch mechanism may begin to falter. Look for signs of wear such as stripped threads on screws, cracks in the plastic housing, or bent metal parts. It is advantageous to gently manipulate the door and handle; the amount of movement observed will help indicate whether the issue is simply loose hardware or an indication of more serious internal damage. Once you have an accurate picture of the damage, you can prioritize tasks and select the correct approach for each problem area. This comprehensive approach saves time and often limits the need for more drastic measures such as replacing the entire assembly.
Next, gather all necessary tools and materials to ensure the repair process proceeds smoothly. Basic hand tools—screwdrivers, an adjustable wrench, and a socket set—are typically required. Additionally, it is wise to have a collection of replacement screws or bolts that match the original specifications, as well as specialized adhesives like epoxy or even a plastic welding kit for repairs on plastic components. For metal parts, standard welding equipment or a riveting tool might be necessary. Safety is critical during all stages of repair: wear protective gloves, safety goggles, and a dust mask when you are sanding or using power tools over gritty surfaces. Before you begin, it is also important to check for any interconnected systems; for example, if your toolbox incorporates electronic locks or lights, disconnect any power sources. With your tools at the ready and safety precautions firmly in place, you are well-prepared to address the problem.
A common issue with loose handles often originates from fasteners that have simply lost their grip over time. The first step in resolving this is to verify that every screw and bolt related to the handle’s mounting is secure. Begin by carefully tightening all visible screws, making sure not to overtighten and strip the threads. In cases where a screw turns freely because its threading is compromised, consider remedies such as inserting a small wooden matchstick or toothpick into the hole. Once trimmed flush with the surface, the wooden filler can provide the missing substance for the screw to bite into. It is also beneficial to apply a thread-locking compound on the screw before reinsertion; this prevents future loosening caused by vibration and external stress. A well-tightened handle not only restores basic functionality but also reinforces the overall structural integrity of the toolbox. This process is a simple yet effective method to extend the service life of your equipment.
When the problem escalates from simple looseness to broken latches or a detached handle, the repair process becomes more intricate. Often, the latch assembly can be carefully removed for closer inspection. During this disassembly, pay attention to all components—the latch itself, its spring mechanism, and any striker plates that may be present. Sometimes, the internal spring might become fatigued or bent, preventing the latch from properly engaging. In these instances, replacing the spring is essential. If the latch housing is cracked, you might repair it using a high-strength epoxy adhesive specifically designed for plastic bonds. After thoroughly cleaning the broken surfaces with an appropriate solvent to remove grease and grime, apply the adhesive evenly. It is important to clamp the pieces together with sufficient pressure and allow the adhesive to fully cure, which can require up to 24 hours. Repairing a broken latch with care not only restores functionality but also improves the durability of the repair, making repeated issues less likely.
In some cases, the damage extends to the handle itself. A handle that exhibits cracks or appears to be detaching from its mount requires careful removal and replacement or repair. For plastic handles, a specialized plastic adhesive or a plastic welding kit may be used to mend the damage. Plastic welding involves using controlled heat to melt the surface and then fusing the parts together, creating a bond that is often stronger than the original material. For metal handles, spot-welding might be the more appropriate remedy. Spot-welding, if done correctly, restores strength without the need for bulky fasteners and maintains the aesthetic continuity of the toolbox. In situations where welding is not permissible, either due to the risk of further damaging the surrounding material or a lack of proper equipment, rivets may serve as an excellent alternative. Once the handle repair is complete, it is prudent to sand any rough edges and, if necessary, repaint the surface to match the original appearance. This not only ensures a safe, smooth operation but also restores the visual appeal of the toolbox.
After the physical repairs are completed, it is time to focus on realigning and testing the entire assembly. Reinstallation should be done with precision—ensure that all components, from the handle to the latch assembly, are securely bolted back in place. During this process, it is critical to re-examine the alignment of the latch with its striker plate. Even a slight misalignment can cause a recurring issue where the latch fails to engage. Testing involves closing and opening the toolbox several times, manually verifying that the handle feels secure and that the latch clicks into place with a satisfying firmness. This iterative process not only confirms the immediate success of the repair but also allows you to spot any lingering misalignments or loose fittings that require further adjustment. Regular testing is a proactive measure that can ward off future breakdowns and keep the toolbox in optimal condition. For those seeking additional pointers on preventative measures, exploring guides on in-house truck maintenance, such as the resource available through this link: in-house truck maintenance, can provide valuable insights and tips.
It is also important to consider periodic inspections and routine maintenance as a part of your overall repair strategy. Exposure to harsh weather and the daily vibrations from truck operations can quickly revert a successful repair into a recurring problem if preventive maintenance is neglected. Make it a habit to check for any early signs of wear, such as a loose handle or a slightly misaligned latch. These small checks can prevent minor issues from escalating into larger, more invasive repairs. Not only is this preventive care cost-effective, but it also ensures that your toolbox remains a reliable extension of your working environment. Regular maintenance bonds the ingenuity of repair with the rigors of daily usage, forming a critical line of defense against unexpected failures on the road.
Maintaining your truck toolbox after repairing a loose latch or a faulty handle is as important as the repair itself. Frequent checks of the mounting screws and the latch mechanism can alert you to any signs of new deterioration. Beyond the physical inspection, consider the environmental factors that may contribute to future issues. For instance, exposure to moisture is a common culprit behind the corrosion of metal components and the degradation of fasteners. Applying a suitable protective coating or anti-corrosion spray can shield metal parts from rust and extend the lifespan of your repair work. Additionally, a routine cleaning schedule can remove debris and contaminants that might otherwise cause abrasive wear over time. By adopting these preventive measures, you create a cycle of maintenance that safeguards your investment and ensures that each journey begins with a toolbox that functions as reliably as when it was new.
In summary, the repair of loose latches and broken handles on a truck toolbox requires a balance of keen observation, precise repair techniques, and diligent post-repair testing. This chapter has taken you through each stage of the process—from identifying the causes of looseness and crack formation to gathering the right tools and materials, and finally to reinforcing the repairs with preventive practices. By methodically tightening screws, using fillers for stripped threads, repairing or replacing damaged latch assemblies, and addressing faulty handles with either adhesive, welding, or riveting techniques, you are not simply mending a tool box; you are restoring a critical component of your work life. Each step, executed with attention to detail and respect for safety standards, contributes to a far more durable and reliable repair.
For those in the trade or even dedicated DIY enthusiasts, the journey toward a better, more secure truck toolbox is marked by these incremental improvements. The repair procedures here are augmented by related maintenance practices that ensure longevity and uncompromised performance. With these guidelines in hand, you secure not only the physical integrity of your toolbox but also the peace of mind that comes from knowing your tools are safe and accessible when you need them. Precision in alignment, careful selection of adhesives or welding methods, and regular preventive checks collectively form the cornerstone of effective truck toolbox repairs.
For further detailed instructions and visual guidance, consider exploring the detailed external resource provided by the Truck Tool Box Latch Repair Guide at Truck Tool Box Latch Repair Guide.
Rust Be Gone: A Comprehensive Journey to Revitalize Your Truck Toolbox
Truck toolboxes are more than just compartments for storing equipment; they are essential components in a truck’s daily operation, designed to endure harsh weather, heavy use, and the inevitable fallout of exposure to the elements. Among the most persistent and destructive issues faced by these vital storage units are rust and corrosion. When unattended, rust can quickly progress from superficial blemishes into deep, structural damage that compromises both the functionality and appearance of your toolbox. In this chapter, we will explore how addressing rust and corrosion is not merely a cosmetic exercise but a critical maintenance task that preserves the integrity of your truck toolbox for years to come.
Your truck toolbox is constantly battling moisture, road salt, and fluctuating temperatures, all of which contribute to the insidious effects of oxidation. Over time, these elements work in tandem, gradually weakening the metal through oxidation processes. This can lead to small, initial pitting that, if ignored, evolves into more serious issues like cracks, holes, or even complete structural failure. The process to repair and protect your toolbox, therefore, must be both meticulous and proactive, incorporating careful cleaning, the application of specialized primers, and protective finishing coats, all underpinned by safe and precise work practices.
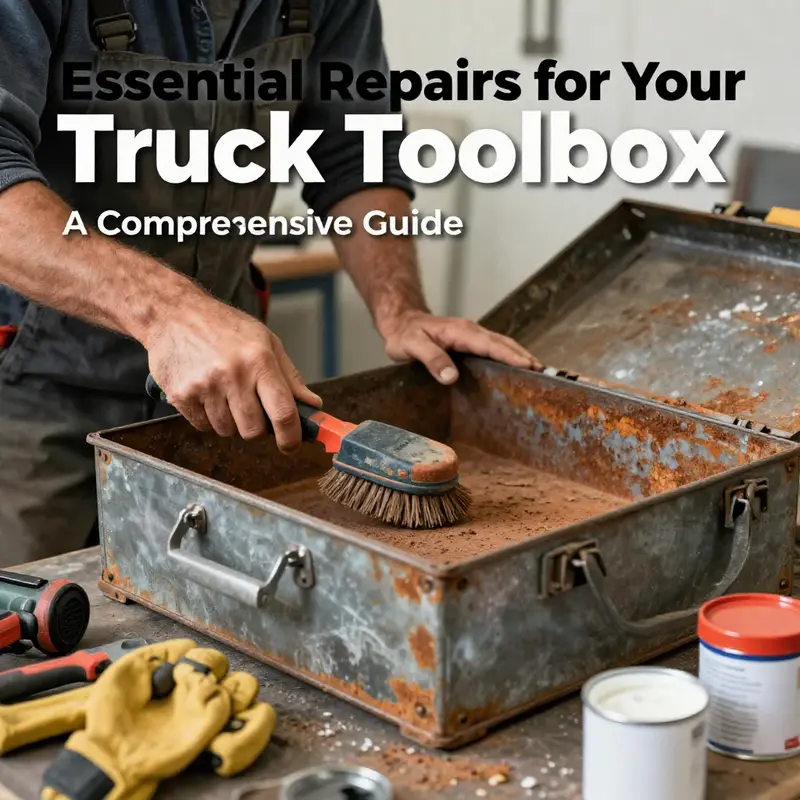
From the onset, the key to an effective repair is to address the issue at its root. This means beginning with a thorough cleaning process that removes any loose rust flakes, dirt, and oil from the affected areas. The process usually starts with physically scraping away the obvious corrosion using a sturdy wire brush, fine sandpaper, or even an electric grinder. These tools help to strip away the unsightly layers of deteriorated material, exposing the bare metal lying underneath. It is essential to be diligent during this stage; any remnants of rust left behind can continue to spread, undermining the integrity of the subsequent repair work.
In dealing with areas where rust is particularly stubborn, it may be necessary to apply a rust converter solution. This chemical treatment works by transforming the toxic iron oxide into a more stable, black protective barrier, effectively halting the rusting process. While this method can be highly effective, it demands careful attention to detail and adherence to product instructions, including proper ventilation and the use of gloves and goggles. This treatment is indispensable for crevices and hard-to-reach spots where mechanical removal may not suffice.
Once the rust has been thoroughly removed and the surface cleaned, the next step is to ensure the metal is ready to accept repairs. A flawless finish depends greatly on how well the surface is prepared. Using fine-grit sandpaper smooths out any uneven or pitted surfaces, thereby promoting better adhesion for the primer. It is good practice to wipe down the surface with acetone or rubbing alcohol after sanding to remove any dust or residue, leaving the metal pristine and ready for the next phase of repair. The gentle yet thorough cleaning process during this stage cannot be overemphasized; it is the foundation upon which the longevity of your repair rests.
With the surface properly prepped, attention then turns to applying a high-quality, rust-inhibiting primer. This step is critical because the primer serves as a barrier between the vulnerable metal and the corrosive elements of the environment. Selecting a primer that is specially designed for metal surfaces, and which offers robust protection against moisture and oxygen, is of the utmost importance. The chosen primer should be capable of bonding strongly to a smooth, clean surface, thereby insulating the metal from potential oxidation. It is advisable to follow the manufacturer’s instructions regarding the application process and the necessary curing time. Allowing the primer to cure completely is essential, as any premature exposure to moisture could compromise the primer’s effectiveness and, ultimately, the entire repair job.
After the primer has fully cured, the task of restoring the toolbox’s external finish begins. Here, the application of a durable, weather-resistant topcoat is pivotal. Options such as polyurethane or epoxy-based paints are popular choices, offering an impressive combination of aesthetic appeal and resilient performance against the harsh conditions frequently encountered by truck toolboxes. For those who wish to maintain the original look of their toolbox, selecting a shade that matches the facility’s design requirements is important. The topcoat is applied in one or two layers, with careful attention paid to ensuring an even spread and avoiding drips or buildup. Once dry, a final layer of clear protective sealant is often recommended to tackle chip resistance and enhance the overall durability of the repair.
Throughout this whole process, safety is paramount. Whether you are sanding, applying chemicals, or painting, you must always wear appropriate protective gear such as safety goggles, gloves, and a dust mask. Working in a well-ventilated space is critical when dealing with fumes from paints and primers. If there is any hesitation regarding tasks like welding or using heavy-duty power tools, it is wise to consult a professional who specializes in auto body repairs. These precautions not only secure your well-being but also ensure that the repair process is as effective and long-lasting as possible.
The journey to revitalize your truck toolbox through rust and corrosion repair is an exercise in patience and attention to detail. It begins with a strategic cleaning phase that removes the underlying damage and halts the progression of deterioration. By methodically scraping and sanding away rust, you create a canvas that is receptive to the necessary treatments. The application of a rust converter to hard-to-reach areas acts as a critical step in ensuring that the problem is addressed at a chemical level, providing stability and preventing future outbreaks of corrosion. This initial phase is essential in setting the stage for a durable repair that not only restores the toolbox’s appearance but also its structural strength.
Once the surface is meticulously prepared, the application of a rust-inhibiting primer becomes the next crucial component. The primer not only seals the clean, bare metal but also offers a robust shield against future corrosive attacks. It is the first line of defense in the battle against rust—a silent enemy that thrives on neglect. By following the recommended curing times and application techniques, you ensure that the protective qualities of the primer are fully realized, thereby enhancing the overall longevity of the repair work.
Following the primer, the topcoat and sealant work together to provide a resilient finish that can withstand the daily rigors of truck use. This finishing stage is where aesthetic restoration meets functional repair. The right topcoat adds a layer of durability, preventing minor abrasions and chipping, while the application of a sealant offers an extra measure of protection, locking in the quality of the repair. Together, these steps ensure that your toolbox stands guard against the elements, maintaining its appearance and structural integrity well into the future.
Over the longer term, it is vital to implement routine maintenance practices to fend off the reemergence of rust. Regular inspections, especially after exposure to extreme weather or harsh driving conditions, help identify potential issues early. Keeping the toolbox clean and dry serves as one of the best defenses against ongoing moisture buildup and subsequent corrosion. In certain challenging environments—such as those where salt and water are prevalent—additional protective measures like installing drainage holes or using desiccant packs inside the toolbox can be a wise investment. For additional tips on maintaining the durability of your truck components, you might consider reviewing some comprehensive in-house truck maintenance insights, which provide valuable perspectives on sustaining performance and longevity.
In essence, addressing rust and corrosion on a truck toolbox is a multifaceted process that calls for both technical skill and a clear understanding of the challenges posed by the environment. The repair process begins with the vigorous removal of rust and the careful preparation of the surface, moves through the critical steps of applying rust converters and primers, and culminates in a resilient finish designed to protect the metal from future degradation. Each phase of this process is designed to work in concert, ensuring that the repair is not just a temporary fix but a long-term solution that rekindles the toolbox’s original strength and appearance.
The meticulous care taken during the cleaning, priming, and finishing stages is mirrored by the importance of ongoing maintenance. Every time you check the toolbox for signs of rust or wear, you are taking an active step in preventing larger, more costly problems down the line. Maintaining a regular cleaning schedule, inspecting for moisture accumulation, and addressing any minor issues immediately can drastically reduce the risk of severe corrosion. This proactive approach is not just about preserving the look of your toolbox; it is about safeguarding the structural integrity that forms a critical part of your truck’s overall functionality.
Moreover, the insights gleaned from properly repairing rust and corrosion can extend beyond temporary repairs to foster an overall mindset of preventive maintenance. Truck owners often learn that investing time in careful upkeep can save both money and time in the long run. Each step—from the initial surface preparation to the final application of a sealant—offers lessons in durability and resilience. By treating the repair of your truck toolbox as a systematic project, you are better equipped to handle similar challenges elsewhere in your vehicle’s maintenance regimen. In many ways, taking the time to repair your toolbox contributes to a broader understanding of how to keep your entire truck in optimal condition.
Given the potential dangers associated with corrosion and structural damage, it is always worthwhile to reflect on the importance of safety throughout the entire process. Working safely means not only protecting yourself with the appropriate gear—such as goggles, dust masks, and gloves—but also ensuring that the work area is properly ventilated and free of unnecessary hazards. When using power tools like grinders or sanders, extra caution is needed to avoid injury and prevent further damage to the toolbox. In cases where more intricate repairs, such as welding, are required, enlisting a professional is often the best strategy. This cautious approach, combined with a methodical repair technique, can significantly enhance the overall success of your repair project.
Ultimately, the mission to eradicate rust from your truck toolbox is as much about preserving safety and investing in quality maintenance as it is about restoring an essential component of your truck’s functionality. By understanding each step of the process and the rationale behind it—from cleaning and surface preparation to the application of primers, topcoats, and sealants—you develop a comprehensive roadmap for repair that not only addresses the immediate issues but also prevents future occurrences.
For those seeking more detailed, step-by-step guidance on managing and repairing rust issues on a truck toolbox, a wealth of information is available through trusted resources. For instance, a reputable external guide on the subject can be found at How to Repair Rust on a Truck Toolbox. This resource provides additional insights and practical tips that complement the strategies discussed here, reinforcing the importance of a thorough and careful approach to truck maintenance.
In conclusion, the process of repairing rust and corrosion on your truck toolbox is an elaborate endeavor that demands a blend of detailed preparation, technical skill, and a proactive mindset. Each stage of the repair—from the aggressive removal of rust to the careful application of protective coatings—plays a vital role in restoring the toolbox to a condition that is both visually appealing and structurally sound. The commitment to quality repair work today is an investment in your truck’s operational reliability tomorrow. Armed with the correct tools, safety practices, and a methodical approach, you can confidently take on this challenging repair, ensuring that your truck toolbox remains a durable asset even in the face of relentless environmental challenges.
Revitalizing Structural Integrity: Expert Steps to Repair Cracks and Holes in Your Truck Toolbox
When your truck’s toolbox has suffered structural damage such as cracks or holes, it is more than a cosmetic concern; it is a pressing safety and functionality issue. Repairing such damage requires a carefully thought-out approach that balances thorough assessment, meticulous execution, and preventative measures. In this chapter, we delve into a comprehensive narrative that not only guides you through the technical steps of repair but also emphasizes the importance of preparation and safety throughout the process.
The first step in the restoration journey is a detailed inspection of the toolbox. Spend time examining every inch of the affected area. Look for hairline fractures, subtle cracks, or visible holes that might be compromising the tool box’s strength. This initial evaluation is critical because it informs the choice of repair method. Minor cracks or superficial holes can typically be addressed with simple welding procedures, while large gaps or deep structural breaks may require a more robust patching technique. During this inspection, it’s equally important to check for underlying issues such as rust or corrosion; these can exacerbate the damage. Remove any loose material and ensure that you have a clear understanding of the nature and extent of the damage.
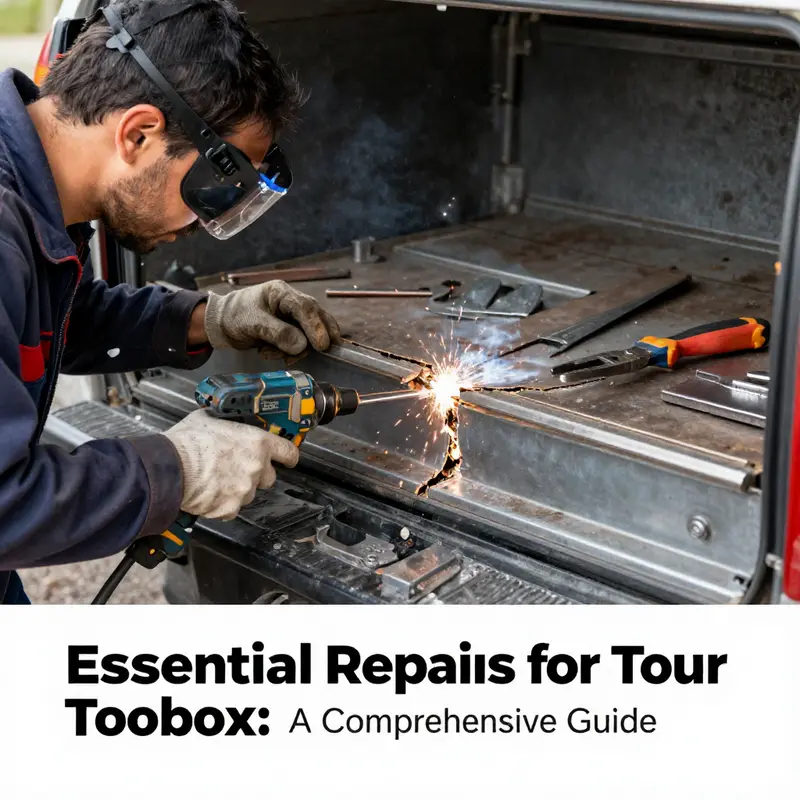
Once the damage is thoroughly assessed, the preparation phase begins. Safety cannot be overemphasized, and it is essential to equip yourself with quality safety gear including gloves, safety goggles, and a dust mask. If you are working indoors or in an area with limited ventilation, ensure that there is sufficient airflow, especially if you are planning to weld. The damaged area should be cleaned meticulously. Use a wire brush or fine-grit sandpaper to strip away any loose rust, paint, or debris. This cleaning step is crucial to achieving optimal bonding. A thoroughly cleansed surface allows the welding or patching material to adhere firmly, reducing the chance of future failures.
After the surface is properly cleaned and prepared, you can begin addressing minor cracks and holes through welding. Welding, particularly using a MIG (Metal Inert Gas) or TIG (Tungsten Inert Gas) welder, is one of the most effective methods for repairing metal damage in a truck toolbox. When using a welder, begin by carefully aligning the edges of the crack to ensure a uniform fill. The success of the weld is largely dependent on precision; uneven welds or gaps can create weak spots that may fail under stress later. As you work, use smooth, controlled movements, allowing the weld bead to merge with the undamaged metal. Once the welding is complete, it is important to grind down the weld seam so that it is flush with the surrounding surface. A smooth finish not only improves the appearance of the repair but also prevents future accumulation of grime or moisture that could lead to additional corrosion.
If the damage includes larger holes or severe cracks, a more extensive approach is necessary. In these cases, a patch must be fabricated and welded into position. Begin by measuring the hole or damaged area carefully, and then transfer these measurements to a piece of replacement metal that matches the original thickness and composition of the toolbox. The replacement material should be slightly larger than the damaged area to ensure that the patch overlaps the intact metal around the perimeter. With the patch cut to size, prepare both the patch and the toolbox surface by cleaning them with a degreaser and acetone or rubbing alcohol. This precaution removes any residue that could interfere with the welding process.
When positioning the patch, secure it firmly against the truck toolbox. For added stability before the welding process, you may temporarily clamp the patch in place. With the patch secured, apply a series of welding passes around the perimeter, ensuring that the patch fuses seamlessly with the original structure. The goal is to create a unified metal surface that can withstand the stresses of daily use. It is crucial to check that no gaps remain between the patch and the original metal. Once the welding is complete, gently grind down the weld seams until the transition is smooth and level with the toolbox surface. The grinding process requires patience and finesse; any rough edges can become points of stress during normal operation.
In instances where the damage is less severe but still affects the overall shape or performance of the toolbox, mechanical methods might be applicable. For example, if minor deformations are visible along with cracks, a combination of controlled heat application and mechanical tapping with a hammer and dolly might help restore the original form. However, applying heat requires precision. The metal must be heated evenly and carefully to avoid warping or weakening the structure. This method is best suited for minor dents or slight warping rather than significant structural damage. Even when using mechanical methods, it is essential to follow up with a welding or patching process where necessary, ensuring that all areas subject to stress are properly reinforced.
After the structural repair has been completed—whether through direct welding or patch reinforcement—the focus shifts to finishing and protection. The repaired section will be vulnerable to rust if left untreated. Begin by applying a coat of rust-inhibiting primer to the entire area. Choose a high-quality primer designed for automotive use, as this will adhere better to metal surfaces and provide durable protection against moisture. Once the primer has dried, finish the process with a coat of matching automotive paint or a powder-coated finish. This not only protects the metal from future corrosion but also restores the toolbox’s aesthetic appeal. Spending the necessary extra time on this final step can extend the life of your repair exponentially.
It is also wise to incorporate additional maintenance steps to prevent future occurrences. Make it a regular habit to inspect your toolbox and perform routine cleaning. Even when no significant damage is visible, a periodic cleaning can remove accumulated dirt and grease that may hide early signs of wear such as minor cracks or rust spots. For truck owners interested in further insights on maintaining truck components, exploring resources on in-house truck maintenance routines can provide useful tips. For example, understanding how to keep your truck’s mechanical and structural systems in optimal condition can be found in practical in-house truck maintenance guides available on various maintenance blogs.
A successful repair is not solely about fixing the immediate issue but also about implementing preventative measures. Always consider the environment in which your toolbox operates. Frequent exposure to moisture, salt, and extreme temperatures can accelerate wear and tear. Thus, ensuring the toolbox is properly sealed during installation is critical. Consider using rubber gaskets or weather stripping when reassembling your equipment. These simple additions can help absorb vibrations and prevent water ingress, both of which contribute to structural damage over time.
One common scenario truck owners face involves repairing a toolbox that sustains both structural damage and superficial wear from years of exposure. In these cases, the repair process might involve a combination of methods. Start by addressing the cracks or holes as described above, then move on to repairing any minor dents through mechanical methods if necessary. The ability to combine different methods offers flexibility and ensures that even damage that appears extensive might have a straightforward solution if approached correctly. It is wise to start with the most severe damage and work towards the less pronounced issues, as this sequence reinforces overall structural integrity.
Even as you work methodically through each repair step, it is critical to monitor the performance of the repair over time. Periodically inspect the patched areas to ensure the welds or mechanical adjustments have held up under regular stress. If you notice any signs of reoccurring cracks, discoloration, or rust formation, it could be due to an insufficient bond between the welded patch and the original metal structure. Strengthening these bonds through prompt intervention can prevent further complications. Often, addressing these issues early helps avoid the need for a full toolbox replacement, providing both financial and practical benefits in the long term.
In addition, the quality of the repair is closely linked to the materials used during the process. Always source replacement metal that closely matches the original matrix of your truck toolbox. Using mismatched metals can lead to issues such as galvanic corrosion, where two different metals react adversely and accelerate degradation. Similarly, ensuring that the screws, bolts, or welding materials are of high quality will provide additional assurance that your repair will be durable. Attention to these details distinguishes a temporary fix from a long-lasting solution.
The methodology behind these repairs is deeply rooted in principles of strength restoration and preventive maintenance. For many truck owners, learning to perform these repairs not only saves money in the short term but also deepens their understanding of truck maintenance. This knowledge empowers you to make informed decisions about when a repair is possible and when it might be more prudent to replace the toolbox entirely. Extensive damage that compromises the ladder-frame of the toolbox might be better served by a complete replacement, particularly if the repair costs approach or exceed the value of a new unit. In such cases, it is advisable to compare repair costs with replacement options, keeping in mind that the safety of your tools and the longevity of your truck’s functionality are paramount.
At its core, this repair process is a blend of art and science, where practical skills like welding converge with an understanding of material properties and structural dynamics. When done correctly, the repaired section not only brings back the functionality of the toolbox but also enhances its resilience. Over time, the repaired area should blend in with the original structure, showing no visible signs of weakness or distress. Any residual imperfections can be largely attributed to the inherent nature of welding and metalwork, but these do not detract from the overall strength if properly sealed with a protective finish.
For those who are new to this type of repair, it might appear intimidating at first. However, practicing on less critical panels or even studying detailed tutorials can bolster your confidence. Some truck enthusiasts find that with a bit of practice, even moderate repairs become a rewarding project that deepens their bond with their vehicle. Moreover, if you ever feel uncertain about any step of the process, consulting a professional metal fabricator or an auto body repair specialist is a wise decision. This decision not only guarantees that the repair is carried out to the highest standard but also ensures that you remain safe while tackling potentially hazardous procedures.
As you progress through the repair, always keep in mind the long-term goal: to restore and maintain the structural integrity of your truck toolbox. This endeavor is not a one-time fix but rather part of a broader commitment to regular maintenance that ensures your equipment remains reliable under the toughest conditions. Remember, frequent inspections and upkeep can go a long way in preventing critical failures. Scheduling routine check-ups and being proactive about minor issues can ultimately save you from more extensive repairs down the line.
In conclusion, repairing cracks and holes in your truck toolbox is an exercise in precision, persistence, and proactive maintenance. Begin with an honest assessment of the damage, follow through with precise cleaning and welding or patching, and finish with a thorough application of rust protection. Throughout the process, always prioritize safety, use matching materials, and strive for a seamless integration of repairs with the original structure. Embracing these detailed steps will not only mend the immediate damage but will also fortify your toolbox against the harsh realities of wear and tear.
For those looking to delve further into strategies for maintaining and prolonging the life of various truck components, exploring specialized resources on in-house truck repair practices can be very beneficial. Detailed guides and firsthand experiences shared by seasoned truck owners can offer insights that extend beyond the immediate repair tasks. For a more in-depth look at comprehensive truck maintenance strategies, you might find this resource on in-house truck maintenance particularly useful: in-house truck maintenance insights.
Lastly, for those interested in the specifics of welding and metal repair techniques, additional practical guidelines can be refined by referring to industry-standard tutorials. An excellent external resource that provides a breakdown of essential welding techniques for truck repairs is available for further reading at The Spruce Crafts on Metal Welding Basics for Trucks. Engaging with these resources not only reinforces proper technique but also underscores the importance of safety and precision in every step of your repair process.
Throughout the journey of repairing your truck toolbox, the sense of accomplishment is deeply tied to the care and attention you invest in restoring its structural integrity. Every crack welded and every patch securely fastened translates to enhanced stability and prolonged service life. This blend of technical know-how and hands-on application reflects the spirit of truck maintenance — a field where determination and expertise converge to overcome even the toughest challenges. With patience and a meticulous approach, you will not only mend your toolbox but also fortify it for the road ahead, ensuring that it remains a reliable asset in your truck’s arsenal for years to come.
Final thoughts
Repairing a truck toolbox requires attention to detail and a methodical approach to various issues, from minor cosmetic damage to major structural integrity risks. Understanding these repairs enhances safety, functionality, and asset longevity, leading to reduced costs and improved operational efficiency. Equipped with the techniques shared in this guide, fleet managers and operational leaders can maintain their tools effectively, safeguarding both the equipment and the investments their businesses depend on. With the right knowledge and techniques, addressing toolbox repairs can be a straightforward task, ensuring that readiness and reliability are never compromised.

