Maintaining the optimal performance of Traxxas trucks is crucial for fleet managers, construction operators, and logistics providers. Understanding the intricacies of shock repair ensures that these vehicles operate at peak efficiency, reducing downtime and maximizing productivity. This guide covers critical areas such as preparation and safety, disassembly processes, inspection and cleaning techniques, rebuilding methods, and effective reinstallation and testing procedures. Each chapter is designed to empower fleet and trucking professionals with actionable insights for maintaining their Traxxas vehicles, ultimately leading to enhanced operational performance.
Precision in Damping: A Deep Dive into Shock Repair for High-Performance RC Trucks

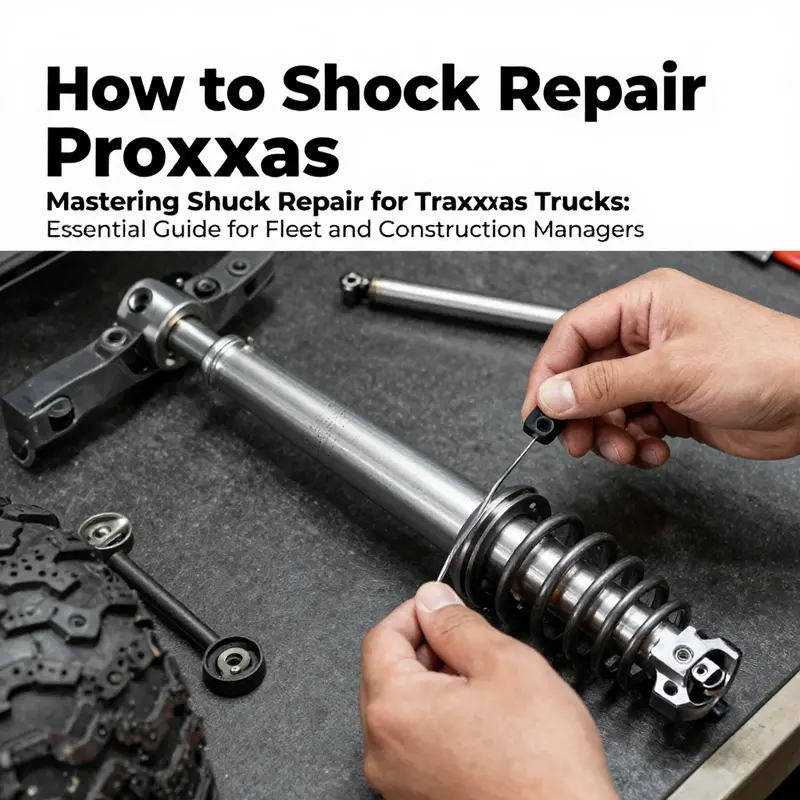
Repairing the dampers on a high-performance RC truck starts long before the first tool touches metal. It begins with a mindset that treats every step as part of a larger system: the suspension that keeps tire contact with uneven terrain, the chassis that translates every bump into control, and the oils and seals that govern how the car responds when fast, tight, or off-camber. The path from a leaking or underperforming shock to a ride that feels planted and predictable is paved with preparation, methodical disassembly, careful inspection, and disciplined reassembly. A calm, well-lit workspace helps more than any fancy tool; a clean bench or repair mat catches drips, prevents lost parts, and keeps the process orderly. PPE isn’t optional—safety glasses shield eyes from splashes when solvents flash, gloves protect hands from sharp edges and hot shocks, and sturdy footwear guards against dropped components. The aim is not just to restore function, but to restore confidence: to know that every component, from the shock shaft to the piston seal, is working as it should and that the vehicle will respond predictably when the throttle is opened and the tires meet rough ground.
The tools you gather before you begin set the tone for the repair. Hex wrenches and screwdrivers of the right sizes, needle-nose pliers for small parts, plastic pry tools to avoid scratching delicate surfaces, and a supply of rags and clean solvents are all part of the baseline kit. A small syringe or funnel makes removing old shock oil clean and controlled, while a magnetized tray helps keep fasteners in order. It’s worth investing a few minutes to set up a parts station that keeps the piston, rod, seals, and bushings separated enough to avoid cross-contamination. The viscosity you choose for the new oil matters as much as the seals you install. In most setups, a mid-range silicone oil—carefully selected to match your model’s expectations—will deliver predictable dampening without excessive heat buildup. Always align your choice with the manufacturer’s guidelines for your particular chassis and shock design. A good rule of thumb is to start with a viscosity in the 40–60 weight range for typical off-road shocks and adjust based on how the truck handles on the surface you test on after rebuild.
Disassembly is where the repair begins in earnest. The shock assembly is removed from the suspension and chassis, freeing it to be examined and rebuilt on the bench. Depending on your model—whether it’s a short-course truck, a monster-scale machine, or a trail runner—the mounting hardware may differ, but the essential steps are similar: detach the top mount, release the shock body from the piston rod, and slide out the rod assembly. A careful approach matters here; the goal is to keep internal parts clean and free of debris that can serve as sandpaper for seals. When you separate the components, inspect the shock tower or mounting point for any signs of wear or misalignment. A loose or uneven mount can cause leaks or irregular damping even after a rebuild. If you encounter pitting on the piston rod or scoring on the shaft, that wear usually signals that the shock needs more than a seal kit; it may require a new rod or a complete rebuild with higher-grade parts.
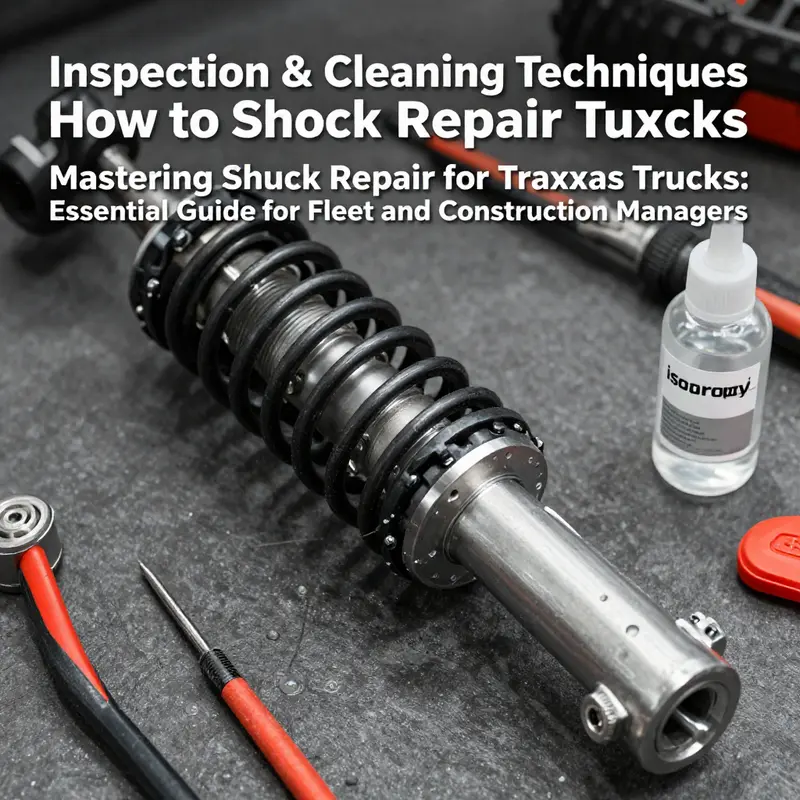
Inspection and cleaning represent the heart of the rebuild in terms of diagnosing what’s truly worn and what’s still sound. Inside the shock body, look for cracks, dents, or leaks around the seals and dust boots. The oil you remove tells a story about the unit’s health: dirty, milky, or depleted oil points to moisture ingress or seal failure. Use isopropyl alcohol or a purpose-built RC cleaner to wipe down the piston, shaft, bushings, and the interior of the shock body. This is where microscopic wear can be detected—micro-scratches on the piston rod, thinning or hardening of seals, or roughness in the bore surface. Any hint of dryness or cracking in the O-rings and seals means replacement is necessary. If metal shavings or grit show up on the cleaning cloth, it’s a red flag that the shock has endured significant internal wear and may benefit from a full rebuild kit rather than a simple reseal.
A rebuild isn’t just about slapping new seals in and calling it a day. It’s about choosing the right upgrades and paying attention to the details that matter under load. Worn bushings are a common culprit for sloppy damping and lateral play; replacing them with higher-quality aftermarket bushings can improve durability and precision. Seals and dust boots should always be swapped during a rebuild to minimize future leaks. If the piston itself is damaged, upgrading to a higher-performance piston—whether with an anodized finish or an adjustable feel—can deliver more consistent damping across varied temperatures and terrains. The inner walls of the shock can also benefit from modern enhancements; PTFE-lined or nitrogen-damped configurations reduce friction and temperature rise, translating into more stable damping in long, technical passages. While these upgrades aren’t mandatory, they offer a meaningful improvement for drivers who push their machines hard or who use shocks in extreme conditions.
Reassembly follows a deliberate sequence that mirrors the disassembly but with a focus on protecting every seal and ensuring smooth, clean movement. New seals and dust boots go into their correct positions with care, and the piston rod is lubricated lightly with the appropriate lubricant before the rod is reinserted into the shock body. It’s essential to ensure that the piston assembly sits squarely and that the O-rings seat evenly to avoid edge leaks. After the components are aligned, the shock is reassembled in the reverse order of disassembly. A cautious approach to tightening is key here: overtightening can distort seals, while under-tightening leaves the assembly unsecured. Once the shock is reassembled, fill it with fresh shock oil to the manufacturer’s recommended level, then slowly cycle the shock to bleed air and remove any trapped pockets of air that would cause inconsistent damping. A practical check is to manually compress and extend the shock several times, feeling for a smooth, uniform movement without hitching, stiction, or creep. If any resistance persists, revisit the seals and the oil fill until the movement is consistent and predictable.
The journey back to the chassis requires careful reinstallation. Align the shock with the suspension arm and the appropriate mounting points, then secure everything to the chassis using the correct hardware. Torque is important here; applying the manufacturer’s specified values protects threads, ensures consistent damping geometry, and reduces the risk of failures during aggressive driving. If you don’t have the exact torque figures at hand for your specific model, the safest route is to consult the official service documentation and follow the recommended torque ranges. After the rebuild, a methodical test is essential. Start with a gentle compression test on the bench to confirm there are no leaks and that the oil remains in place. Then move to a controlled test drive on a calm surface. Observe how the vehicle responds to small bumps, transitions, and mid-corner loads. A well-tuned shock should dampen disturbances smoothly, maintaining tire contact and predictable handling rather than bouncing or wallowing through terrain.
Beyond the immediate task of repair, several maintenance practices can extend the life of your dampers and keep performance steady. A simple rule of thumb is to inspect shocks after every run; look for visible leaks, oil staining along the shaft, or unusual noises during compression. A full rebuild every 10–20 hours of runtime is a practical cadence for drivers who haul off-road or high-speed use. If the truck operates in harsher environments or at higher speeds, you may find yourself rebuilding more frequently. Moisture is a constant adversary in damp environments, so store the truck in a dry place and shield it from direct exposure to rain or high humidity. The goal is to minimize exposure to contaminants that can compromise seals and bore surfaces.
The appetite for upgrades among the RC community can be strong, and a few thoughtful choices can yield meaningful returns. PTFE-coated inner walls reduce friction and give a smoother, more consistent response across a range of temperatures. Nitrogen-damping variants can offer more stable damping under load, especially during high-speed impacts or sustained corners. Aluminum shock towers add stiffness to the suspension, helping to preserve geometry under spirited driving. Each of these upgrades carries considerations in weight, cost, and compatibility, so it’s wise to evaluate your driving style, terrain, and preferred tuning window before making changes. For many drivers, the base rebuild with fresh seals, quality oils, and meticulous reassembly already makes a dramatic difference in feel and control.
As you work, remember that the exact procedures, torque values, and part compatibility depend on the model and the shock design you’re servicing. Keeping a manual on hand and verifying the specifics for your vehicle is the surest path to success. For practitioners who want a structured, model-specific reference, there are comprehensive resources and diagrams that detail the steps, the order of assembly, and the exact torque expectations for the mounting hardware. In addition, practical maintenance guides from veteran hobbyists offer insights into common failure points and how to diagnose them quickly. If you’re looking for a curated set of ongoing maintenance ideas and hands-on advice, consider exploring the Master Truck Repair blog, which collates a range of repair workflows and maintenance tips that can complement your shock servicing routine. Master Truck Repair blog.
For those seeking an authoritative, model-agnostic reference when you’re unsure about a particular step, the official maintenance resources and service manuals provide diagrams and specifications that are crucial for safe, accurate work. A model-specific owner’s or service manual will show you the correct torque values, the exact order of components during reassembly, and any nuances unique to your chassis. These manuals are the most reliable source for ensuring your repairs won’t compromise reliability or safety. If you prefer a direct link to a concrete reference, you can consult the available official maintenance documentation that outlines the step-by-step procedure, including diagrams and factory-recommended practices. In any case, the core discipline remains the same: start clean, work deliberately, verify each seal and bore, and test under controlled conditions before returning the truck to full duty.
When a repair is done thoughtfully, it reaps rewards beyond a single drive. A well-tuned shock system improves handling, reduces tire wear, and enhances driver confidence. The vehicle feels more composed over rocks, roots, and jumps, and the damped response translates into crisper steering and more predictable mid-corner behavior. The longevity of the shock components increases as seals and dust boots are kept fresh, oil remains clean, and the damper body is preserved from dirt and moisture. This philosophy—pairing careful maintenance with selective upgrades—helps ensure your RC truck maintains its performance envelope over time, rather than slipping into a cycle of short-lived fixes.
If you’re building a routine, consider turning the repair into a moment of learning rather than a chore. Take notes on the oil viscosity you used, the rebound and compression settings you achieved, and the results of a controlled test drive. Small adjustments can accumulate into a finely tuned suspension that matches your preferred driving style and terrain. By integrating reference materials with hands-on practice, you develop a reliable playbook that makes future maintenance quicker and more precise.
For those who want to dive deeper into the specifics of model configuration, recommended oil viscosities, and the exact sequence of steps for different shock designs, it’s worth consulting the official service documentation for each chassis. The manuals provide diagrams, measurement tolerances, and the recommended aftermarket upgrade paths that align with your driving goals. They are the most authoritative source to ensure that your repairs are safe and effective, and they prevent missteps that could lead to leaks, misalignment, or reduced performance on the track or trail. And while the journey through shock repair may seem technical, it also offers a deep sense of hands-on mastery—the kind that comes with listening to the telltale sounds of a damped, well-sealed shock and feeling the confidence it brings when you’re negotiating a challenging course.
External resource: For model-specific torque values and diagrams, consult the official maintenance documentation available from the manufacturer’s site. This reference will guide you through the precise steps and help ensure your rebuild adheres to the safest and most effective practices. https://www.traxxas.com/support/manuals/traxxas-58334-4-slash-short-course-race-truck-owner-manual
In summary, a disciplined approach to shock repair blends careful preparation, thorough inspection, precise rebuilding, and thoughtful testing. It emphasizes safety and cleanliness, respects the delicate balance of seals and bore surfaces, and remains open to meaningful upgrades that can elevate performance. With the right tools, a clean workspace, and a methodical mindset, you’ll maintain a damped, responsive suspension that keeps your high-performance RC truck confident on every surface and ready for whatever challenges the next run may bring. And when you want to extend that knowledge into broader maintenance practices, a reliable resource like the Master Truck Repair blog offers practical, grounded guidance to help you stay on top of routine care and unexpected repairs alike.
null
null
null
null
Precision Under Pressure: Rebuilding Shocks for High-Performance RC Trucks

Shocks are the unsung workhorses of off-road control. In a fast, rugged RC truck, the damping system not only smooths the ride but also governs how the tire maintains contact with uneven terrain. A small leak or a worn seal can transform precise handling into a twitchy, unpredictable ride. Rebuilding shocks isn’t just maintenance; it’s a restoration of the vehicle’s confidence on the ground. When you approach a rebuild with method and care, you restore the vehicle’s balance, enabling power to translate into control rather than chaos. This chapter walks through a cohesive mindset and a step-by-step approach that treats every shock as a calibrated component rather than a disposable item. The goal is not simply to replace parts but to understand how each piece contributes to damping, rebound, and overall stability on varying surfaces. It’s a discipline of patience, accuracy, and a willingness to revisit the fundamentals whenever behavior changes after a run.
Preparation begins long before you touch a tool. Power off the truck and disconnect it from any power source. Work on a clean, flat surface and use a dedicated mat or tray to organize hardware so nothing gets mixed up. Gloves protect your hands from sharp edges and from silicone oils that can irritate skin, and small parts can easily hide in a lap or crease if you’re not paying attention. The tools should be fit for the job: a set of Allen keys, small screwdrivers, needle-nose pliers, and a shock-specific tool if you have one. A syringe or small funnel is handy for removing old oil, and a tray of isopropyl alcohol or a dedicated RC cleaner helps you strip away oil, dust, and grime. Silky-smooth operation after reassembly depends on how meticulously you clean and inspect every surface, from the shock body to the piston to the spring.
Disassembly begins with the shock itself, detached from the suspension arm and chassis so you can access the cap and shaft without fighting the whole chassis. The removal process varies slightly by model because each platform carries its own mounting points and shock towers, but the principles stay the same. You’ll carefully loosen the top cap to release the spring and any retaining clips, then take apart the internal assembly in a controlled sequence. The goal is to preserve the orientation of the piston and shaft so that when you reassemble, the parts fall back into their designed places without misalignment. If you’ve never done a rebuild before, you’ll benefit from pictorial guides or a schematic that shows how the pieces fit together. The key during disassembly is to keep the order, label parts if needed, and avoid forcing components that resist normal movement. A patient approach reduces the risk of bent shafts, torn seals, or mis-seated dust boots, all of which are telltale signs that a rebuild will be compromised from the start.
Inspection is where the rebuild earns its value. Look for cracks or dents in the shock body, and inspect the shaft for bends or scoring that would produce uneven damping or oil leakage. Seals and dust boots deserve close scrutiny; even a minor nick on a seal’s edge can become a leak path once oil is reintroduced. The piston itself should be checked for wear, with particular attention to holes or notches that regulate oil flow inside the shock. If the piston is worn or pitted, damping characteristics will change unpredictably, and it’s often wiser to replace the piston rather than risk persistent performance issues. The bushings at each end of the shaft should be checked for play; excessive play translates into sloppy motion and degraded control. The spring remains visually simple but is equally important: a fatigue crack or a bowed coil will not produce even force as the suspension cycles, creating inconsistent damping across the travel range. If any of these internal components shows significant wear, plan to replace them with quality parts. A thorough inspection also includes wiping away residual oil and debris to better judge the surfaces once new oil is introduced. In many cases, a rebuilt shock still underperforms if a small seal or o-ring is cracked, so replacing these with fresh, properly lubricated seals is a wise investment.
Cleaning is often the most overlooked phase, yet it underpins reliability. After removing the old shock oil—usually a silicone-based fluid—you’ll want to clean the shock body and all internal components with isopropyl alcohol or a dedicated RC cleaner. The aim is to remove all dirt, metallic shavings, and degraded oil that could contaminate the new oil and cause accelerated wear. The piston rod should be wiped clean and dried; any residual moisture can compromise seals once the assembly is refilled. When cleaning, take care to avoid abrasive contact with the shock walls. A light touch can save you from micro-scratches that would alter lubrication dynamics. As you inspect and clean, it’s a good time to consider what upgrades might bring longer life and more consistent damping. You’ll hear suggestions about higher-quality bushings, new seals, and dust boots, and while these upgrades require investment, they can translate into noticeably steadier handling over time. The idea is not to chase every shiny option but to select improvements that align with your use case—heavy off-road use or high-speed desert runs demand different compromises than casual bashing on a driveway track.
Rebuilding the shock involves a measured sequence that starts with replacing worn parts and ends with careful reassembly and oil refilling. First, replace worn or damaged elements: bushings and seals, the piston if it shows wear, and the dust boots to guard against future contamination. You’ll also consider upgrading the piston if you’re pursuing a more precise damping profile, such as a piston with upgraded flow characteristics. It’s common to upgrade to higher-quality seals and dust boots during a rebuild, since these components are the first line of defense against leaks. When it comes to lubrication, apply a light coating to the piston rod as you slide the piston back into the shock body, then reinsert the shaft. The volume of oil you use is critical; follow the manufacturer’s guidelines for the correct fill level, which ensures the shock achieves the intended damping characteristics without over- or under-filling. After reassembly, tighten all threaded connections to the specified torque and confirm the seals seat properly with a light pressurized test before the full reassembly into the chassis. Some hobbyists opt for a PTFE-lined inner wall or other coatings that can reduce friction and extend service life, but the core principle remains consistent: reduce friction, ensure even oil distribution, and prevent leaks.
The reassembly stage is where patience pays off. Start by reinstalling the piston and shaft into the shock body in the opposite order of disassembly. Fine-tune the seals so they sit flush against the end caps and the dust boots are correctly oriented to seal against any grit that can migrate into the system. Lubricate the seals with a small amount of silicone oil to help seat them and to minimize initial friction when the shock starts to cycle again. Before you seal the top, ensure the oil is in the correct viscosity for the intended use; 10W-20 is a common baseline for many setups, but your specific conditions may call for a slightly heavier or lighter blend. Then reattach the cap and the spring, ensuring that nothing binds during the initial compressions. When the shock is fully sealed and the cap is secured, give the assembly a few manual compressions to check for smooth travel and to feel for any roughness that might indicate a mis-seated seal or an internal obstruction.
Reinstallation and testing bring the rebuilt shock back into the truck and into life. Align the shock with the suspension arm so that travel is symmetrical and the wheel geometry remains consistent across the travel range. Torque all mounting bolts to the manufacturer’s spec for your model; precise torque ensures that the shock remains in a stable position under load and during dynamic movement. A cautious initial test is essential: compress the shock by hand several times, listening for any leaks and feeling for smooth resistance. If the motion binds or leaks, stop and recheck the seals and oil level. After the initial bench test, take the truck to a controlled environment for a short test drive. Observe the damping as the truck moves across different terrain patches—soft dirt, small rocks, and flat pavement. You’re listening for a damping feel that is neither overly soft nor overly rigid, and you’re watching for the vehicle’s body roll and how quickly it returns to its baseline after a bump. Fine-tuning may be needed based on the surface, the weight of the truck, and the stiffness of the springs. Small changes such as a slight adjustment in oil viscosity or a minor modification to the spring preload can move the damping response toward your preferred handling profile.
Maintenance is the quiet promise of long-term reliability. After every run, inspect for leaks and signs of oil seepage around the seals. A full shock rebuild is a prudent maintenance milestone every 10–20 hours of runtime, particularly after rough off-road duty or high-speed use where the shock experiences repeated compression and rebound cycles. Keeping a consistent maintenance schedule prevents small leaks from becoming bigger issues and prolongs the life of the entire suspension system. Storage matters too: keep the truck dry and away from moisture that could compromise seals and lubricants. On a practical level, maintaining a routine—checking oil levels, listening for unusual noises, and observing damping consistency—helps you catch issues before they become expensive or time-consuming repairs. This routine extends beyond the shocks themselves and fosters overall reliability in performance, control, and predictability on the trail or track.
Beyond the basics, many enthusiasts consider upgrades that can further elevate performance. Among the commonly discussed enhancements are shock bodies with better internal coatings to reduce friction and wear, shafts with harder coatings for longer life, and stronger towers to reduce flex under load. The overarching goal is improved damping consistency and reduced maintenance intervals, especially under demanding conditions. It’s worth noting that such upgrades should be selected with your use case in mind: a high-speed, smooth-track setup benefits from different refinements than an aggressively off-road, rock-strewn rig. When you’re weighing upgrades, keep in mind that the backbone of any effective rebuild is clean internals and a reliable seal system. With a solid rebuild and thoughtful upgrades, you’ll notice calmer handling, steadier landings, and faster recovery after disturbances, all contributing to more confident line selection and smoother acceleration.
To ensure you’re following best practices and model-appropriate guidance, consult the official manuals and support resources. These sources provide model-specific torque specs, oil volumes, and recommended maintenance intervals that help you tailor the rebuild process to your exact chassis and usage profile. For a broad perspective on professional repair guidance and step-by-step tutorials, you can refer to the official repair help and support resources, which offer comprehensive DIY guides, schematics, and downloadable manuals designed to support both newcomers and seasoned hobbyists.
If you’re looking for supplementary context on broader truck maintenance workflows, you can explore this practical guide that discusses routine in-house upkeep and planning for future repairs and upgrades. Turnage Sons in-house truck maintenance.
For a deeper dive into model-specific repair instructions and troubleshooting, the official repair help and support page provides a wealth of information, including maintenance sections and detailed schematics. https://www.traxxas.com/support/repair-help
In summary, rebuilding shocks is about disciplined preparation, careful disassembly, scrupulous inspection, precise reassembly, and thoughtful testing. It’s a process that rewards patience with consistent damping, improved control, and extended component life. By treating each shock as a precision instrument and not merely a replaceable part, you preserve the animal in your RC truck—the responsiveness you rely on when the surface under tires changes in an instant.
From Reassembly to Real Ride: Reinstallation and Testing After Shock Repair for High-Performance RC Trucks
Repairing a shock system on a high-performance RC truck is more than a mechanical task. It is a careful dialogue between parts that move, a whisper of fluid, and the way the chassis talks back to the ground. When done with patience and a clear plan, reinstallation and testing become less about guesswork and more about restoring the precise balance that lets the truck respond to terrain rather than fighting it. This chapter follows a cohesive flow from the moment you finish cleaning and rebuilding the shock assembly to the first controlled road test that proves the work has paid off. It is a narrative of method, not a parade of parts, because the goal is consistent damping, predictable handling, and a ride that returns confidence after every jump, corner, and crest of the trail.
Preparation is the quiet heartbeat of a successful reinstallation. Before you touch a single bolt, power down the vehicle and remove any power source or battery leads. A clean, flat workspace is non-negotiable, and a dedicated repair mat can help keep small parts organized as you go. The tools you choose set the tone for the rebuild: a set of Allen keys, appropriate screwdrivers, a small pair of pliers, and a shock-specific tool if you have one. Donning gloves keeps hands clean and reduces the risk of transferring oils to seals. The goal is to recreate the same controlled environment that existed when the truck was new, so every step feels deliberate rather than hurried. If you’ve followed a rebuild flow before, you’ll recognize the rhythm: assemble in the reverse order of disassembly, respect the orientation of seals, and monitor for any binding or misalignment as you proceed.
Disassembly and reassembly are not mere bookends; they are the centerpiece of a successful shock service. The reinstallation begins by aligning the shock with its mounting points on the suspension arm and chassis. It is a moment where precision matters as much as strength. You slide the shock into place, paying attention to the shock tower or mounting point specific to your model’s geometry. A common pitfall is to force the shaft back into the body or misthread a cap, which can pinch seals and create leaks that undo your hard work. Take the time to ensure the shock body sits square to the mounting surface and that the shaft remains true and free of bend or burr. If a shock tower or mount shows any signs of wear or fatigue, now is the moment to correct it; a misaligned mount can translate into uneven damping, which ripples through the entire chassis and spoils handling.
Once the physical placement is secure, the hydraulic side of the shock comes into focus. The piston, seals, and shaft are not simply components to be bolted back in; they are the interface that controls motion. When reinstalling, first confirm the orientation of the piston and ensure the shaft slides smoothly within the body. Any stiffness or gritty feel is a red flag that something is catching on the internal components, and you should stop to inspect the seal rings and dust boots. If you replaced seals and boots during the rebuild, reinstall them with a light coat of shock oil as a lubricant to keep the seals from binding. The idea is to create a consistent seal surface that will maintain damping characteristics without excessive friction. With the shaft in place, actuate the shock by hand. Compress and extend it several times to verify smooth, resistance-free travel through the full range. If you notice binding, backtrack to the seals and re-check the piston assembly. This is the moment where the “feel” of your setup starts to reveal itself. If the motion feels inconsistent or prone to stiction, you may be dealing with a marginally bent shaft or a misfit seal that needs adjustment before you proceed.
As you move toward completion, the importance of correct oil fill and air management becomes evident. The oil you choose sets the baseline damping of your system. A standard practice is to fill the shock to the recommended volume according to the manufacturer’s guidelines for your model. The process often involves using a syringe or a small funnel to purge air from the body before topping off. Air inside the shock translates into inconsistent damping, especially under load, because compressibility of air changes with temperature and pressure. After filling, reinstall the end caps and seals, taking care to torque them to spec. This is not a place to guess; over-tightening can damage threads and seals, while under-tightening can lead to oil leaks and oil-starved damping. A light, even torque is the sign that you have achieved a consistent seal and a stable interface between the cap, piston rod, and body.
With the mechanical side settled, attention turns to the reinstallation’s relation to the rest of the suspension. A chassis is a system; the dampers do not operate in isolation. Reattach the shock to the suspension arm using the correct mounting holes and a method that preserves geometry. Cross-check the alignment by visually confirming that both shocks on a given axle point in the same direction and share identical anchor heights. The suspension’s overall geometry determines how the vehicle transfers weight, responds to bumps, and recovers after a impact. When you’ve got the dampers back in place, re-tighten all mounting bolts to the manufacturer’s recommended torque. If you don’t have a torque wrench, the guideline is to snug the fasteners firmly enough to resist loosening during a test drive but not so tight that you risk stripping threads or deforming the mounts. The TRX-style and Slash-style geometries you may be dealing with will have model-specific torque values in the official manual; if you want to verify values quickly, you’ll usually find a model-agnostic range that keeps the hardware safe while preserving proper damping.
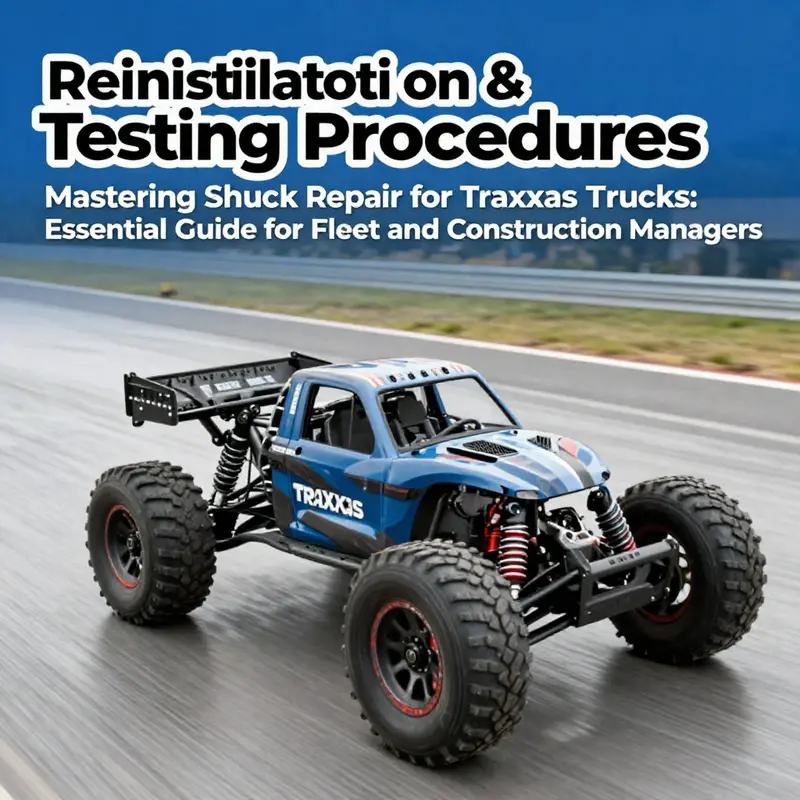
Testing is the moment of truth, the point at which you move from theoretical damping to practical handling. Begin with a controlled, relaxed test—no high-speed runs, no jumps, just a slow loop on a flat, obstacle-free surface. Compress the suspension with your hand; the shock should exhibit smooth motion without knocking or binding. Then, drive a short, low-speed lap and observe how the truck handles. The goal is consistent damping across the range of suspension travel, so listen for unusual noises: creaks, squawks, or a plop of oil escaping the body. If any of these signs appear, stop and recheck the seals and oil levels. You should also monitor the ride height and sag. A properly adjusted shock should maintain consistent ride height with minimal bottoming and a predictable rebound. If the truck feels loose or overly stiff, you may be dealing with an incorrect oil viscosity for the operating weight, or perhaps a need to fine-tune the piston’s bleed or orifice size. For many drivers, this is a minor calibration that makes a big difference in the way the truck tracks through corners and lands from jumps. A broader principle here is to approach tuning incrementally: small changes in oil volume, small changes in the rebound setting, and then another test. The goal is to converge on a setup that feels balanced for the terrain you run most often, whether it’s smooth indoor floors or rough outdoor trails.
After the initial testing, you’ll want to push the boundaries a bit, but with care. A controlled environment remains essential. Take the truck to a forgiving but representative surface where you can gauge how the suspension reacts to more challenging features: small obstacles, a mild incline, a few rollers. In this phase, you’re listening for subtle shifts in behavior: does the truck squat excessively on landing, or does it rebound quickly and pogo on a rough section? A well-tuned shock will absorb the impact and return to the center promptly, maintaining a stable line rather than lurching sideways or skipping. If you notice a drift in handling under braking or acceleration, check that the shock shafts are properly centered and that the mounts have not shifted during the reassembly. The alignment of the entire suspension system is as critical as the damper internals because changes in one area can cascade into others, altering track width, weight distribution, and even tire behavior.
Maintenance does not end with a successful test drive. A disciplined routine is the single most reliable way to sustain damping performance. Expect external checks after every run: inspect for leaks, verify the oil color if your setup uses colored oil, and make sure the seals remain intact after heavy use. A full shock rebuild is advisable every 10–20 hours of runtime, especially after strenuous off-road runs or aggressive high-speed use where seals and bushings take the brunt of the abuse. Even when no visible damage exists, internal wear accumulates, and a proactive rebuild prevents gradual degradation in damping. Storing the truck in a dry place is another simple but effective habit; moisture invites rust on the shafts and can degrade seals over time. The long-term health of the suspension is a story of attention rather than a single heroic rebuild, so integrating these checks into your routine ensures every ride feels like the first one finished correctly.
If you are curious about ways to further improve the reliability and consistency of your dampers, you can consider upgrades on a purely technical level rather than a brand-name upgrade. Options that enhance durability include shock shafts with harder surface coatings, as well as designs that reduce play within the seal surfaces. Upgrading to a PTFE-lined inner surface can reduce friction and improve long-term consistency, while inner-wall improvements that reduce air entrapment can help maintain damping across a wide range of temperatures and speeds. For some drivers, shifting to a nitrogen-damped system translates into more consistent damping under load, especially during energetic driving on rough surfaces. These kinds of enhancements emphasize the physics of damping—reducing friction, controlling heat, and stabilizing the boundary layers where the piston meets the oil. This is not about chasing the latest shiny part; it is about understanding how damping works under load and matching that behavior to your preferred driving style and terrain.
Within the larger ecosystem of RC maintenance, reinstallation and testing are the bridge between a rebuild and a reliable ride. If you want practical guidance on budgeting and planning routine maintenance to support this kind of work, consider a focused resource on routine maintenance planning: Budgeting for Routine Truck Maintenance. This reference helps you think about tool costs, replacement part cycles, and scheduling, so your repair efforts stay aligned with what you can sustain over time. For model-specific diagrams, torque specs, and step-by-step instructions tailored to particular layouts, consult the official maintenance sections in the product manuals. While model differences can matter, the core principles—cleanliness, careful inspection, proper lubrication, and precise reassembly—remain universal across platforms. Keeping these principles in mind helps you approach each reinstallation with confidence and keeps the truck ready for the next diversion, jump, or obstacle.
In the end, the chapter of a shock repair is not just a sequence of steps but a transformation of control. The moment you slide the final bolt into place, you are not merely closing a repair; you are reestablishing a conversation between chassis and ground, between damping fluid and motion. When testing returns a predictable, balanced ride, you have earned a quiet pride in a job well done. You have tuned out the noise of uncertainty and tuned in the language of physics, so each ride becomes, again, a precise and exhilarating dialogue with the terrain beneath the tires.
External Resource: For model-specific manuals and diagrams, refer to the official maintenance section here: https://www.traxxas.com/support/manuals/58334-4-slash-owner-manual
Final thoughts
Proper shock repair maintenance for Traxxas trucks enhances vehicle performance and reliability, ultimately saving time and resources for fleet managers and operators. By following the structured processes discussed—from preparation to testing—organizations can ensure their vehicles are well-equipped to meet operational demands. Regular upkeep and timely interventions not only prolong the lifespan of the shocks but also promote safer and more efficient driving experiences. Investing time in these critical maintenance practices yields substantial returns in fleet productivity and operational success.

