Introduction: The Importance of Maintaining Battery Cables in a 1989 Nissan Truck
In the trucking and logistics industries, proper maintenance is paramount for ensuring the reliability and efficiency of vehicles, particularly for fleet managers and professionals operating heavy-duty trucks such as the 1989 Nissan model. Among the various components that require regular attention, battery cables often go overlooked, yet they play a crucial role in vehicle performance. Worn or damaged battery cables can significantly hinder electrical connectivity, leading to difficulties in starting the vehicle and impairing the functioning of essential systems. A study by the American Trucking Associations revealed that approximately 34% of engine start failures in long-haul trucks are directly attributable to degraded or corroded battery cables, underscoring the necessity for routine inspections and maintenance of these vital components.
Neglecting battery cable integrity can lead to increased operational costs, downtime, and ultimately, compromised logistics performance. For fleet operators, these concerns translate into delayed deliveries and diminished client trust. Additionally, as outlined in a report from Fleet Maintenance Journal, trucks with worn cables experienced an average of 2.3 unscheduled stops each month, highlighting the direct impact on fleet productivity. Professionals in the field are urged to adopt preventive maintenance strategies, with recommendations for inspecting and replacing battery cables showing signs of wear or excessive resistance. By prioritizing the upkeep of battery cables, trucking companies can enhance their fleet’s overall reliability and performance, ensuring that vehicles remain operational and efficient in the challenging landscape of logistics and transportation.
For further insights on maintaining your fleet’s performance, learn more about routine maintenance budgeting. Discover how optimizing your fleet’s size and maintenance can contribute to operational efficacy by reading more here.
Identifying Battery Cable Issues
For fleet managers and operators relying on a 1989 Nissan truck, recognizing battery cable issues is critical for maintaining operational efficiency. Here are some common signs and symptoms that indicate trouble with battery cables:
Visual Indicators
-
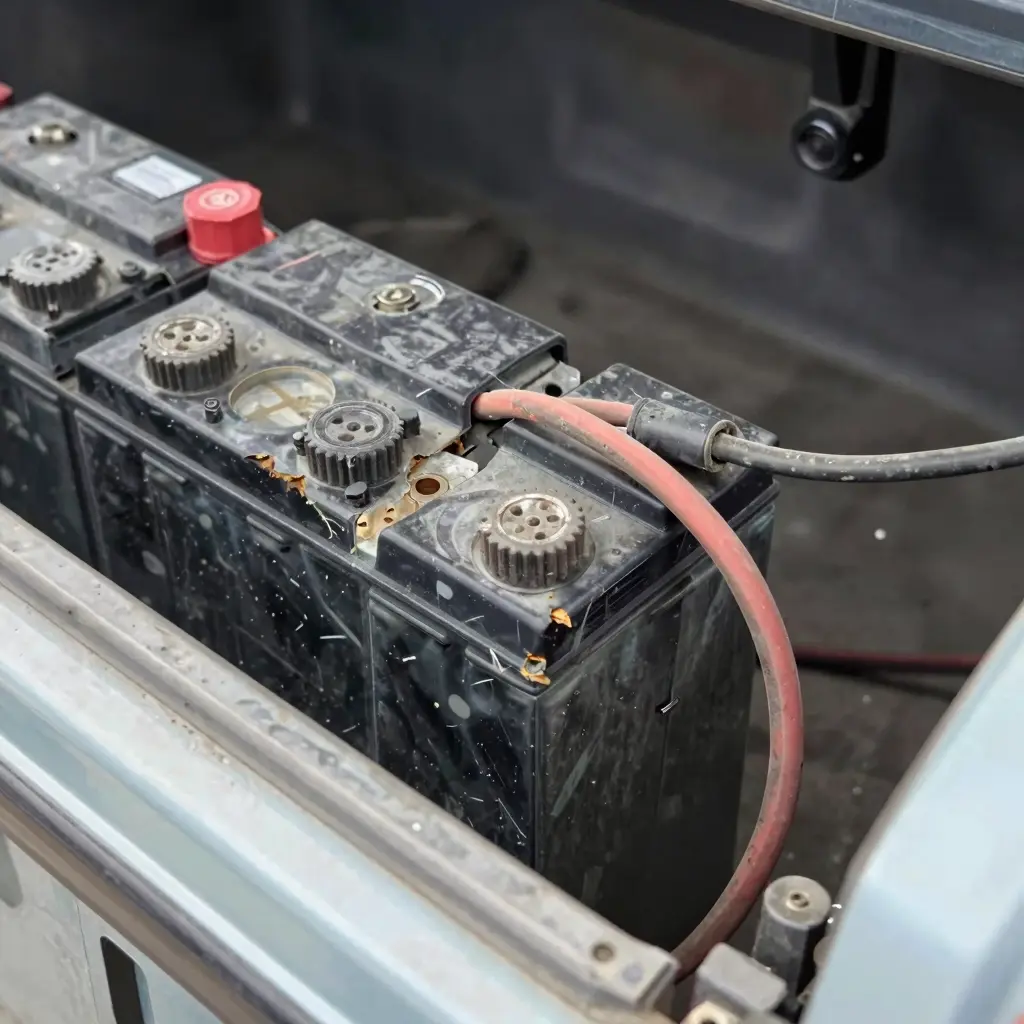
Corrosion on Terminals: A white, powdery substance or greenish tint around the battery terminals signals corrosion, which can impede electrical connections. This can prevent proper current flow, resulting in starting difficulties, especially in colder weather.
-
Fraying and Insulation Damage: Inspecting the cables for frays or cracks in the insulation is vital. Damaged cables can lead to short circuits, increased fire risk, and overall failure of electrical systems.
-
Loose Connections: If connections are not secure, the vehicle may exhibit symptoms such as slow cranking or failure to start at all. Regularly tightening connections at both the battery and starter solenoid is essential to ensure reliability.
Implications for Fleet Operations
Overlooking these symptoms can have serious repercussions. Such battery cable issues may lead to:
- Increased Downtime: Vehicles that can’t start due to faulty cables result in significant delays and disrupted schedules.
- Higher Repair Costs: Frequent breakdowns increase maintenance expenditures and may require urgent repairs, impacting overall cost-efficiency.
- Safety Hazards: Corroded or damaged cables can pose serious fire risks, endangering both personnel and equipment.
For further reading on how such maintenance can impact overall fleet budgeting, you can learn more about budgeting for routine truck maintenance.

Step-by-Step Guide to Repairing Battery Cables on a 1989 Nissan Truck
Repairing battery cables is a critical maintenance task for keeping your 1989 Nissan truck in optimal working condition. Here’s a comprehensive guide that outlines the necessary tools, safety precautions, and the step-by-step methodology for this repair.
Tools Required
- Insulated Wire Strippers: Essential for safely stripping the insulation off the cables.
- Crimping Tool: Necessary for attaching new terminals to the cables.
- Replacement Battery Cables: Make sure to use cables that are compatible with your Nissan model-consult resources like AutoZone for specifications.
- Wrenches: Ideally suited for loosening and tightening battery terminal connections.
- Sandpaper or Wire Brush: Useful for cleaning corrosion from battery terminals.
- Electrical Tape or Heat Shrink Tubing: Provides insulation to newly crimped sections.
Safety Precautions
Before starting, make sure to prioritize safety to prevent electrical shock:
- Personal Protective Equipment (PPE): Wear insulated gloves, safety goggles, and non-conductive shoes. Ensure your gloves can handle a voltage of 1000V or higher.
- Disconnect Battery: Always disconnect the negative cable first to avoid short circuits. Follow procedures from reputable guides like those from Popular Mechanics.
Repair Methodology
- Preparation: Park the truck on a flat surface and turn off the ignition. Open the hood and locate the battery.
- Disconnect the Cables: Start with the negative terminal (black) followed by the positive terminal (red).
- Inspect the Cables: Check for corrosion, fraying, or damage. If deemed necessary, cut away the damaged portions.
- Strip and Crimp: Use wire strippers to expose 1-2 inches of copper. Insert the cable into a new terminal and use the crimping tool for a secure fit.
- Reconnect the Battery: Attach the positive terminal first, followed by the negative terminal.
- Test the Connection: Turn the truck on to verify that the electrical system functions correctly.
Conclusion
Maintaining the battery cables on your Nissan truck is an essential part of vehicle upkeep. Regular checks can help prevent extensive damage and ensure reliability. For extensive fleet maintenance tips, consider exploring the methodologies outlined in mastertruckrepairllc.com.
How to Identify Damaged Battery Cables on a 1989 Nissan Truck
Identifying damaged battery cables is crucial for the reliability of your 1989 Nissan truck. Here are some signs to look for:
- Visual Inspection: Inspect the cables for signs of wear, fraying, cracking, or corrosion. Look for any visible damage that might affect connectivity.
- Connection Check: Ensure the connections at both ends of the cable (i.e., battery terminals and starter solenoid) are tight, and check for any greenish-blue corrosion buildup. This corrosion indicates a chemical reaction due to moisture and electrical current.
- Feel the Cables: If the cable feels soft or spongy when squeezed, it may have internal damage.
- Engine Performance: A slow cranking engine or one that won’t start, particularly in cold weather, could result from poor conductivity due to damaged or corroded cables.
Always remember to disconnect the battery before inspecting or replacing cables. For more insights, you can learn more about budgeting for routine truck maintenance.
Understanding Battery Cable Types
When repairing the battery cable on a 1989 Nissan truck, it is crucial to select the appropriate type of battery cable to ensure reliability and safety. Below is a comparison of different types of battery cables, their specifications, and their best use cases, tailored for fleet managers and service providers.
| Type of Battery Cable | Conductor Material | Sectional Area (mm²) | Ampacity (A) | Best Use Cases |
|---|---|---|---|---|
| Tinned Copper Stranded | Tinned Copper | 16, 25, 35, 50, 70, 95 | 120 – 500+ | General vehicle battery connections; high-vibration environments (e.g., trucks, buses) |
| Copper Stranded (Plain) | Bare Copper | 16, 25, 35, 50, 70, 95 | 110 – 480 | Standard automotive battery cables; cost-effective, minimal environmental damage exposure |
| High-Temperature (HT) Cable | Tinned Copper | 16, 25, 35, 50, 70 | 100 – 450 | Suitable for engine bays and areas with high temperatures |
| Shielded Battery Cable | Tinned Copper | 16, 25, 35, 50, 70 | Used where electromagnetic interference (EMI) is a concern, as in advanced fleet vehicles with ECUs |
This table provides a clear overview of battery cable types that will best suit your needs when performing repairs. For further understanding of maintenance budgeting, check our article on budgeting for routine truck maintenance.
Troubleshooting Battery Cable Issues
Diagnosing battery cable issues is crucial for maintaining the reliability of your fleet. Below are practical tips and techniques for effective troubleshooting:
-
Visual Inspection: Regularly check for signs of corrosion at terminal connections, frayed or damaged insulation, and loose connections. Corrosion can increase resistance, impacting performance and preventing your truck from starting. Clean terminals using a baking soda solution and a wire brush for optimal conductivity.
-
Voltage Drop Test: Use a multimeter to measure the voltage drop across the cables during engine cranking. A drop greater than 0.5 volts indicates excessive resistance due to cable issues.
-
Cable Size and Quality: Ensure that the cables installed meet OEM specifications. Undersized cables can lead to overheating and failure, especially in extreme conditions. Consider using vibration-resistant connectors to maintain secure connections over time.
For more comprehensive maintenance strategies, learn about budgeting for routine truck maintenance and optimizing fleet size and maintenance.
Repairing Battery Cables on a 1989 Nissan Truck
Maintaining the battery cables on your 1989 Nissan Truck is crucial for ensuring reliable performance and preventing unexpected breakdowns. Over time, battery cables can experience corrosion, loosening, and degradation, which impact the electrical flow. Hence, it is vital for fleet managers and trucking company owners to prioritize regular inspection and maintenance of battery cables to enhance the longevity of their vehicles.
As an ASE-certified technician states, “Even if your battery is healthy, bad cables can make it seem like the battery is dead. Regular inspection and cleaning of the terminals and cables are essential-just as important as checking the battery itself”. This underscores the significant role that battery cables play in the vehicle’s electrical system. Without proper maintenance, problems such as dimming lights and starting failures can arise, leading to costly downtime.
Steps to Repair Battery Cables
- Inspection: Begin by checking for any visible signs of wear, corrosion, or frayed wires on the battery cables.
- Cleaning: Use a mixture of baking soda and water to clean the terminals and cables carefully. A wire brush can help remove stubborn corrosion.
- Secure Connections: Ensure that all connections are tight and corrosion-free. Consider using a corrosion inhibitor to protect them in the future.
- Replacement: If the cables are significantly damaged, it may be necessary to replace them entirely, ensuring you use cables compatible with your Nissan Truck model.
By following these steps regularly, you can extend the lifespan of your truck’s battery and maintain optimal performance. Regular check-ups and maintenance not only save you money but also improve the reliability of your fleet. For more on effective maintenance strategies, learn more about budgeting for routine truck maintenance.
Conclusion on Battery Cable Repair and Maintenance Impact
In summary, effective battery cable repair is vital for maintaining the optimal performance of a 1989 Nissan truck within a fleet. Properly addressing and maintaining battery cables not only ensures that vehicles start reliably and operate efficiently but also significantly contributes to the longevity of the vehicle’s electrical system. The process involves detailed inspection, thorough cleaning, and proper connection techniques that can mitigate future issues, reducing downtime and maintenance costs.
Moreover, regular maintenance is linked to broader operational efficiency in fleet management. By implementing structured battery maintenance protocols, fleet managers can combat common issues such as sulfation and charge deficiencies that often lead to unexpected failures. As highlighted in Midtronics, timely detection and correction of potential battery issues are paramount in preventing operational interruptions.
Thus, prioritizing battery maintenance not only enhances performance but also plays a critical role in optimizing overall fleet efficiency, ensuring that trucking operations remain both reliable and cost-effective. By investing in proper battery care, fleet managers can drive their operations towards sustained success.
Battery-related issues consistently rank among the most significant challenges faced by fleet managers, particularly as the industry experiences a gradual shift towards electric vehicles. Understanding the statistics related to battery failures and their impact on logistics is critical for effective fleet management.
Key Statistics on Battery Failures
Research indicates that battery failures have not only become common but also highly consequential. A study from the Transportation Research Board reveals that battery-related breakdowns can cause an average of 18 hours of unplanned downtime per vehicle annually. This unexpected downtime translates to a 12% increase in logistics costs. The study emphasizes that the financial burden can escalate further, with repair costs often exceeding $10,000 per incident, especially when failures occur post-warranty.
Furthermore, a publication by Fleet Management Today underscores the relevance of battery monitoring systems. This source notes that battery issues can disrupt delivery schedules, resulting in increased operational costs and inefficiencies. Specifically, issues such as undercharging, often due to irregular vehicle usage cycles, are highlighted as primary causes for premature battery failures.
Consequences of Ignoring Battery Maintenance
The repercussions of neglecting battery maintenance are significant. First, modern battery management systems (BMS) are crucial for fleet operations, as they help manage state-of-charge readings and power stability. Failures in these systems can lead to drivers running out of power unexpectedly, as noted in an article from Electric Fleet Journal. Such failures not only jeopardize safety and reliability but also compel fleet managers to make costly last-minute adjustments, like reroutes or deploying backup vehicles.
Operational downtimes and repair costs further emphasize the need for proactive battery maintenance practices. Fleet managers should adopt a scheduled maintenance approach that includes routine inspections and battery health assessments to minimize unexpected failures and related costs.
Conclusion
In conclusion, battery issues pose a serious threat to efficiency and profitability in trucking. The statistics on downtime and repair costs underscore the need for regular battery maintenance. Fleet managers must prioritize battery health to ensure seamless operations and mitigate financial risks. For more insights on maintenance strategies, consider reading about budgeting for routine truck maintenance and optimizing fleet size maintenance. Regularly addressing battery health will play a crucial role in maximizing fleet efficiency and reducing unforeseen expenses.
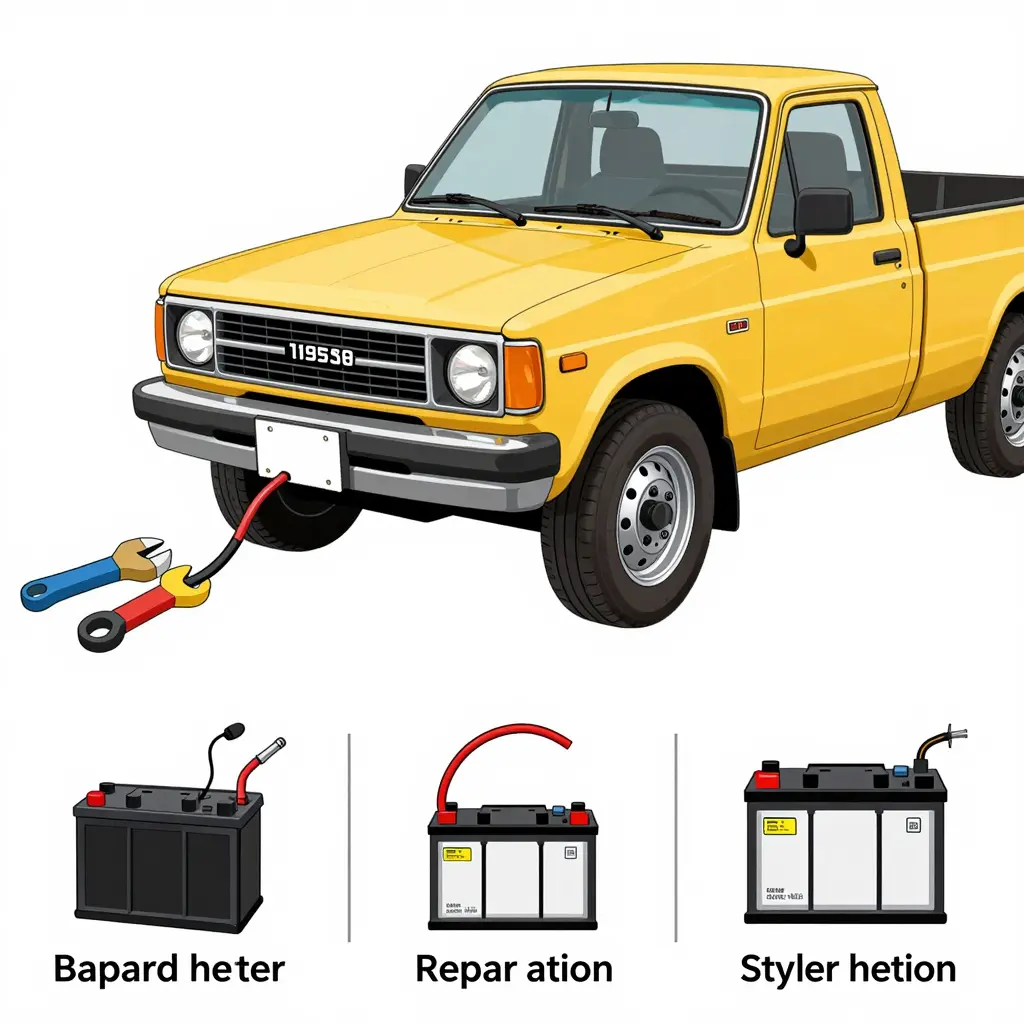
Proper Battery Cable Connection Guide
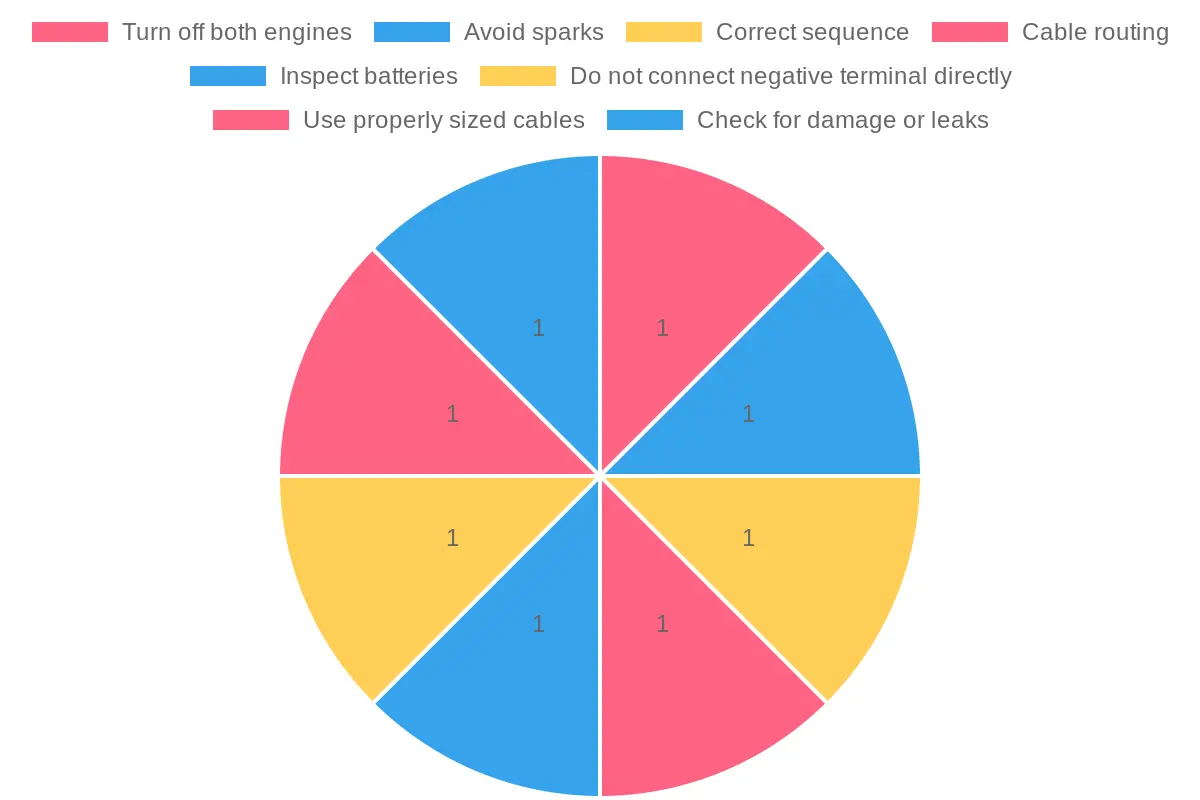
Connecting battery cables incorrectly can lead to battery damage or personal injury. The following diagram illustrates the proper procedure for jump-starting a vehicle safely:
-
Step 1: Connect the red (positive) cable to the positive terminal of the dead battery.
-
Attach the other red clamp to the positive terminal of the working battery.
-
Step 2: Connect the black (negative) cable to the negative terminal of the working battery.
-
Finally, connect the other black clamp to an unpainted metal surface on the vehicle with the dead battery.
Safety Precautions:
- Always turn off both vehicles and remove keys before starting.
- Never let clamps touch each other or any metal surfaces during the connection process.
- Connect positive first, then negative; reverse the order when disconnecting.
- Ensure that cables are routed away from moving parts and heat sources.
- Check for damaged batteries or leaking electrolyte before attempting a jump-start.
For further tips on maintenance and safety, check out our guide on budgeting for routine truck maintenance.
Understanding proper cable connections is crucial for fleet managers and truck operators alike.

